3D Scanning and Printing
Hero Shots
Click Here for Our Group Assignment
My Print
3D Scan
3D Print
Initial Reaction
I have been looking forward to this topic. Having printed about a dozen parts in the last couple months, I have a little bit of experience with 3d printing, but I am definitely still new to the topic. Similarly, I tried 3d scanning once a few years ago (and failed), but I am very much looking forward to revisiting it and attempting to be more successful this time. As usual Niel went over a TON of information and resources for these topics. We have a few assignments this week once again. The group assignment is to test the design rules for our 3D printer and to characterize the limitations. And there are two individual assignments. The first is to design and 3D print small object that could not be easily made subtractively; and the second is to 3D scan an object, try to prepare it for printing, and optionally to print it. We are headed to Kamp Lintfort tomorrow to spend the day with the 3D scanner. It should be fun.
After Local Workshop
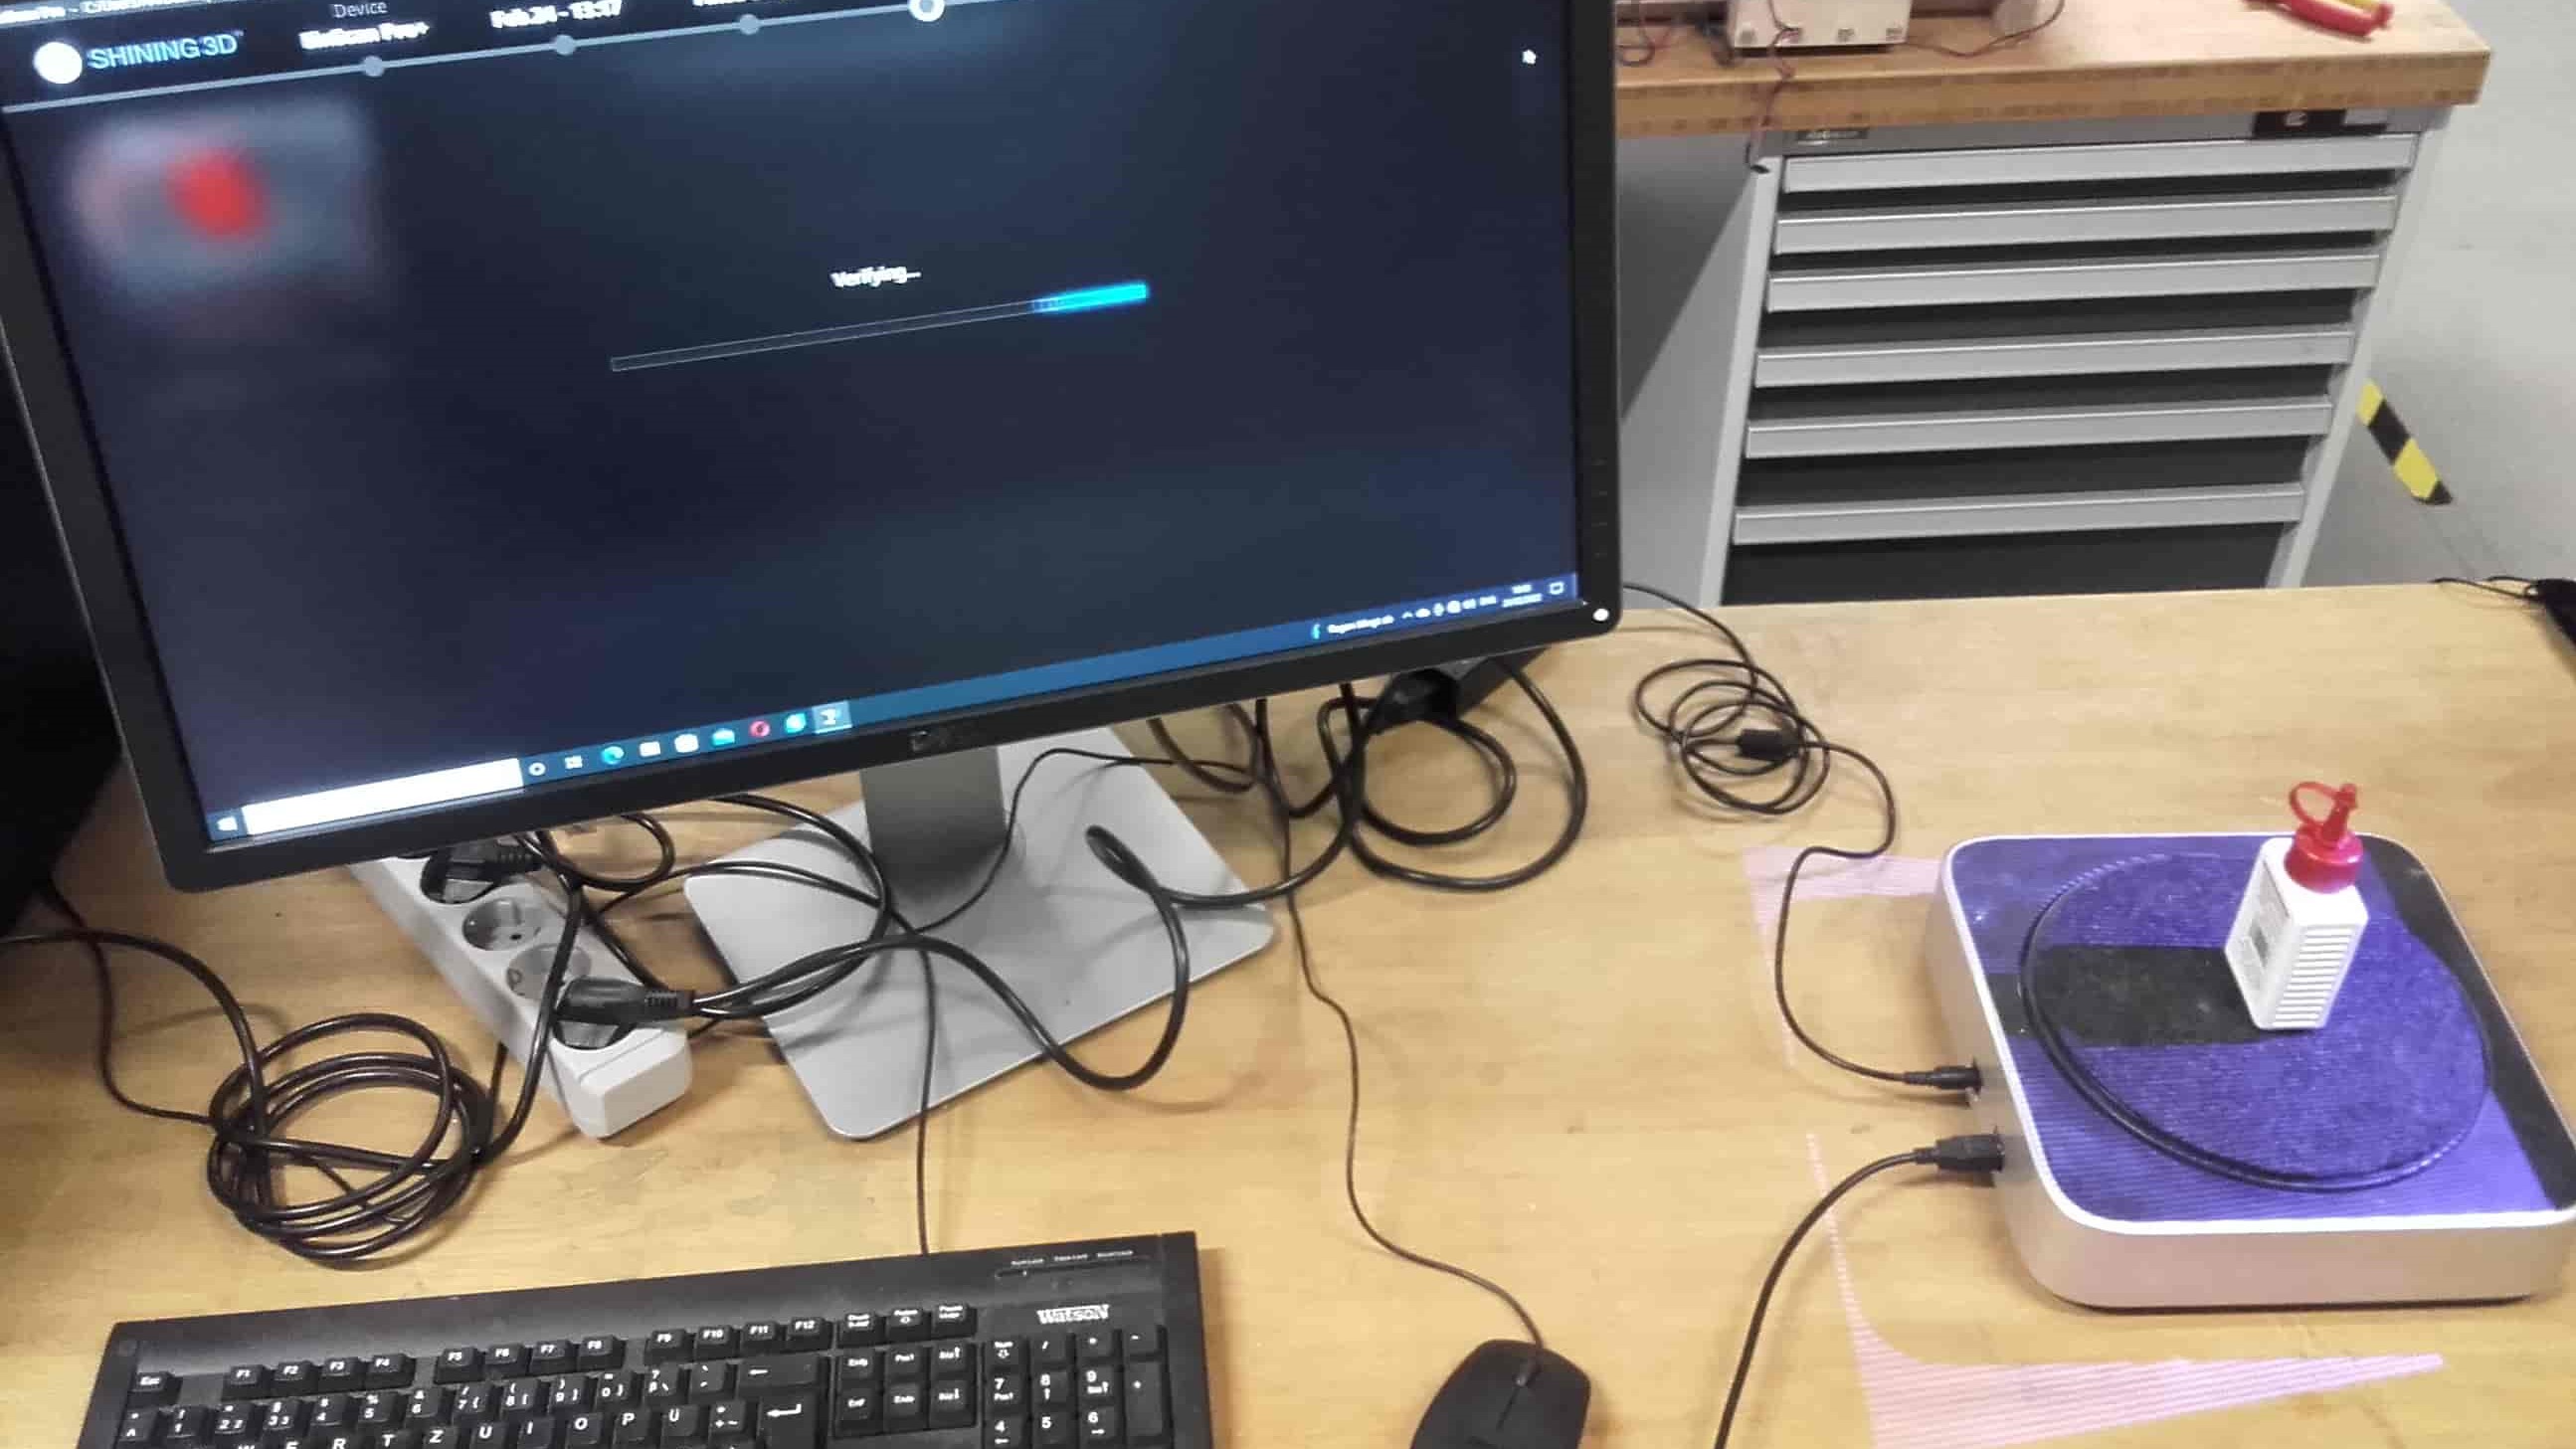
The local workshop was a crash course in the Shining Einscan Pro 3D scanner's hardware and software. For the first time during FabAcademy, all five of the Kamp Lintfort students were in the lab at the same time so it was really nice to meet Lisa and Jan in person for the first time. It was also really nice to officially meet Ahmed! The scanner is expensive and there is only one, so we have to go one at a time. I'll go last an see what I can learn from the experiences of the others.
3D Scanning
Einscan Pro 3D Scanner
Hardware
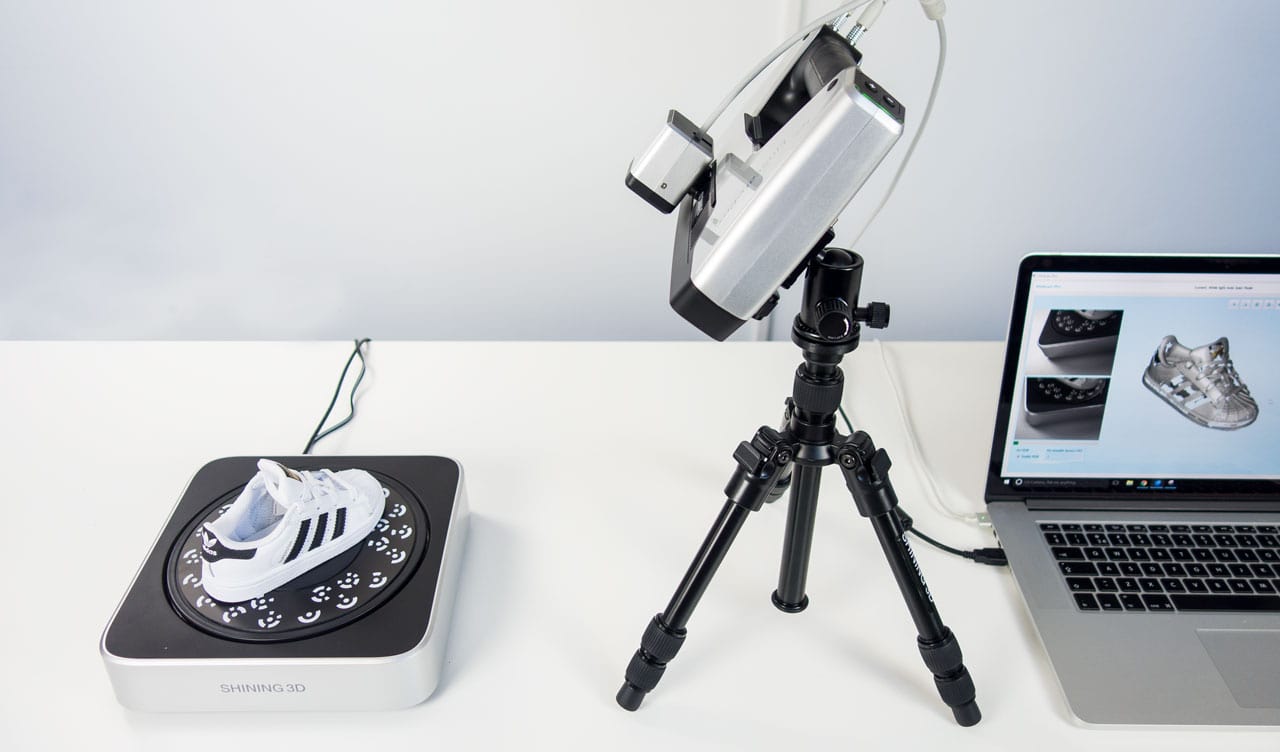
While we all downloaded the software, Ahmed gave us a brief introduction to the scanner. He also provided some anecdotes about using it successfully as well as unsuccessfully, and compared it to other 3D scanners he had used in the past.
Fixed Scan
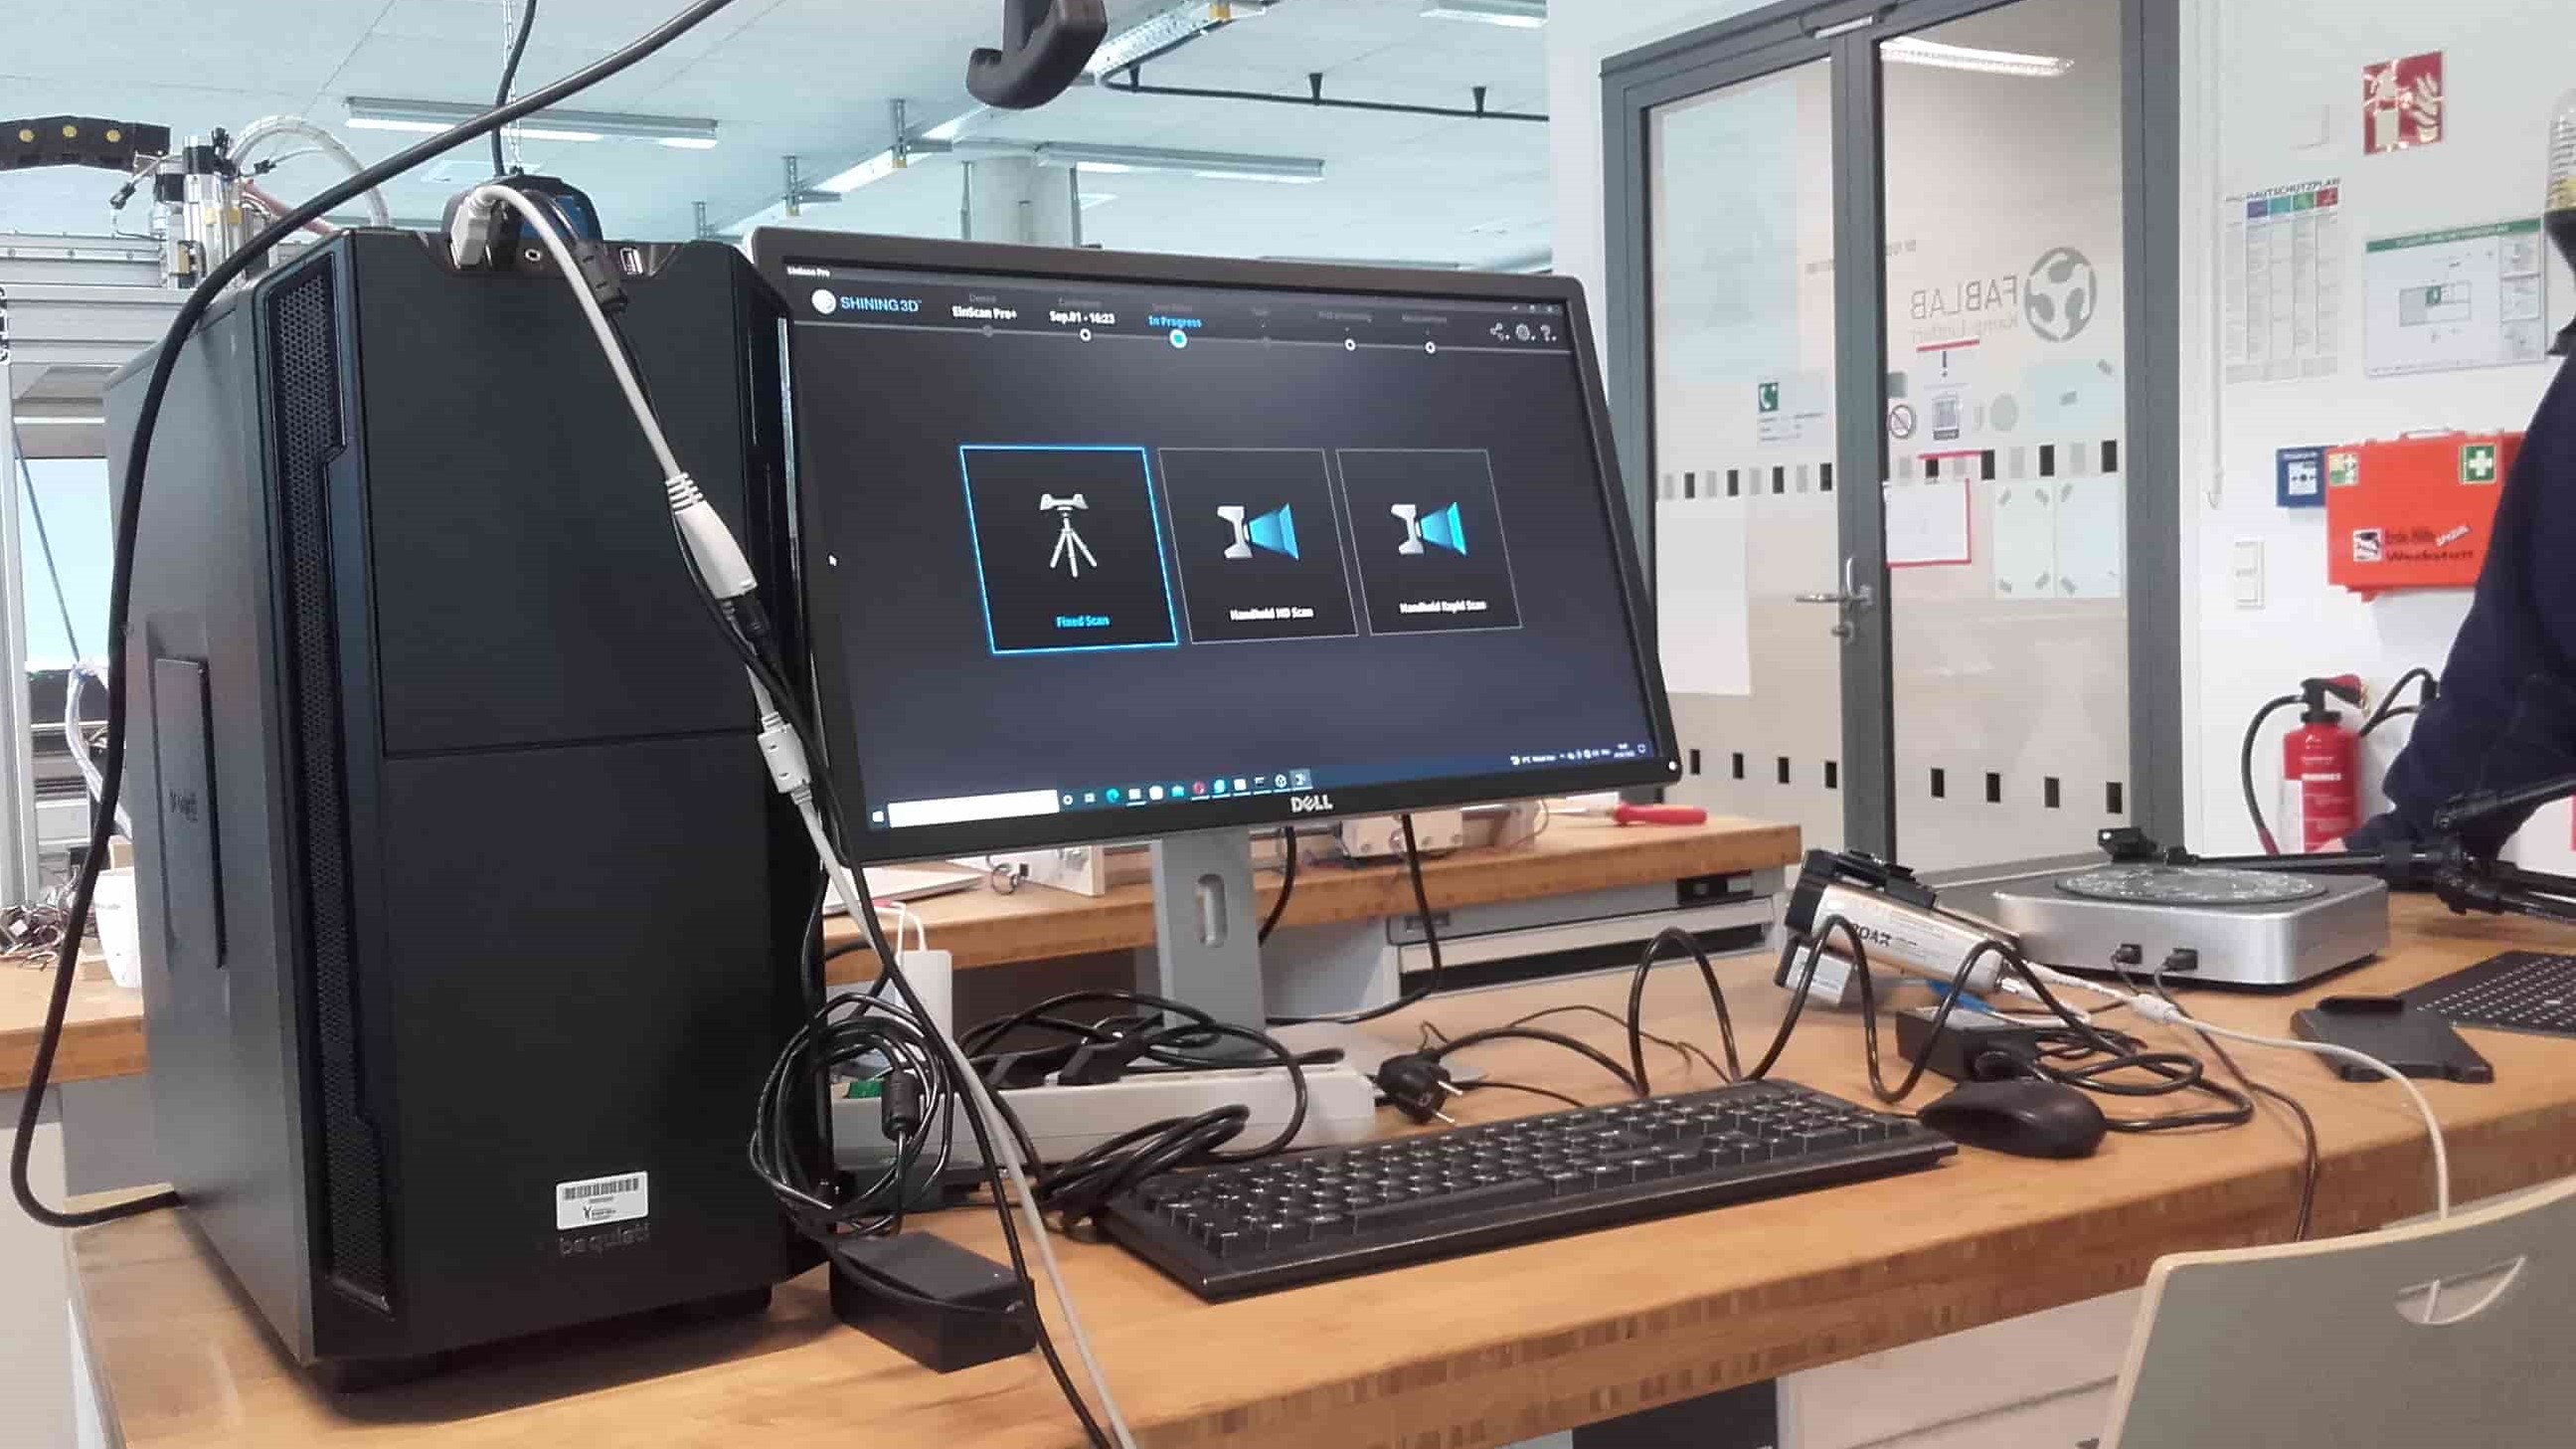
There are several options when using this scanner, but we focused mainly on fixed scans.
Texture Scan
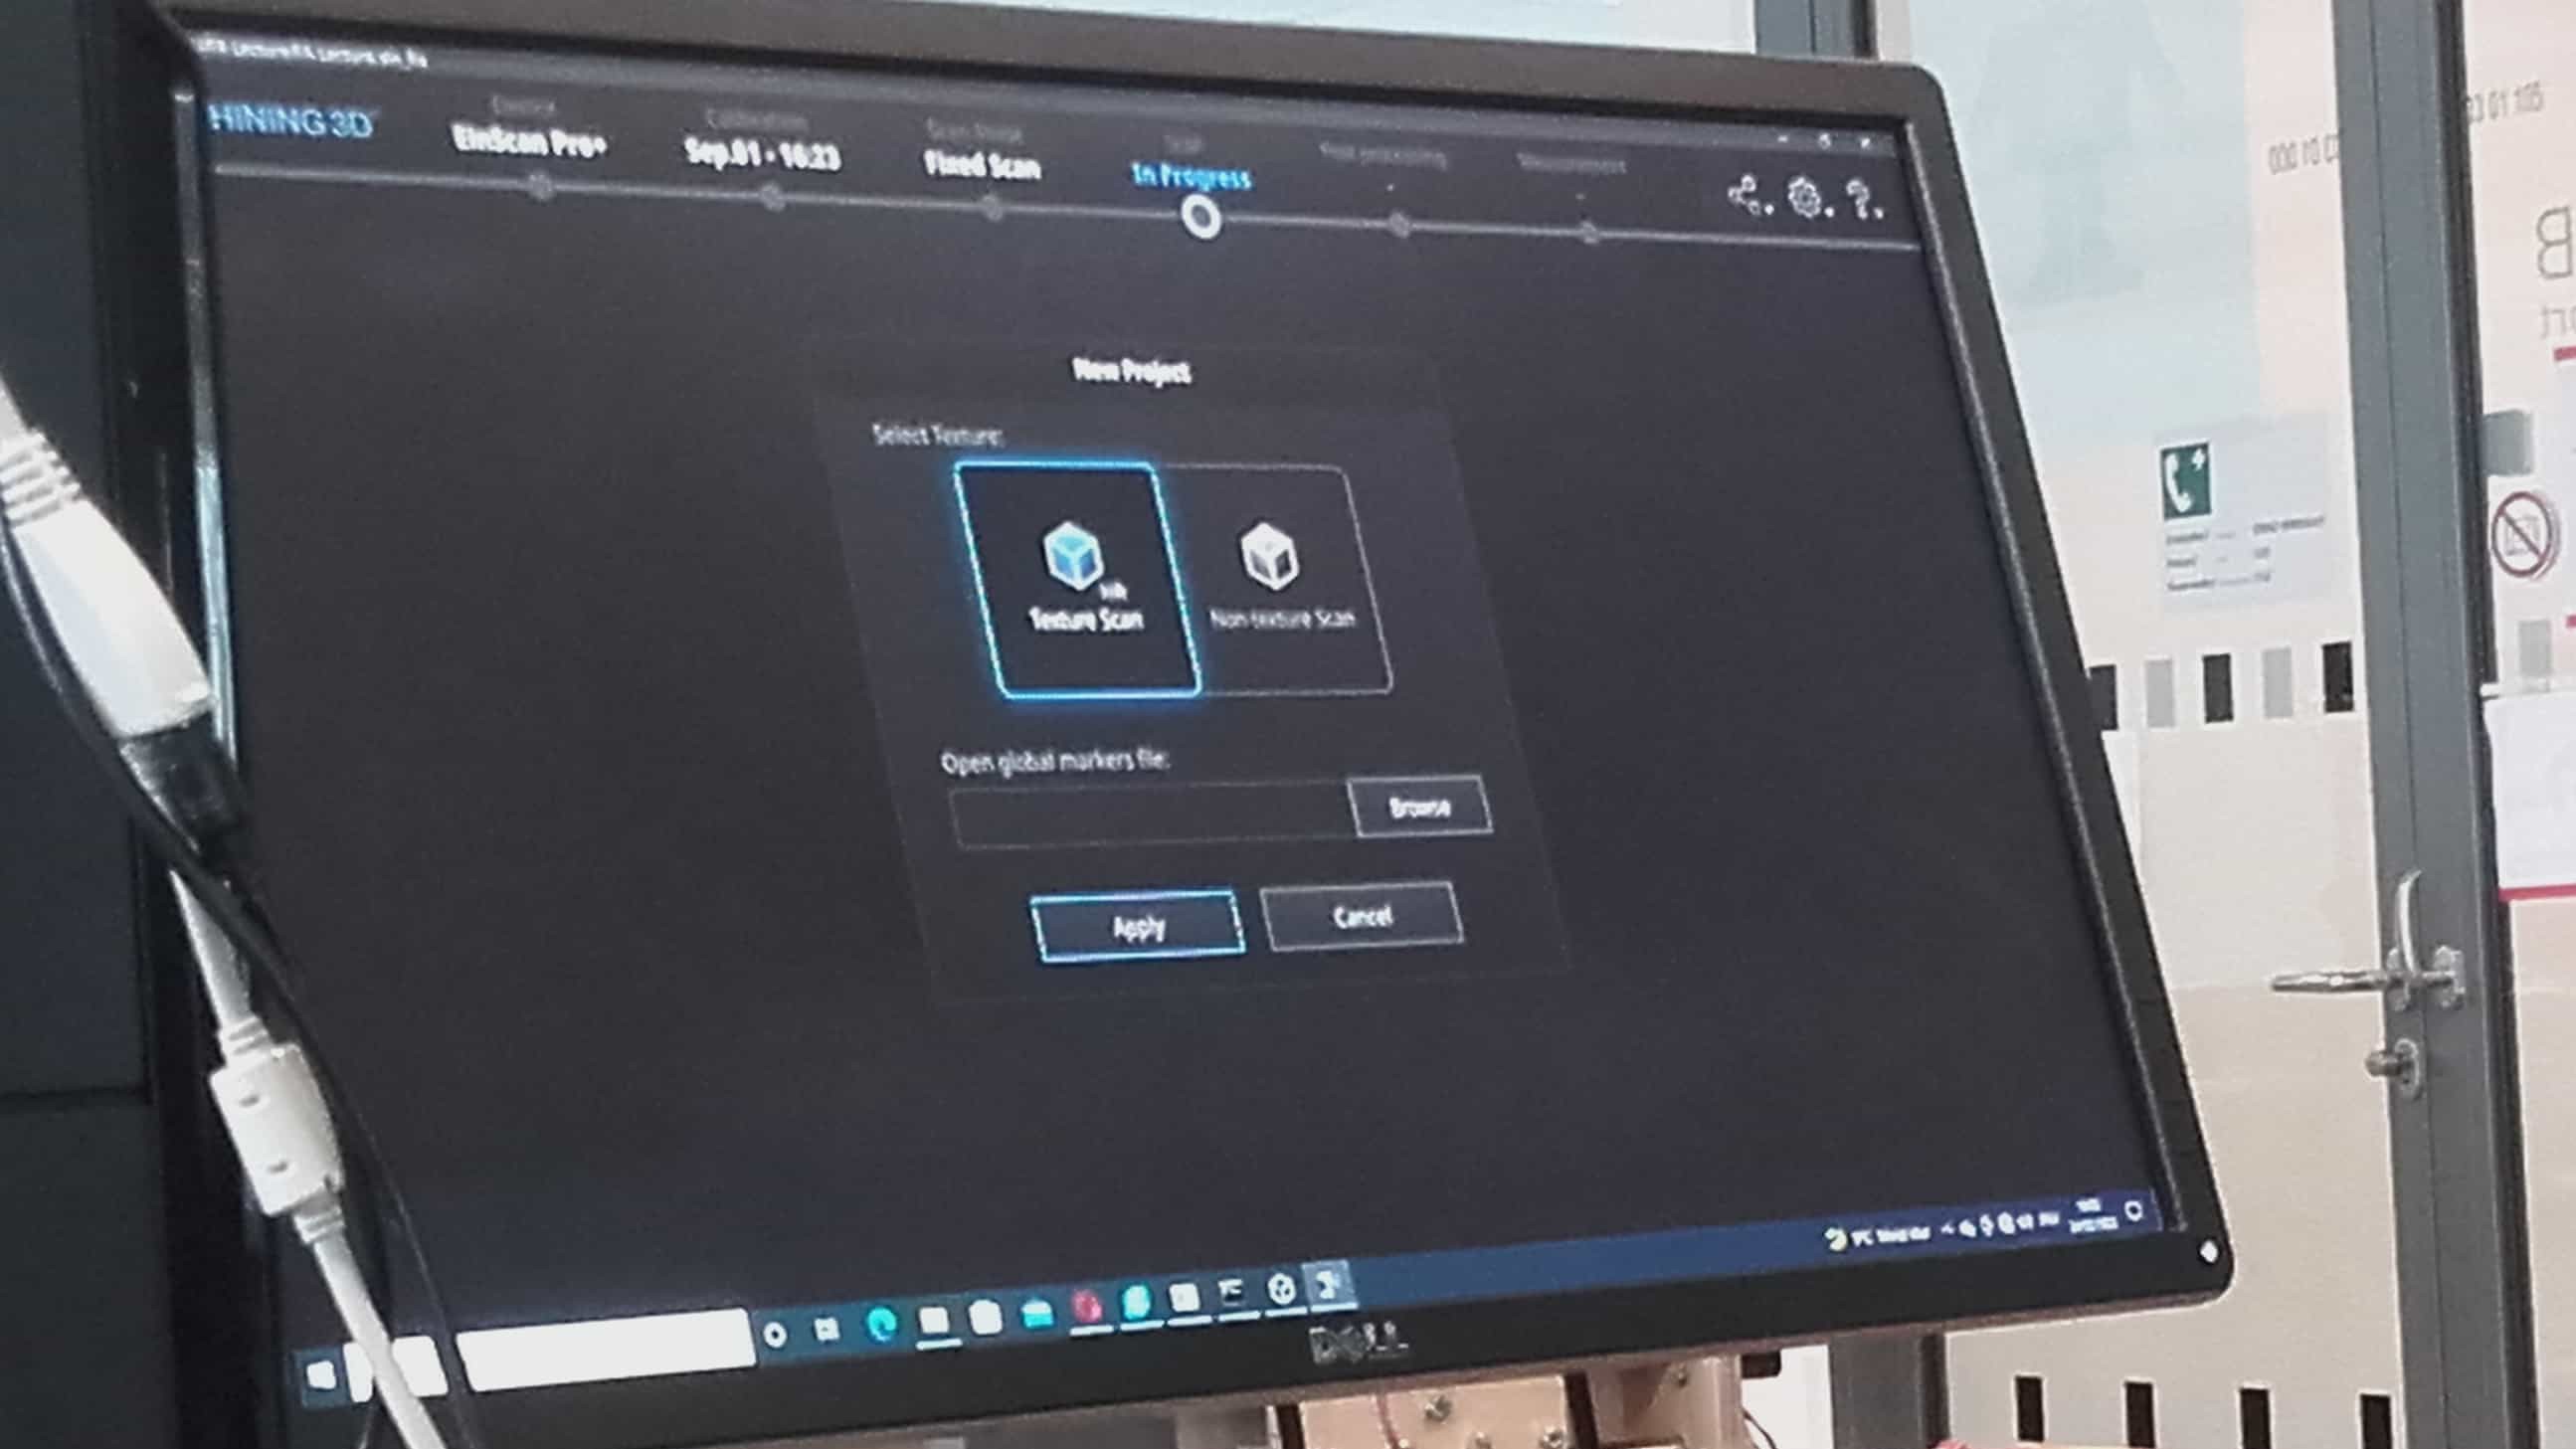
And since we have the texture camera accessory for the Einscan, we also did scans that included texture.
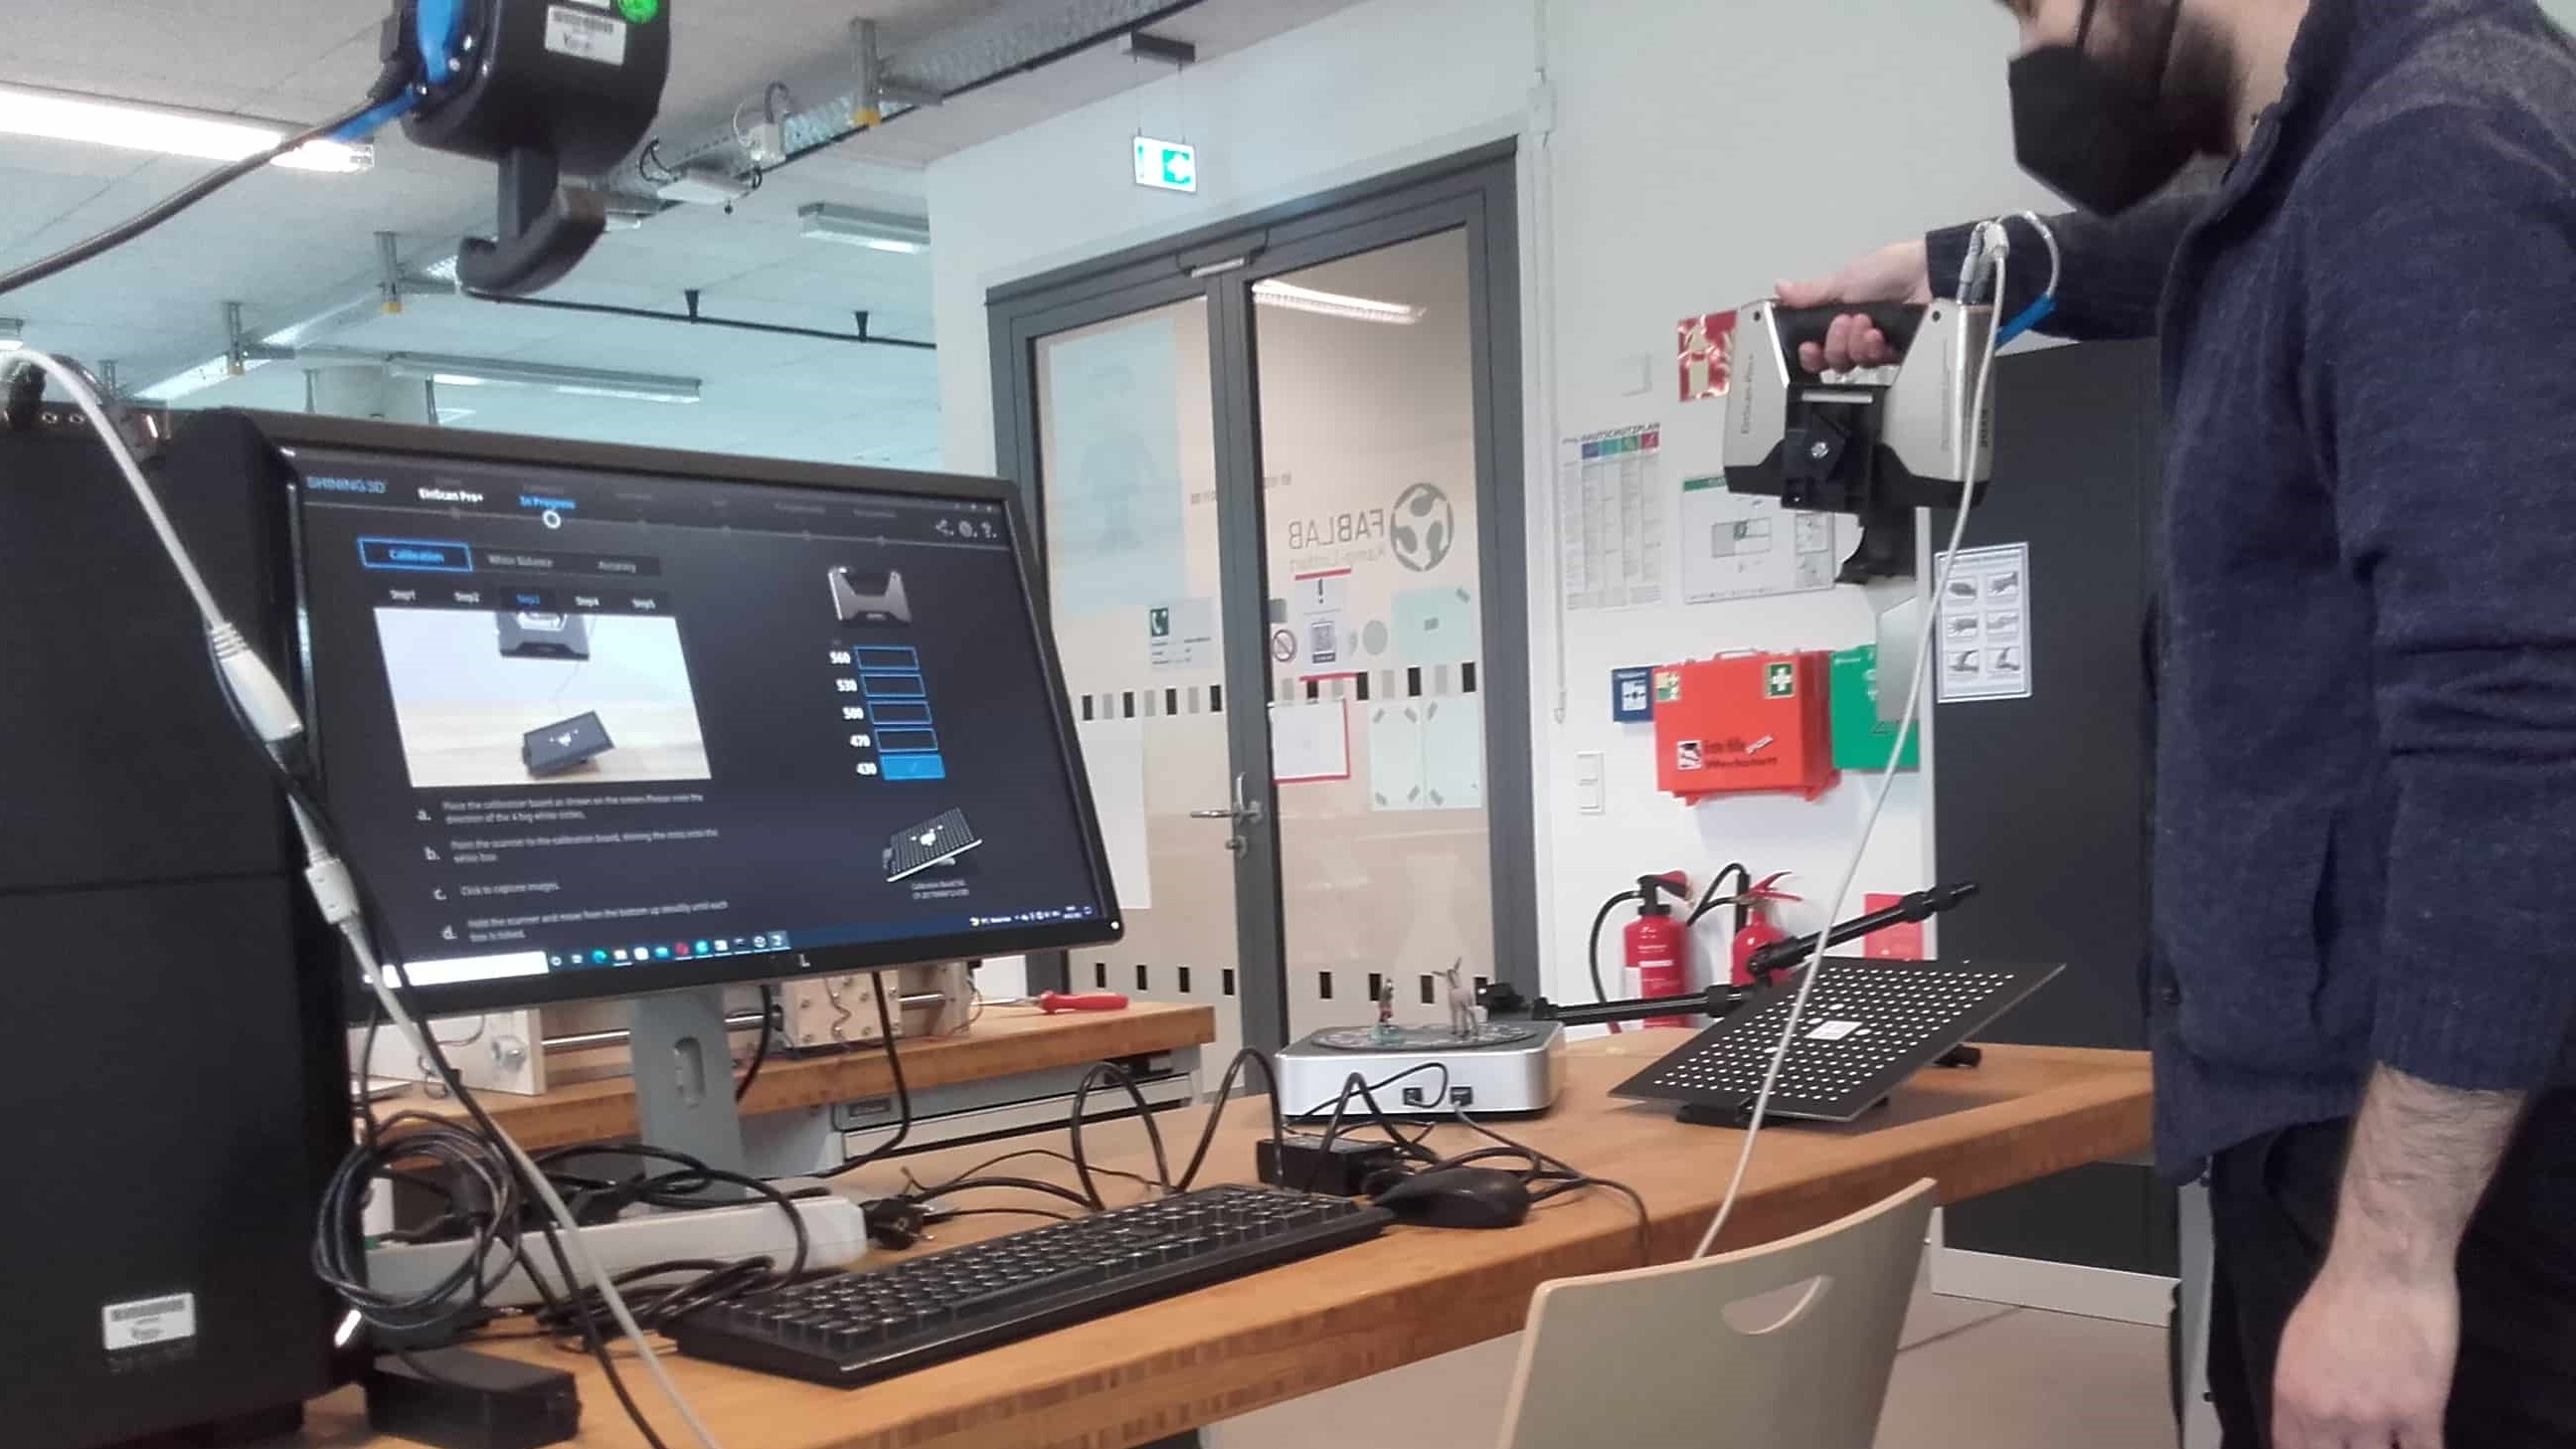
Calibrating
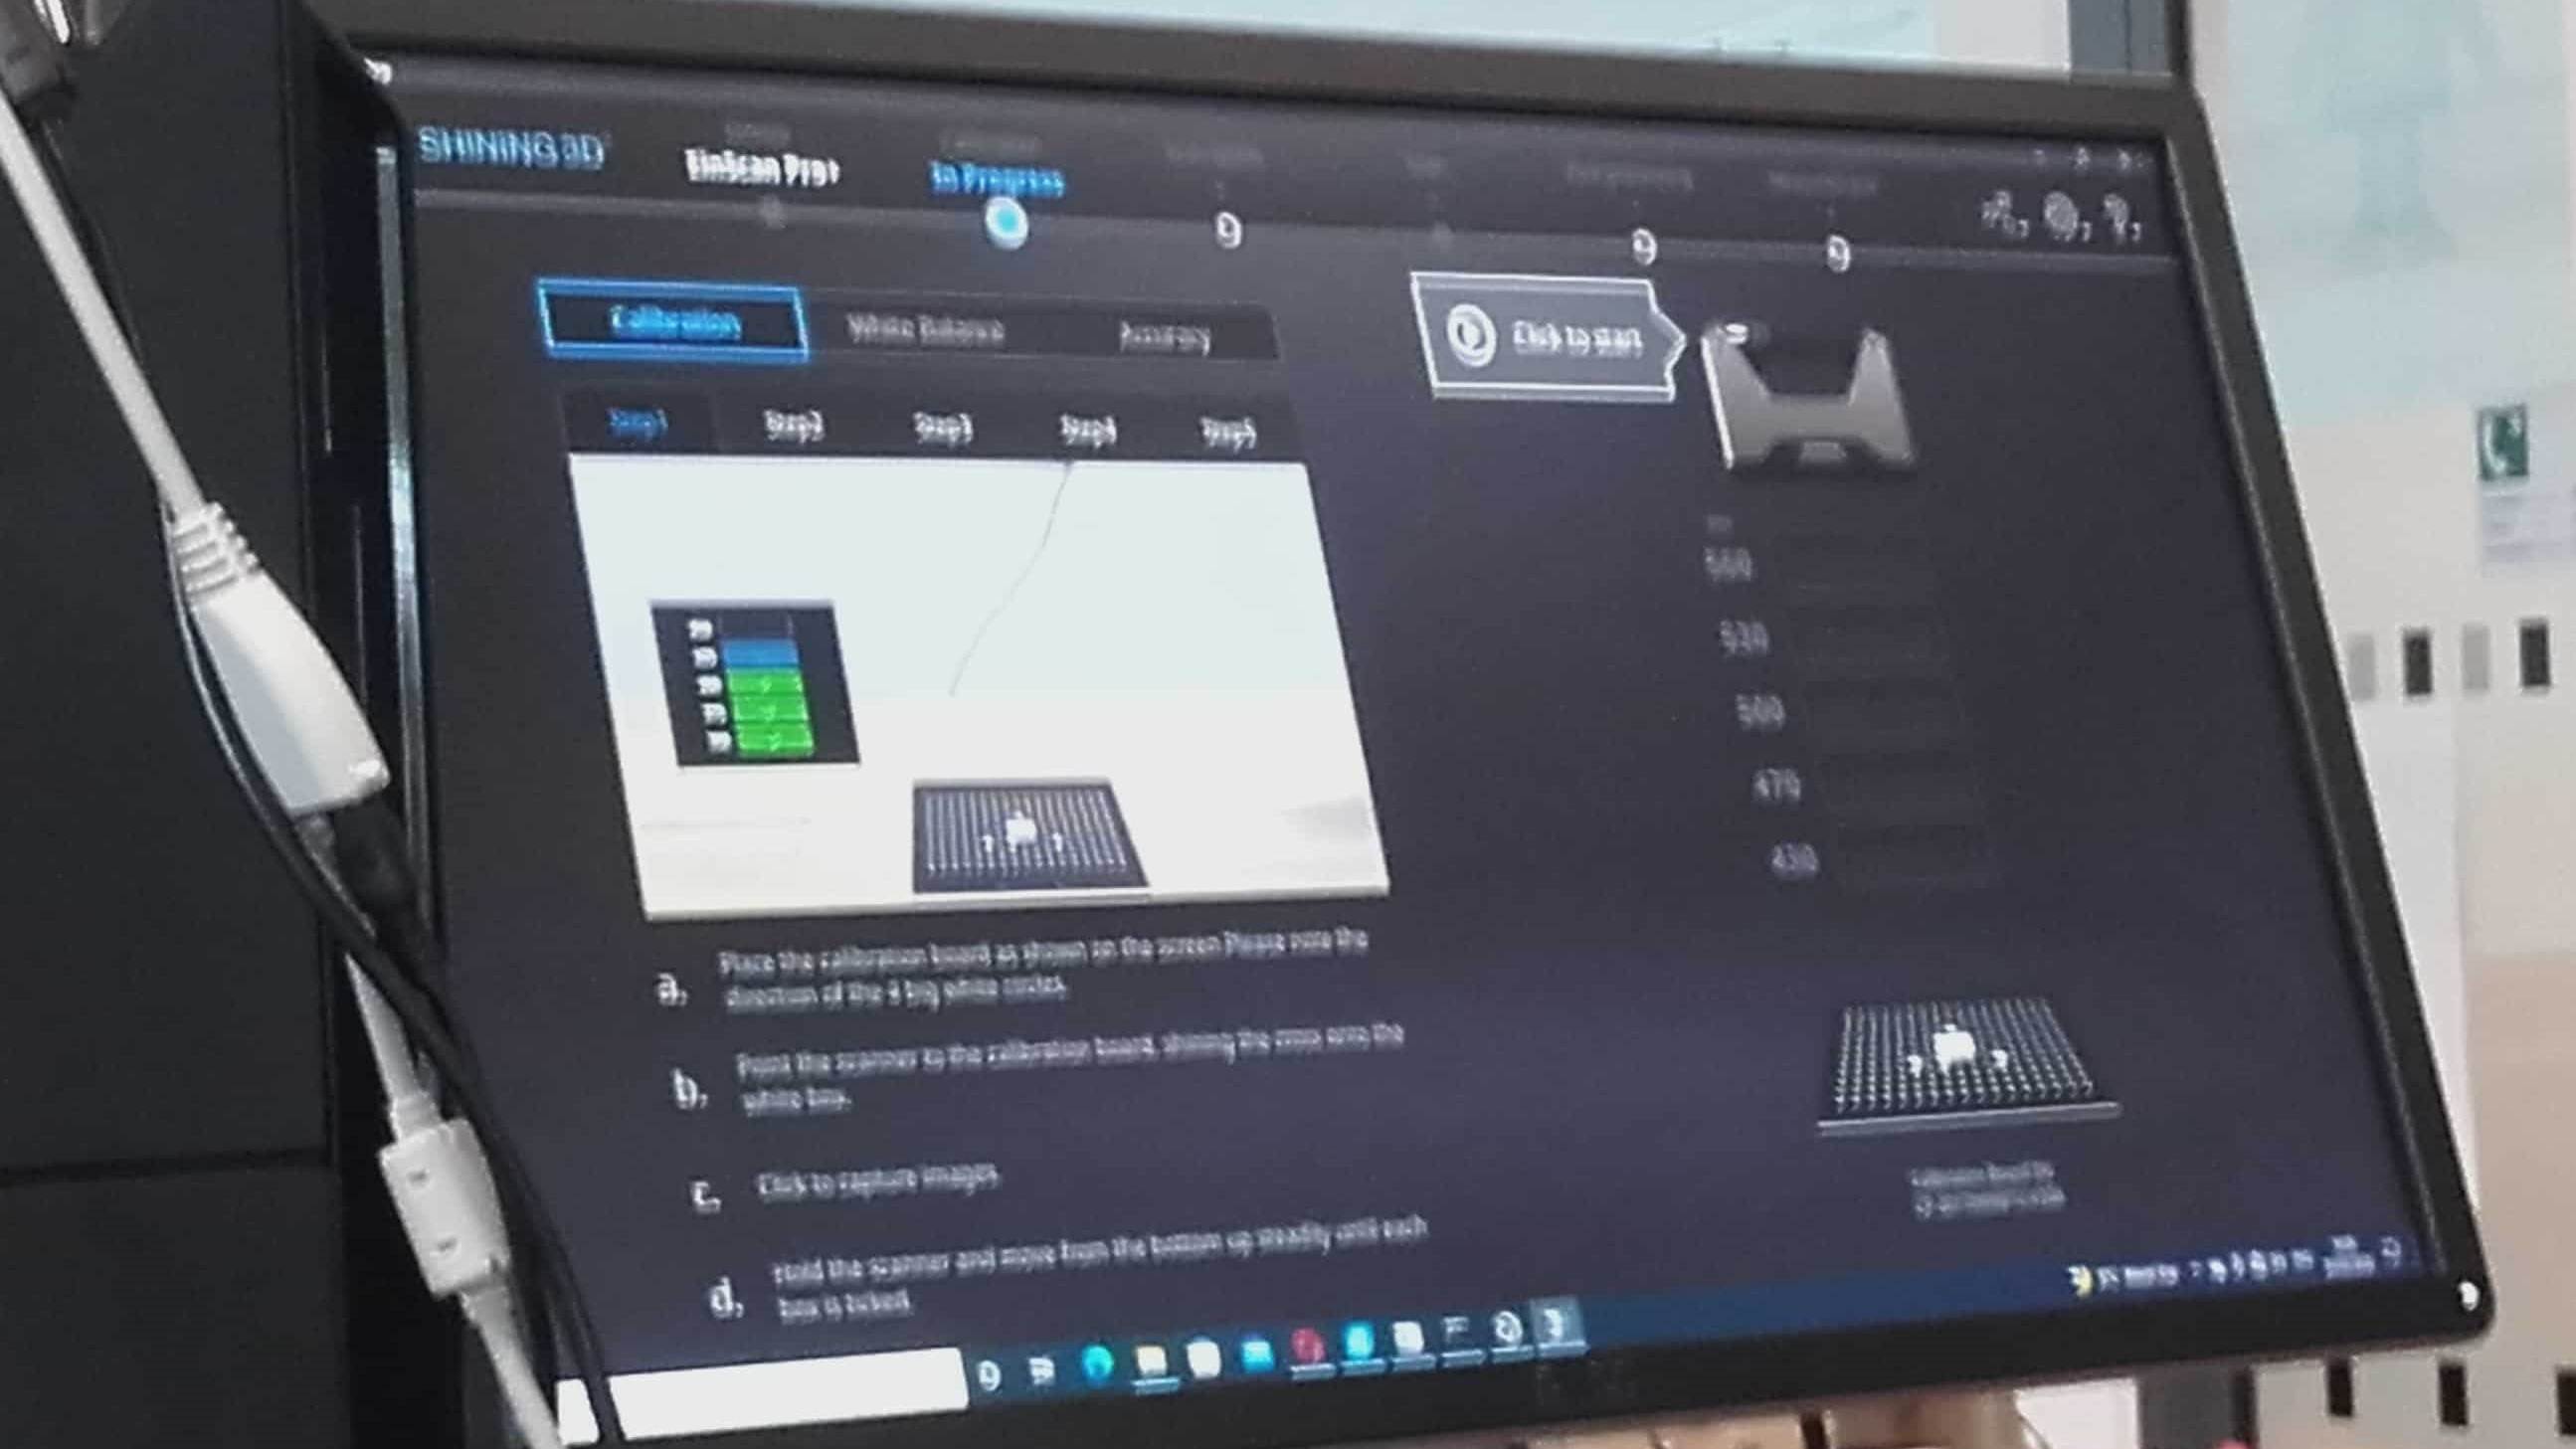
Then Ahmed showed us the full calibration process. He said he recommended doing this every time the scanner is being used in a new session, especially if it is acting strangely.
Easy
The software provides a useful little video of what you need to do so you basically just need to follow along.
Waiting
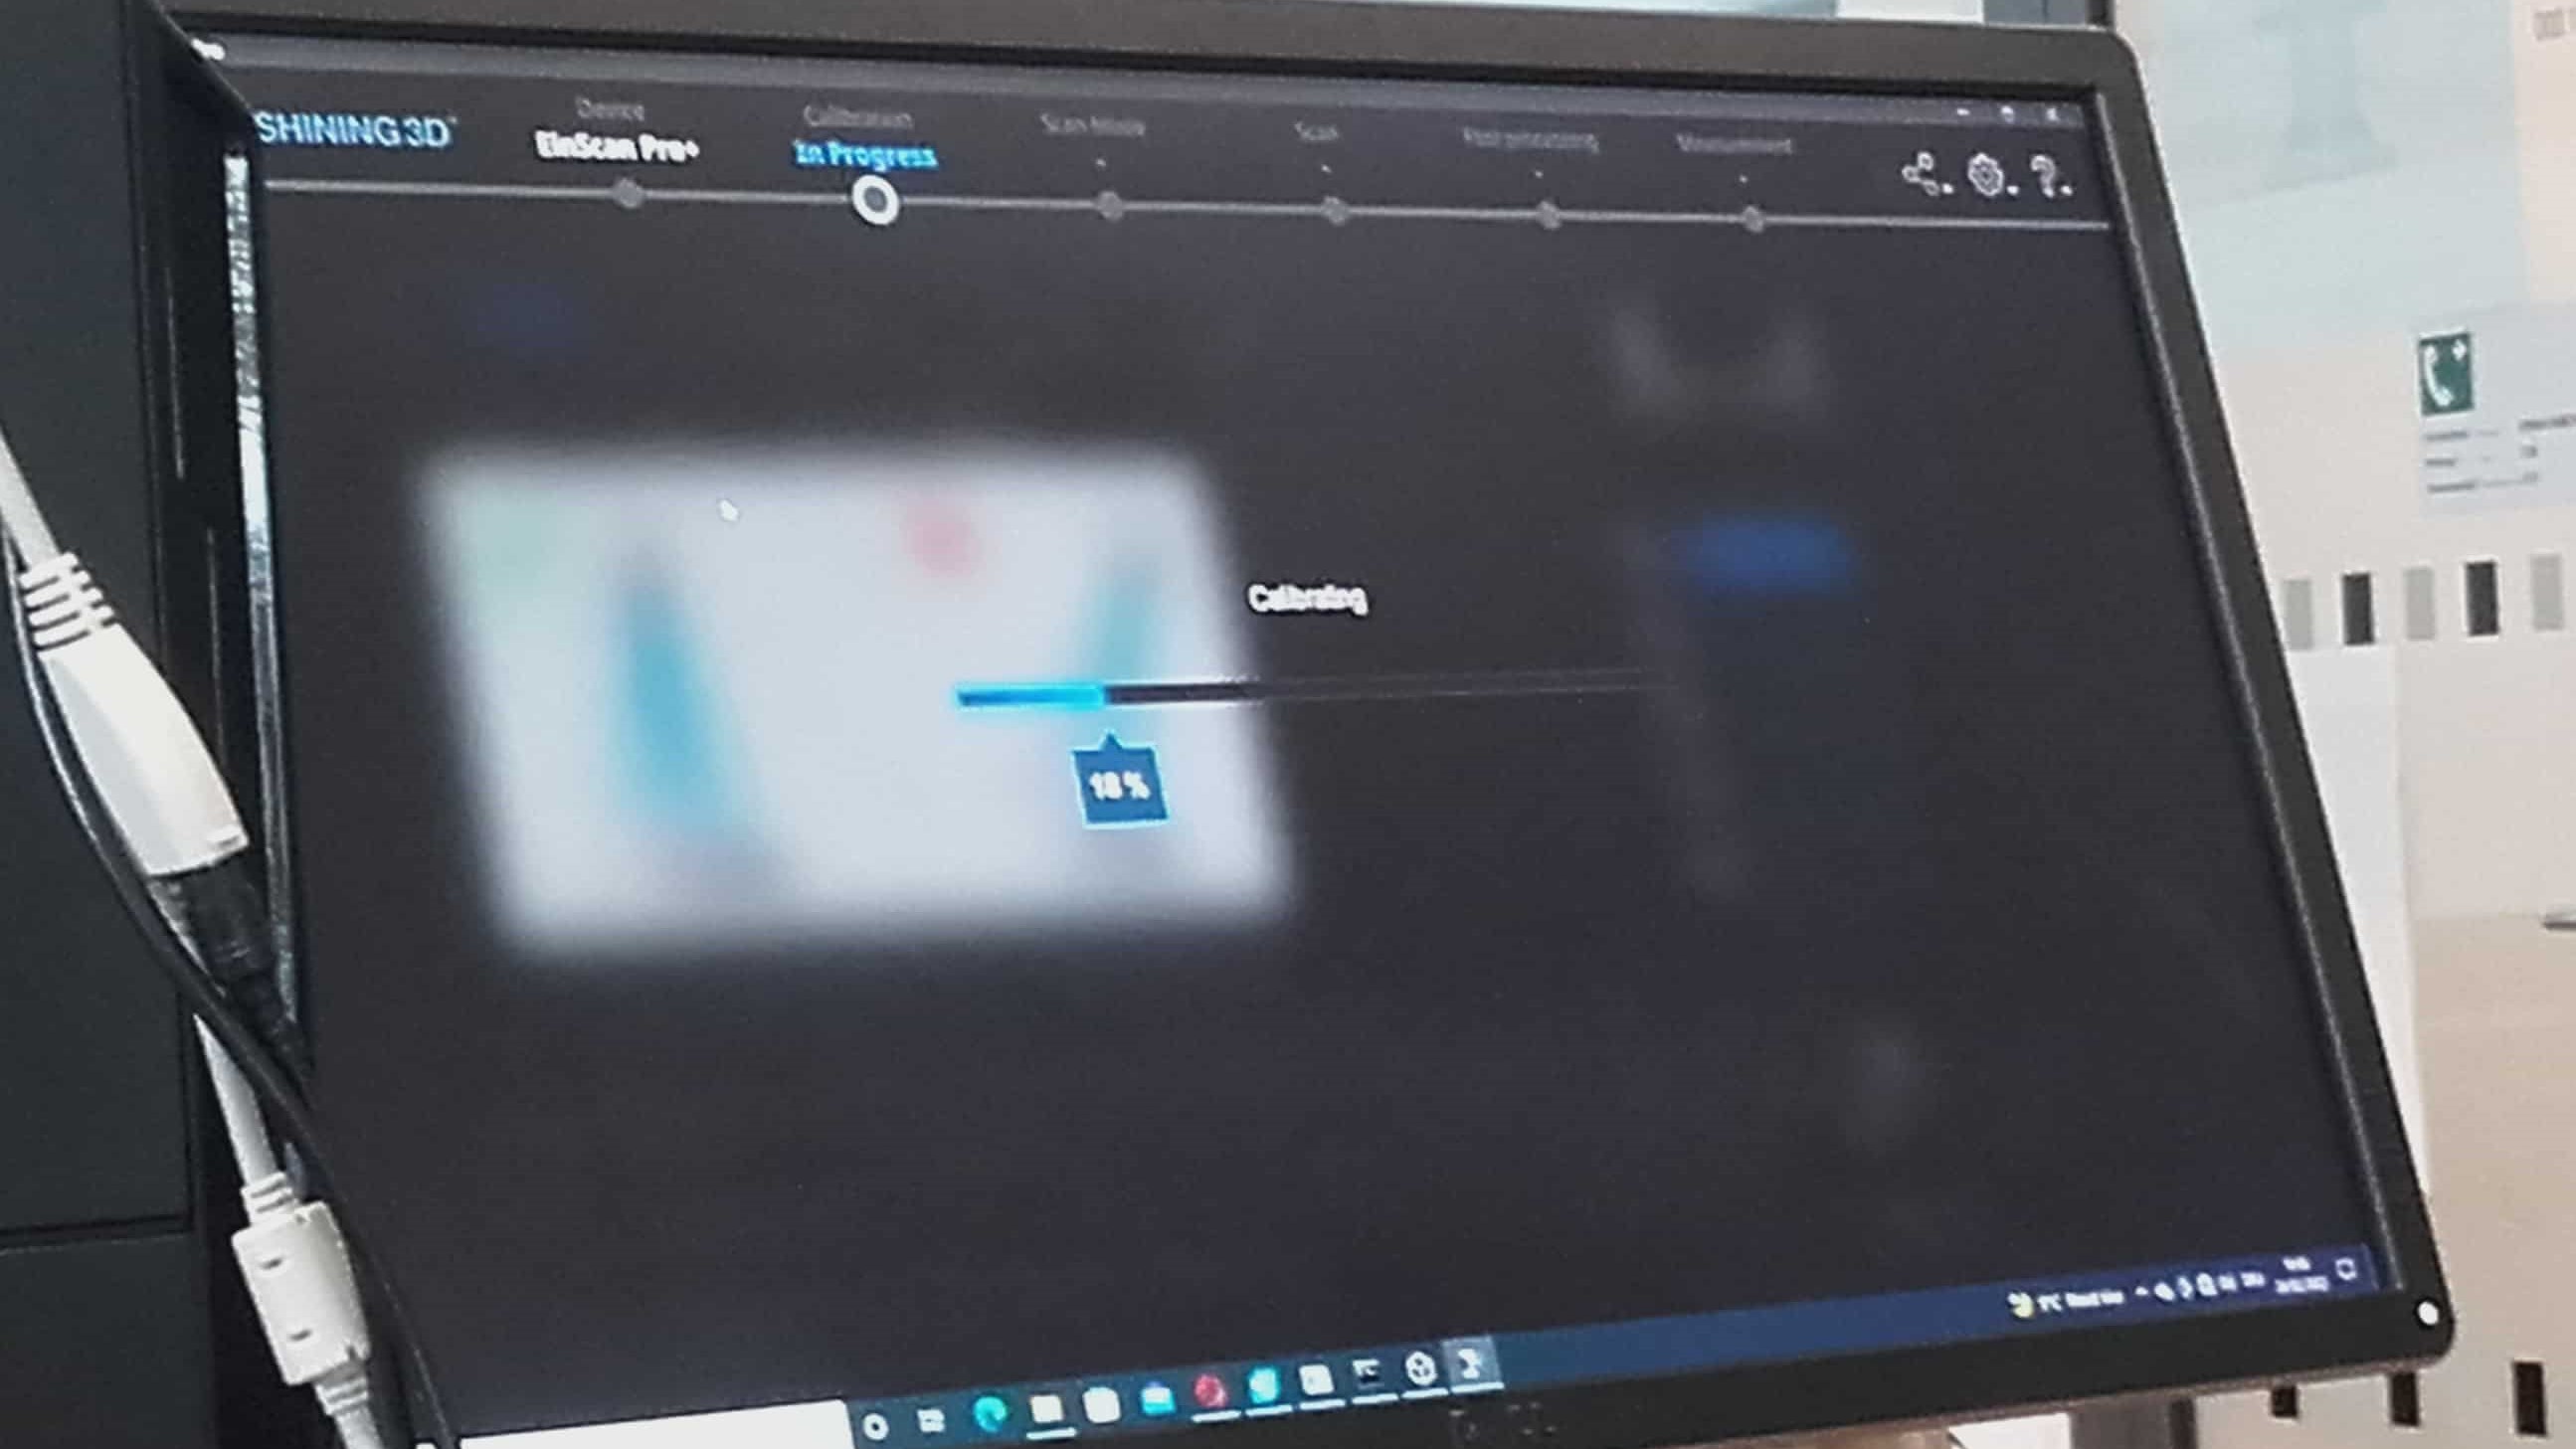
The calibration process took a while, but it was easy.
Success
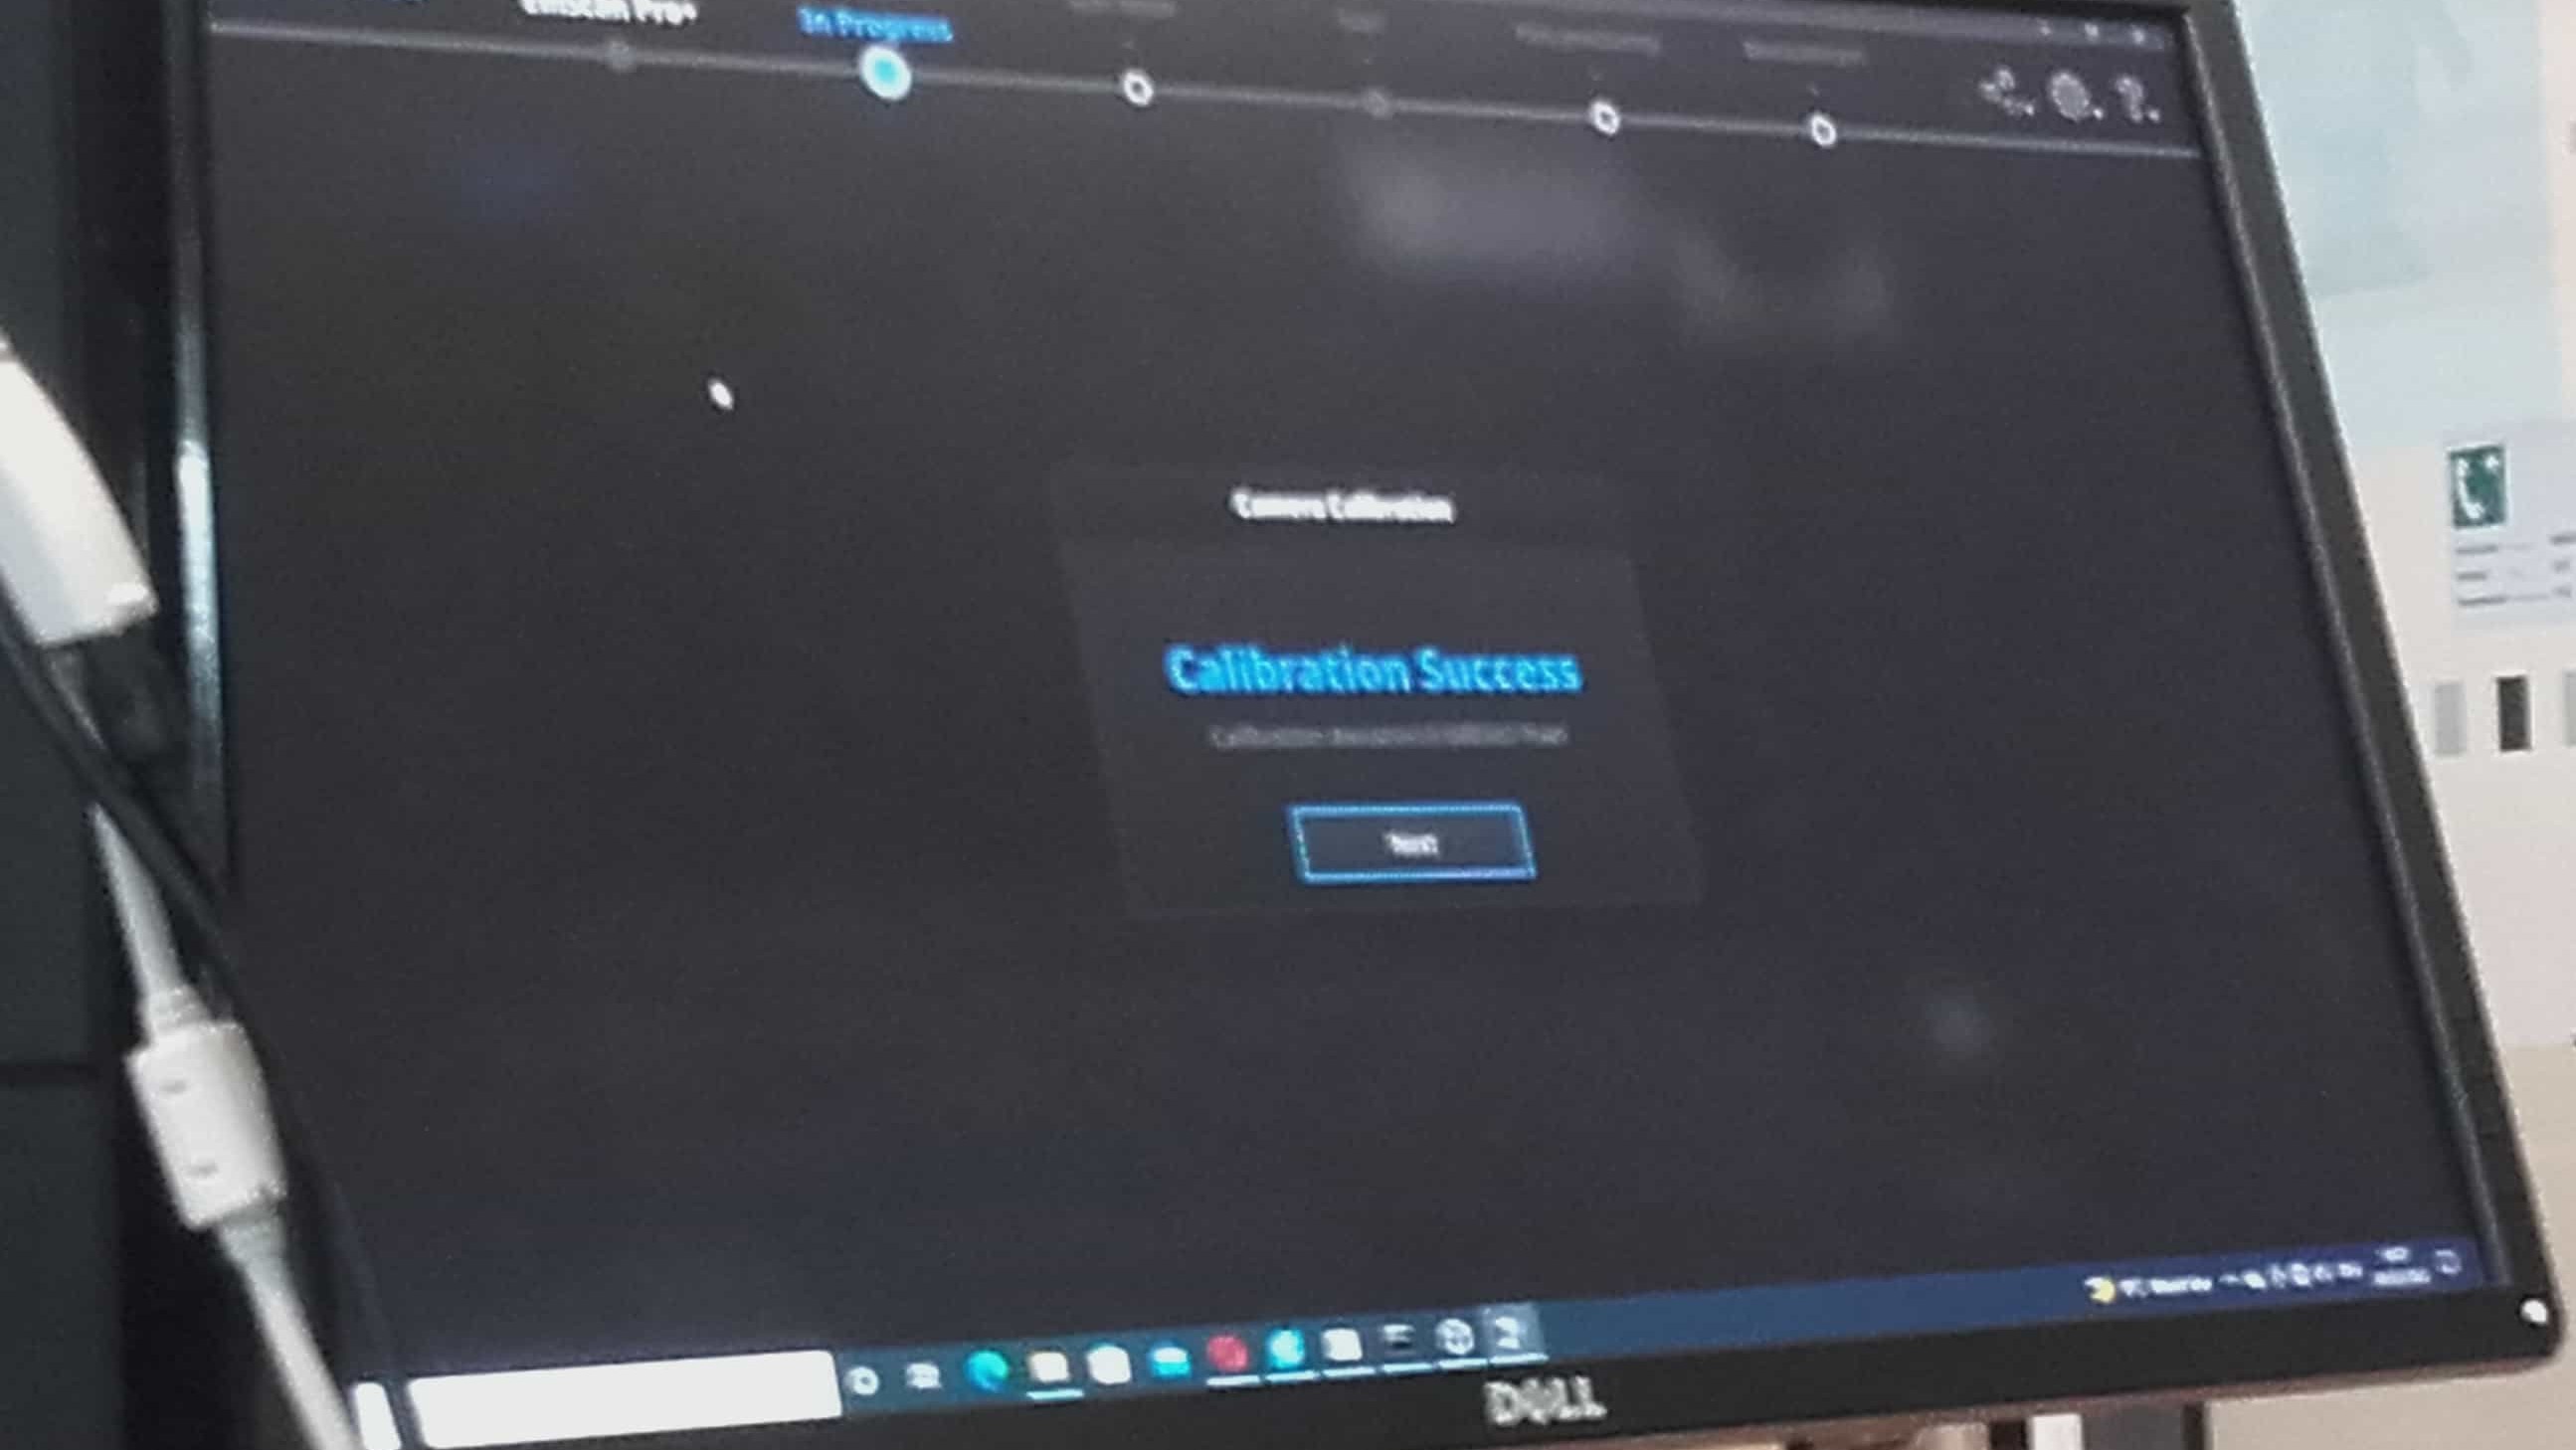
And after a few minutes, it was done.
Setting-Up the Models
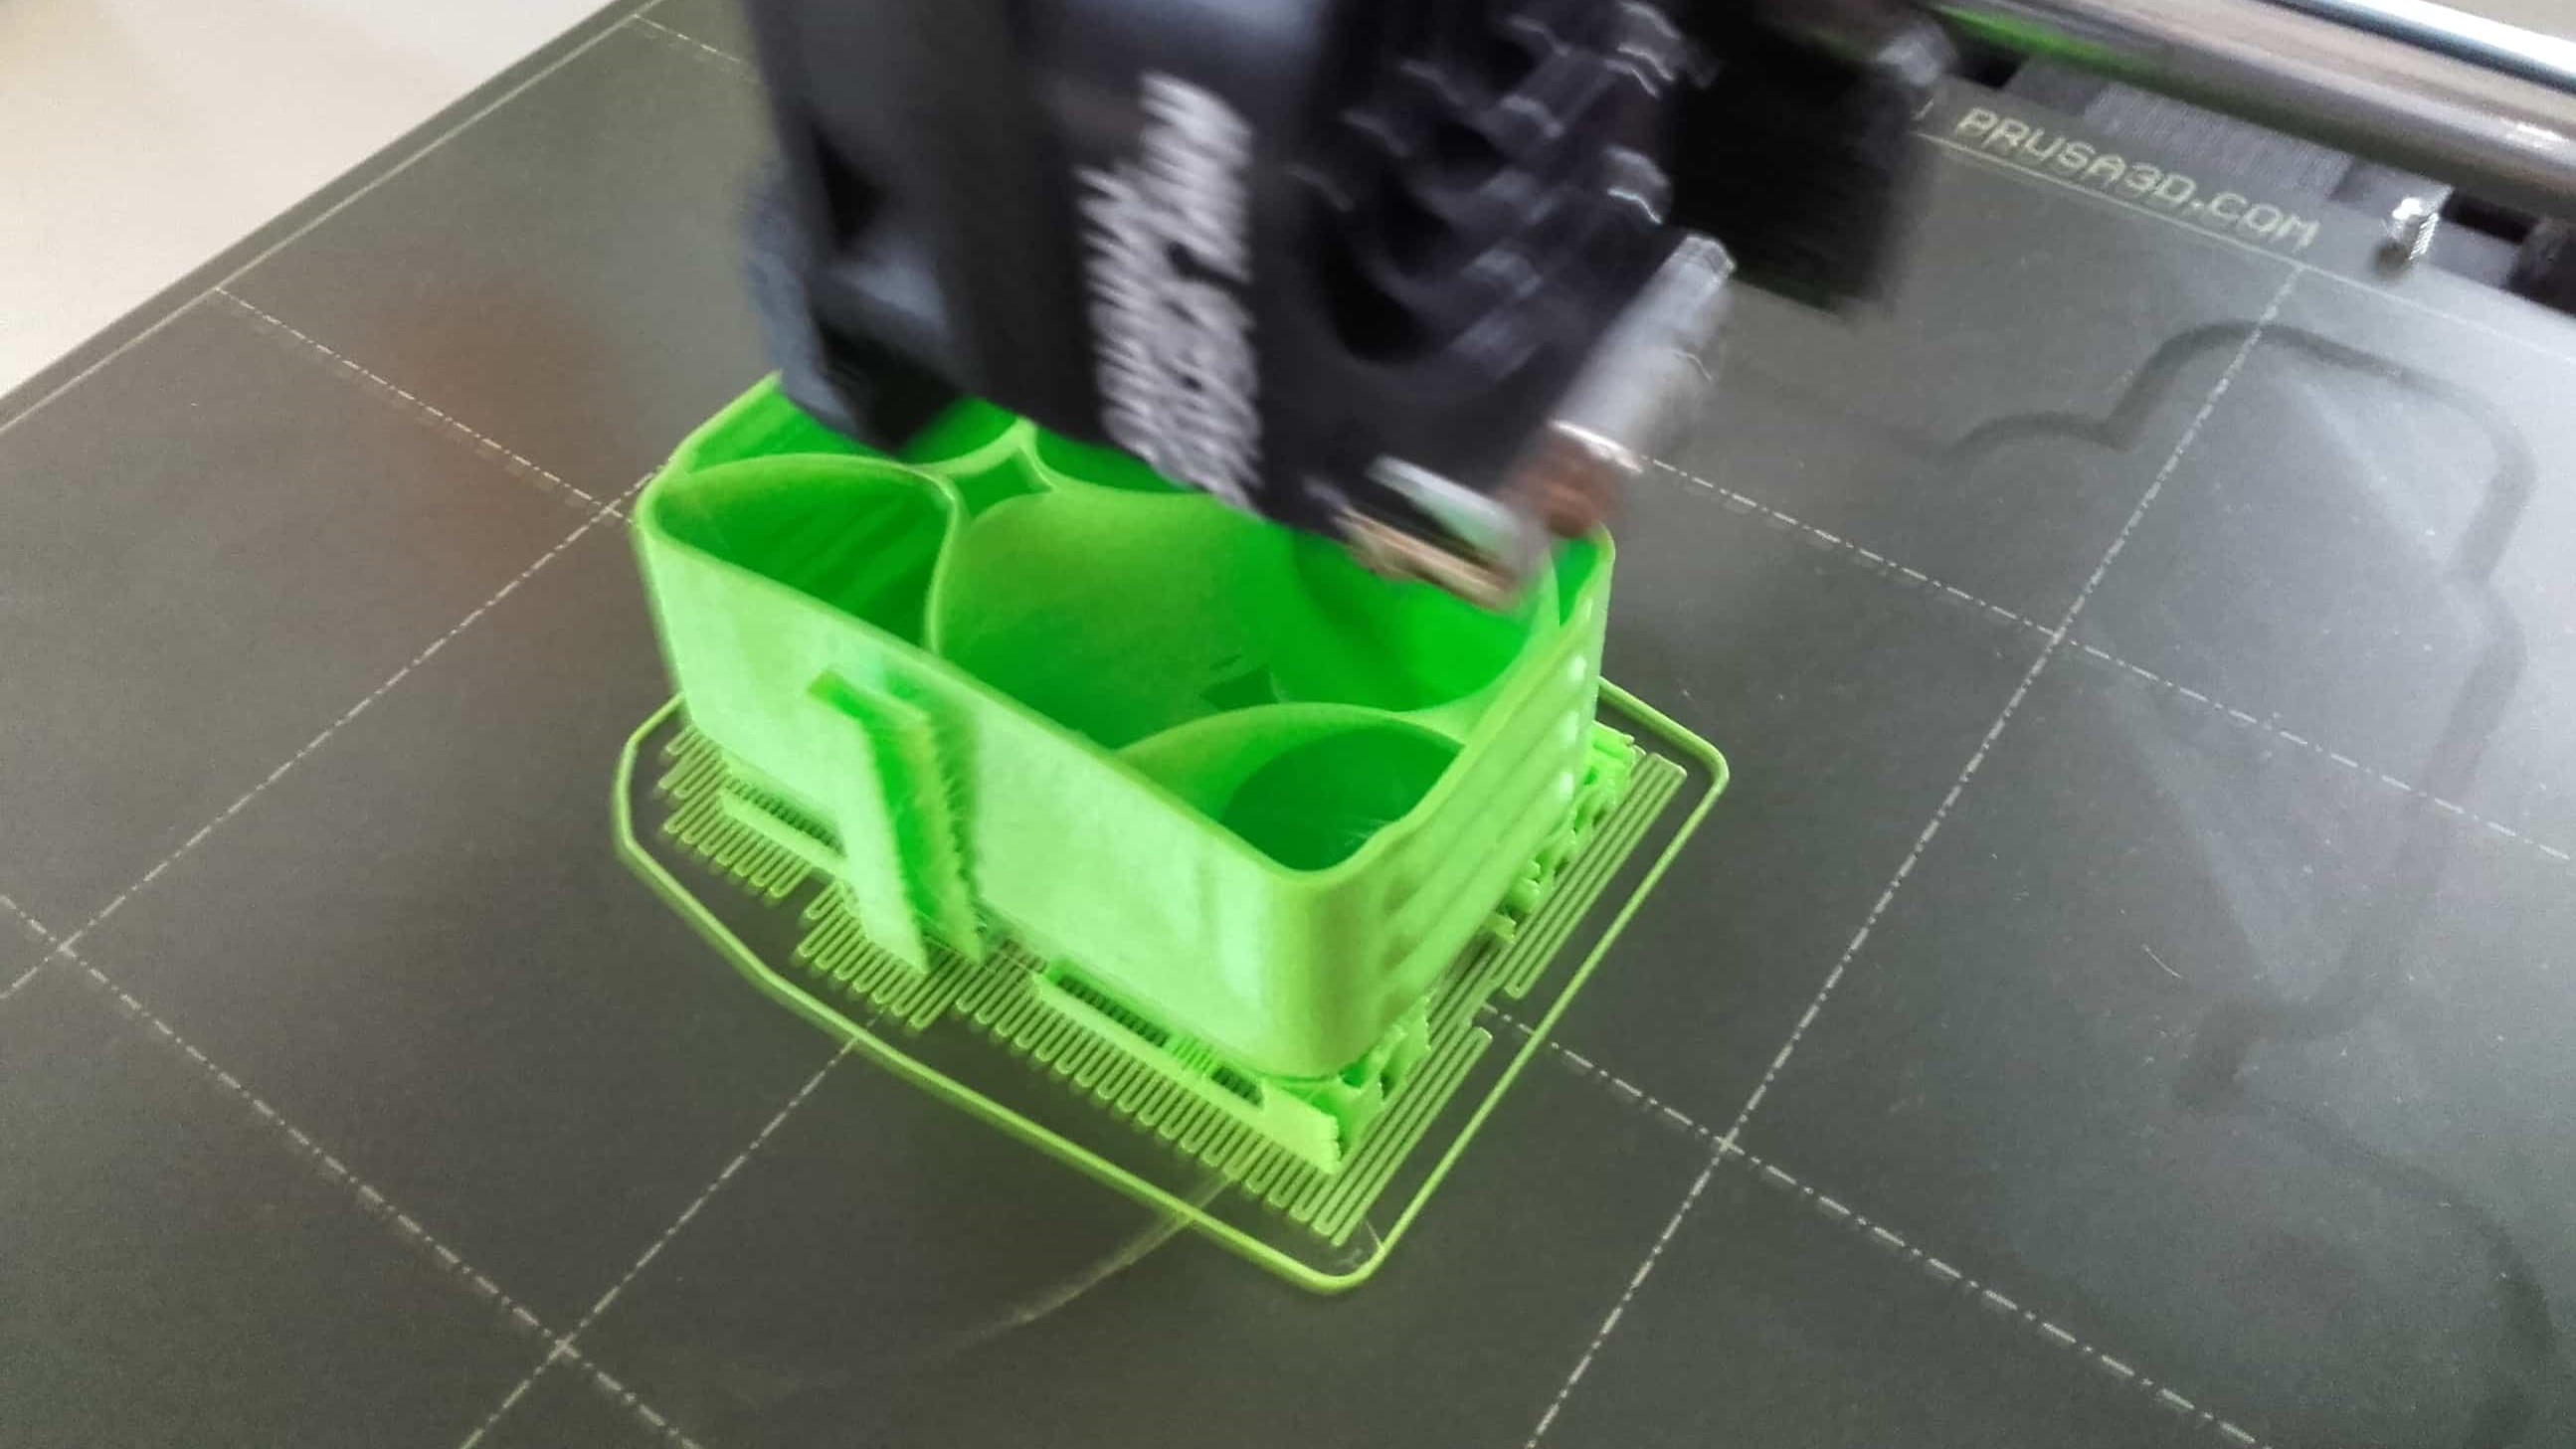
Now that we were ready to scan, we chose a couple small figurines to scan together for our first test.
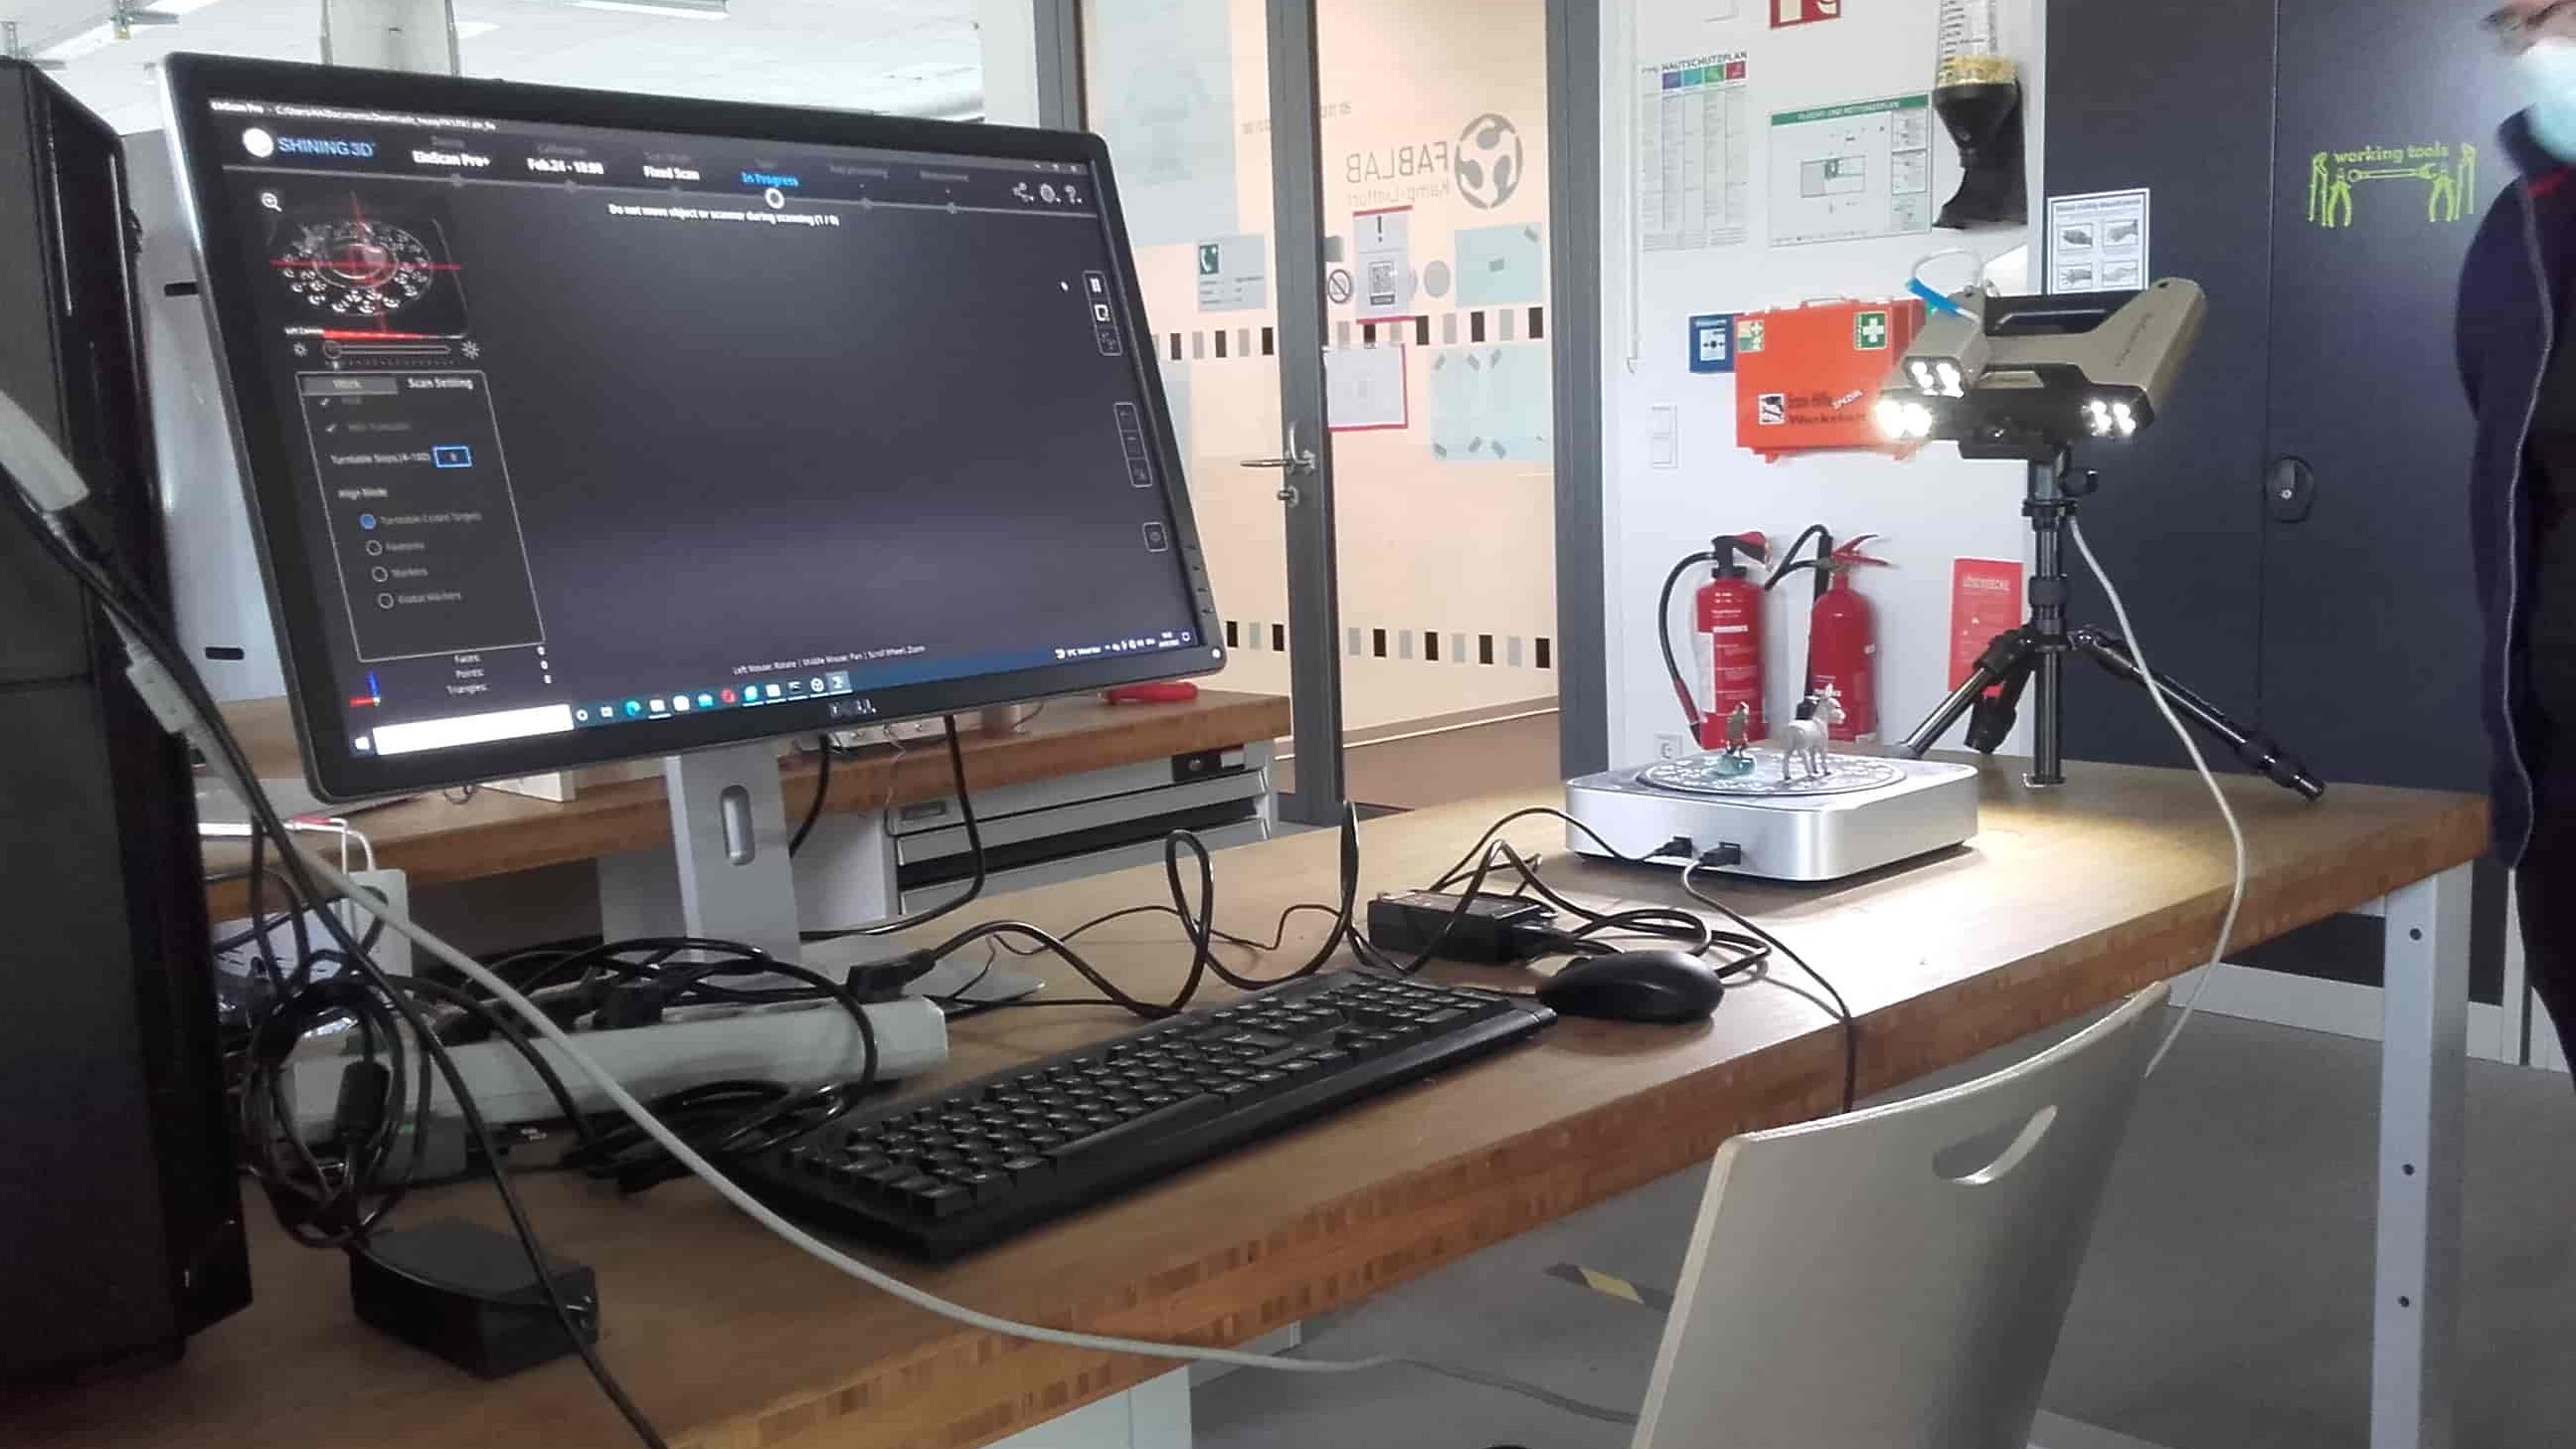
Scanning

We did several scans of the objects using the rotary table from the Einscan. We did a few trials with the markers to orient the scanner, and then did several more with the felt pad, Always removing any unwanted bits from each scan before adding it to the composite.
Generate Mesh
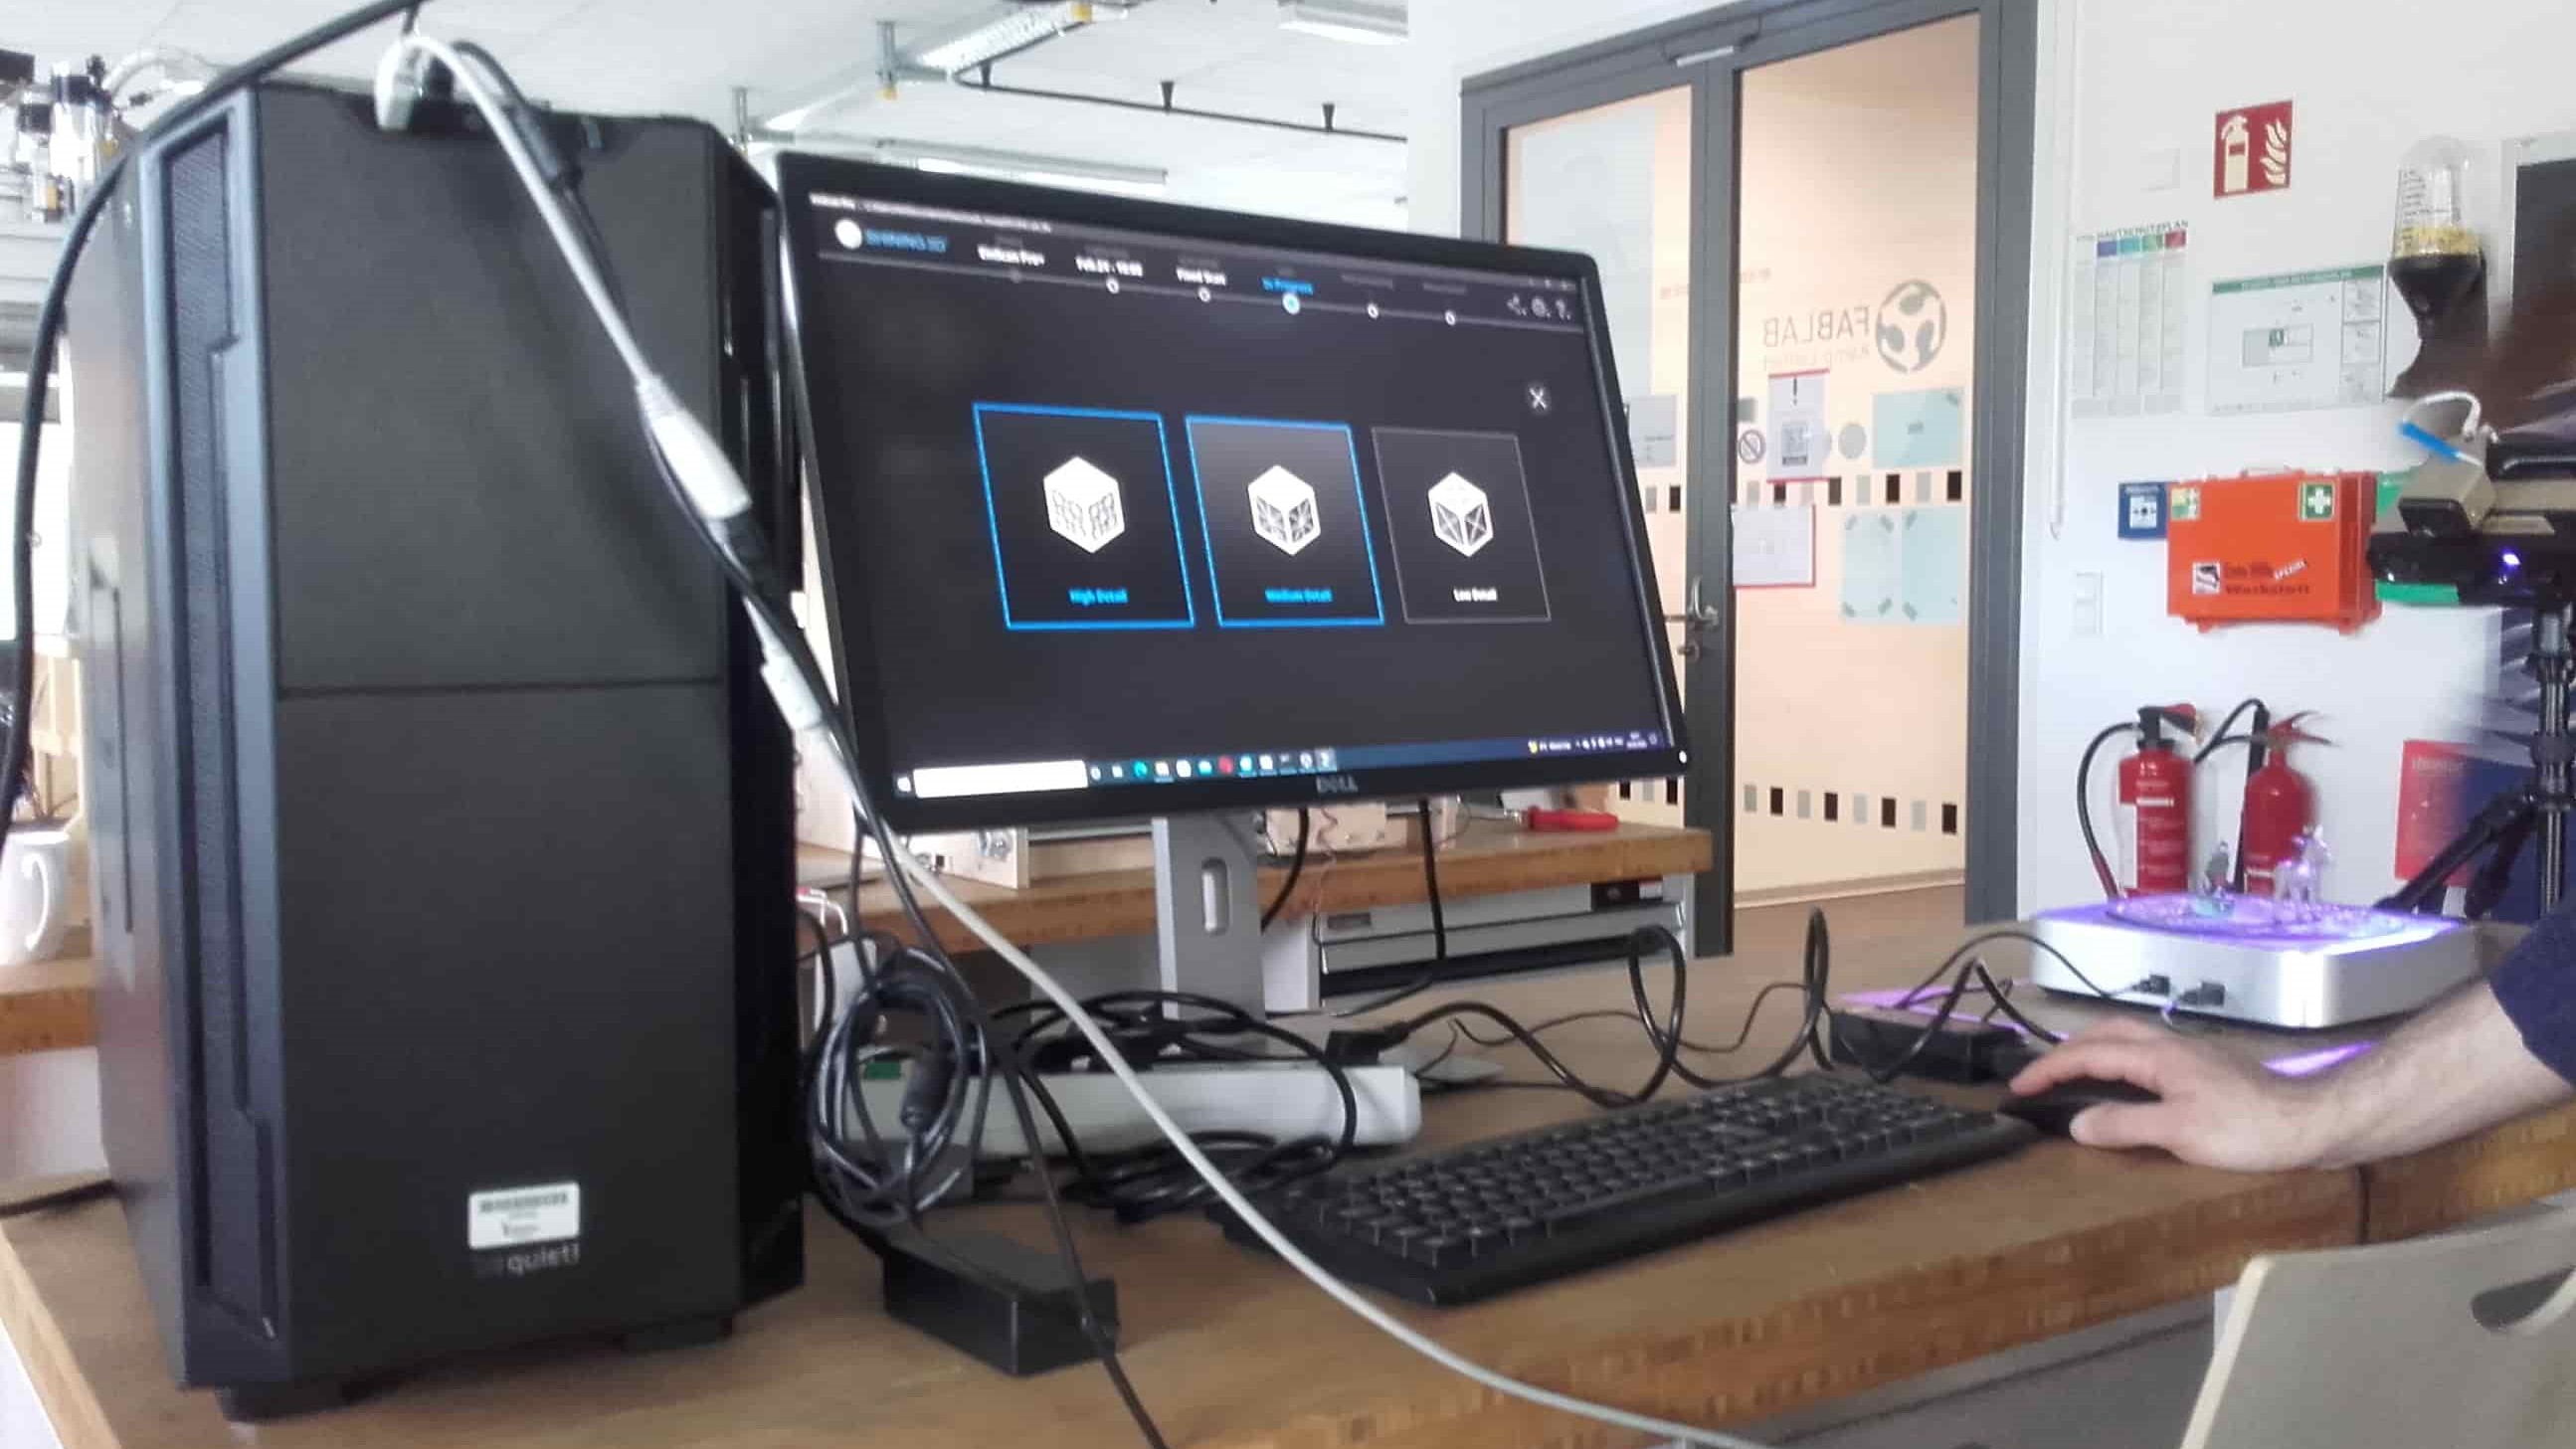
The model of the donkey was being captured quite well, but the other figurine was just too small so we just got rid of it when we generated the mesh. We chose a watertight mesh with high detail.
New Mesh

And finally we had a mesh, with textures, that could be saved as an stl file.
Time to Get Started
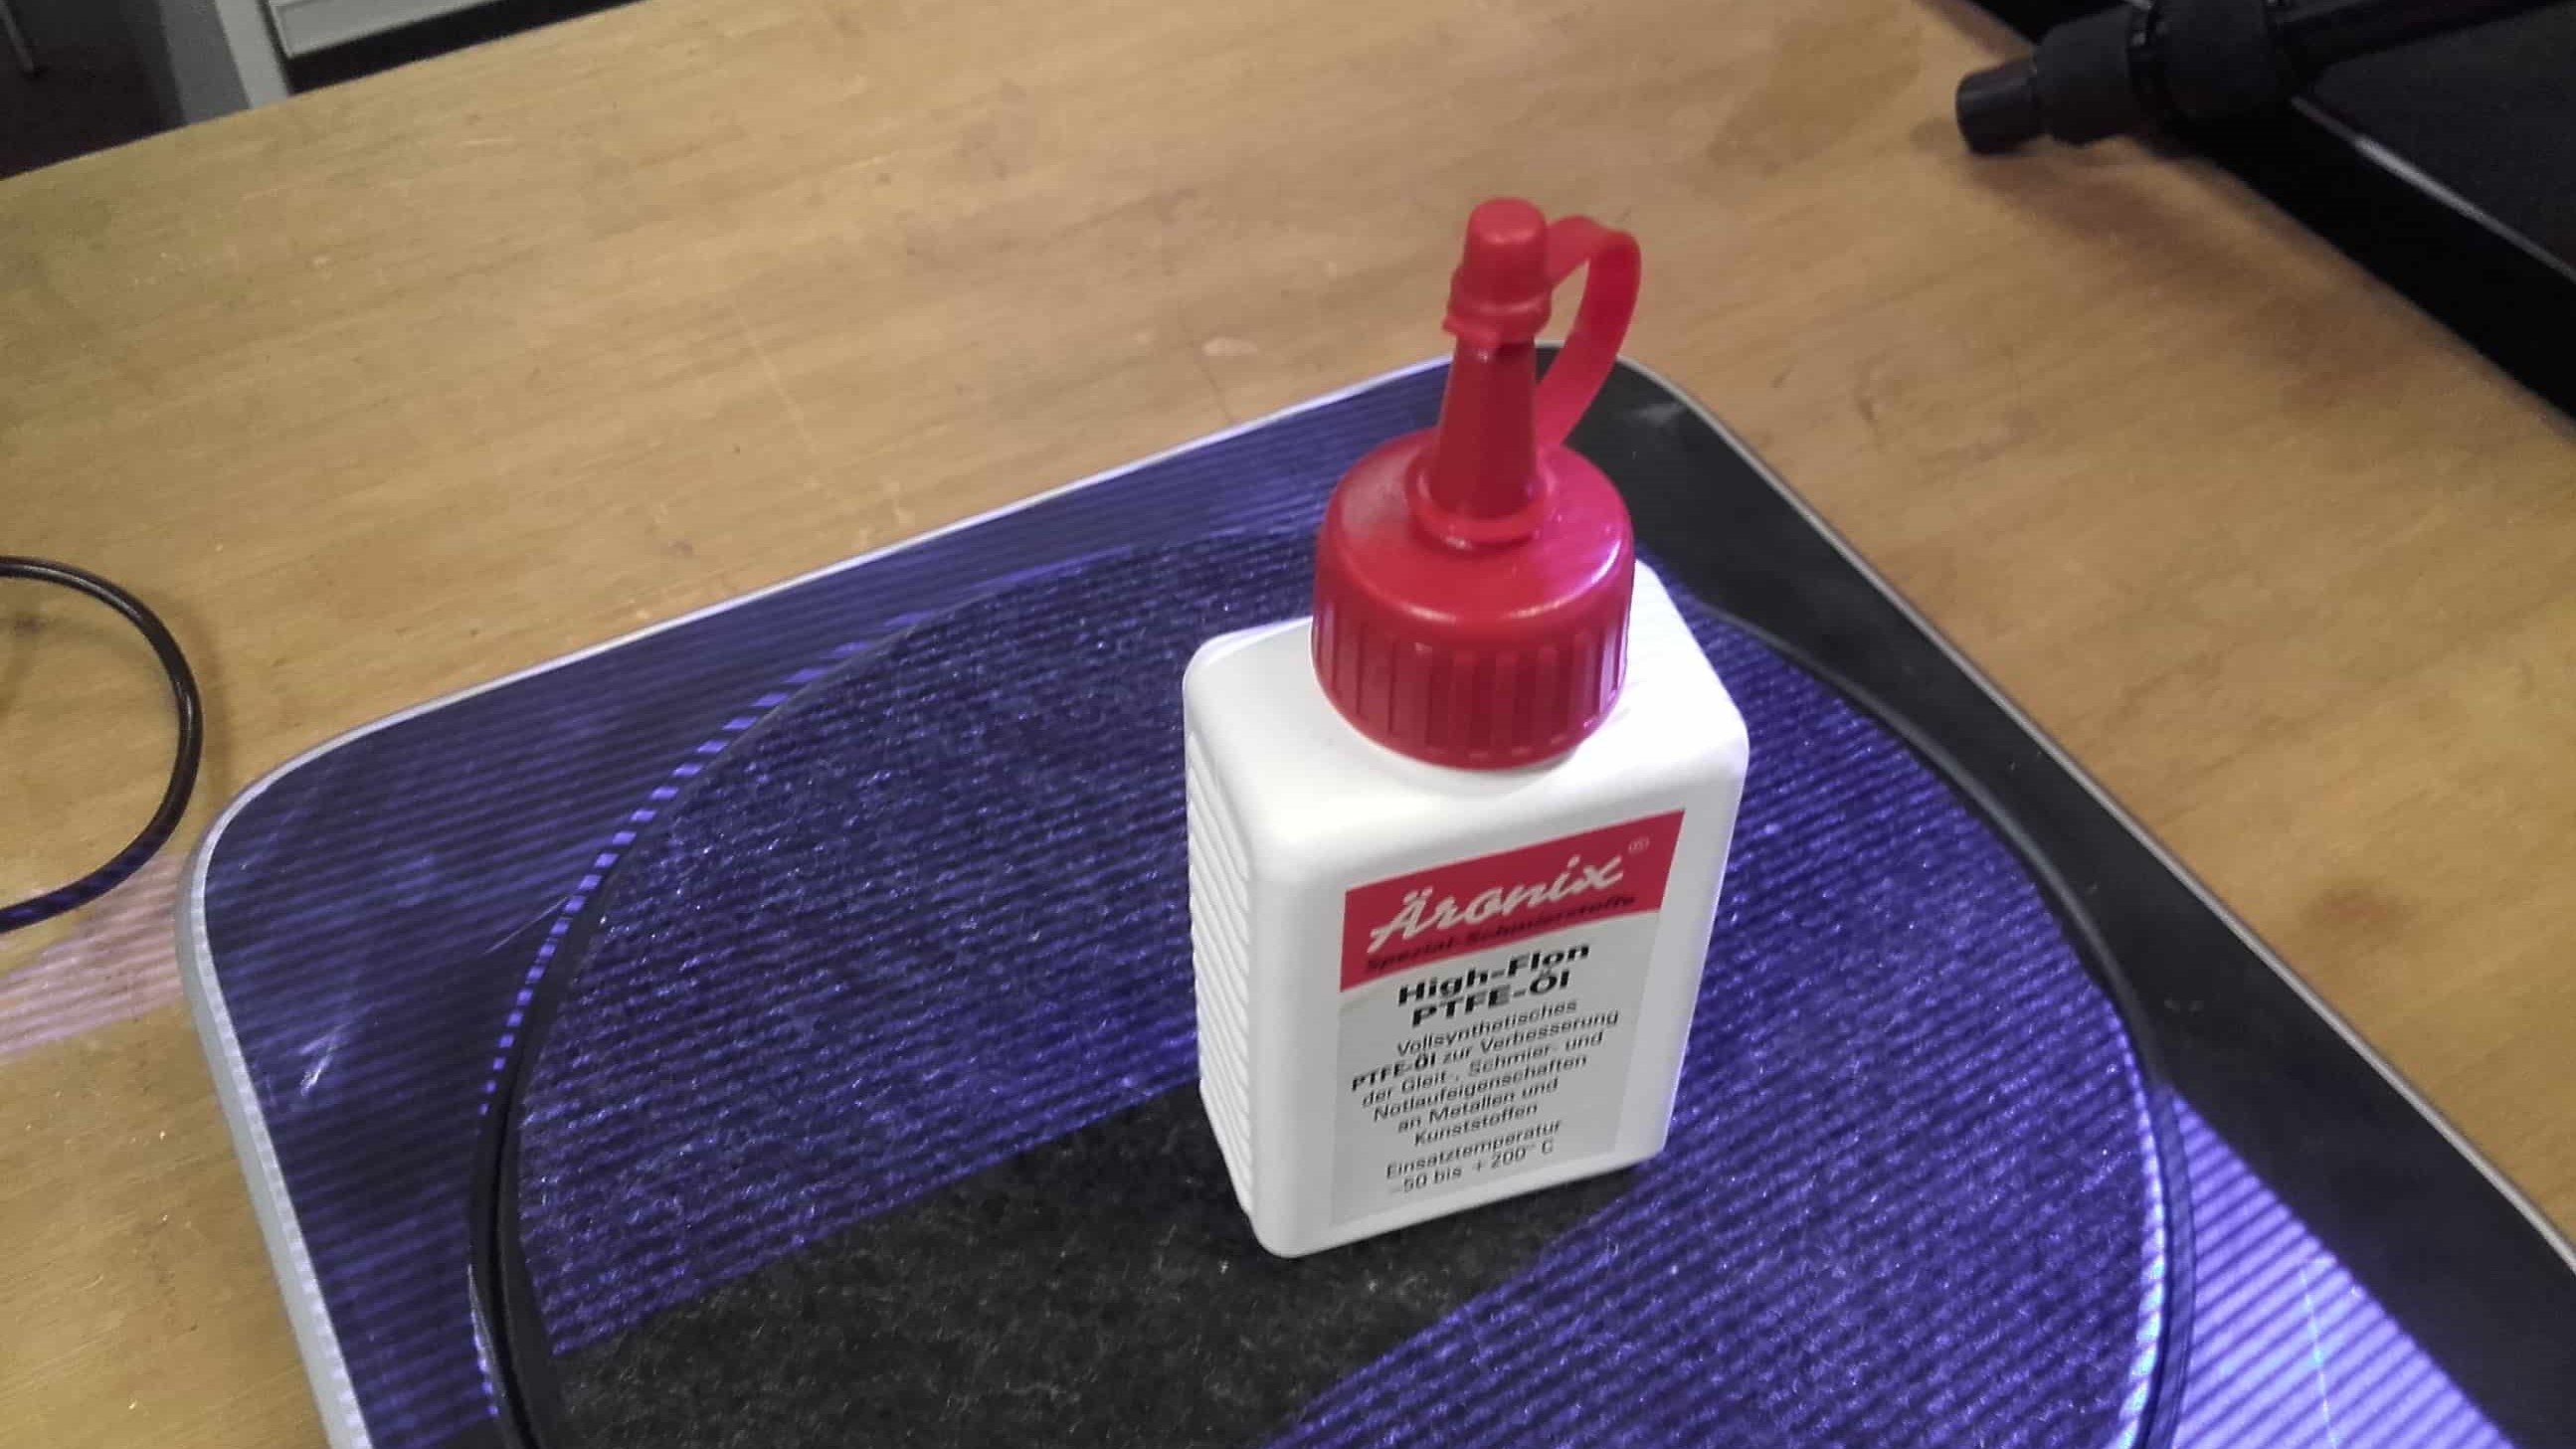
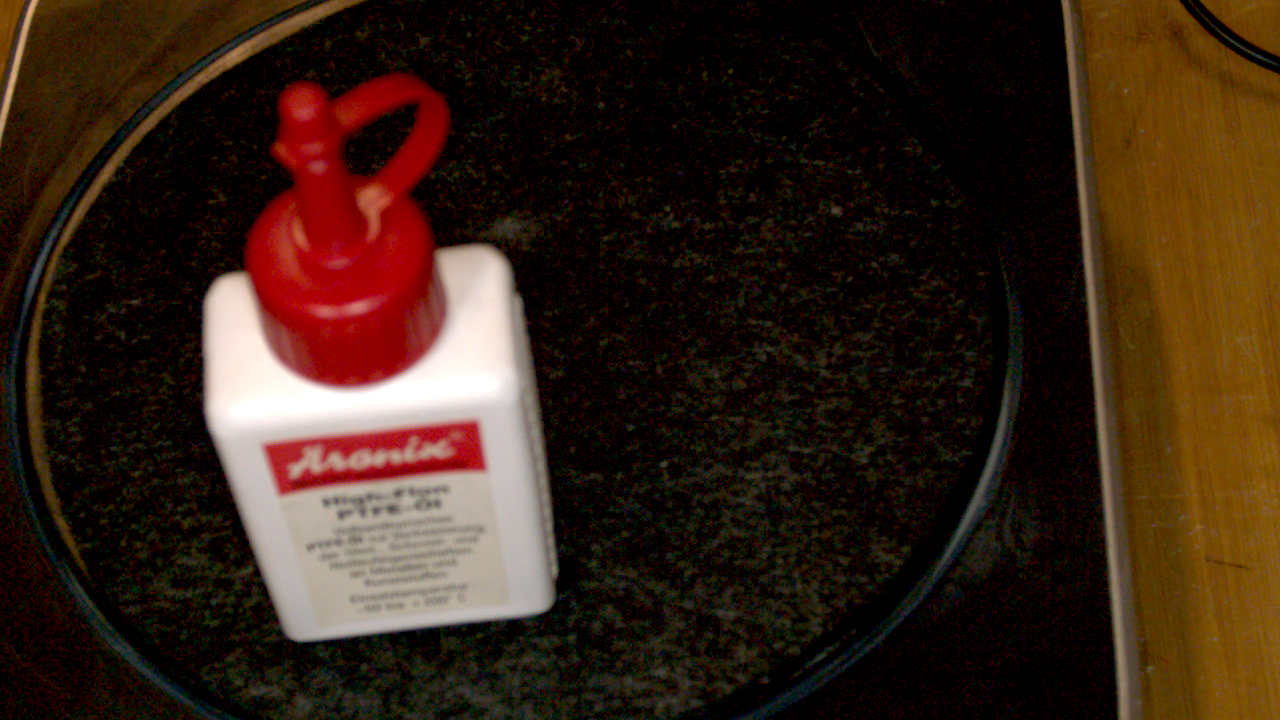
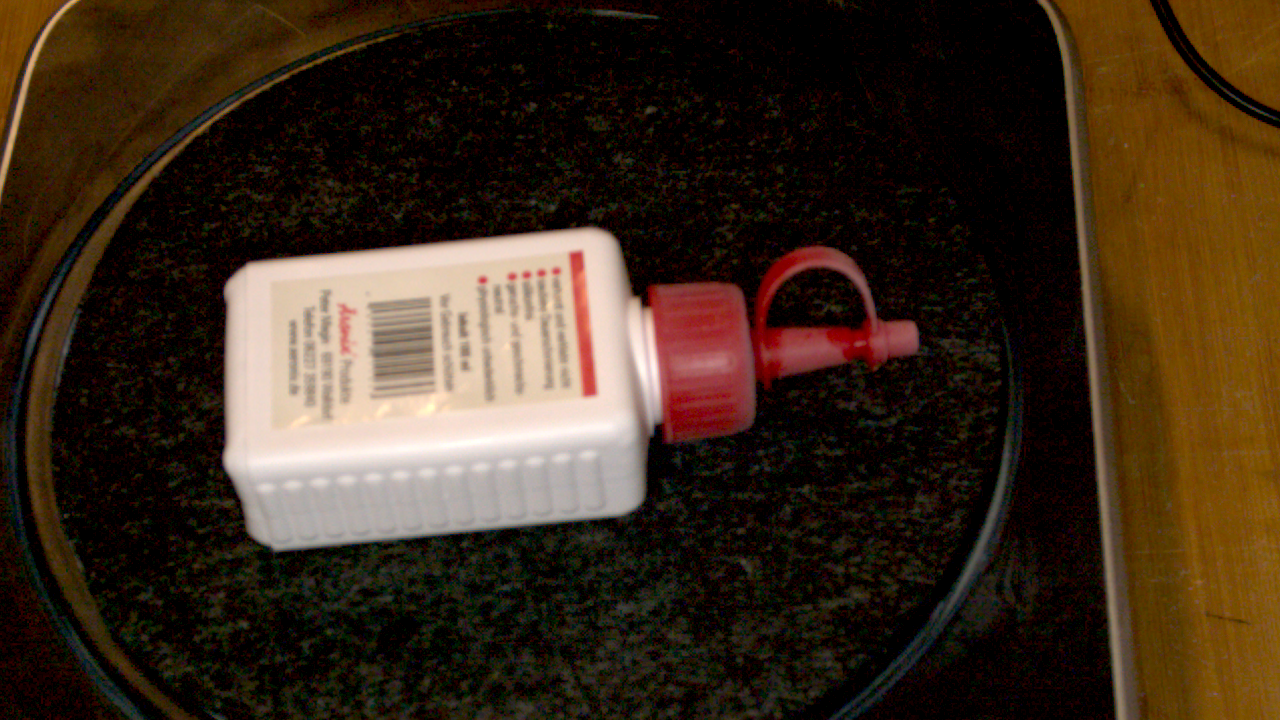
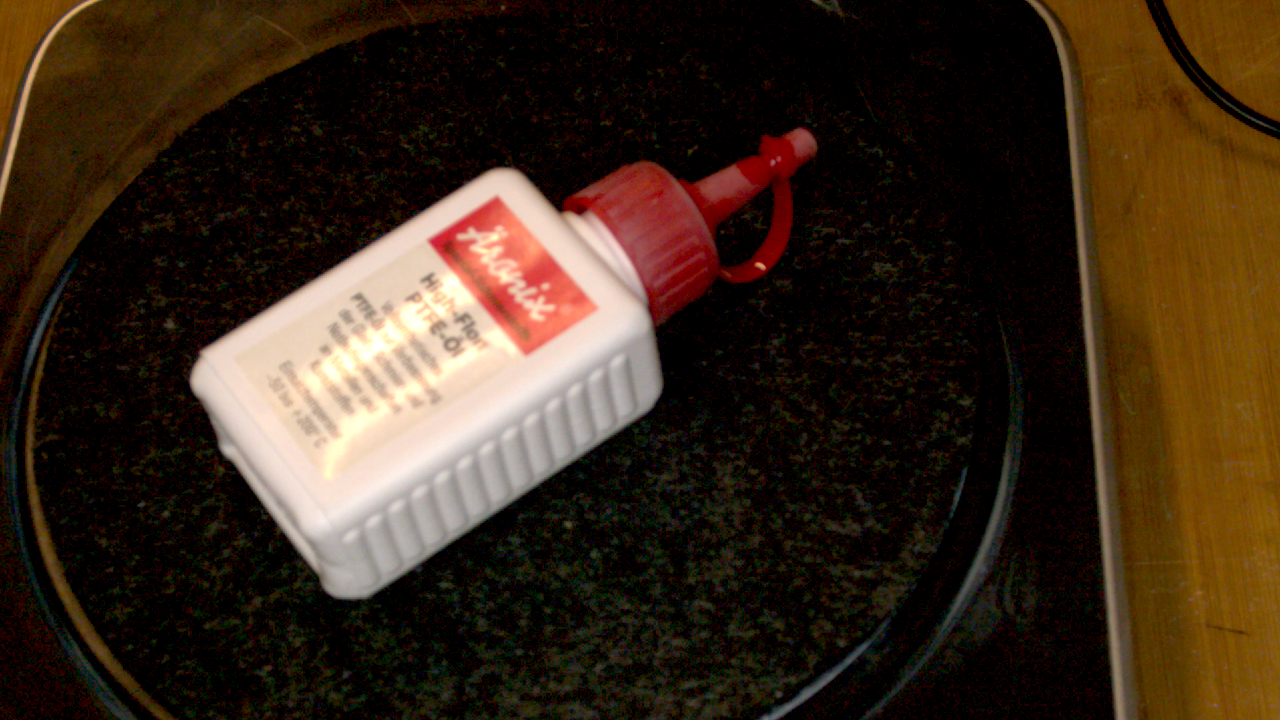
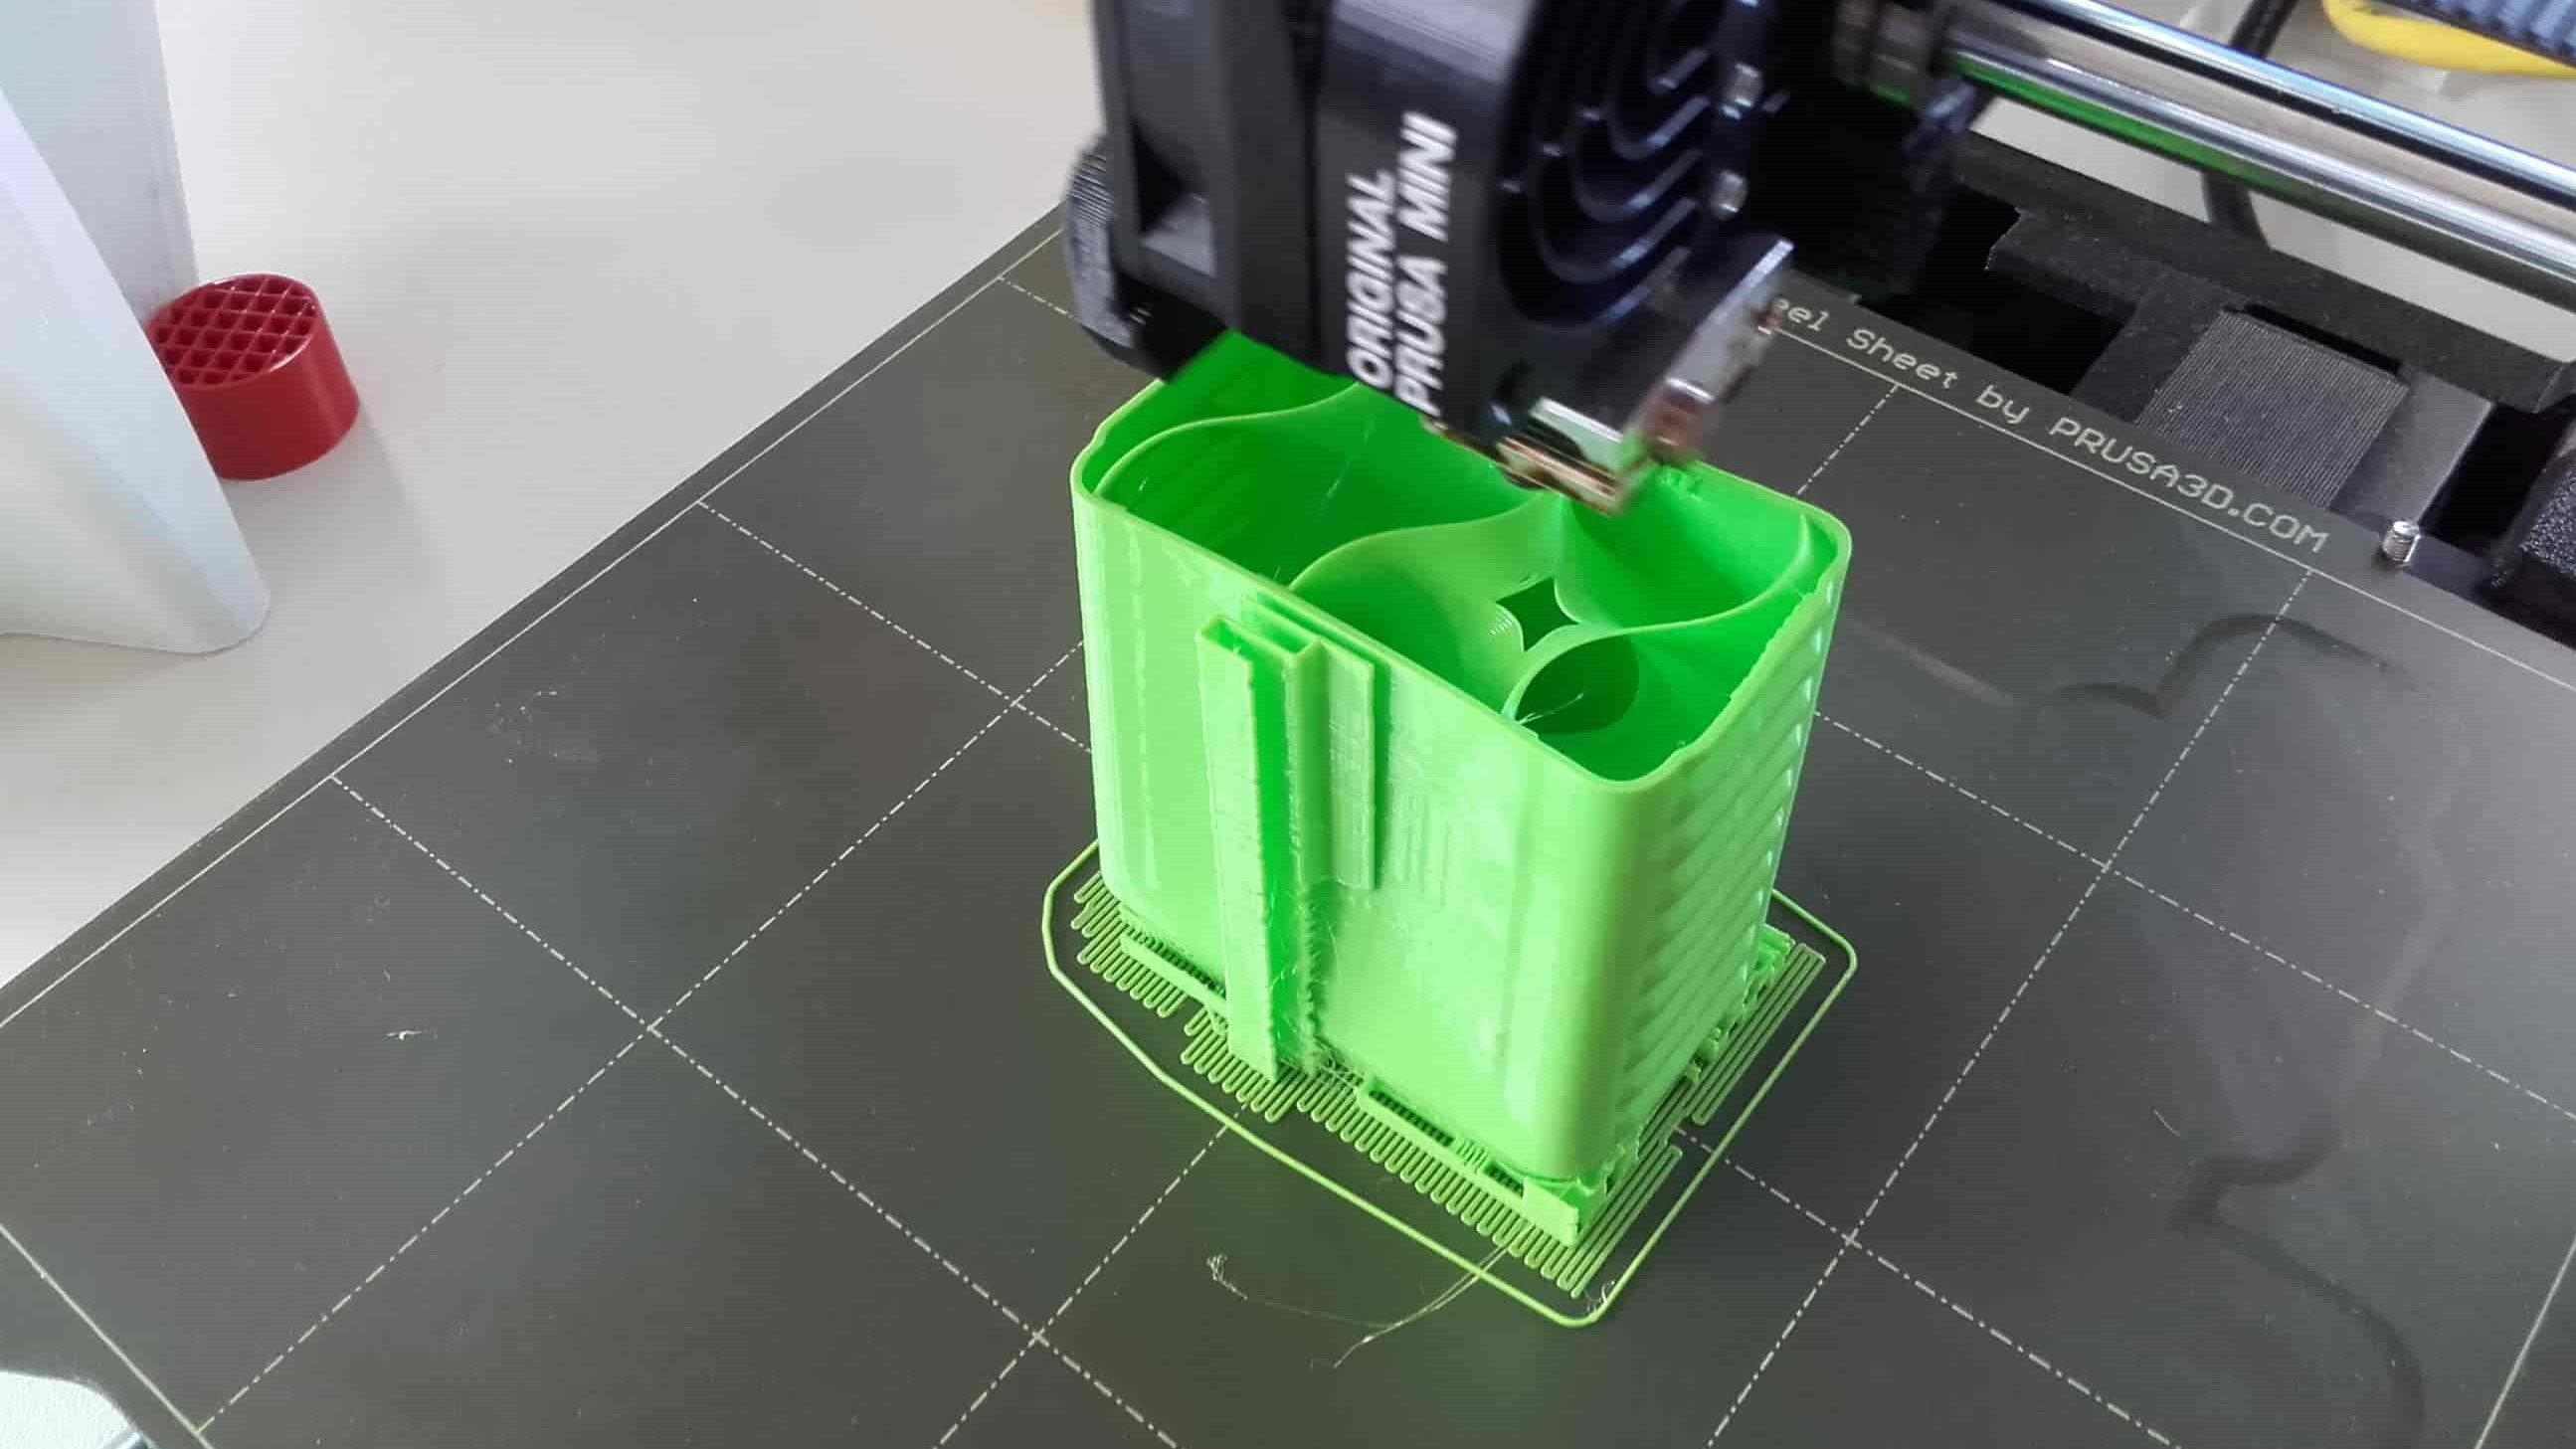
The whole process, including all of the explanation, took about an hour. Now it was our turn to generate scans of our own objects. I decided to let the others go first since I had not yet selected an object and was hoping to learn from their experiences during their scans. This turned out to be a good move. We had a few scans that resulted in multi-headed donkeys and stuffed dolphins that looked as though they came out of a nightmare...and we had a few scans that took FOREVER and just refused to be successfull no matter how nicely we asked. When it was finally my turn, I decided to go with a very simple object that had few, yet easily distinguished features -- a little oil bottle.
My Turn
The Model
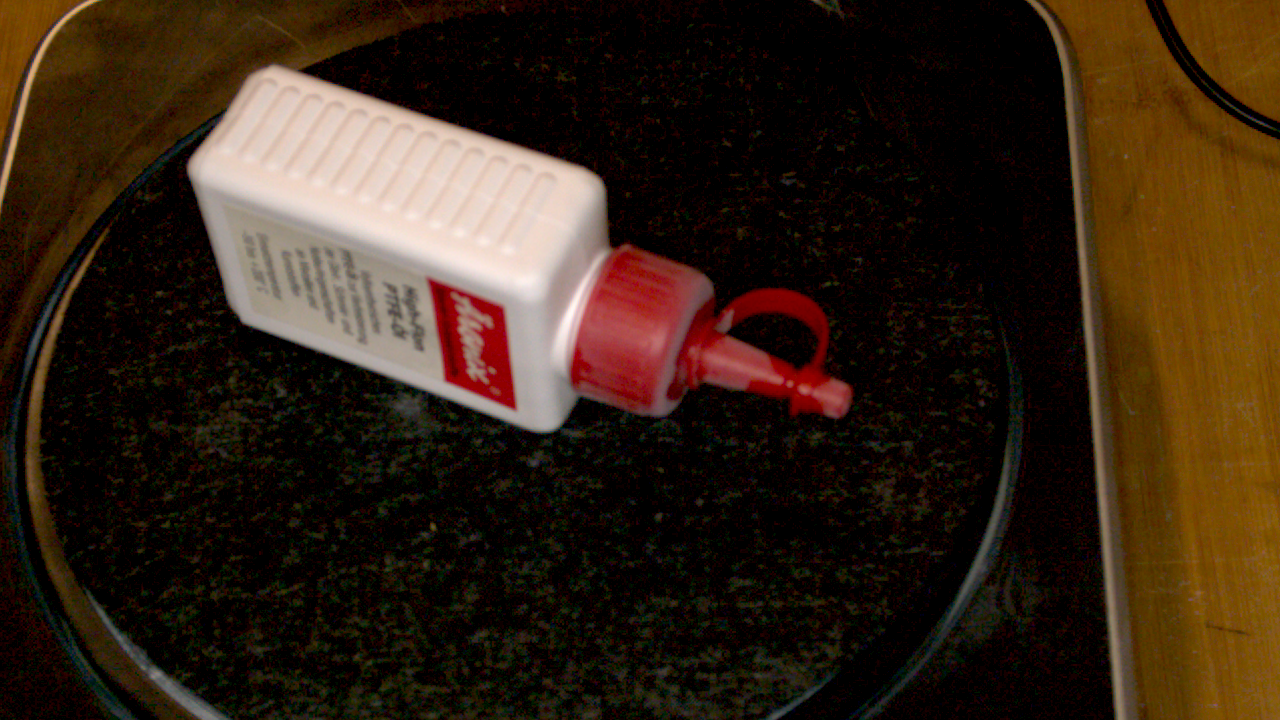
I set up my model on the turntable...
Adjusting the Scanner
...and raised the scanner on the tripod so I could better capture the interesting features at the top of the bottle.
EinScan-Pro+
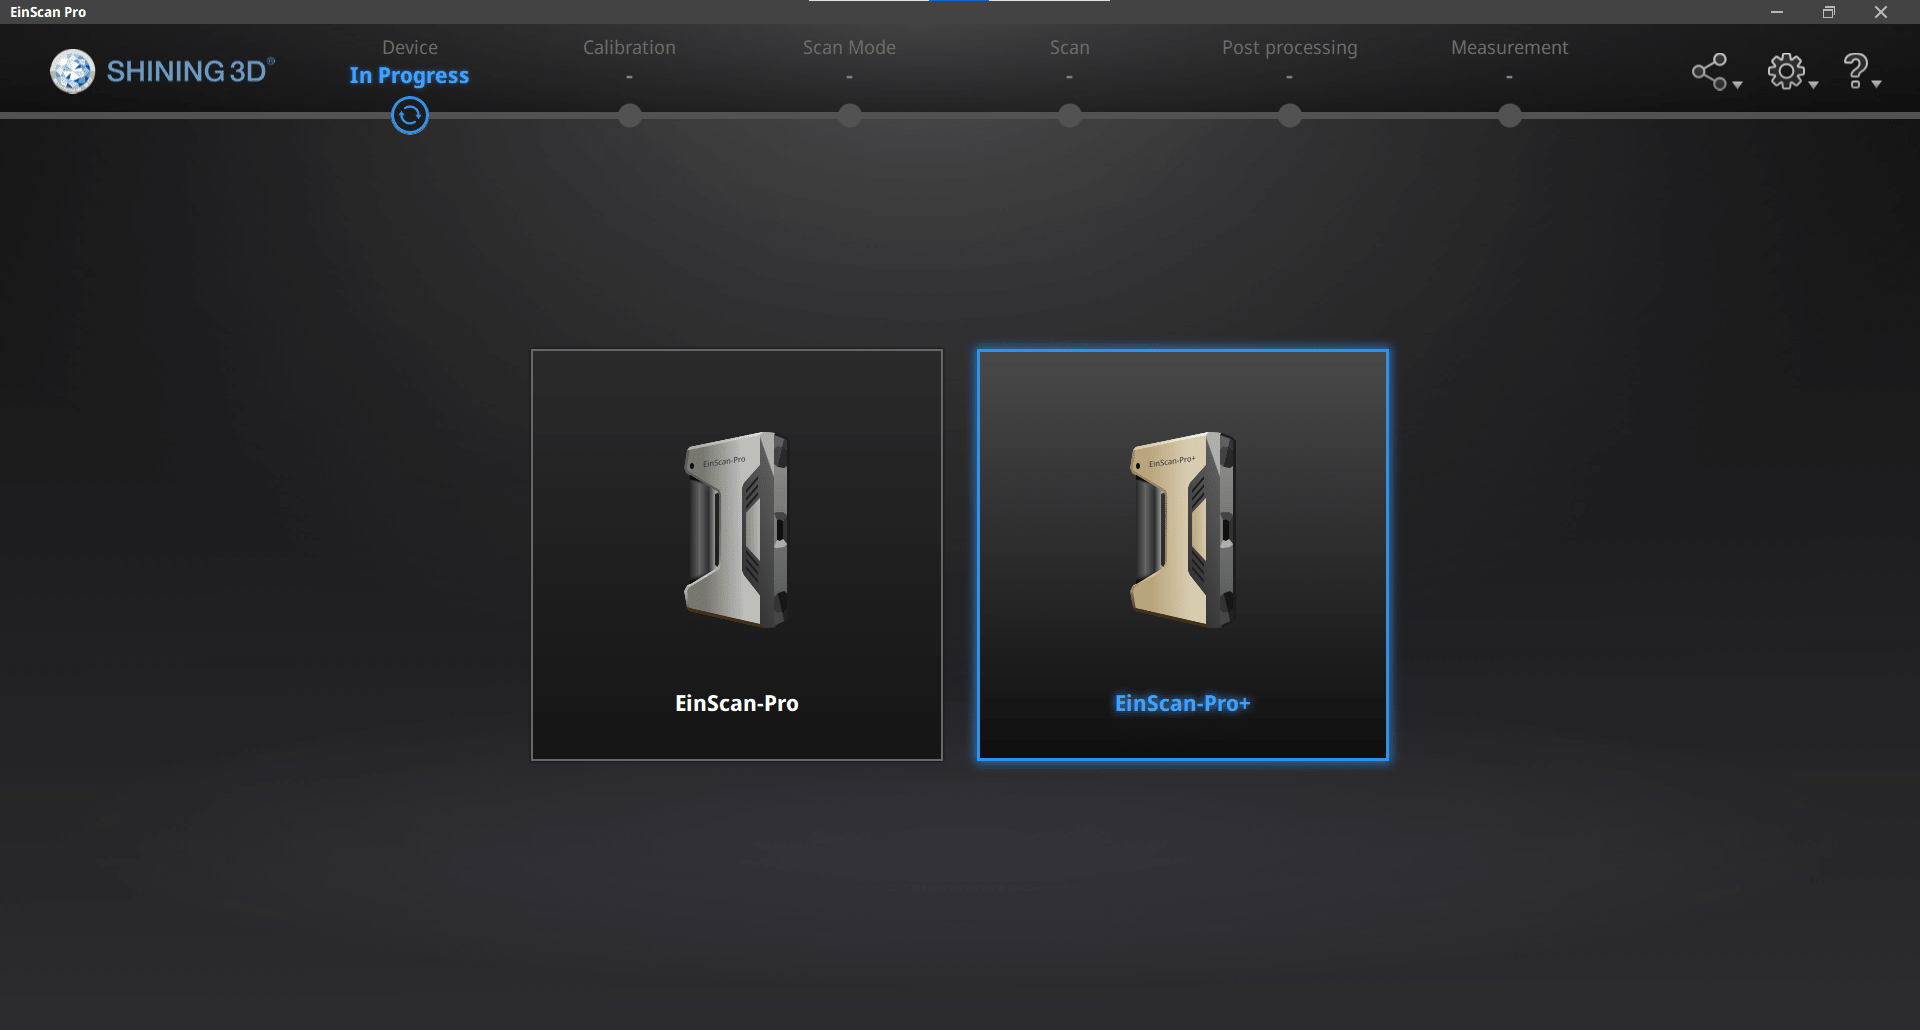
I chose our scanner...
Fixed Scan
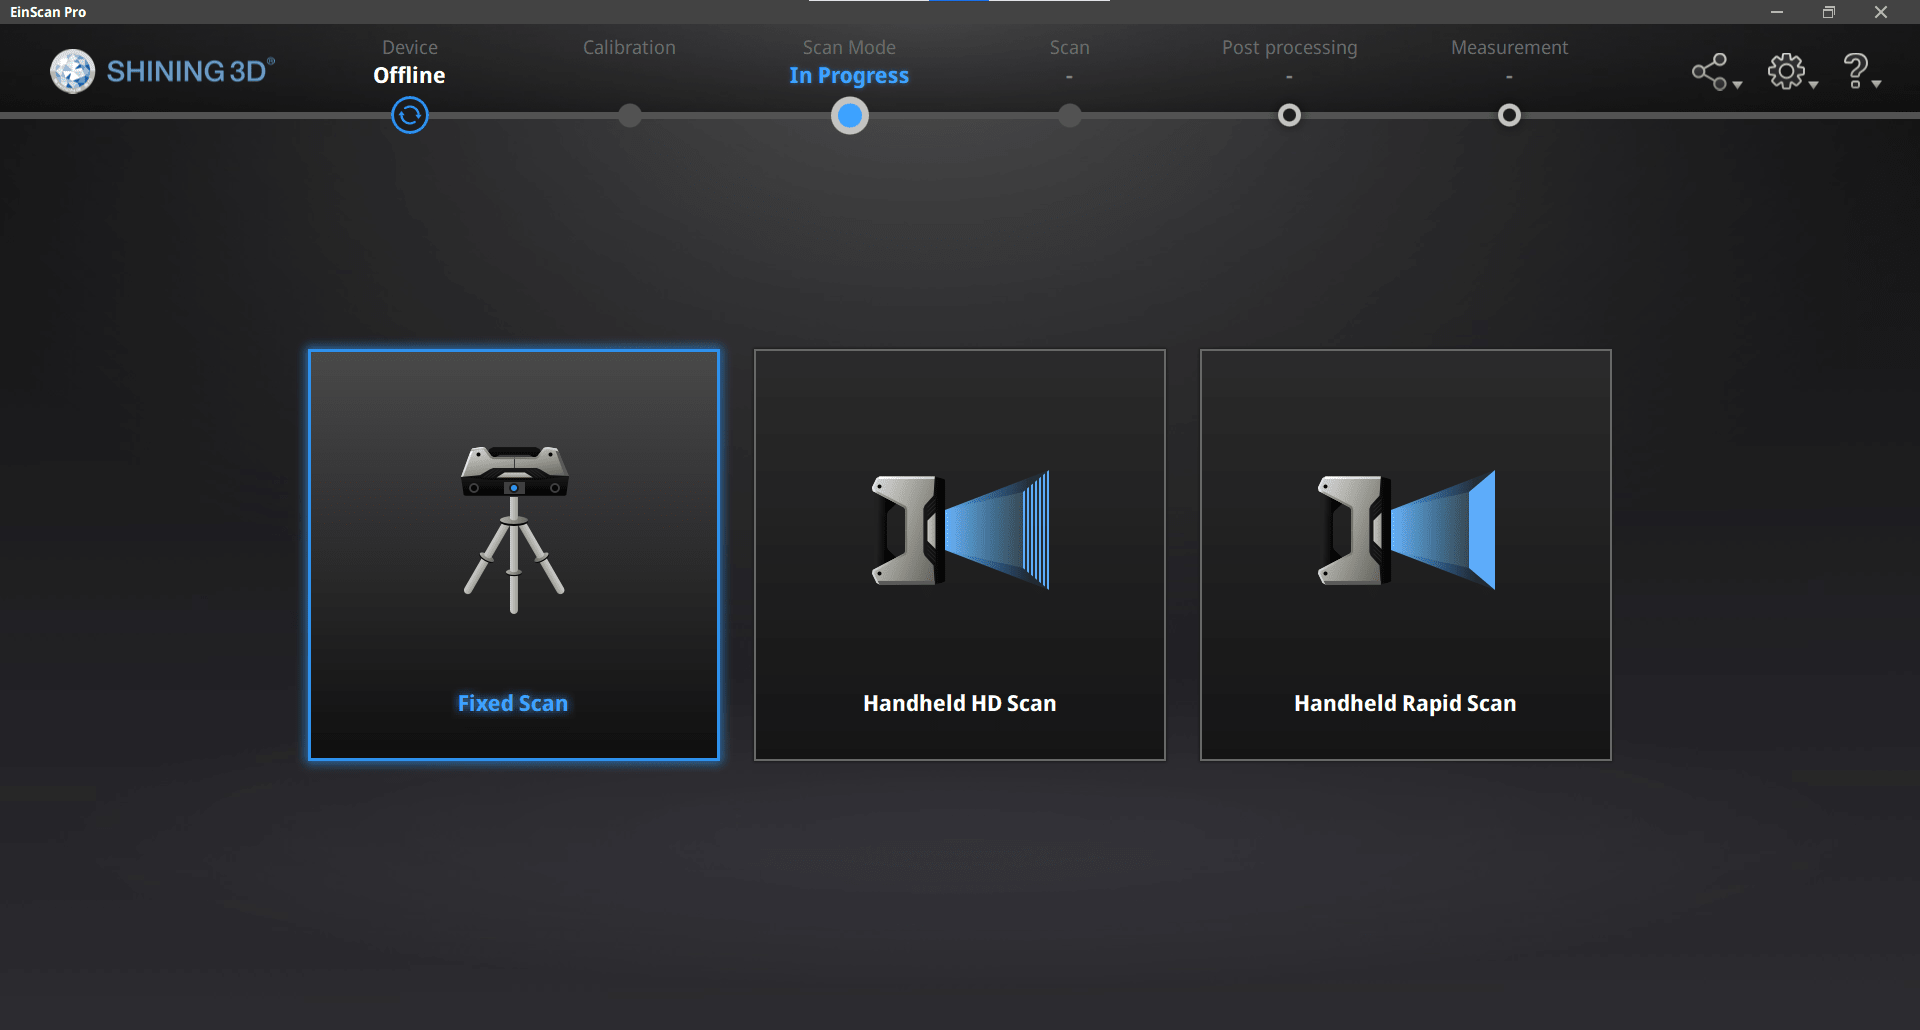
...Fixed Scan...
New Work
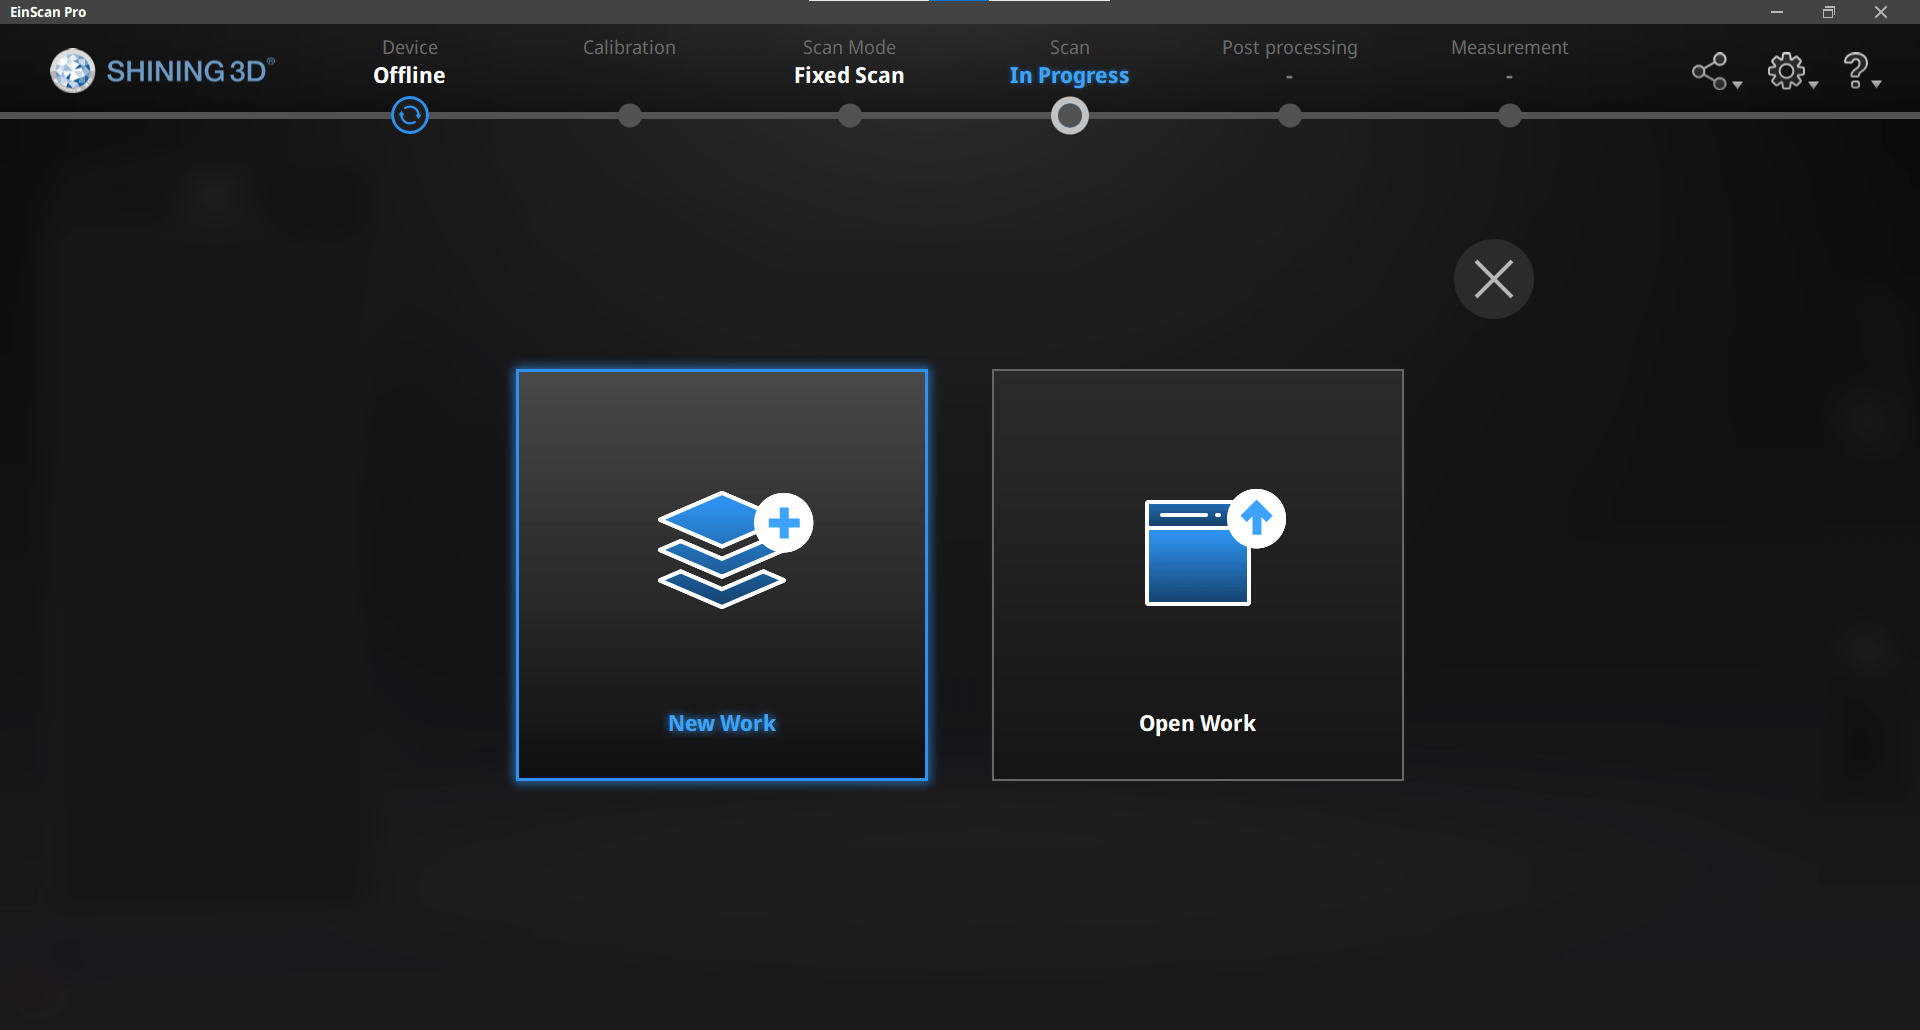
...and chose my directory for a new project.
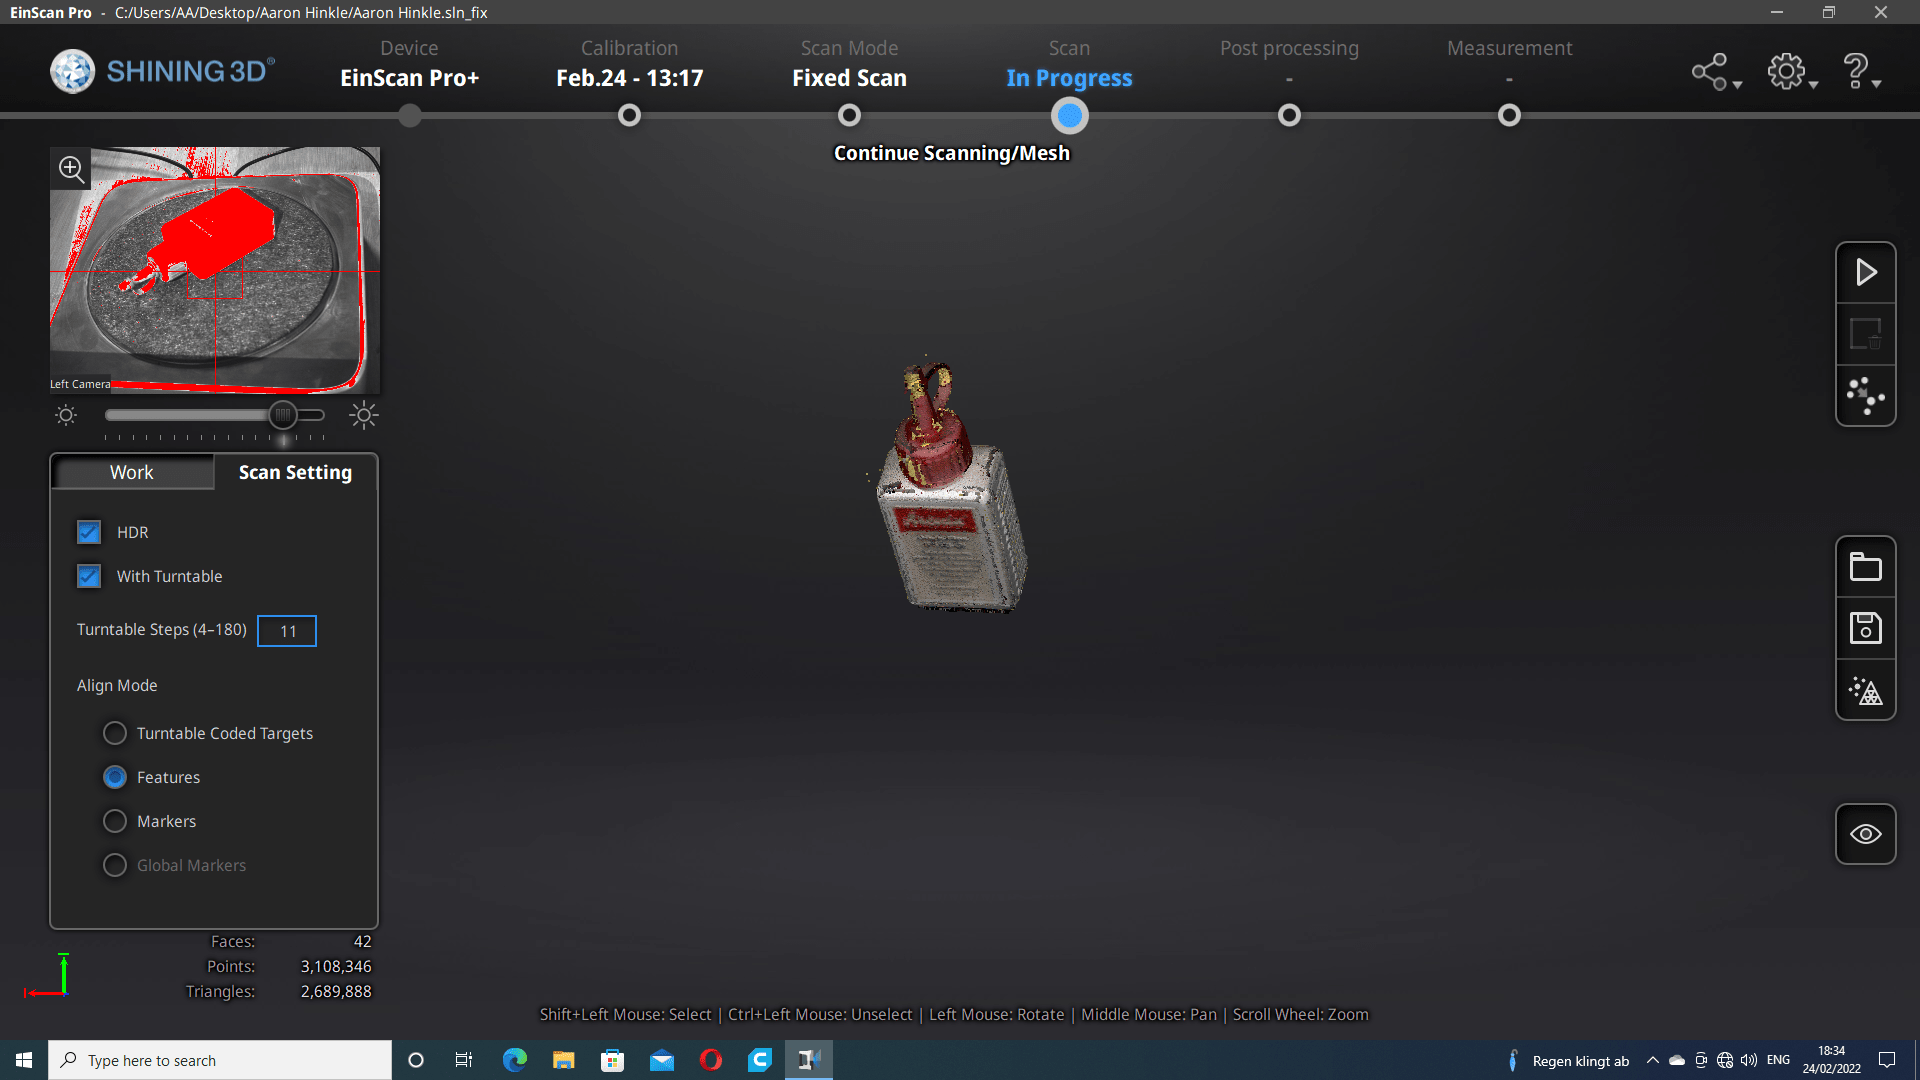
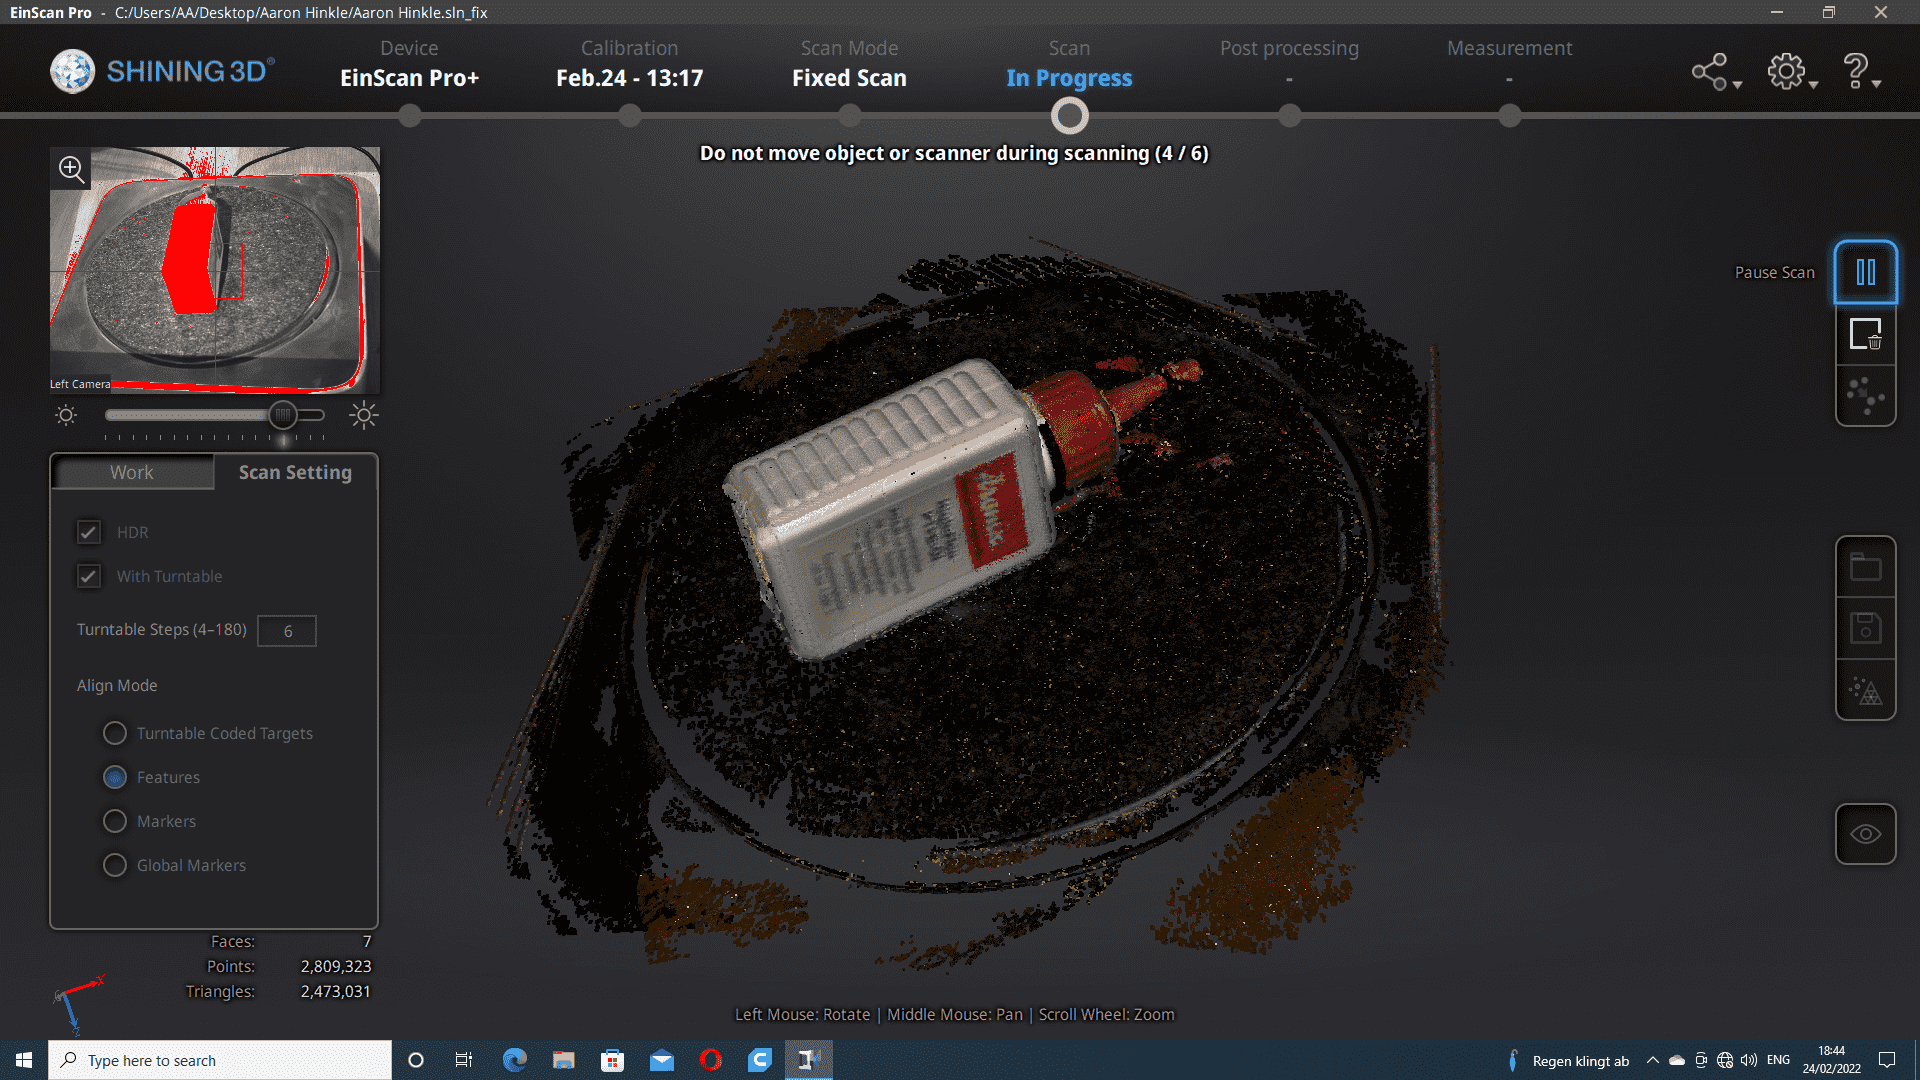
Scanning
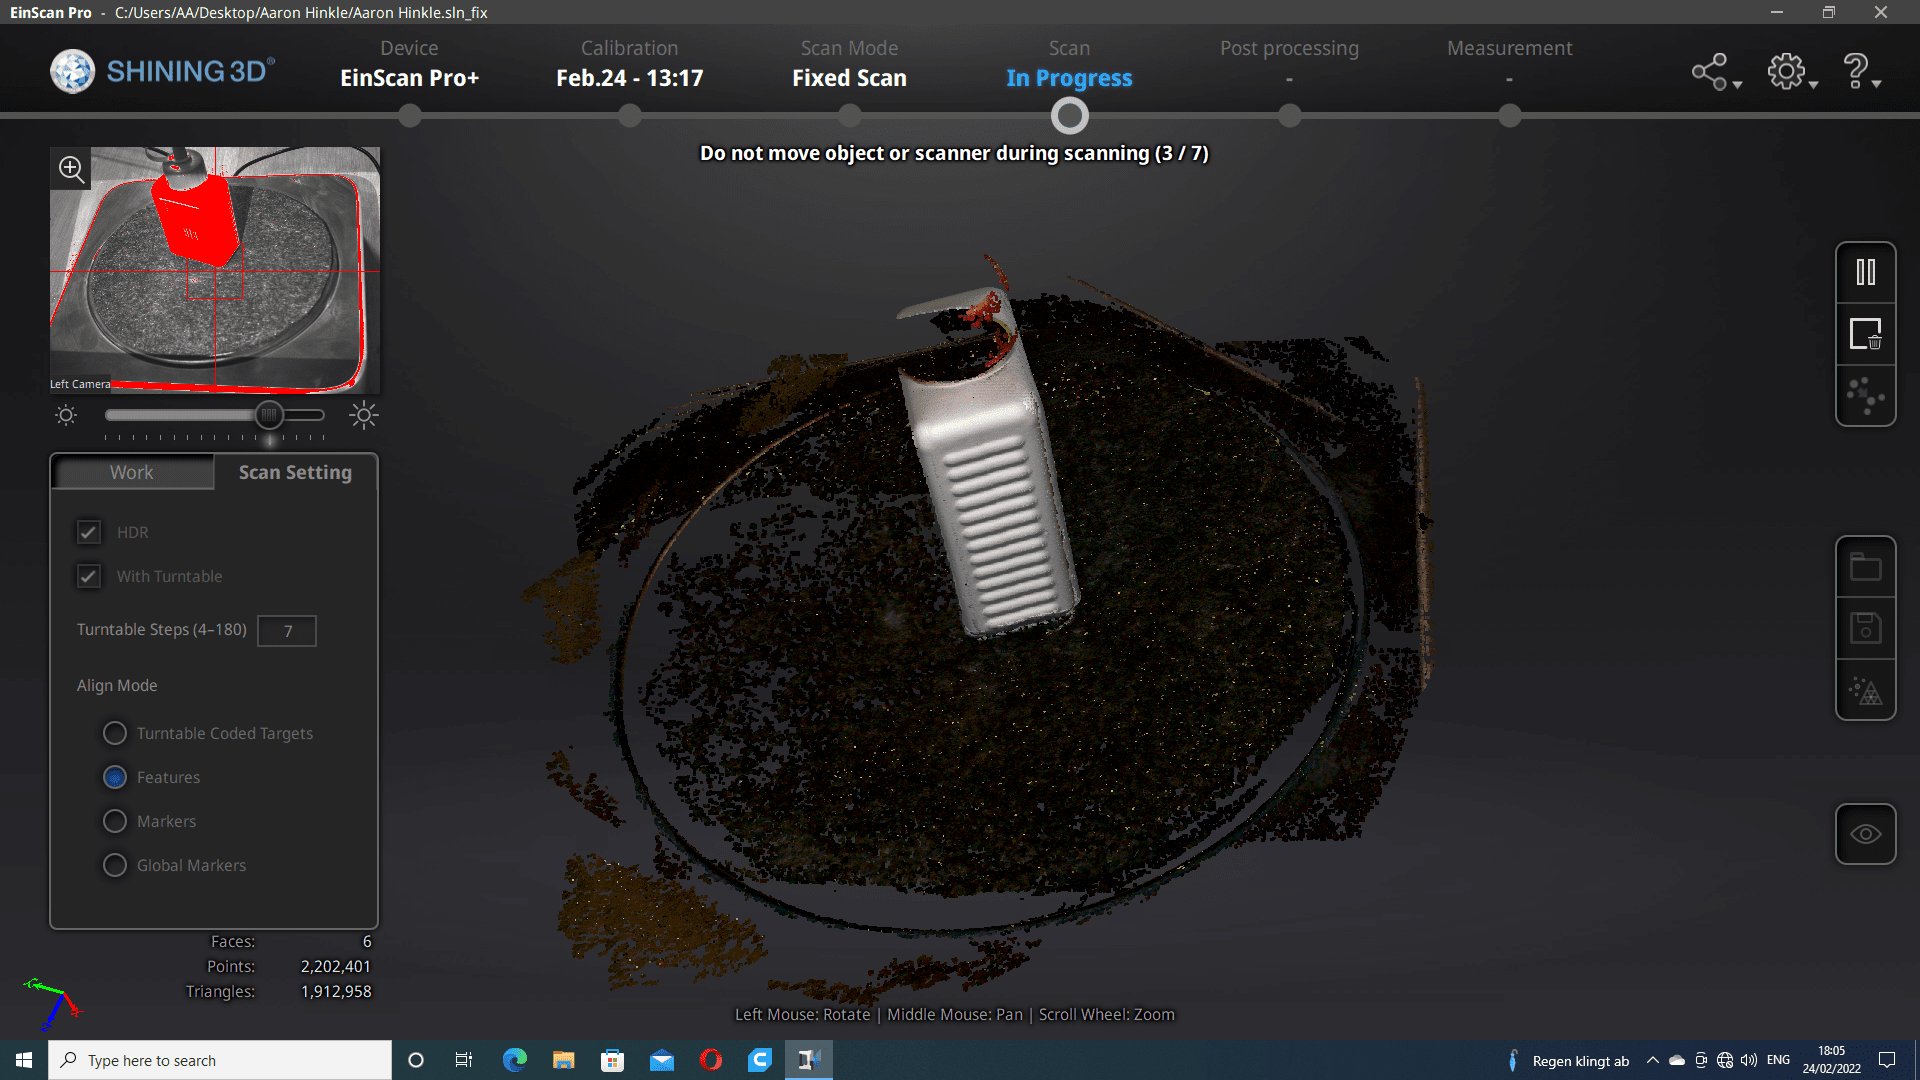
I began with a few HDR feature scans so the software would hopefully be able to recognize enough features before I began moving the object around.
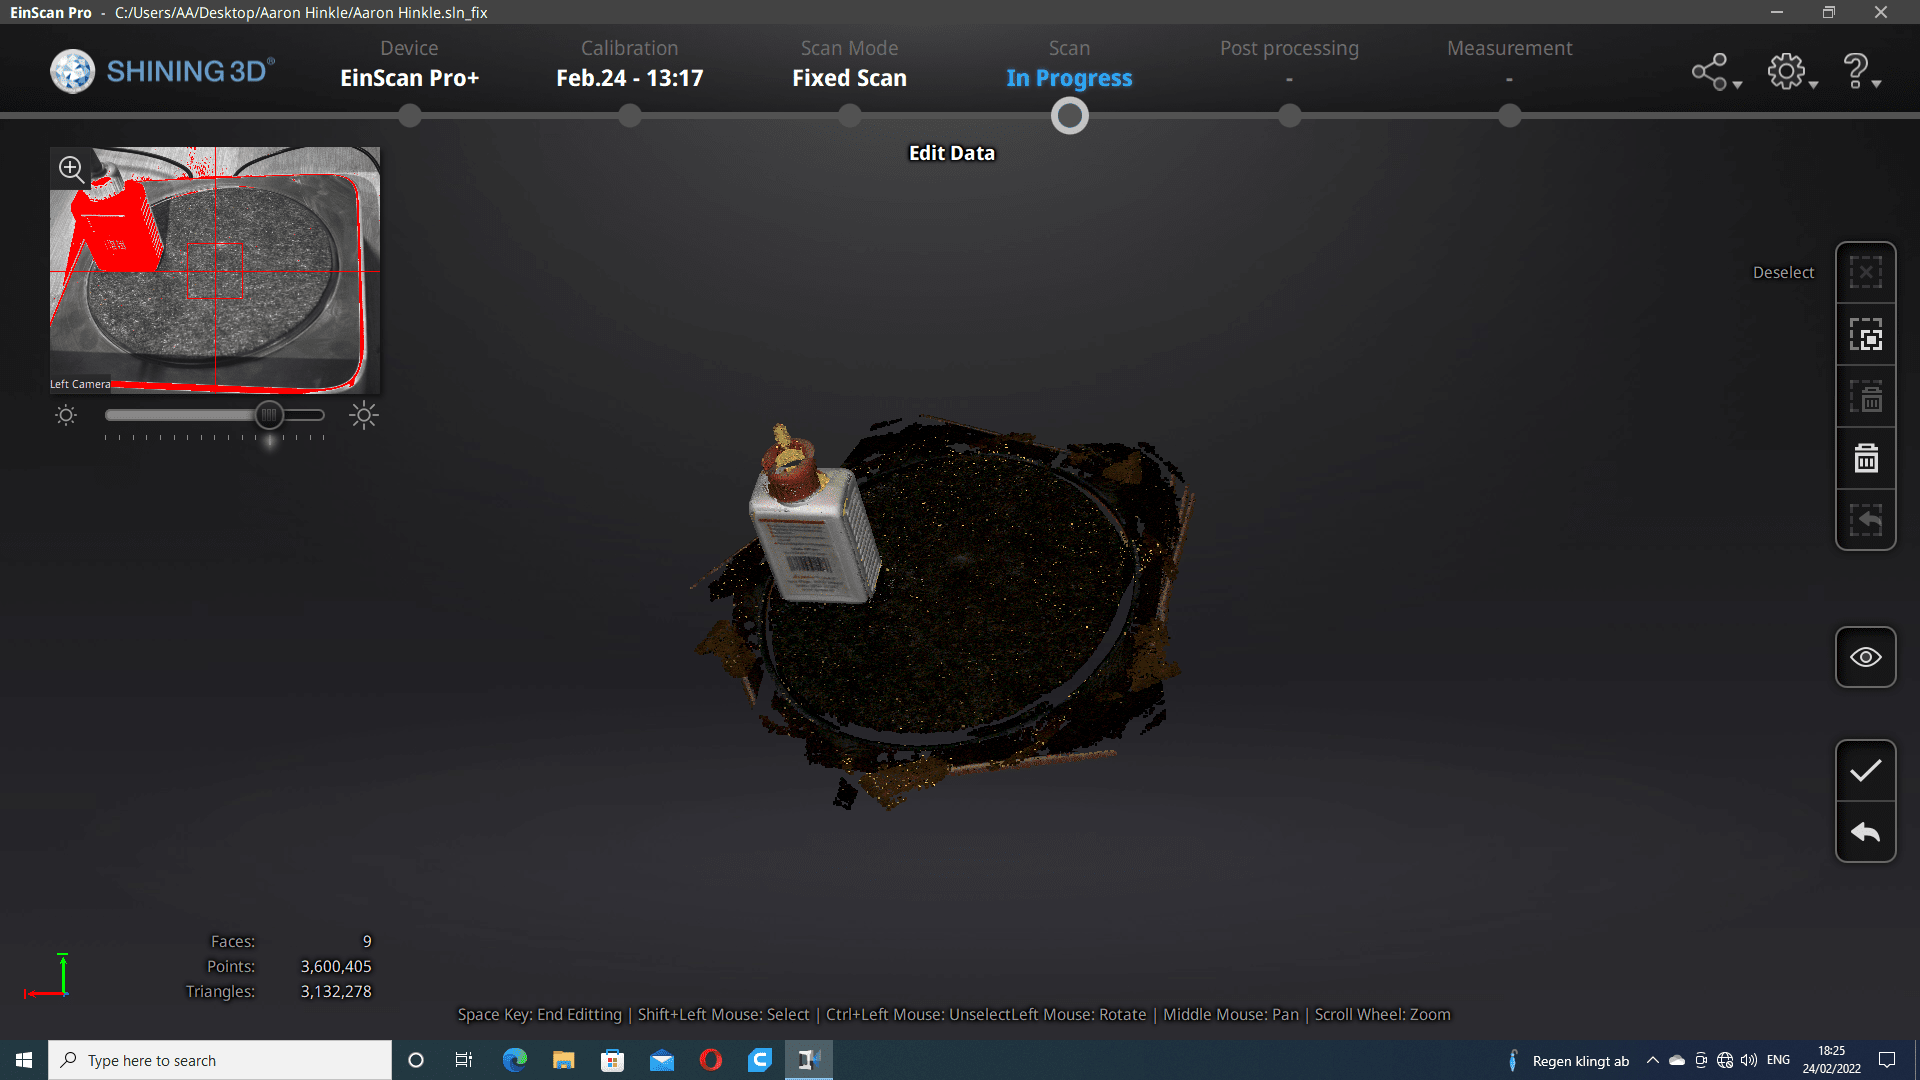
Editing
With each scan, I carefully removed everything that isn't part of the model.
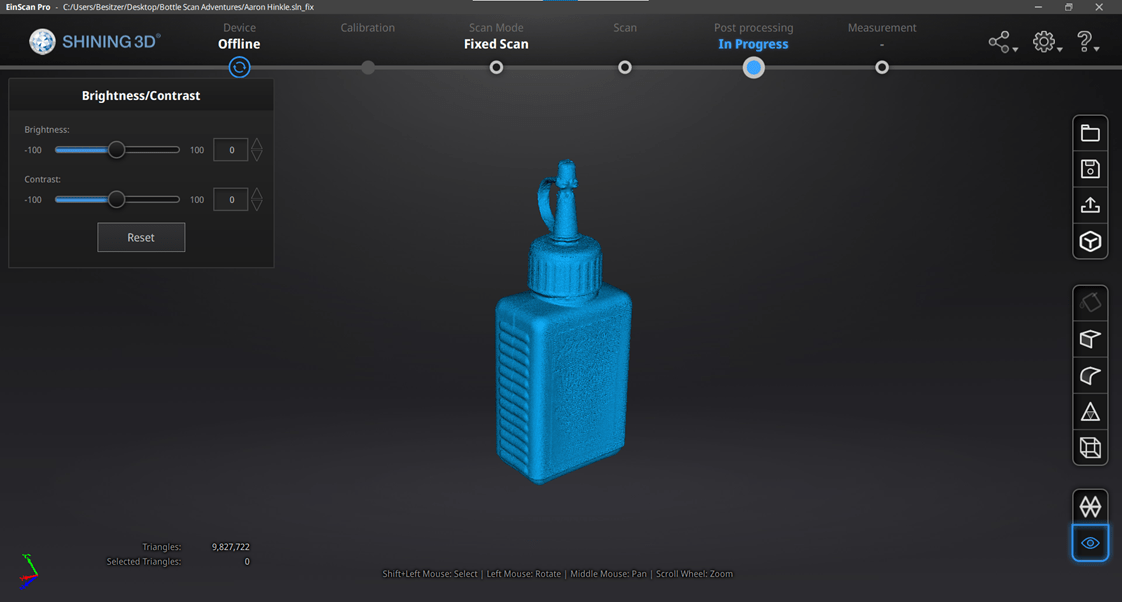
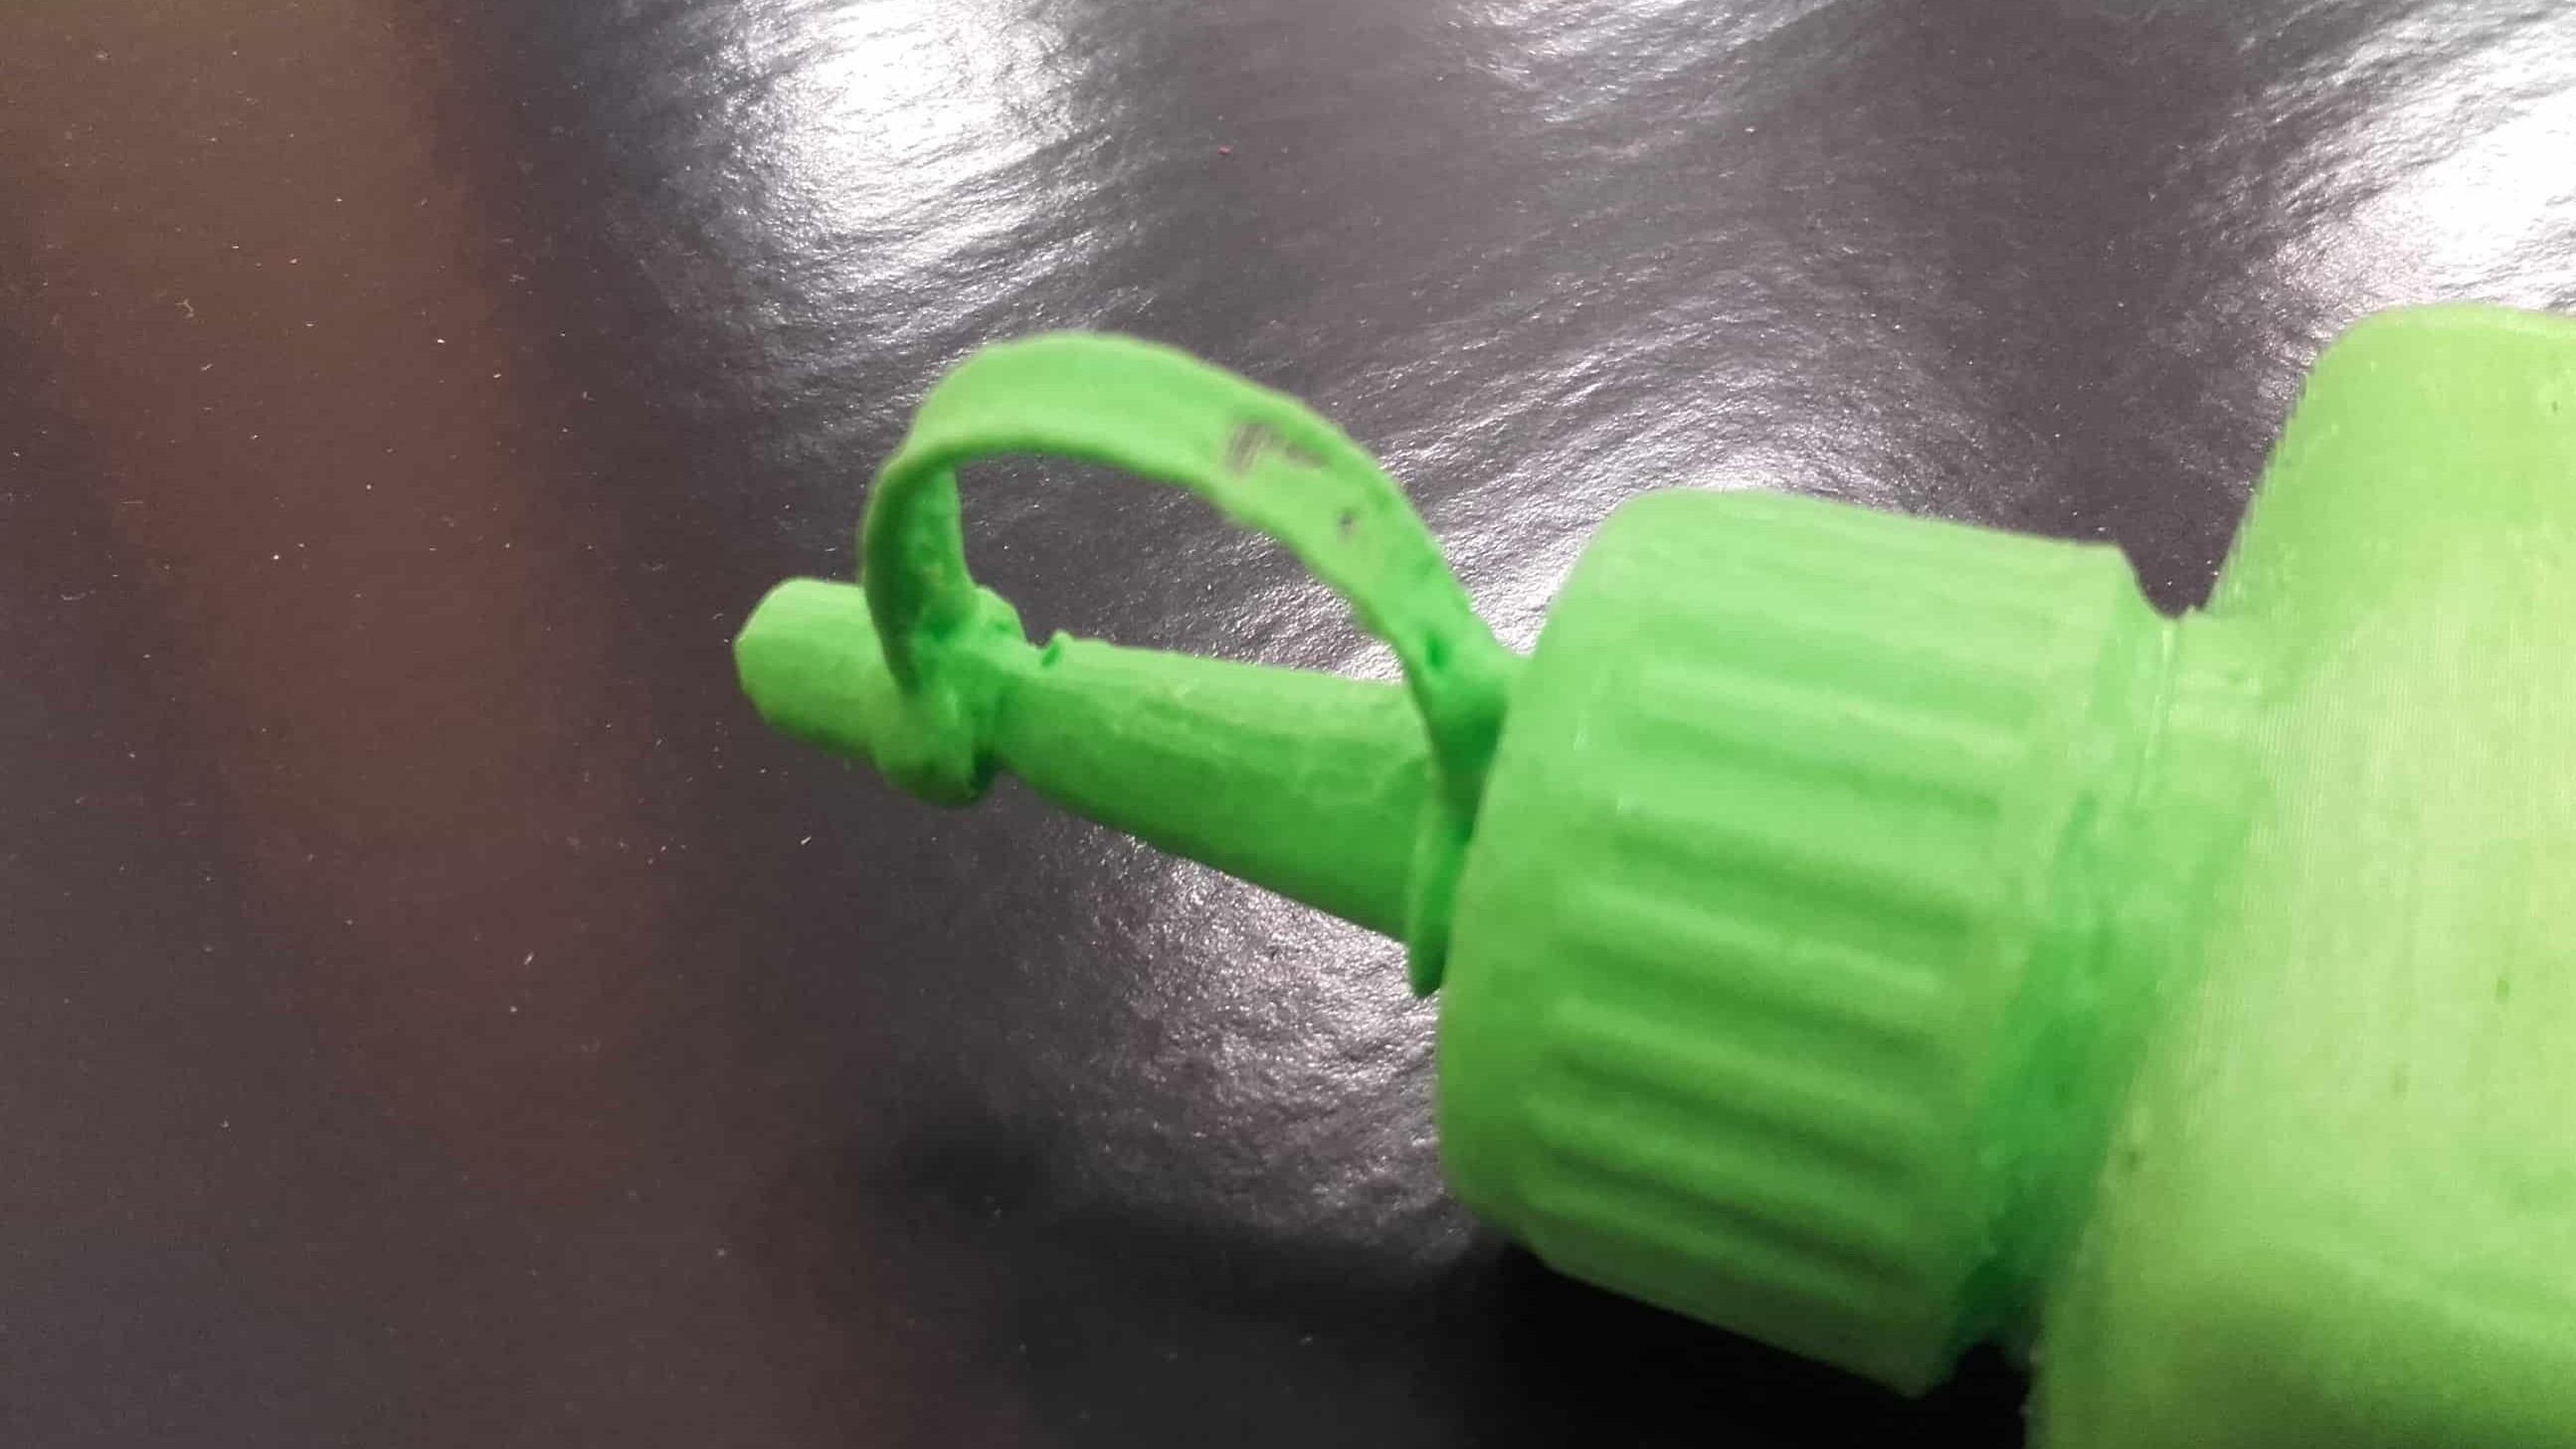
No Lid
The full bottle was inside the image capturing area of the camera, but the lid was too reflective for the camera to pick up the features and it was conspicuously missing from the generated model.
Powder Spray
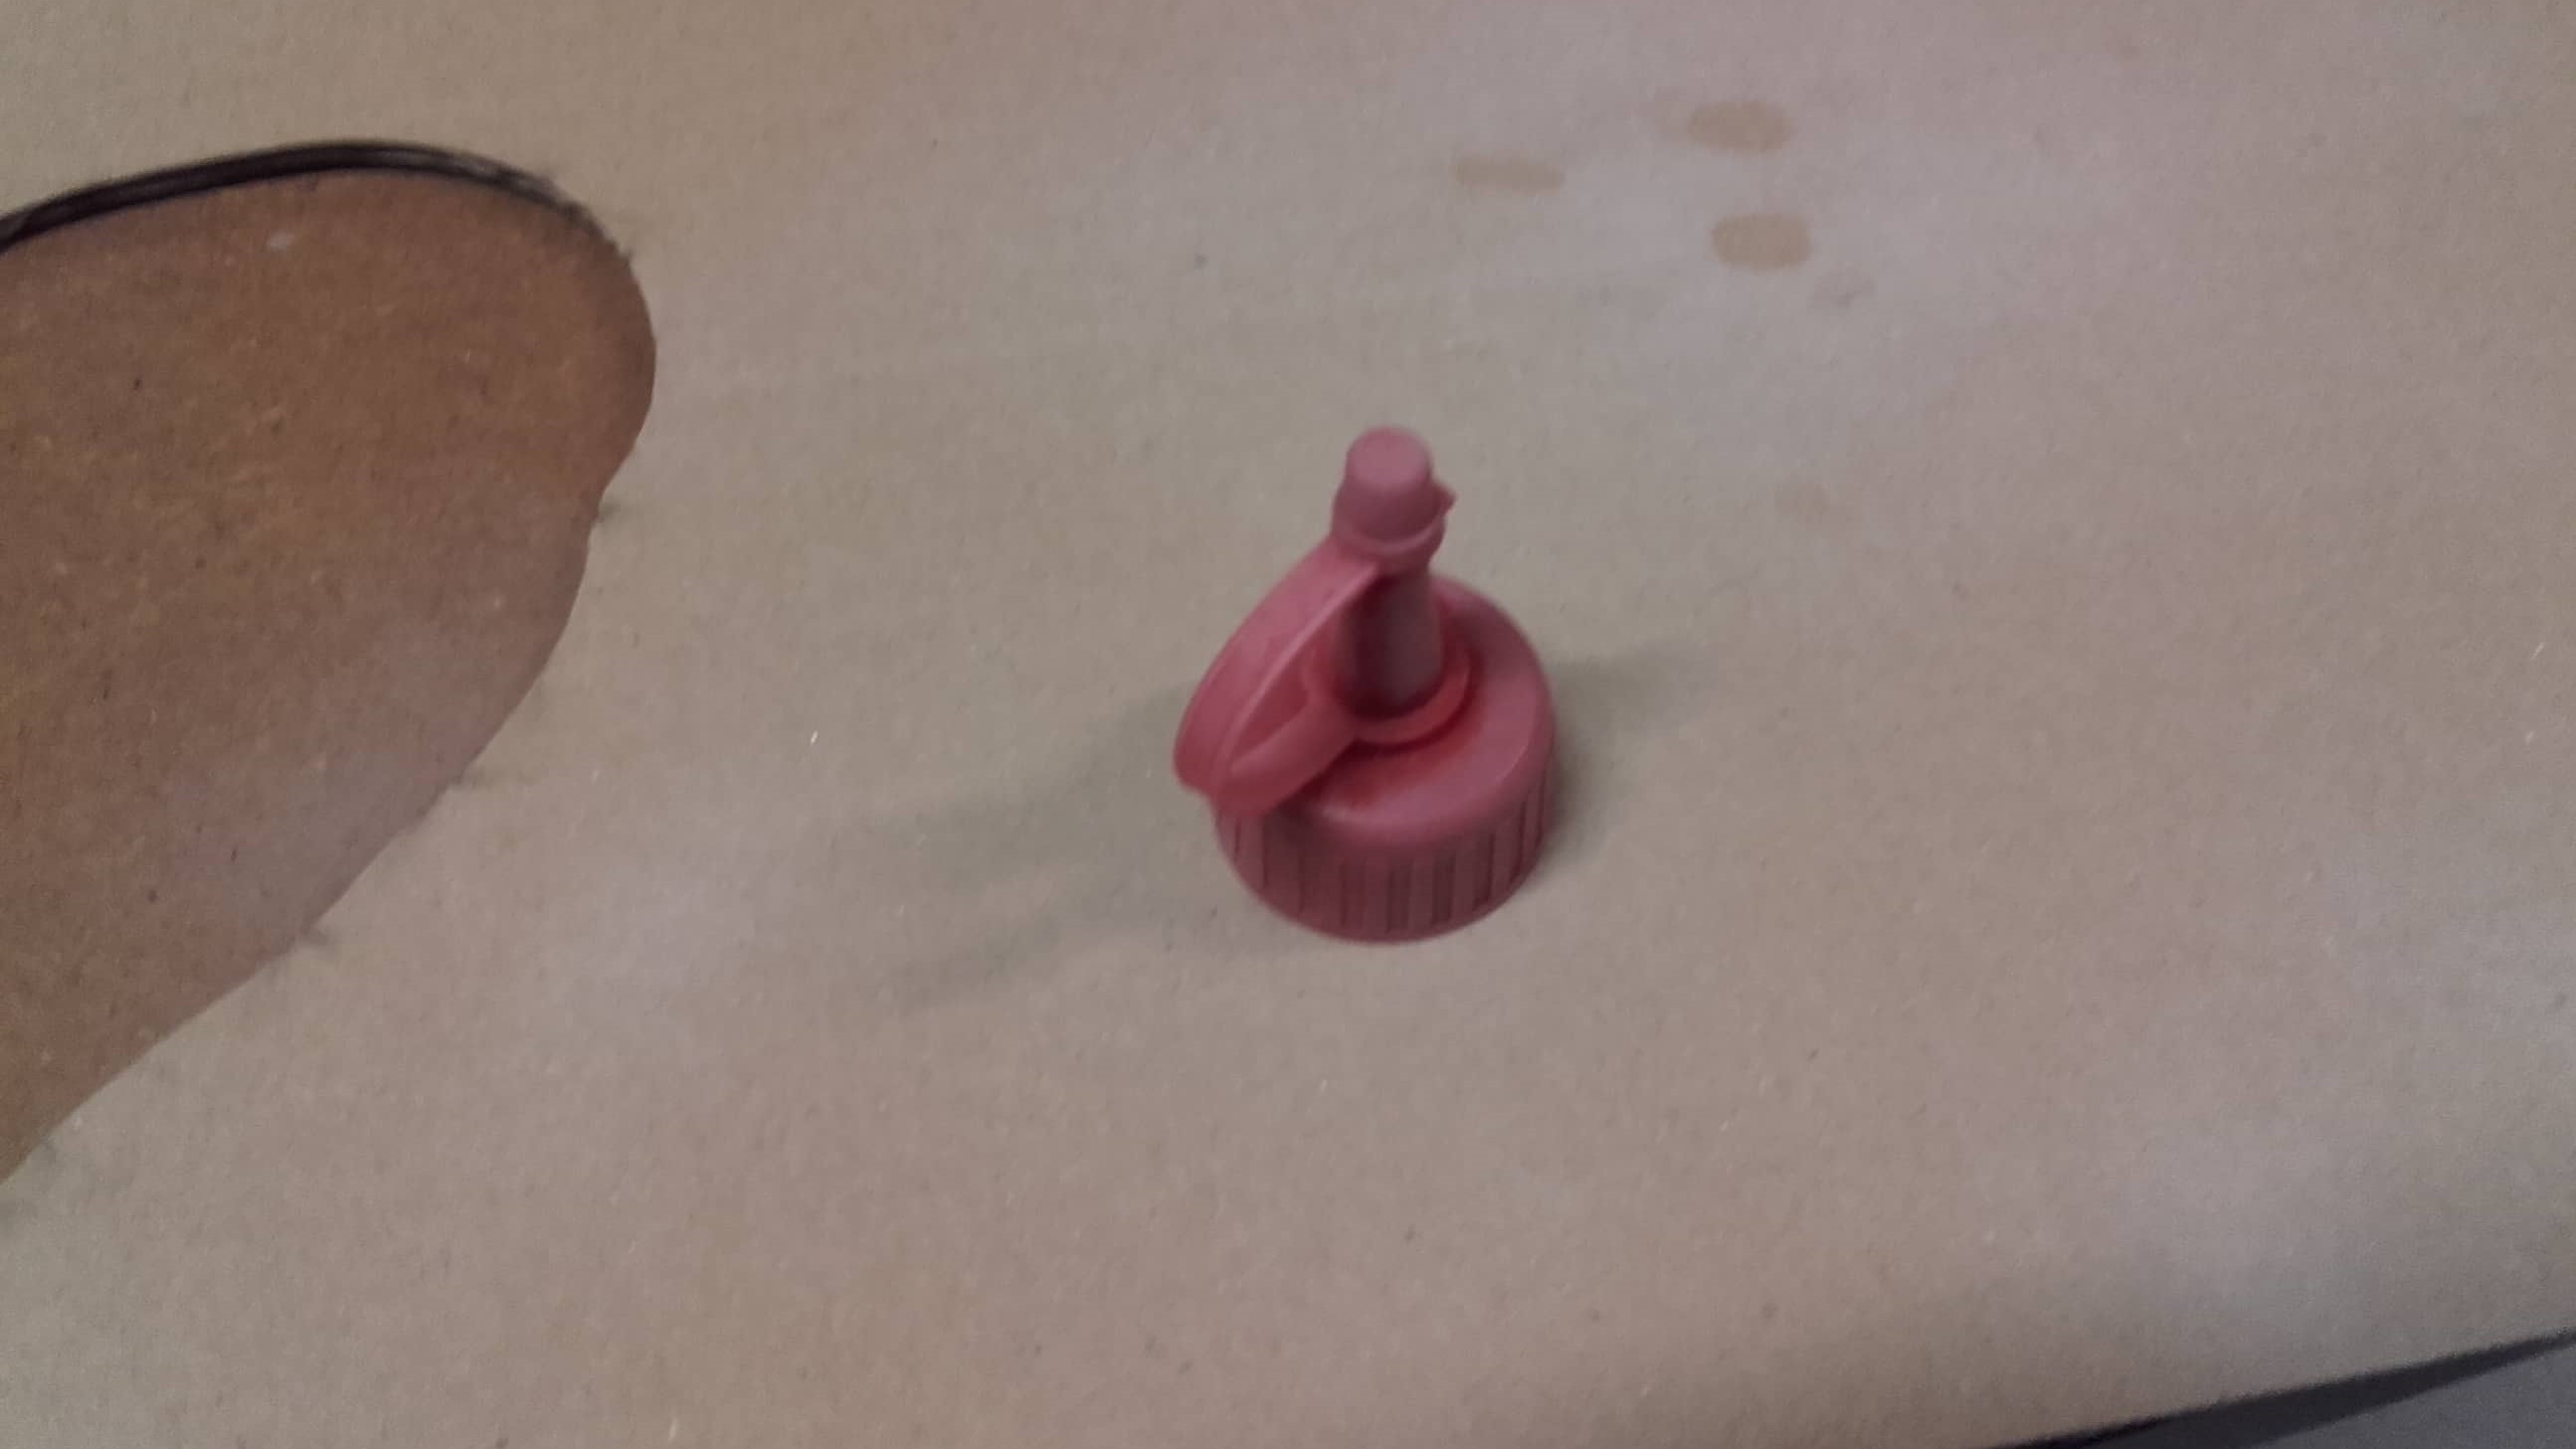
So I sprayed it with some 3D scanning spray powder to give the camera a better chance of being able to see it.
Peep That Sweet Lid Action
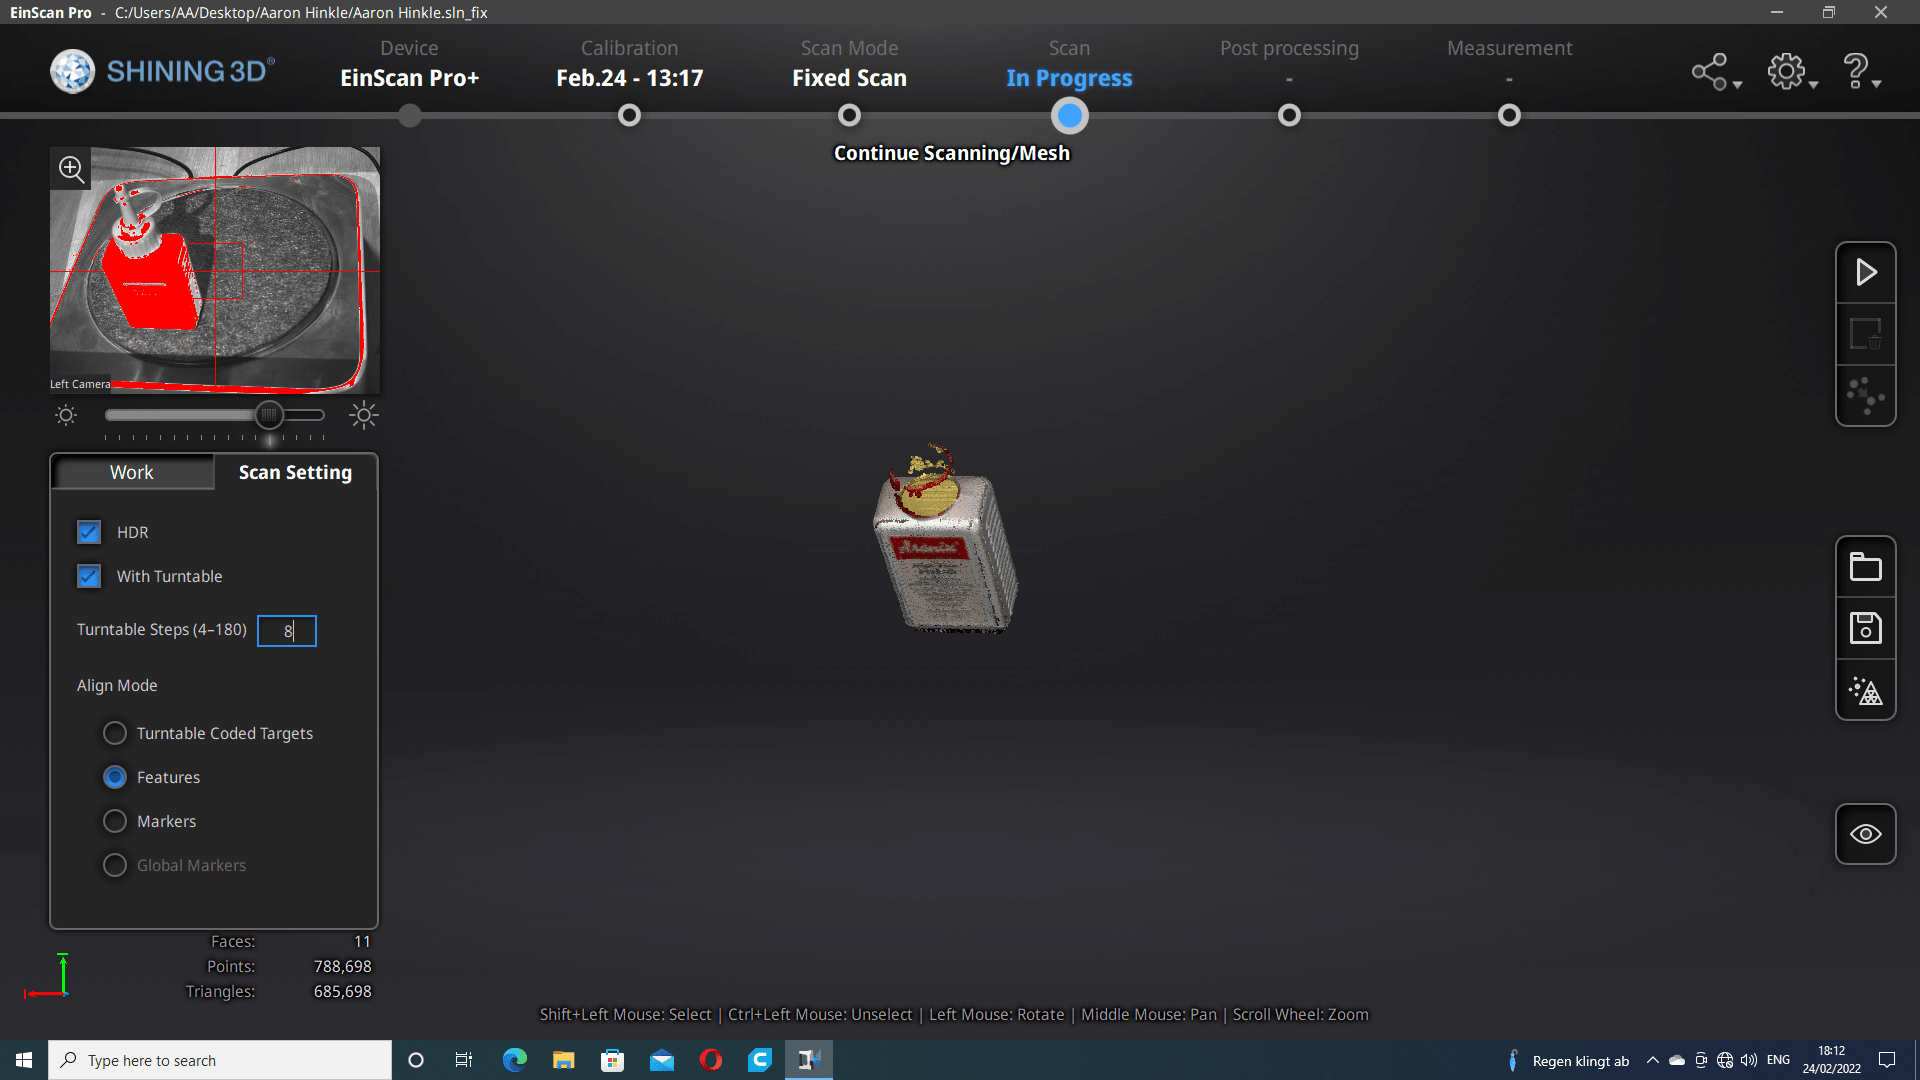
This seems to have worked because all of the subsequent scans got bits and pieces of the lid that could all be added to the composite.
More Editing
Of course, with more rounds of editing between each scan.
On Its Side
I then scanned the bottle...
Scanned
...and edited...
Compiled
...and compiled...
Composite
...the scans...
On Its Face
...in several more...
On Its Back
...different orientations.
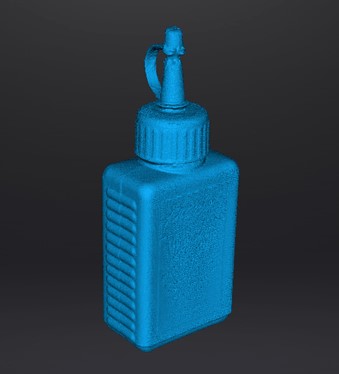
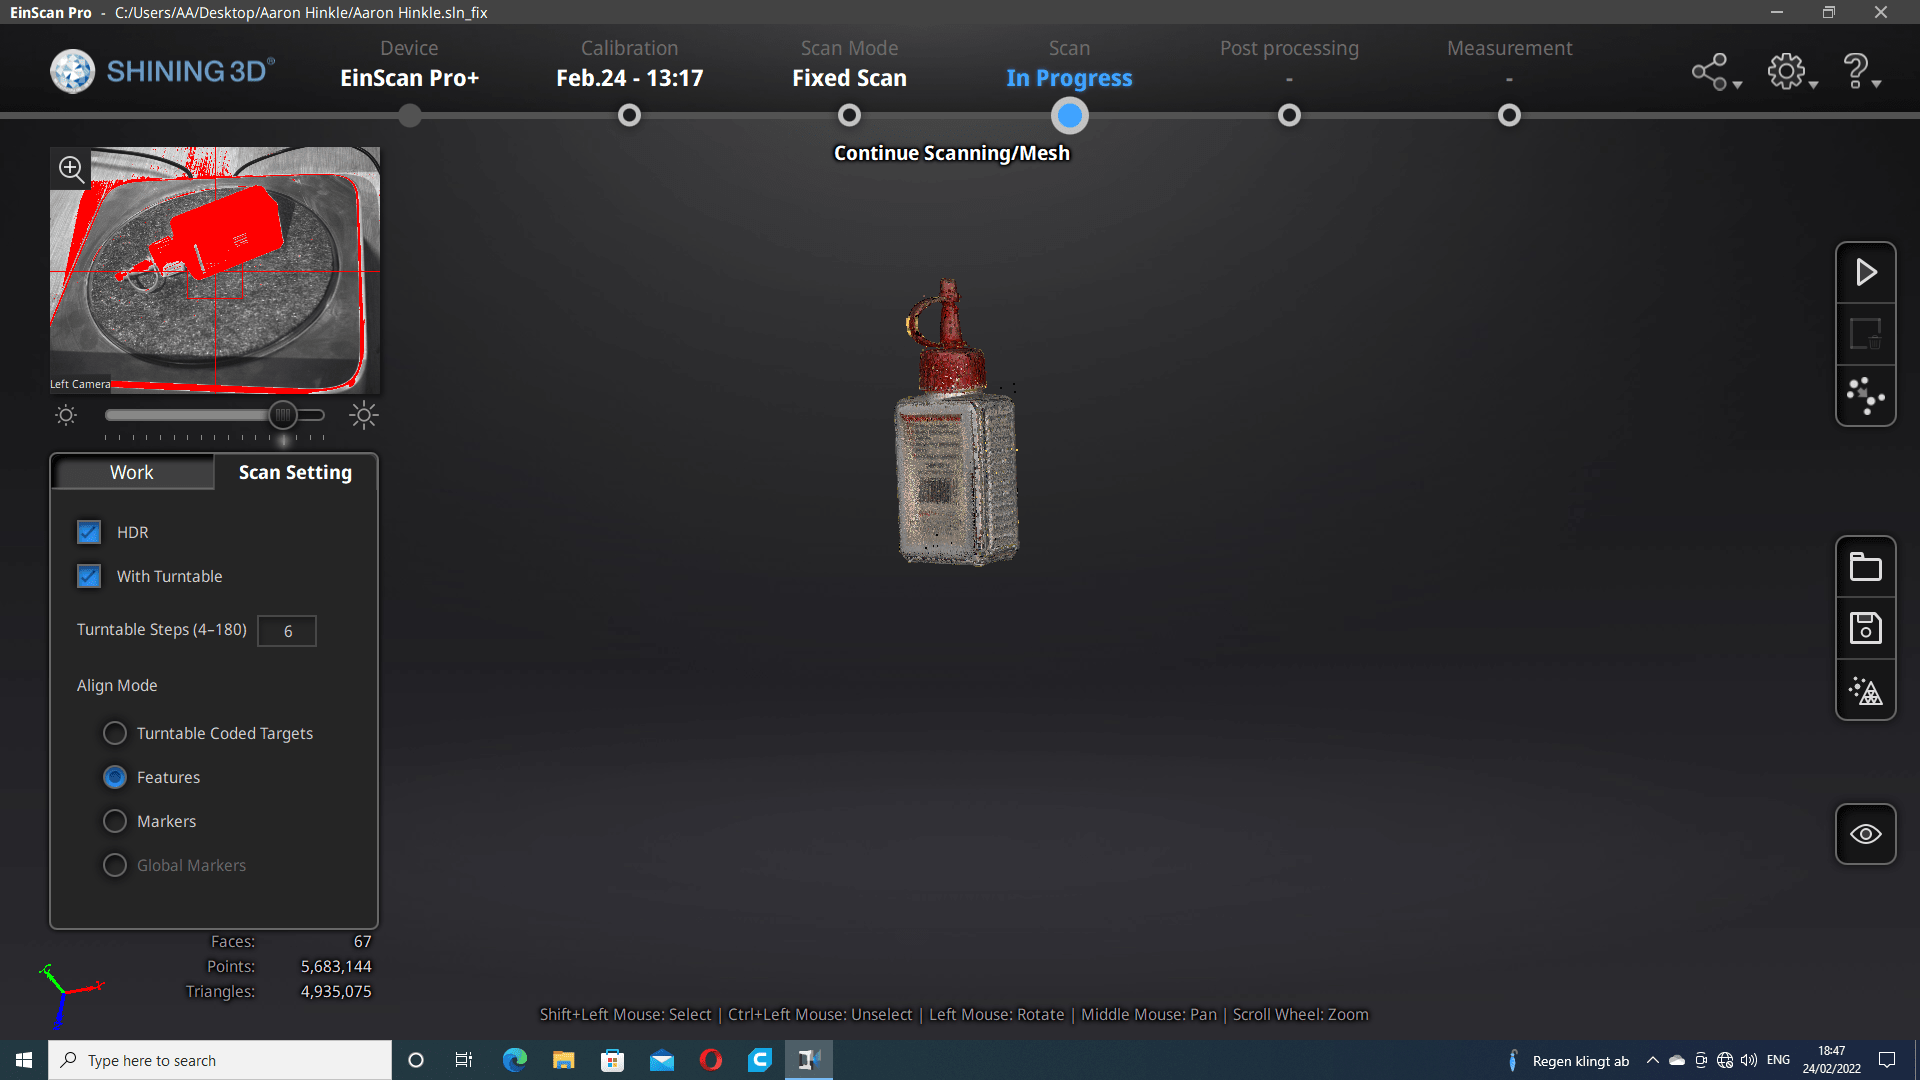
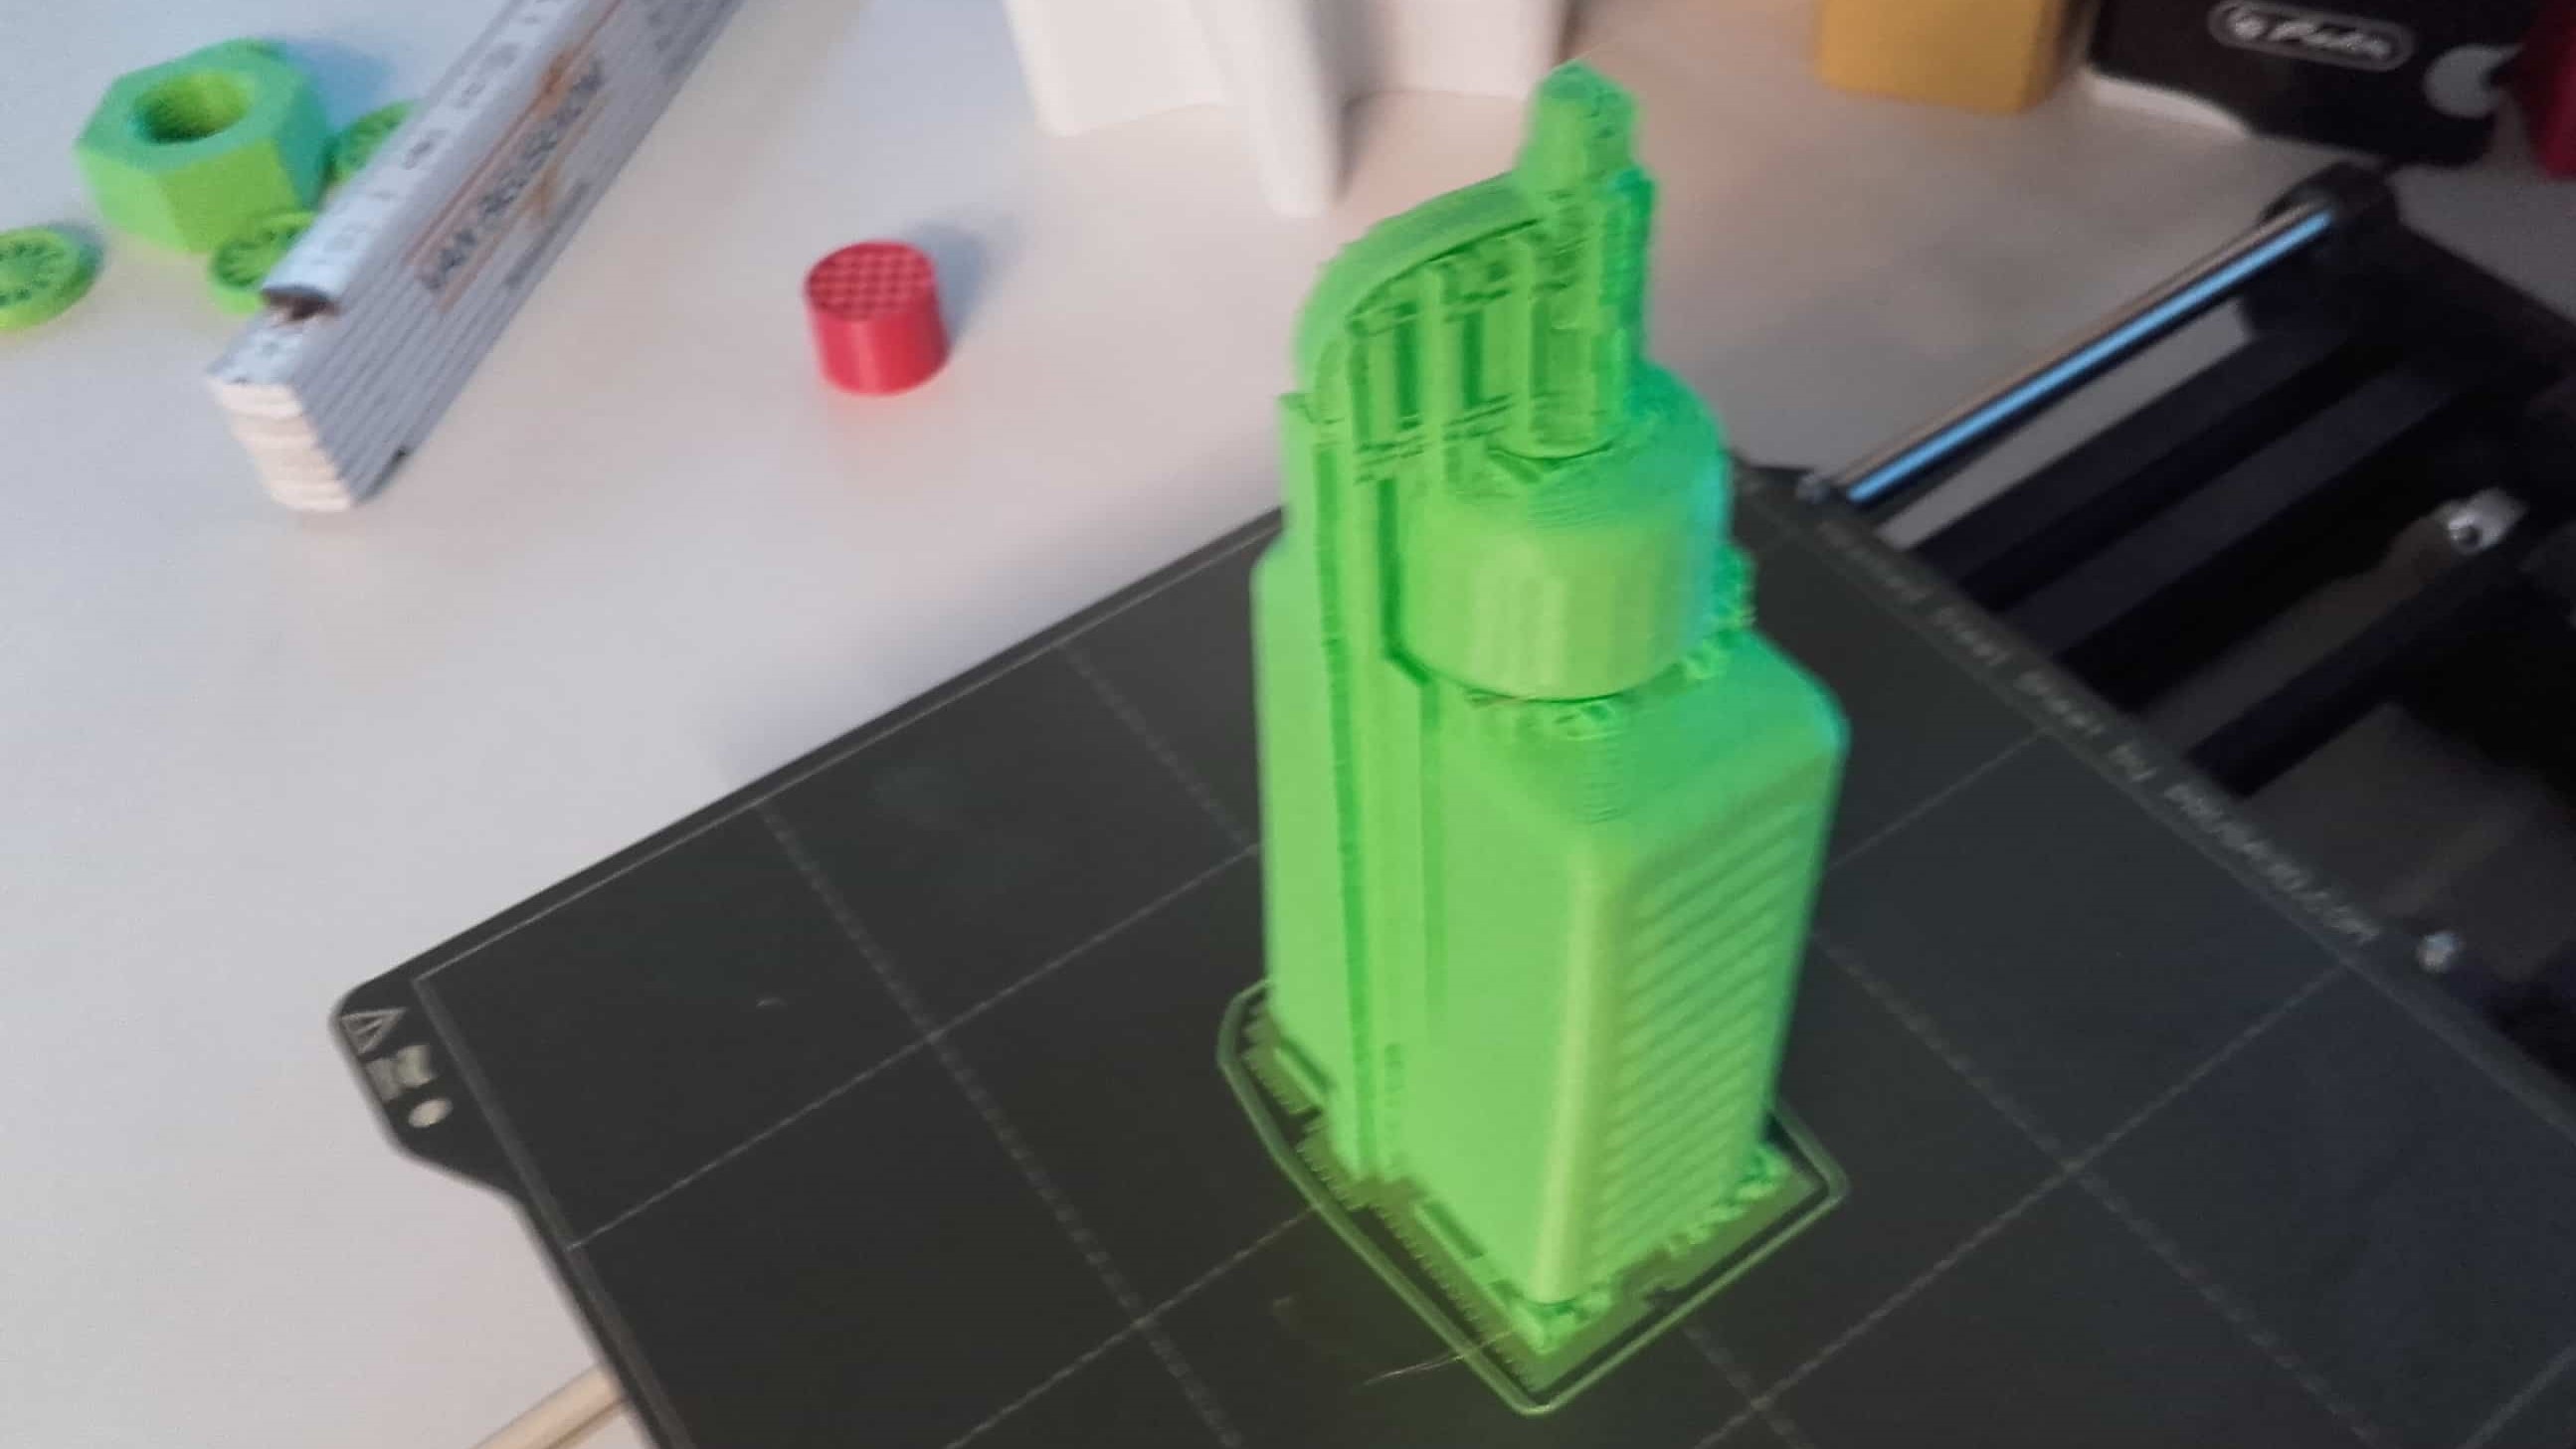
Generating the Mesh
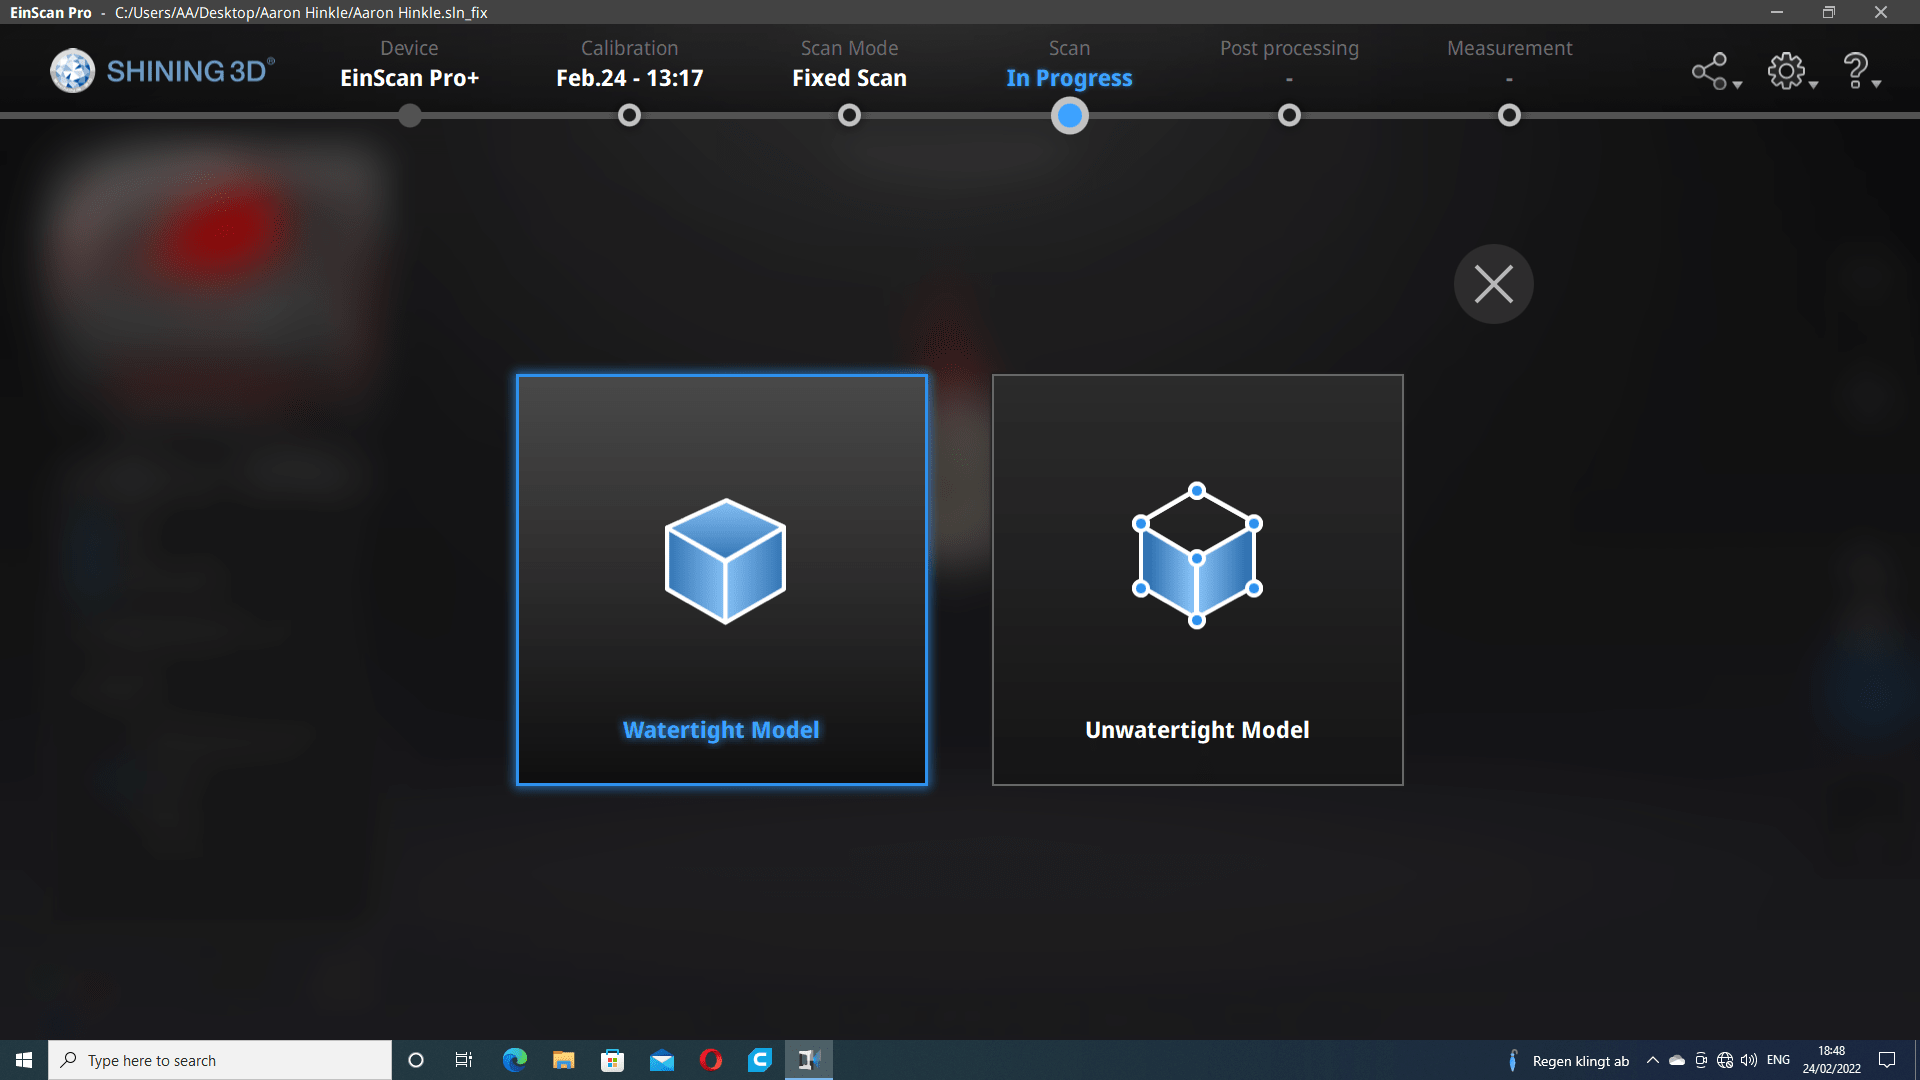
Until it was finally time to generate the mesh. I chose a watertight mesh.
High Detail
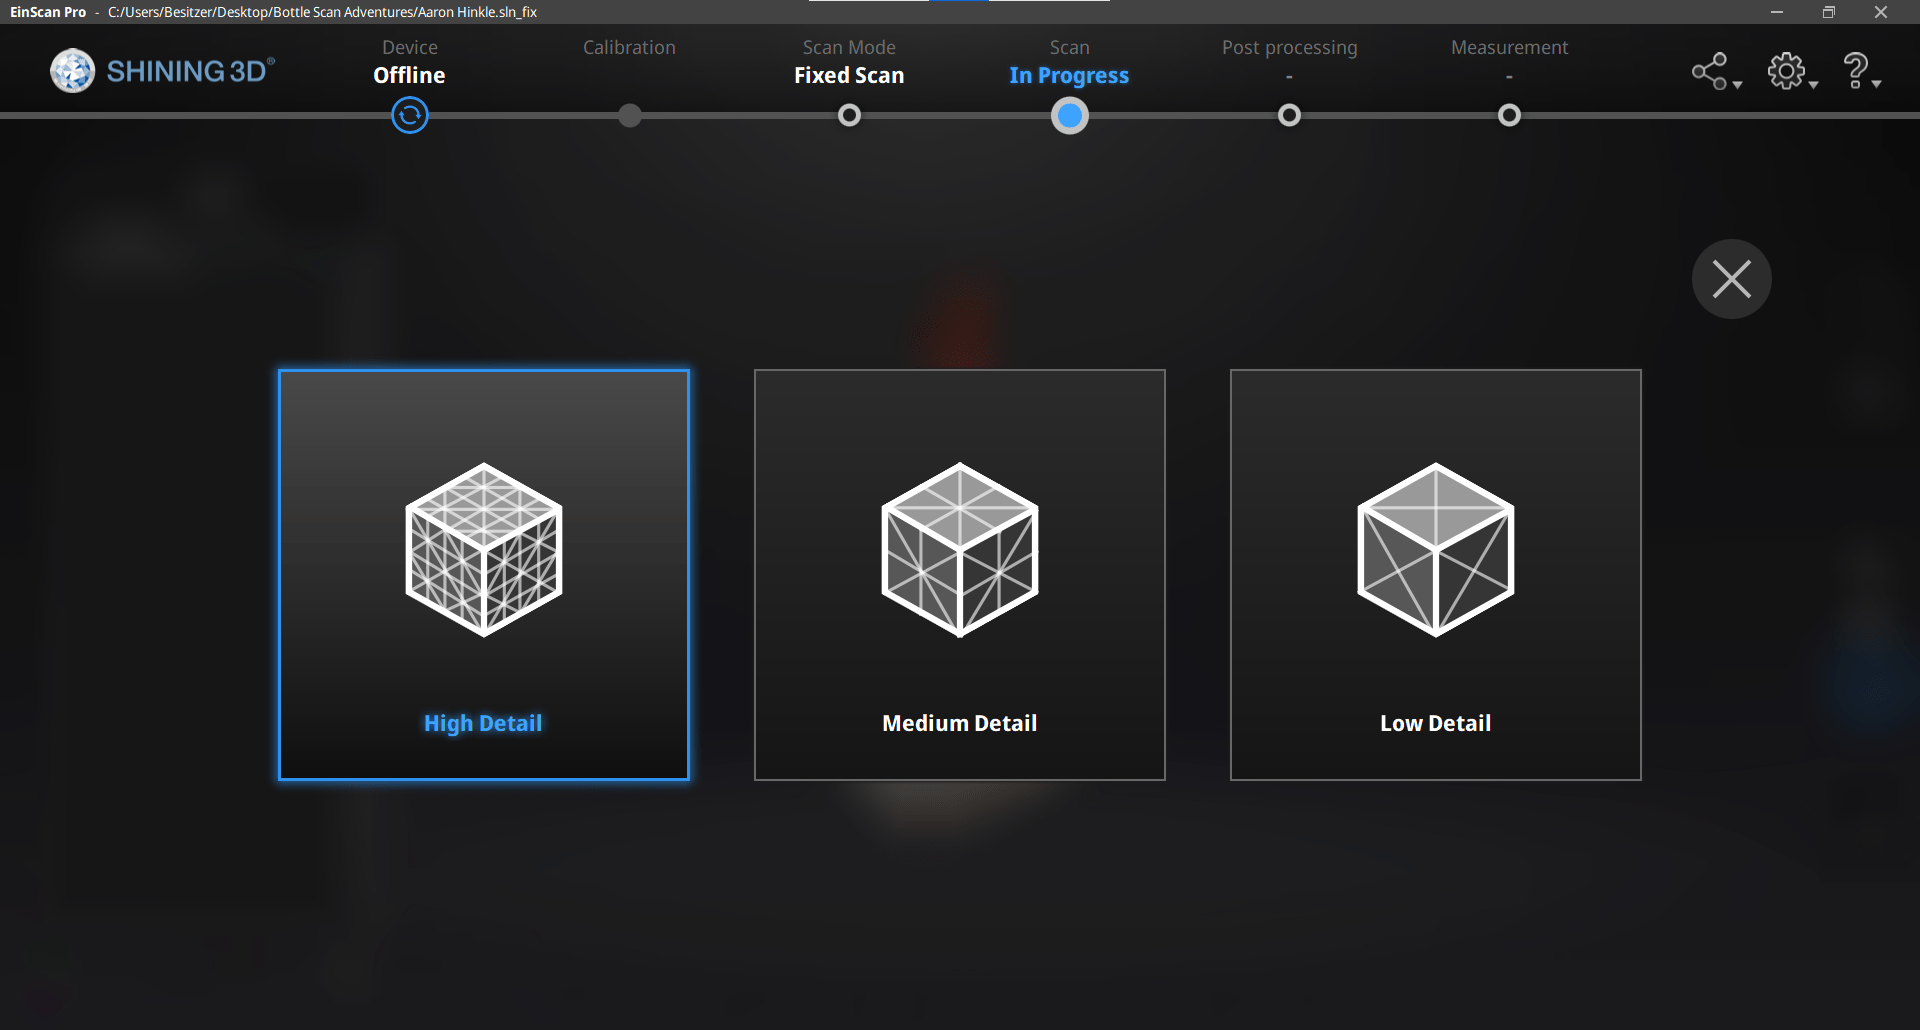
And high detail (although this was unnecessary in the end).
Waiting... ... ...
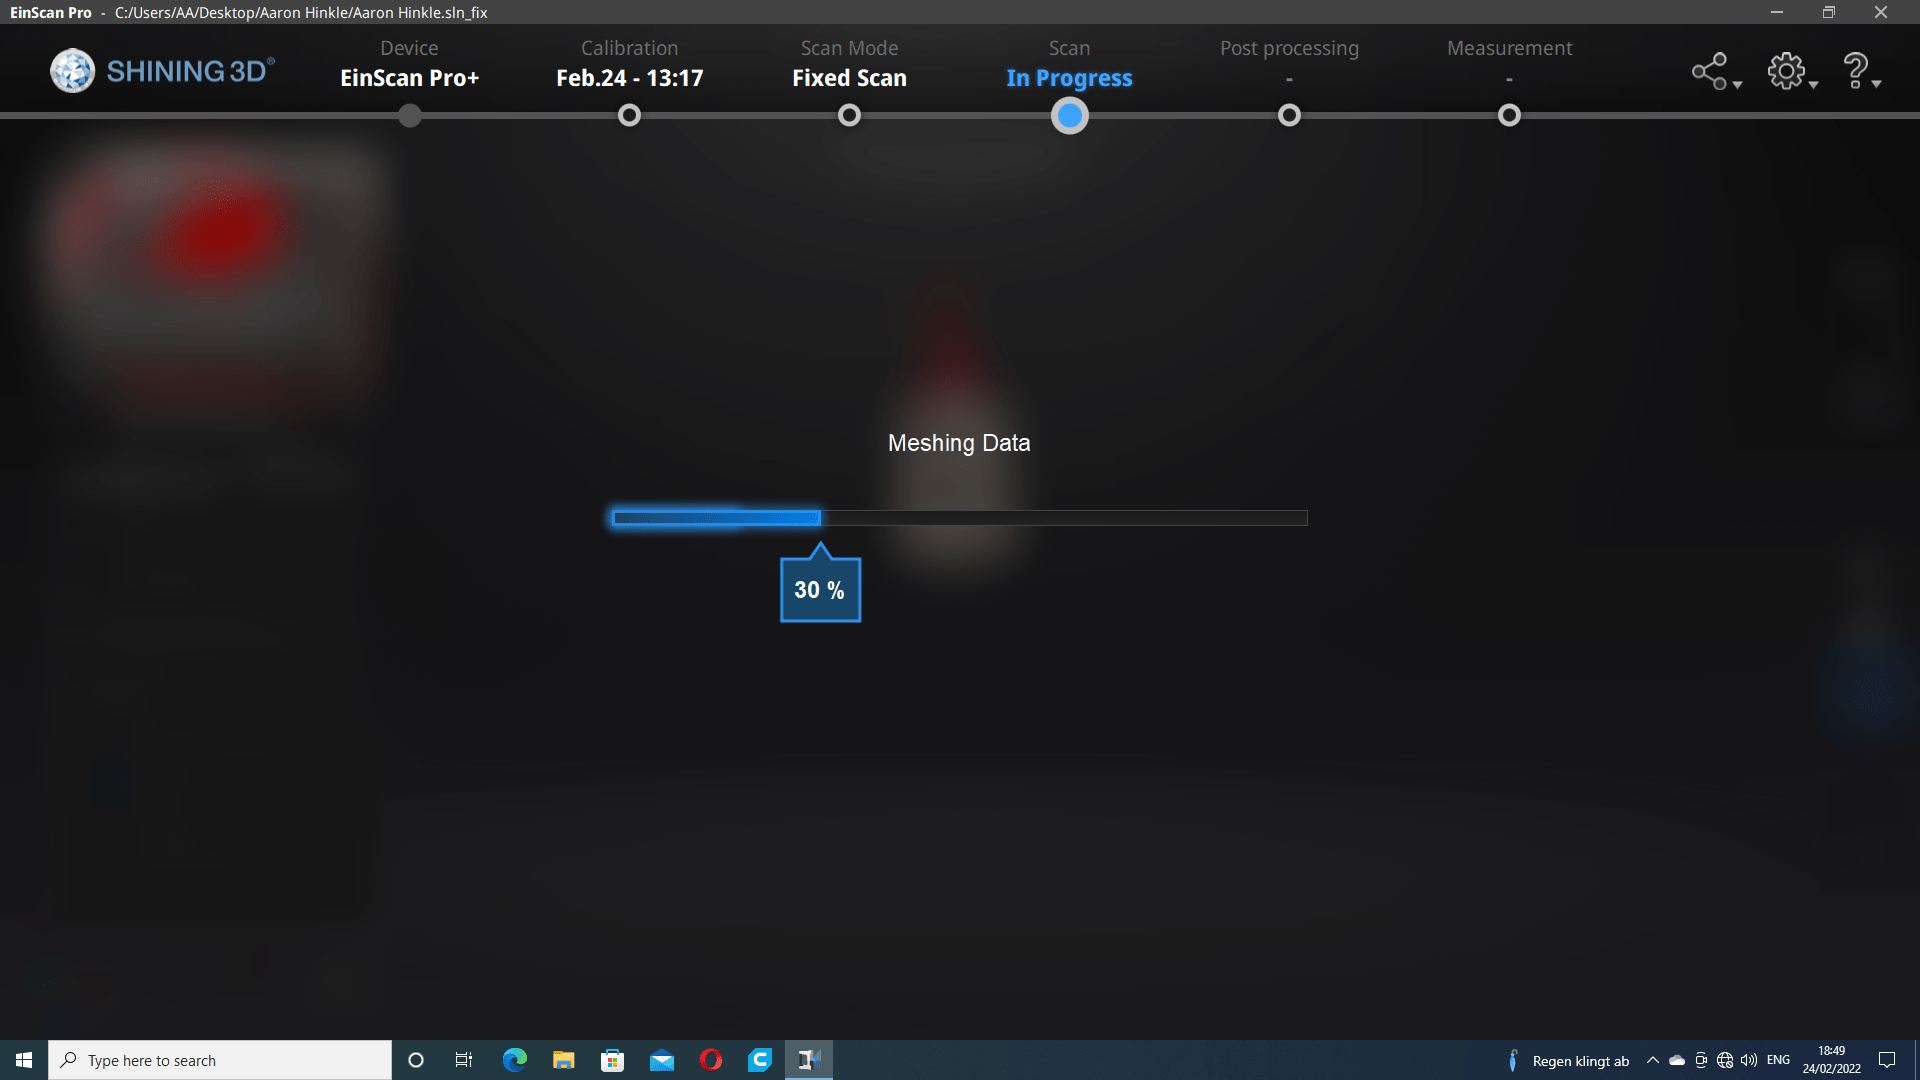
The choice of high detail was almost immediately regretted because the mesh took FOREVER to generate.
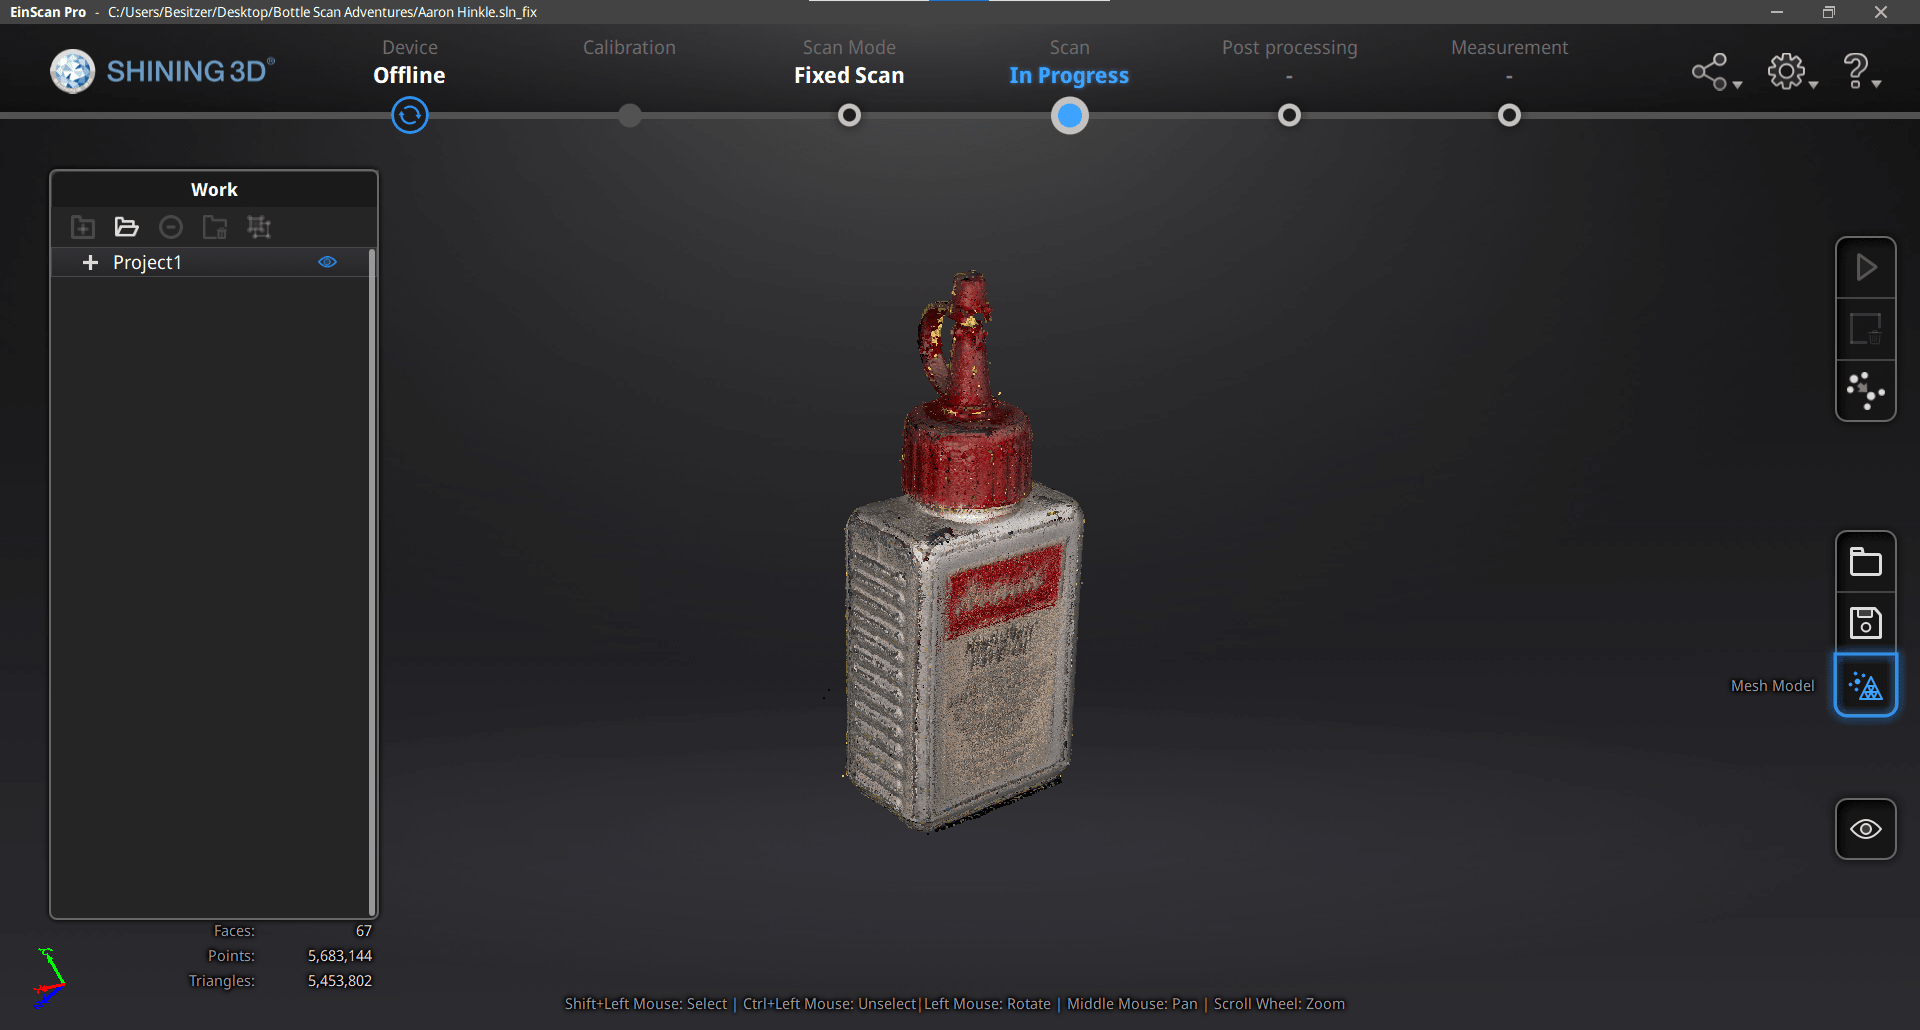
Finally a Mesh
Eventually the mesh was finished! But it had 9.8 million triangles and the file was almost 470 MB...I need to do some repairing in Blender before I try to print this thing.
Repairing the Mesh
Blender
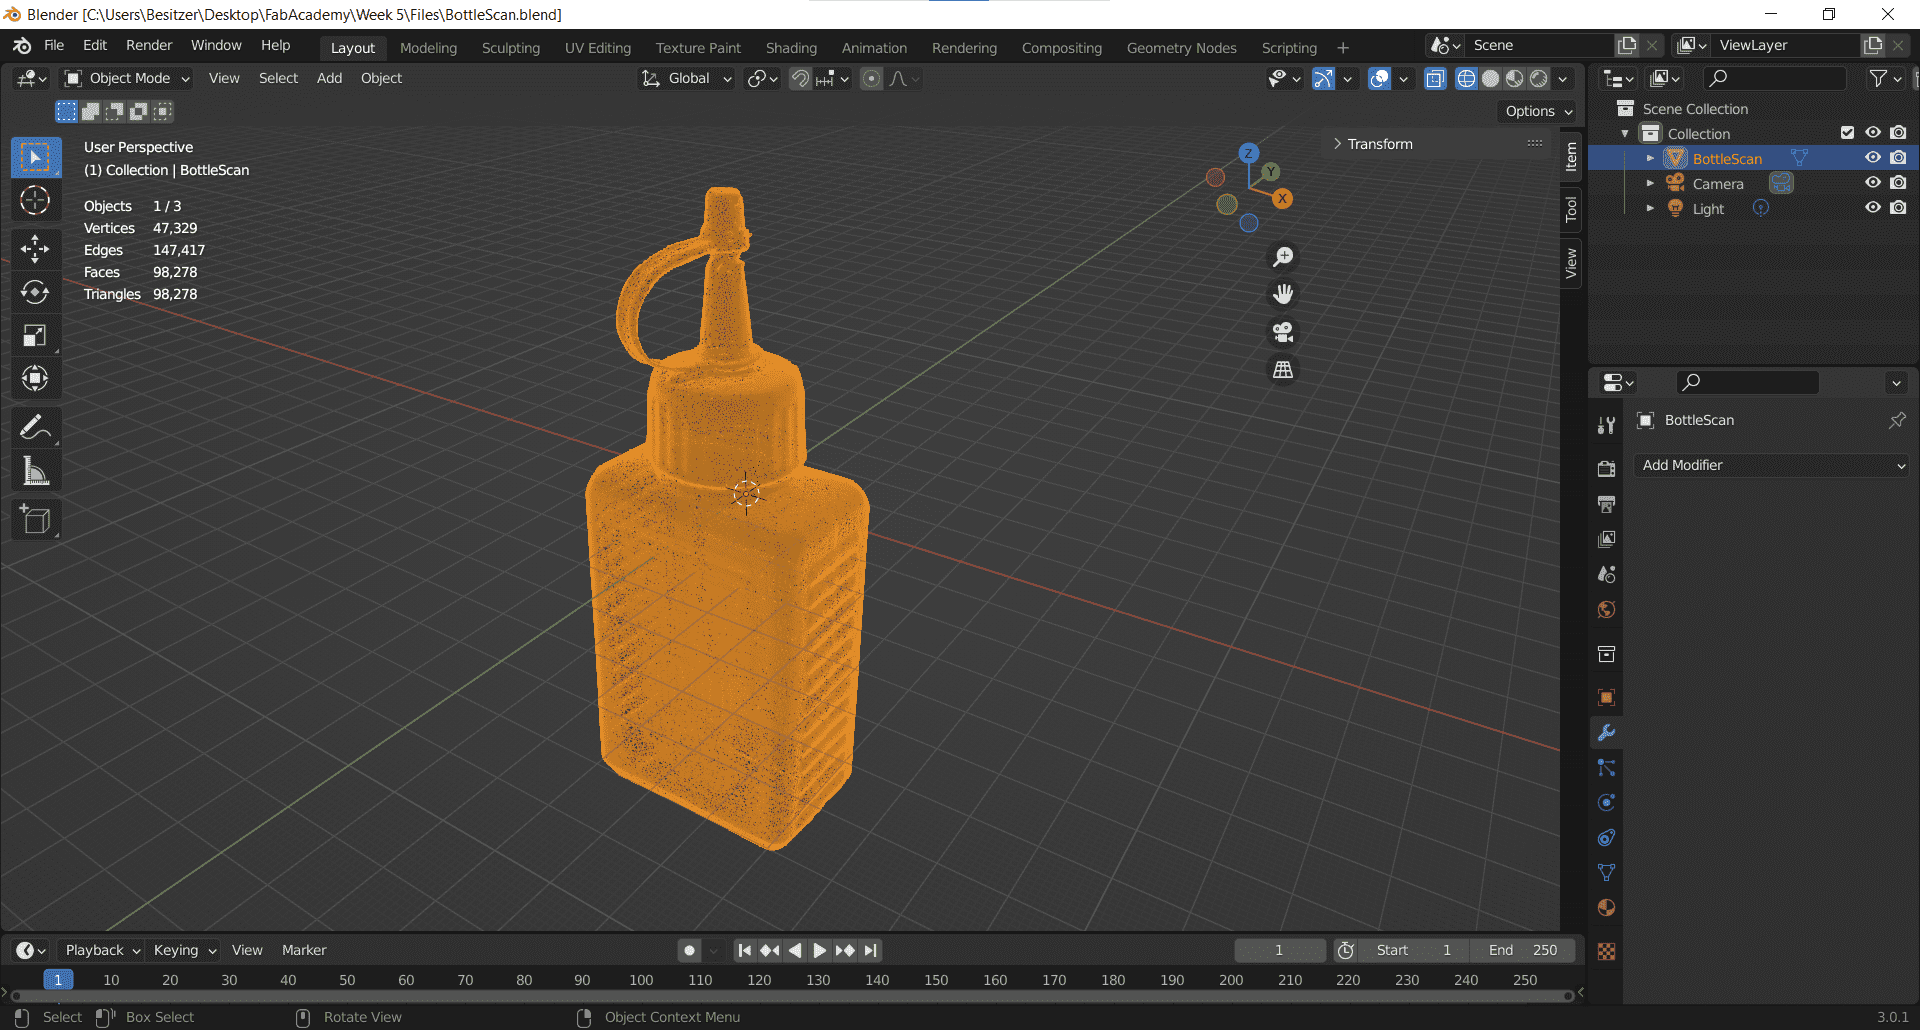
First I opened the stl in Blender (this took forever with such a huge file).
Decimating

Then I decimated the mesh down to 0.01% of the original and knocked my 9.8 million triangles down to only 980 thousand.
Exporting
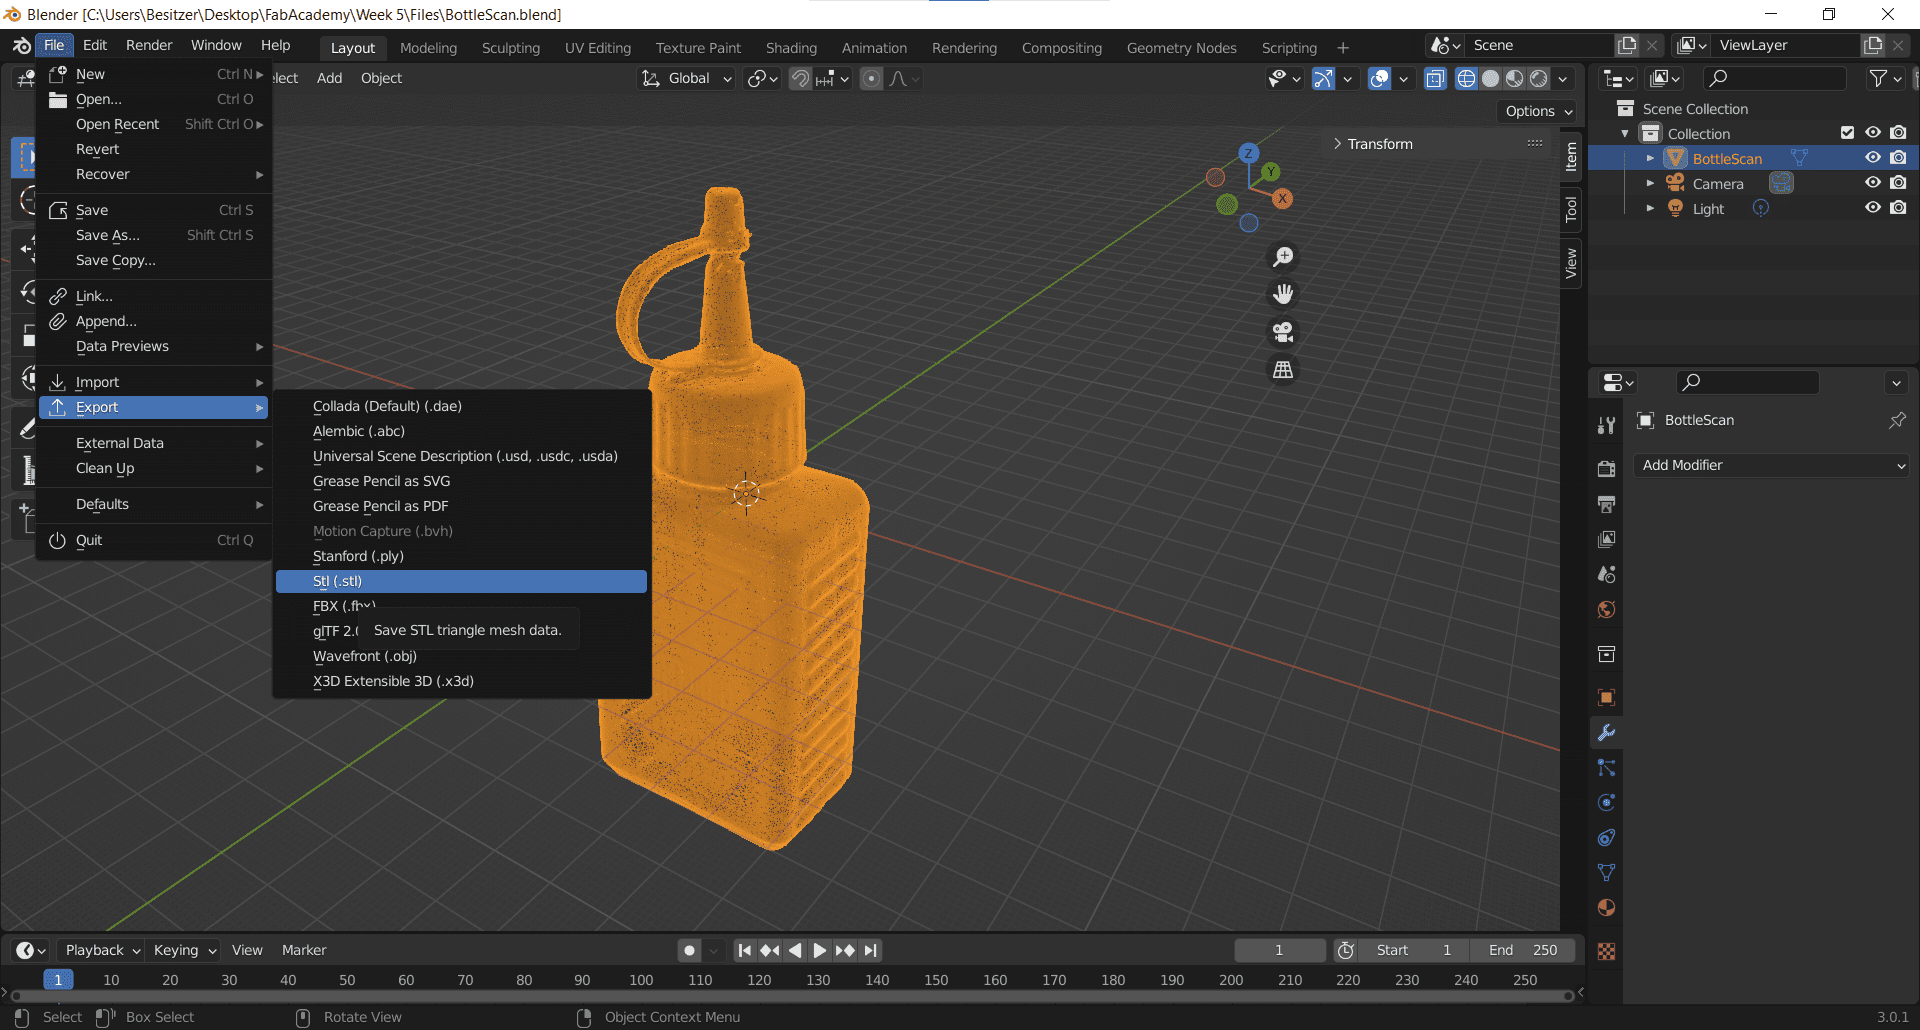
Then I exported the new, much smaller stl so I could open it in a slicer for a 3D printer.
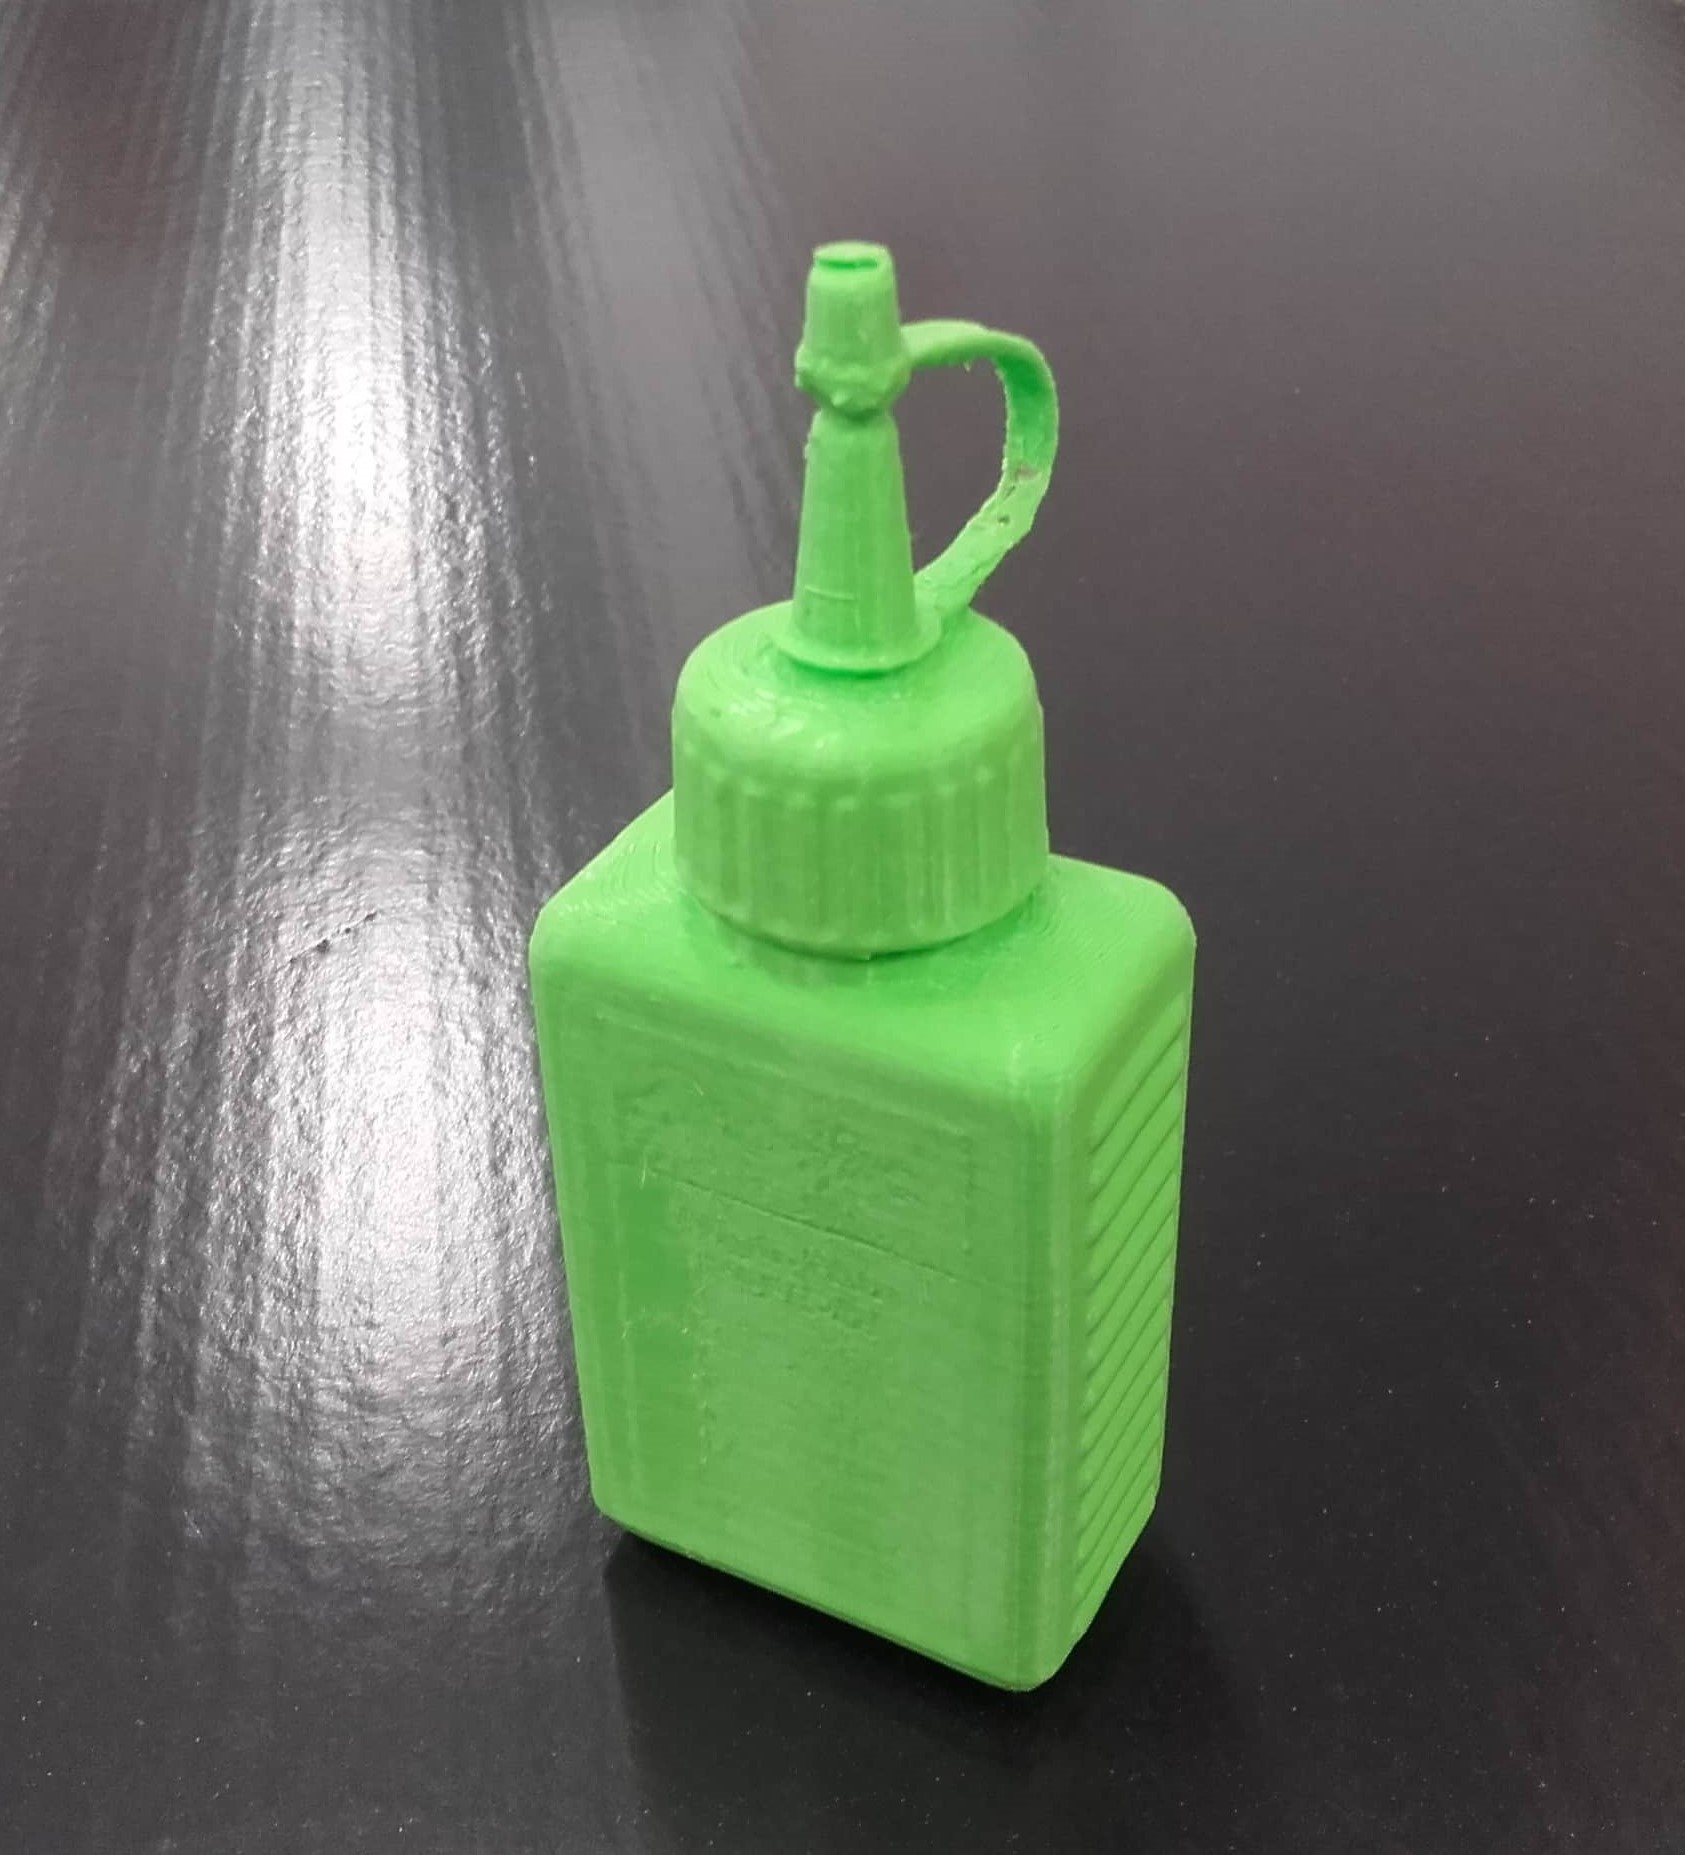
Printing
Prusa Slicer
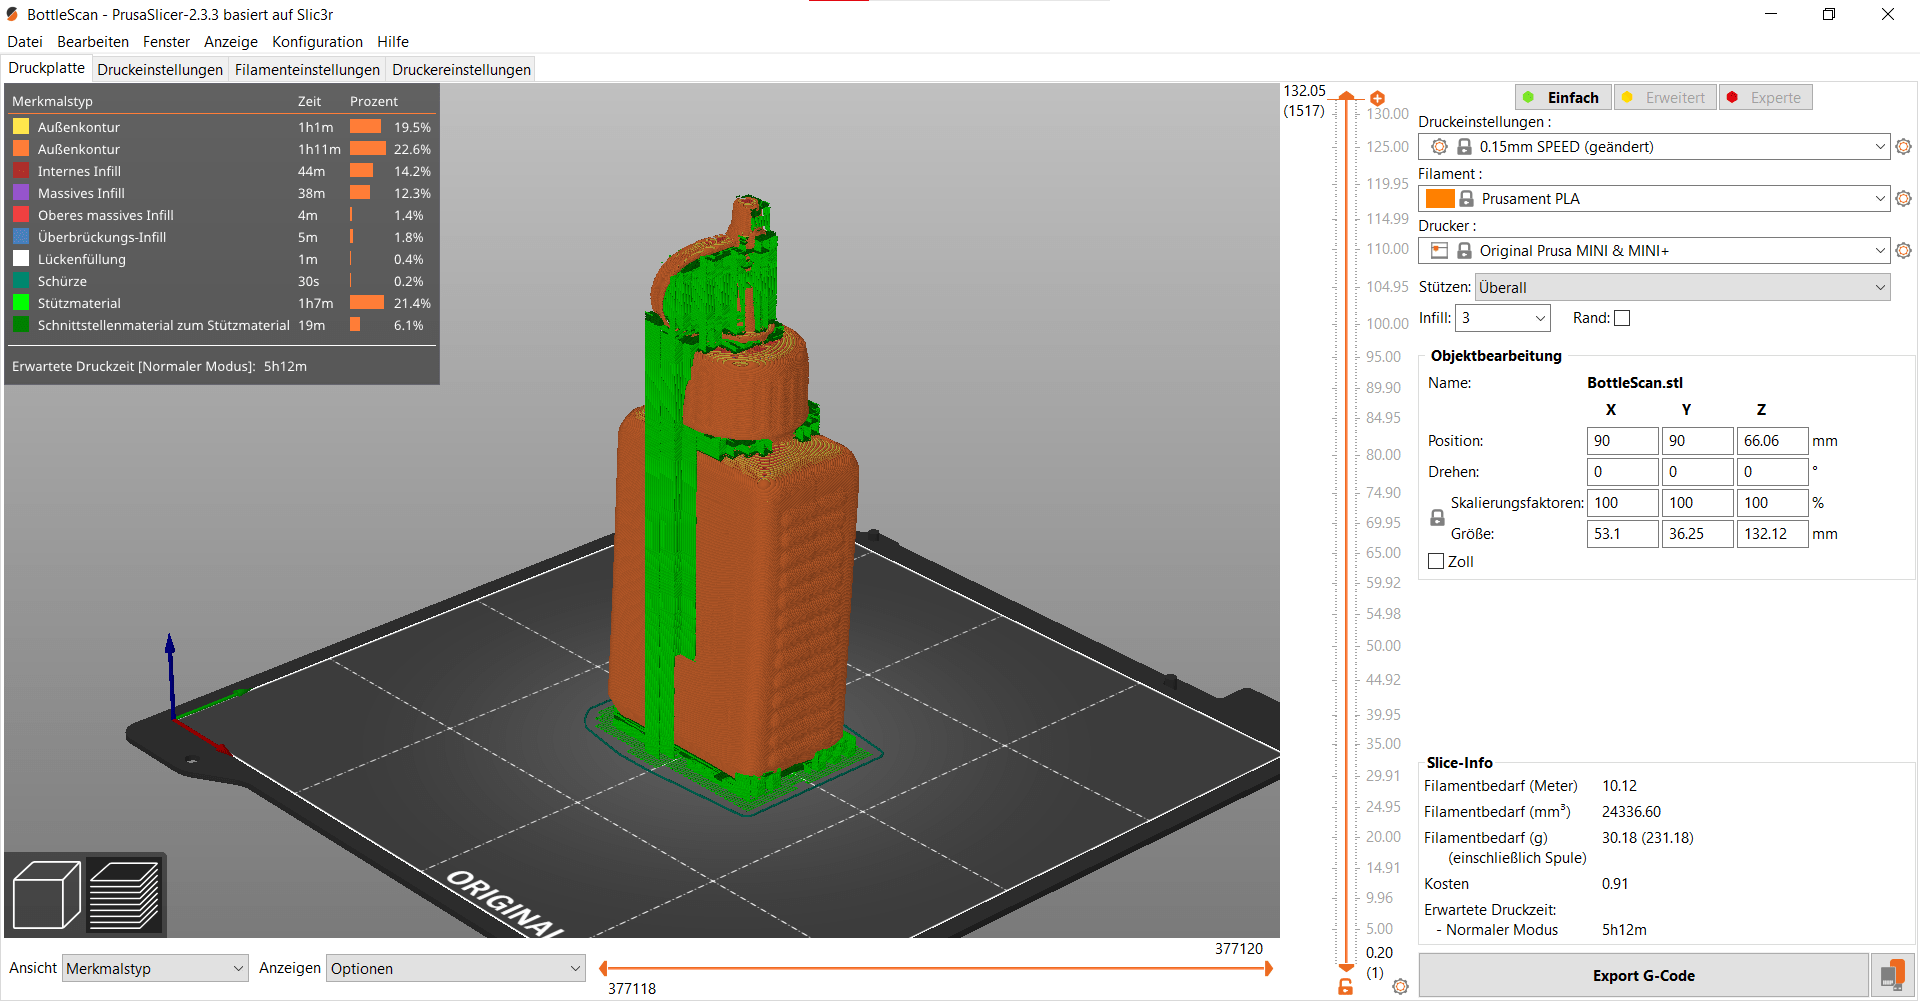
We didn't have any of the smaller filament for the Ender 3, so I decided to print my bottle using the Prusa Mini. I don't have a Prusa profile for Cura yet, so I used the Prusa slicer on a friend's computer.
Print Settings
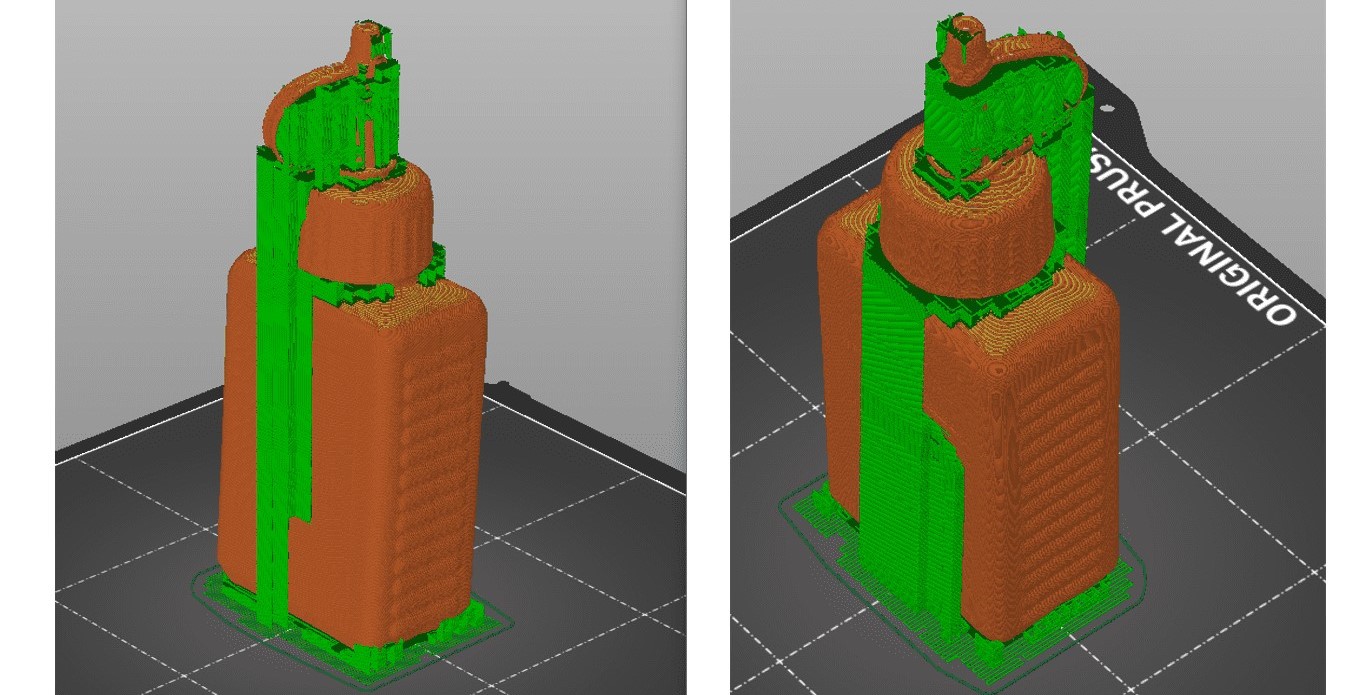
She had the default language set to German (which I do NOT speak well), so I kept most of the settings on their defaults. The only things I changed was to set the print setting to "0.15mm speed," I set the infill to 3% in a gyroid pattern, and then chose the setting to generate overall (Überall) supports.
First Try
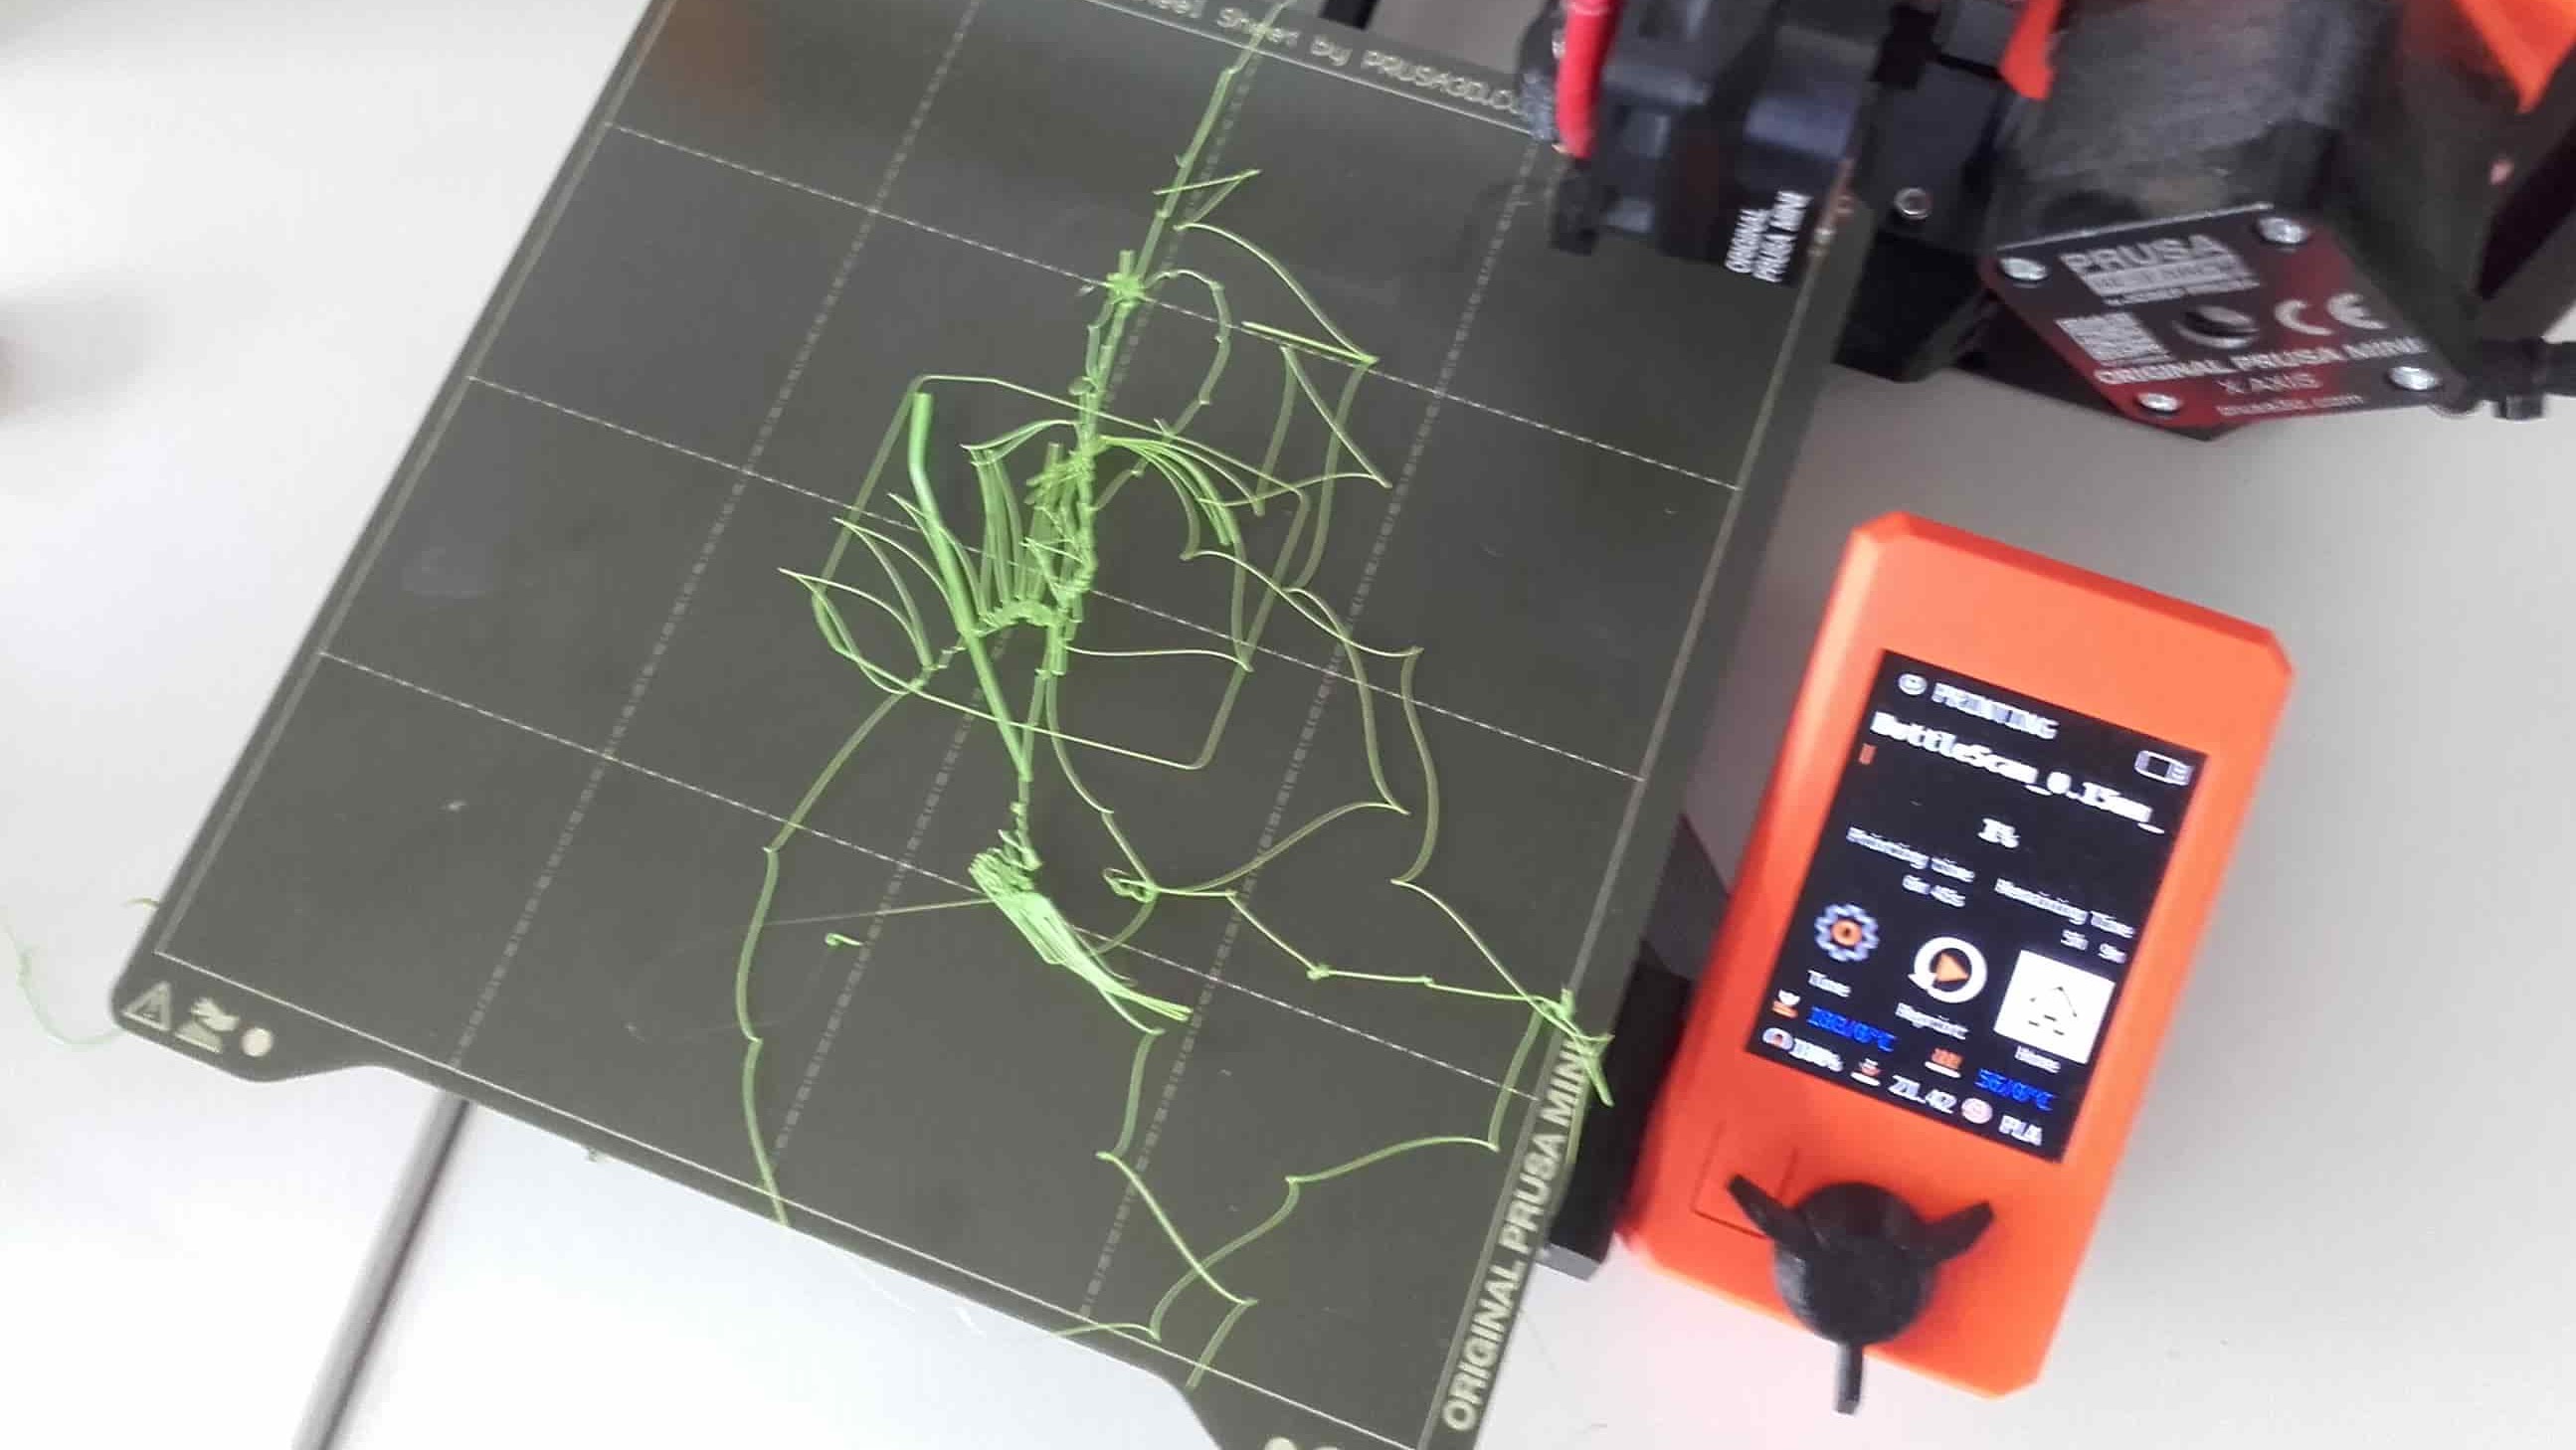
The first attempt was not successful.
Second Try
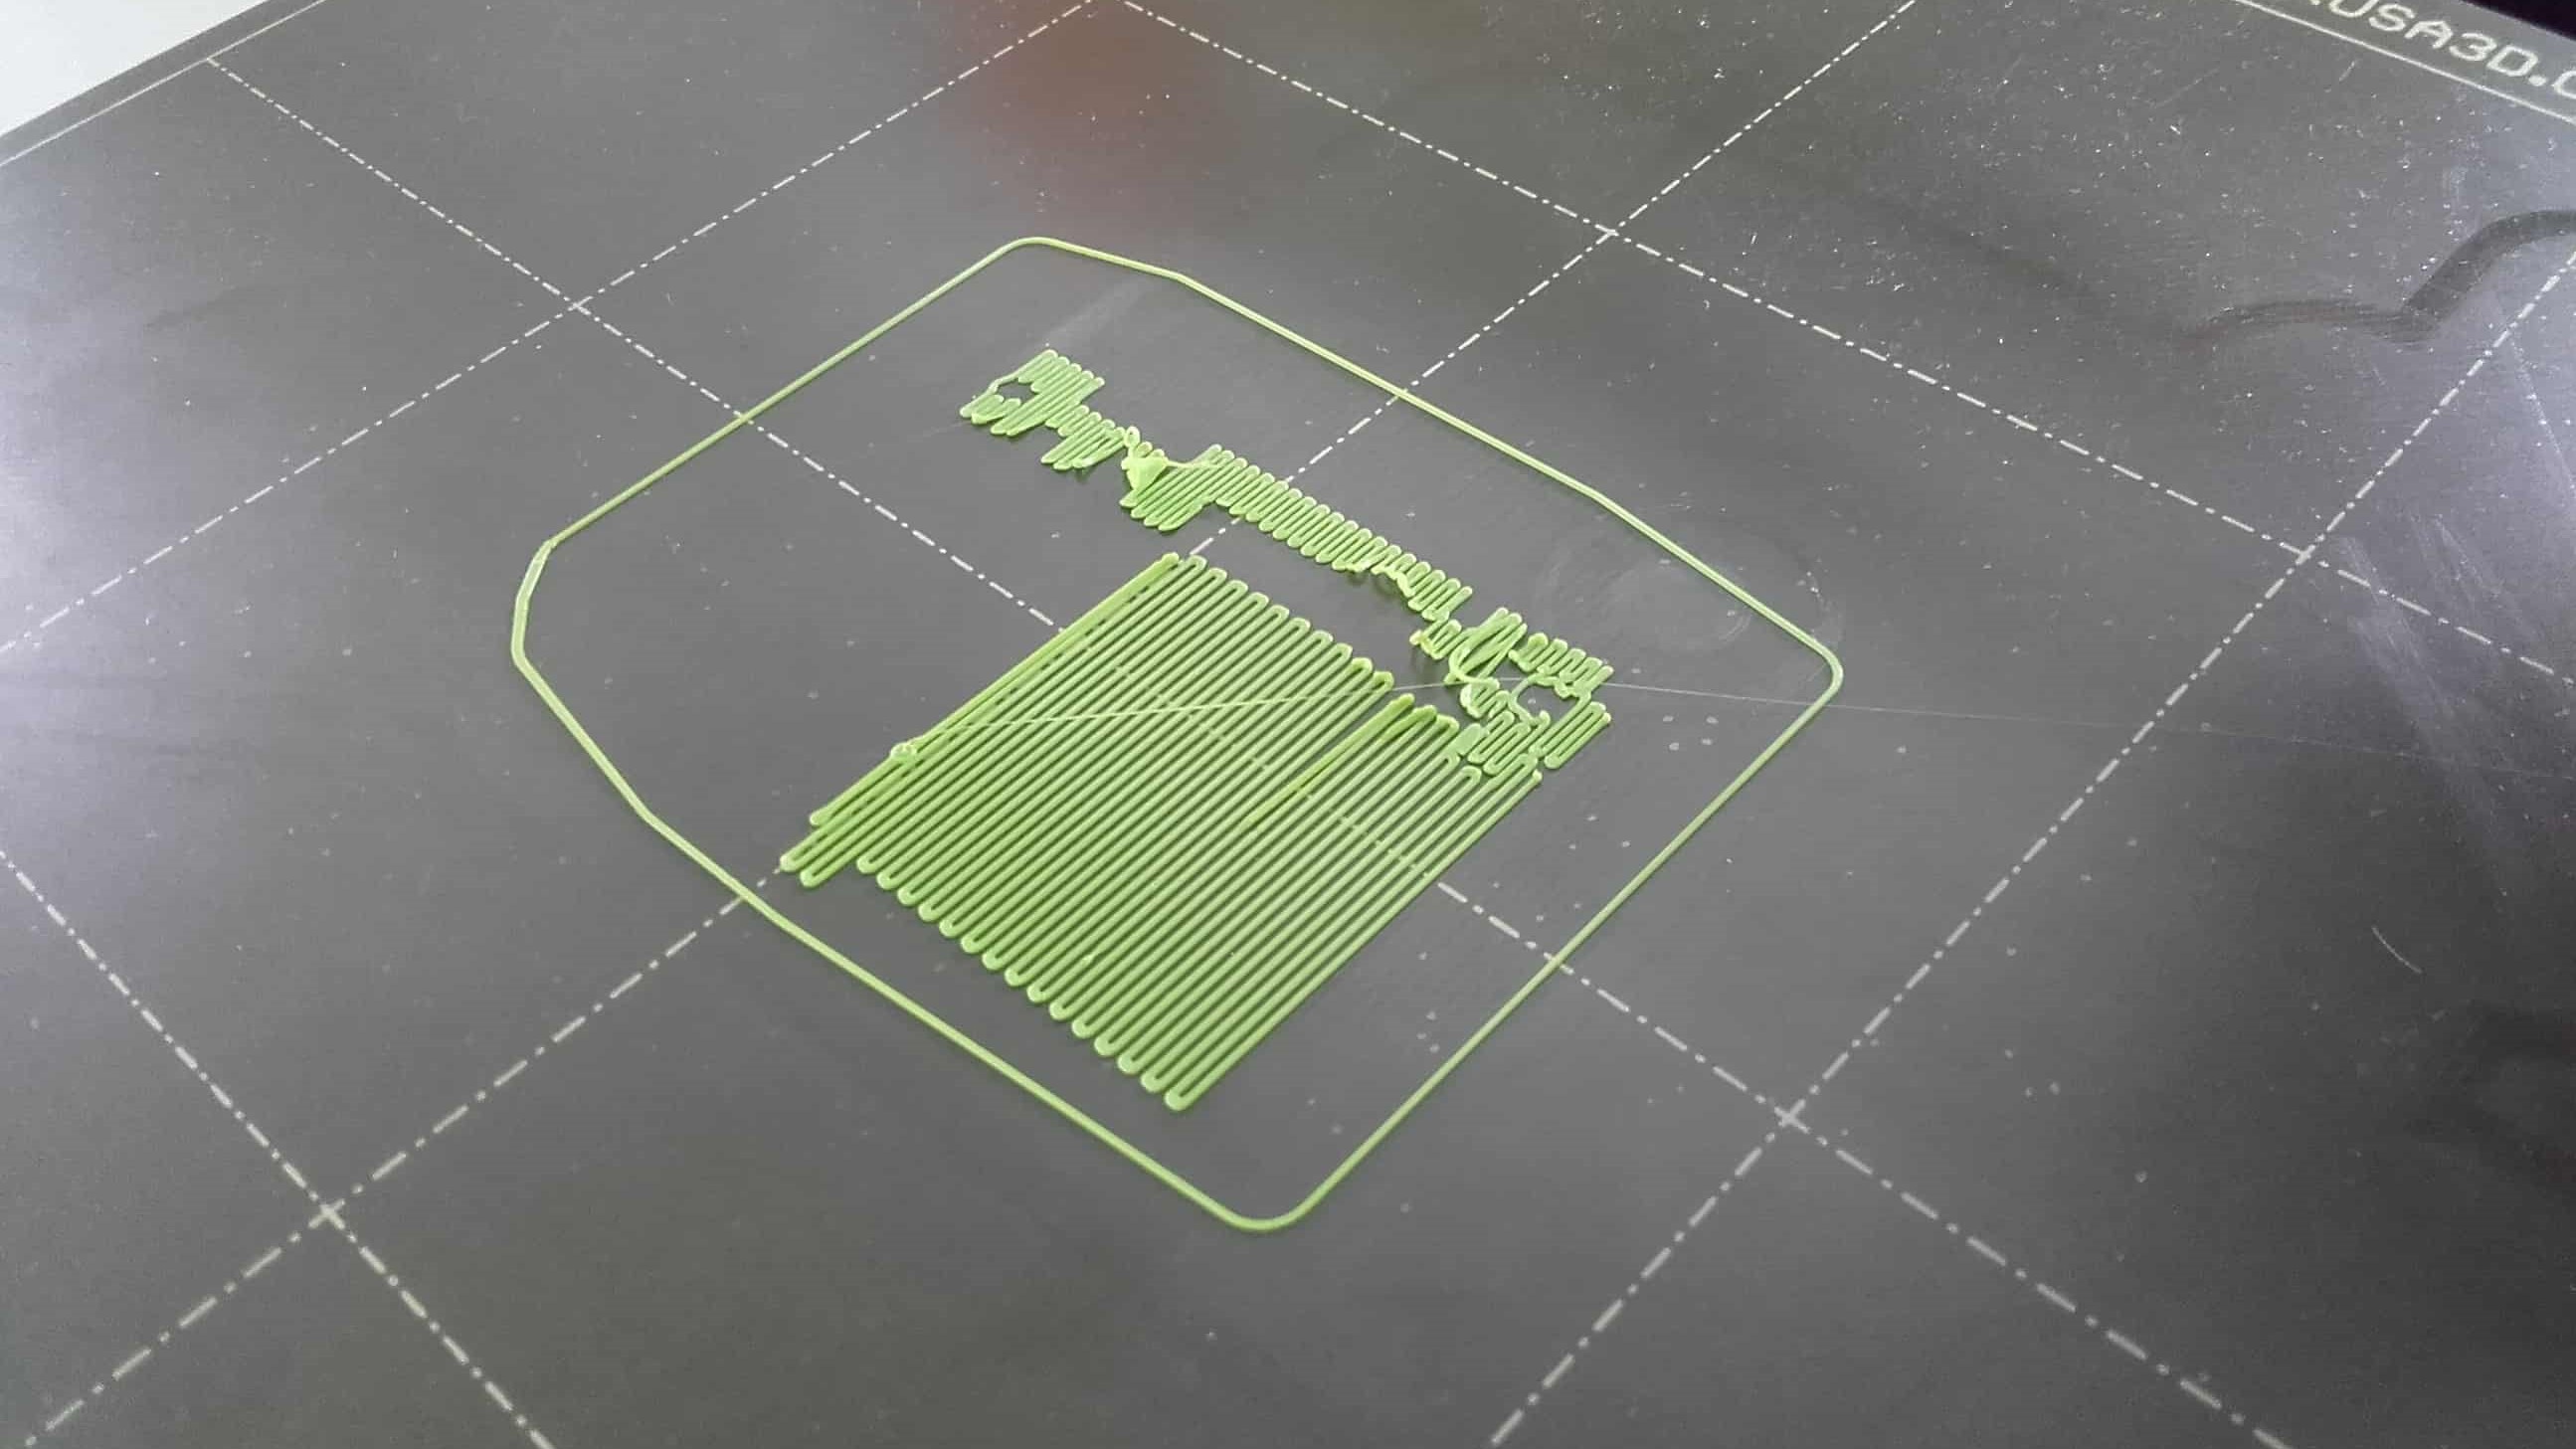
Nor was the second attempt. The print was not adhering to the bed.
Back in Prusa
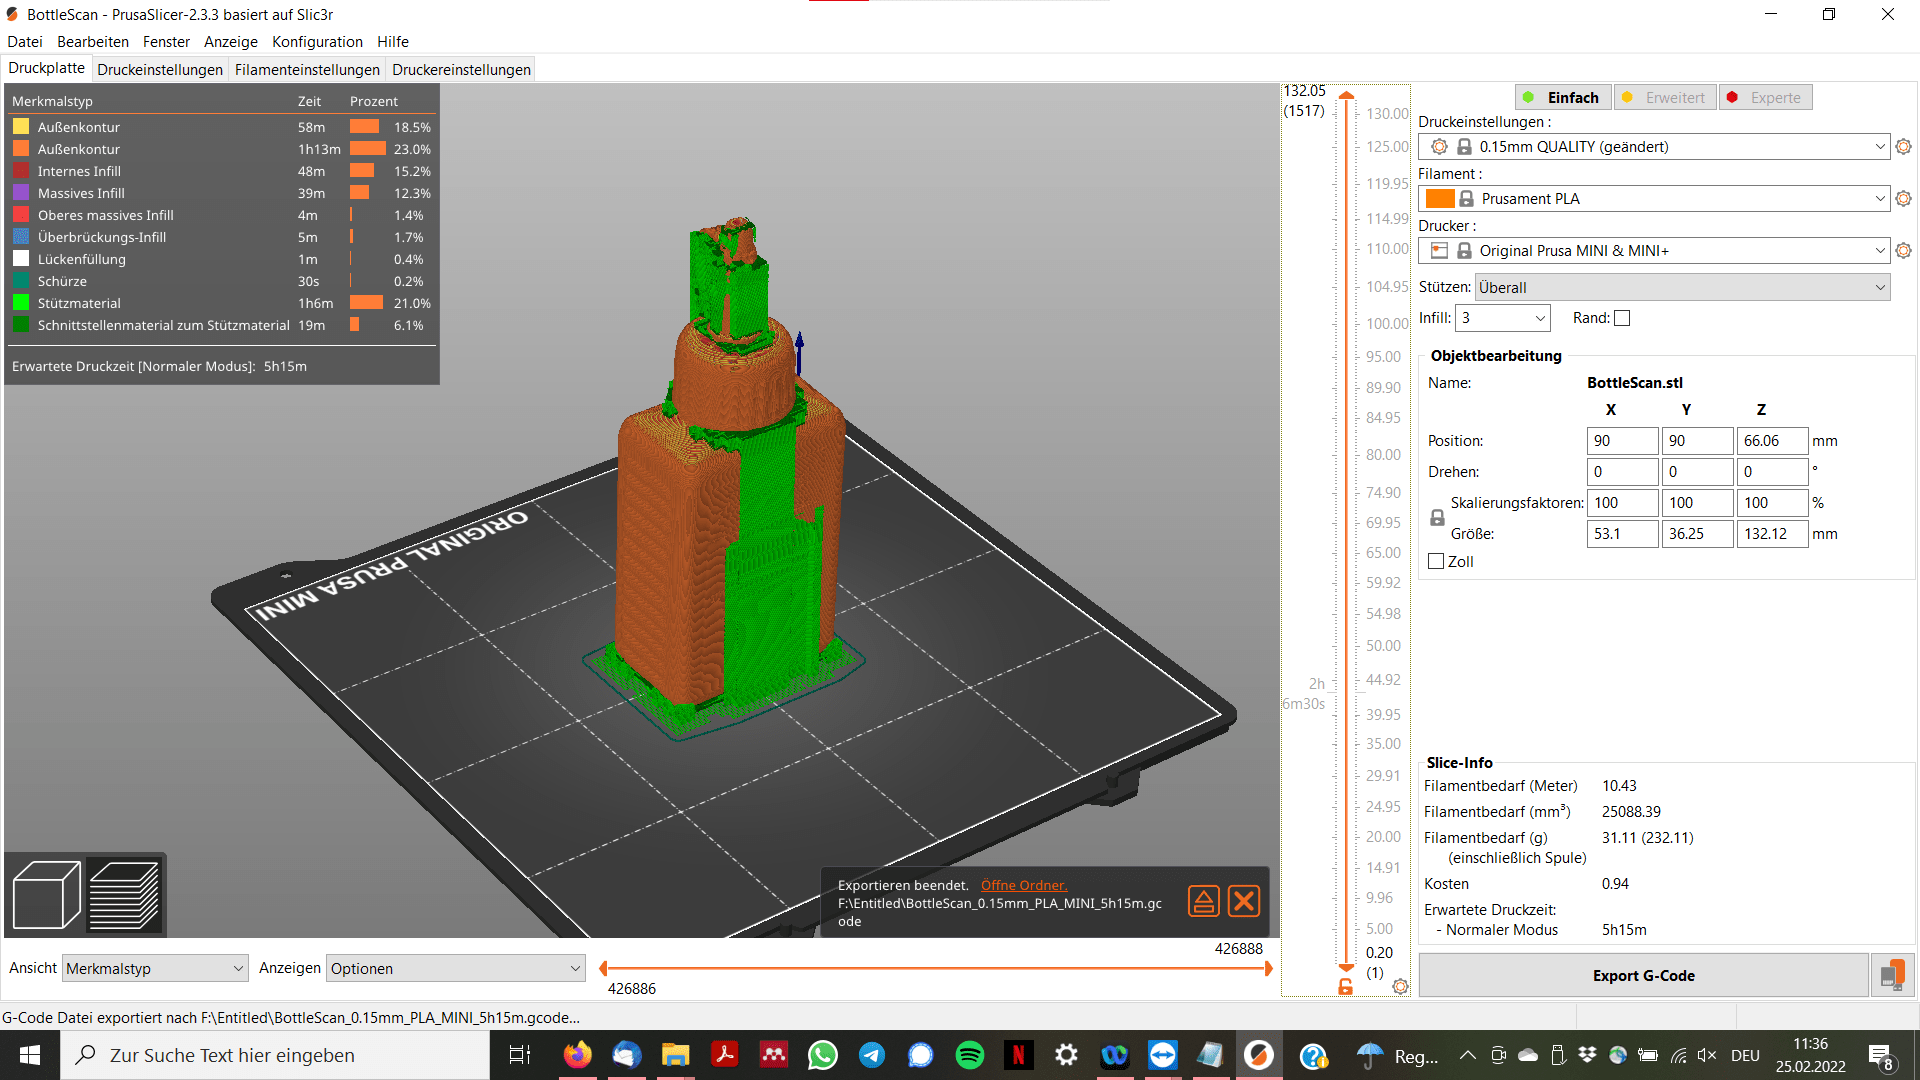
So I got back into Prusa and selected the print setting of "0.15mm quality."
Third Time's the Charm
This time, the print adhered well and I (along with my bottle) was off to the races.
Watching Carefully
I was sitting next to the printer the whole time it was printing, watching, waiting for an issue to arise...
Done
...but none ever did. The print finished successfully and was now ready for weeding.
Weeding
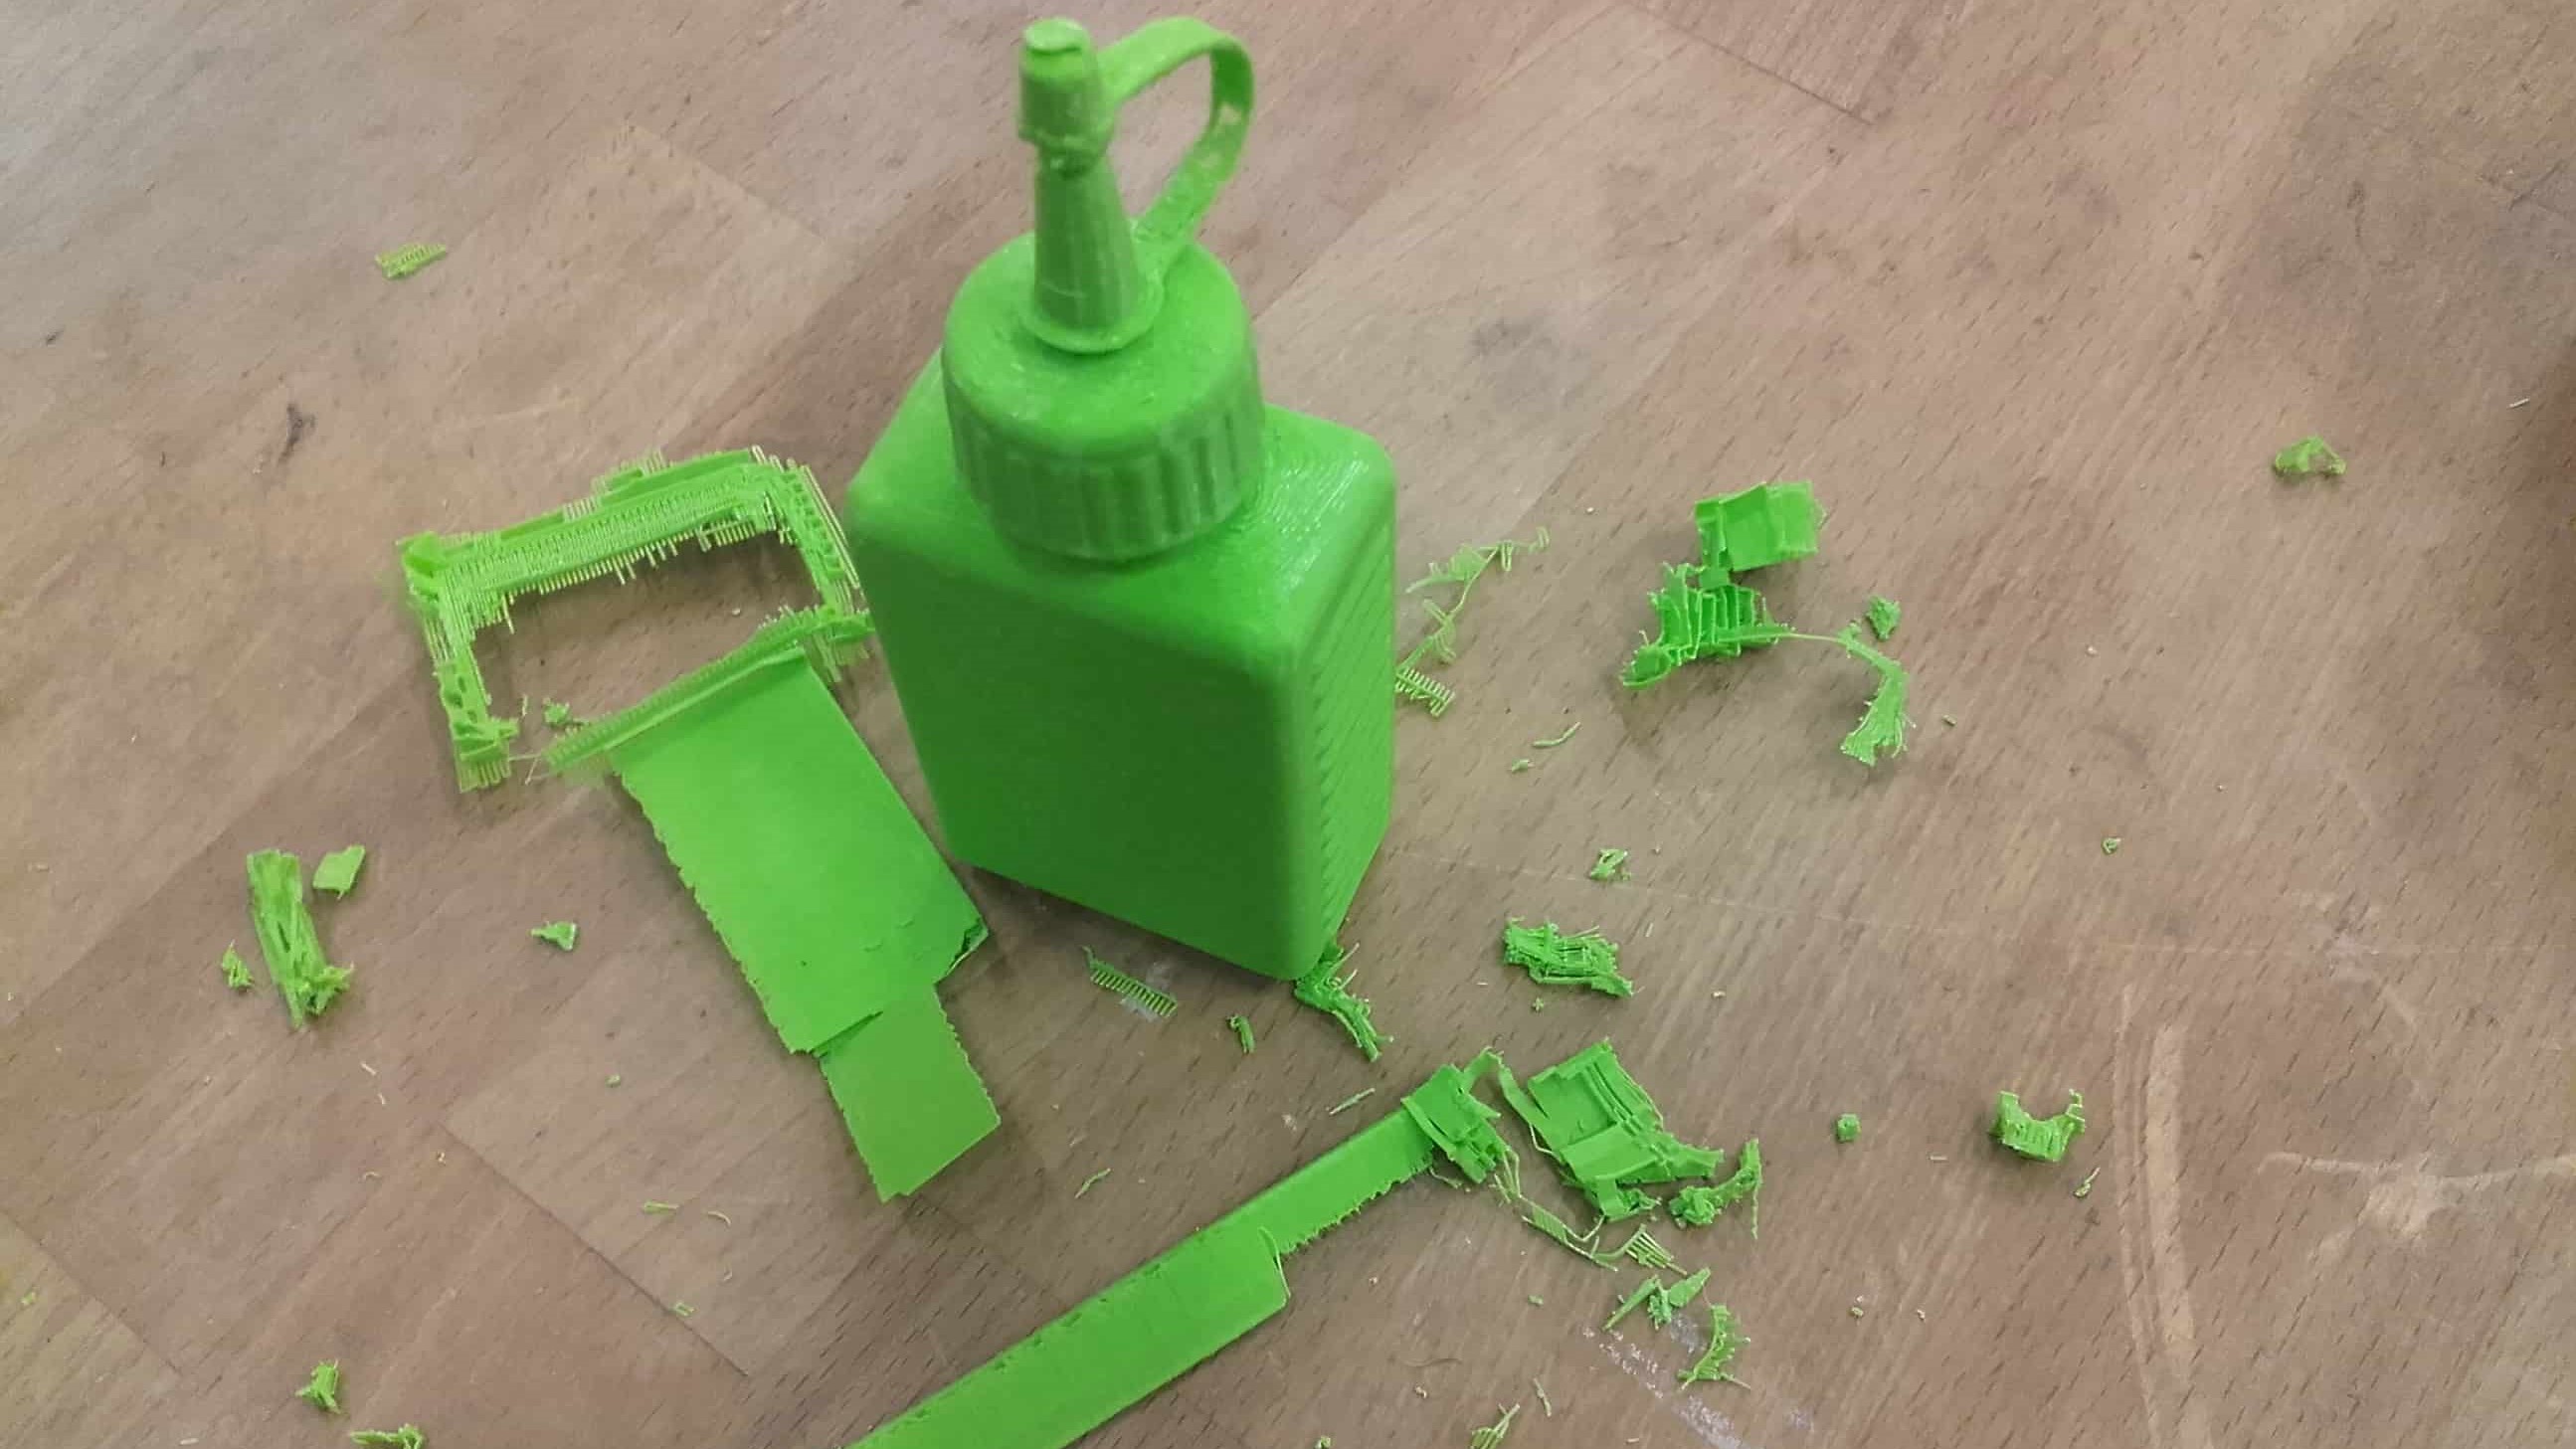
Next, I removed the support material. This was my first print with support material so there was a bit of a learning curve.
Don't Look Here
I didn't realize how well the supports were actually bonded to the print, so I slightly damaged the thin section on the cap while removing it all.
Or Here
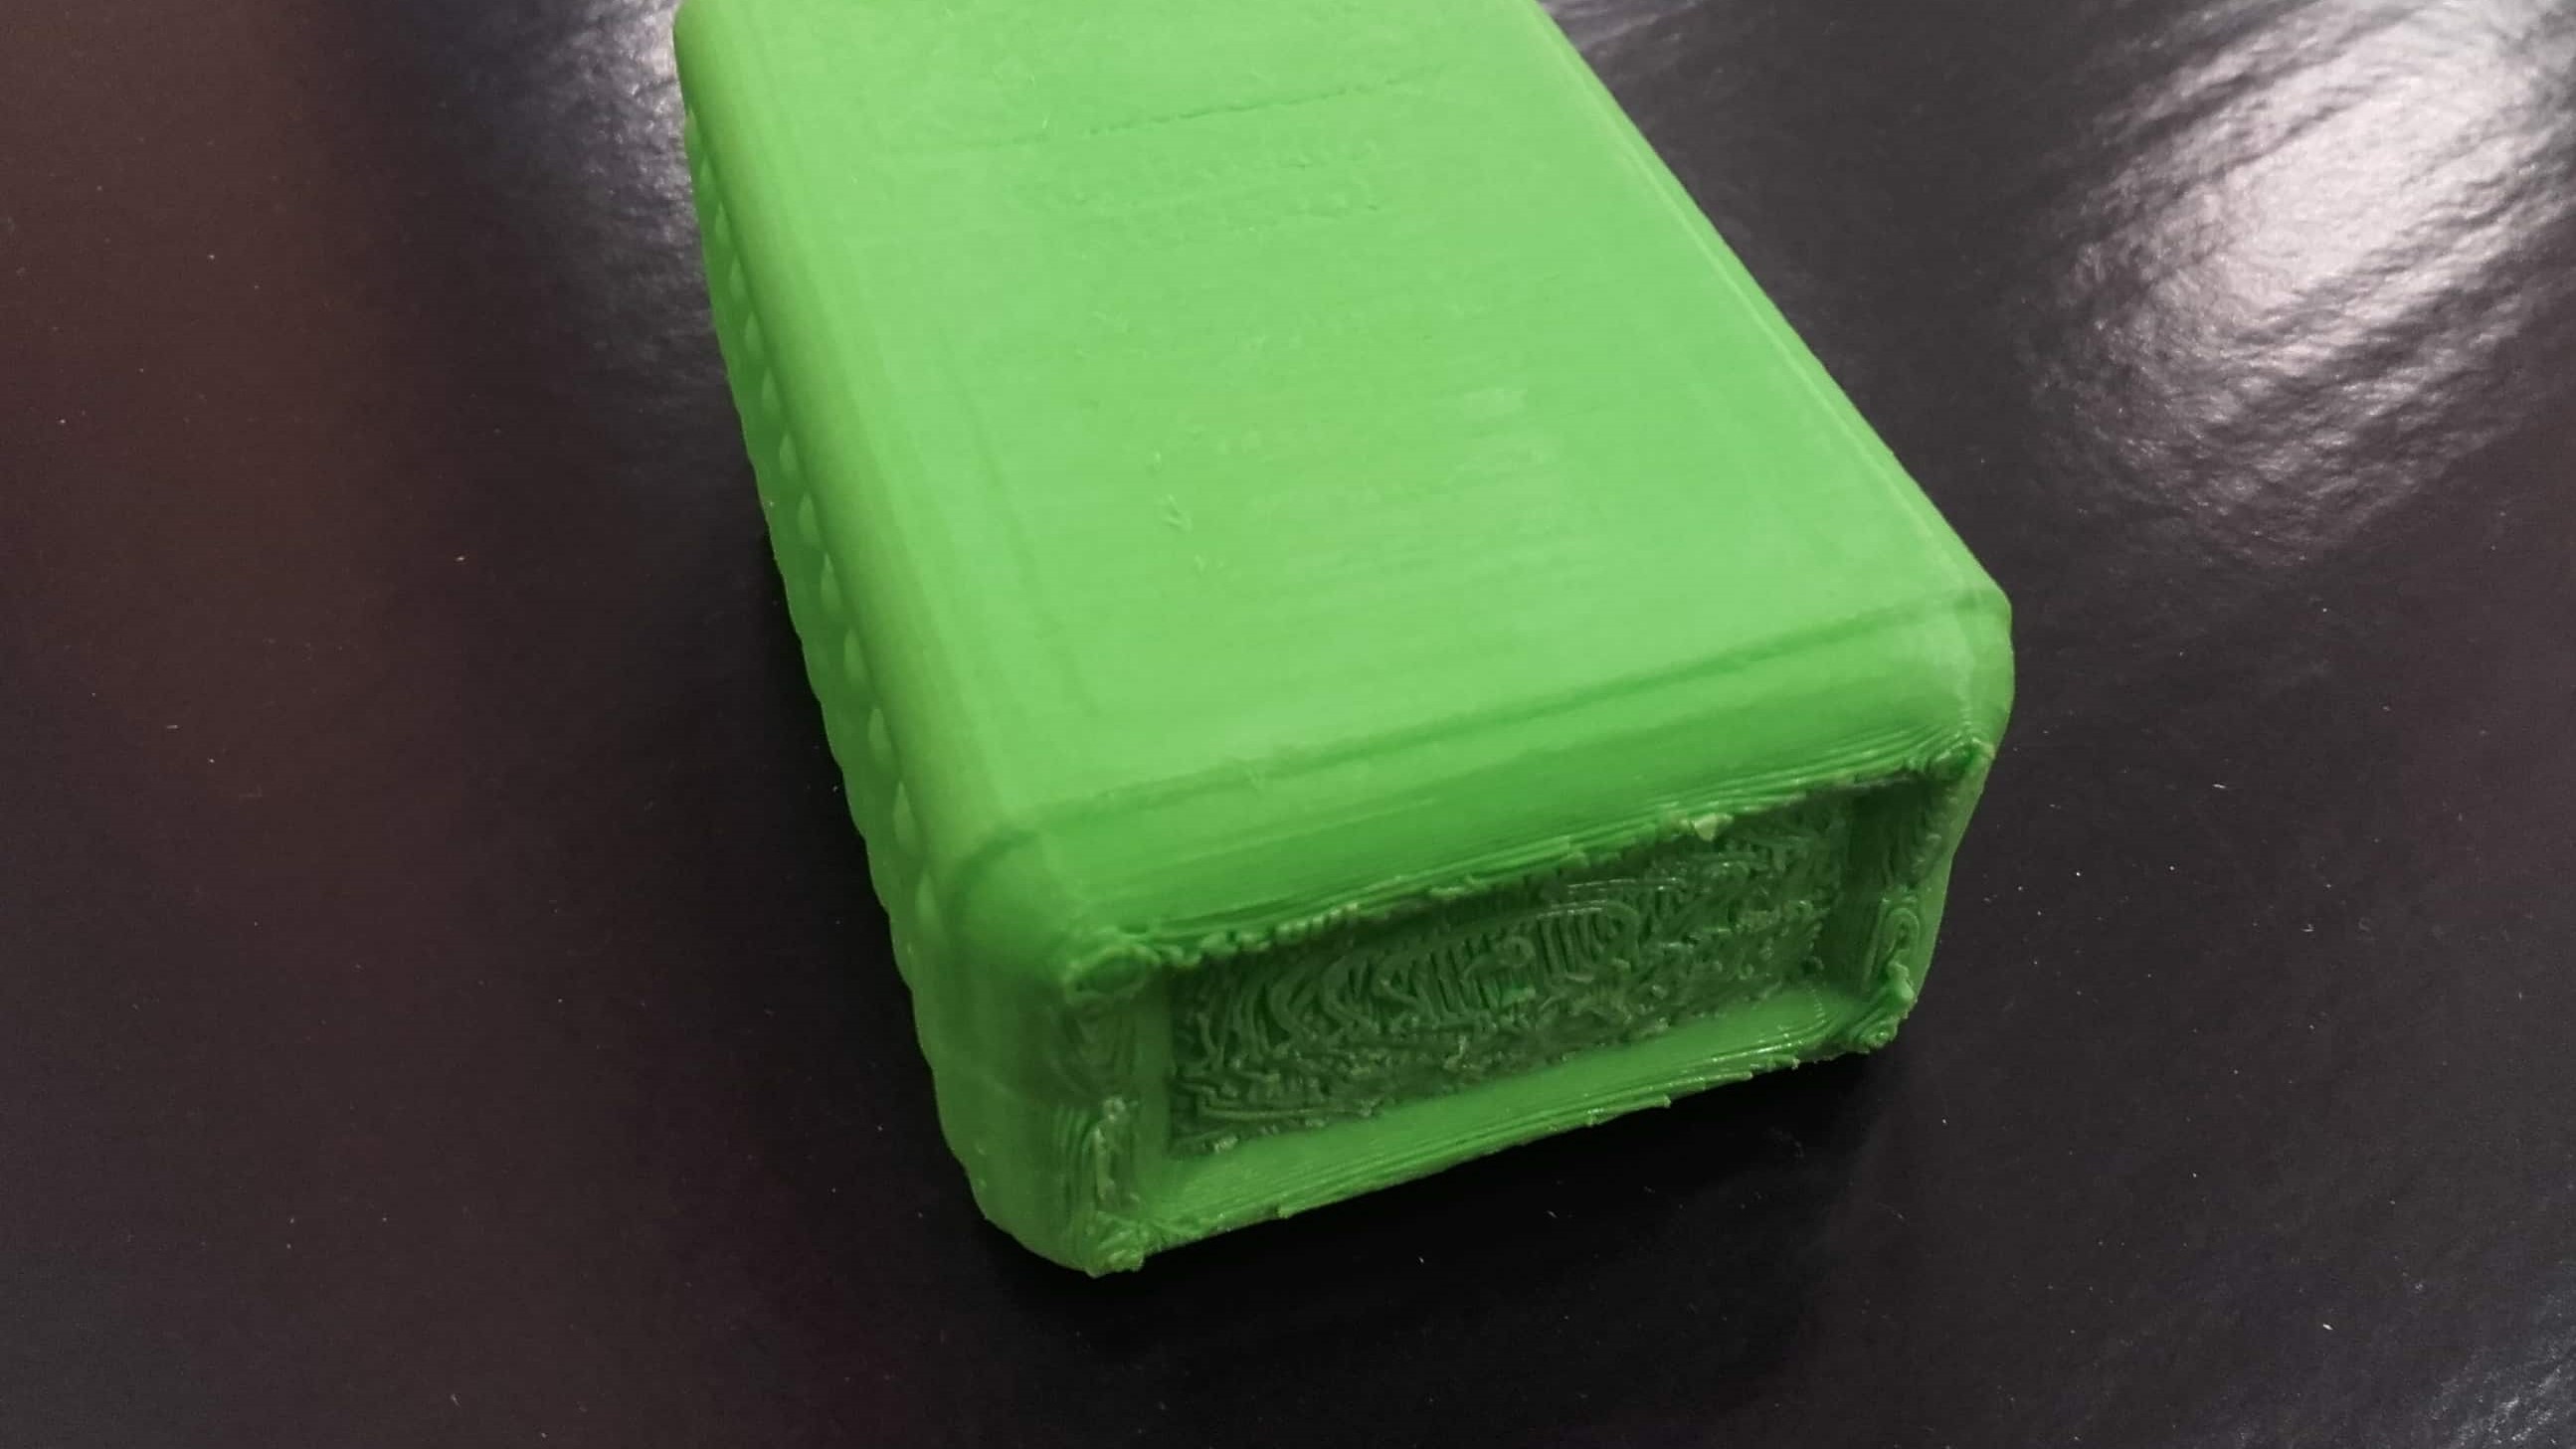
Also, the bottom didn't turn out so nice, but I don't think it was reasonable to expect much from such strange surface geometry.
Fin
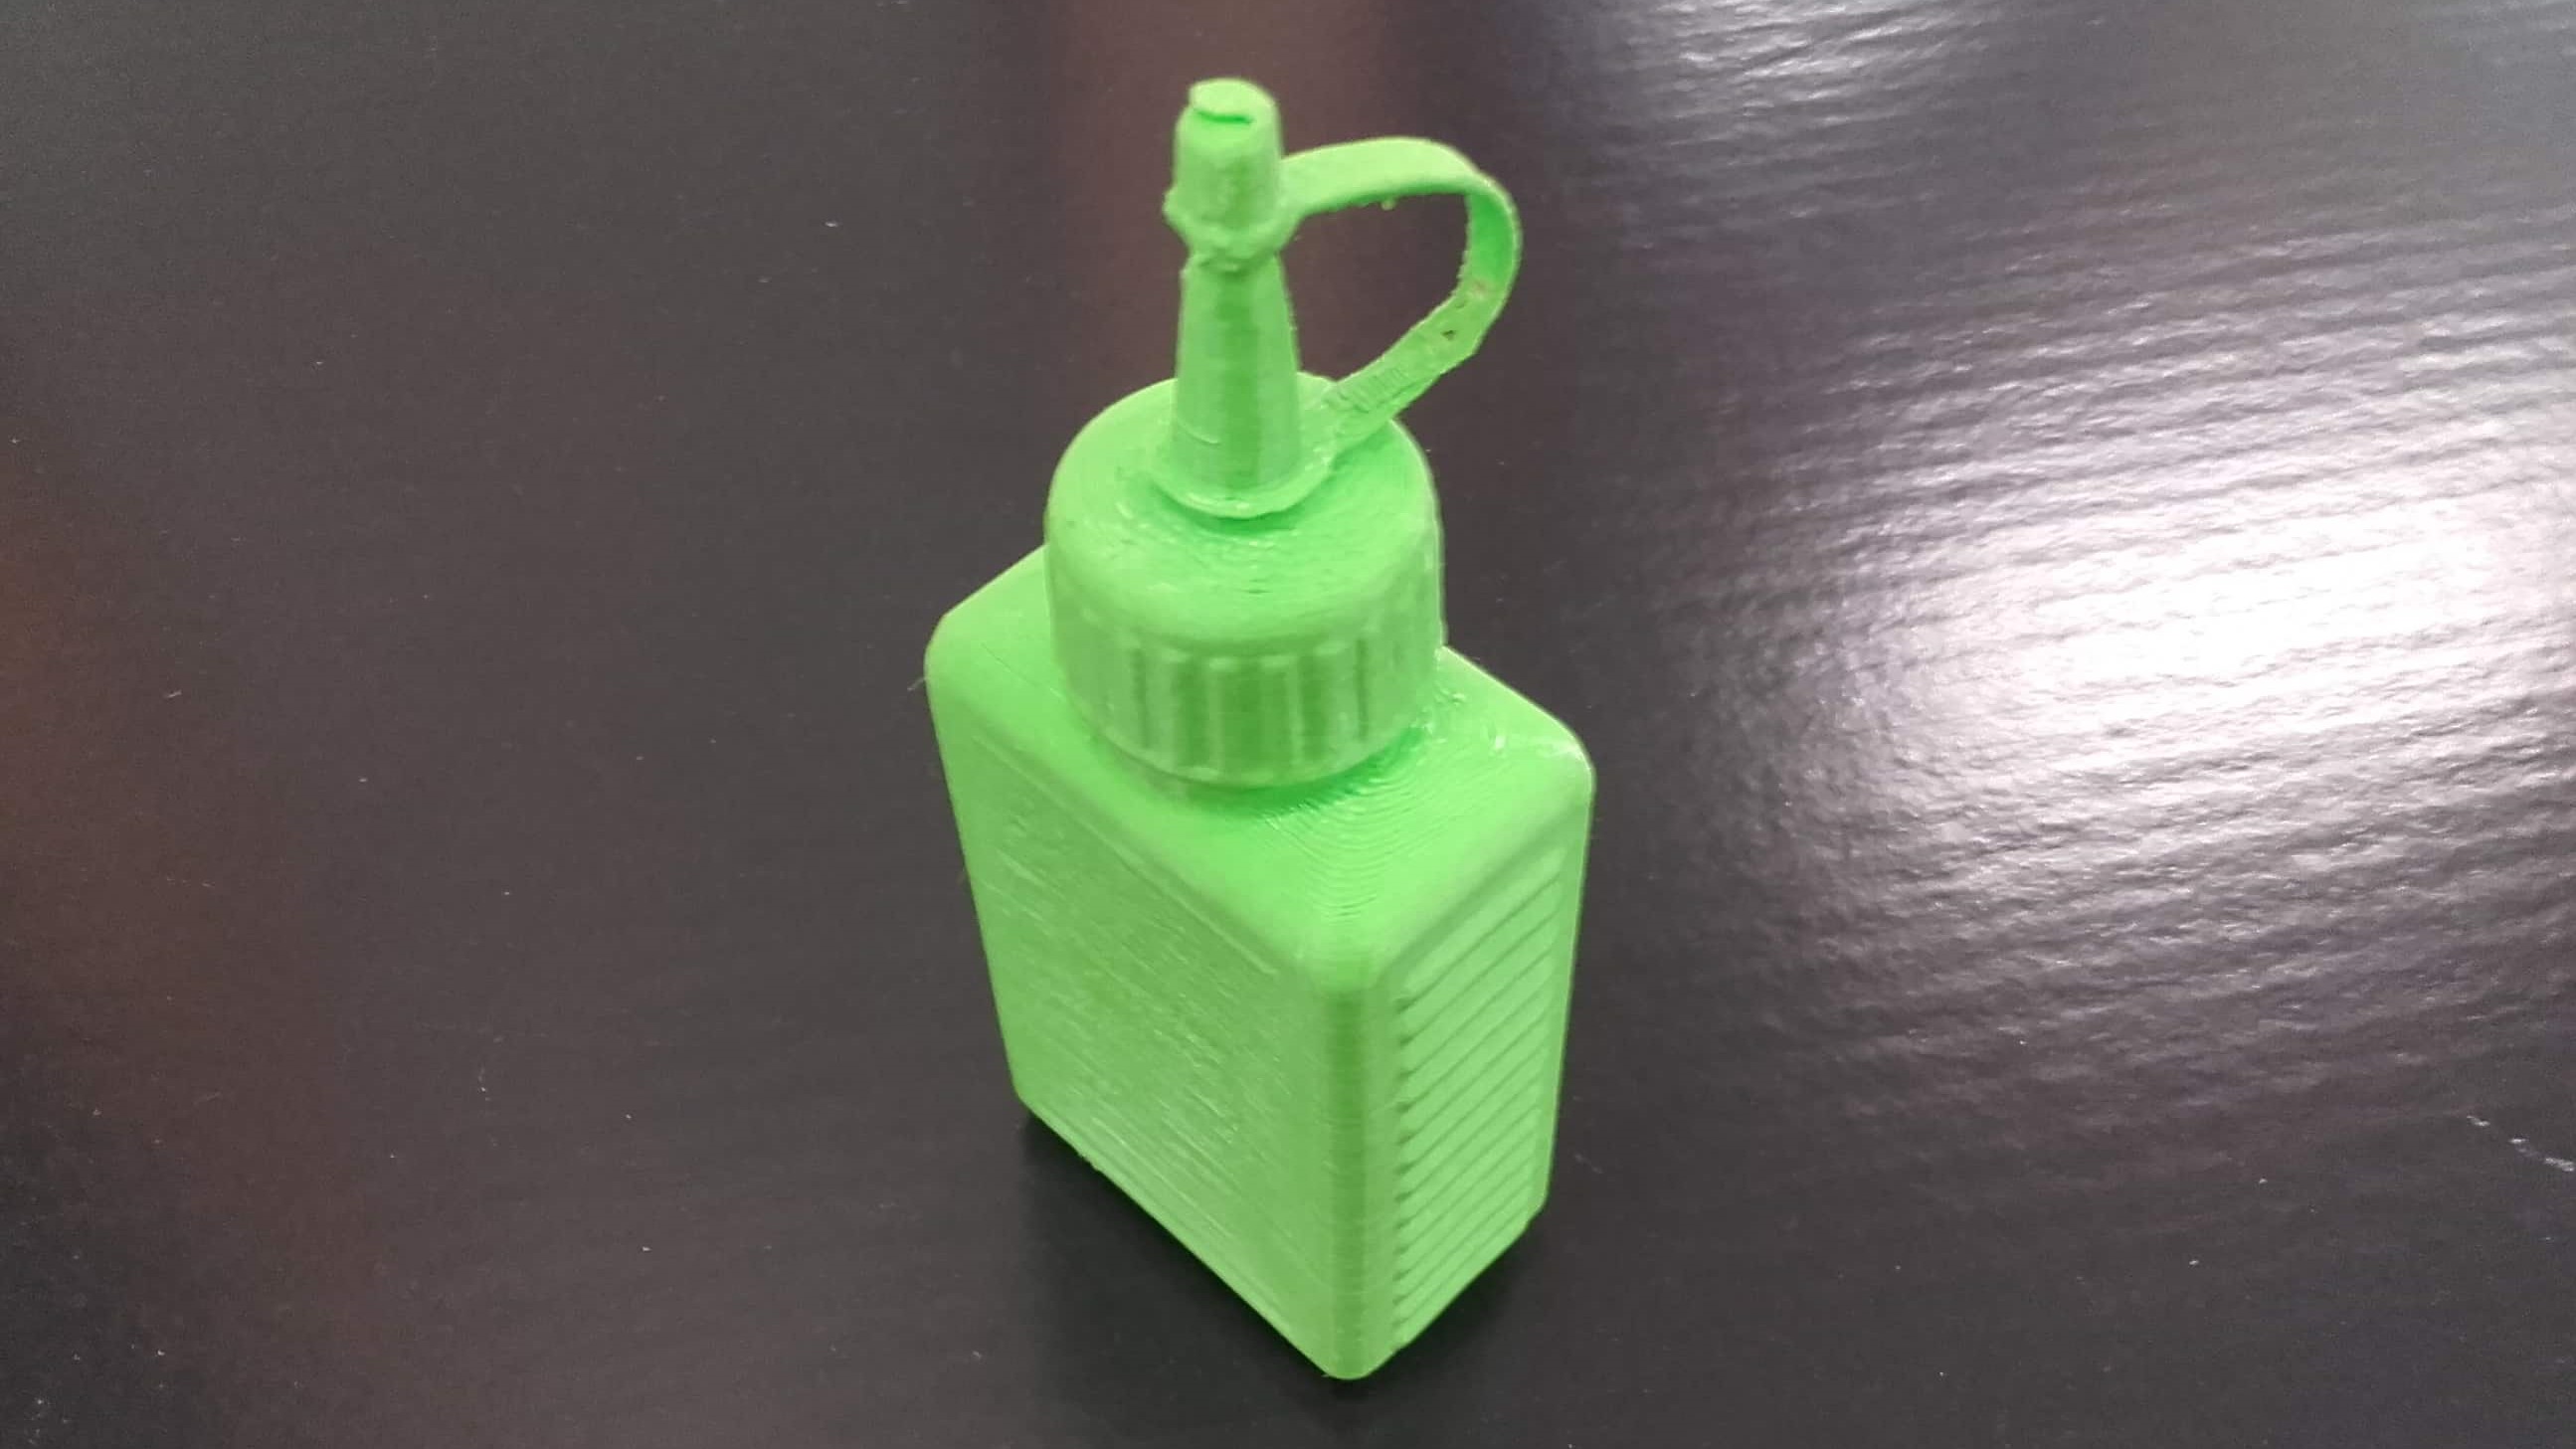
I think it came out great overall (although this is a truly terrible color 😂). I am surprised how well the 3% infill worked too. I will have to use that gyroid pattern again; it seems to offer more support than the grid I usually use. Also, I am pretty pleased with using the Prusa. My previous experience is with the Ender 3 so it was nice to get some face-time with a new toy.
My Submission
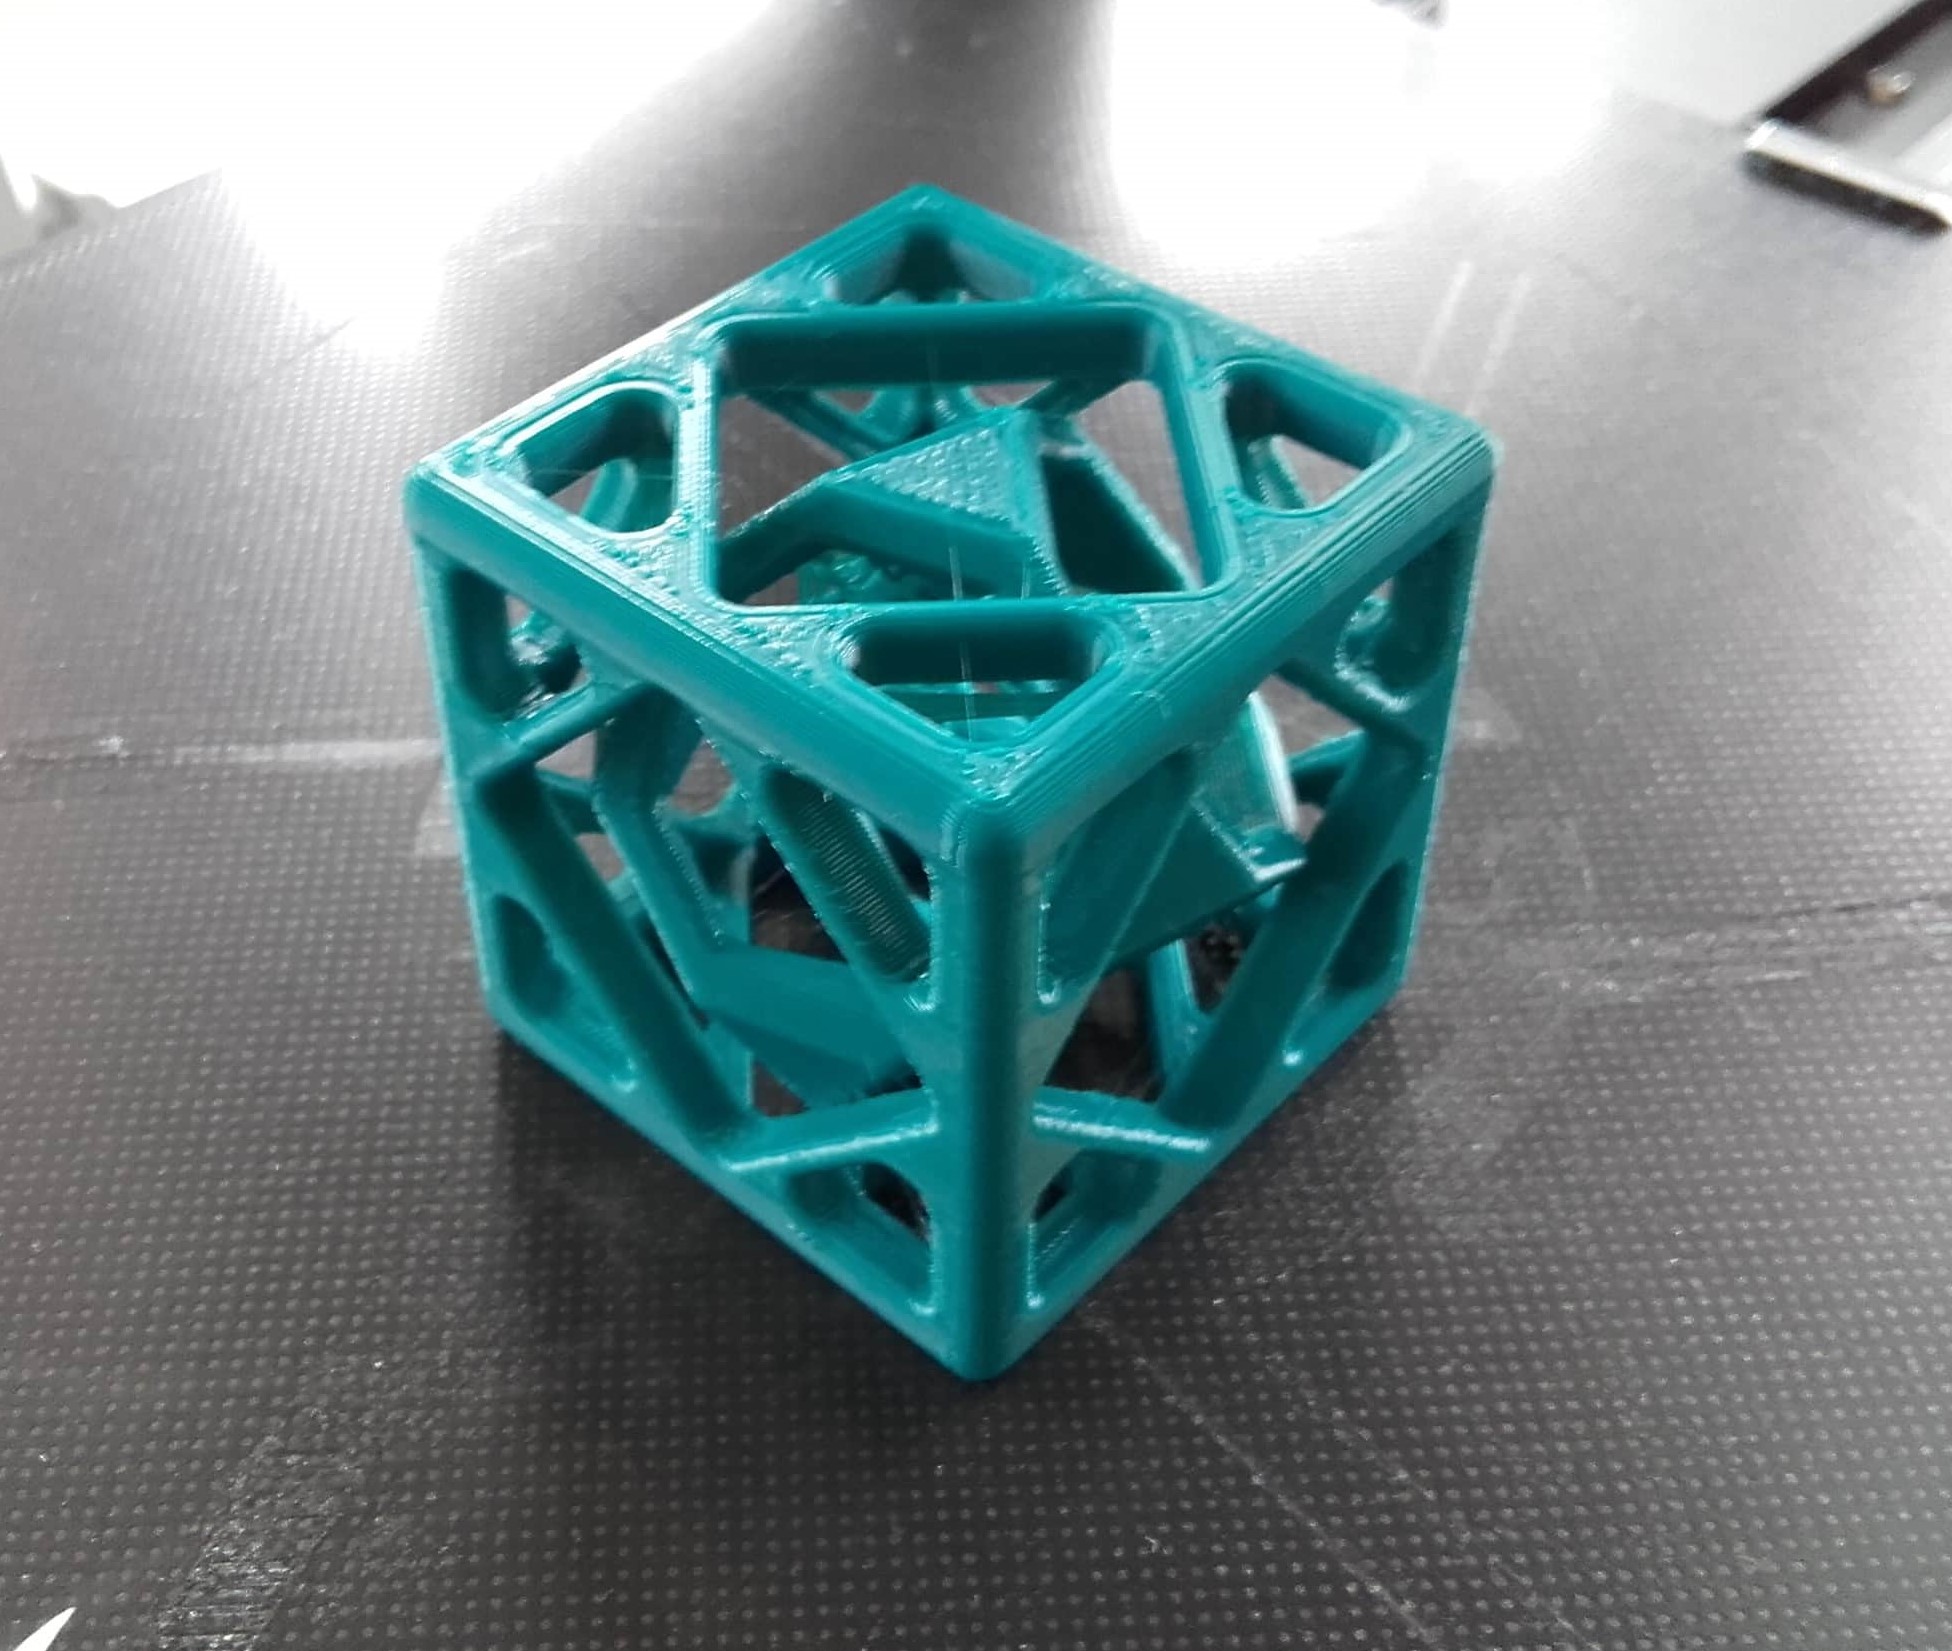
Cube in a cube
New Design
For my "object that can't be easily manufactured using subtractive methods," I decided to make a small hole-y truncated cube inside another slightly larger hole-y truncated cube (just come along for the ride, you'll understand soon enough. Hey Anja! 🤣🤫). As usual, I began in SolidWorks with a sketch for the outer cube.
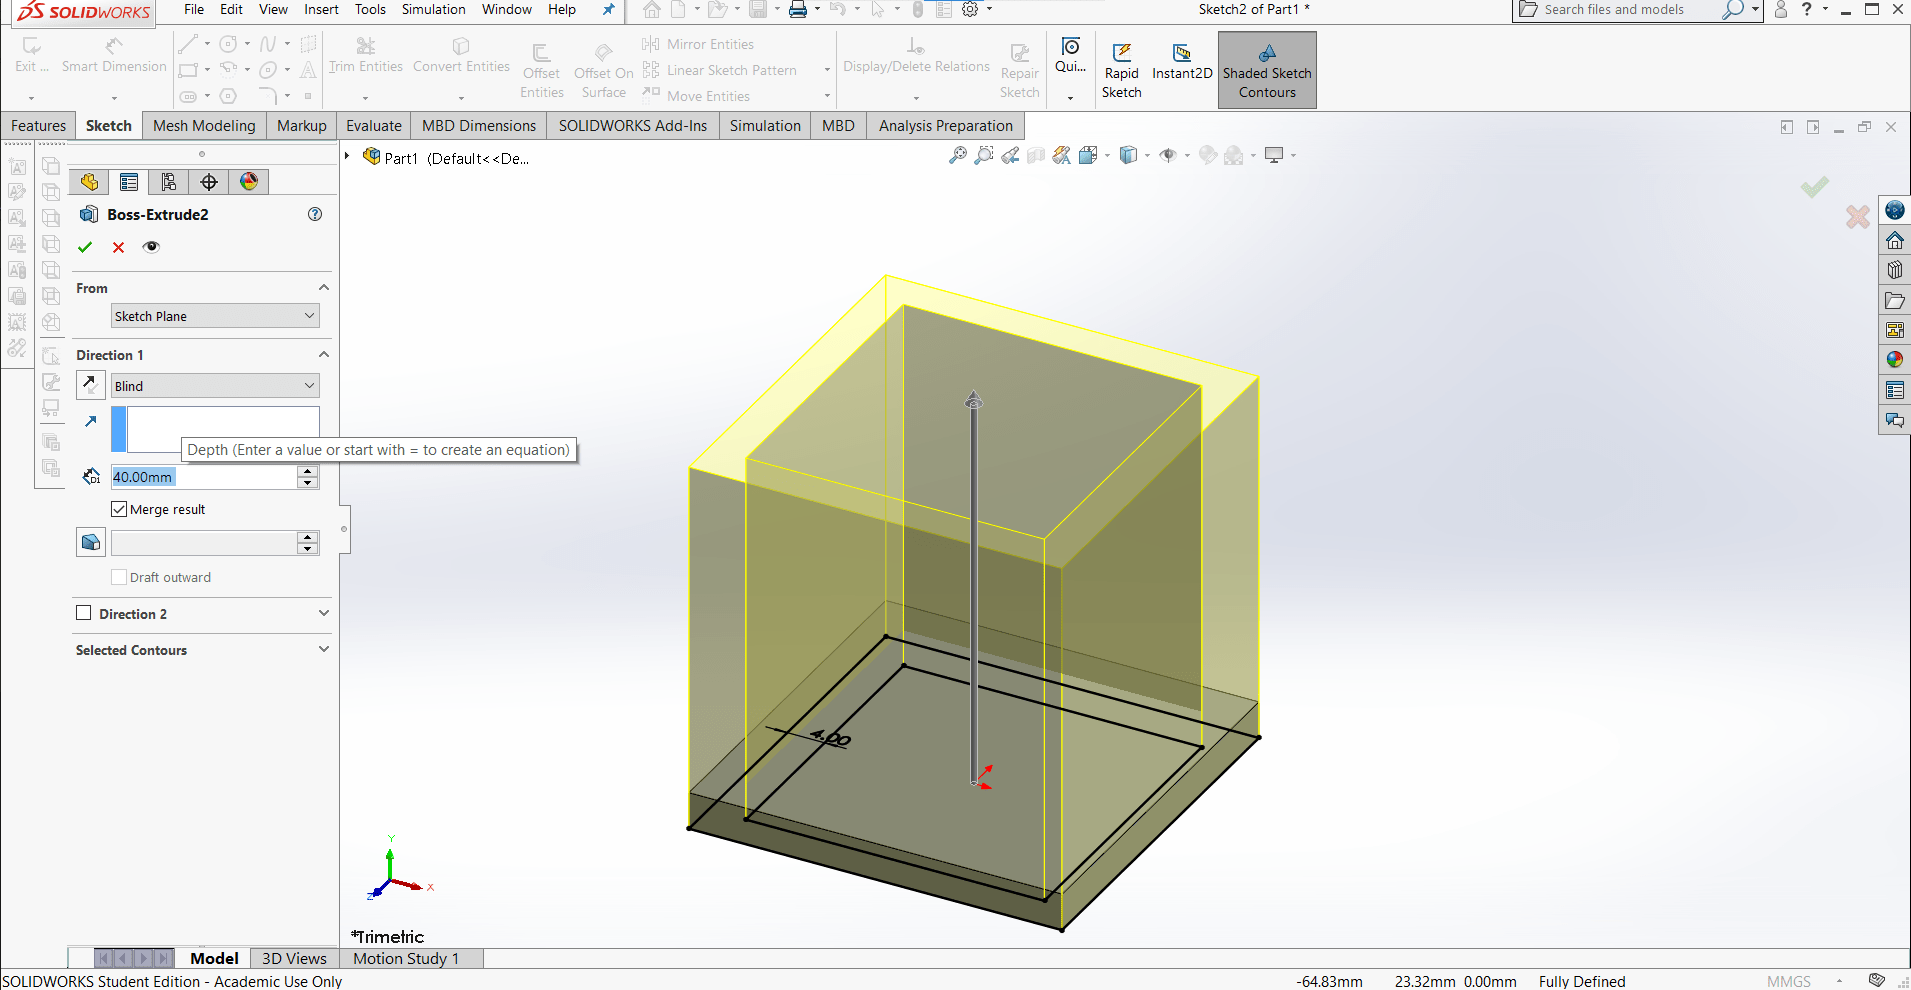
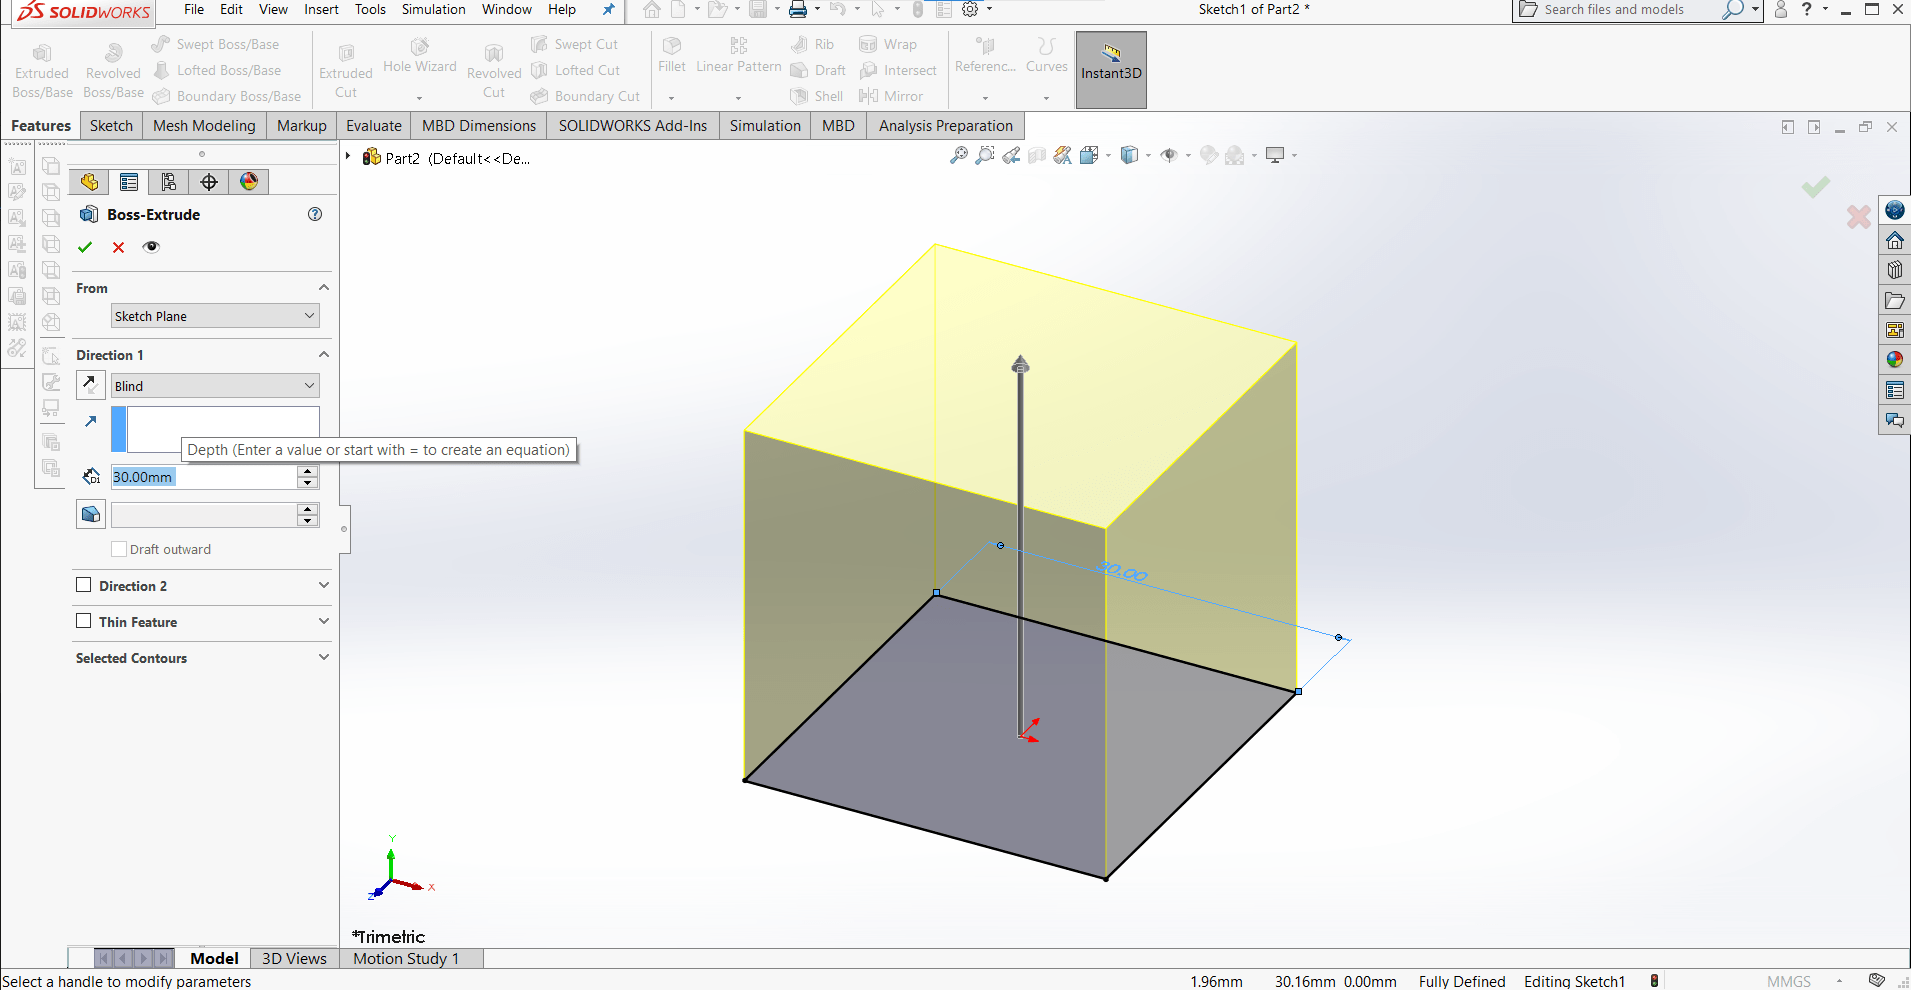
Extruding

I decided to make the initial cube by extruding the bottom...
Walls
...the walls...
Top
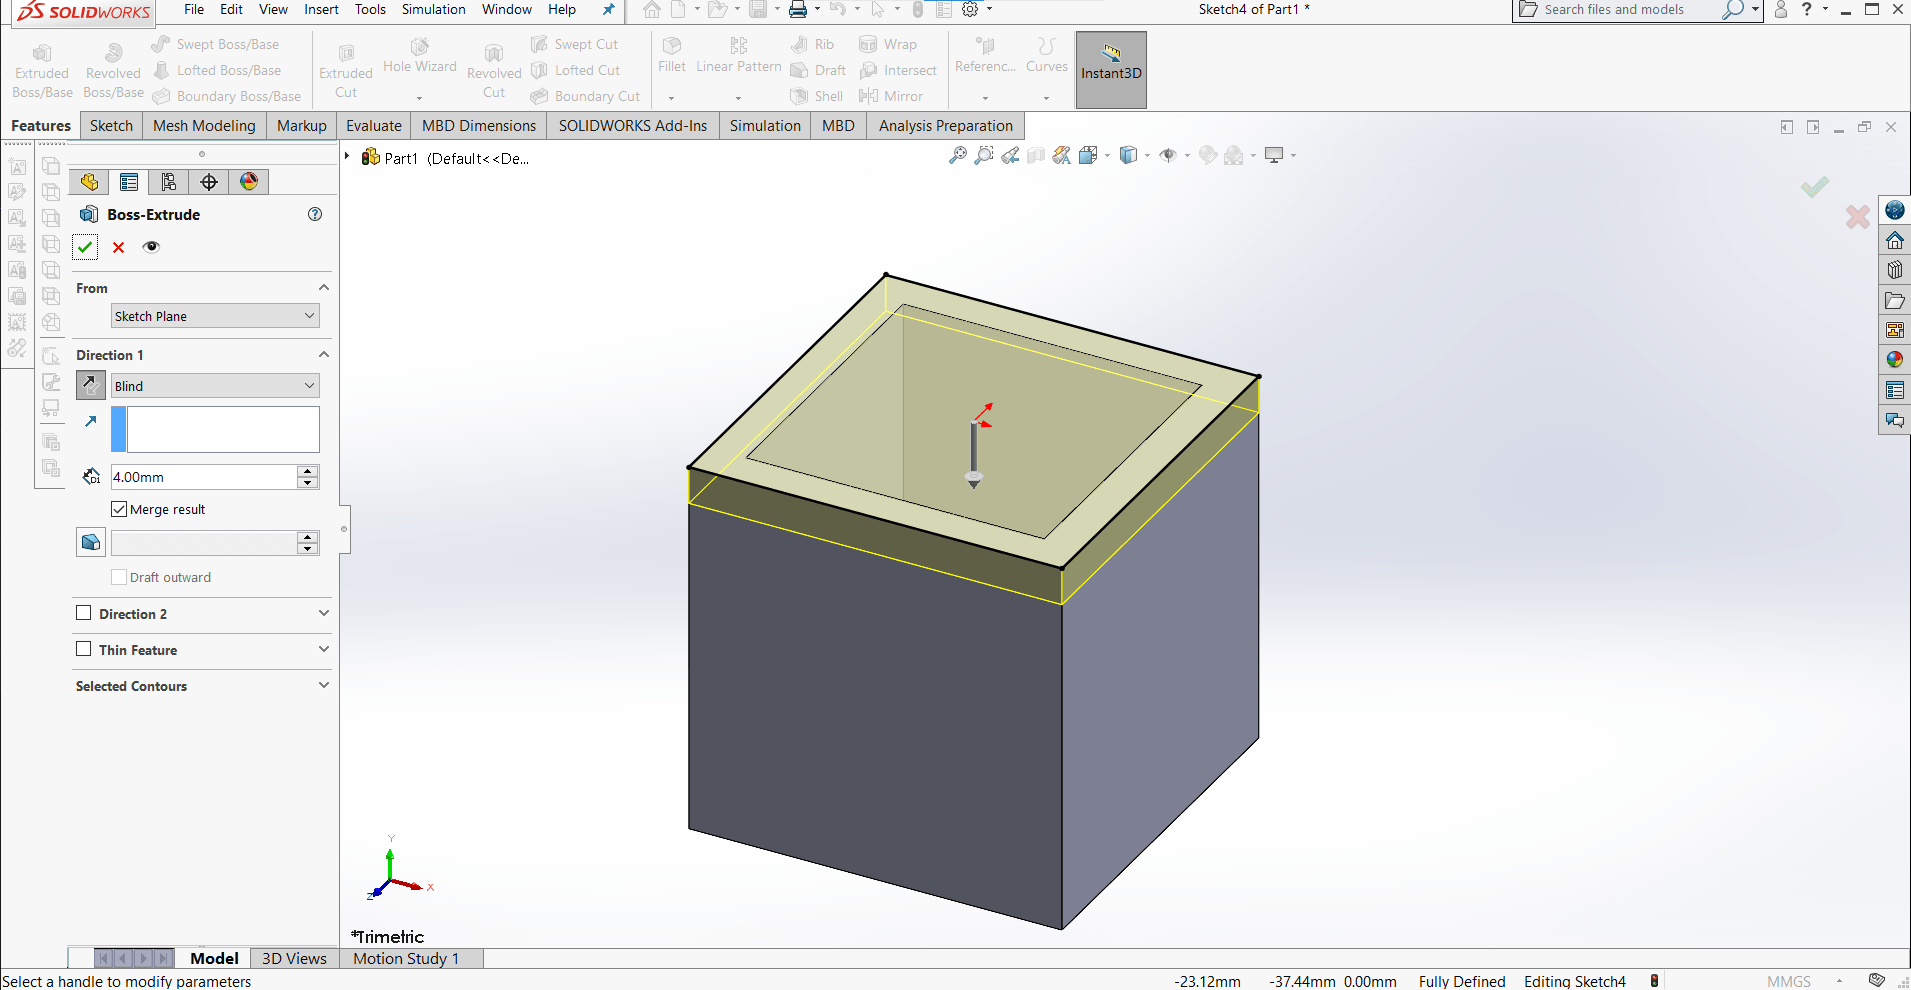
...and the top, all 4 mm thick, with outer dimensions of 40mm3.
New Sketch
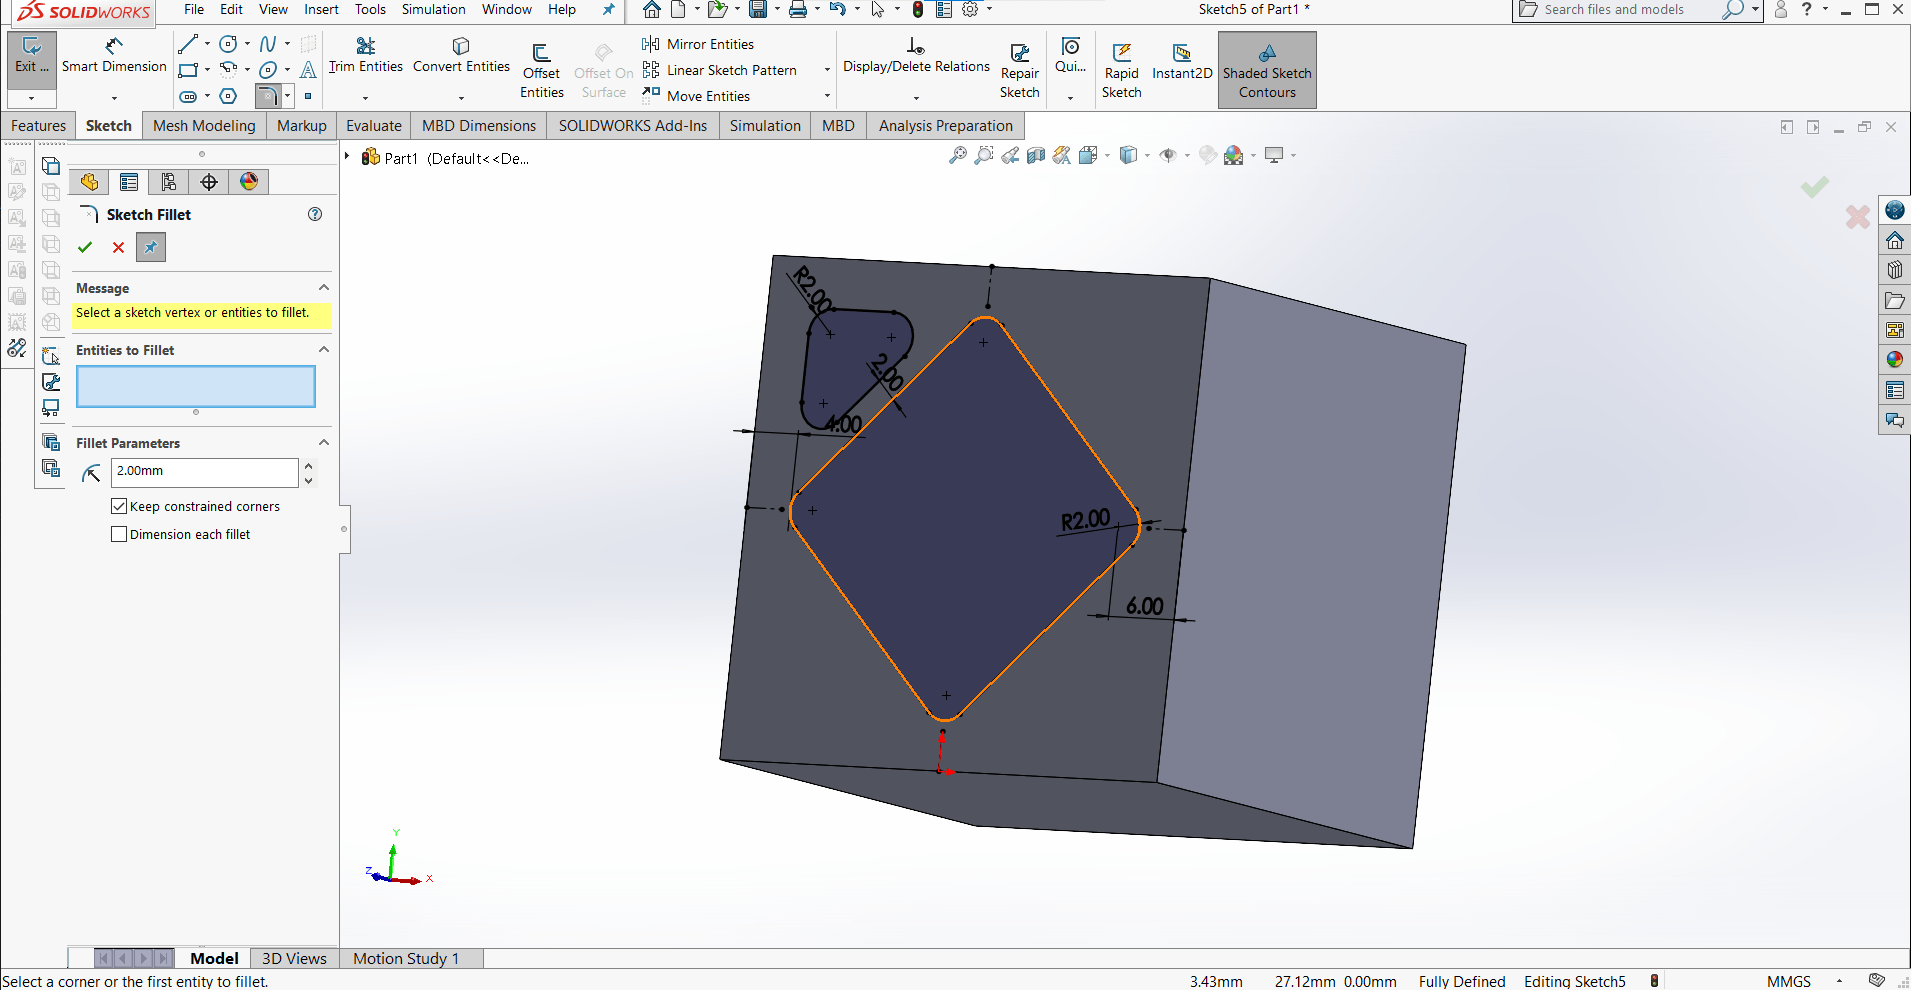
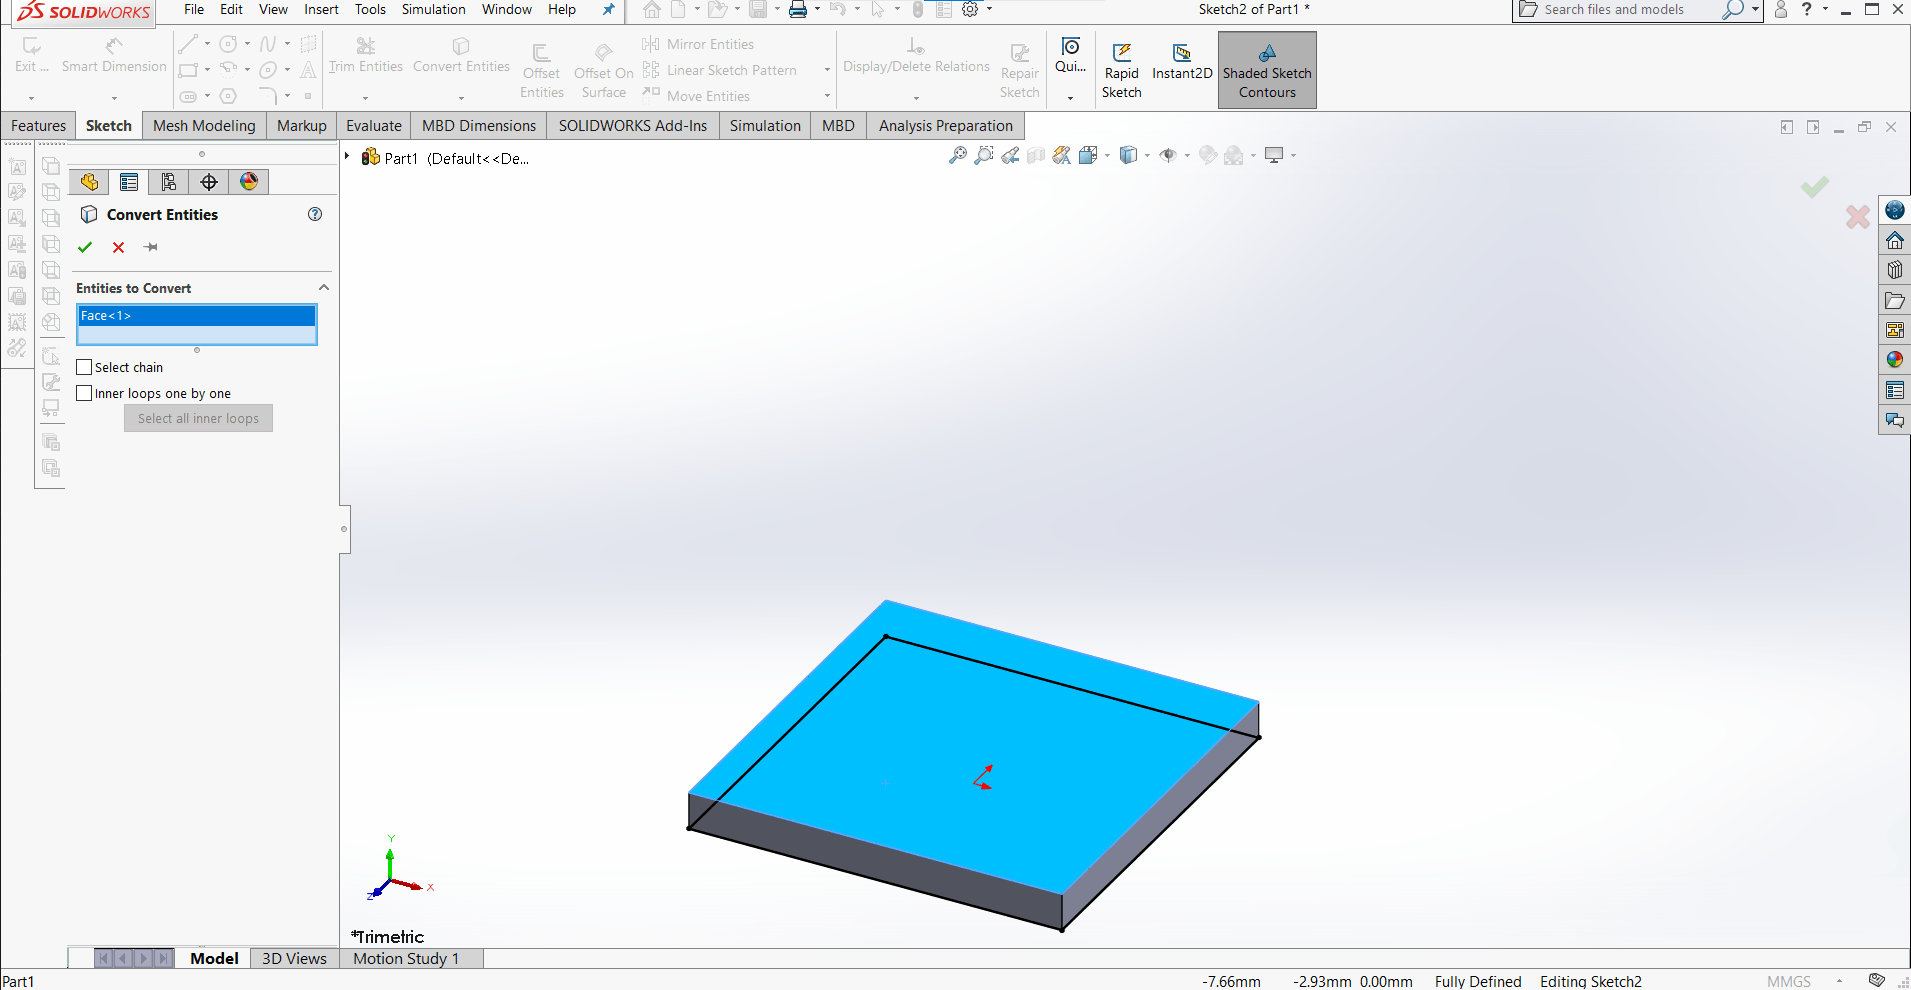
Next I chose a face at random and began the sketch that would define the material to remove (making it a hole-y cube, instead of just a cube)
Mirror
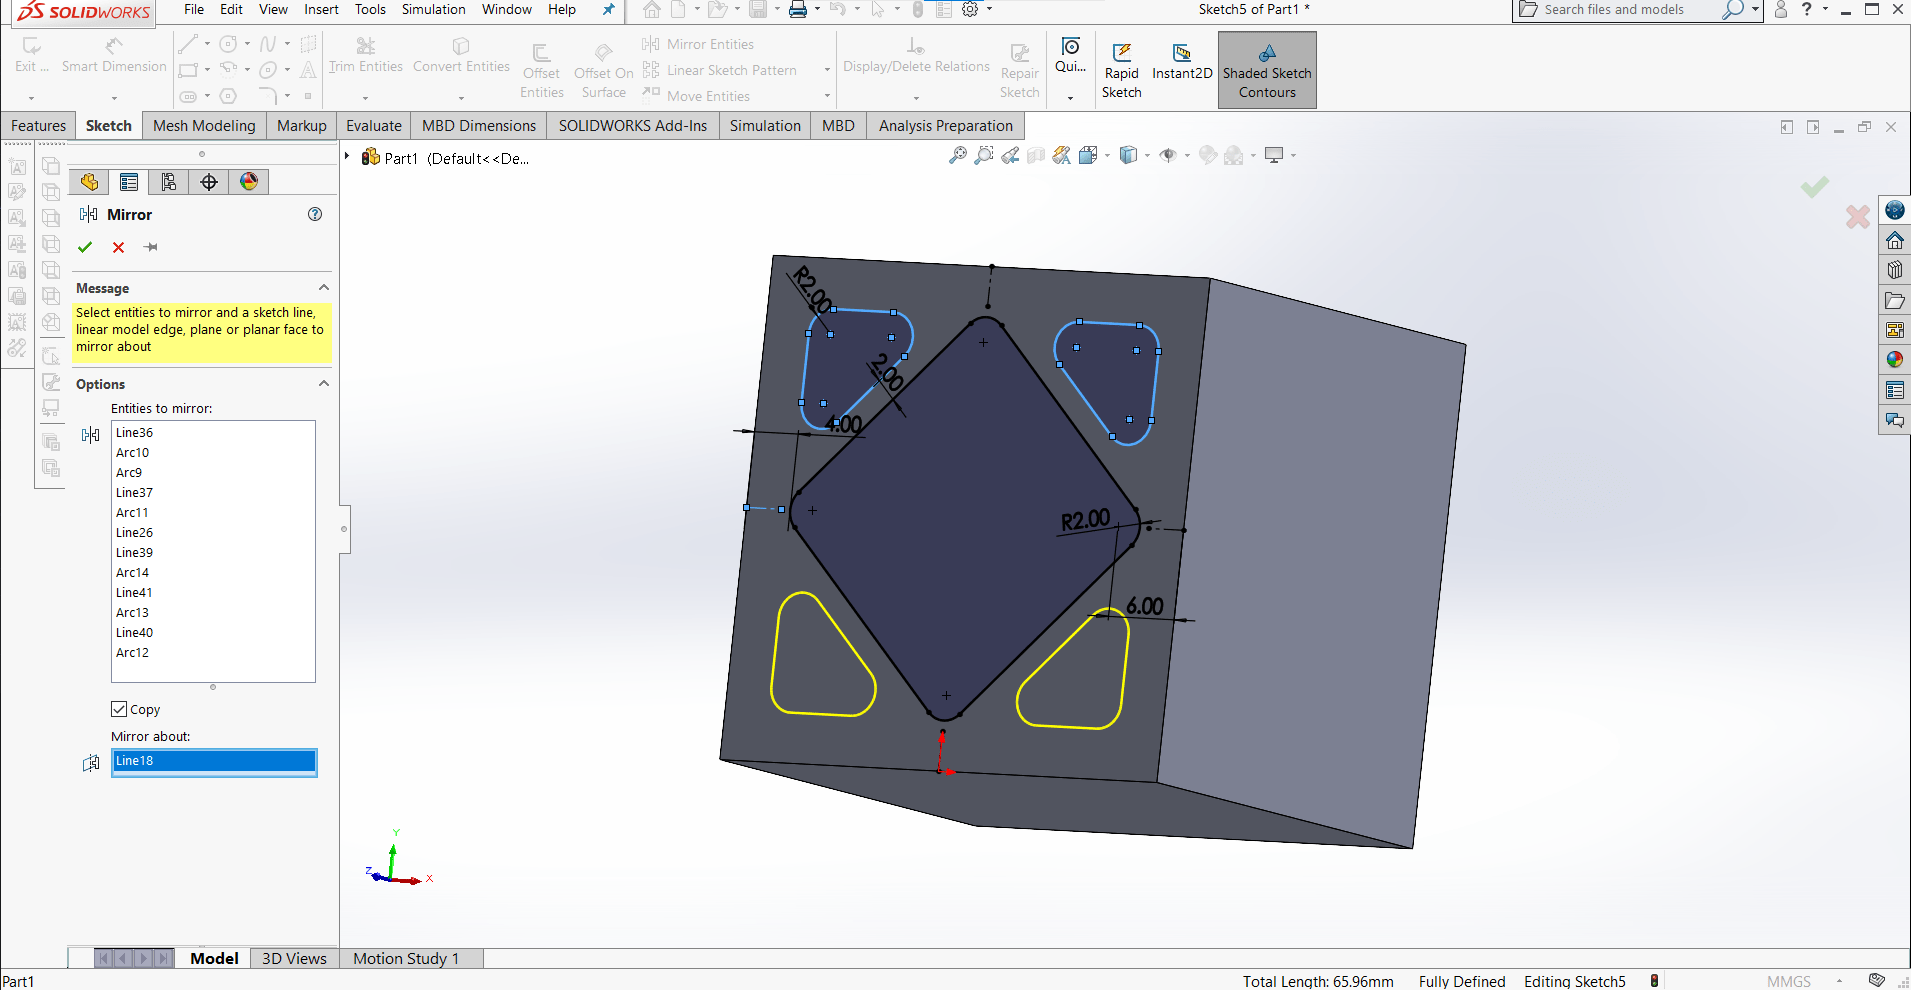
Then I used the sketch Mirror tool to add the feature to the other corners as well.
Extrude Cut
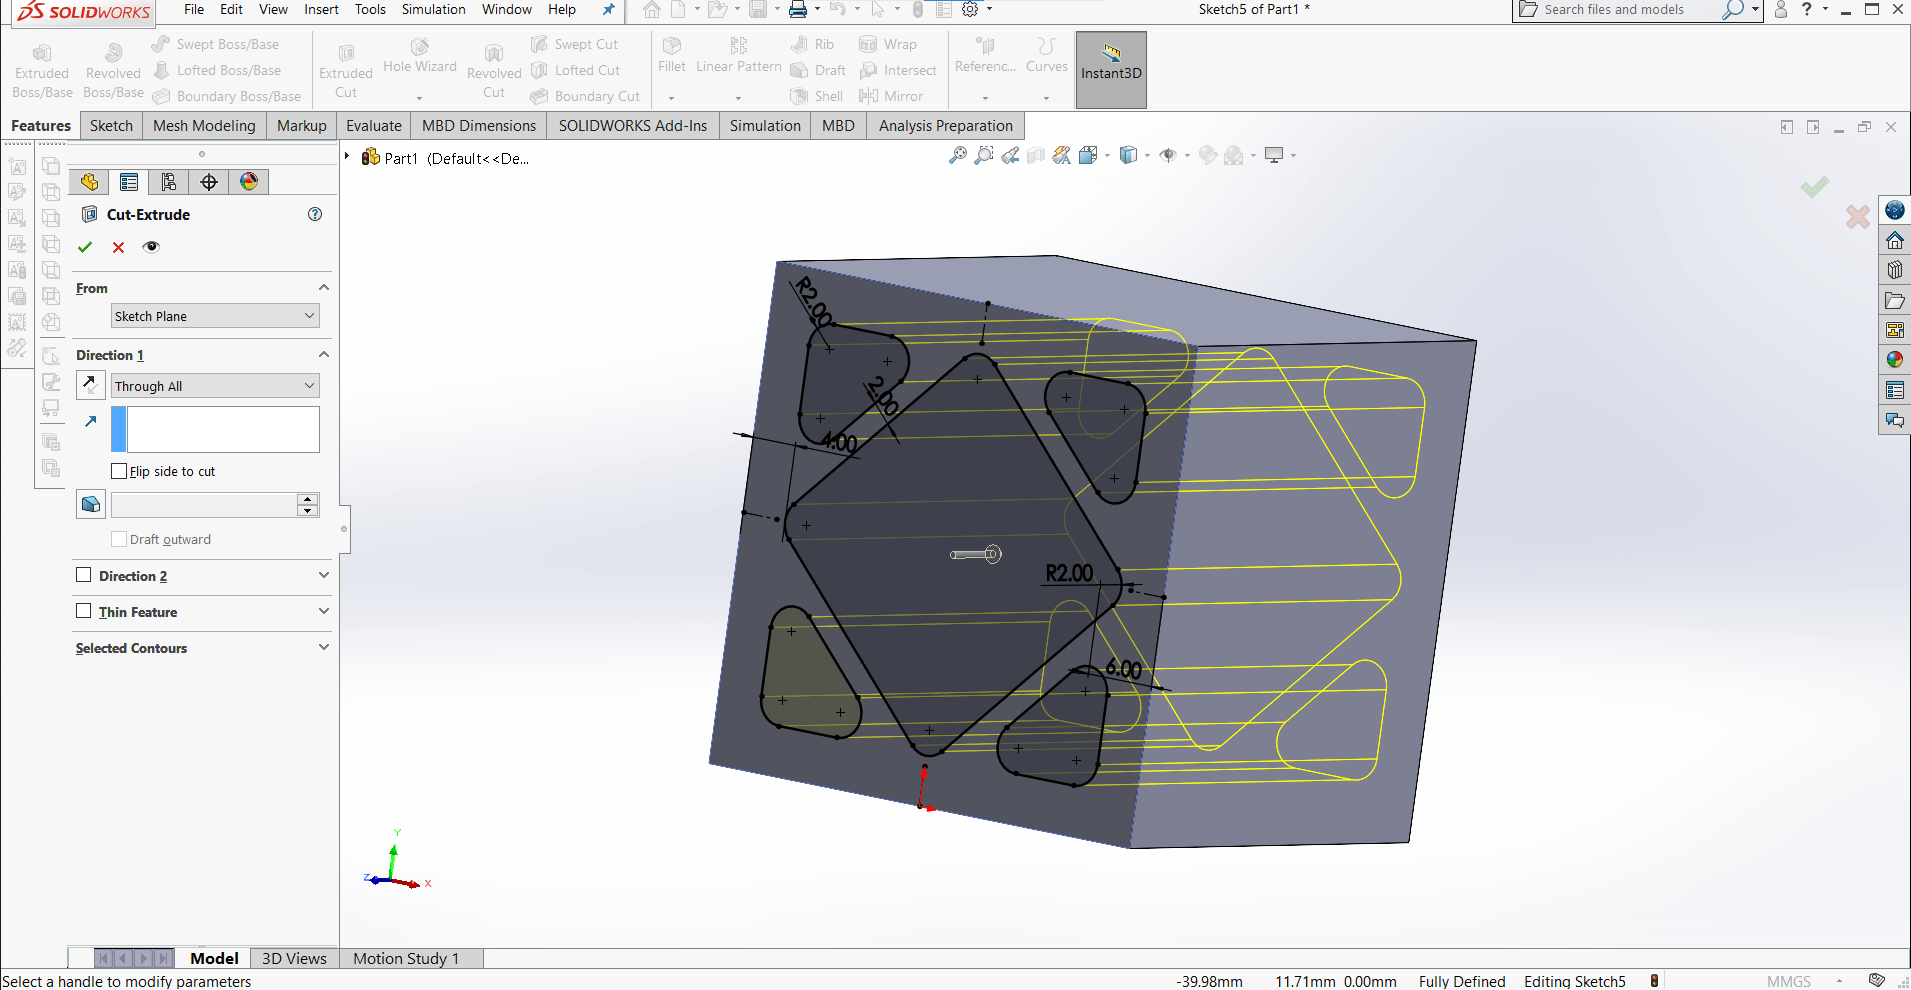
Once I had the sketch as I wanted, I cut it out using the Extrude Cut tool. My plan was to only make one quarter of the sketch and then to mirror it, then to copy the sketch and repeat the cut two more times in the other dimensions. I used one of my favorite tools for this kind of thing...
Make Block
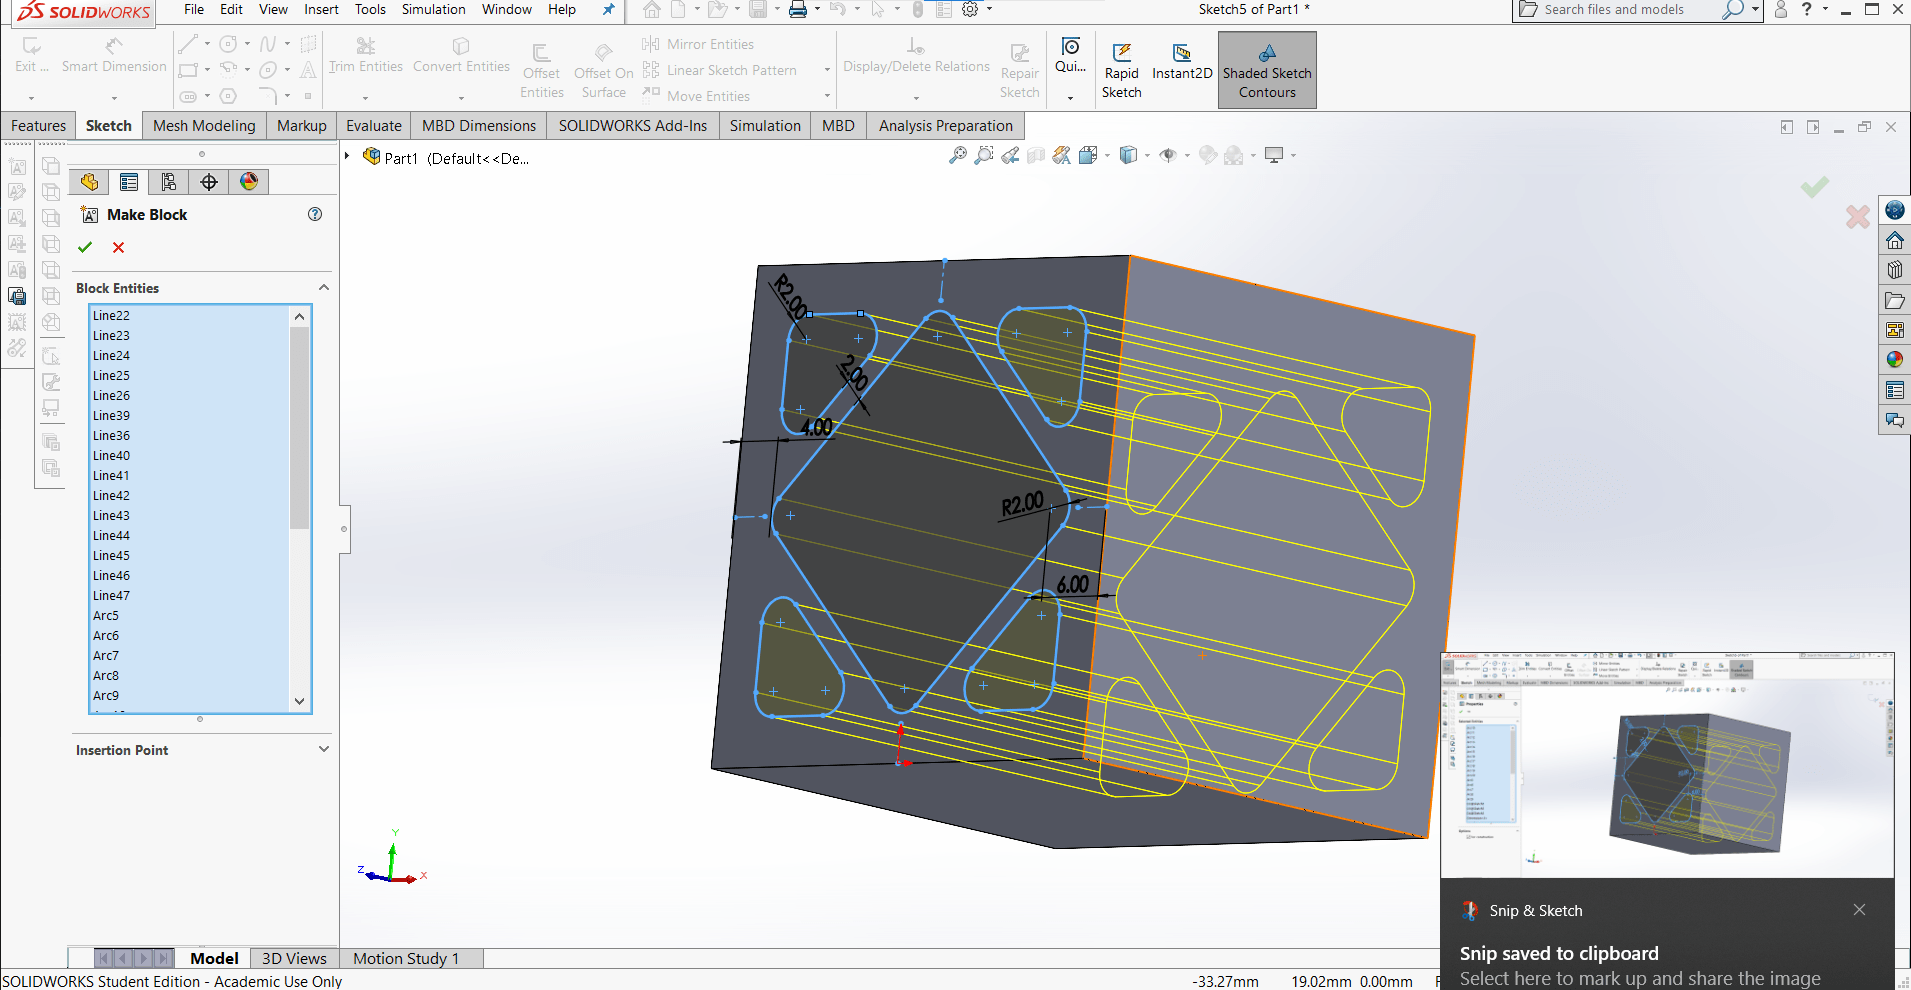
... select a sketch (or any part of one) that you want to copy and paste, right click and click Make Block. This will group all of the lines and associated relations and dimensions into one group that can be easily inserted into other sketches. Very handy!
Holiness
Then I inserted the block onto the other two planes and extrude cut them as well.
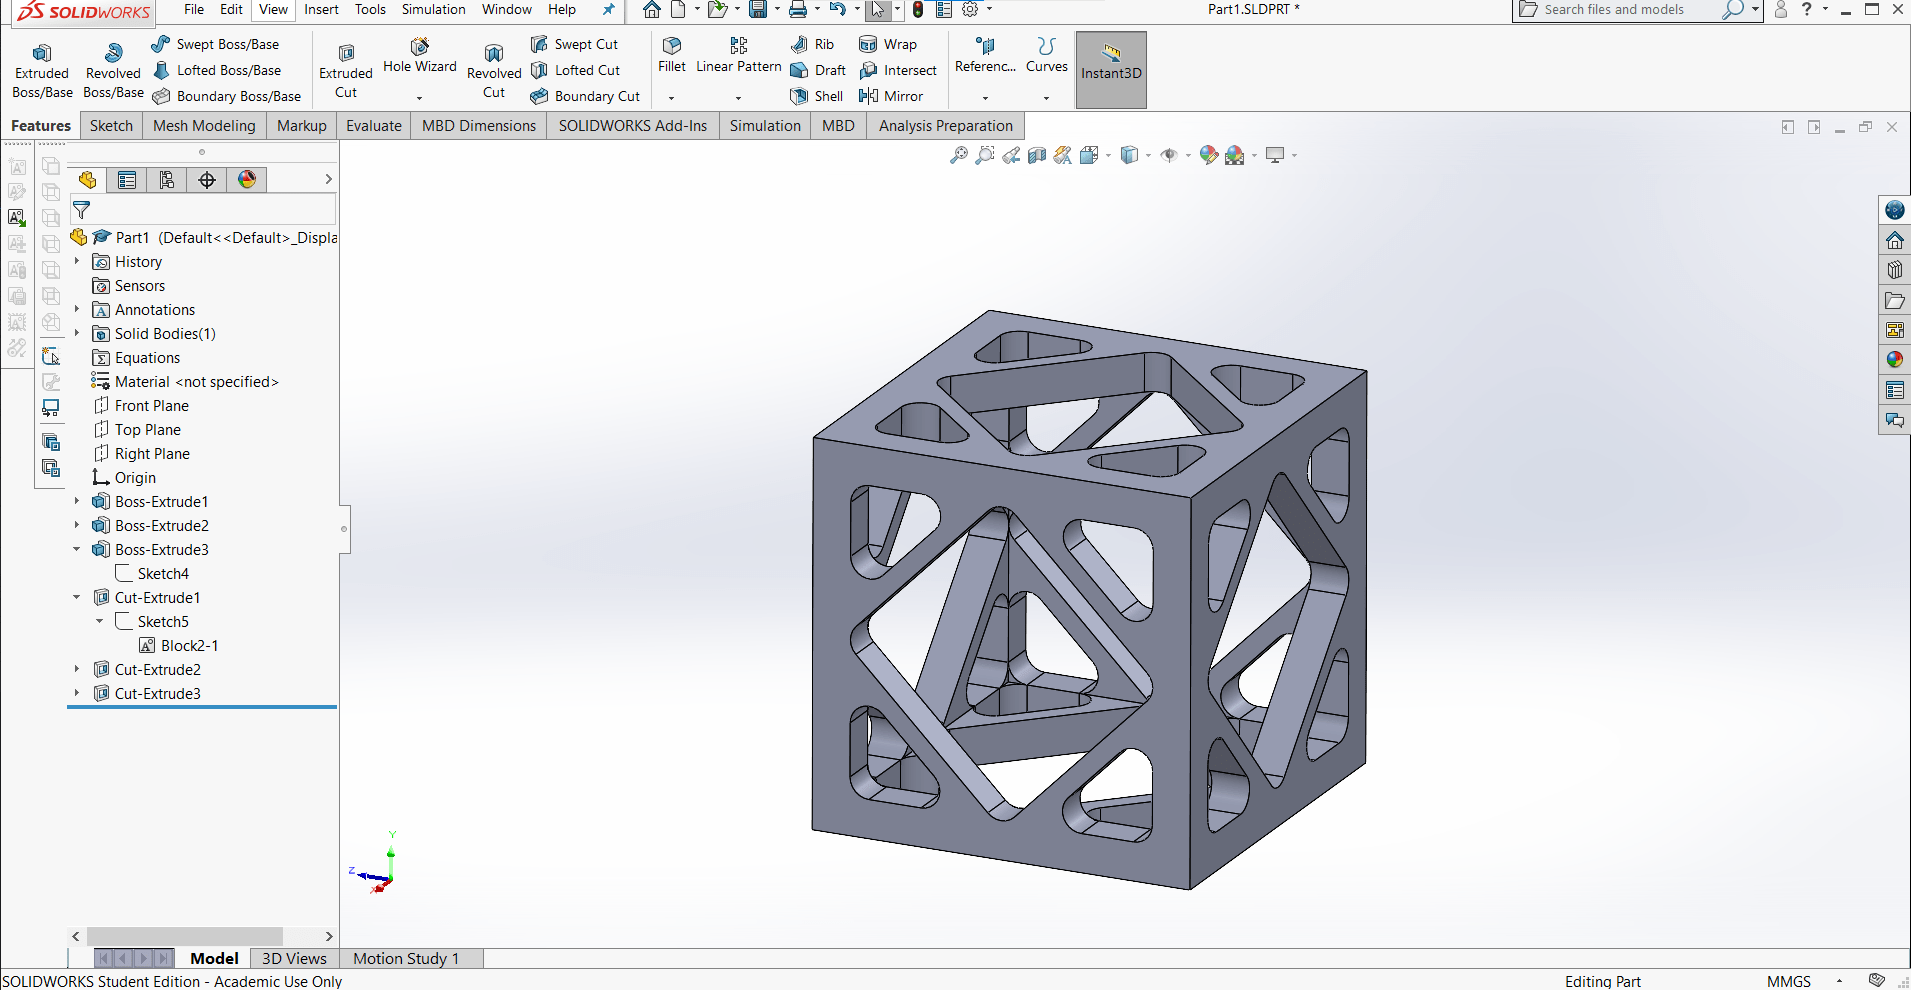
One Down
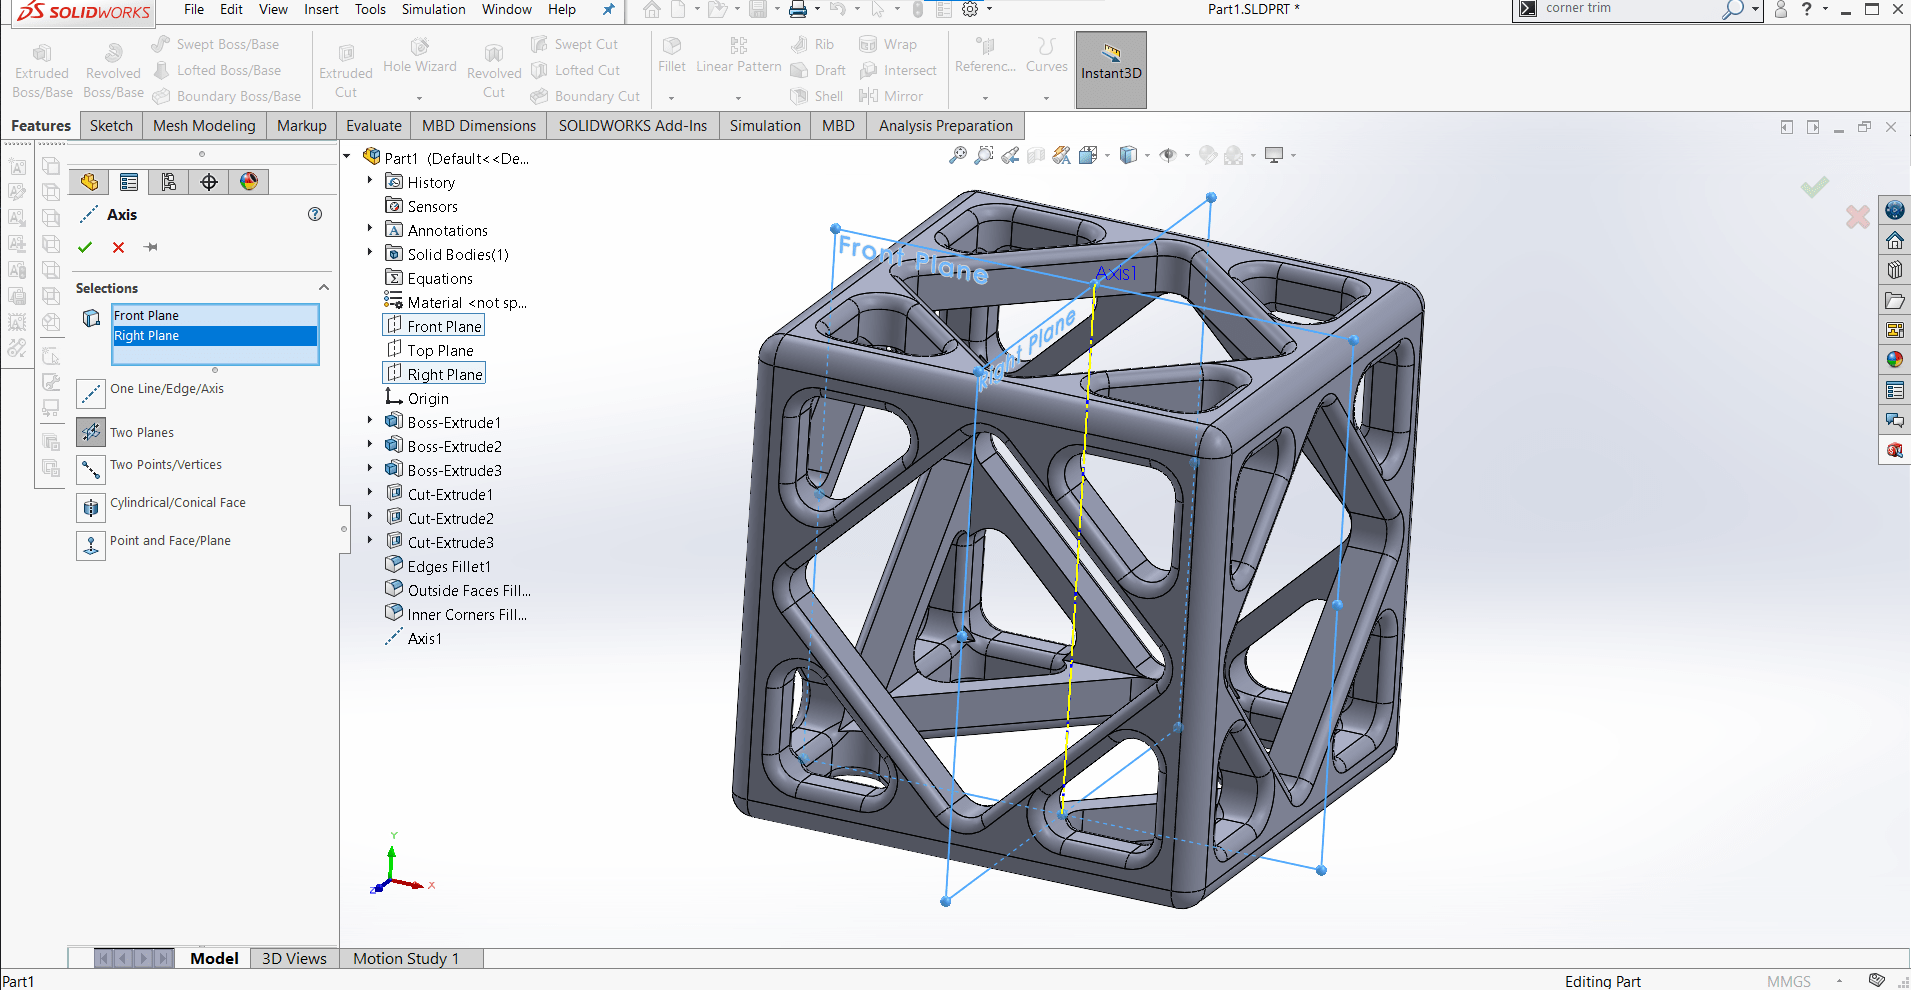
Then I finished off the part with some fillets and an axis that would be useful in the assembly later.
One to Go
I made the inner part a bit differently. I didn't want just another cube, so I decided to truncate it by cutting the corners off.
3D Sketch
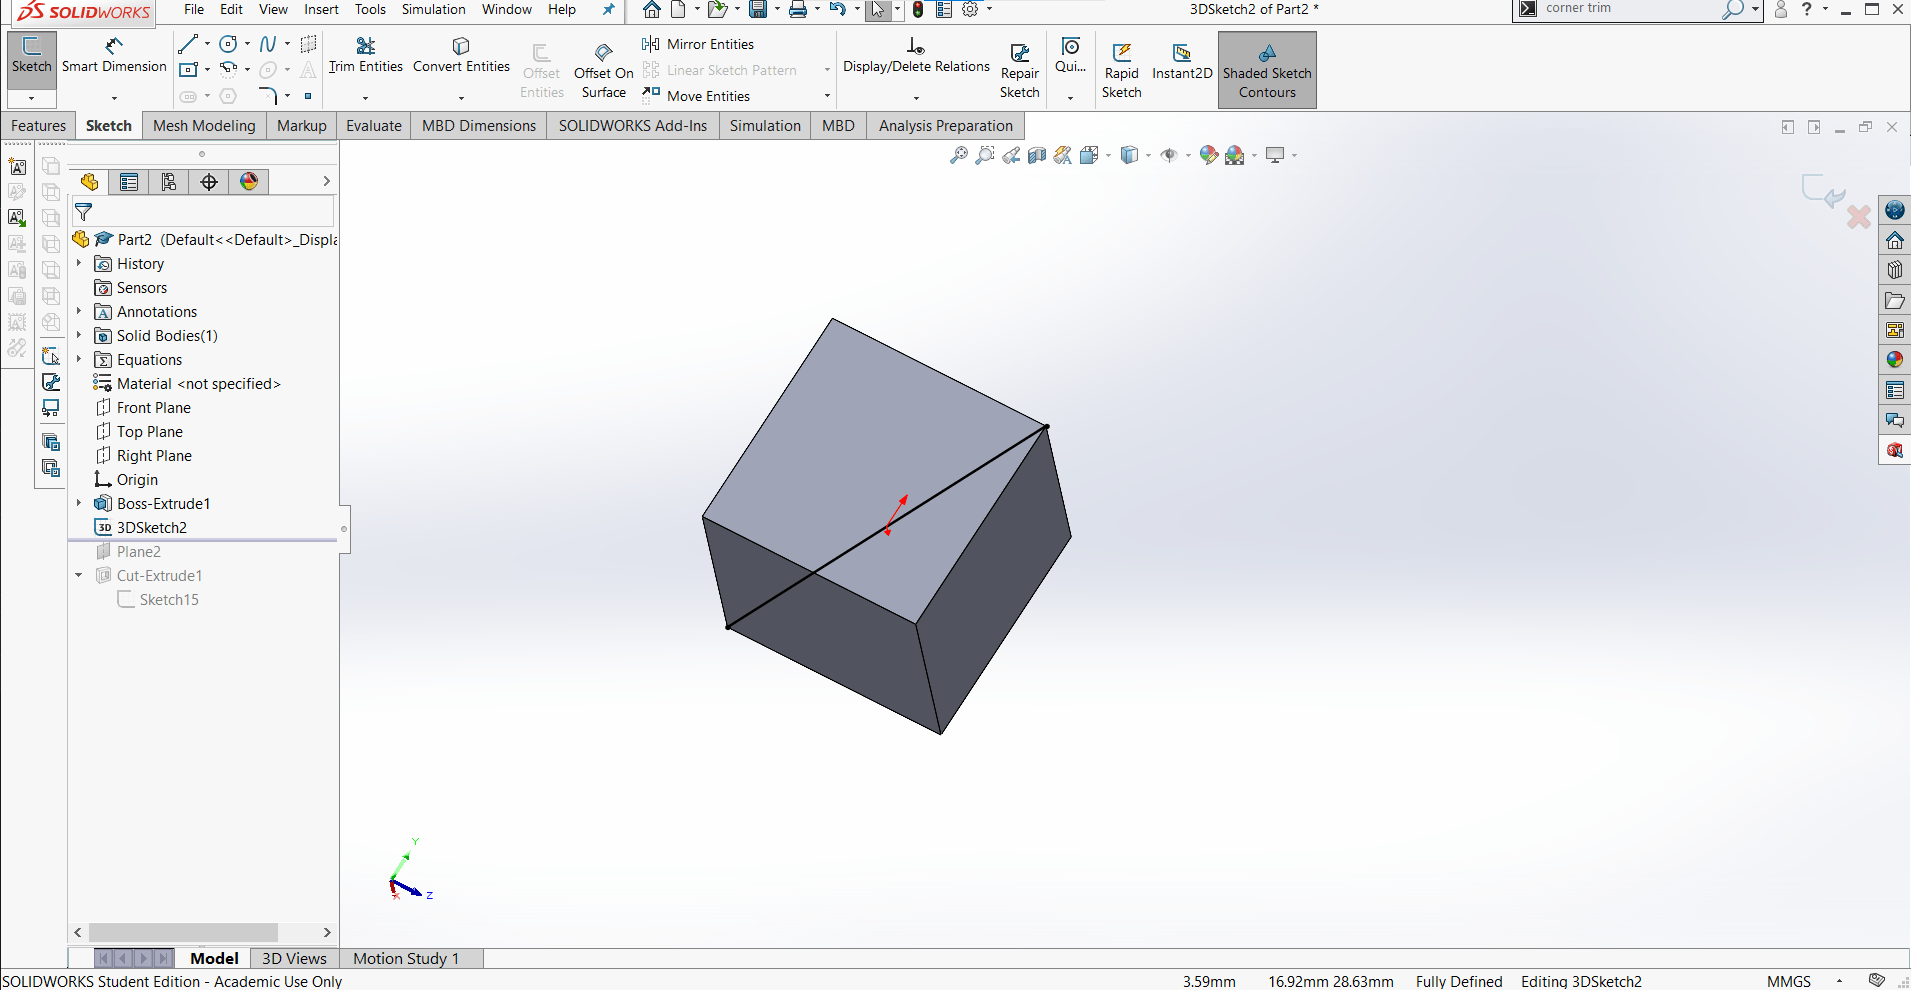
I used a 3D Sketch to create some reference geometry...
New Plane

...and then used that sketch and the vertex to define a new plane.
Extrude Cut
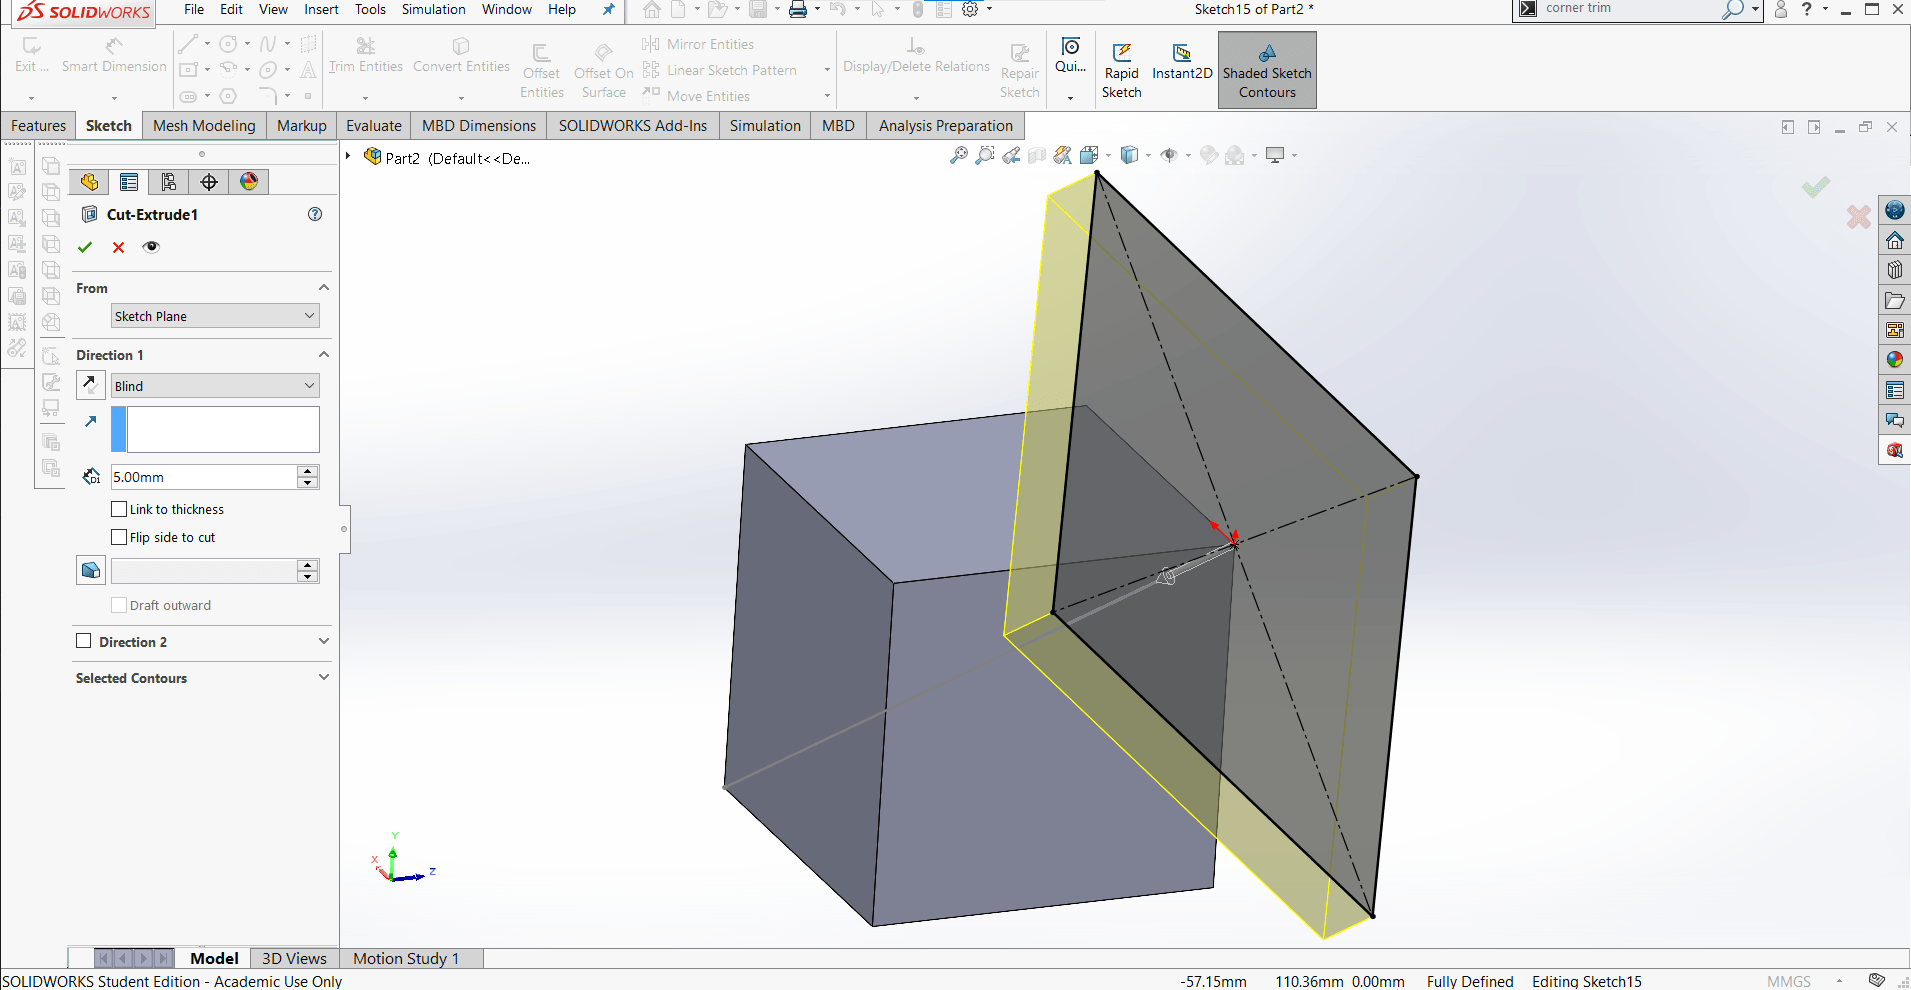
I used the new plane to cut 5 mm off of the corner...
Mirror
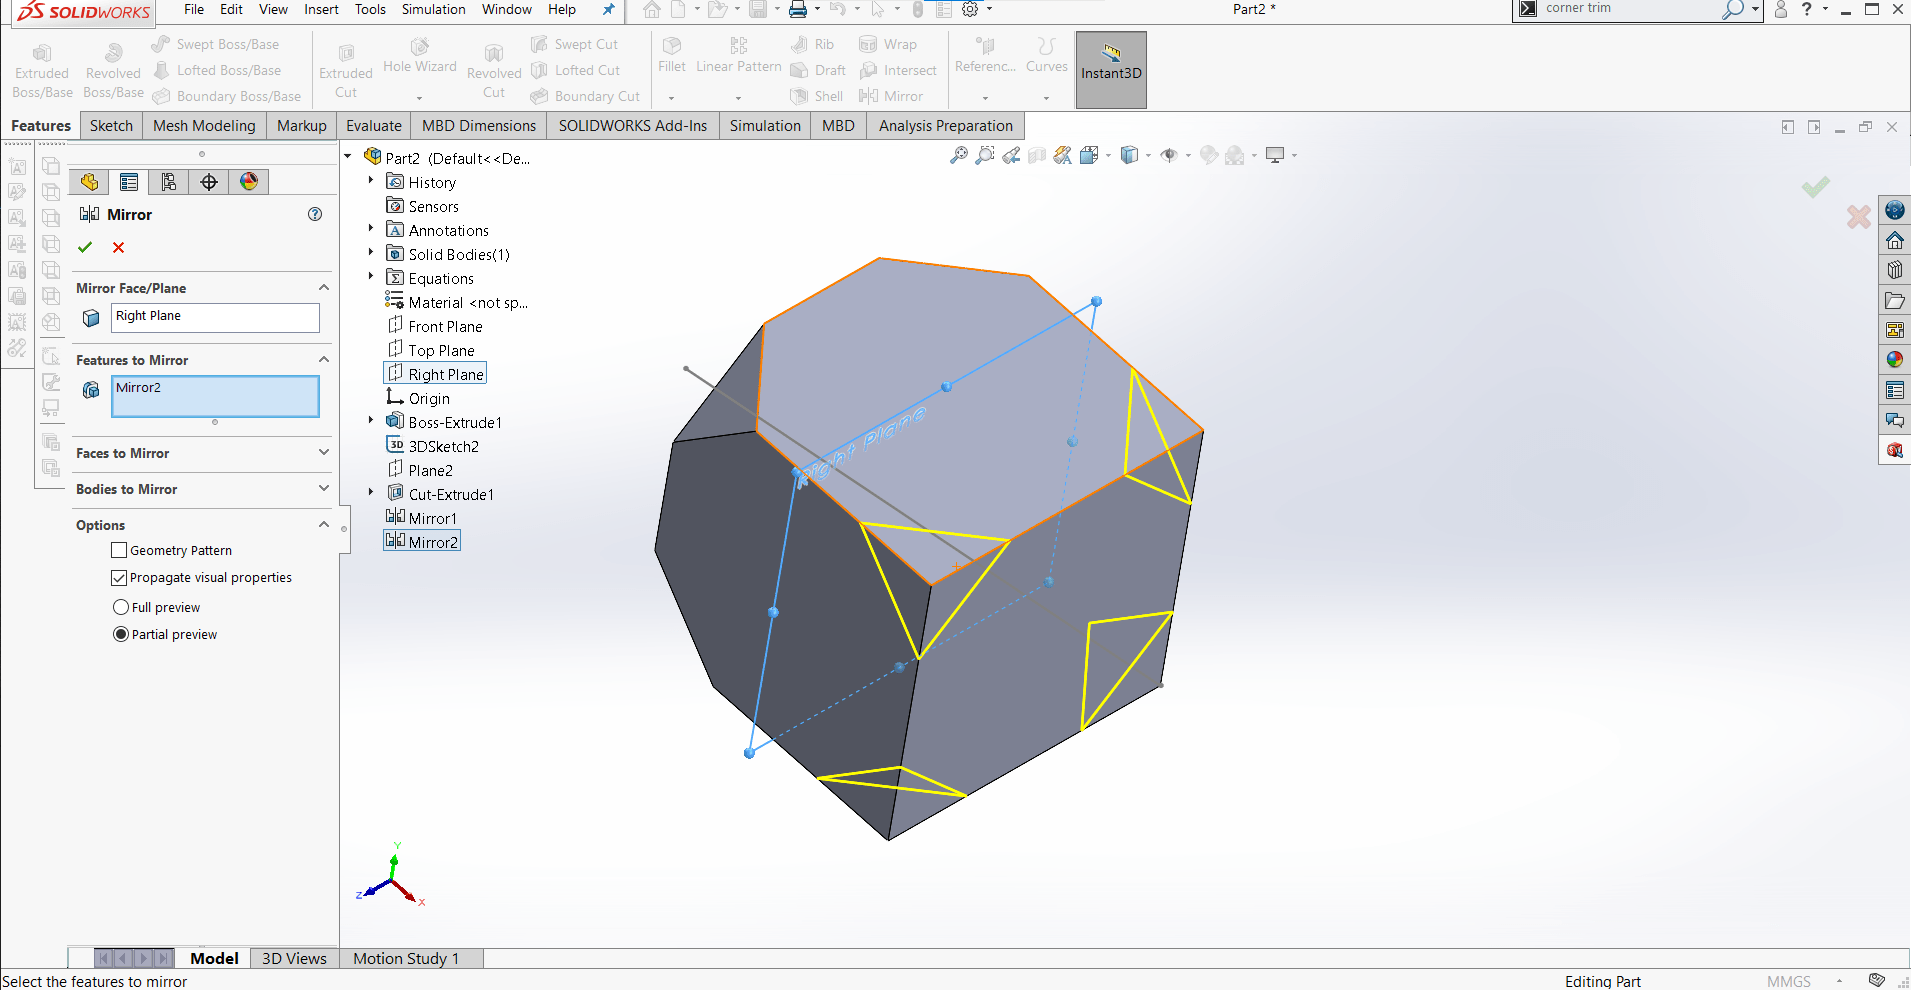
And then used the Mirror feature to duplicate the cut on the other corners.
New Sketch
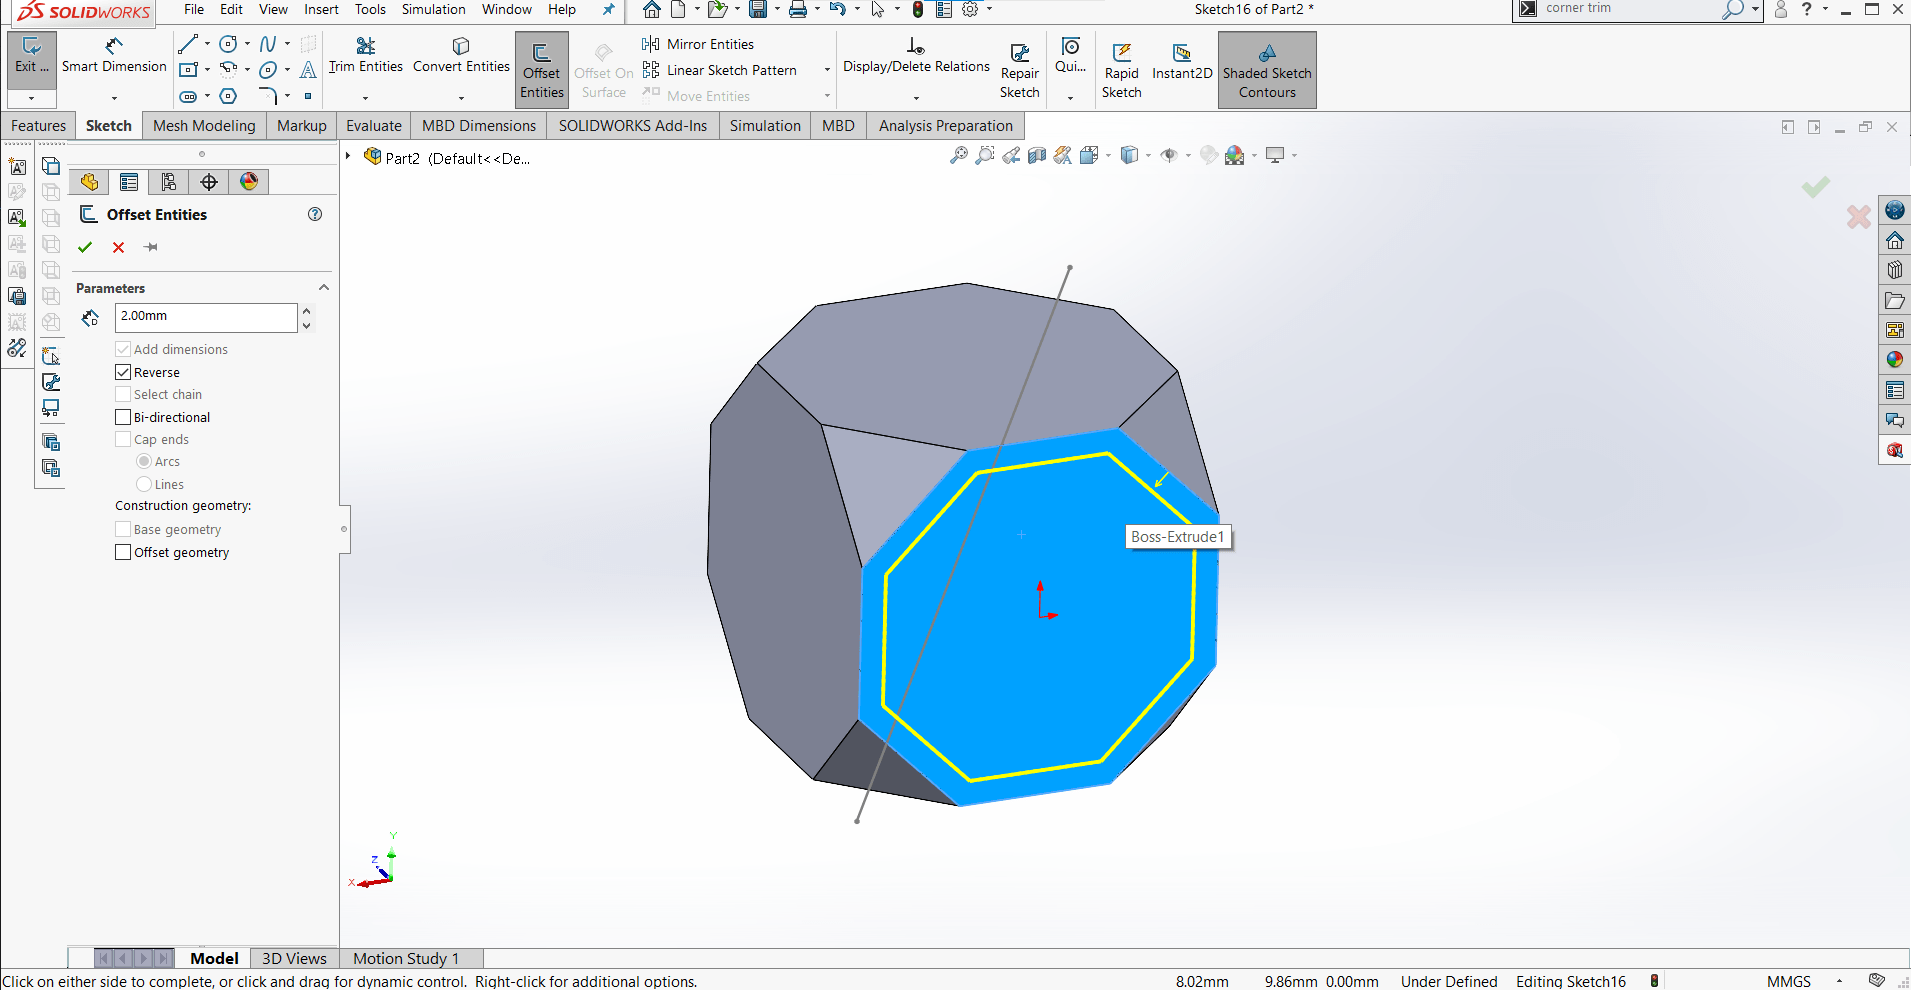
This part needed More Holes! I set out to correct that with a new sketch.
Offset Entities
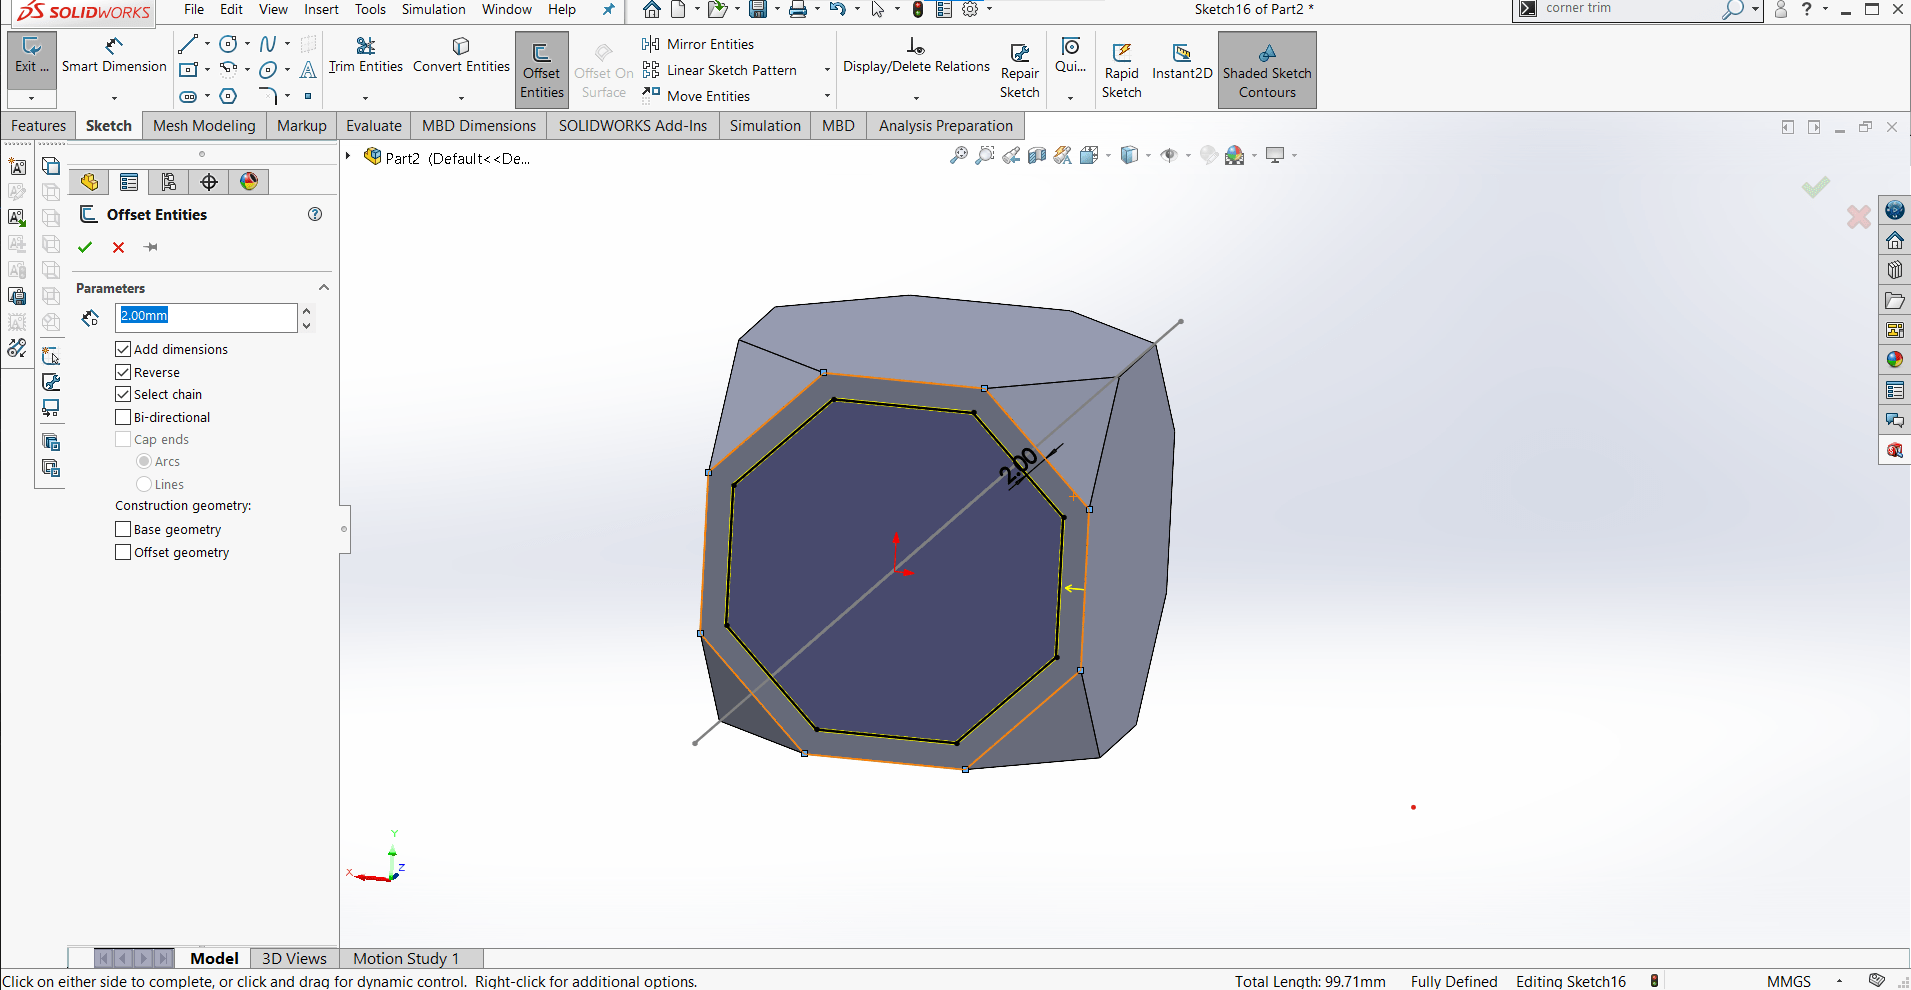
I offset the edges of the face by 3 mm...
Extrude Cut
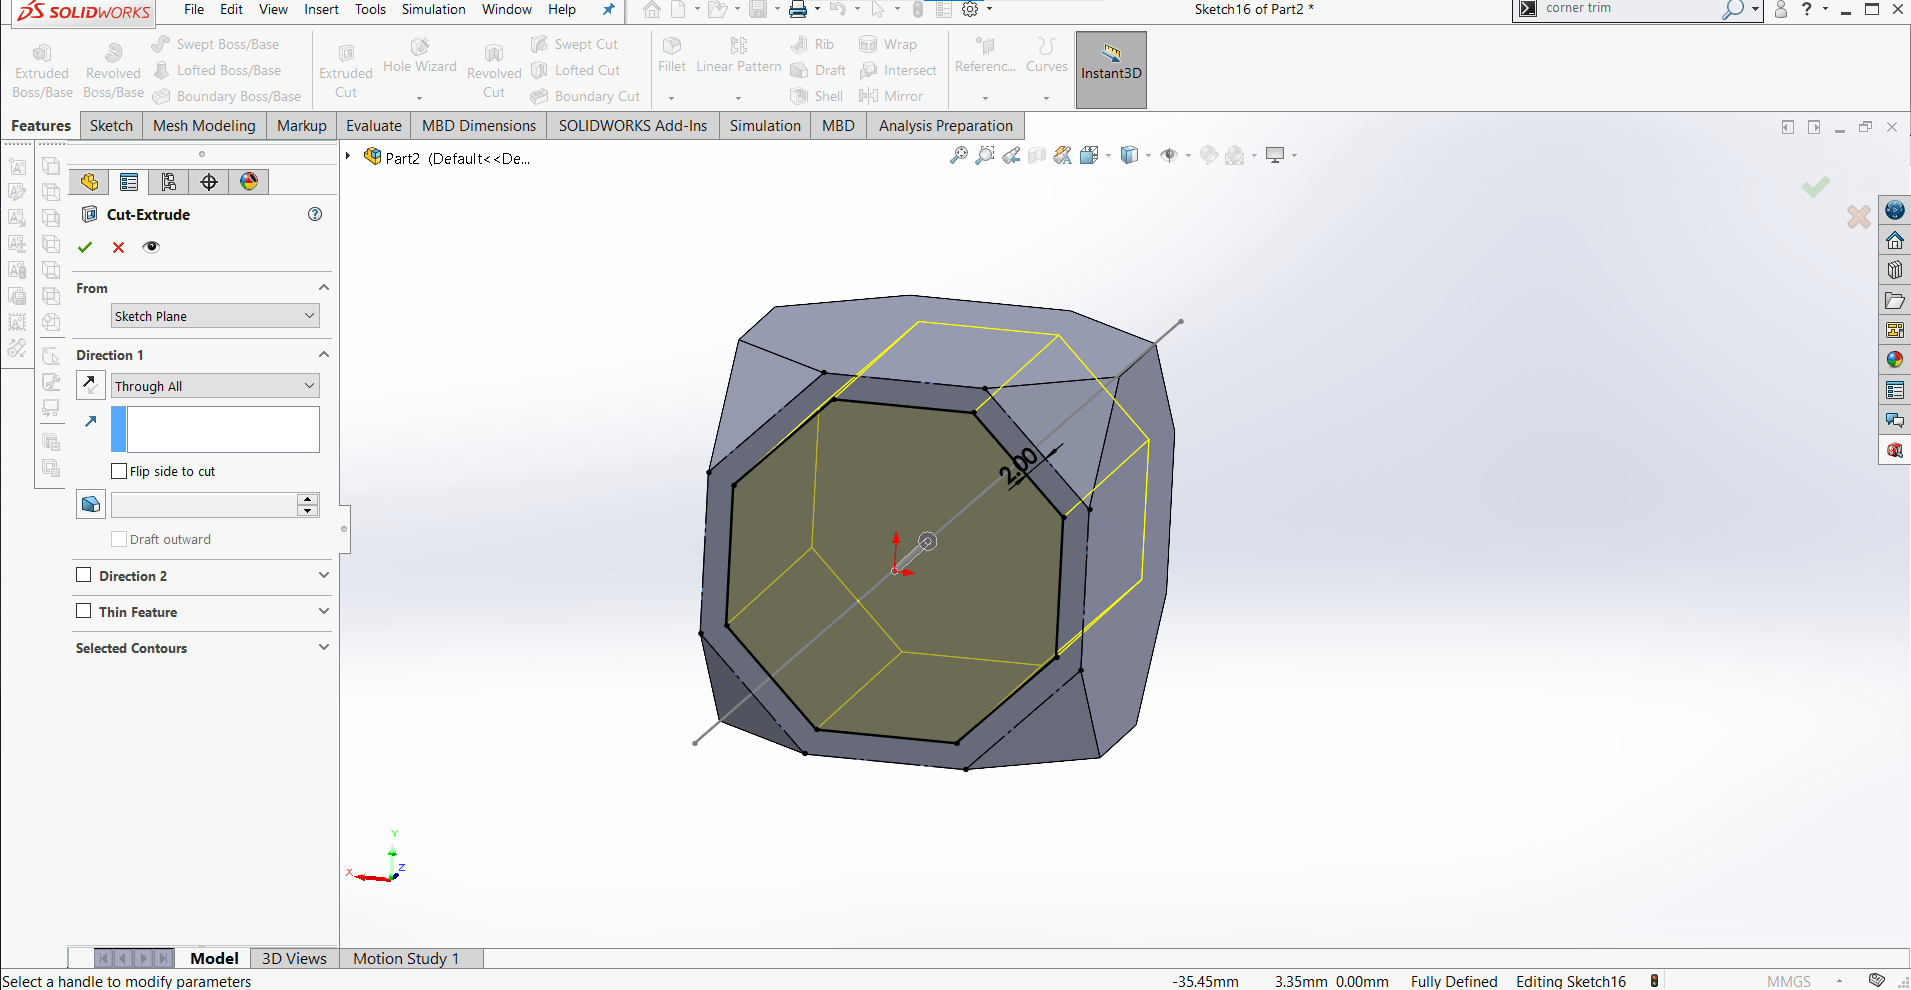
...and then cut the new shape out of the cube.
Fillets
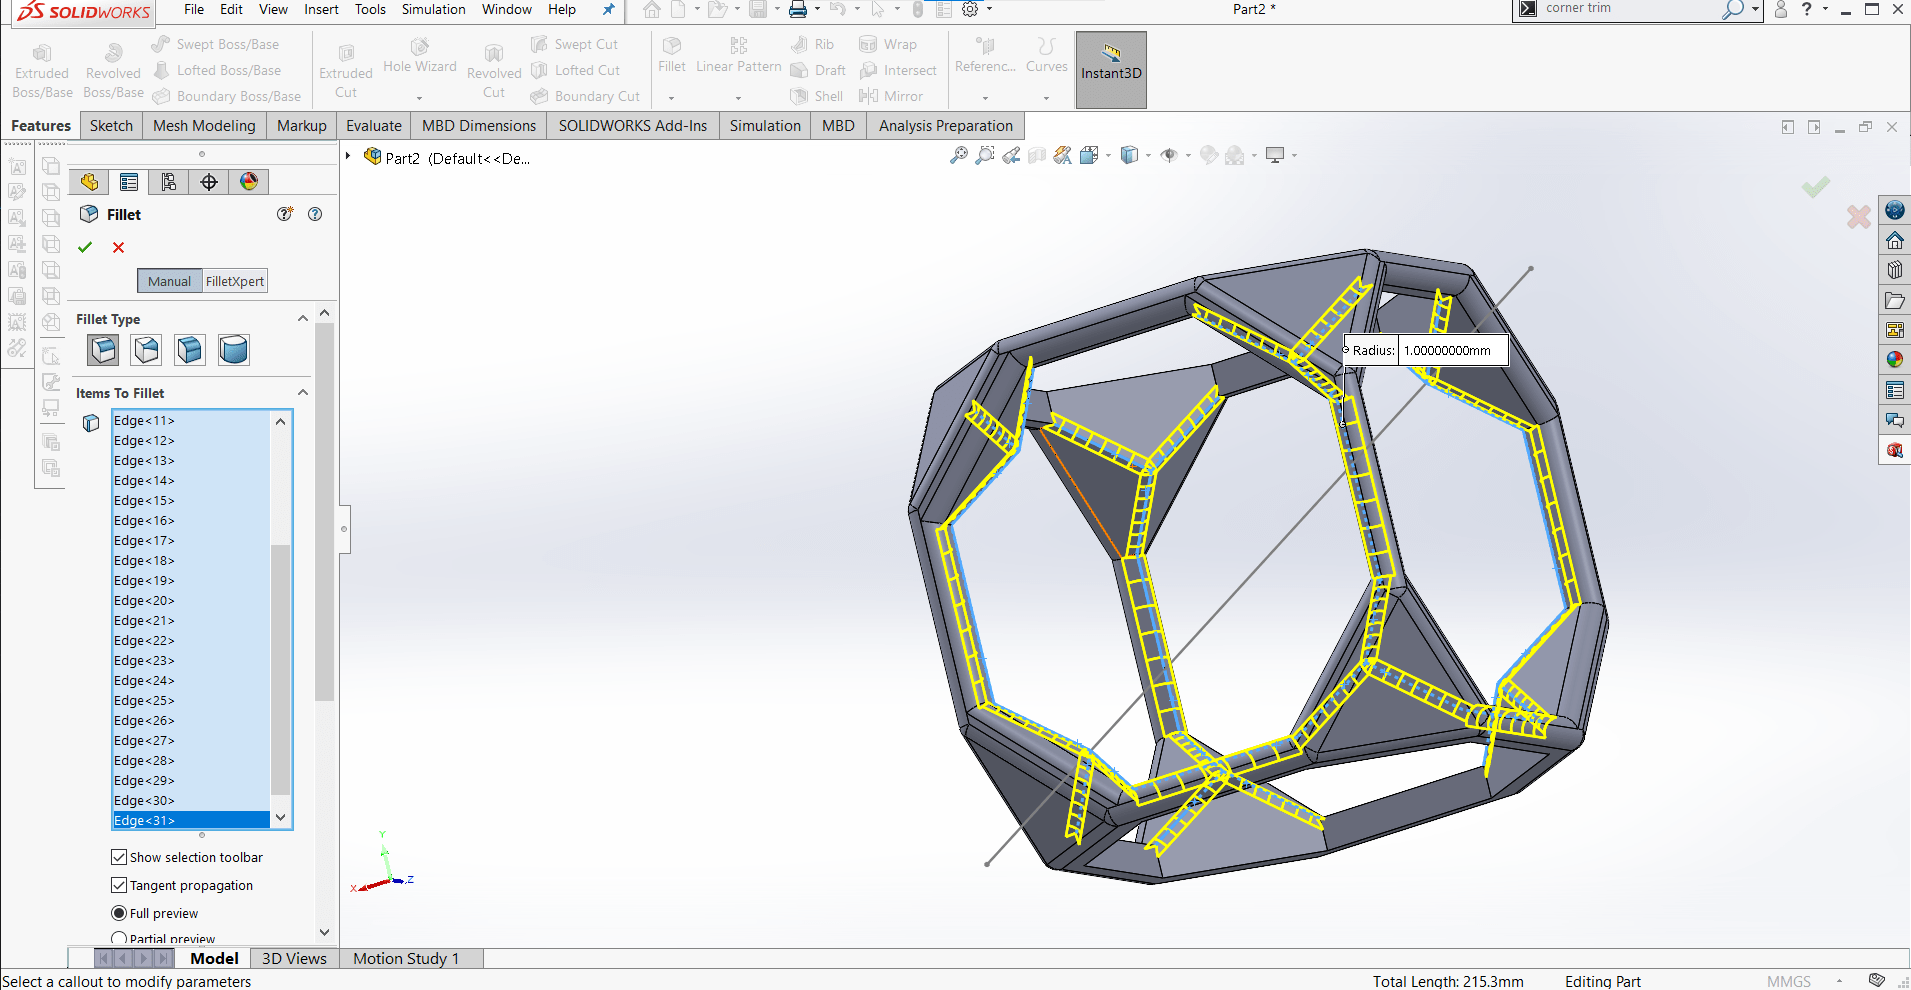
Finally, I finished off the part with some fillets...
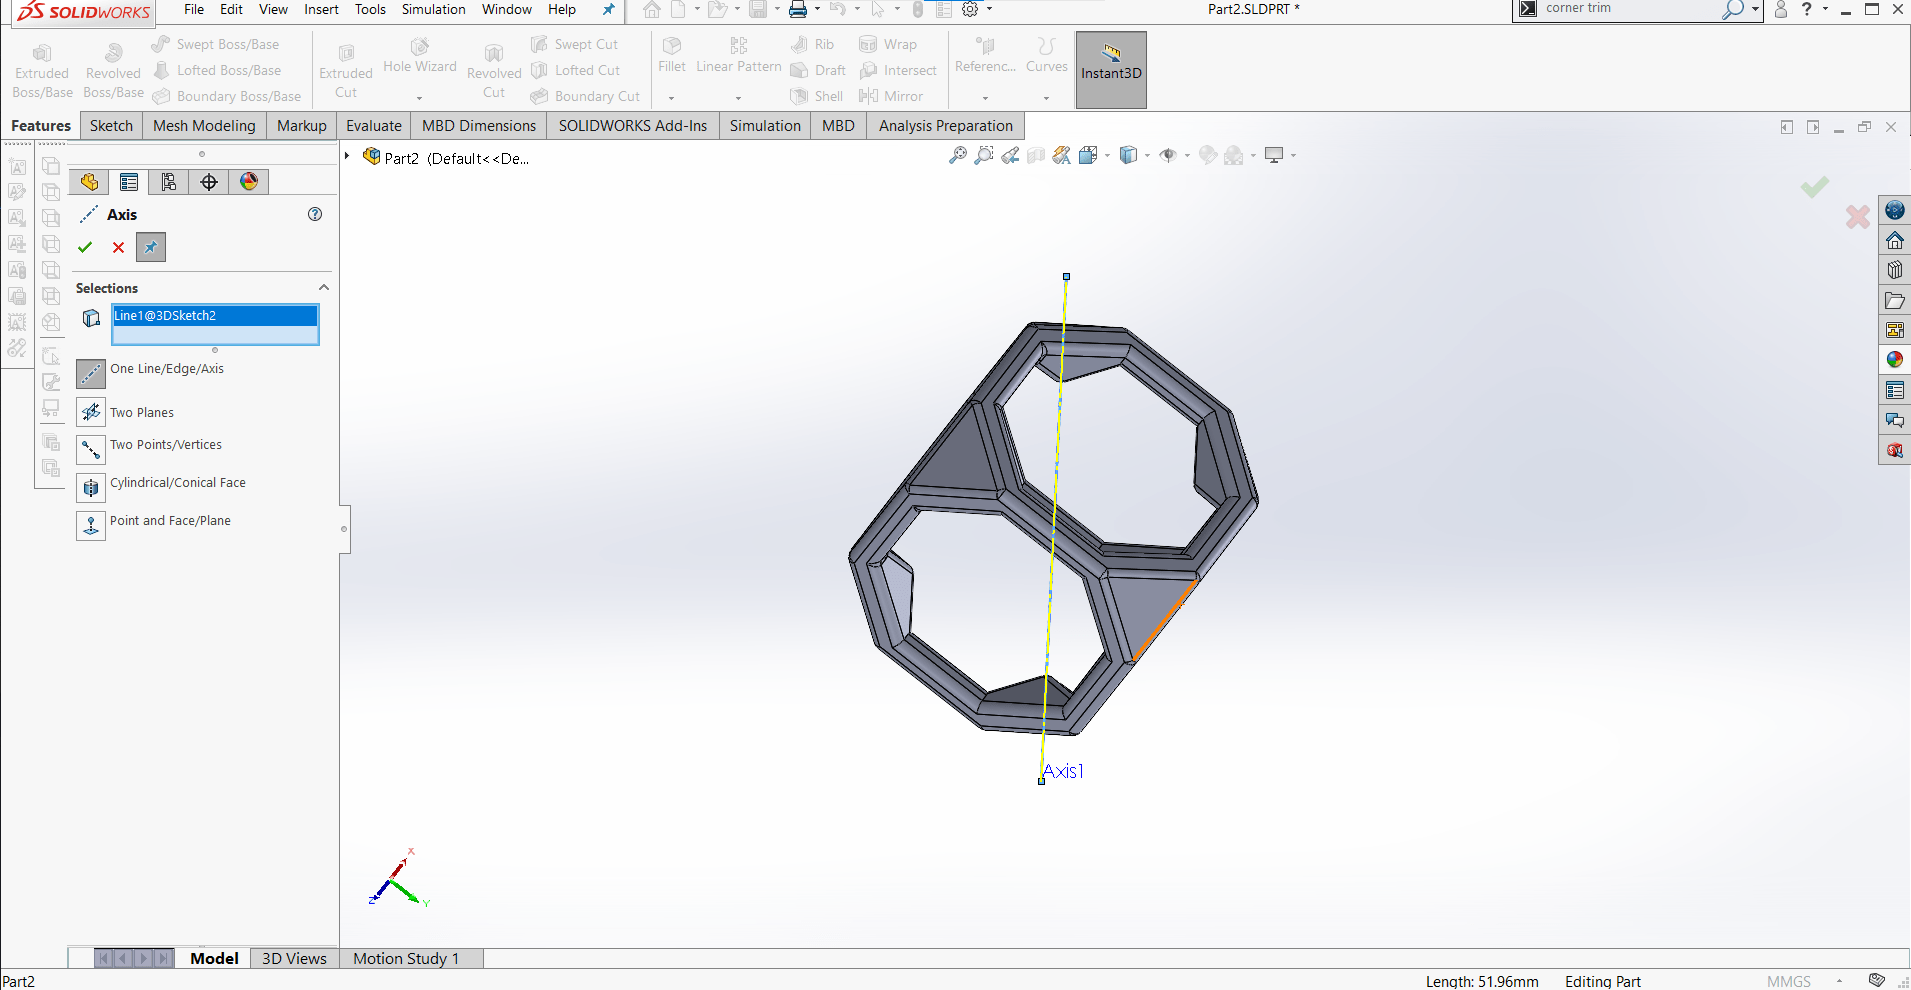
...as well as another reference axis that would be useful in the assembly.
Assembly
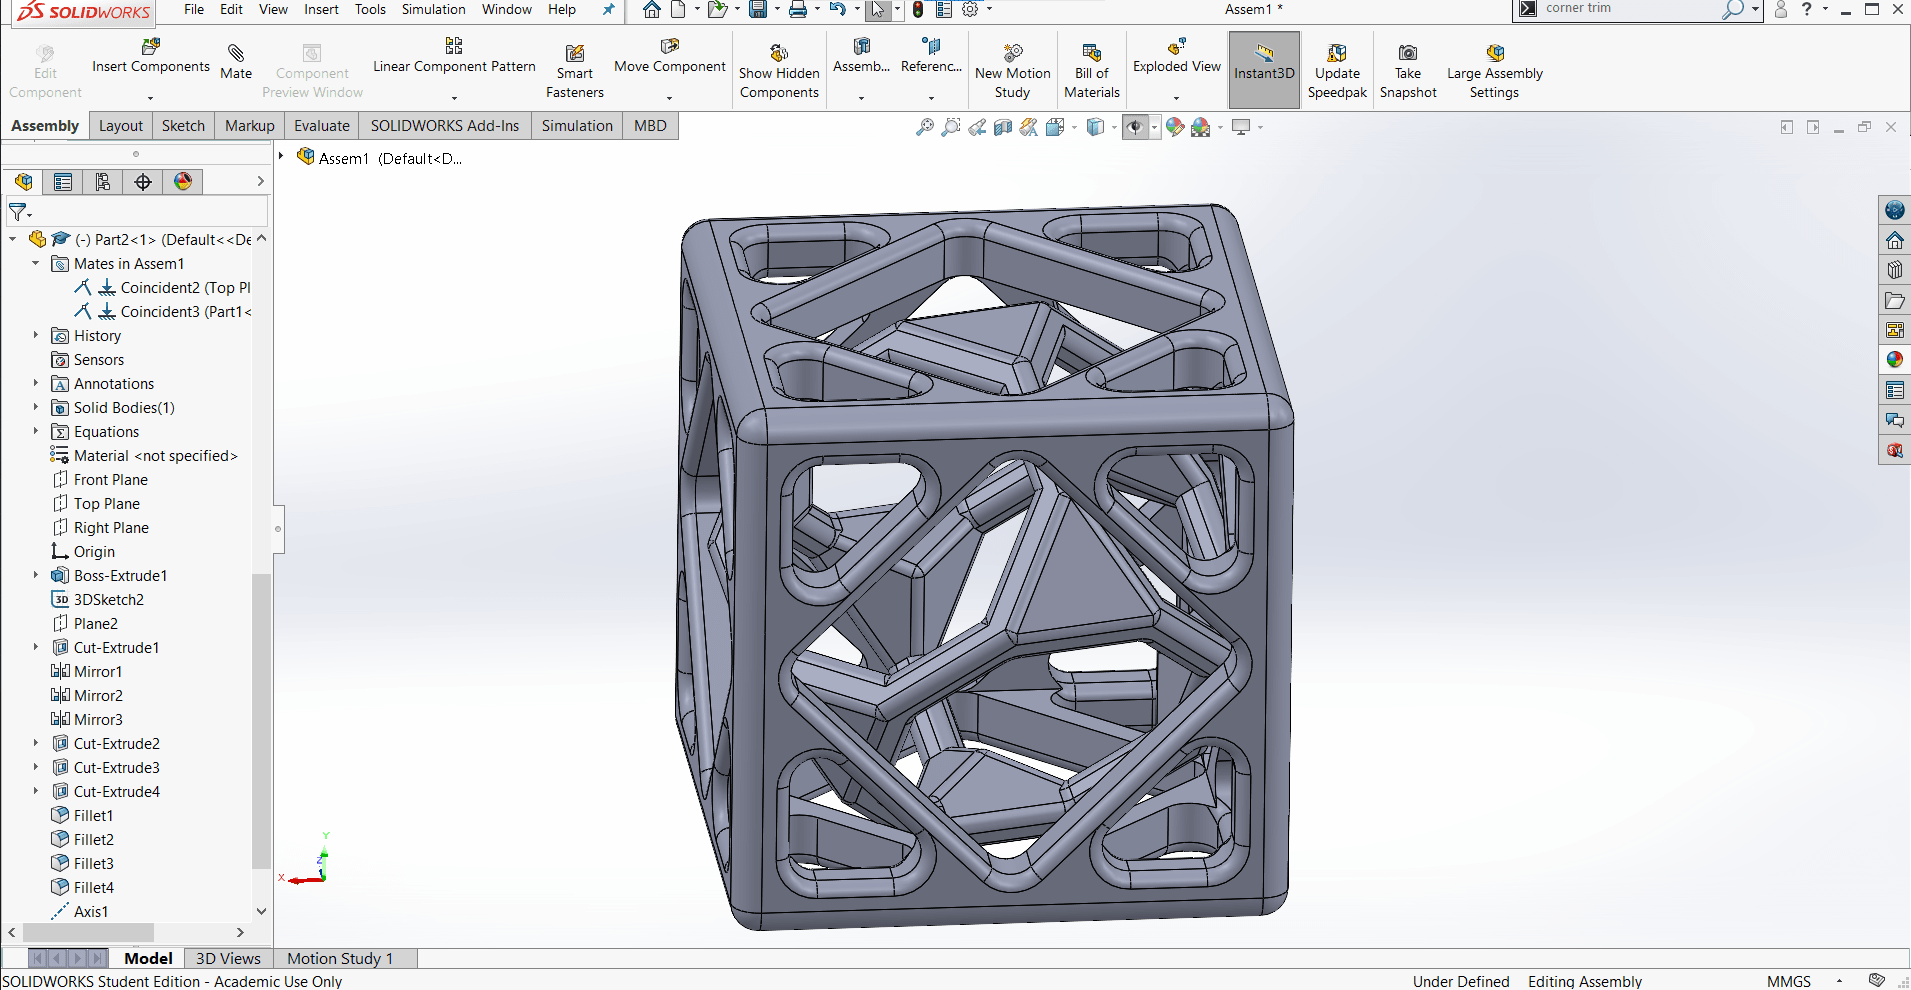
I wanted the inner part to print inside the outer part (obviously) and I thought it would be easier to adjust their placement in a SolidWorks assembly than it would be to do it in the Cura slicer, so I made an assembly, intending to export both parts together as a single stl file.
Render
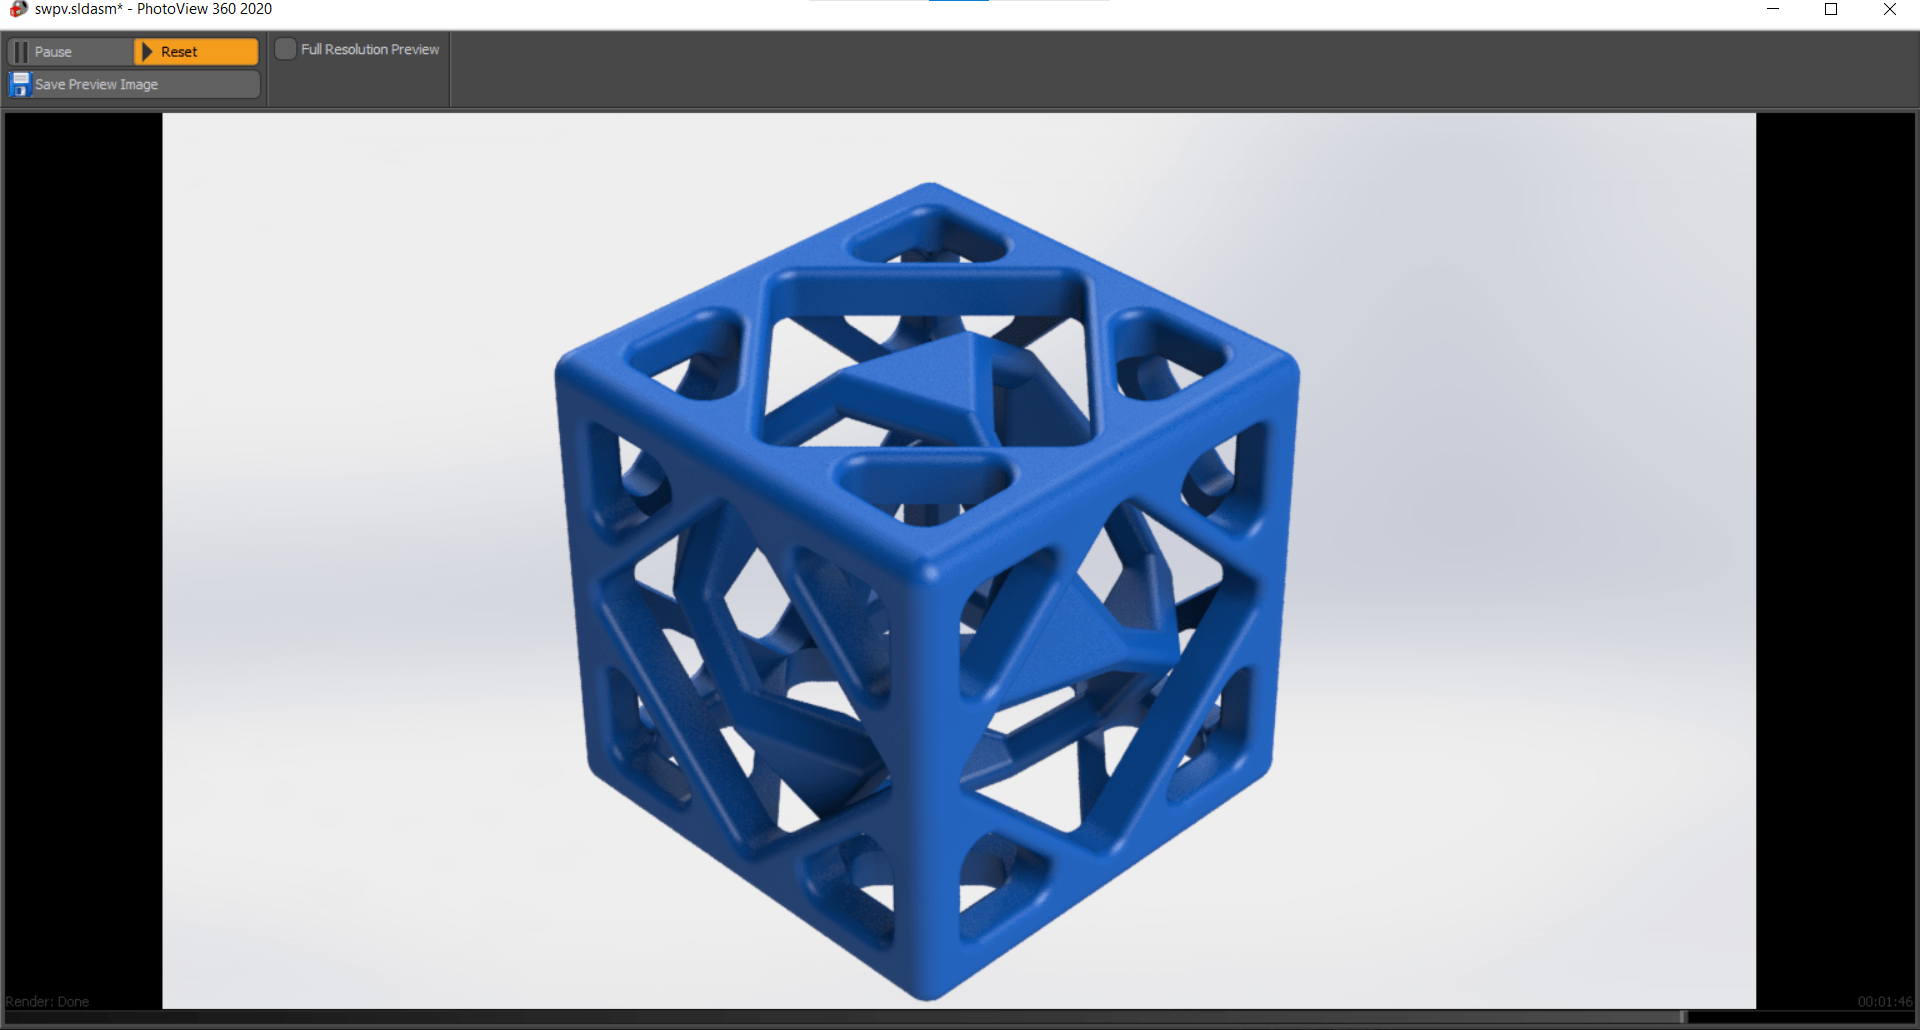
In the assembly, I made sure that the parts weren't interfering with each other using the Interference Detection tool. And of course, I needed to see what it would look like rendered and dressed in blue. It was looking good so I save the stl.
Cura

Despite it's unpopular reputation around my lab, I like the Cura slicer, so I decided to use it.
Unsupported
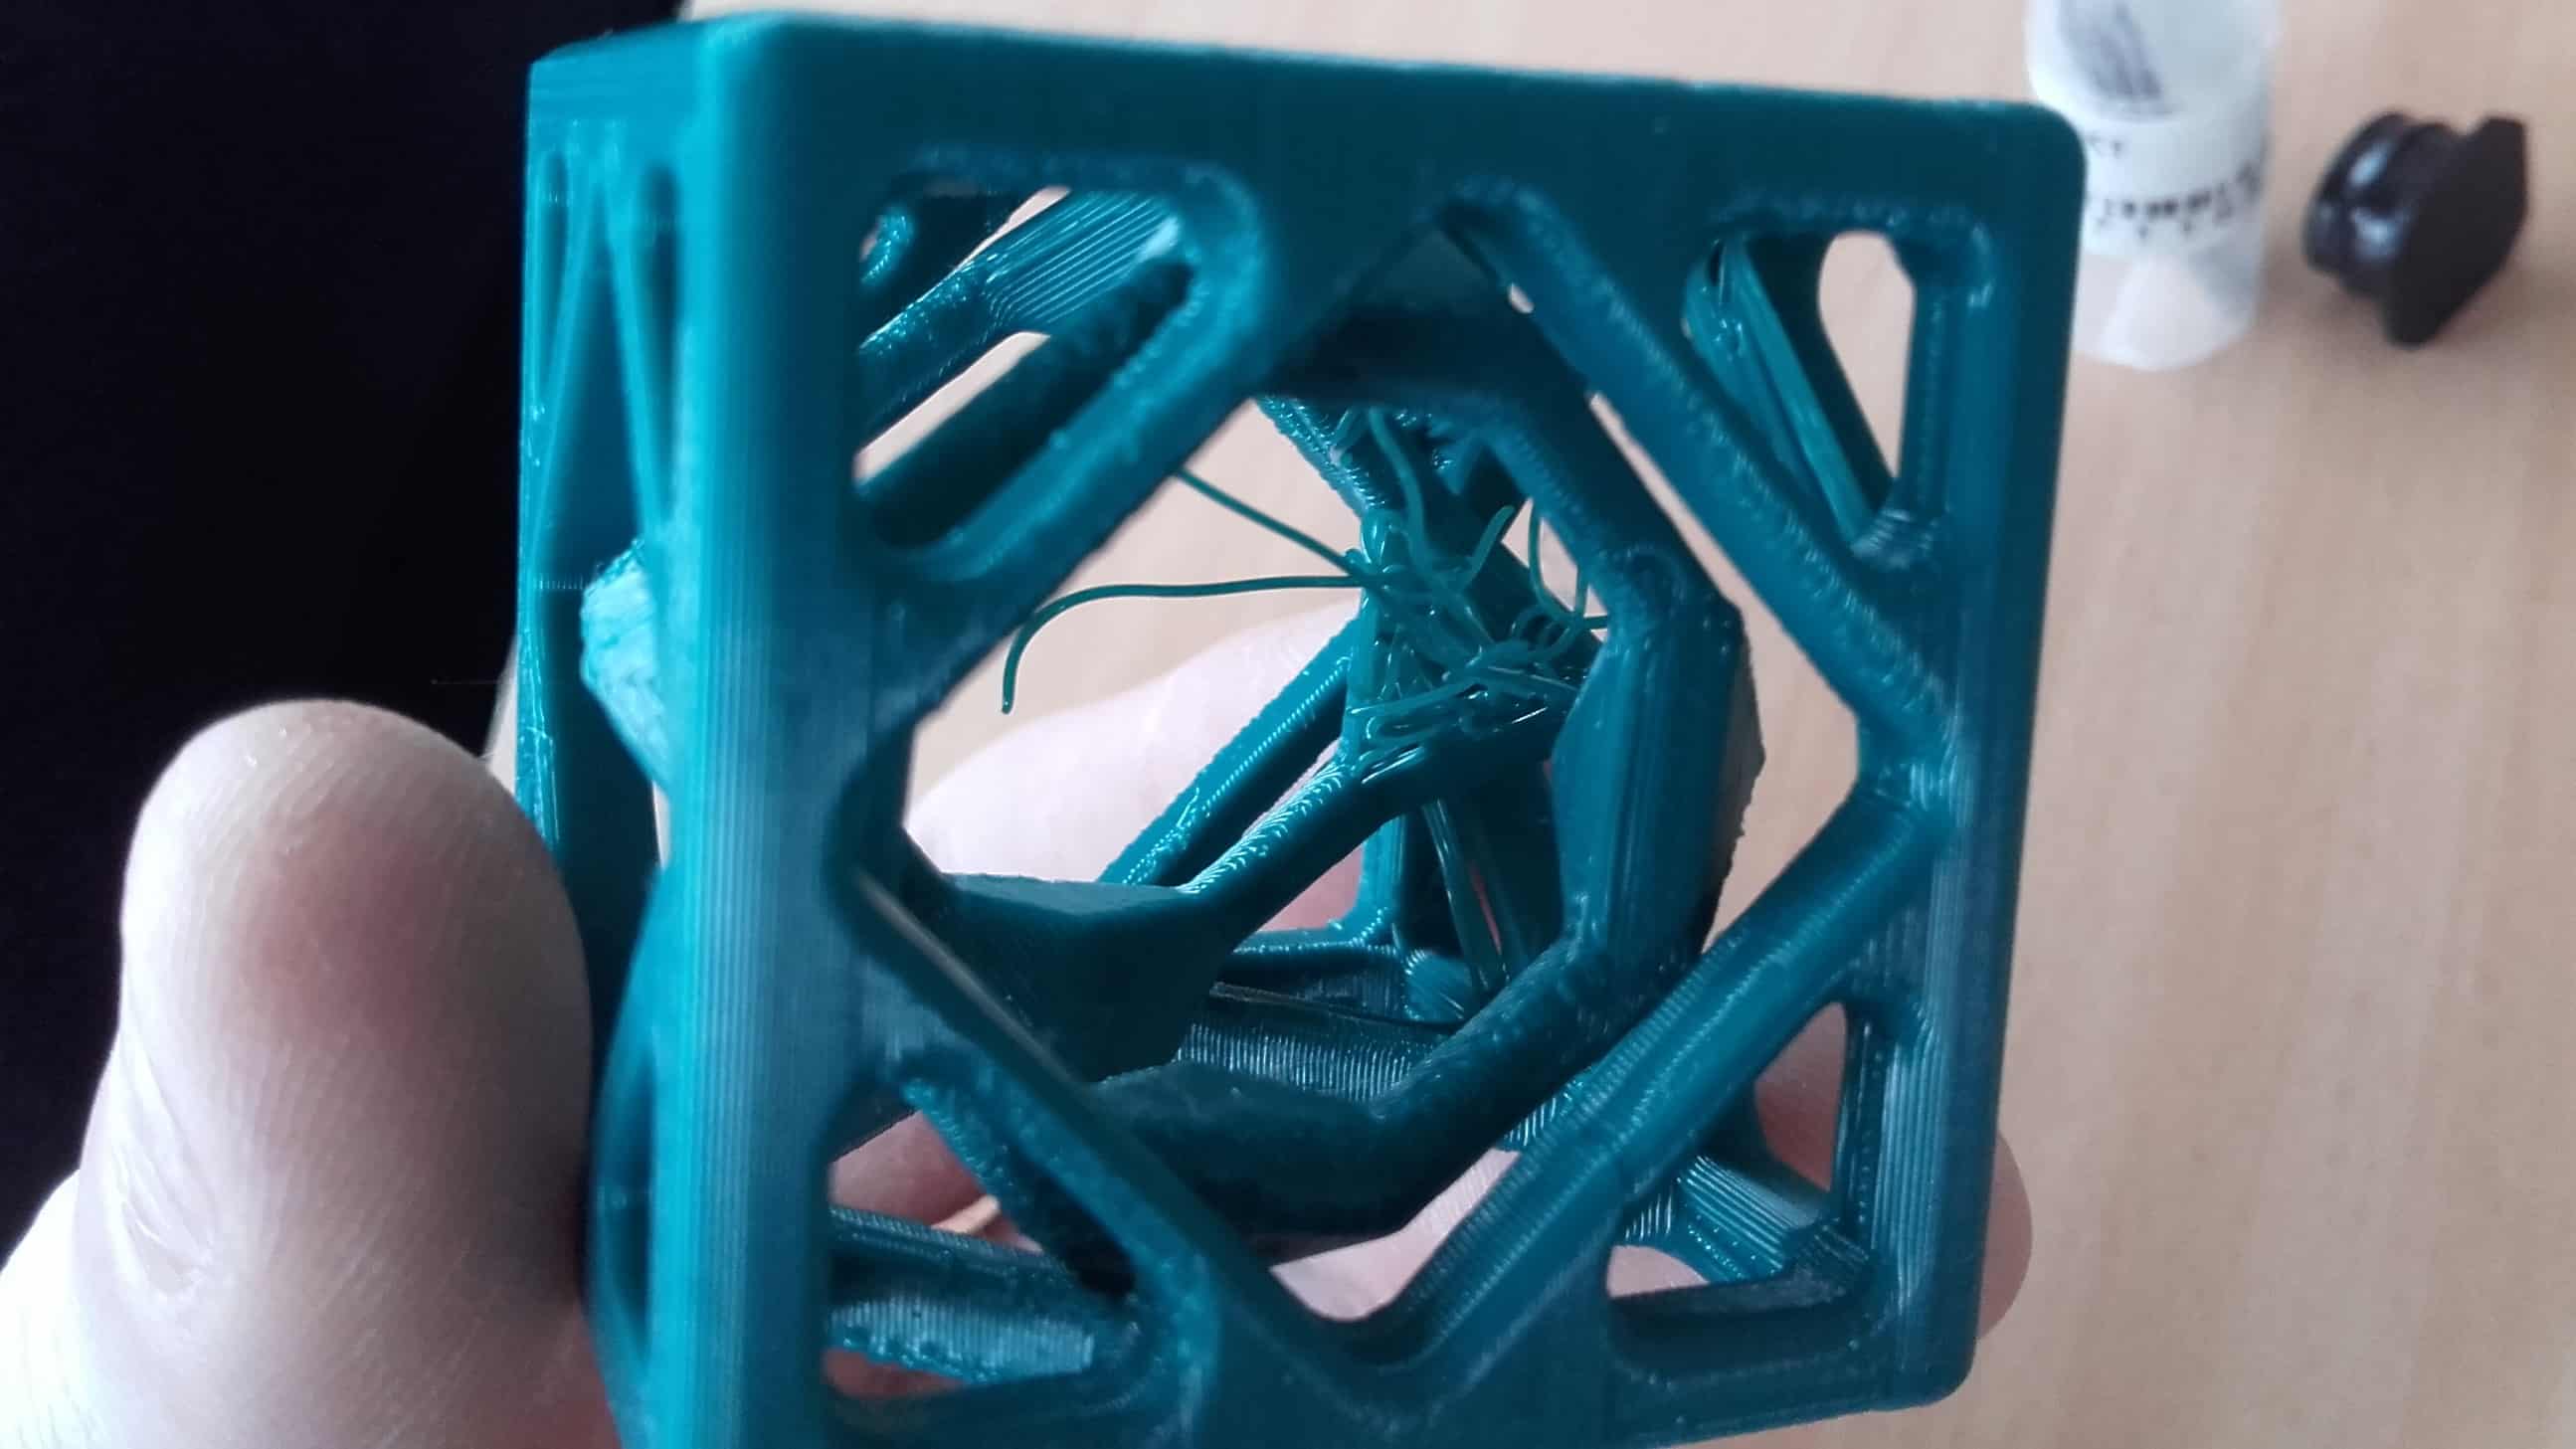
Hopefully I don't need to spend too much time explaining why this part would be extremely difficult to make subtractively. I won't say impossible, but you'd have to be a masochist to even attempt such a thing. Thanks to a generous donation from Roland, the lab is flush with filament once more so I decided to print my part on the Ender 3. I had just printed the overhang and bridging tests for our Group Assignment and was really impressed with how well the Ender was able to compete with some of its far more expensive brethren, so I decided to push my limits a bit and tried printing this strange shape, in all its overhung, hole-y glory, with no supports 😲. I exported the gcode, pushed the GO-button, crossed my fingers, and then left the lab to go home for the night.
Success!
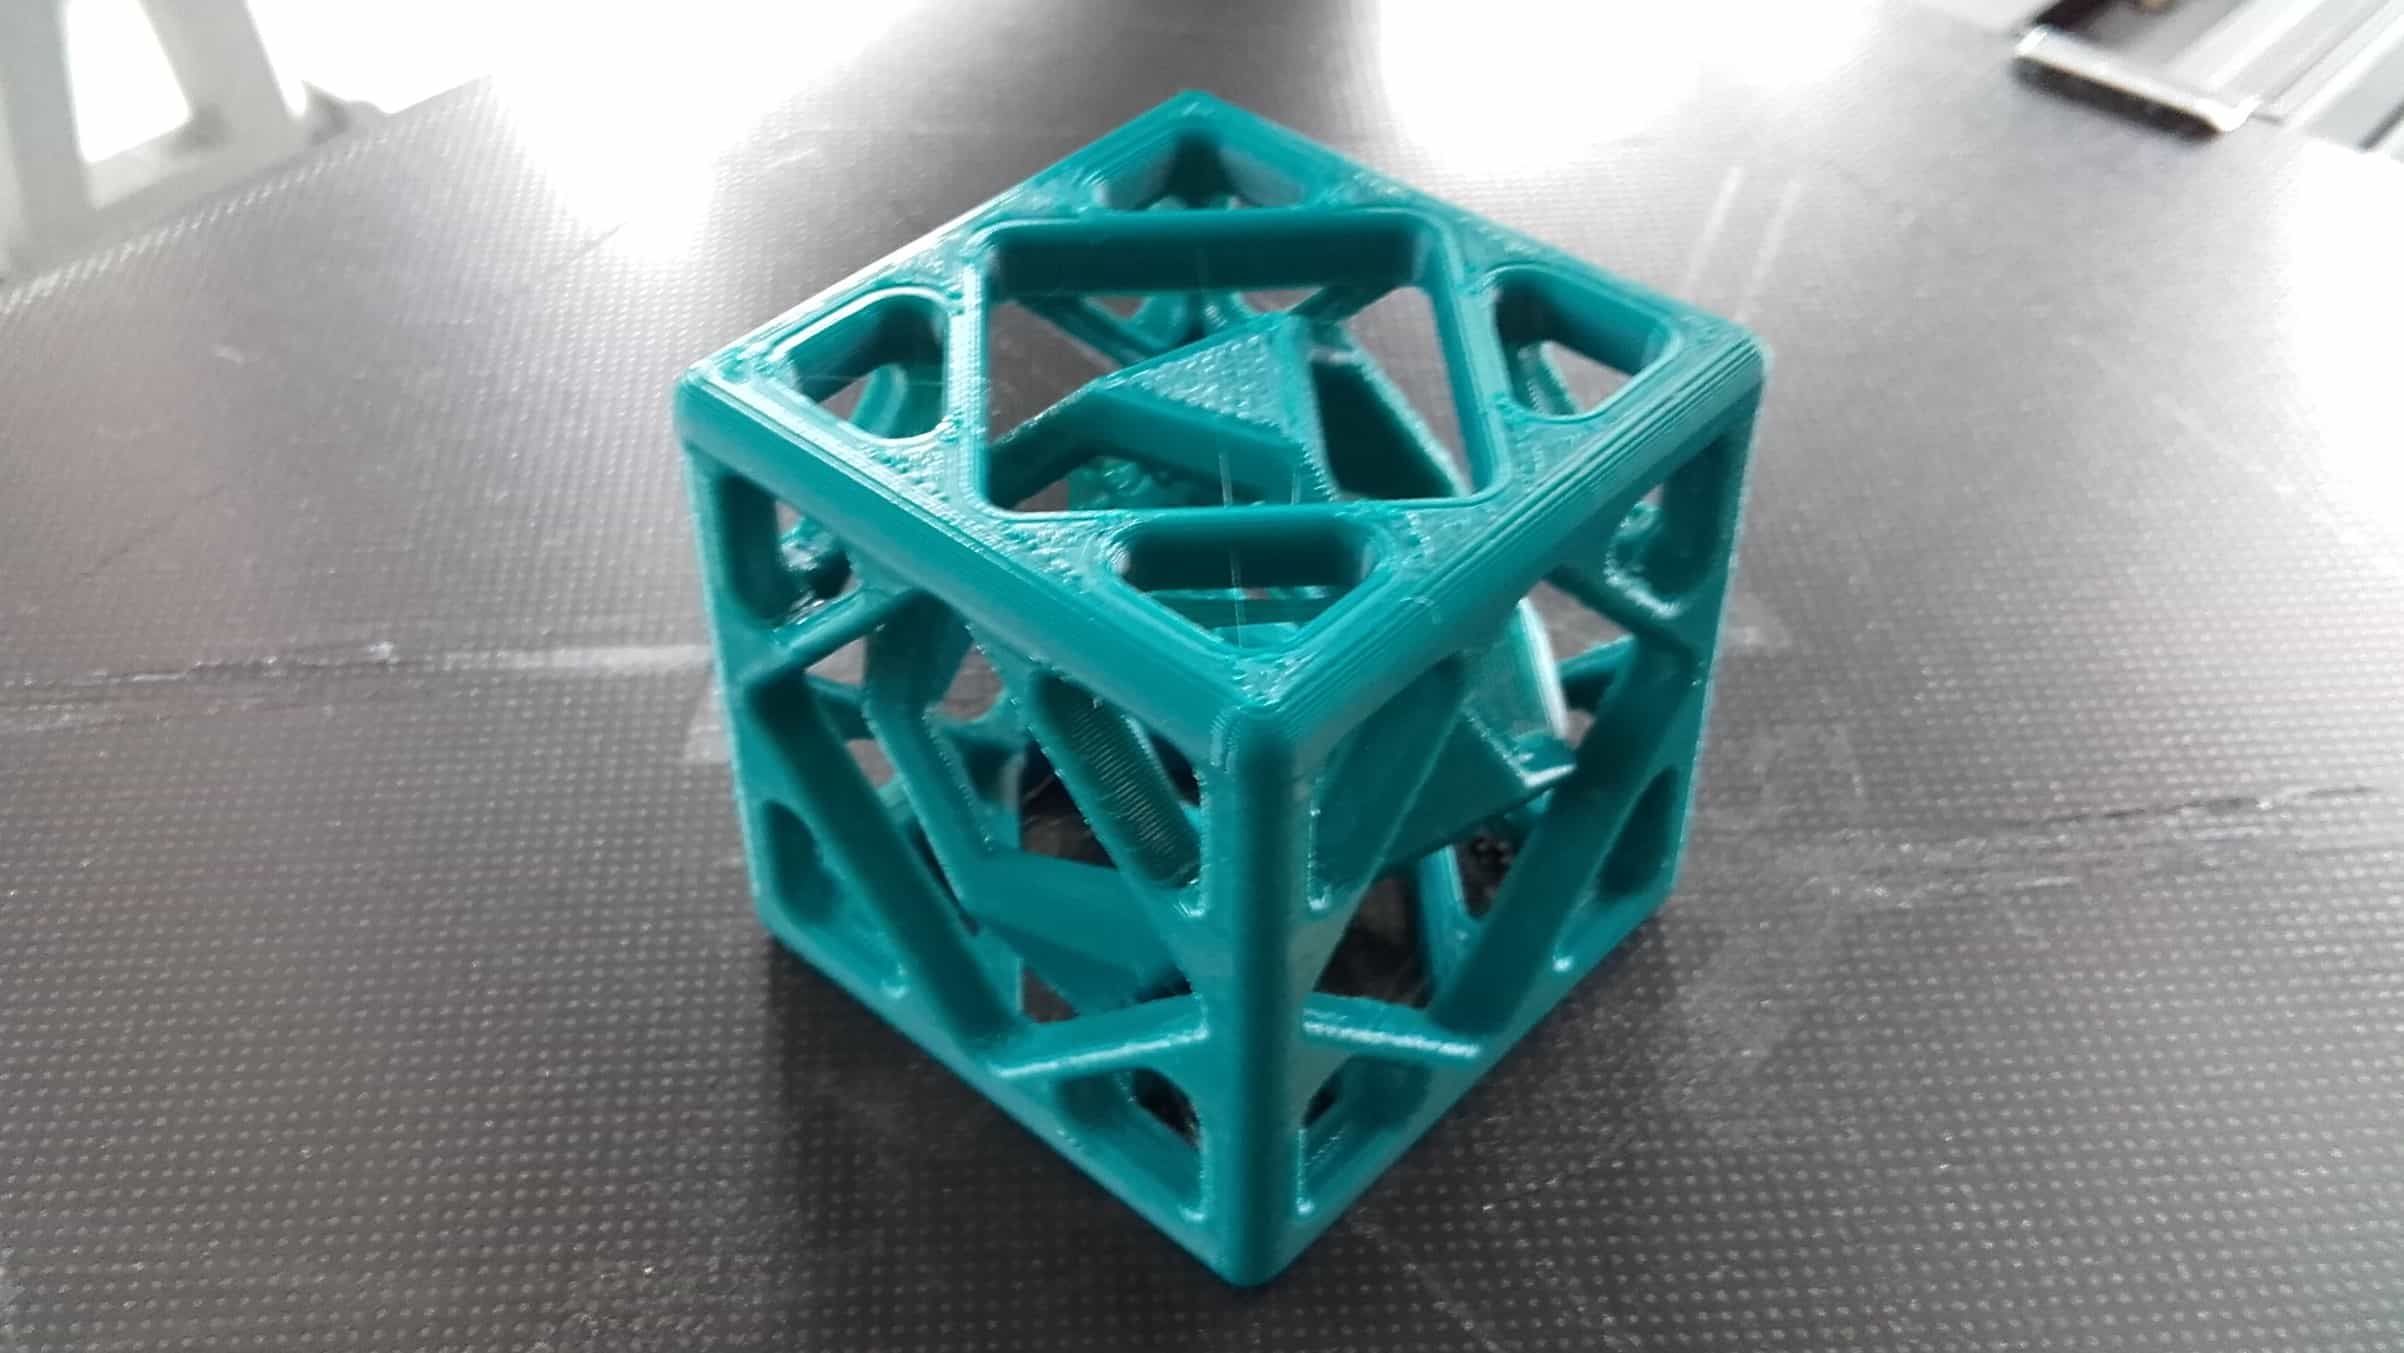
I returned the next morning to find a very happy looking print waiting for me.
Nearly
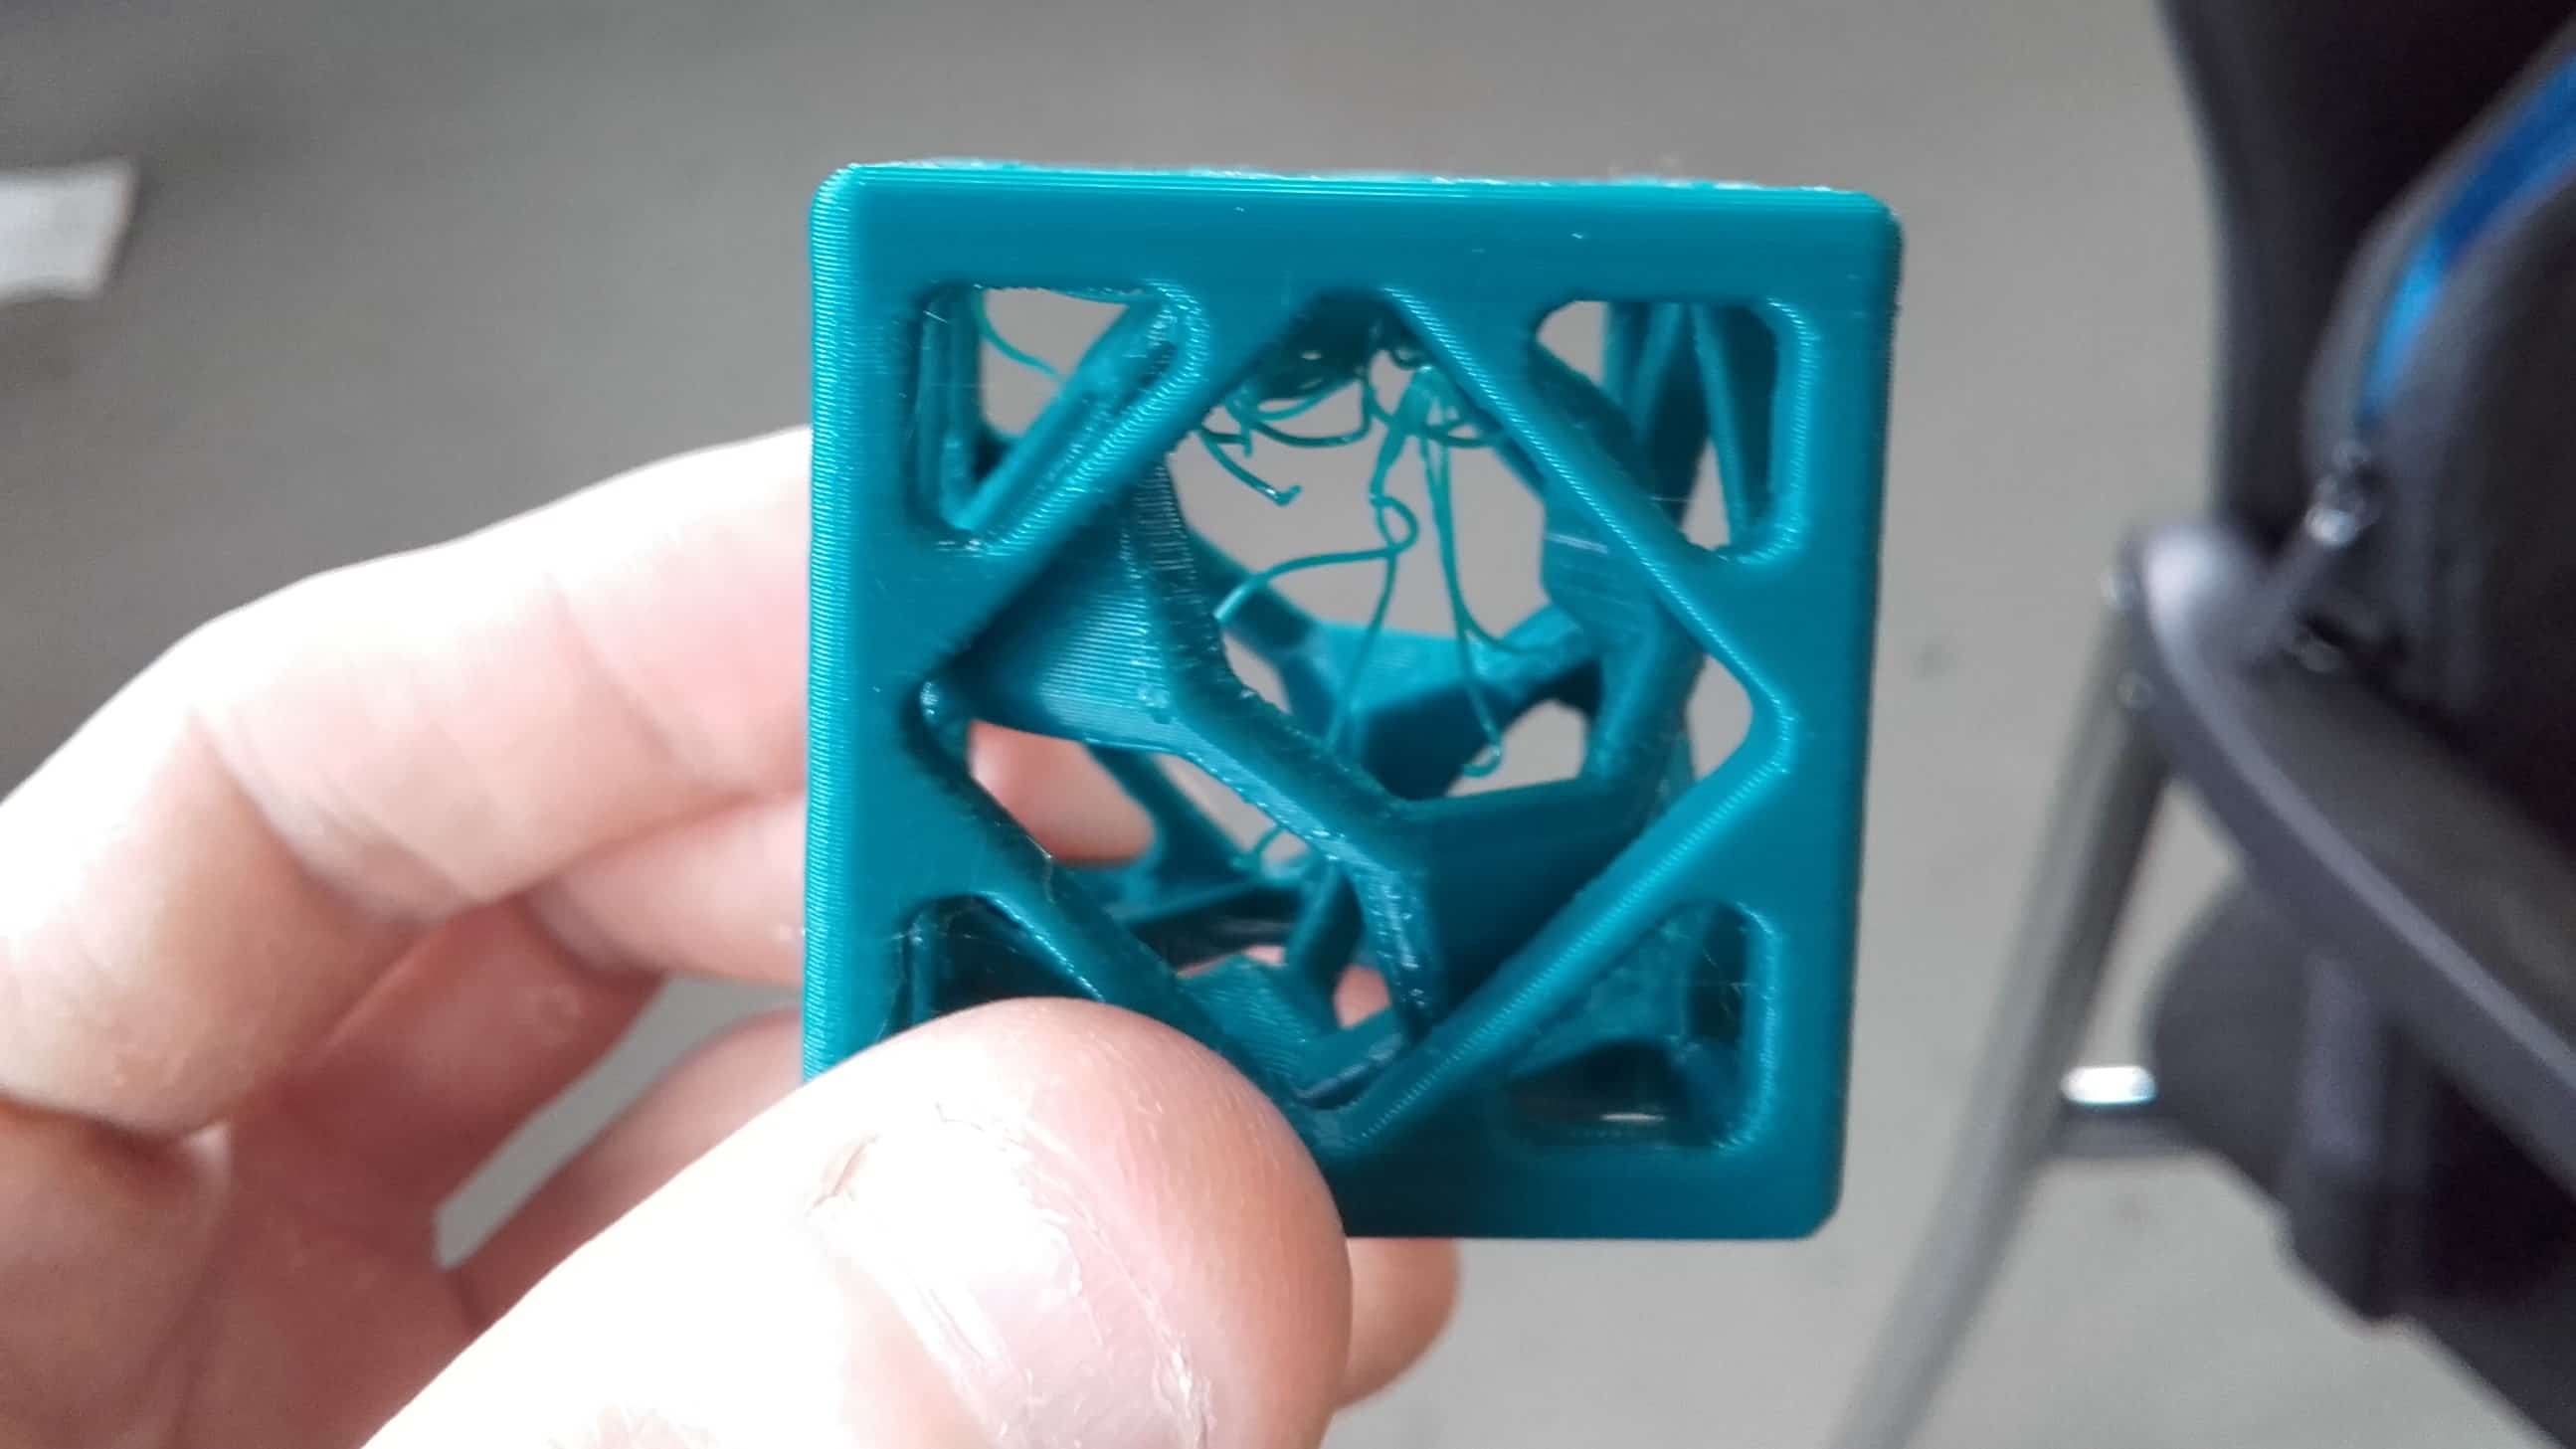
The only problem was the pointed part that hung down (which let's be honest, was NEVER going to print properly without supports) got a bit stringy.
But Seriously Not Bad
I think it was pretty impressive results overall considering the ridiculous geometry of this part.
Their Holinesses All Cleaned-Up
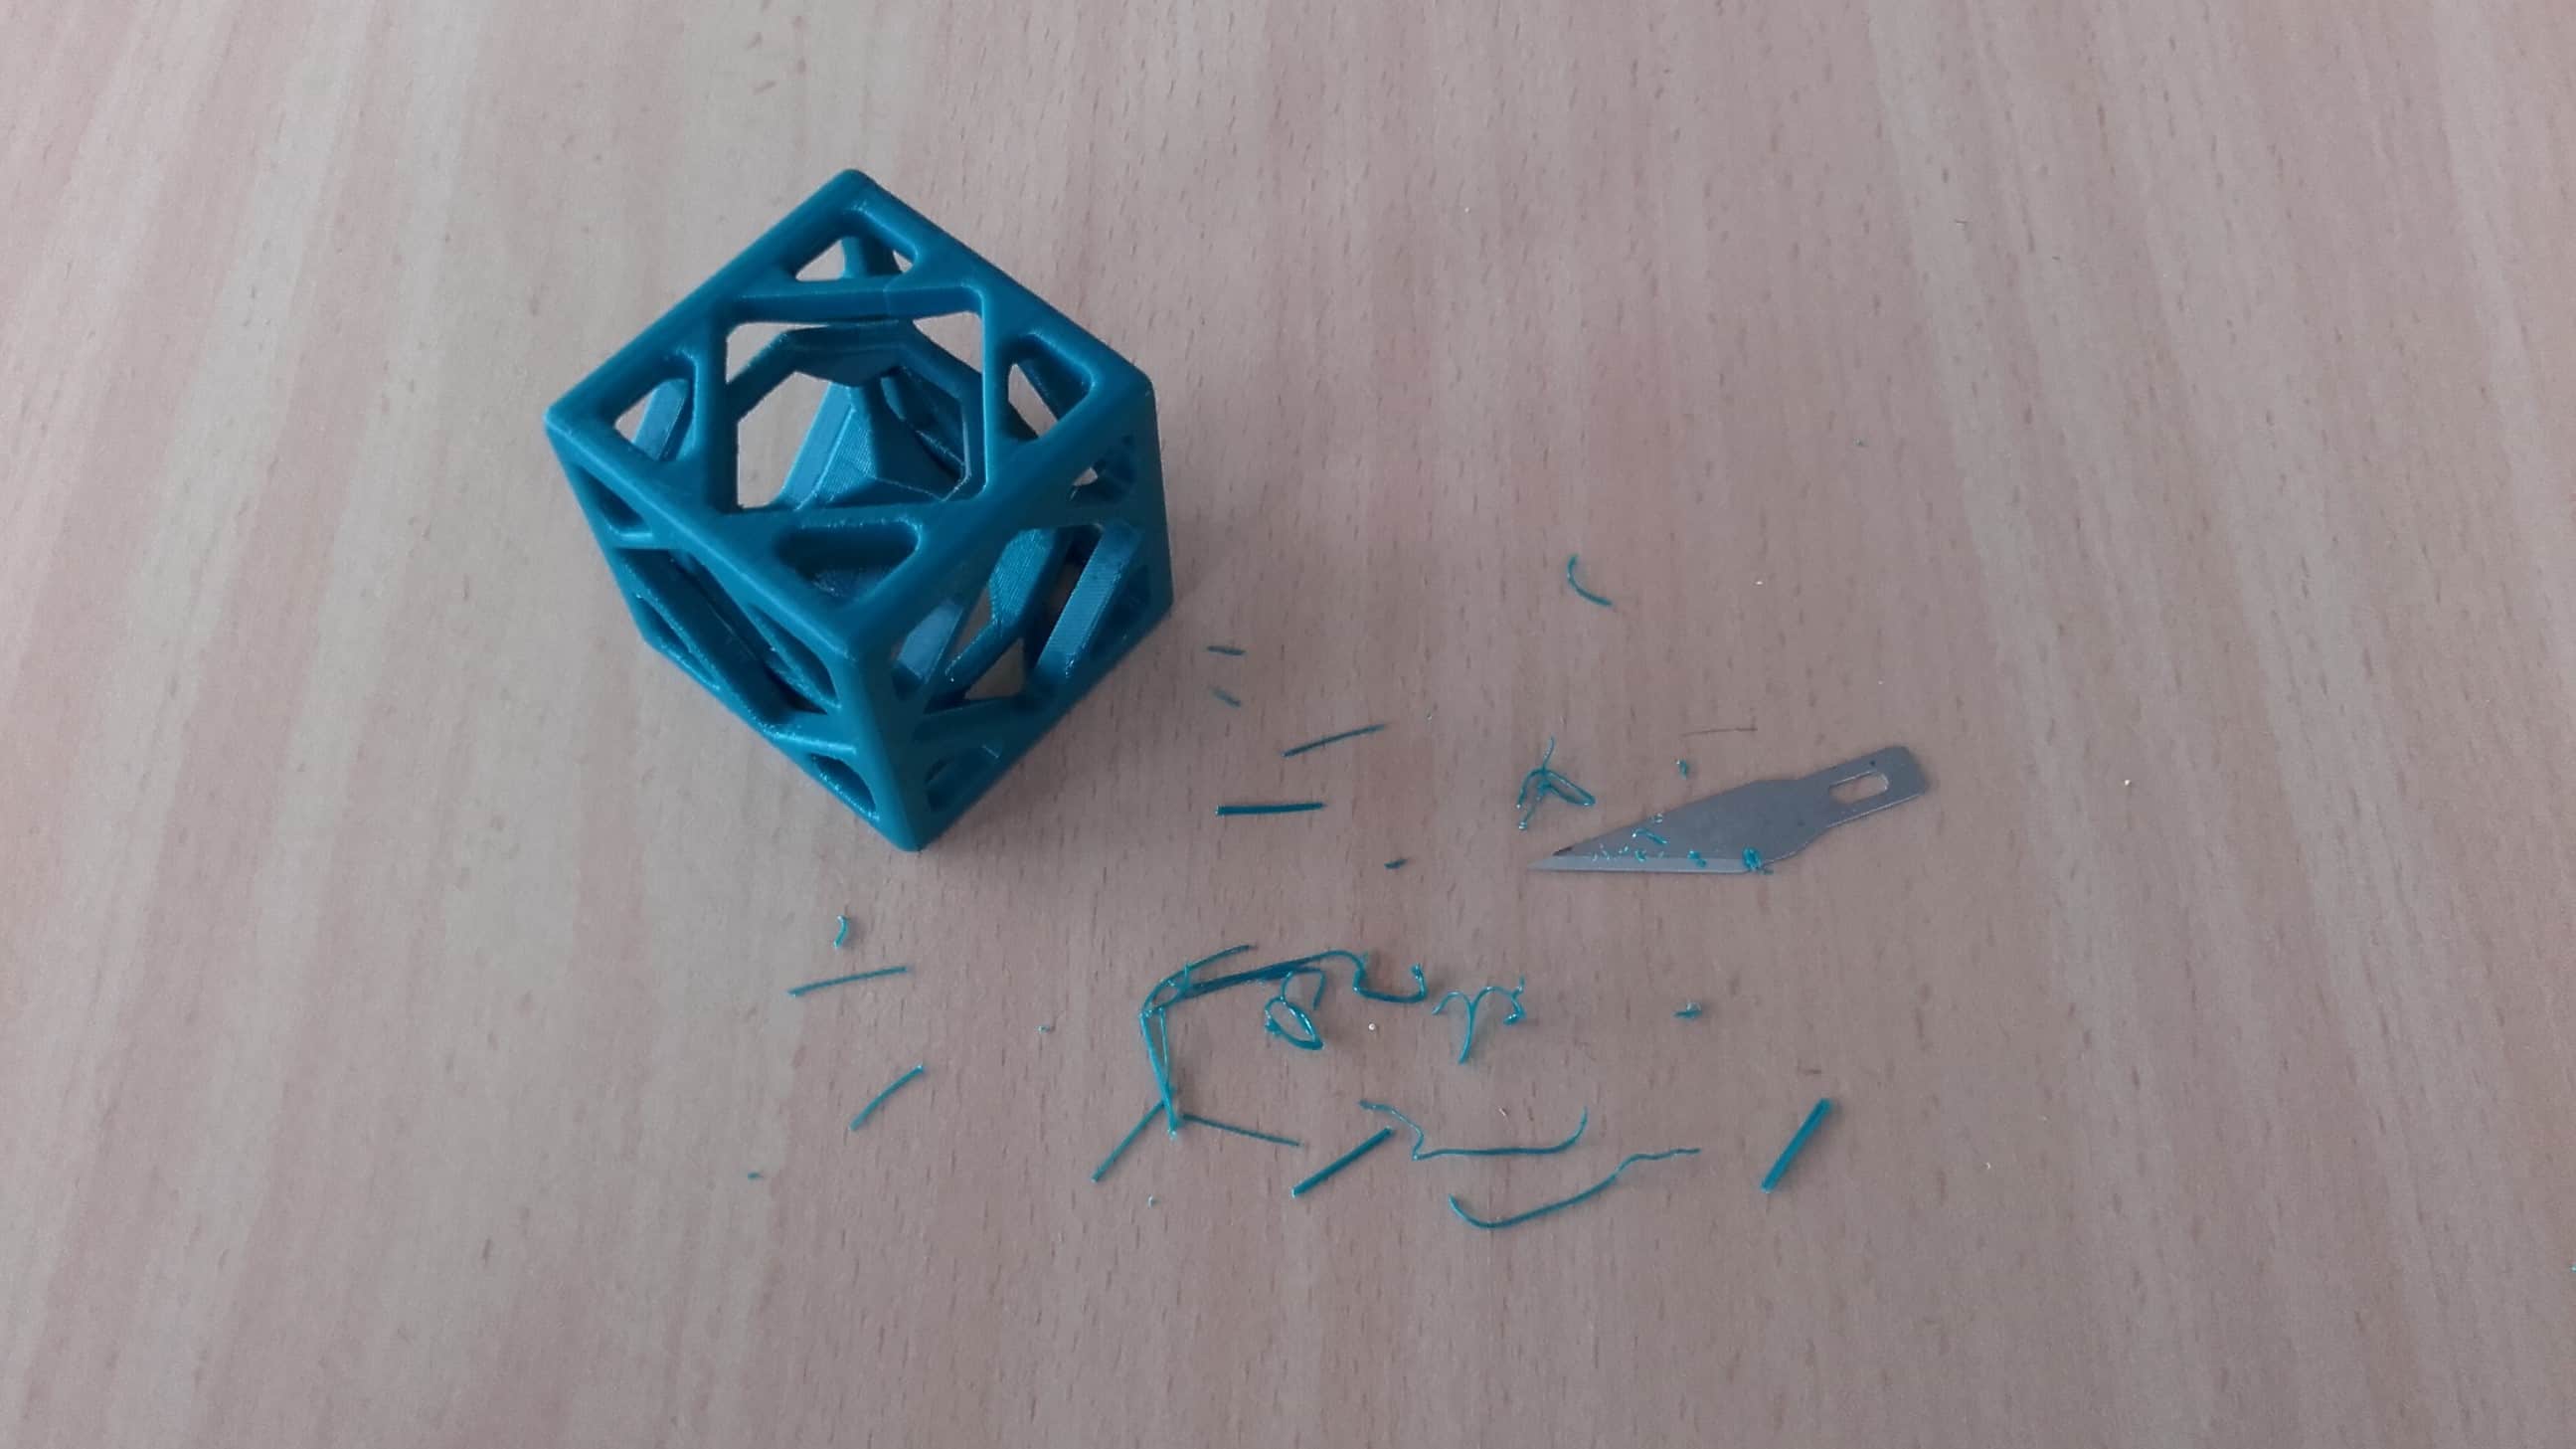
I cleaned the parts up a bit with an exacto blade and they were looking fresh. This has been a long week, but I had fun with it.