4. Electronics production
Group Assignment
Link to Electronics Production Group Assignment
This week’s assignment is the most challenging one for me so far. My family member got COVID-19 last week. For safety reason, I stay at home for self-quarantine this week. And did our group assignment via Zoom meeting. Terry, Jason, and our mentor German operate the machines at our lab. I shared my experiences on making PCB using CNC with them and did some document works such as searching necessary information from the Internet and capturing the important moments in the progress. I went to the lab and finished my individual assignments 10 days after that.
Milling a PCB with CNC
Tools and material
The CNC Machine
| Spec | Details |
|---|---|
| Model | Roland MDX-500 |
| Max. Spindle Speed | 12000 RPM |
| Spindle Motor | DC Brushless Motor 400W |
| Working Area | 500 x 330 mm |
Bits
| Spec | Details |
|---|---|
| Size | 100*80mm |
| Trace Milling Bit | 0.1x30degreex3.175 V-Bit |
| Edge Milling Bit | 0.1x0.7x3.175 Corn-Bit |
PCB
| Spec | Details |
|---|---|
| Size | 100*80mm |
| Thickness | 1.6mm |
| Copper Thickness | 0.15mm |
| Base Material | FR1 |
G-Code Conversion
For the PCB used to test Electronic Production process, I choosed a MOSFET driver I designed.
Convert GERBER into G-Codes
-
Open FlatCAM, open Top.gbr and BoardOutline.gbr, which is the trace and outline of the MOSFET driver.
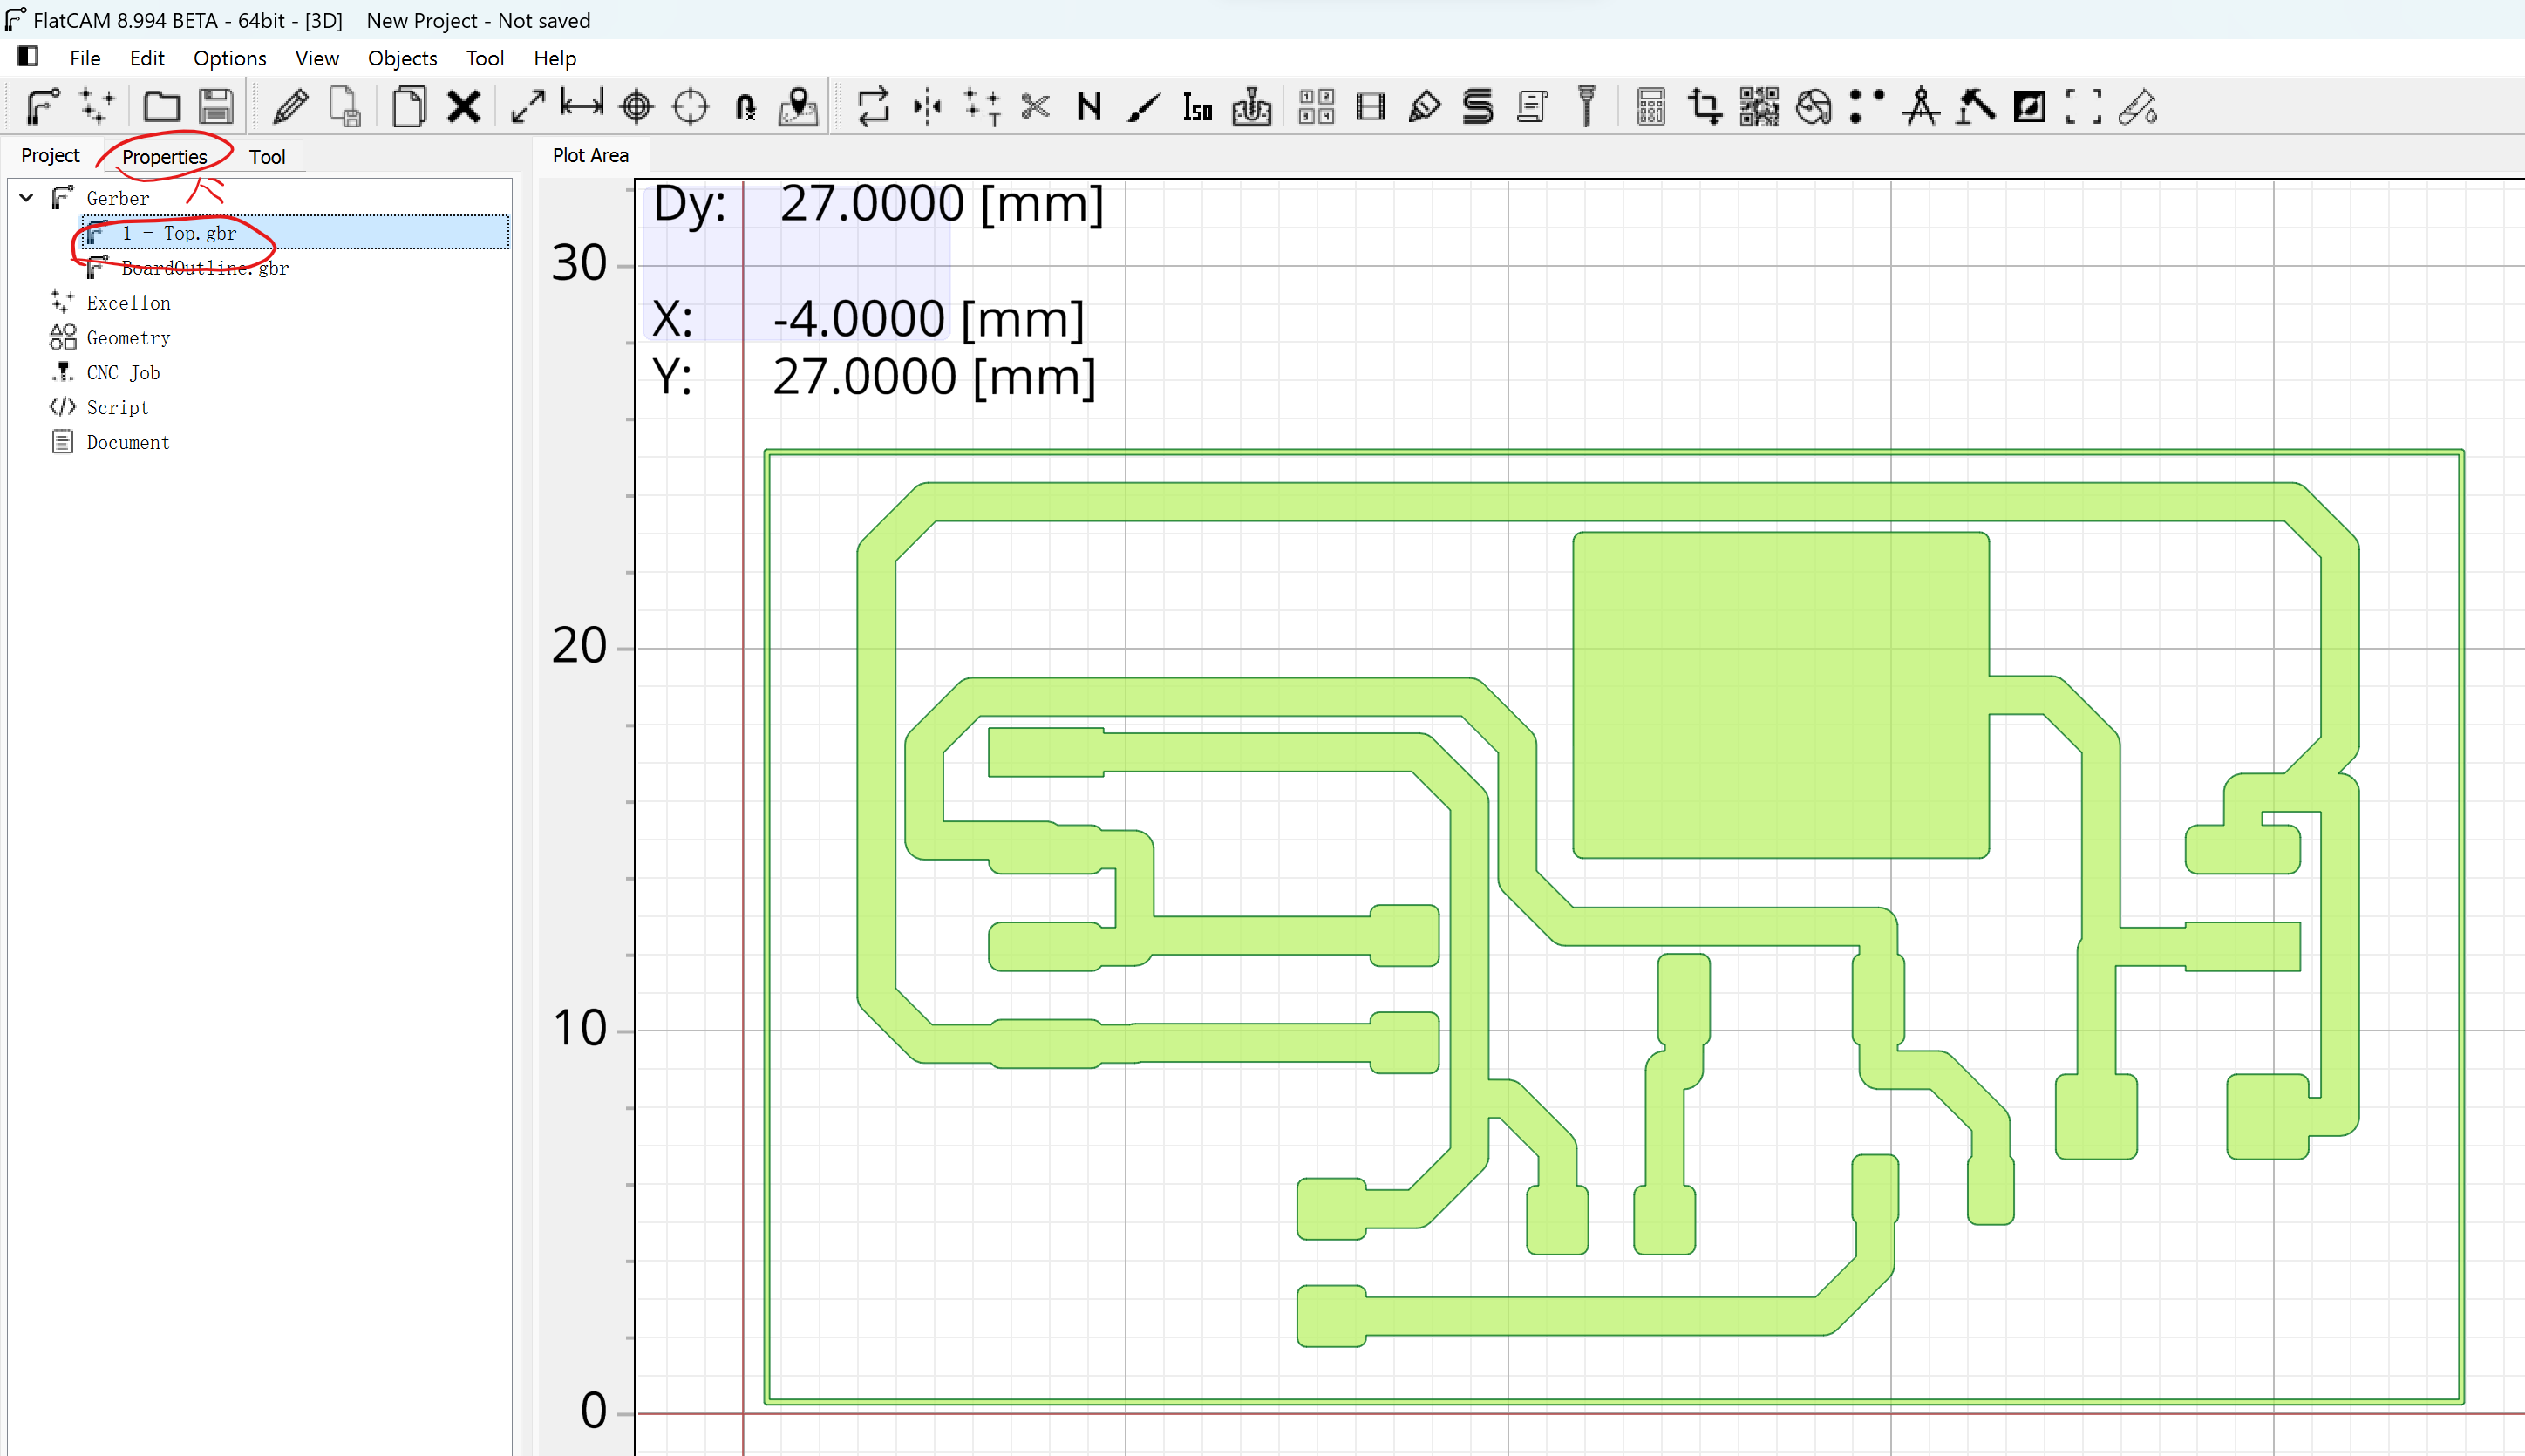
-
Select Top.gbr then switch to Properties tab, click Isolation Routing, input tool tip diameter, clock Generate Geometry

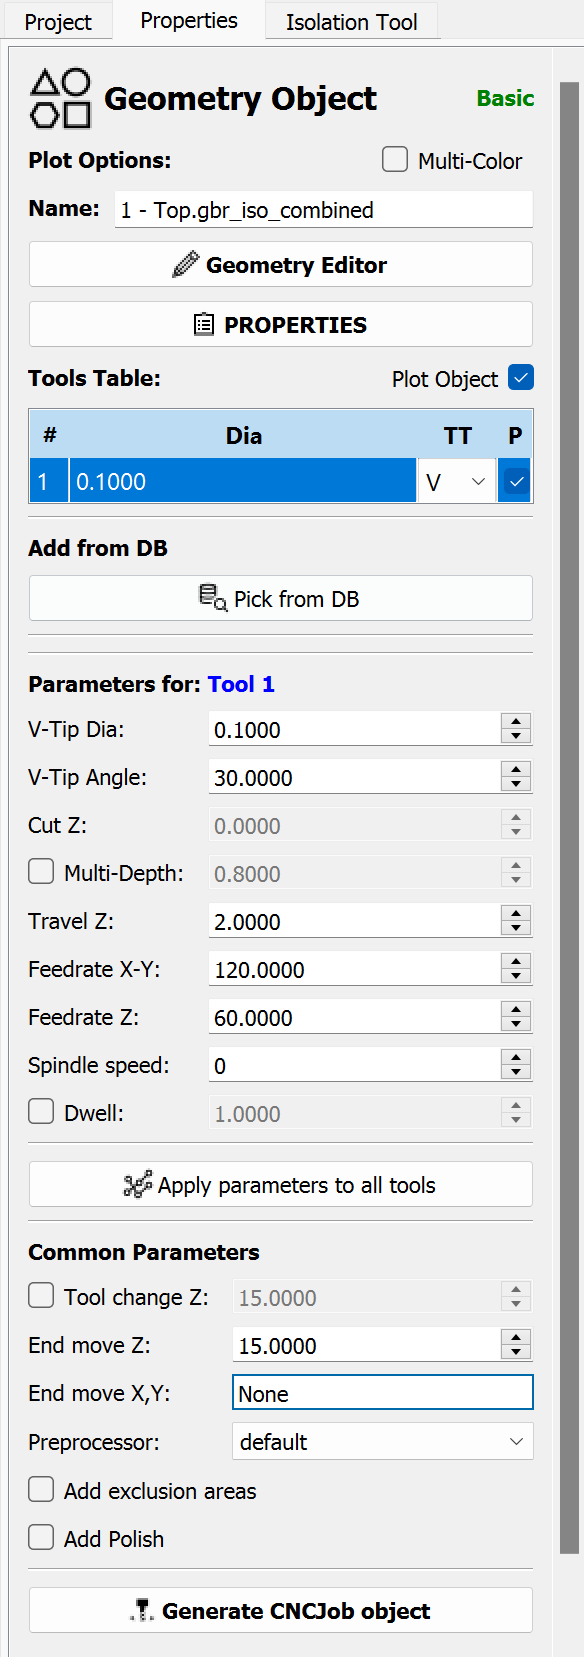
-
Input the correct parameters of my selected bit. Then click Generate CNCJob Object, then clock Save CNC Code
Preparing for Milling
Sanding the PCB Board
I first sand the copper on the PCB board with a #400 sand paper to remove the oxidation layer. This helps the PCB board become easier to solder and provide conductivity while setting the z-origin with a probe.
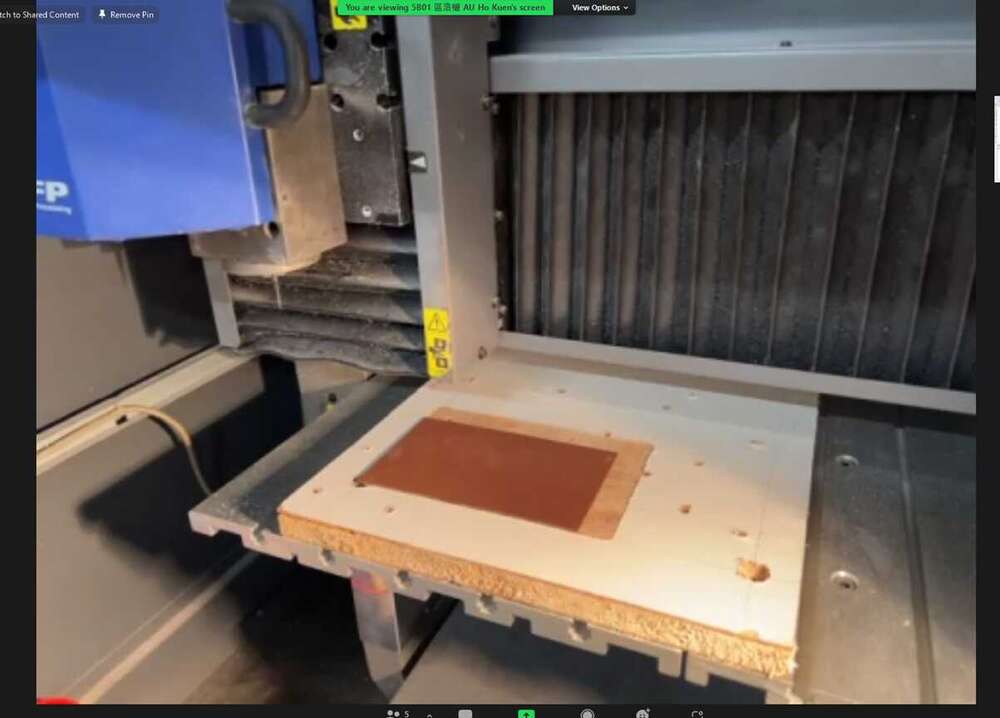
Fixing the PCB Board to Work Area
The ply-wood on the CNC machine was scratched, and I found it will teared by the double-sided tapes when we fix the PCBs on its surface and remove time by time. That makes it uneven. So I replace it with a piece of walnut. It’s much harder than the ply-wood and make it difficult to being teared by the double-sided tapes during the removal of PCB. A thin layer was milled using a 10mm flat end mill to make sure the surface was flat.
Setting the work origin
After fixed the PCB to the work surface, I pointed the v-bit to the lower left corner of the PCB. Then press X-Y button to set the X-Y origin to there. Then I pressed Z- to lower the bit to around 5mm above the surface of PCB. Then select Sensor Mode in the machine menu. I touch the probing wire to the PCB surface, then I kept pressing Z- until the tip of the v-bit touchs the PCB surface and set Z origin automatically.
Seding the G-Codes
I open the .nc file in edytornc, then press Send button to send all g-codes in the file to the machine buffer. The machine start milling the PCB immediately.
Place and solder
At the last step, I first squeeze the soldering paste on the copper leads. Then place the SMD components on pcb, placing the PCB on the heat plat which heated up to 215 degree celsius. The solder paste will start melting and fix SMD parts in place.
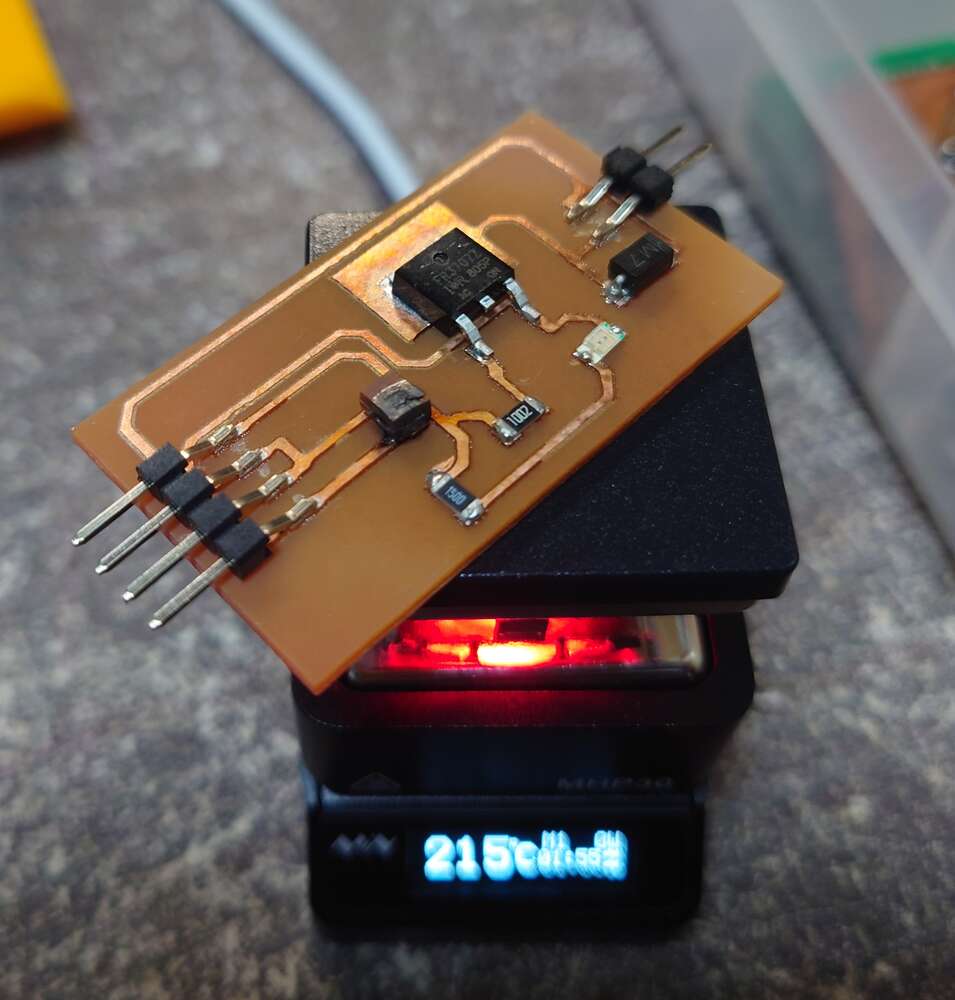 This picture shows how a pcb was placed on top on the hot plate. This is not the same board I made in this week, just to present the concept.
Test the board
Problem Met
Misunderstanding about DAP
I made a mistake in understanding the concept of how DAP works. I thought the 4-pin SWD jumper on target boards that receiving firmwares from the ISP could also used to download programs to another target board when the they were loaded with the Free-DAP firmware. So I choose the USB-D11C-serial board as my “ISP” because it seems easier to make. When I finally figured out how they works, I made a new ISP with 4 separate pins to download program to traget boards.The USB-D11C-serial board used to test if my ISP works. The making-of photos and videos are taken with the USB-D11C-serial board. But the process of milling and soldering are the same as making the ISP.