3. Computer controlled cutting
Hero Shots:

This week I tested the vinyl cutter and made a stick for a car, created a press fit construction kit. I also created a script to crop and the JPG file.
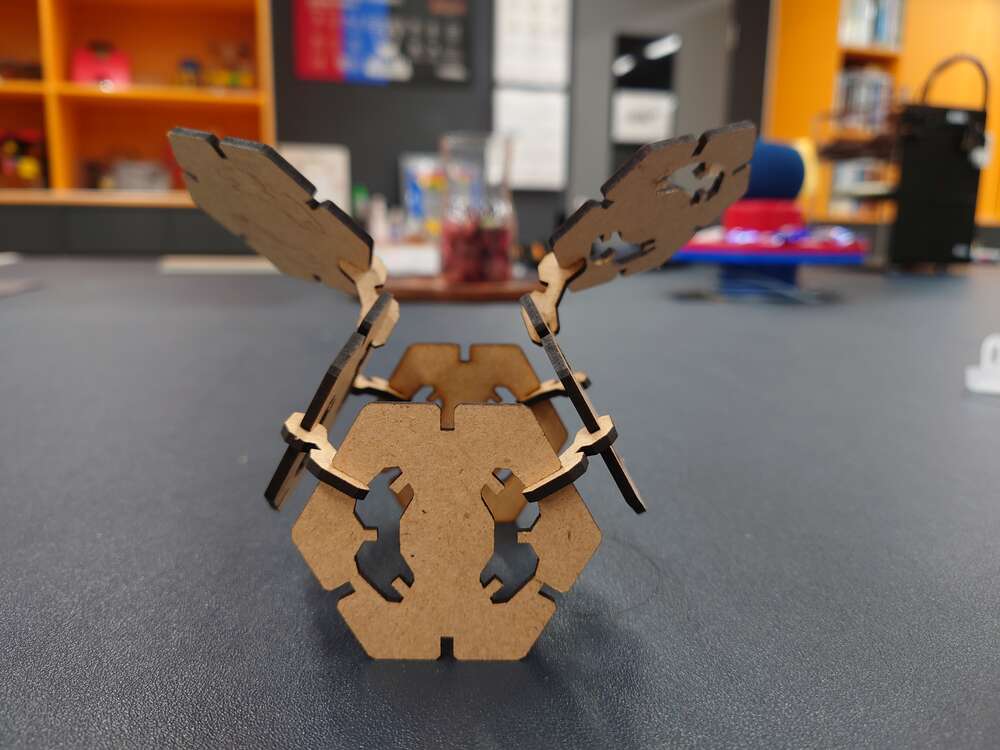
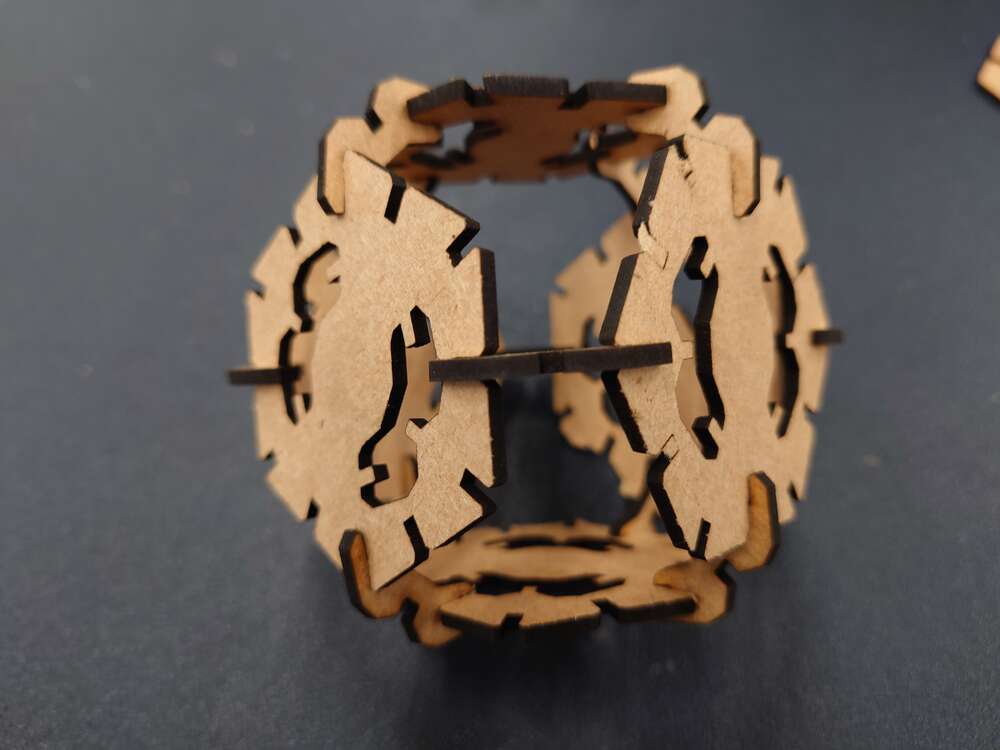
Designing a press-fit construction kit
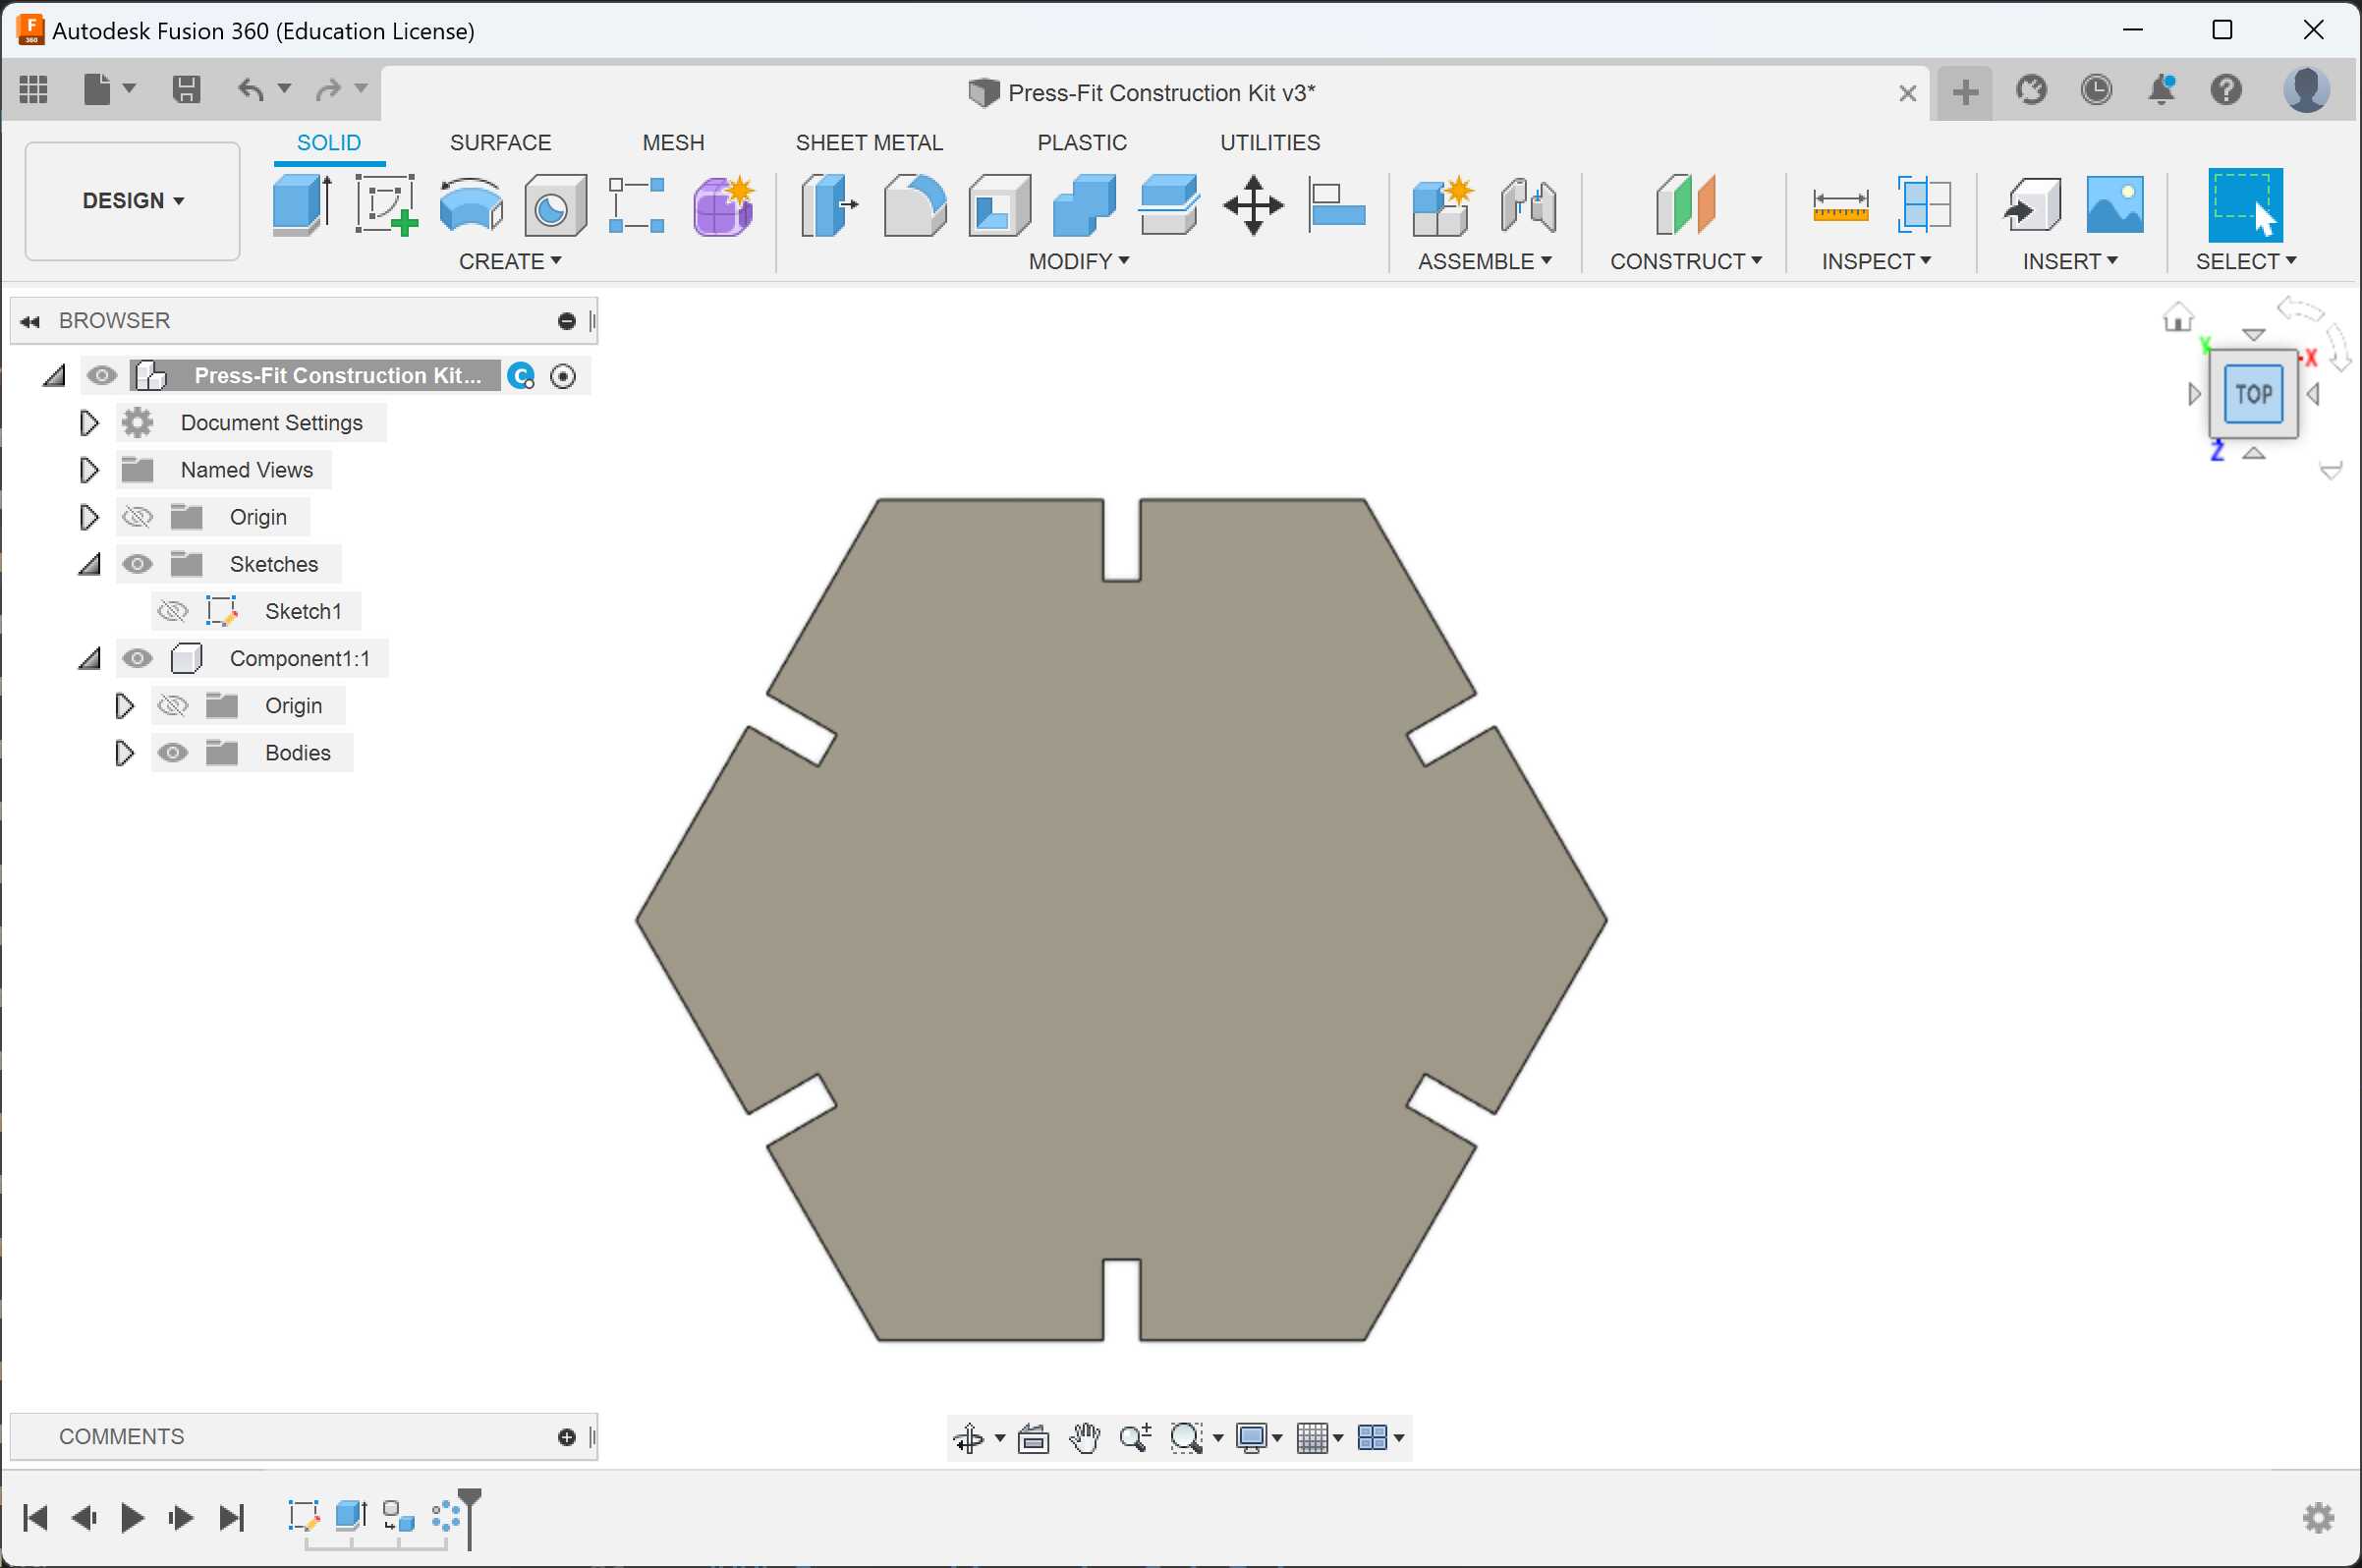
I designed a press-fit construction kit on Fusion 360. Its basic elements are hexagontal pieces and connectors.
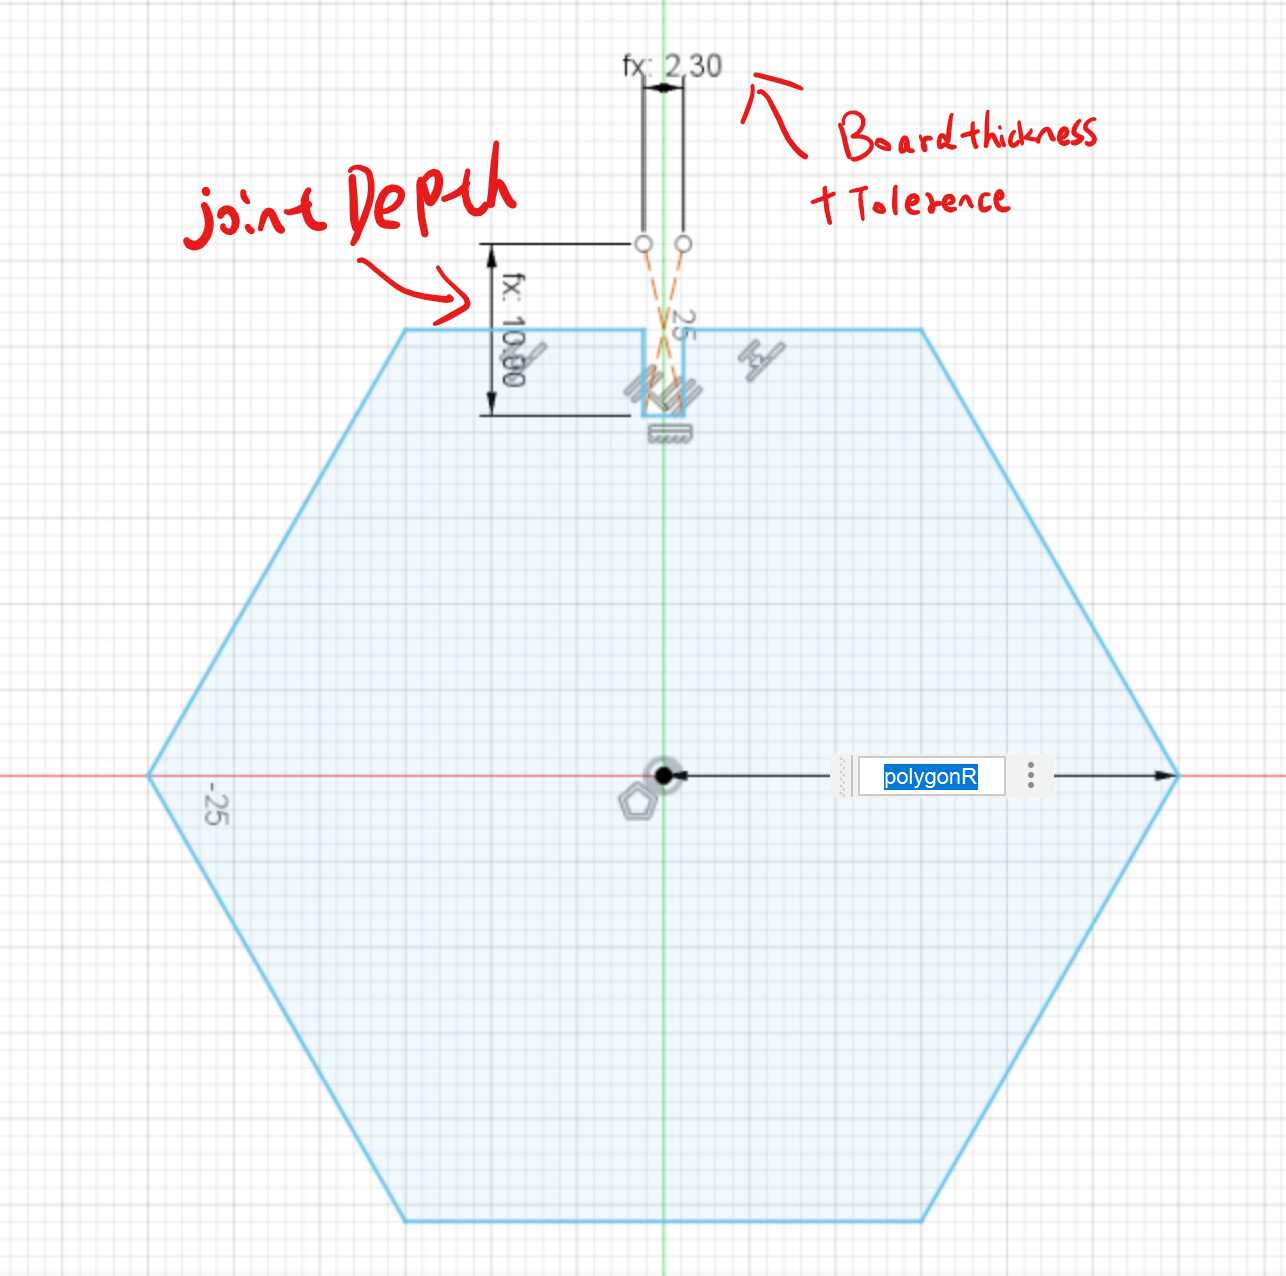
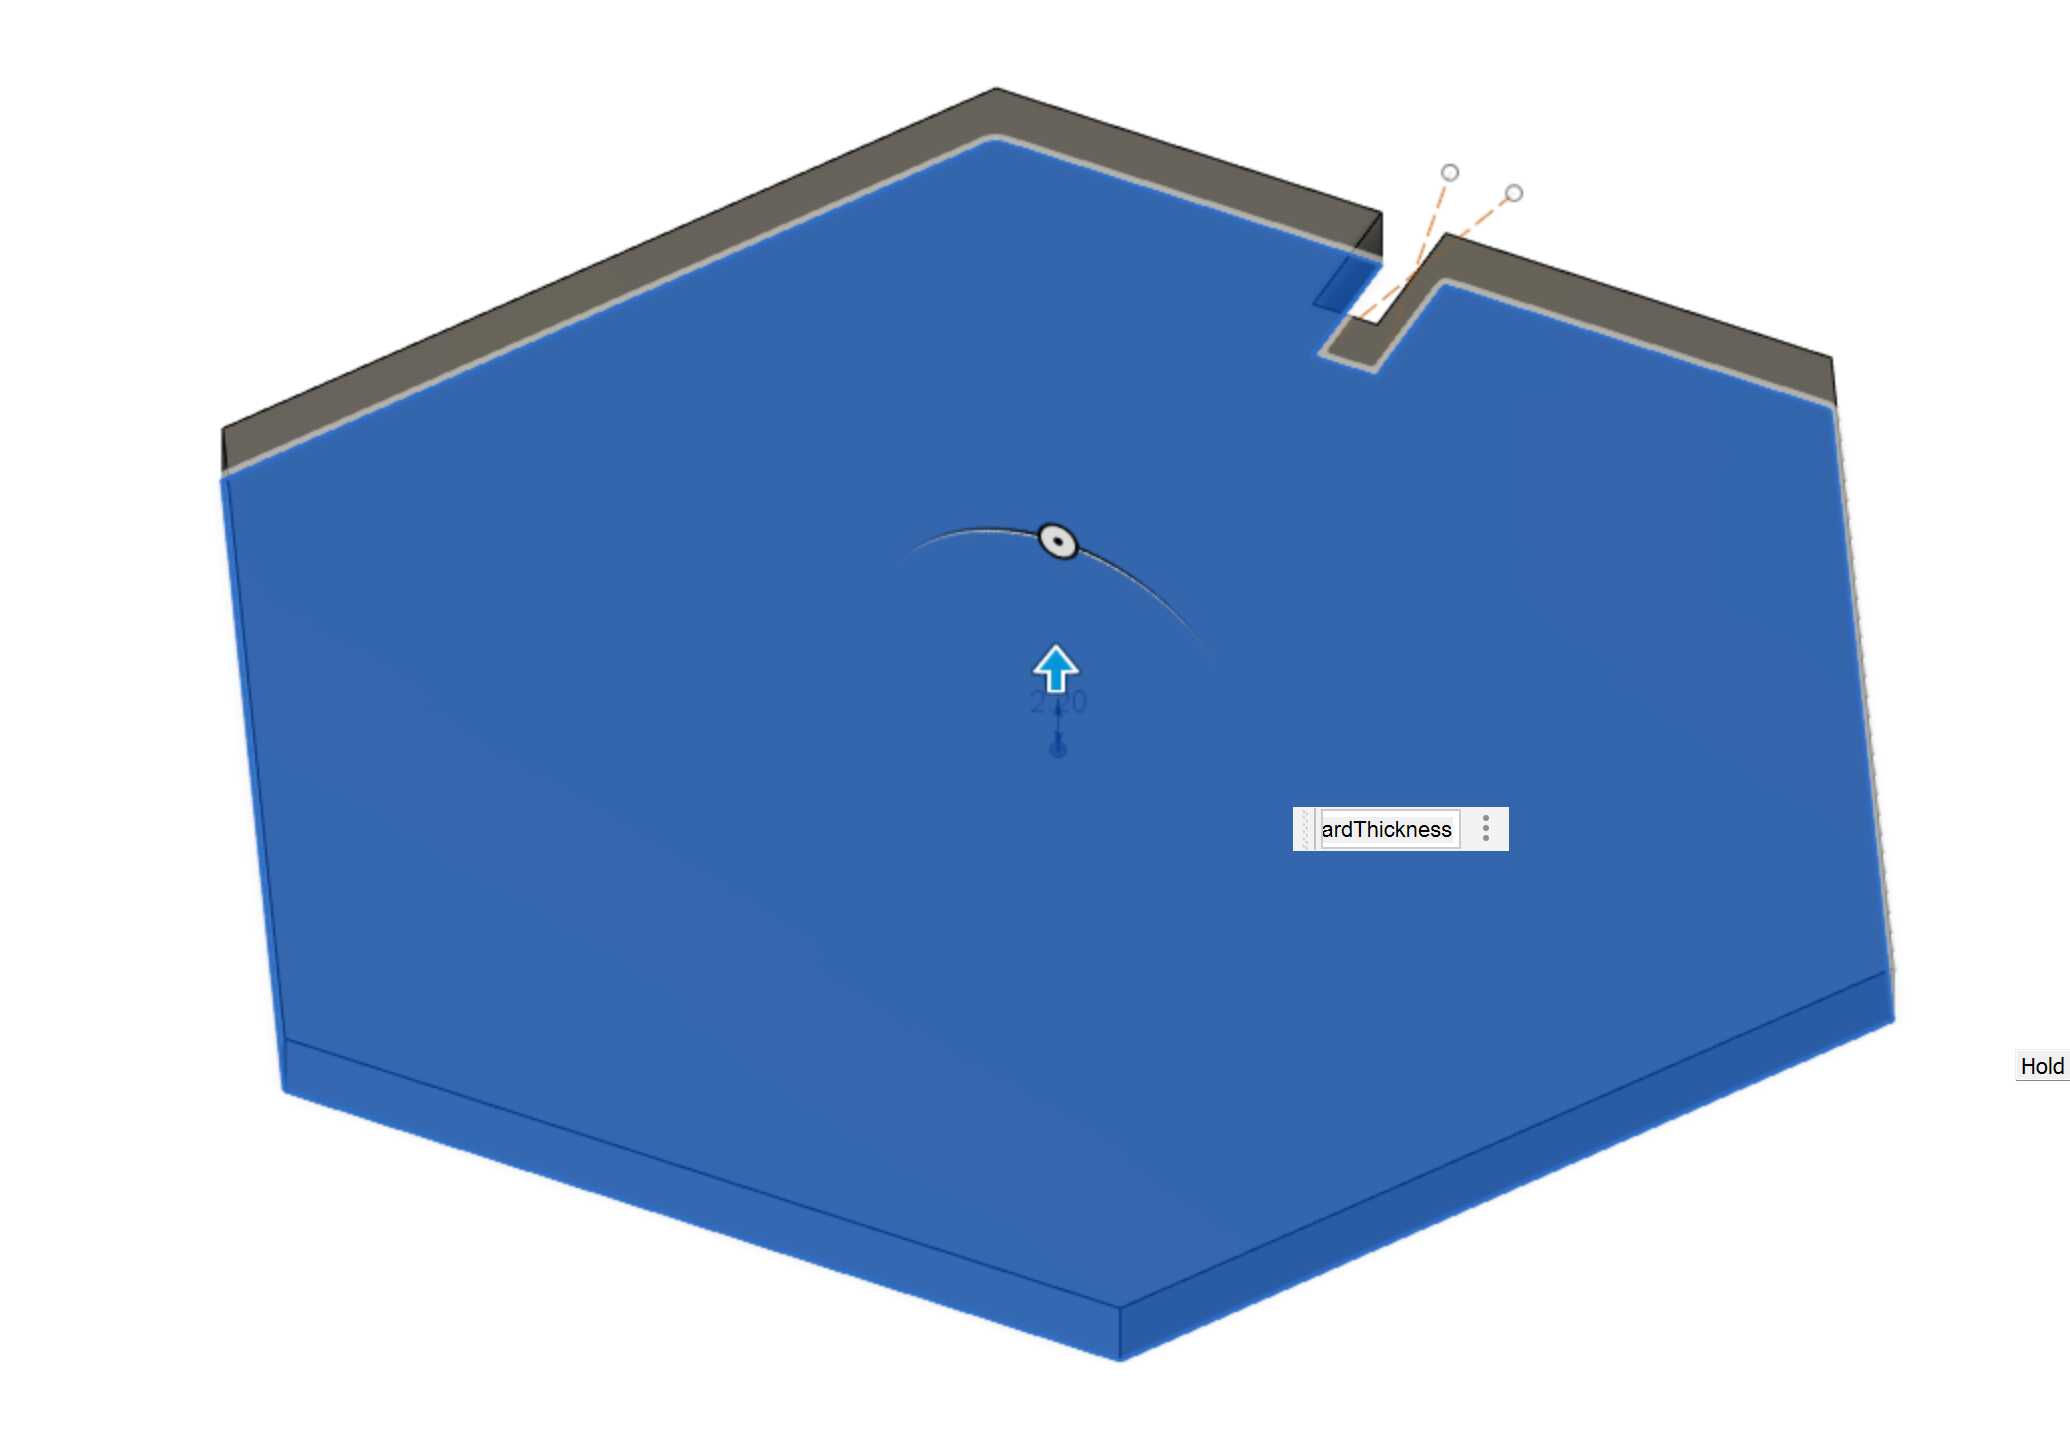
I first define four parameters, which can adjust anytime according the materials or design change.
bordThickness: The thickness of the wooden board
polygonR: radious of the hexagon piece
tolerence: affecting the fitness and tightness of the joints
jointDepth: the depth of the joints
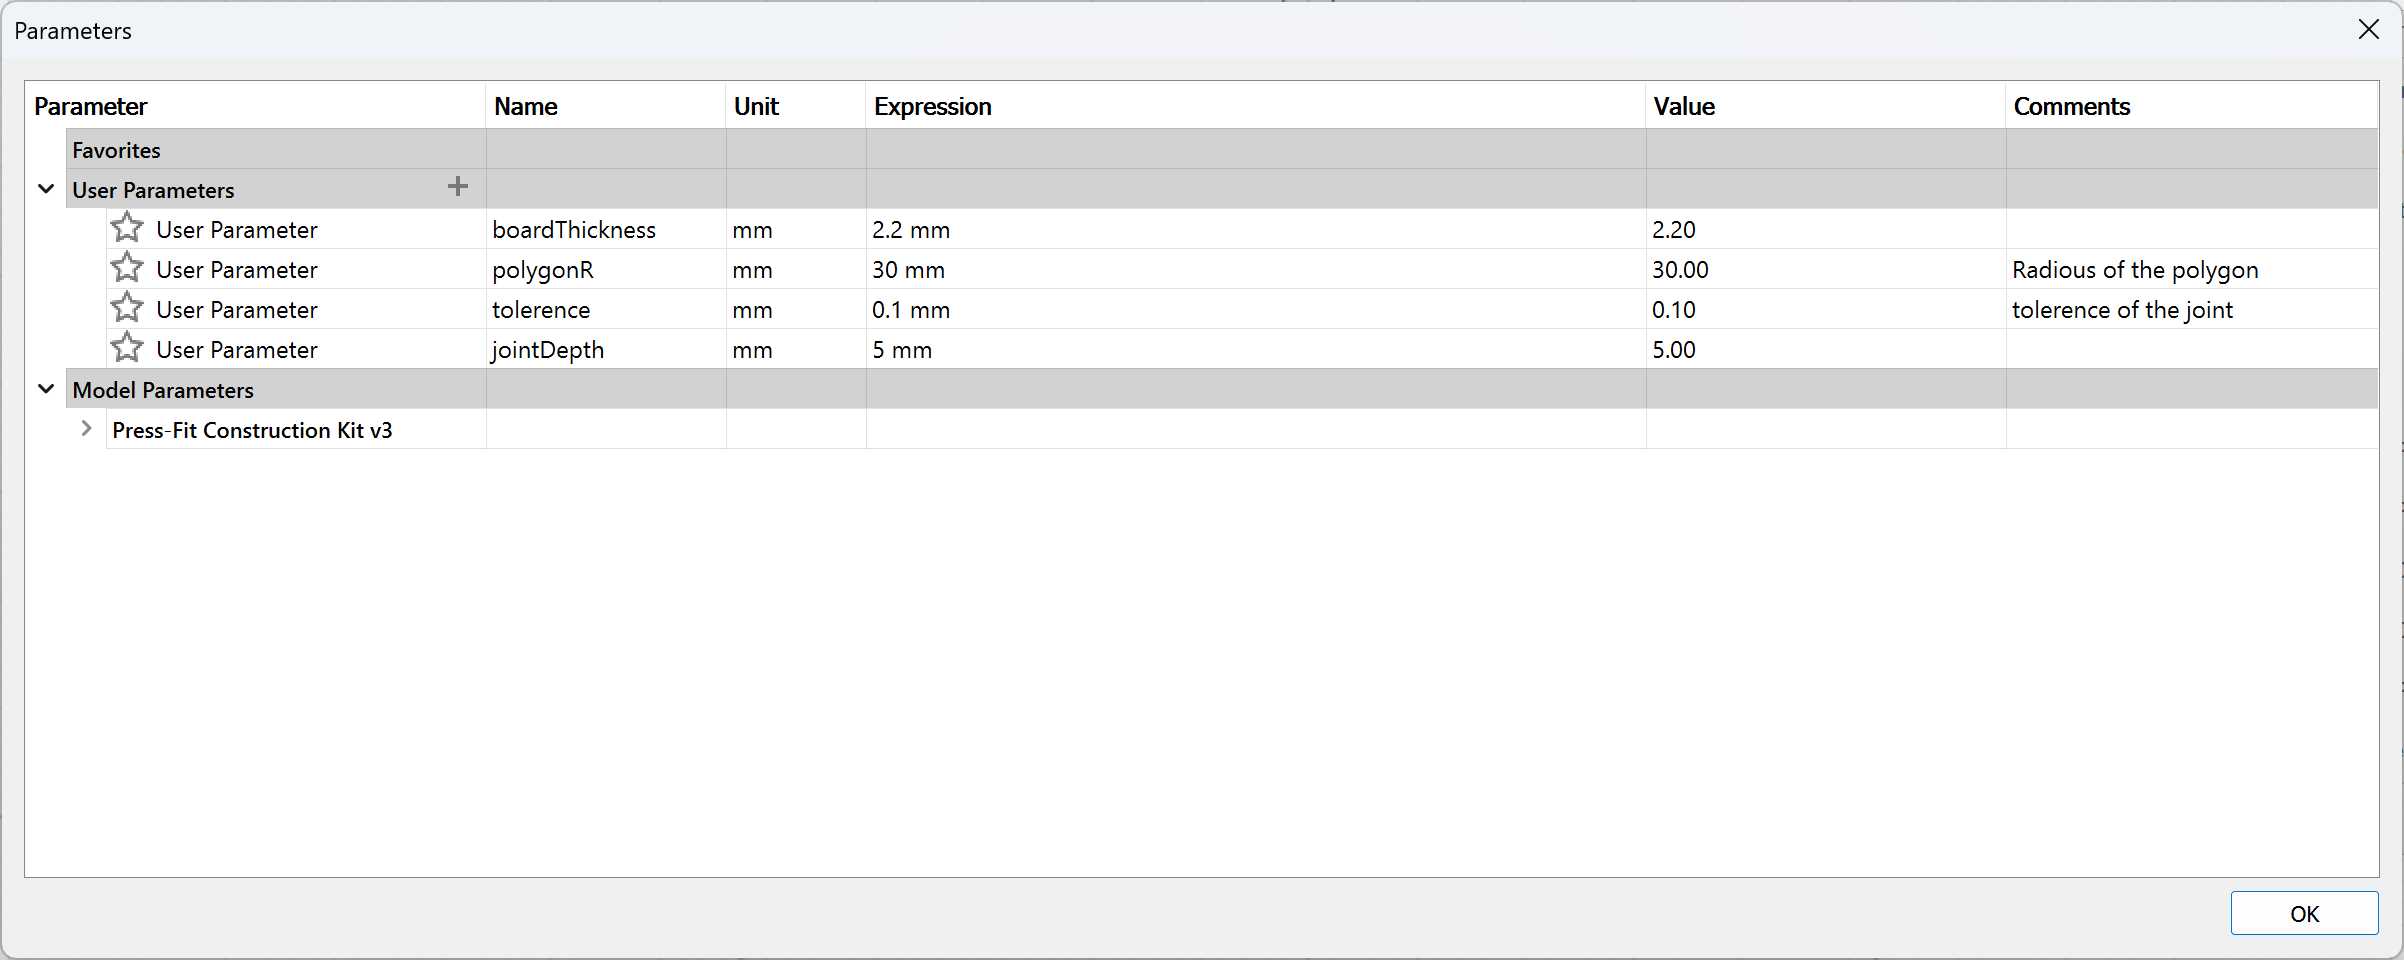
To make parameters work, I typed parameters’ name instead of numbers when drawing the sketch. So that I can change the dimensions anytime when needed.
After drawing the hexagon on the sketch. I pulled a hexagon piece with Pull tool and typed boardThickness in the text box.
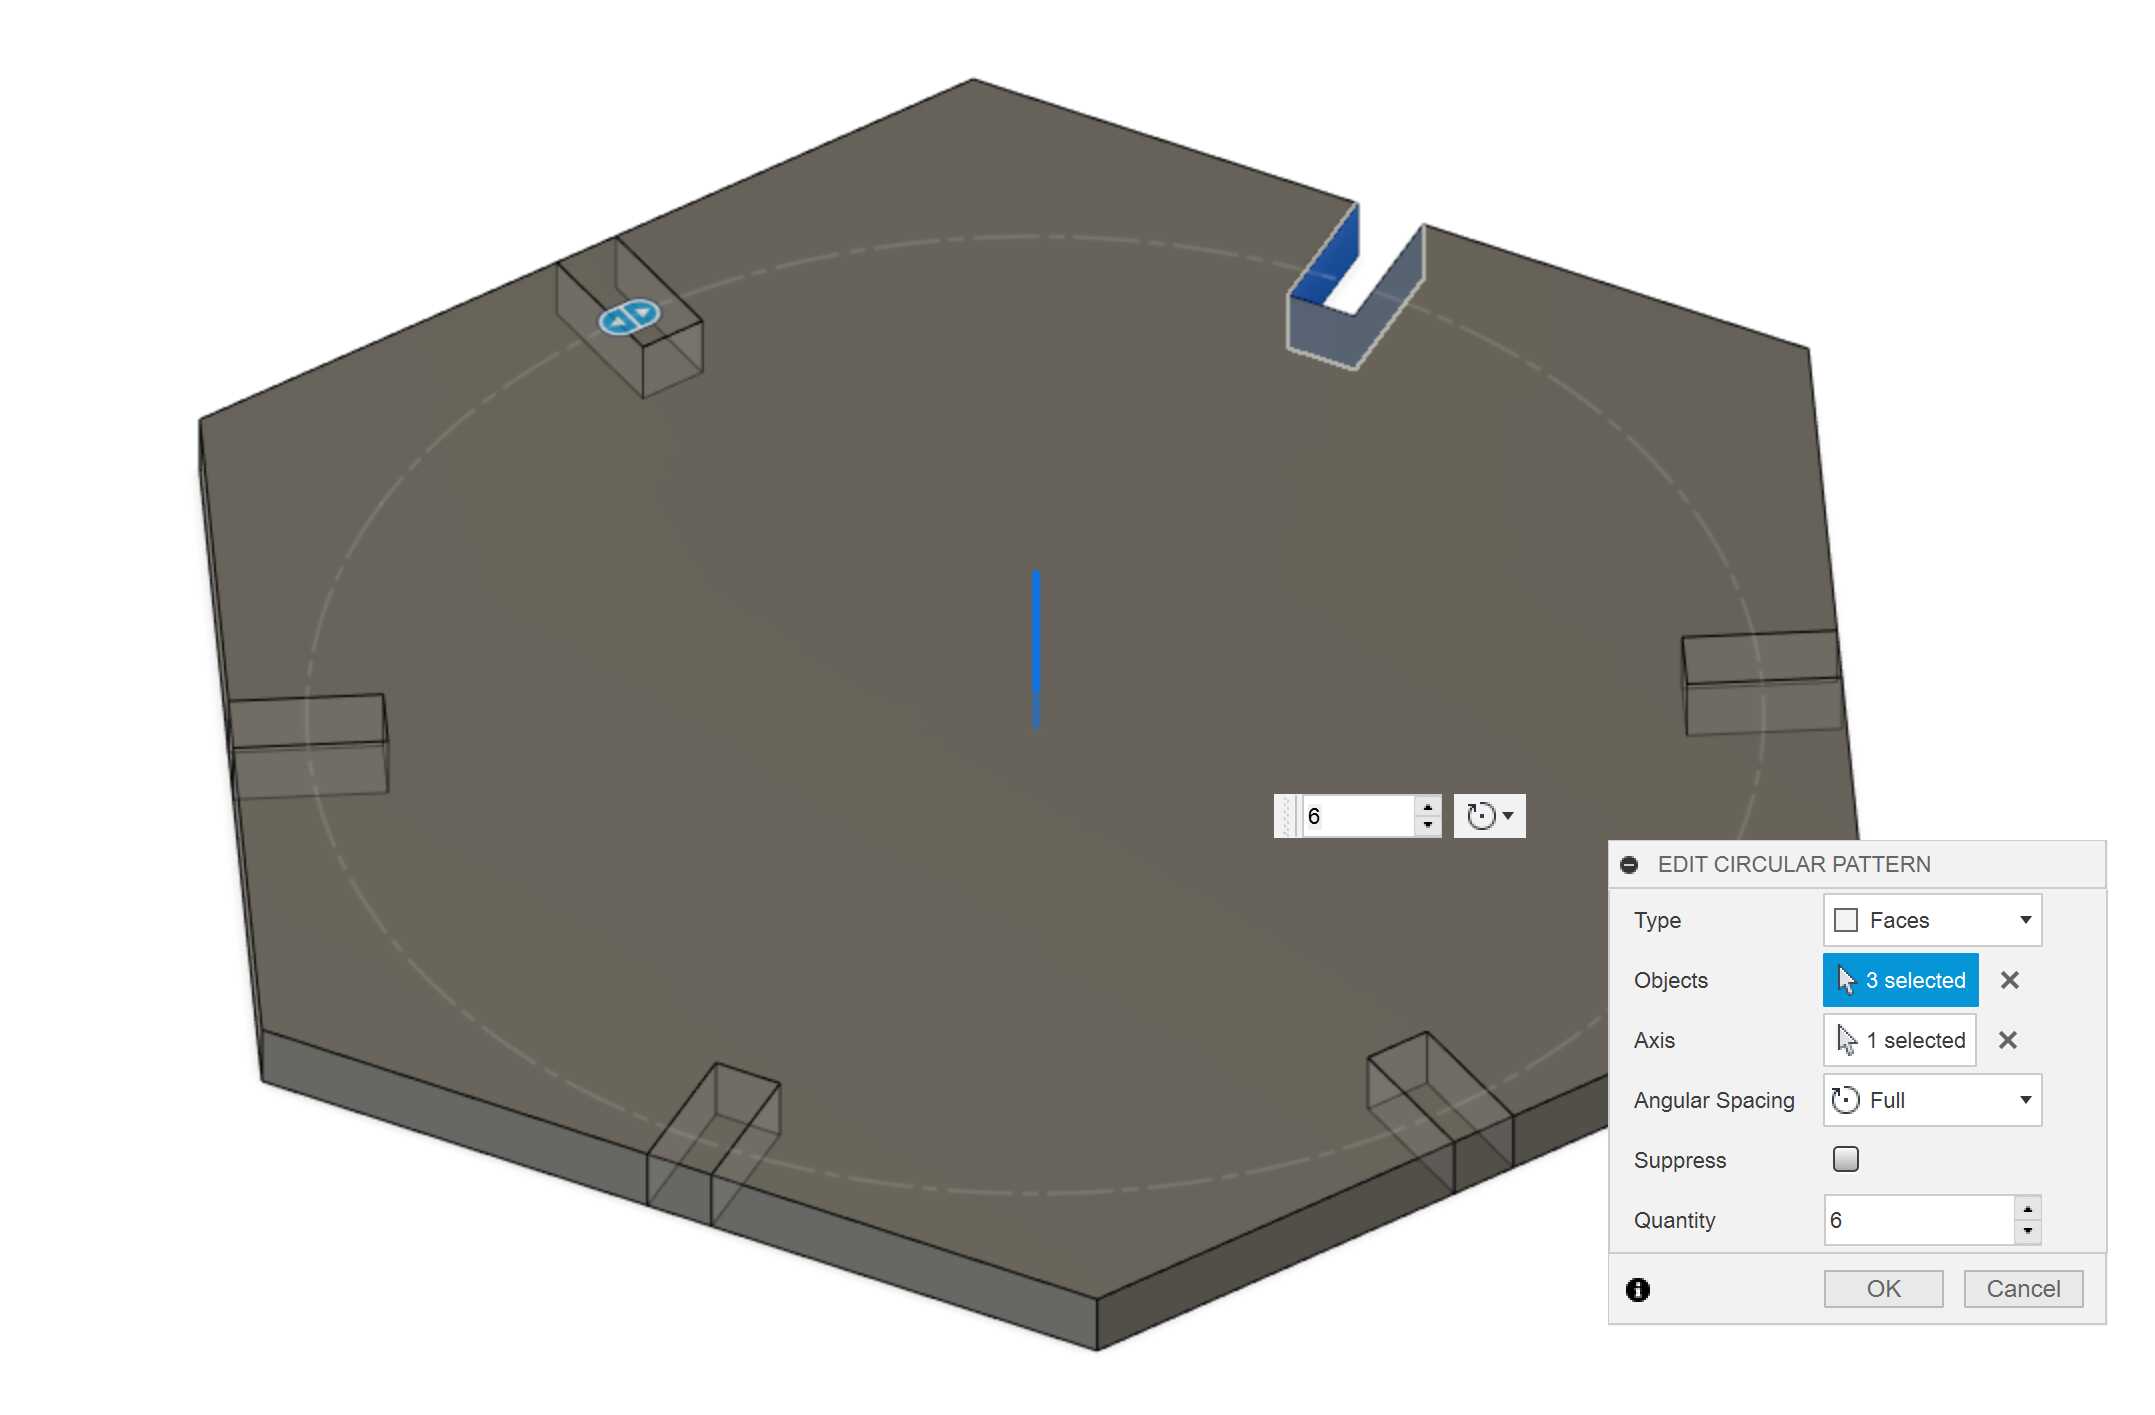
To make a slot at every side, I use circular pattern tool and select the first slot I made, type the quantity and rotation axis. It generates five additional slots at the edges.
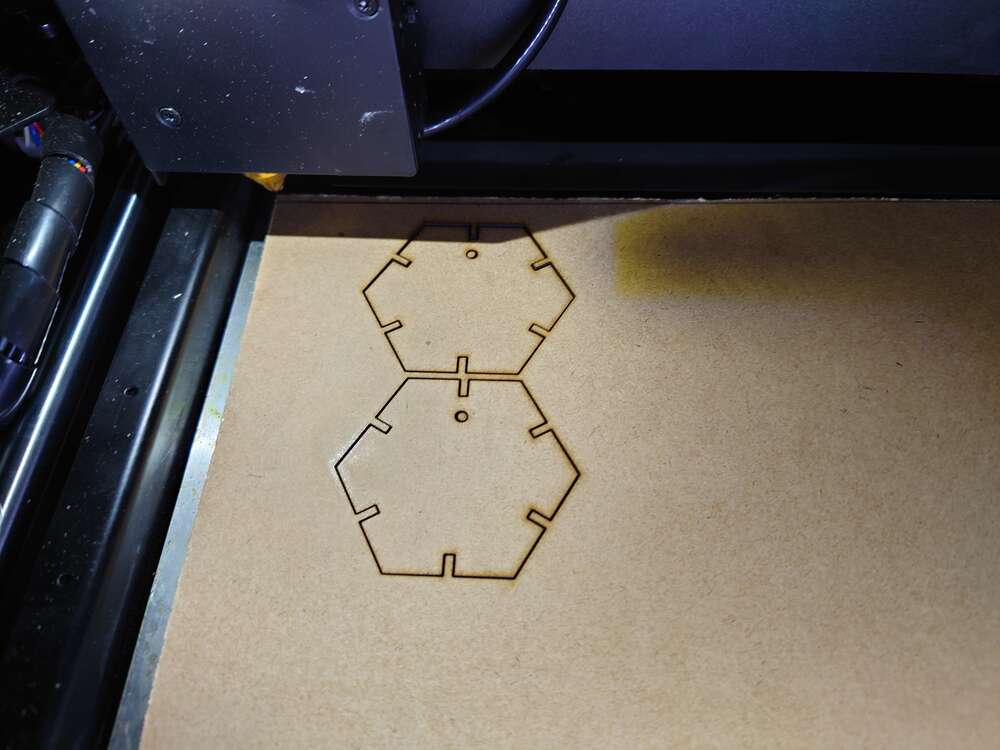
I then send the design to the laser cutter to cut out the pieces.
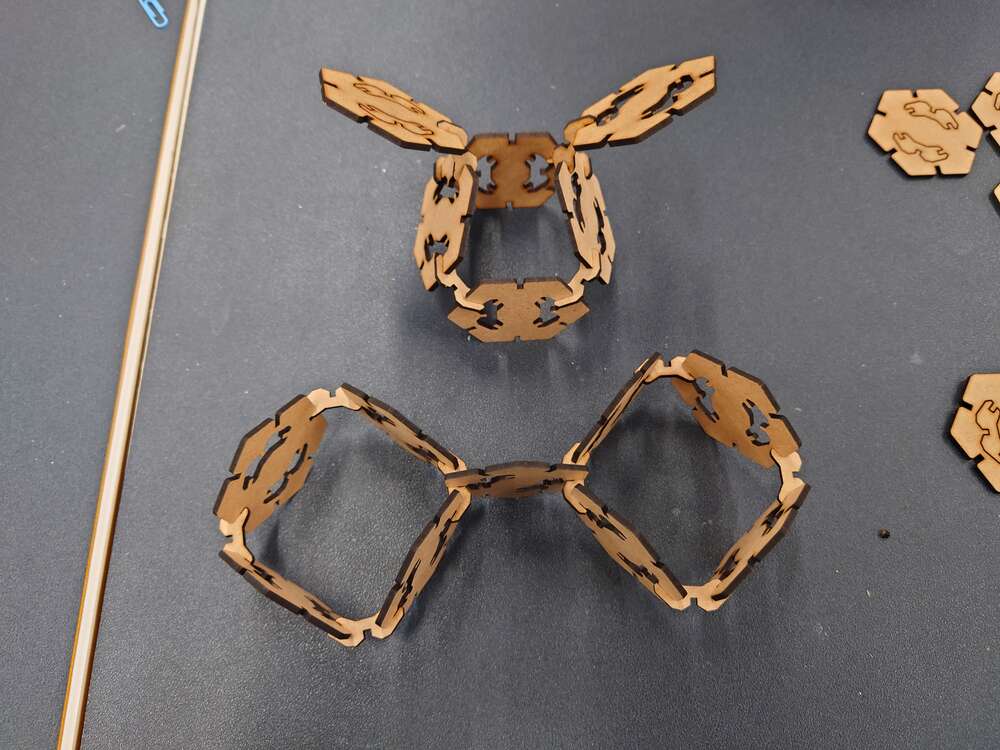
The kit can be assbmeled in anyway by joinin the slots together.
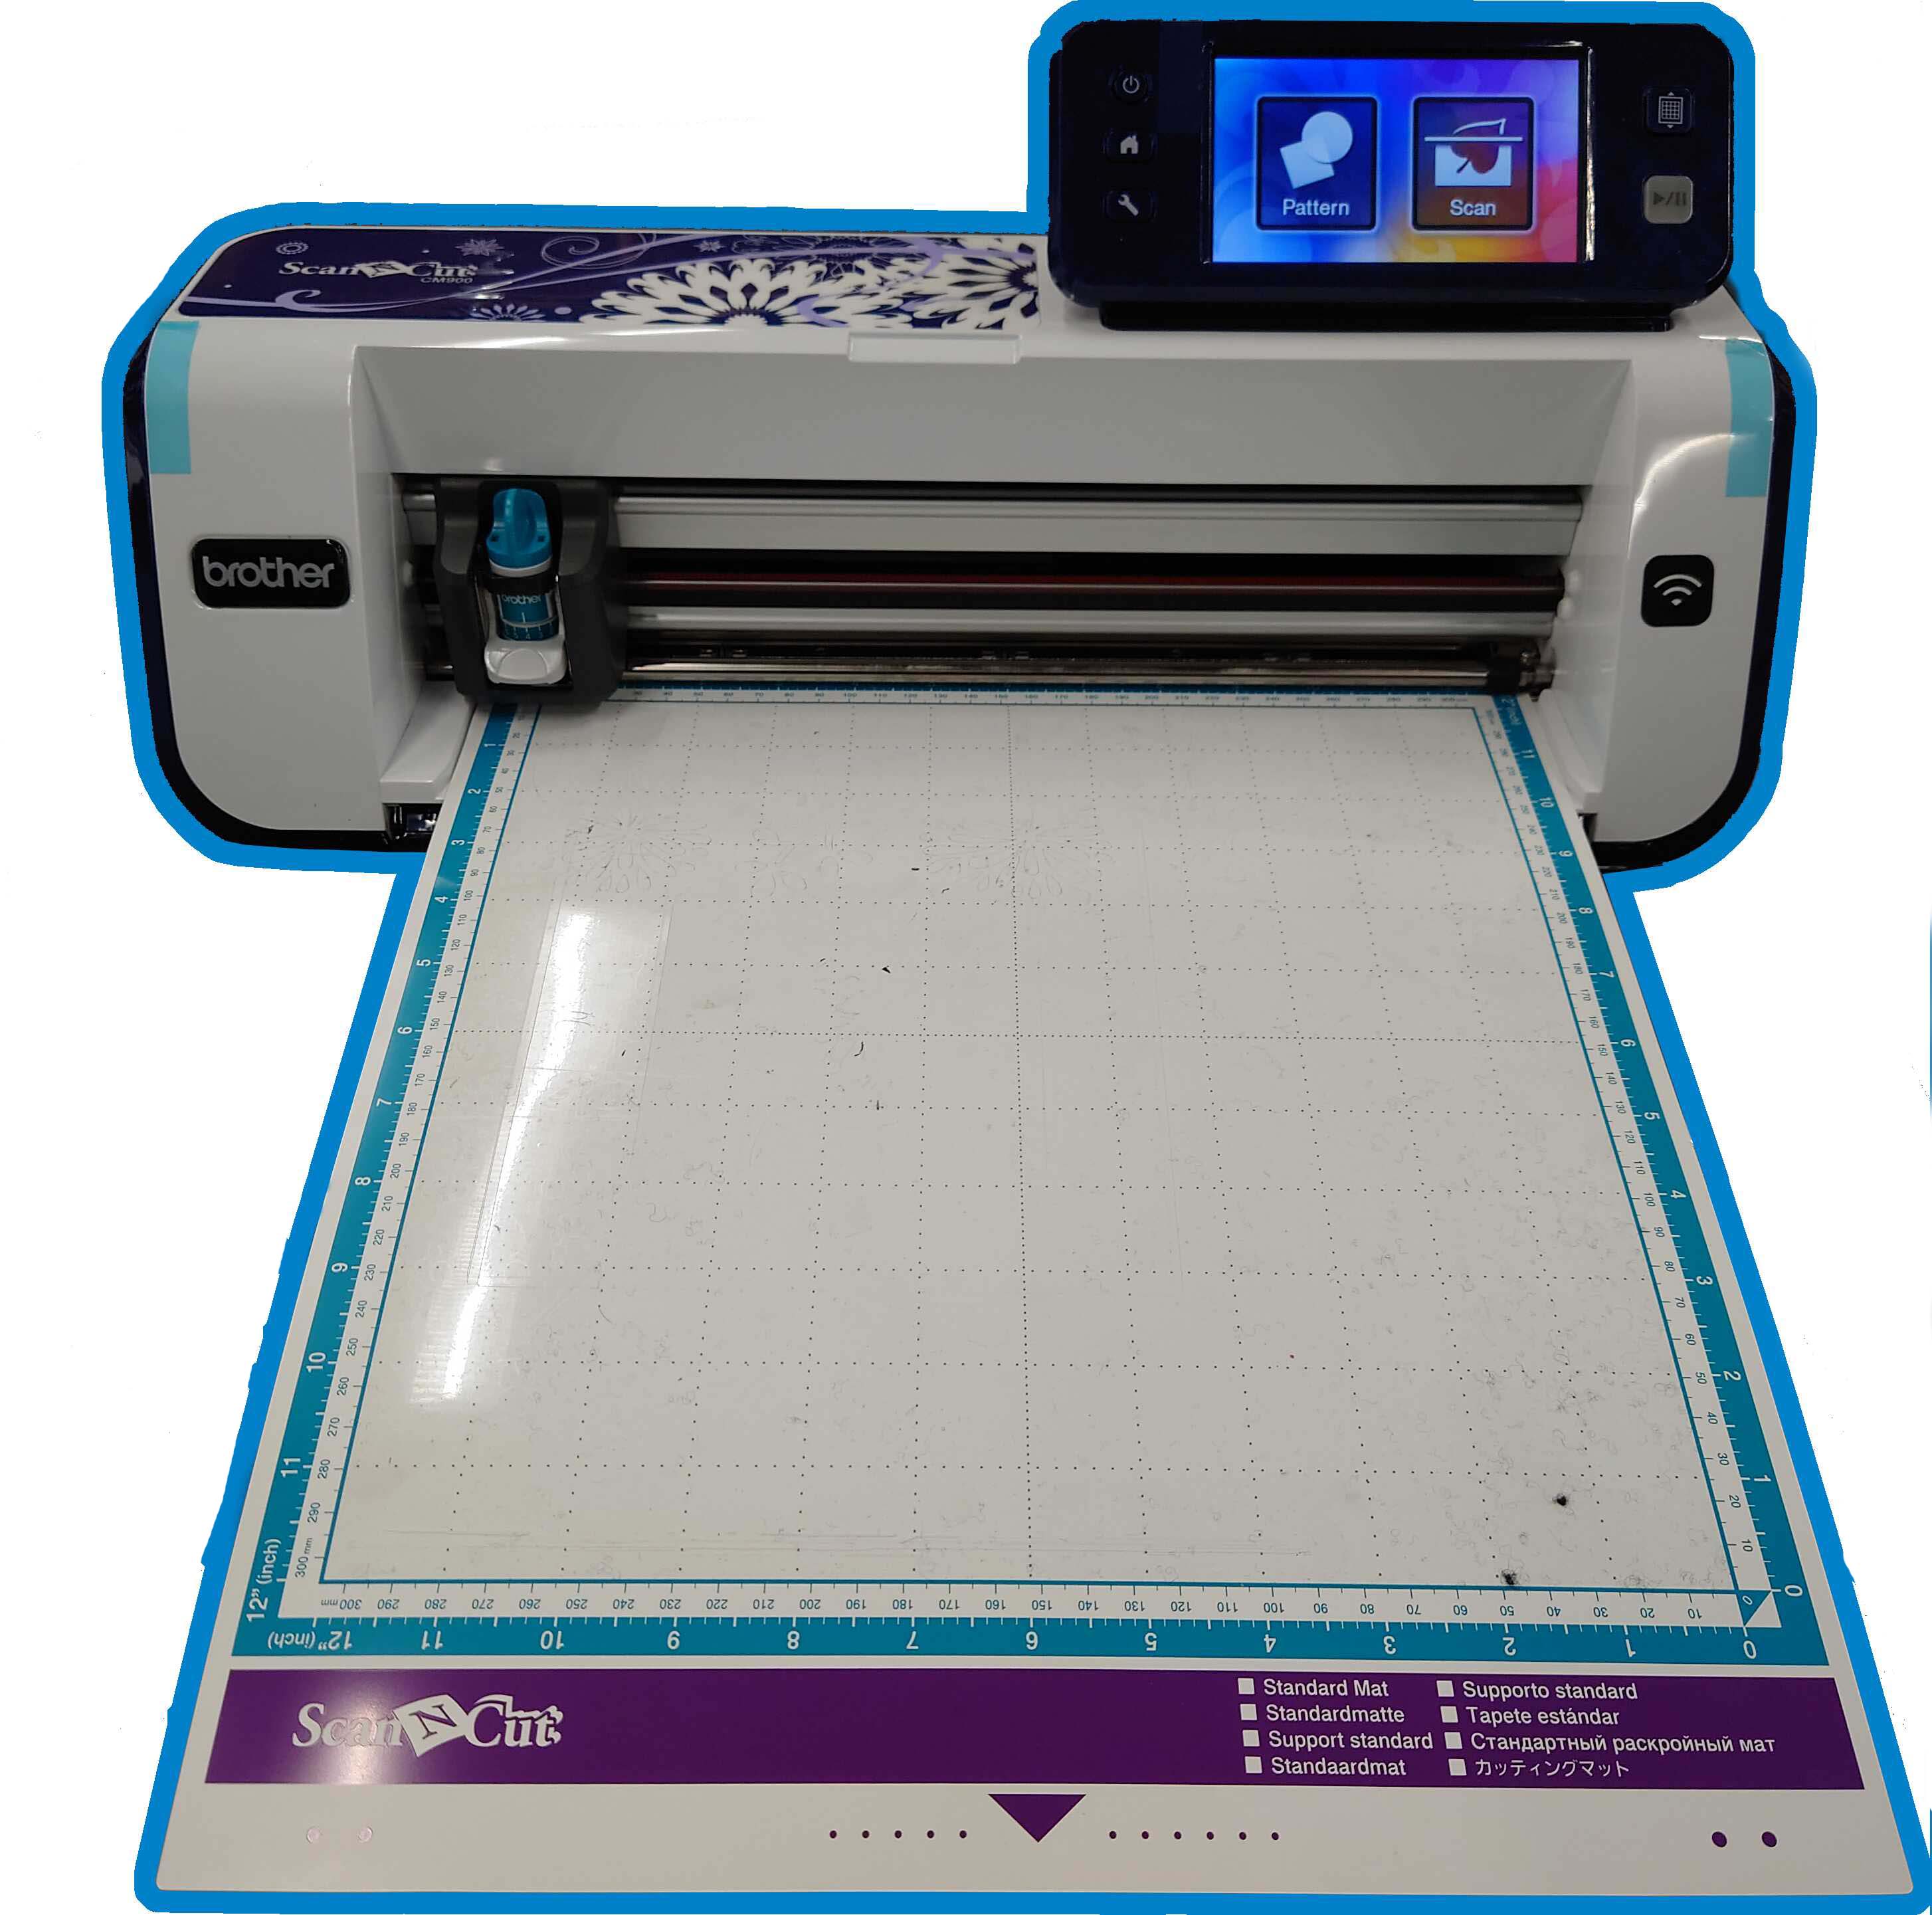
Vinyl Cutter
The vinyl cutter I used is ScanNCut CM900 from Brother. It has an integrated scanner to scan and save the pattern for further creations. It also comes with a wifi connection to transfer creations between the machine and CanvasWorkspace, a feature-rich design platform.
Scan pattern to Cut Data
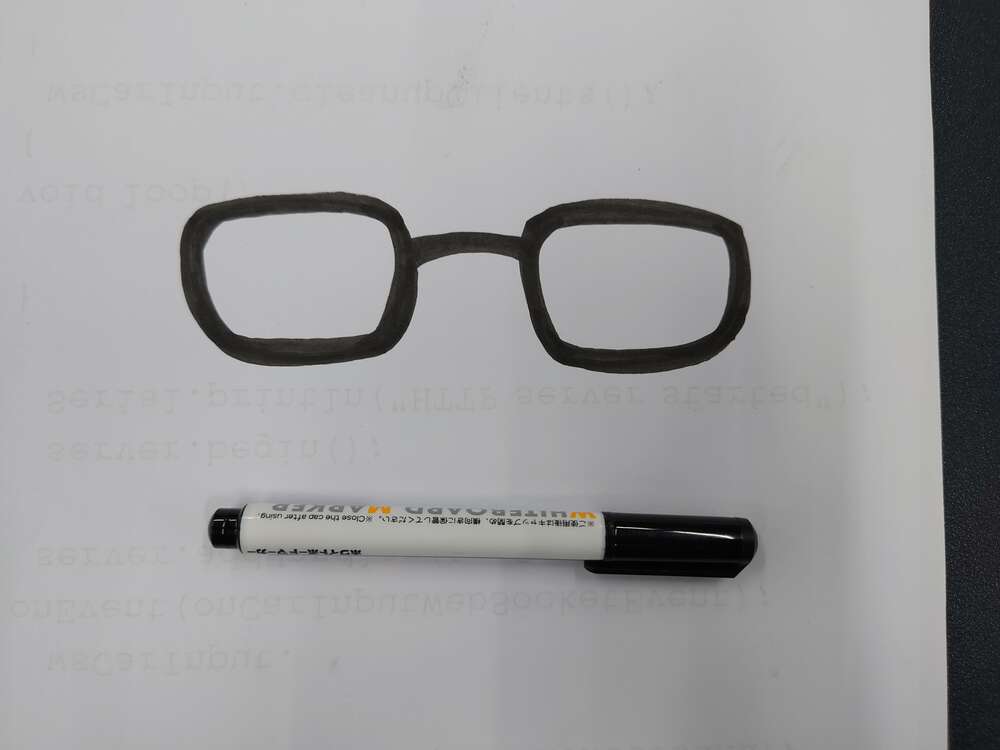
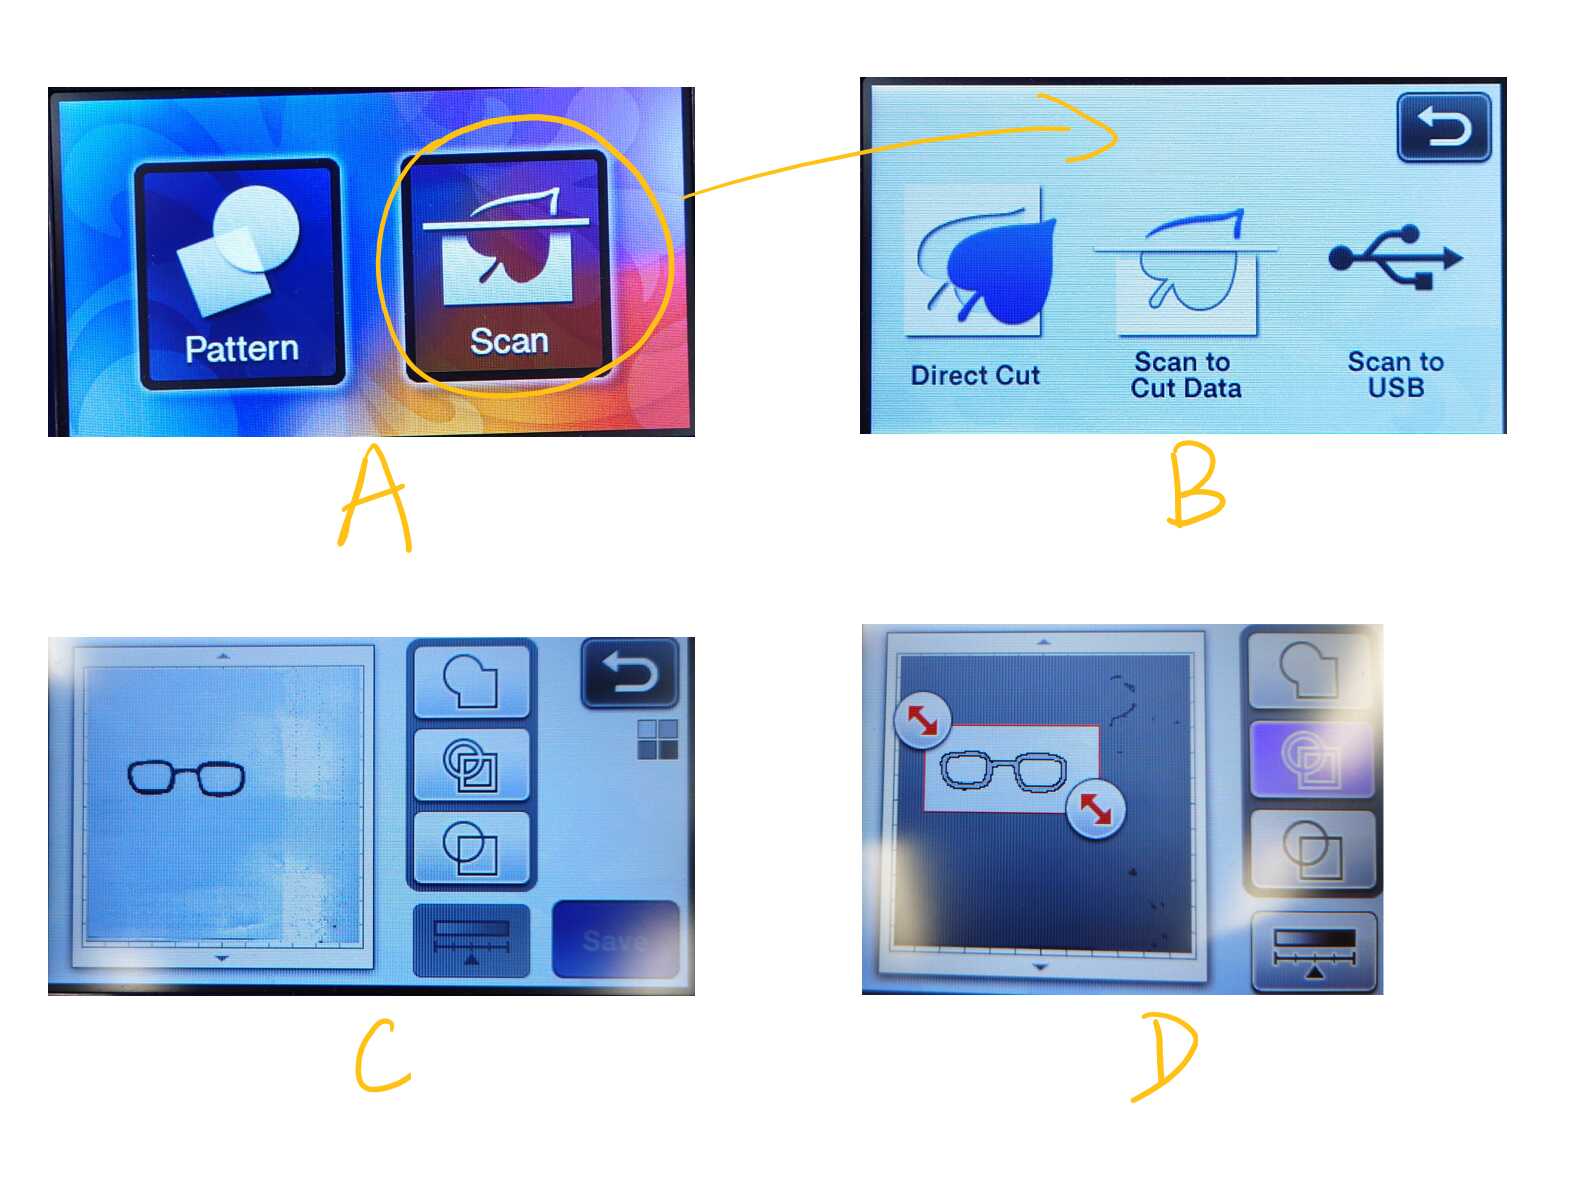
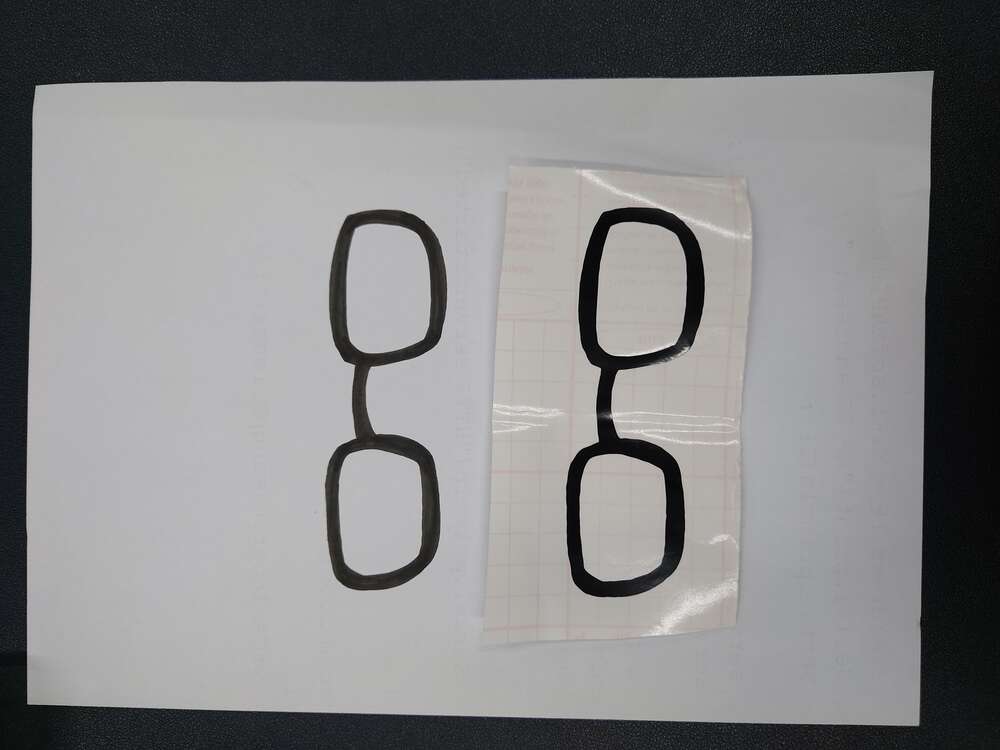
I tested the Direct Scan function of CM900. Which scans and converts my hand drawings to cut data. Firstly, I draw glasses on paper.
 Then I attached the paper to the cutting mat. The mat was coated with a layer of adhesion to fix the paper.

Then I used the scan function to scan the hand drawn glassed to its memory. I could adjust the tracing method and crop specific area.
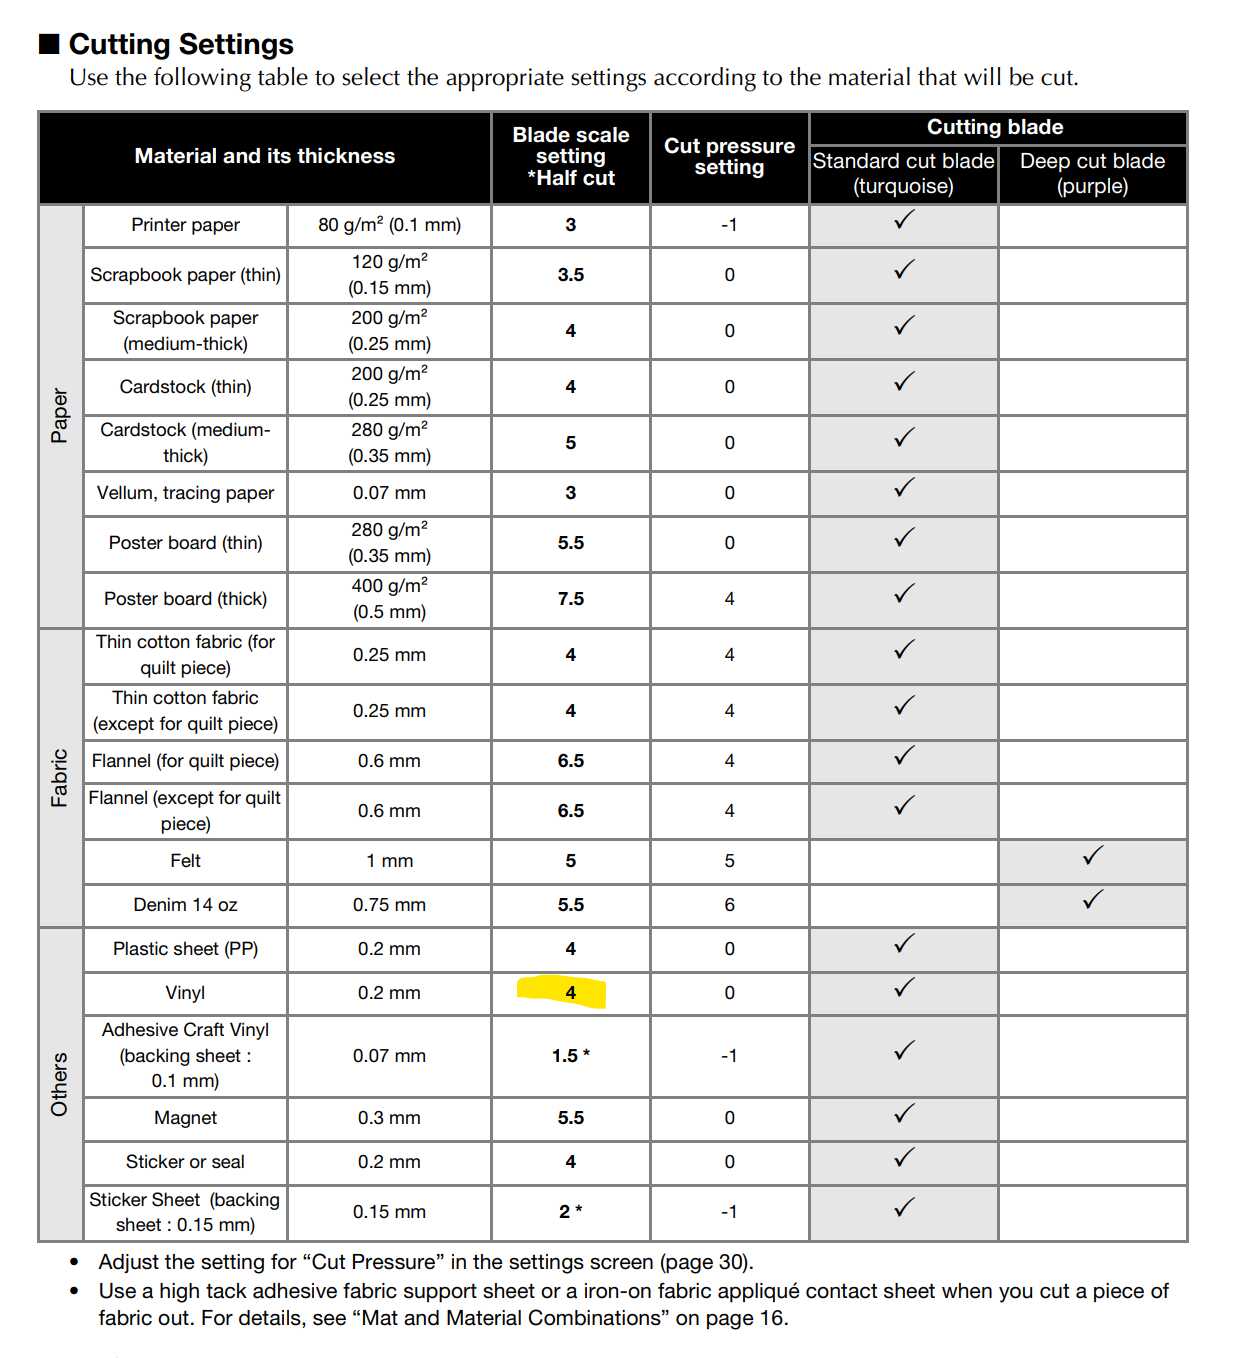
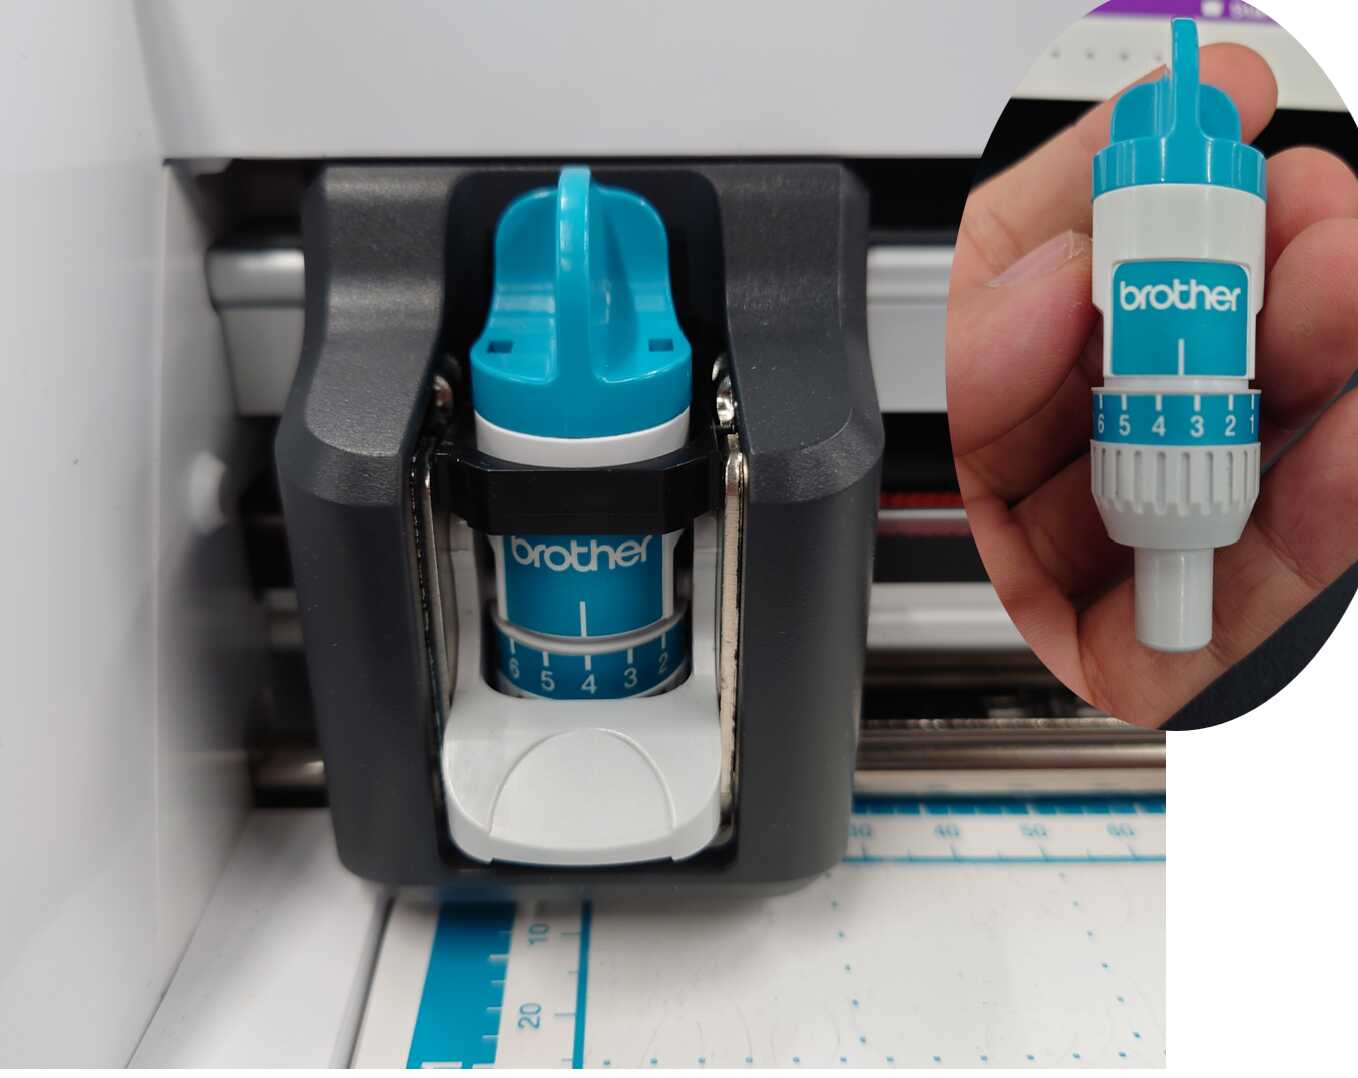
Adjust the blade extension
Before cutting the adhesive craft vinyl. I follow the user’s manual from Brother, the starting blade setting is 4. But I found 4 is a little over cut to my stickers. So I finally adjust the blade scale to 3.5. It turned out works perfectly. It cut the sticker without hurting the backing sheet.
Cut from saved design
I select the saved file on the machine. Then adjust the position I wanted to cut. I used the scan function to help me positioning.
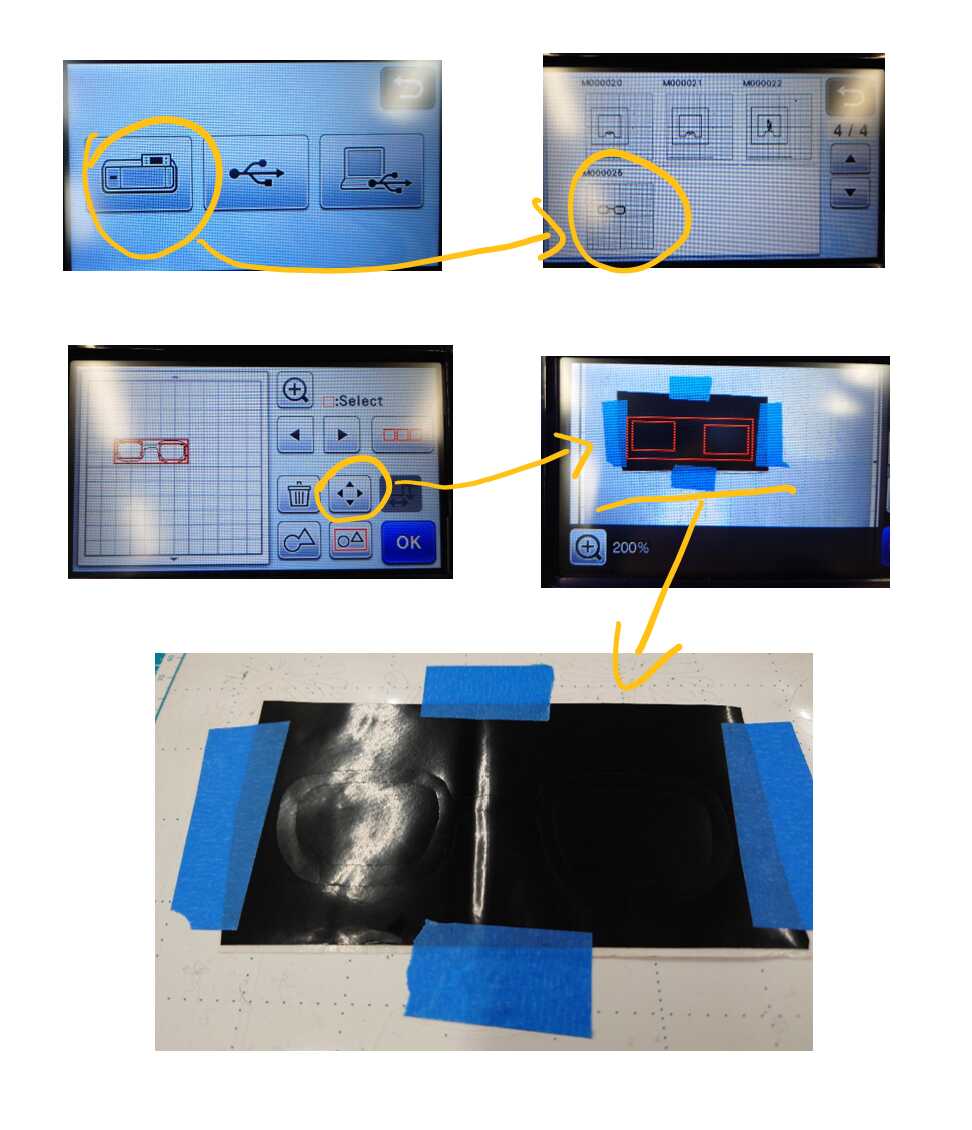
The sticker cutted by CM900 almost identical to my hand drawing.
Design Patterns in CanvasWorkspace
Brother made a very good platform called CanvasWorkspace to desing patterns for vinyl cutter. It could only be used in Brother ScannNCut series.
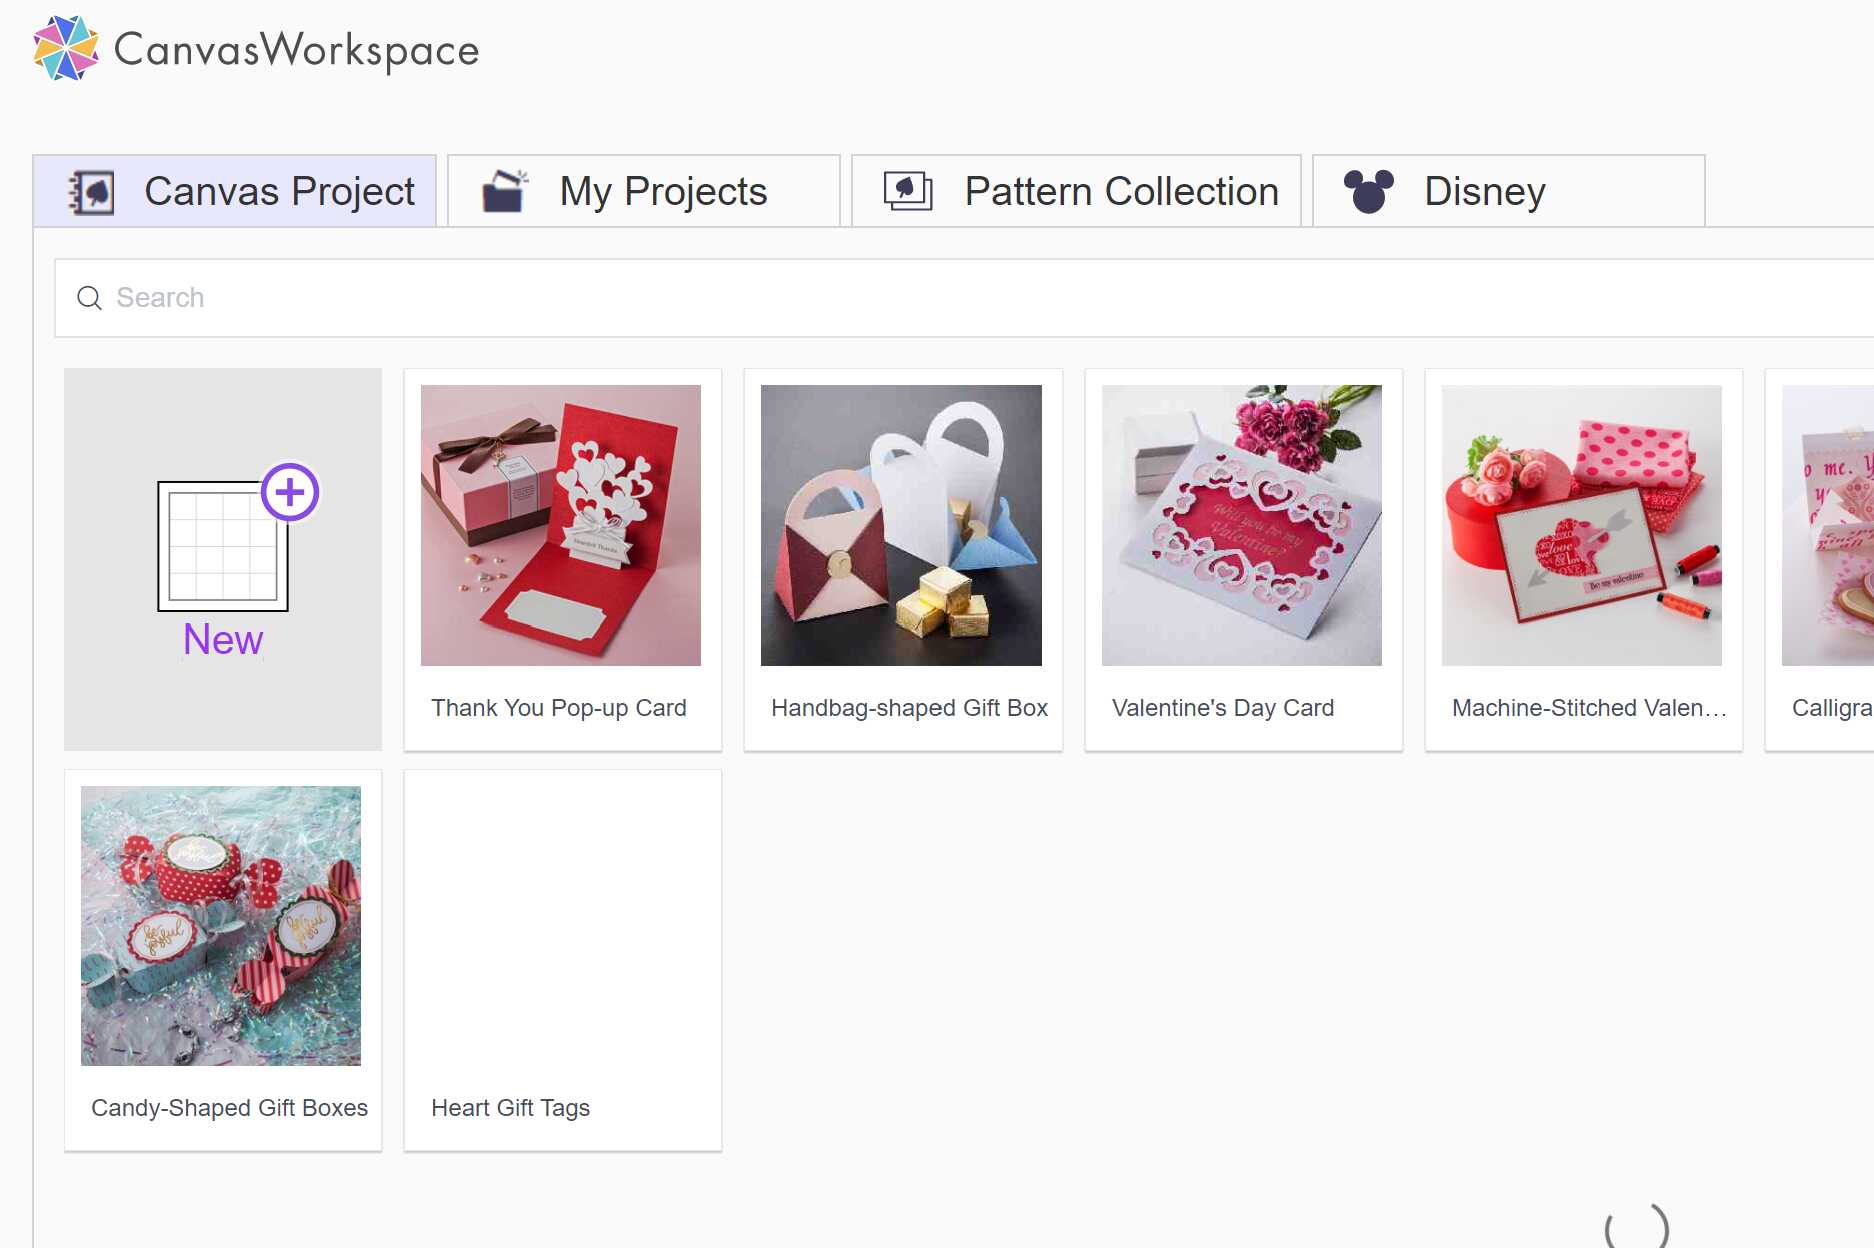
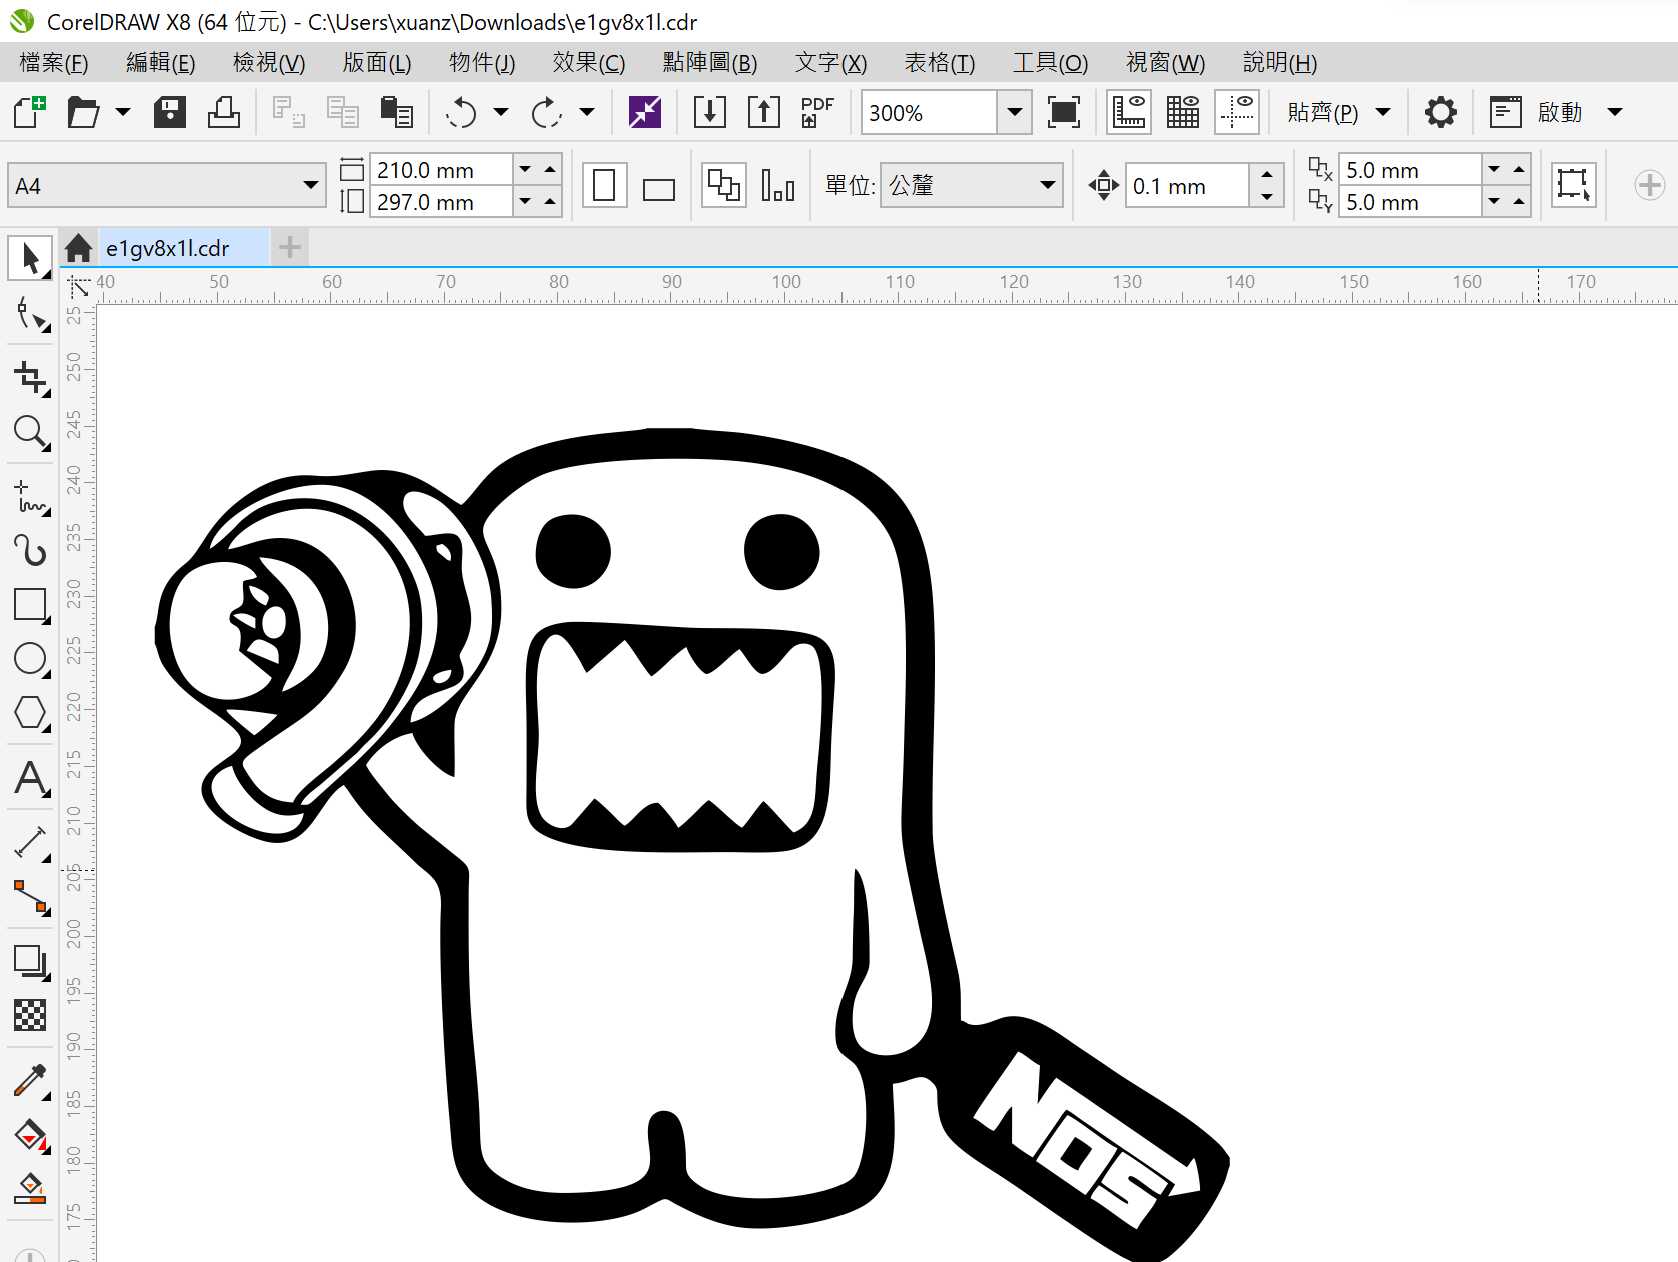
I could import SVG files to the CanvasWorkspace. I found a cute car sticker design on the Internet. It’s .cdr format. So I convert it to SVG format in CorelDRAW.
I import the SVG file to the CanvasWorkspace. The platform allows me add more elements to the design such as texts and graphs. I just left the design not changed as I was satisfied with the original design.
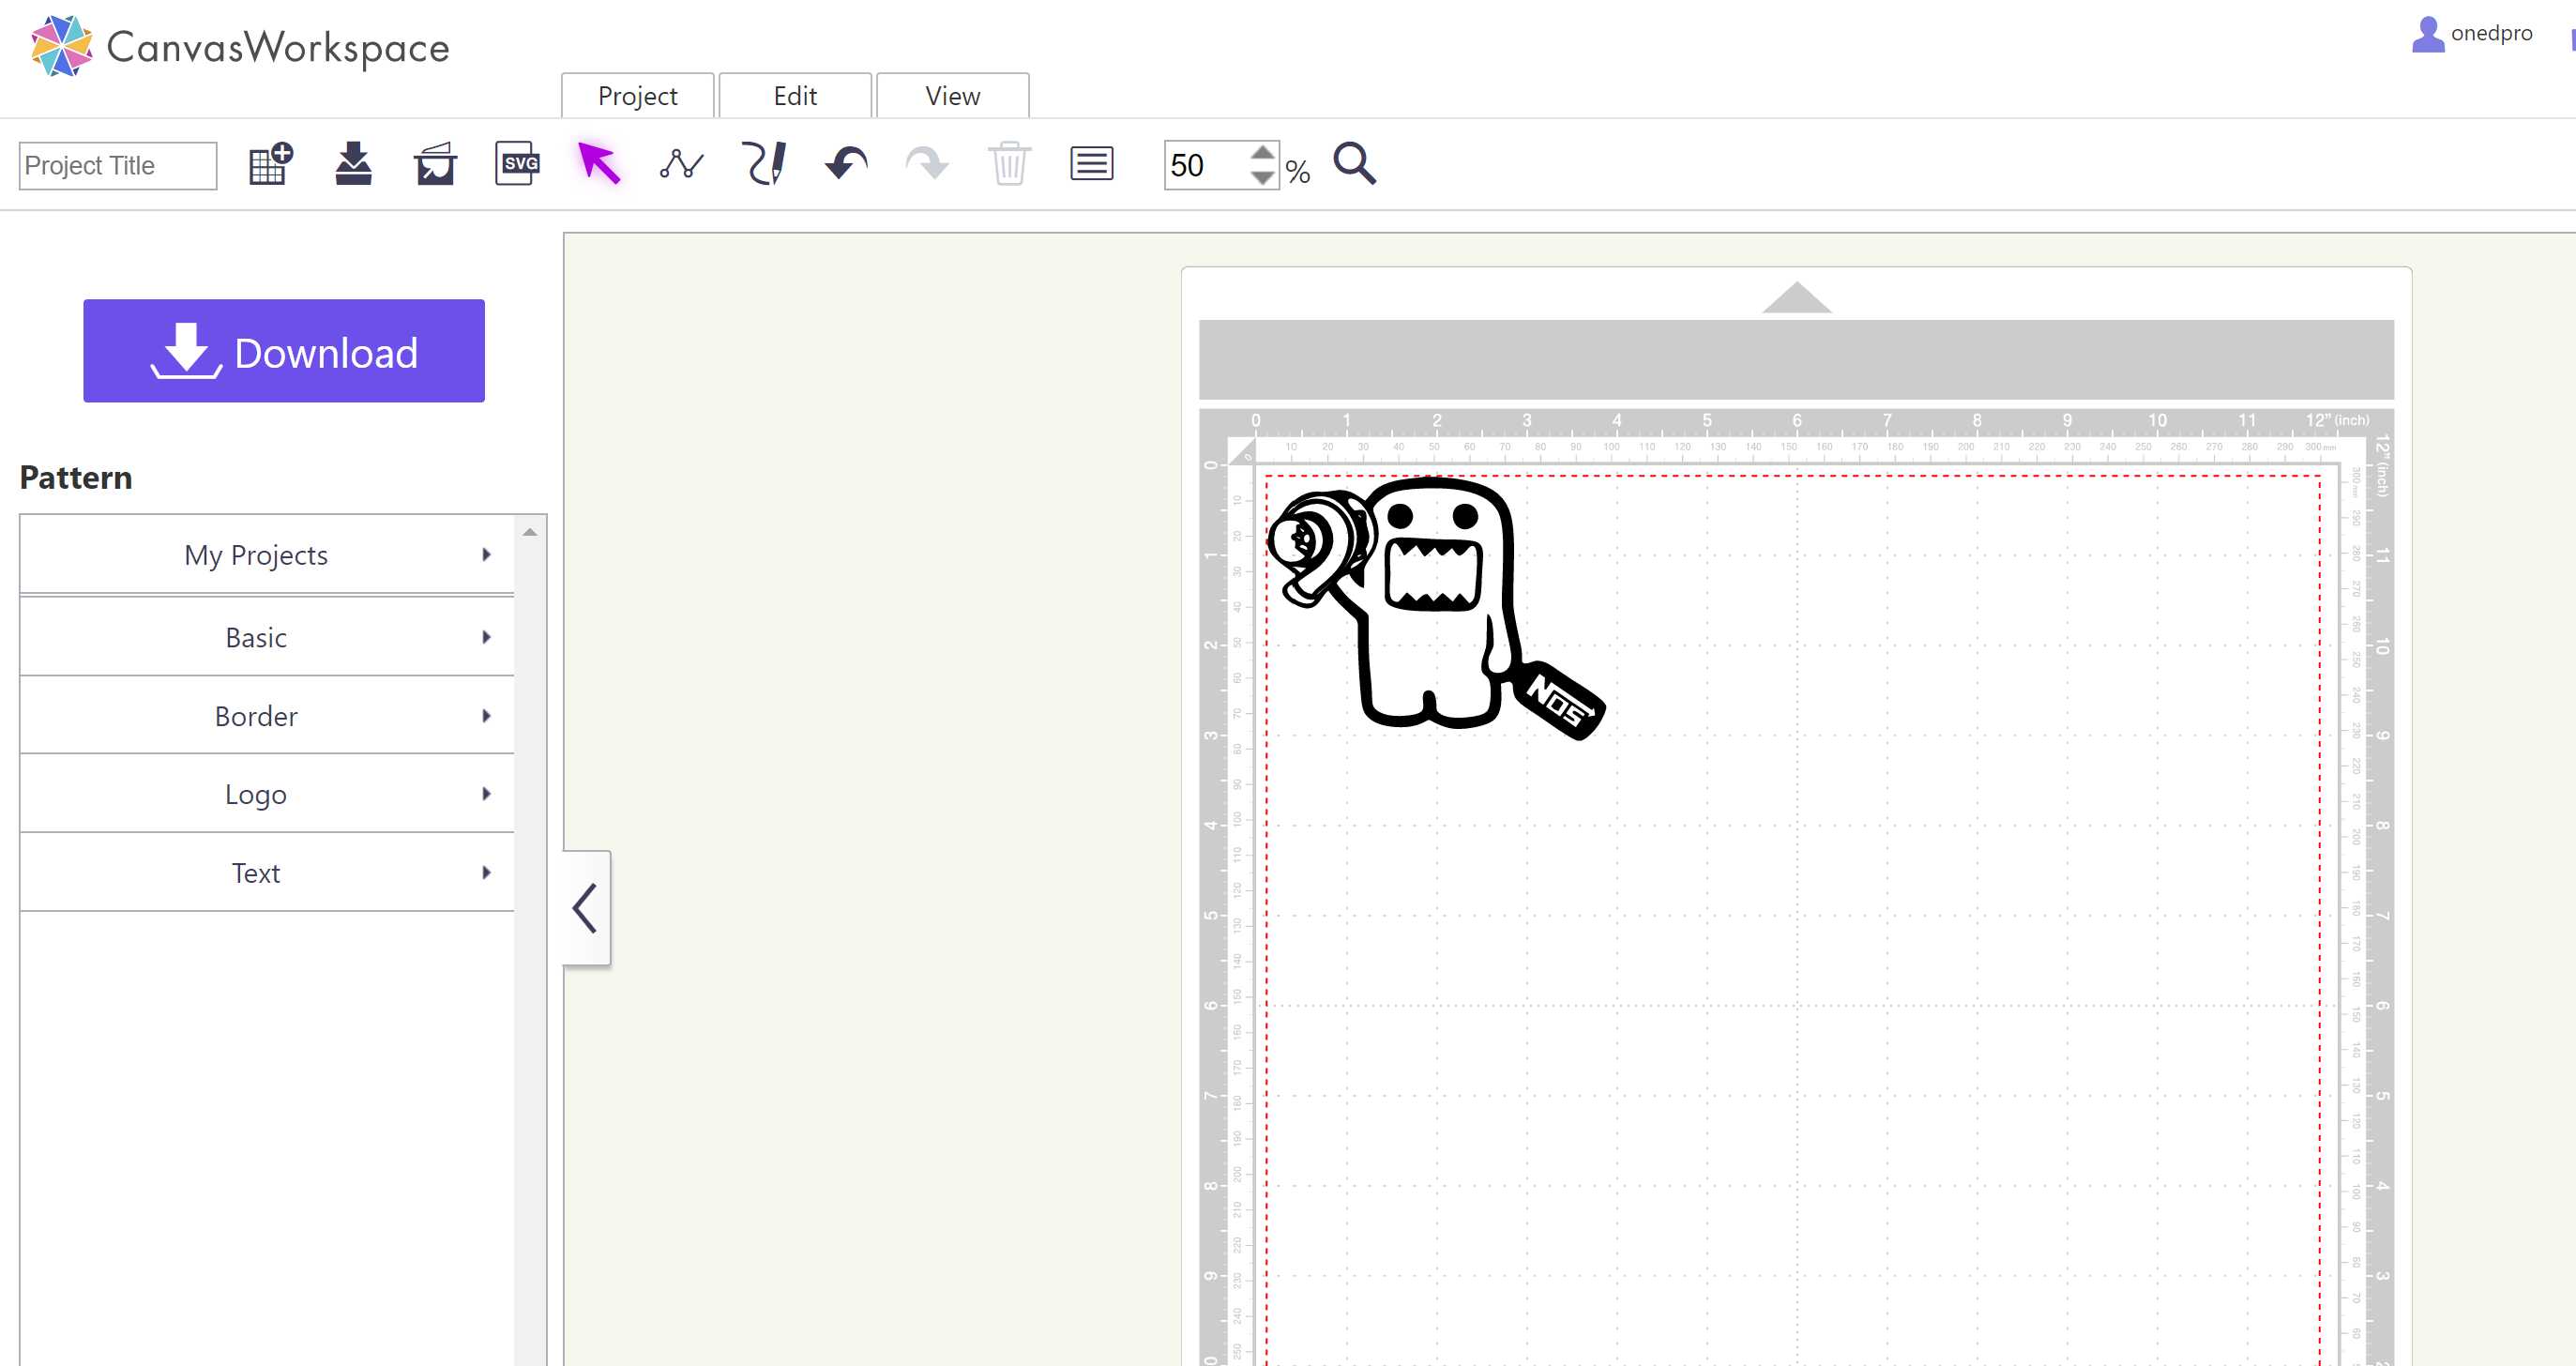
To download cutting data to the machine. I press the Download button and pressed the ScanNCut Transfer button on the control panel of the machine. The data transfered to the machine on one second.

This is how the output design looks like.
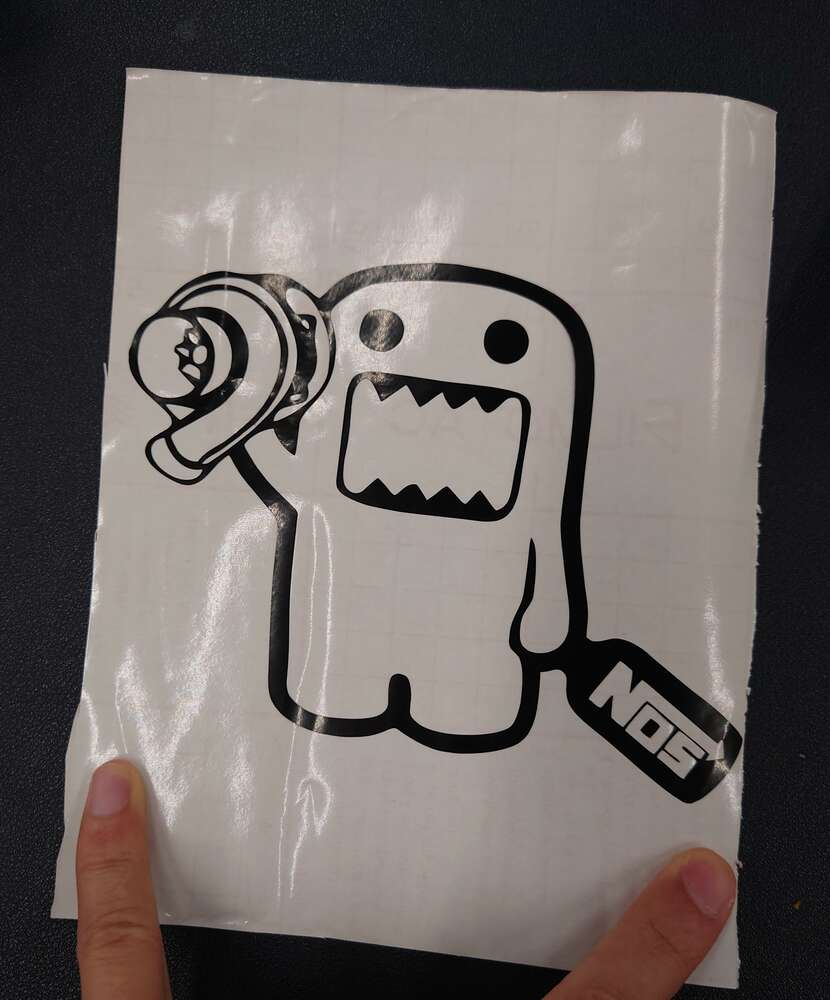 I then transfer the stick to my lab instructor German’s car. The car looks cute with the sticker.
JPG Crop and Compress Script
I wrote a script to convert my screen capture image from.jpg to JPG format to reduce size. That helps me a lot in reducing image size. However, besides of capturing from the screen. I have to take photos with my phone and cameras for my assingments. Although they are jpg file. They normally sized 3-4MB, still too large for FabAcademy. So I wrote another script to reduce the resolution to maximum 1000x1000px and adjust the jpg quality to 60. This setting made a good balance between size and quality.
@echo off
echo Resizing and compressing JPGs file...
magick mogrify -resize 1000x1000 -quality 60 *.jpg
echo Done!
pause
It’s usage is similar to the.jpg-JPG conversion script at week three. Just drag one of the JPG file to the script. It then convert all JPG files at that folder.
File Download
Press-Fit_Construction_Kit.f3d Resize_JPG.cmd