10. Molding and casting
Week 09 / March 23
This week’s assignment:
Group assignment:
- review the safety data sheets for each of your molding and casting materials, then make and compare test casts with each of them.
- extra credit: try other molding and casting processes
Individual assignment:
- design a mold around the stock and tooling that you’ll be using, mill it (rough cut + three-axis finish cut), and use it to cast parts.
- extra credit: use more then two mold parts
Machinable wax and molds
First we developed the machinable wax locally. For this we used a combination of paraphine and low density polietileno. The cooking process was long, and it took several hours. In the meantime, we cutted the mold boxes on the laser cutter. We then poured the machinable wax on the molds.
Size on the molds (cms) 15 x 15 x 3,5.
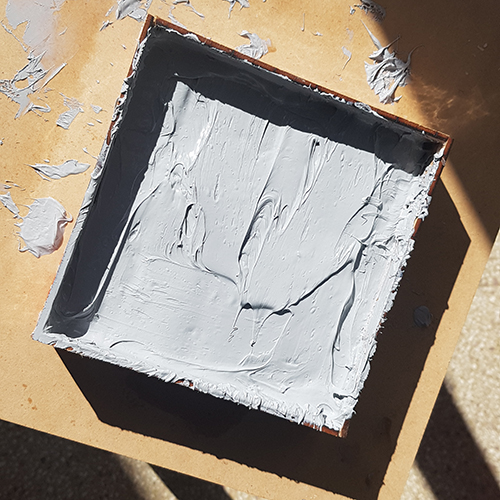
It was interesting to notice that the wax contracted upon drawing, on all axes. Thus, a first lesson is that the real volume you got of machinable wax is always smaller than your box, even if you fill it all the way to the top. Therefore, it is a good idea to build your mold box around 10 to 15% bigger than the actual size you need.
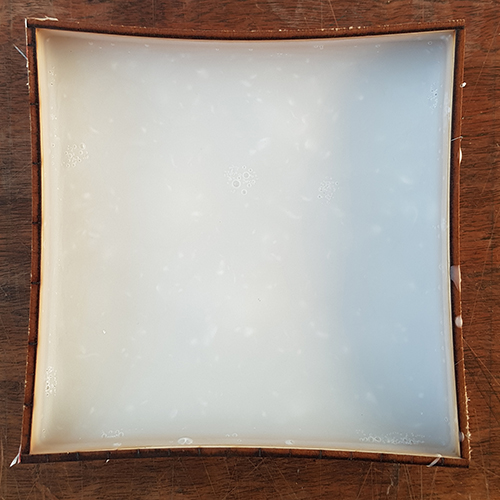 Image 1: Machinable Wax on mold, please see the contraction
A second loss of stock volume is related to the regularization of the upper surface of the wax. Even if you pour carefully the hot wax on the molds and do your best to achieve an even surface, it will not be perfect. The first step of the machining process is to use the drill to make this uper face smooth and regular.
In mi case, the effective volume after the contraction of the wax and the regularization of the upper face was approximately 14,5 x 14,5 x 2,2 cms.
Design process
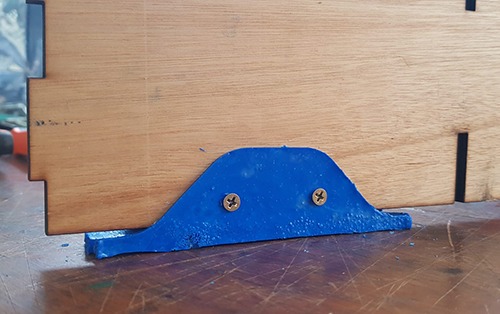
Then I started to draft the piece I was going to model. I wanted to link this excersice with my final project, and the desing of the supports for the Shadowhouse seemed like a good challenge.
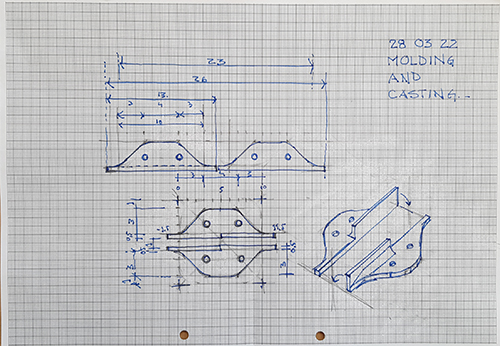 Image 2: Draft design for the rubber supports
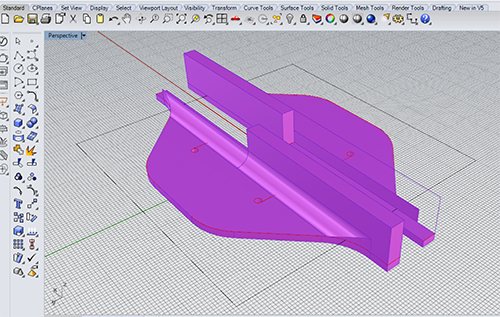
The real available stock (after all the aforementioned adjustments) was a restriction to consider on developing my design. Thus I designed the rubber base part in two complementary sections that can be assembled upon finishing the casting and molding process. The first version of the design was hand drawing upon graph paper. The digital version was developed on Rhino.
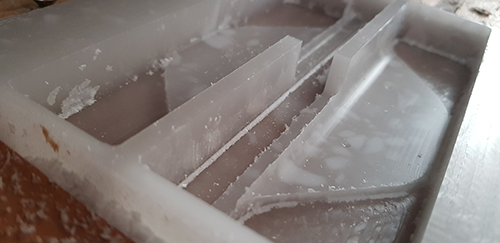
Machining
The machining process on the Roland was perfect. I used two different drills. The regularization of the upper side of the wax and the rough cut of the model were done using a 1/4 drill. Then, the finisihing of the model was done using a 1/8 drill. The process of finishing was slow (around 5 hours) but provided a smooth finishing.
It is worth mentioning that we could verify one of the hipothesis of the week: the quality of the finishing is much higher that what we could obtain by FDM 3d printing.
Possitive, then negative.
After machining, it is necessary to produce the negative mold, using sylicone. At this point we found problems. The school had bought a product that seems great. Under the commercial name of Smooth-on OOMOO 25, is a pourable Silicone Rubber. The product is presented in A+B format, and really easy to use, since the mixing proportion is 1 to 1.
However…. The silicone rubber presented a problem. Is a product of short shell life, and must be stored up until 23 degrees Celsius. Here we had two clear issues: the first one is that these products were bought in 2019, when we imported most of the machines and electronic components and tools for Fab Lab CIDi, mere months before Covid changed our priorities durint the entire year of 2020. Not to mention that 23 Celsius is basically the temperature of our winter. Around 10 months a year we are above 23 Celsius.
Long story short, one of the components of the Silicone Rubber was already solid within the bottles. Thus we had no products for the negative mold. Furthermore, this is a product that is not regularly imported to the country.
Then we had to undergo a quick search of alternatives. We tried three different products for the negative mold.
a) A custom mix, using glicerine and gelatine. The mix ratio was 2 ounces of gelatine per 6 ounces of glicerine, and adding hot and cold water. The mix actually hardened, but it did not worked properly. It was fragile and breaked on the process of unmolding.
b) A polyurethane adhesive. A commercial product we found locally. We applied to two of the molds (mine and Daniel Ughellis). At this point, some 18 hours after application, the product is curating, has a relative rigid outer part but the interior part remains fluid. It seems that it will curate but that it will take days.
c) Alginate for dental modeling. Finally, this product seems to be the local answer we were looking for. The product is easy to mix (just powder and water), it curates quickly and it provides good resolution upon unmolding. However the molds are still very fragile and tend to break on the process of unmolding. More work will be required to test and find the adequate mixing proportions and obtain better molds. Furthermore, alginate comes with a warning that it only provides dimensional stability for 5 days, thus, it is not a product that can result in molds we can use many times.
I will get back to you
At this point, then, we are stucked on the process of the negative mold. I hope that Alginate will be good enough as to obtain a proper mold even if it has a short life span. I will report back upon solving this issue.
I am back (April 2, 2022)
Well, finally I could make the second mold. It turns out that we had a second product that worked well: Smooth-on SORTA-Clear 37. Unlike my previous attempt with Smooth-on OOMOO 25, (and all the other products) this time everything worked fine. I poured the Silicone on the first mold late on Friday evening and took it out on Saturday afternoon.

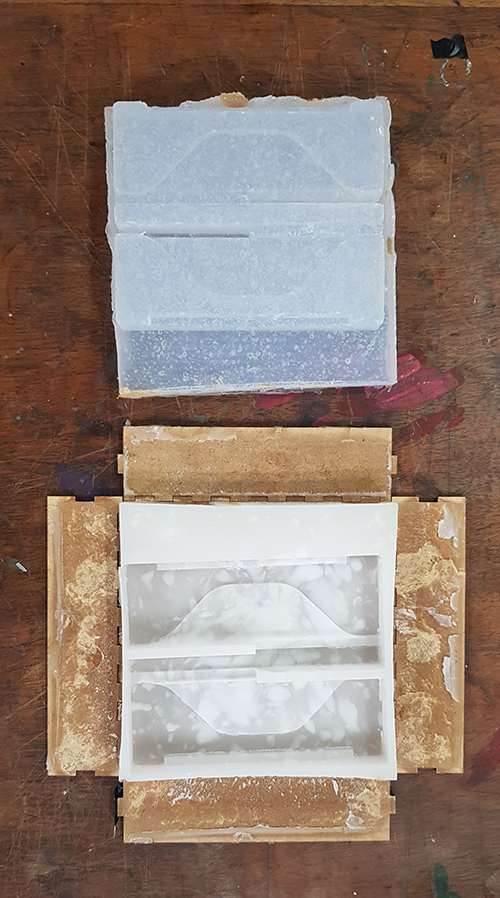
To avoid any confusions on the issue of positive and negative molds:
We present you with the following mnemotecnic trick: The fabber eyes
+ _ +
Thus, the right order is: positive, then negative, then positive. But if in doubt just look into the mirror XD.
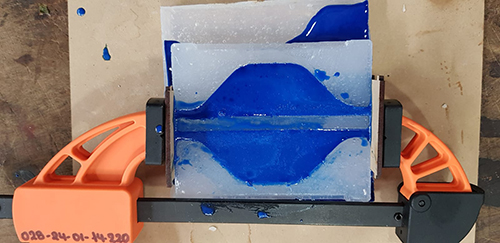
Negative, then positive. (April 5 2022)
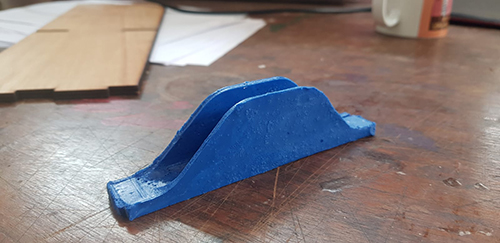
Finally, I could finish the excersice by doing the positive mold. For this I used the material that we now have available at the lab, wich is liquid plastic from Smooth on (smooth cast 305). I am partially satisfied with the result, considering that the finishing on the interior side is good, but not so much on the outside. Furthermore, I need to reproduce this in some form of rigid ruber or similar material so I can actually use it as the base of the final project.
Today, I also unmolded my first attempt. After a week, the adhesive was not yet solid. Thus is fair to say that the polyurethane adhesive is not a viable solution as casting material.

Design file here: