6. 3D Scanning and printing
For our group work see here. The STL file for the custom print can be found here. The gcode can be found here. The fusion file can be downloaded here.
Tuning 3D Printer
The majority of my time spent this week was on tuning my 3D printer. This included leveling the bed, adjusting the nozzle distance to the bed, and adjusting the line height.
I found this probe routine on thinkaverse.com. The downloaded gcode originally drew a square after the probing was complete but I took that out because I found a more complex design that I liked to test if the bed was level and the nozzle was close enough to the bed.
When the Bedlevel_Probe_Routine code is run, the nozzle will go to each corner of the bed where I would slide a notecard between the bed and the nozzle to estimate distance between the nozzle and the bed. According to a quick google search, the ideal height between the bed and the nozzle is 0.1m. So, as the probe went to each corner I would raise/lower the bed until I could slide the notecard underneath the nozzle but still felt some friction.
This process turned out to be quite the headache. Everytime I thought I had leveled the bed enough, the nozzle would still be too high in some places and too low in others. One key problem is that when you raise one corner, it also slightly raises another corner - so the corners are dependent on one another. For this reason, I edited the gcode in the Bedlevel_Probe_Routine to go to each corner twice. This way I could readjust each corner if they were influenced by other adjustments.
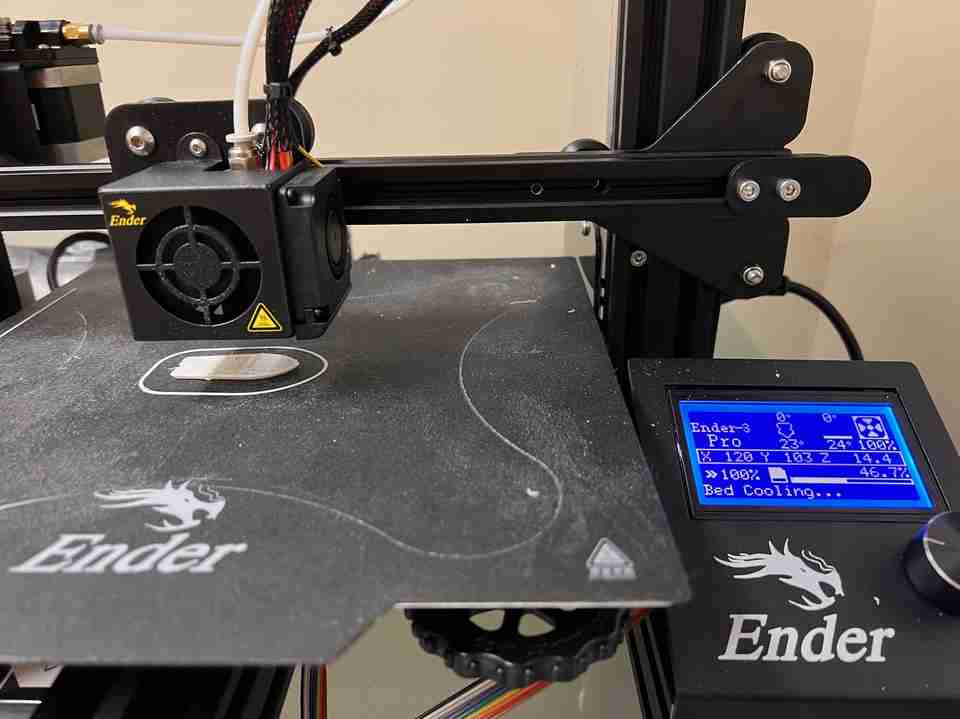
Even though I thought I leveled the bed properly, the Bed_Level print didn’t stick:
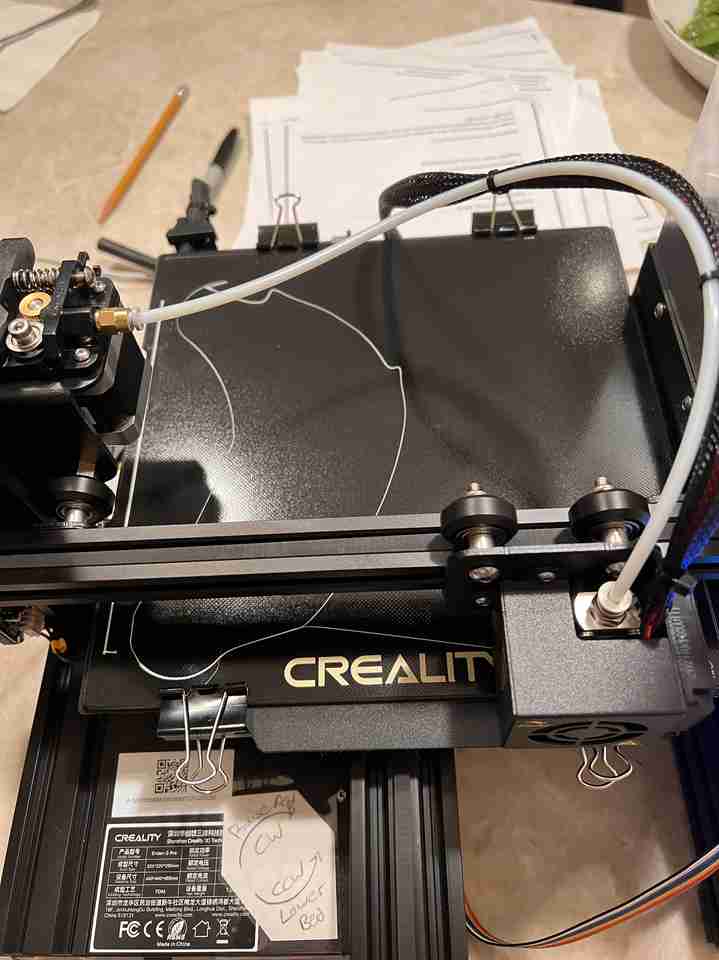
In addition, my nozzle ran into the clips that were holding the glass bed down. Yikes! So, I decided to switch to using the magnetic bed for printing:
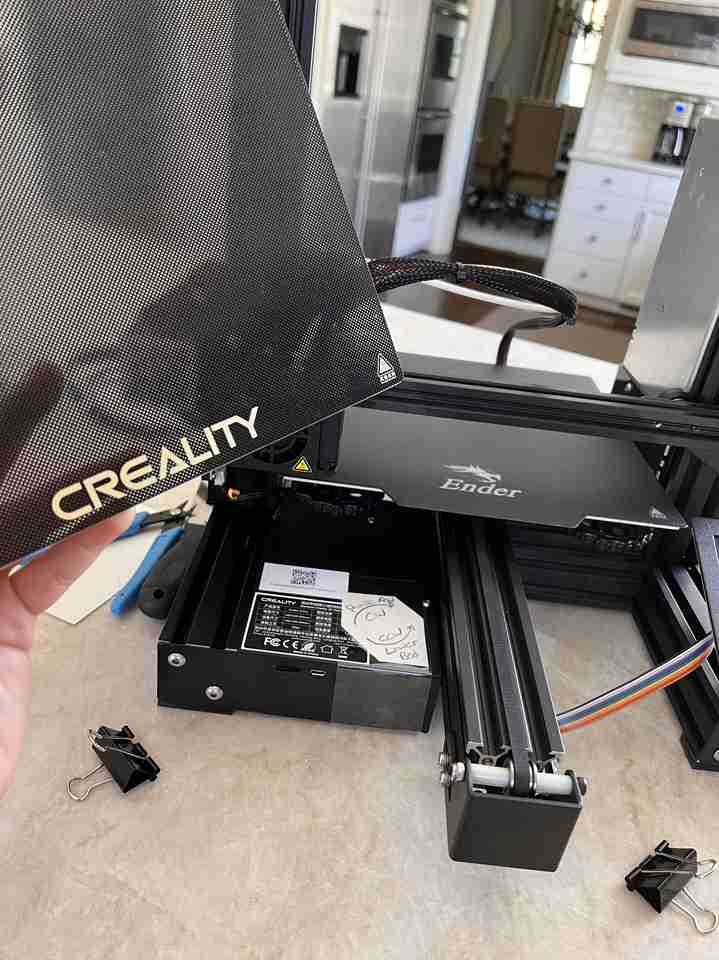
I was hoping that this was the solution to making the print stick, but alas, it was not. Then, I thought I was being smart to use a leveler for probing:
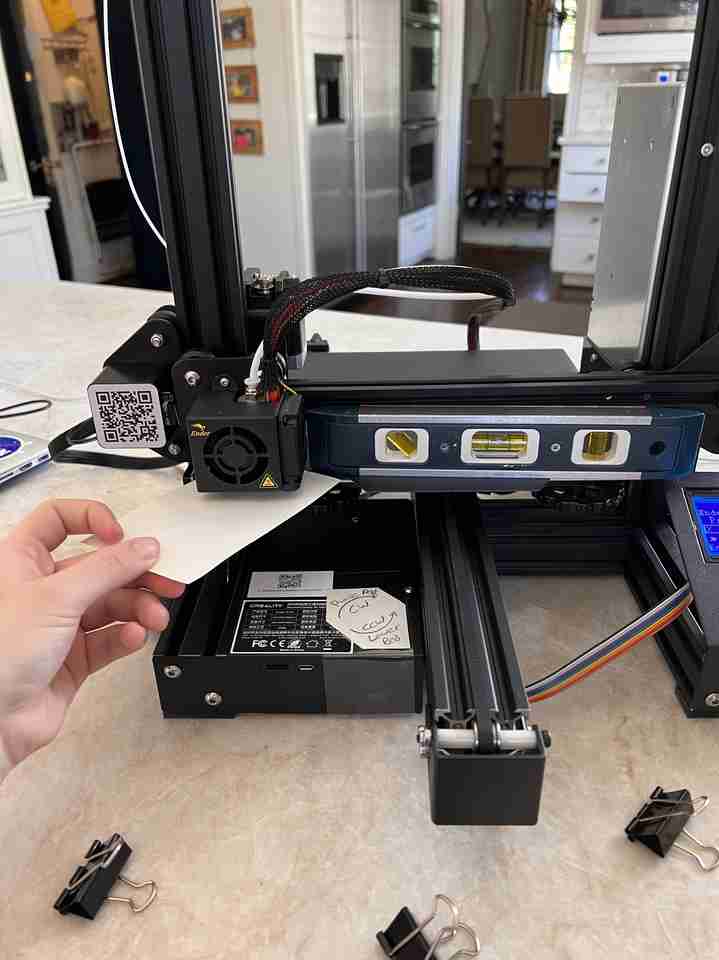
But alas, I was not. Although using the leveler resulted in my best print yet:
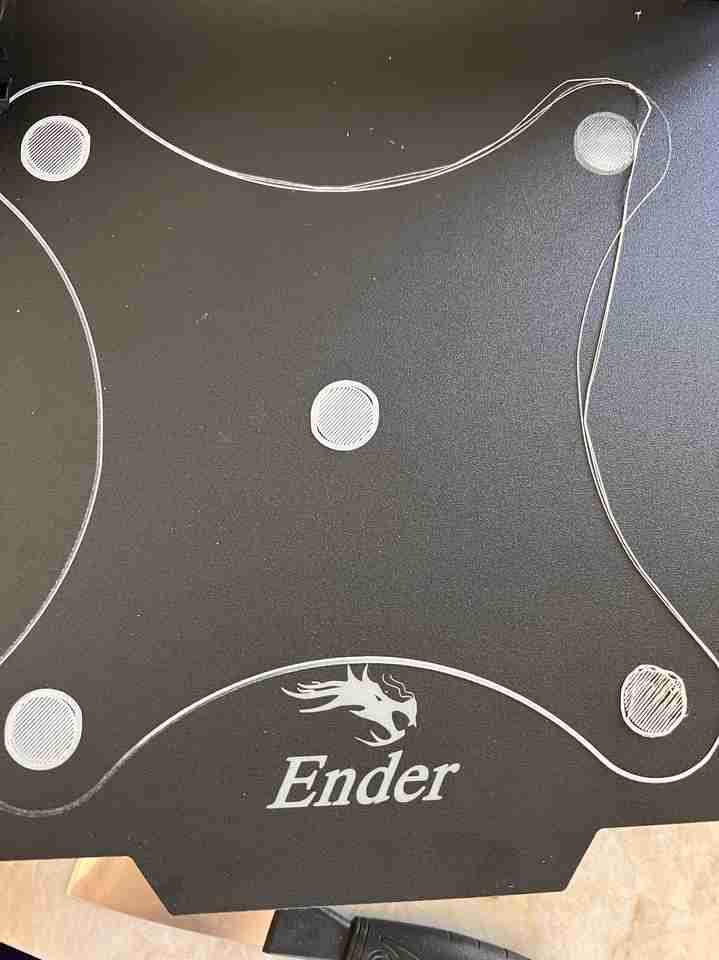
The nozzle was basically hitting the bed in the top right corner, was too close in the bottom right corner, and you can see the bed is not level by the elliptical shapes of the circles. The problem with the leveler is that it assumes the relative angle (angle of the bar holding the nozzle to the bed plane) is the same as the global angle. If the angle of the bar holding the nozzle or the angle of the table wasn’t perfect - this could cause issues.
After I had almost given up, I decided to call upon my brother, Charlie Horvath. He explained to me different settings such as line width and layer height:
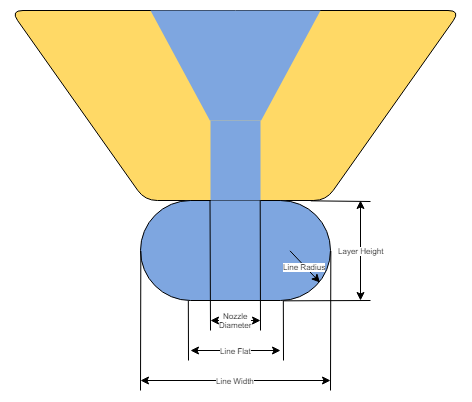
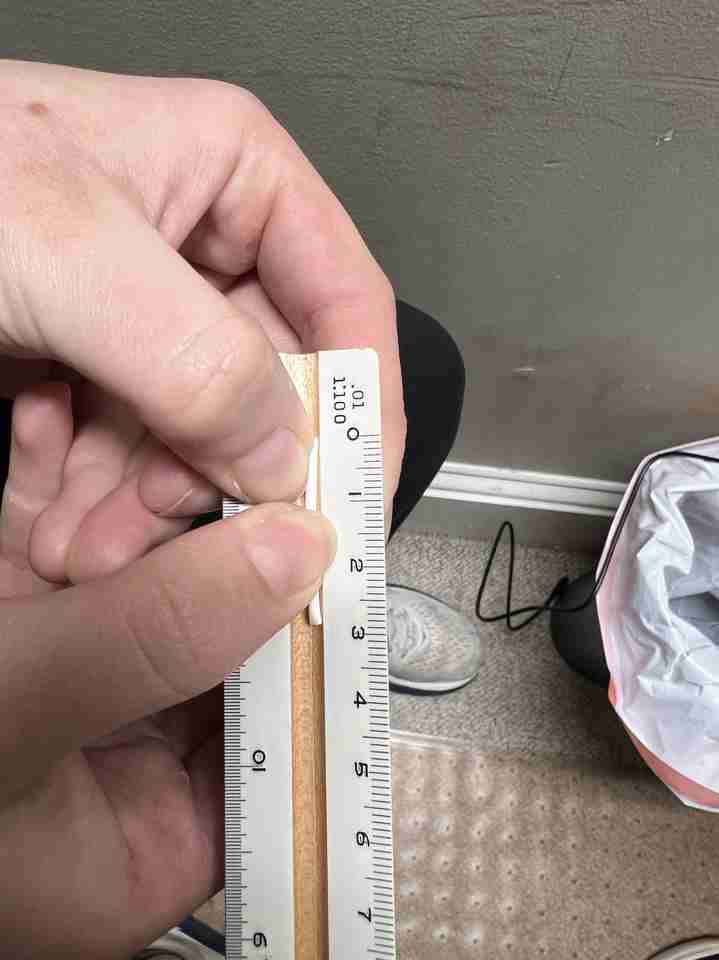
And that the layer height should be between 0.25 * line_width and 0.5 * line_width. So, we changed the layer height to be 0.2 in Cura Ultimaker because my nozzle size is 0.4mm on my Ender Pro 3. Another thing we checked was Steps/mm (i.e. how much the stepper motor has to turn to output a mm). Before, it was set to 93 but when we extruded 100mm (via Motion –> Move Axis –> Extrude), we measured it at 97. So, we went into config –> Advanced Settings –> Esteps/mm and changed 93 to 96 because 93 * (100/97) = ~96. Then, when we extruded 30mm, it seemed to hit 30 on the nose:
Once again, we probed the bed and then decided to adjust the bed live while the Bed_Level was printing. As a result, the circles below are not elliptical like they were before, each of them stuck) and they all look similar (meaning the bed should be level and the nozzle should be at the correct height):
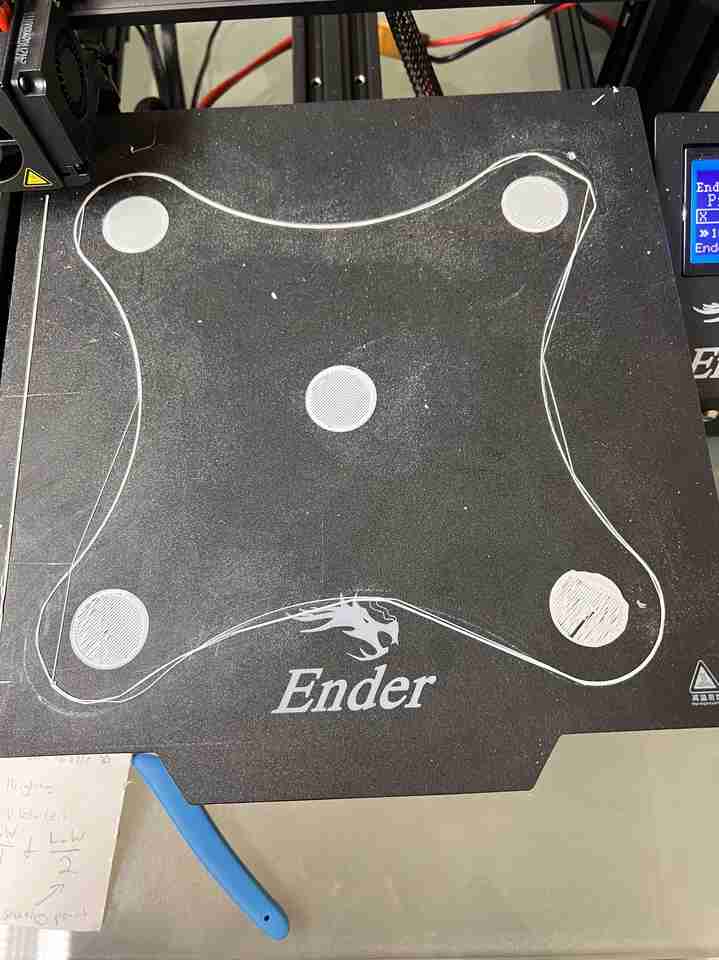
You’ll notice some of the strands on the outline did not stick, but that is when we live adjusted the bed level. So, we were just looking at the circles to determine if the test was “successful”.
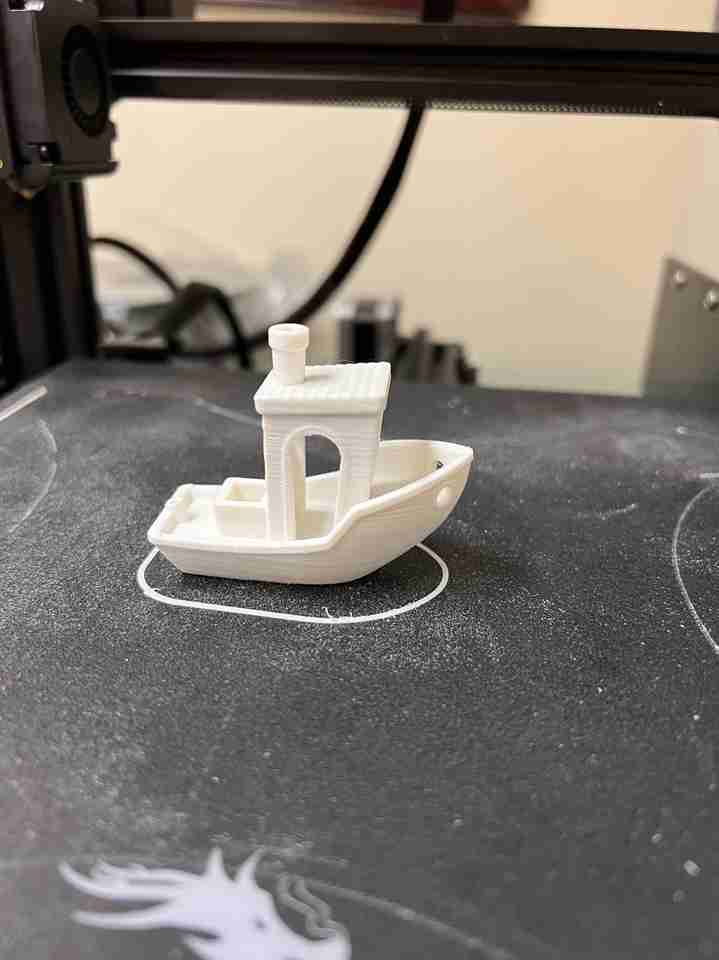
Printing Benchy
Whew! Now it was time to print something that would be hard to print with a subtractive process while simulataneously verifying that my printer was setup properly. For these reasons, I chose to print Benchy. This little ship is great for verifying all these benchmarks and I can’t imagine making this through a subtractive process.
I’m still not 100% sure why my first attempt went wrong. I loaded the program to the SD card and printed the program through that. However, my USB cable was still plugged in and I was preheating the bed before I begun via the USB cable to speed up the process. I left the printer to do its thing for about 40 minutes and came back to see this:
The nozzle was still moving but the bed and nozzle were both room temperature. My best guess is that the “preheating” (via USB) was still controlling the temperature and were overrode the temperature commands sent at the beginning of the 3D_Benchy gcode. So, once the preheating shut off, then nothing was telling the bed and nozzle to stay hot (because the Benchy temperature commands were already sent and overridden), resulting in this mess.
When I unplugged the USB and tried again, I got this beautiful thing:
Woo Hoo!
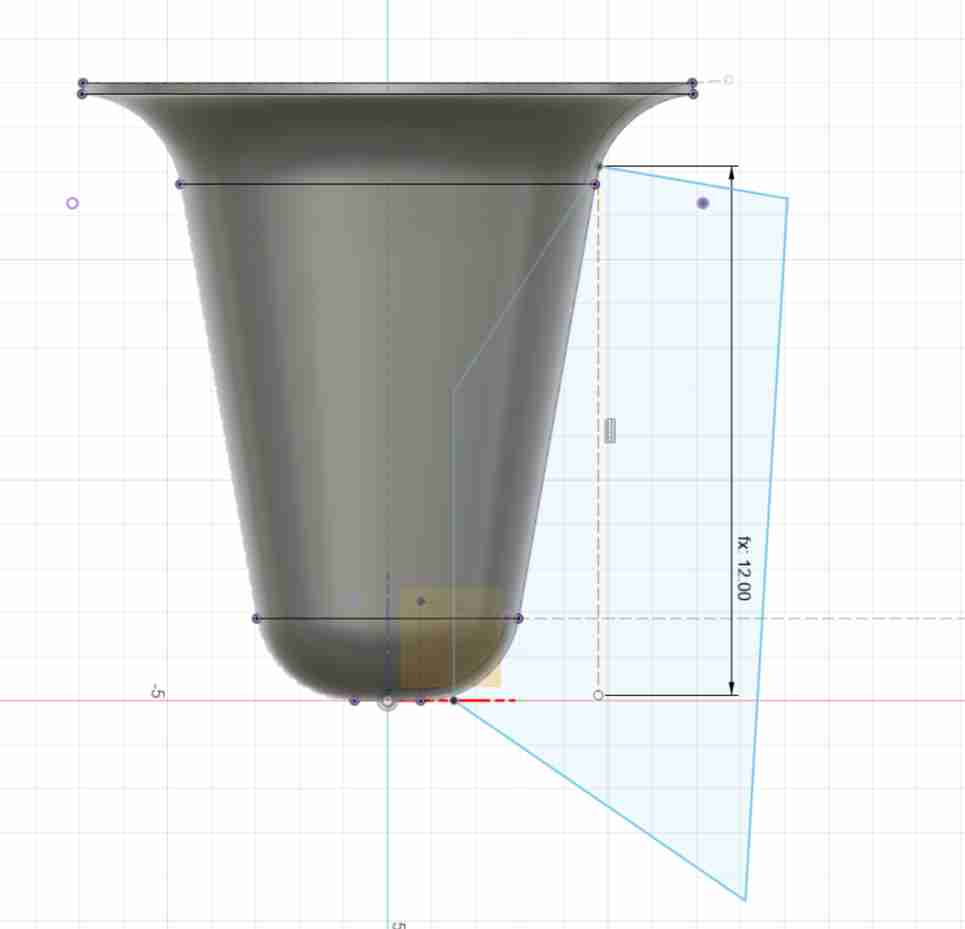
Custom Design Print
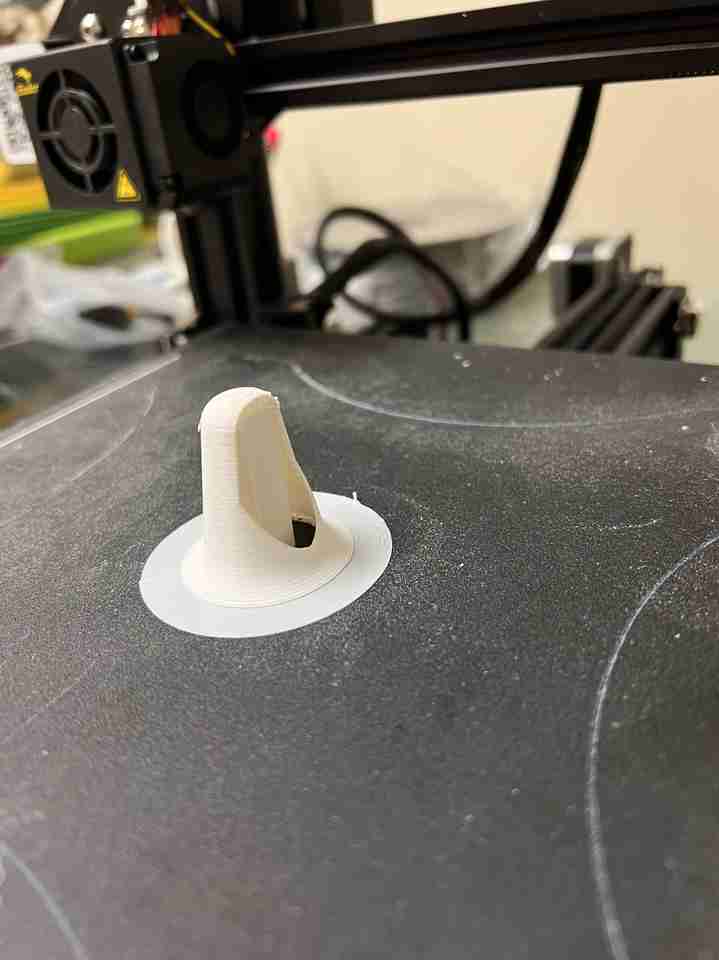
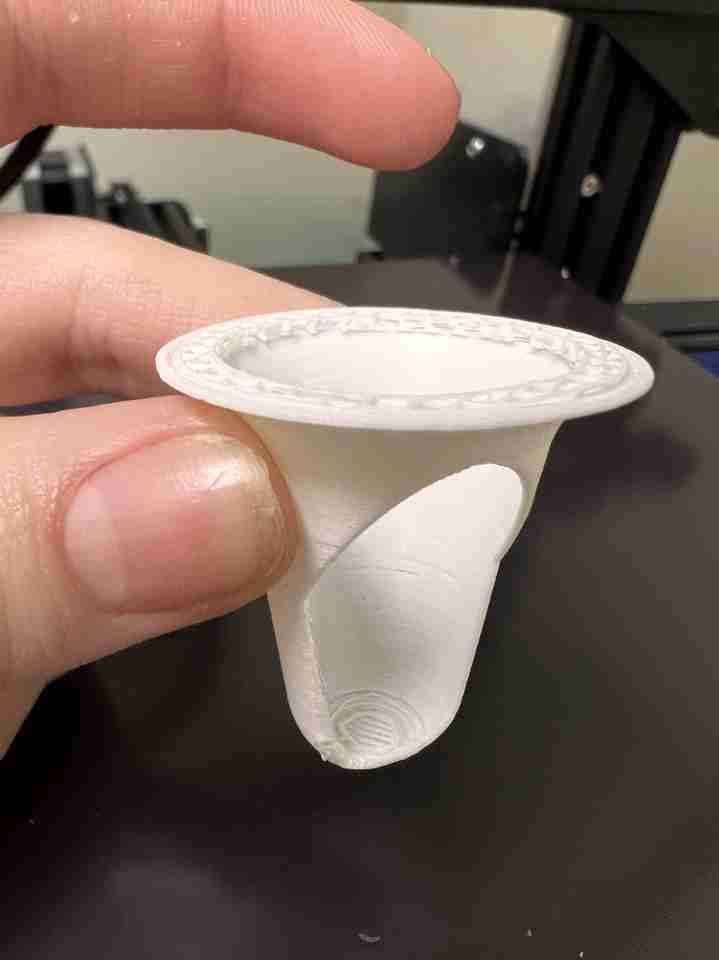
For my custom design print, I decided to print the funnel portion of my final project initial design. The STL file can be found here. For this print I resdeigned the opening slightly:
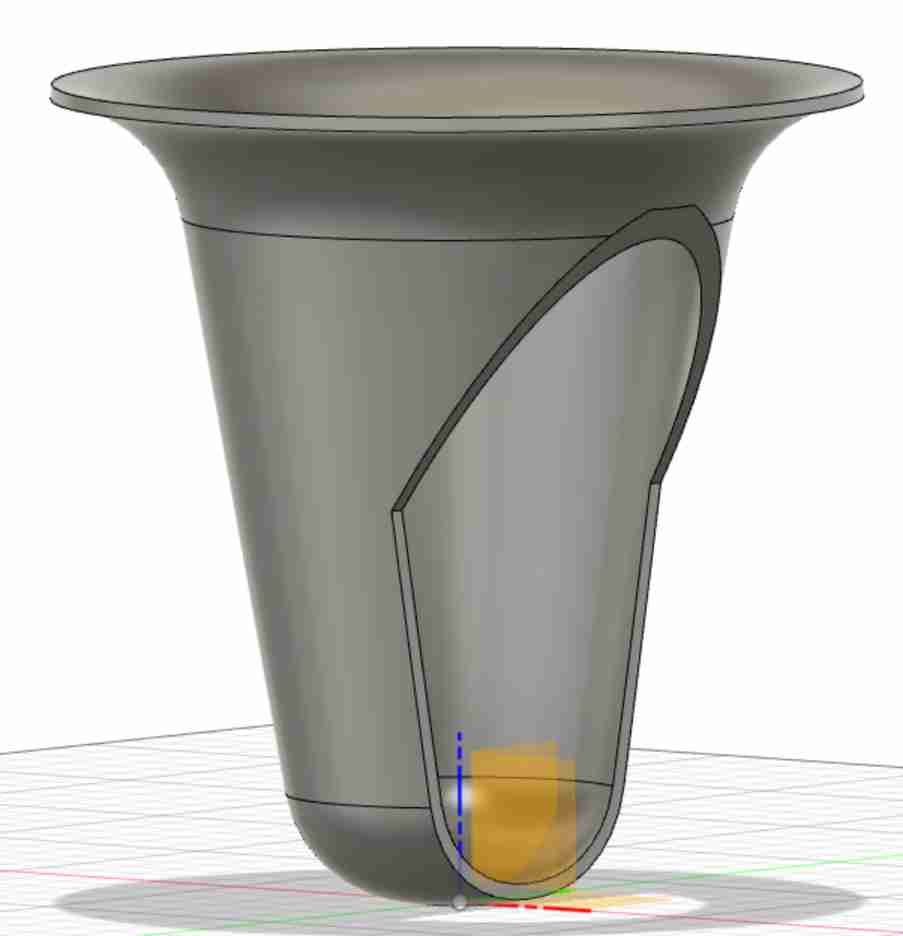
This object is custom design and would be hard to make with a subtractive process, thus fufilling this week’s requirements. To send my fusion model to Cura Ultimaker, I used Mesh –> Export feature shown below:

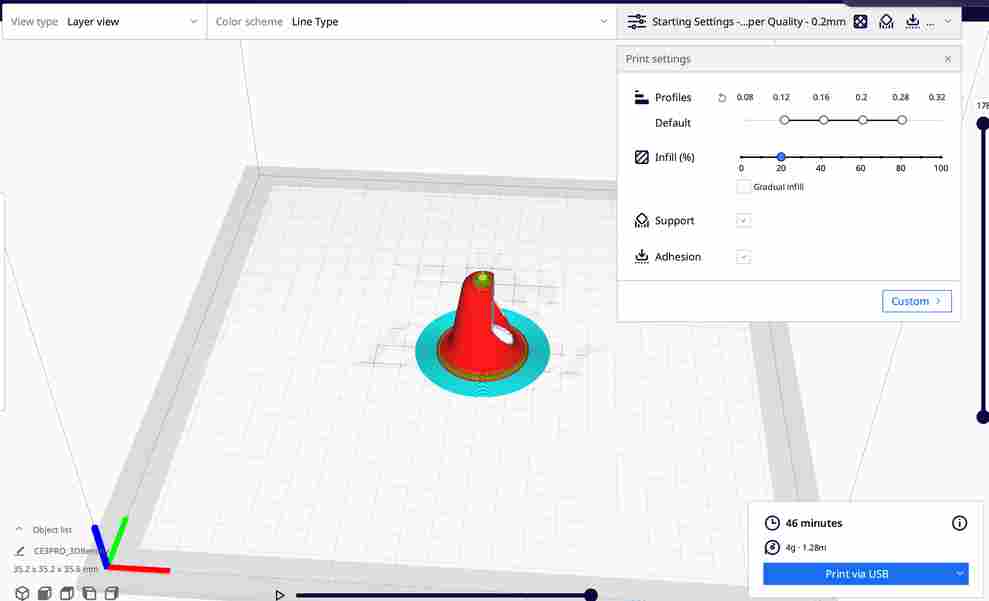
Because the funnel has a round bottom, I made sure to check “Support” and “Adhesion” in the Cura print settings to make sure it would stay in place while printing. Also, printing the funnel upside down reduced the print time in half:
The final result is shown below!
3D Scanning
For the 3D scanning assignment, I downloaded Metascan on my iPhone 13 and I wanted to scan an American football. At first I tried to use the LIDAR but the football just turned out as a blob:
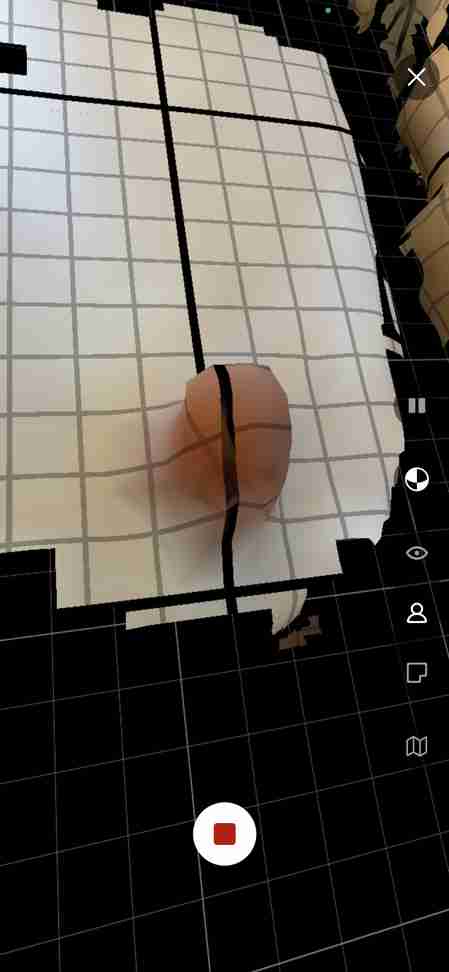
Instead, I tried the “Photo” option where you take 20+ pictures of an object. This produced WAY better results:
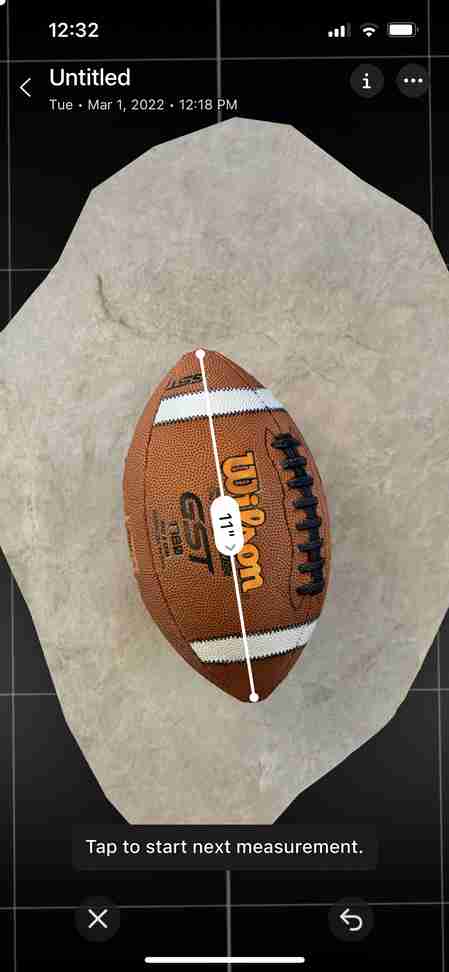
There is a blip in this scan so I wanted to try standing the football up on a cone:
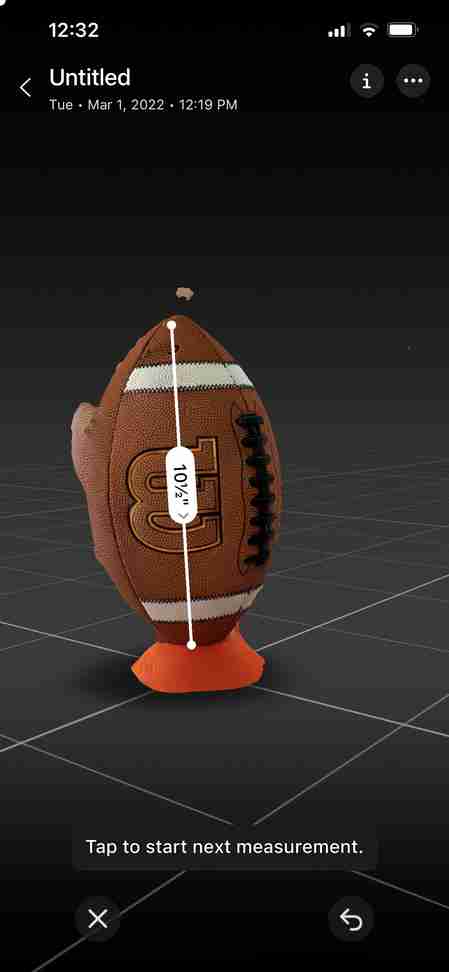
There are still a few sketchy parts but overall I was very impressed with this scan. Using the measuring tool, both scans above say the football is 11 inches long, which is correct! Because the scans were 60 MB, I did not upload them to GitLab. I could only export as a STL or OBJ file if I upgraded to “Pro”, which costed money soooooo I didn’t do that.