13. Input devices
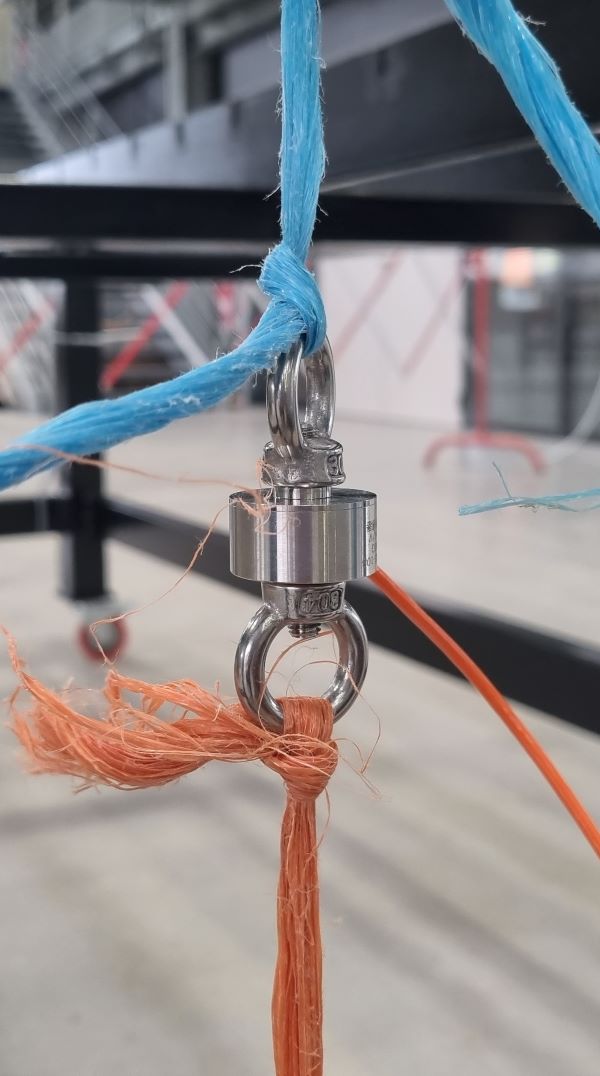
This week I worked on adding an input to my final project : a cell force ! The assignments are below :
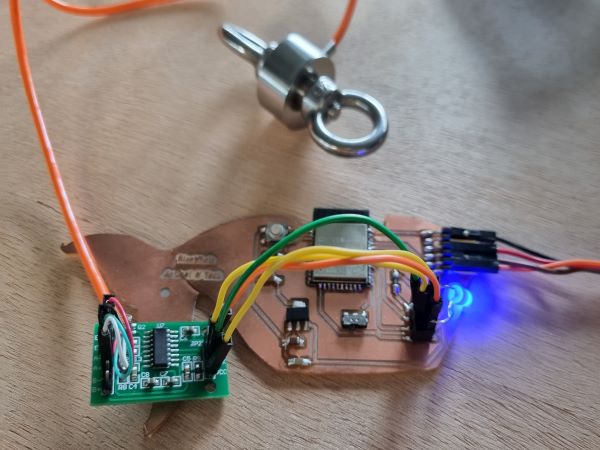
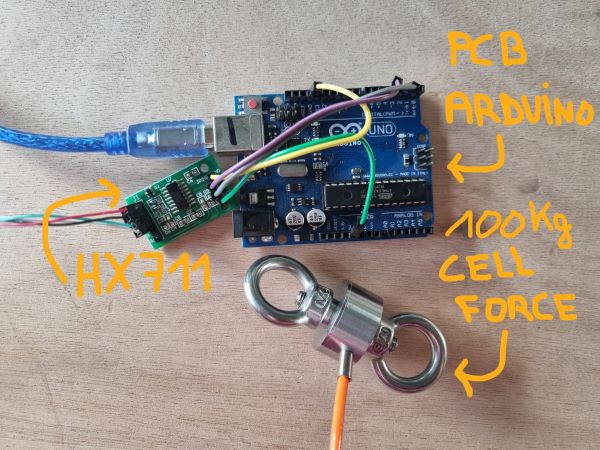
Hero shot
Choosing my input
100kg micro compression and tension force sensor
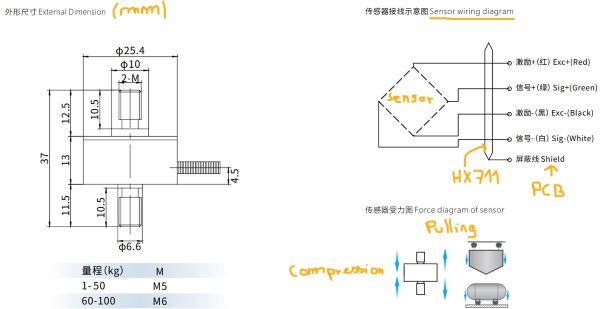
Regarding my final project, I chose to use a 100kg micro compression and tension force sensor to measure the strength exerced on the leash of a dog !
It’s an analog sensor called : DYMH-103 from the brand Xin Nuo Qi. Here is the DYMH-103 datasheet
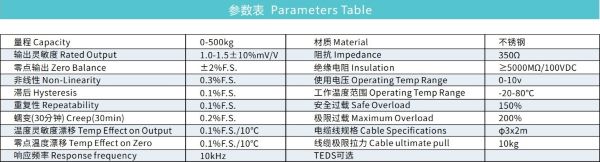
Below are some caracteristics like the dimensions, the sensor wiring diagram and the sensor force diagram :
And the parameters table from the datasheet :
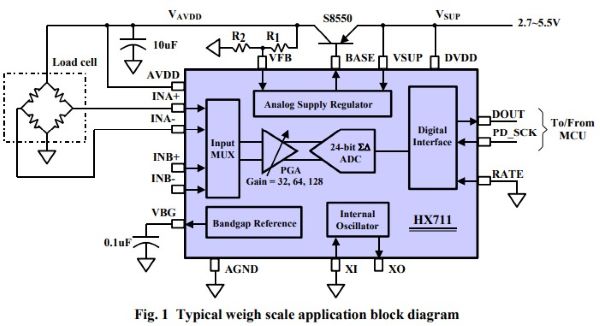
HX711 module
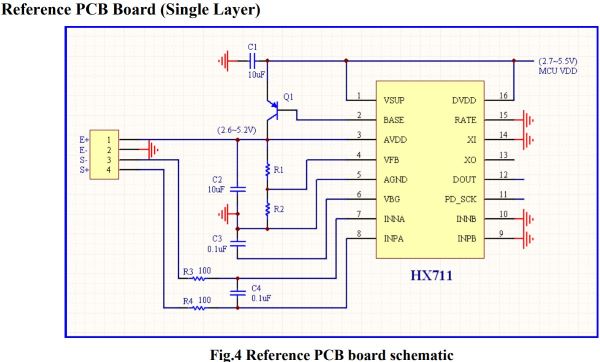
If you want to use it you need to add a HX711 module to amplifie the signal and make it communicate with your board.
Here is the HX711 datasheet.
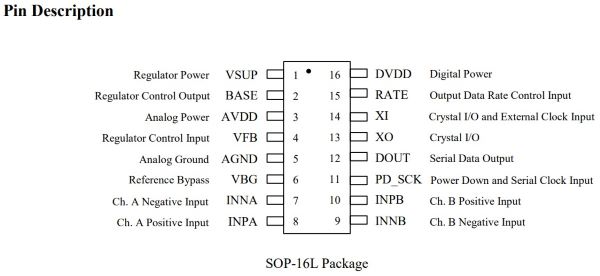
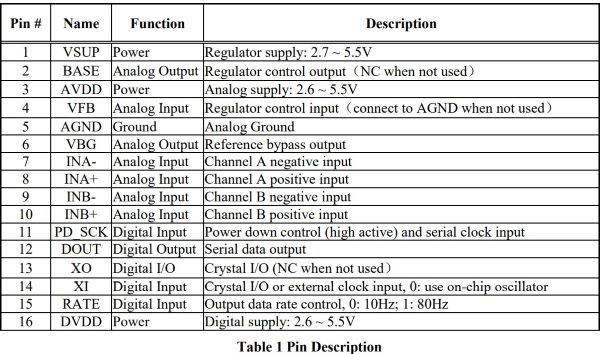
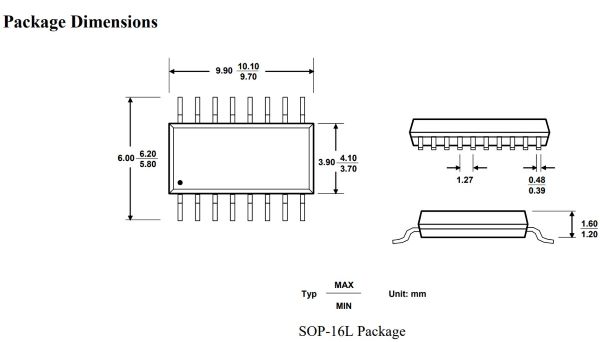
Below are some caracteristics from the datasheet :
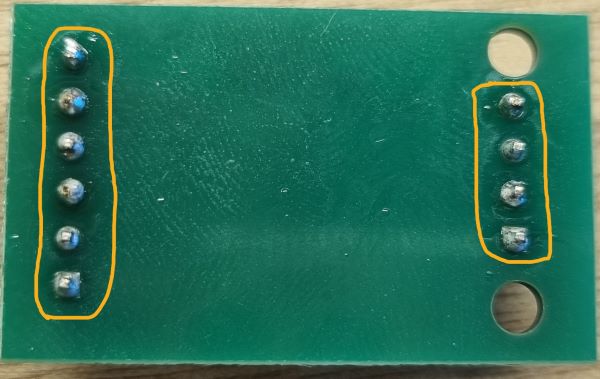
Prepare the HX711 and the cell force circuit :
- Solder the connectors to the Avia semiconductor HX711 ADC.
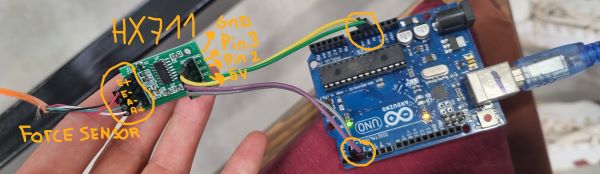
- Prepare the connections :
- Connect the wires
- Prepare the weight calibration !
And then, check your code !
Arduino coding
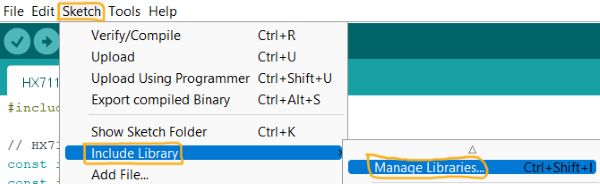
First, download the HX711 arduino library
Then, check this HX711 arduino tutorial and open the HX711 Arduino library example to be inspired :
#include "HX711.h"
// HX711 circuit wiring
const int LOADCELL_DOUT_PIN = 3; // Name the DT pin of the XH711
const int LOADCELL_SCK_PIN = 2; // Name the SCK pin of the HX711
HX711 scale;
void setup() {
Serial.begin(9600);
scale.begin(LOADCELL_DOUT_PIN, LOADCELL_SCK_PIN); // The two pins start transmit datas
}
void loop() {
if (scale.is_ready()) {
long reading = scale.read();
float conversion = ((reading + 122700.)/ 320200 * 10.)*0.724; // modifie the values regarding your "zero" value and your weight standard
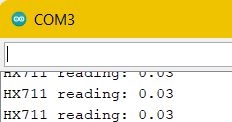
Serial.print("HX711 reading: "); // your monitor prints the values reads and begins by "HX711 reading: "
Serial.println(conversion);
//Serial.println(reading);
} else {
Serial.println("HX711 not found.");
}
delay(100);
}
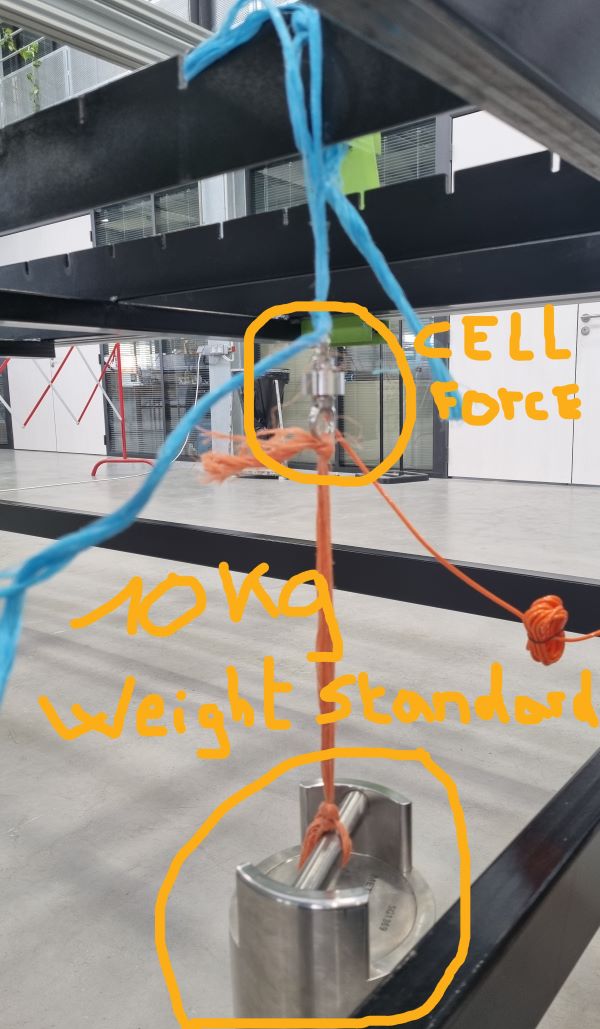
For the calibration, start by putting nothing on the cell force force and note the value your monitor shows. Then put a weight you know, I used a 10kg weight and note the value showed. Then make a little calcul to know the value you have to put in the code to make the conversion and be around the right value.
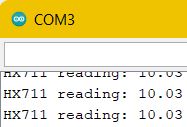
Here we are ! The cell force is calibrated to diplay the value of 10.03 when you put a 10kg weight and 0.03 kg when you put nothing. It’s not perfect because you still have about 0.03 kg more but it’s okay for the moment. You can also change the formula to erase the 0.3 difference.
Design your board and test it
I designed later a board and tested the cell force with it.
Here is the cell force with my board at work !
When the pressure decreases, a light signal is emitted !
Group Assignment with Luc HANNEUSE from Agrilab
Probe an Ultrasonic Sensor HC-SR04 analog levels and digital signals !
We chose an Ultrasonic Sensor HC- SR04 by following this tutorial.
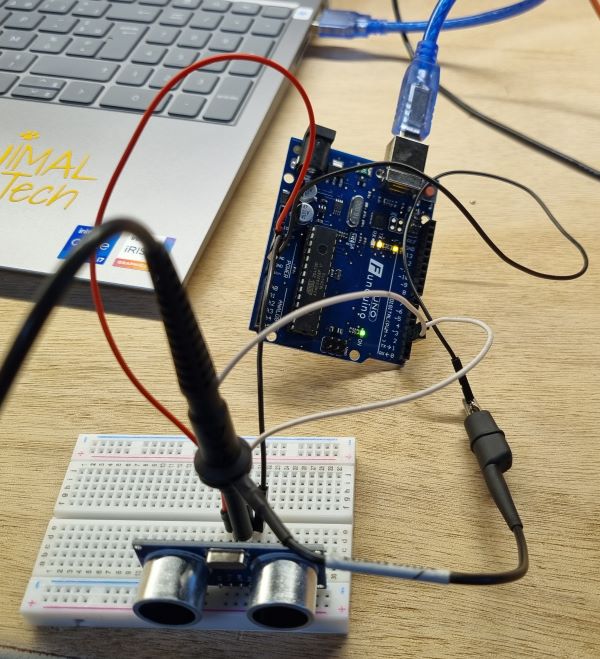
I used a Digital Tektronix oscilloscope.
Here is the Diagram from Arduino realized with Fritzing :
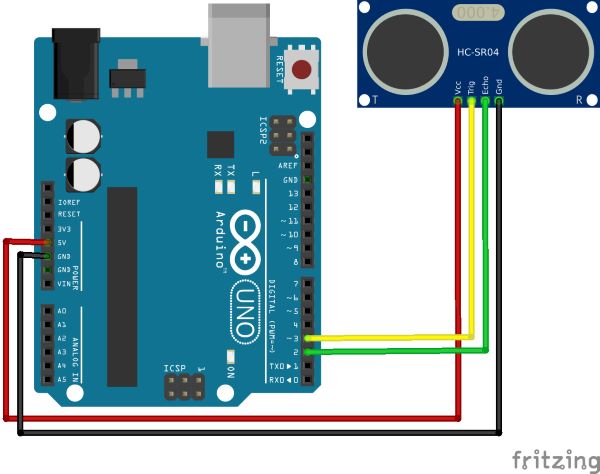
Here is the list of materials :
- 1x Arduino Uno
- 1X Ultrasonic Sensor HC-SR04
- 2X Male to Male Jumpers
- 1X Breadboard
- 1X Oscilloscope
Here is the circuit :
Here is the results of the signals :
When you’re getting closer to the Ultrasonic sensor, you can see the signal amplitude decrease :
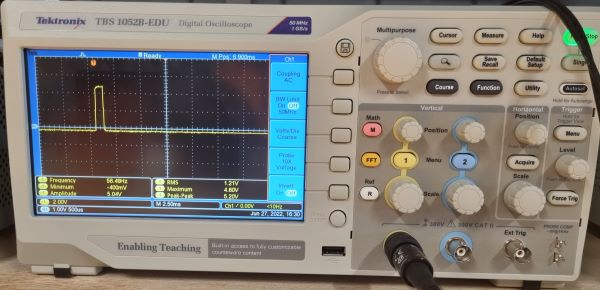
When you move away from the sensor you can see the amplitude increase :
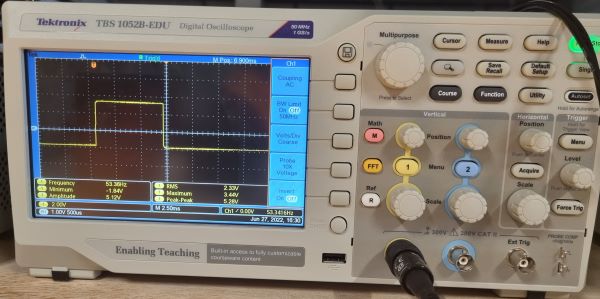
It makes it possible to measure the distance between an object and the sensor.
Here is a video showing the change when the paper is getting closer :
And getting away :
Files
Useful Links
- final project
- 100kg micro force sensor
- DYMH-103 datasheet
- HX711 module
- HX711 datasheet
- HX711 arduino library
- HX711 arduino tutorial
- tutorial