11. Output devices
This week I worked on Output devices. The assignments are below :
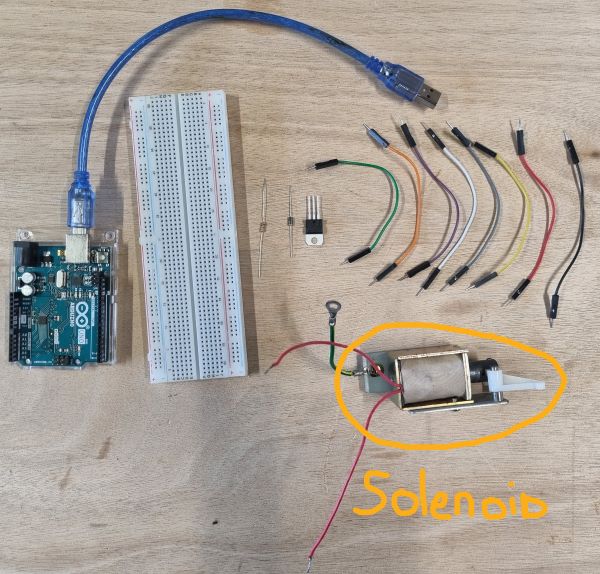
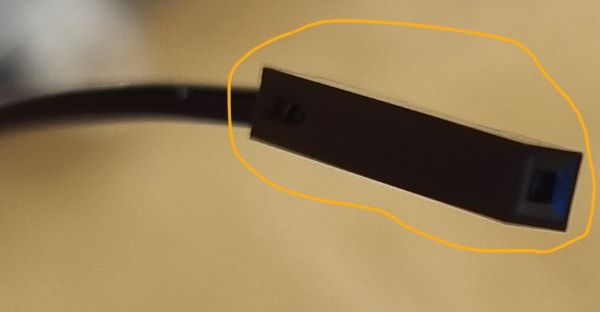
Hero shot

Choosing my output
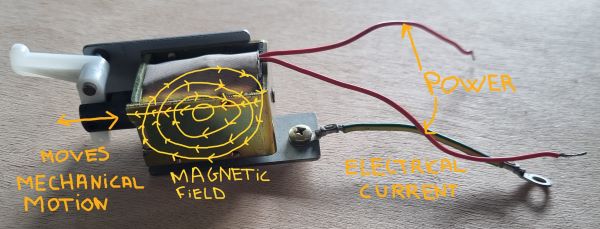
Regarding my final project, I chose to use a Solenoid.
It converts the electrical power into mechanical motion thanks to magnetics fields inside the solenoid where there is a coil :

Solenoid explanation from TLXTech
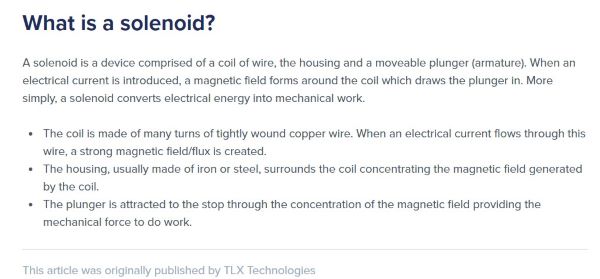
Solenoid explanation from TLXTech
BC Robotics Tutorial to control a solenoid with arduino
The material necessary :
- 1 x DN15 Solenoid Valve, or 12V Solenoid Valve – 3/4″
- 1 x Arduino Uno or compatible microcontroller
- 1 x Solderless Breadboard
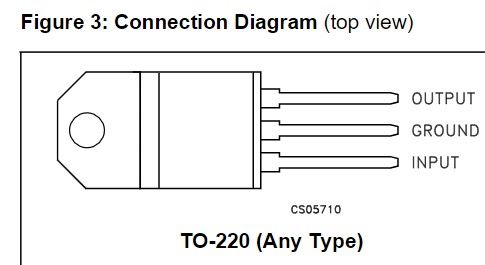
- 1 x TIP120 Darlington Transistor
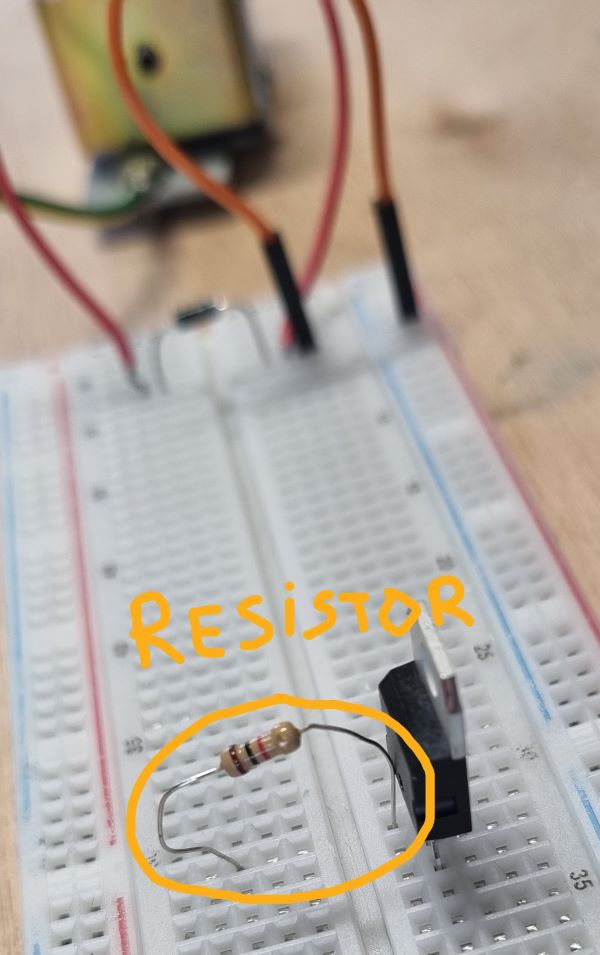
- 1 x 1K Ohm Resistor
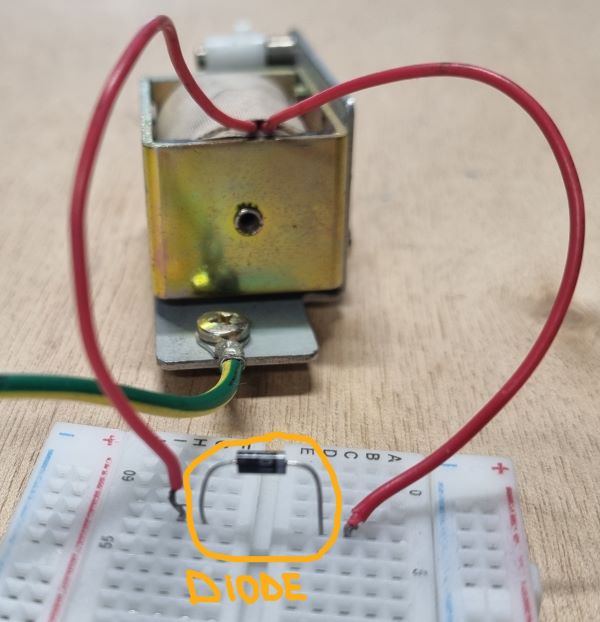
- 1 x 1N4001 Diode
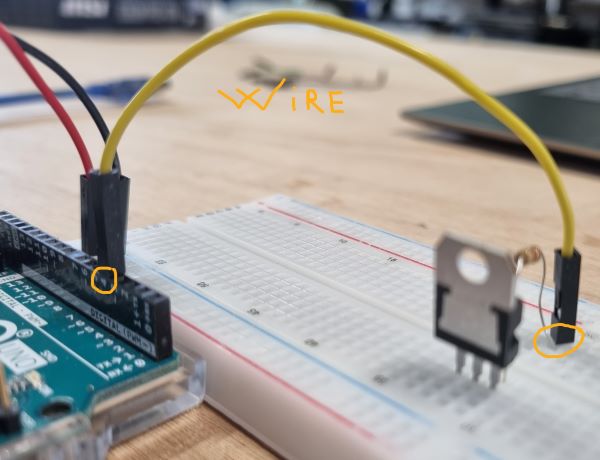
- Hookup Wires - recommandation for Premium Male/Male Jumper Wire
The Schematic :
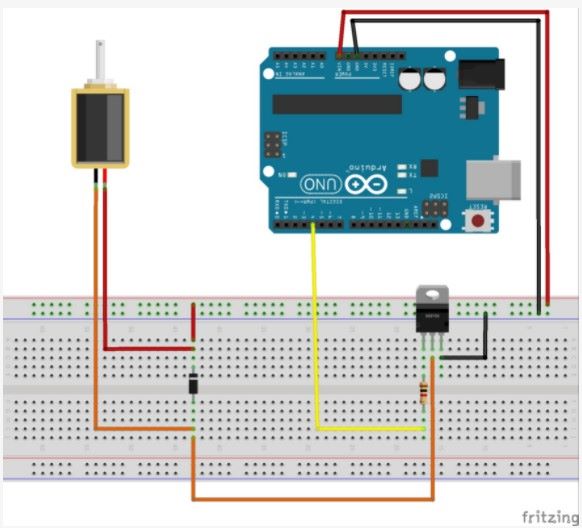
From BC Robotics Tutorial
The preparation of the board :

Transistor description :
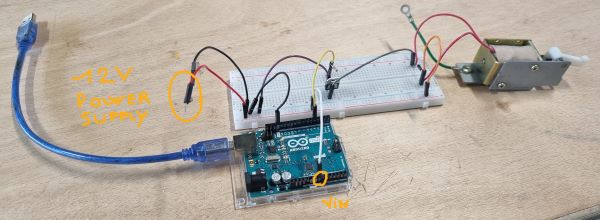
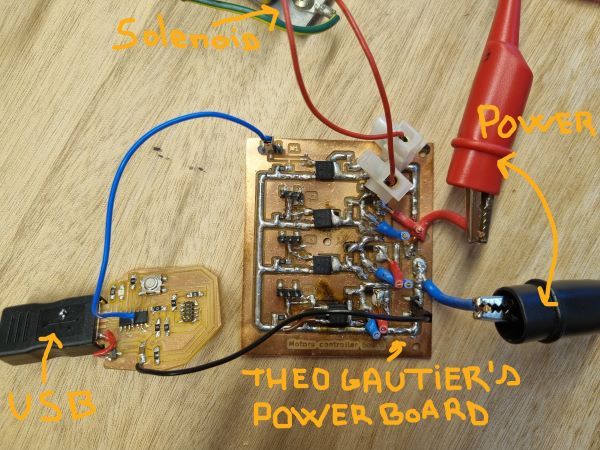
Unfortunately, it didn’t work so we used the Theo Gautier Power board and my own PCB that I made for the Electronics design week composed of an ATSAMD11C microcontroller and it worked !! So maybe it was a wrong contact issue with the wires…
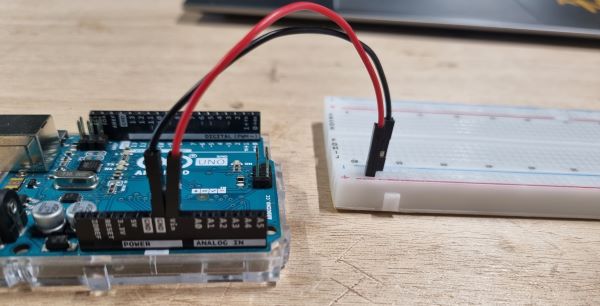
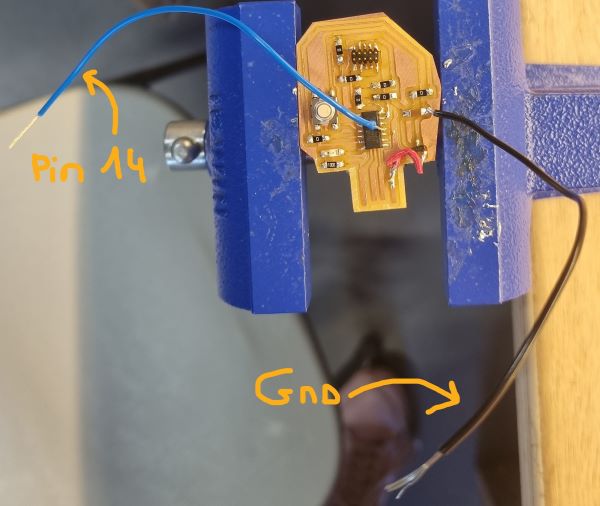
First, I needed to solder two wires on my board :
- one on Ground
- one on a free pin, I chose the 14th to connect my solenoid.
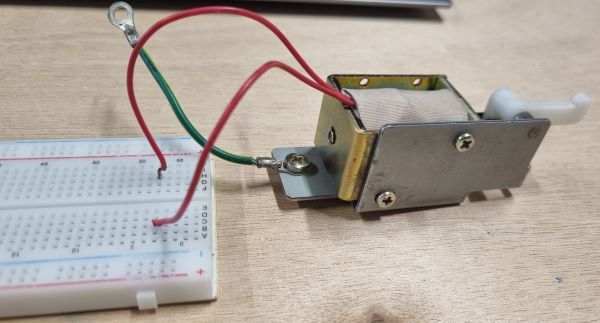
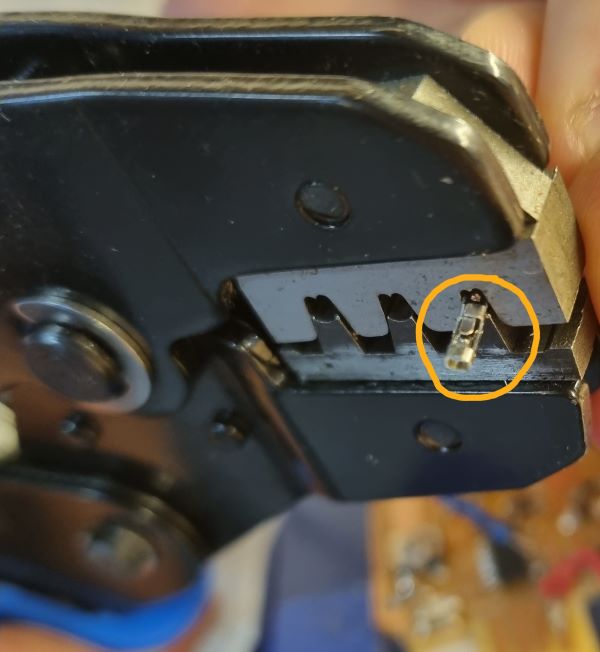
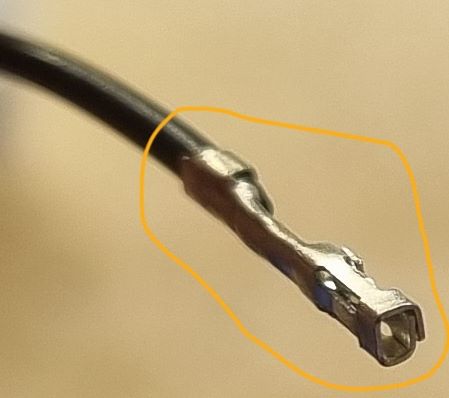
Then prepare your wires by putting some female connector :
Flash your board with this solenoid code to make it click one time :
int solenoidPin = 14; //This is the output pin on the Board we are using

void setup() {
  // put your setup code here, to run once:
pinMode(solenoidPin, OUTPUT); //Set the pin as an output
}

void loop() {
  // put your main code here, to run repeatedly:
digitalWrite(solenoidPin, HIGH); //Switch Solenoid ON
delay(1000); //Wait 1 Second
digitalWrite(solenoidPin, LOW); //Switch Solenoid OFF
delay(1000); //Wait 1 Second
}
Plug it to 12V power and it should work !
Group Assignment with Theo GAUTIER from Agrilab
We measured the power consumption of the 12V solenoid with the RS Pro DC Power supply IPS 3303S at 12V.
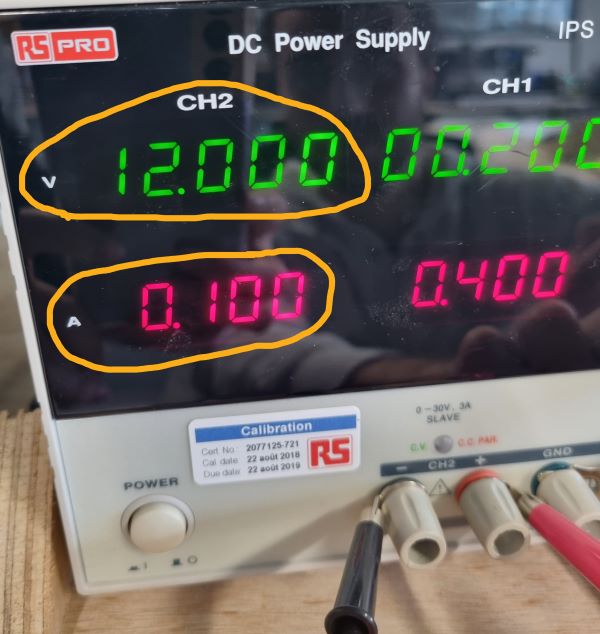
The power consumption of the 12V solenoid is around 0.1A per activation.
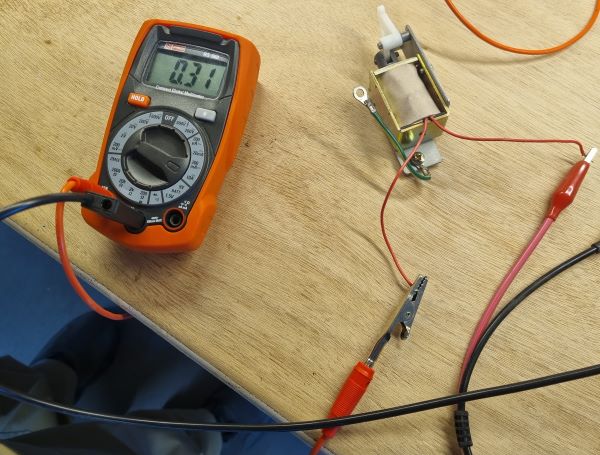
Multimeter measurement
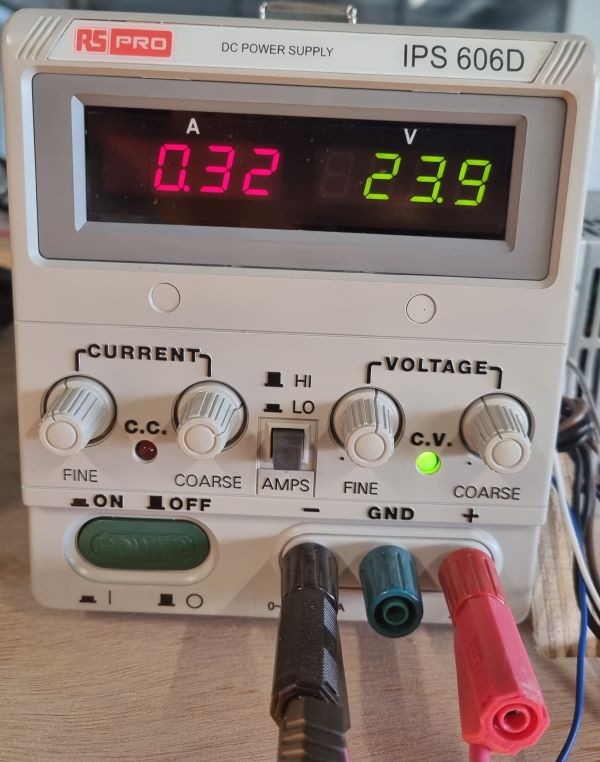
We measured the intensity with a multimeter and put the power with the RS Pro DC Power Supply IPS 606D: At 24 V :
At 12V :
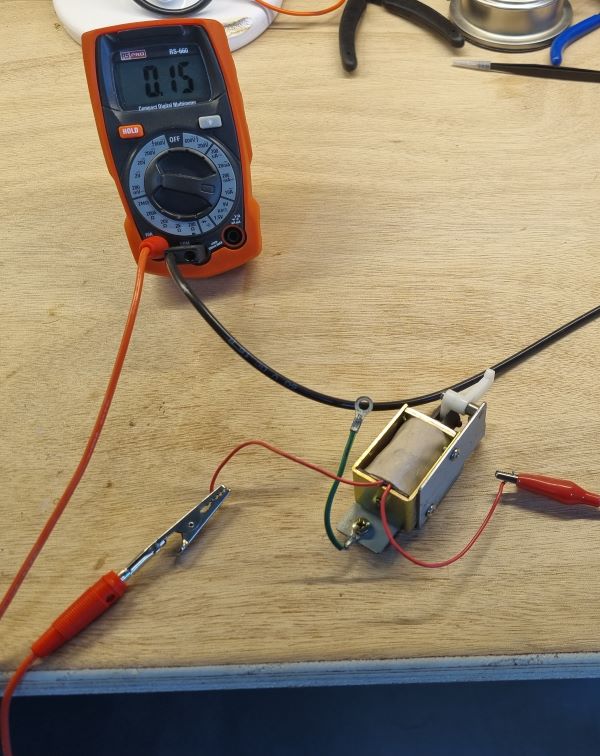
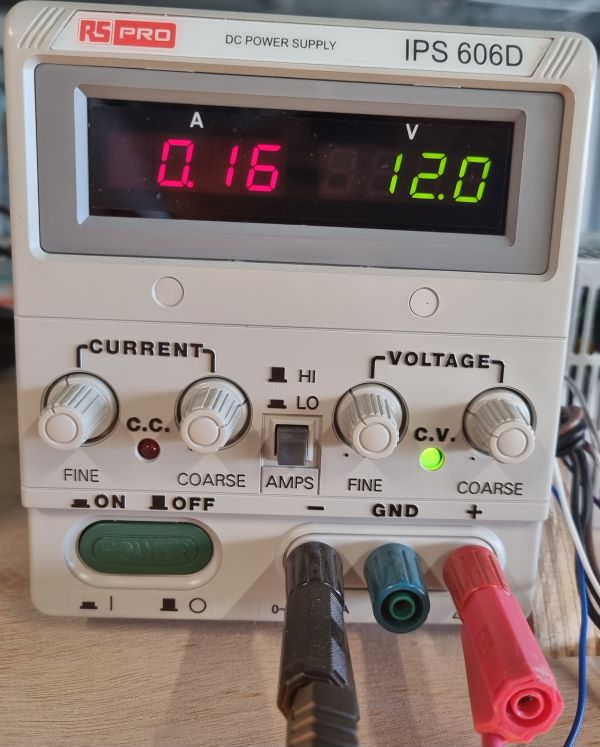
Thus, you can see that the intensity varies regarding the power you put.
Oscilloscope
We also looked at the electrical signal variations of the solenoid with a Tektronix Digital oscilloscope :
Mistakes
- We didn”t succeed with the Arduino tutorial but we’re not sure about the cause…
Files
Useful Links
- final project
- Solenoid
- TLXTech
- BC Robotics Tutorial
- Theo Gautier Power board
- RS Pro DC Power supply IPS 3303S