Final Project - Fab Barberi
Siena is well known for an historical horse race that takes place twice a year, known as the Palio di Siena.
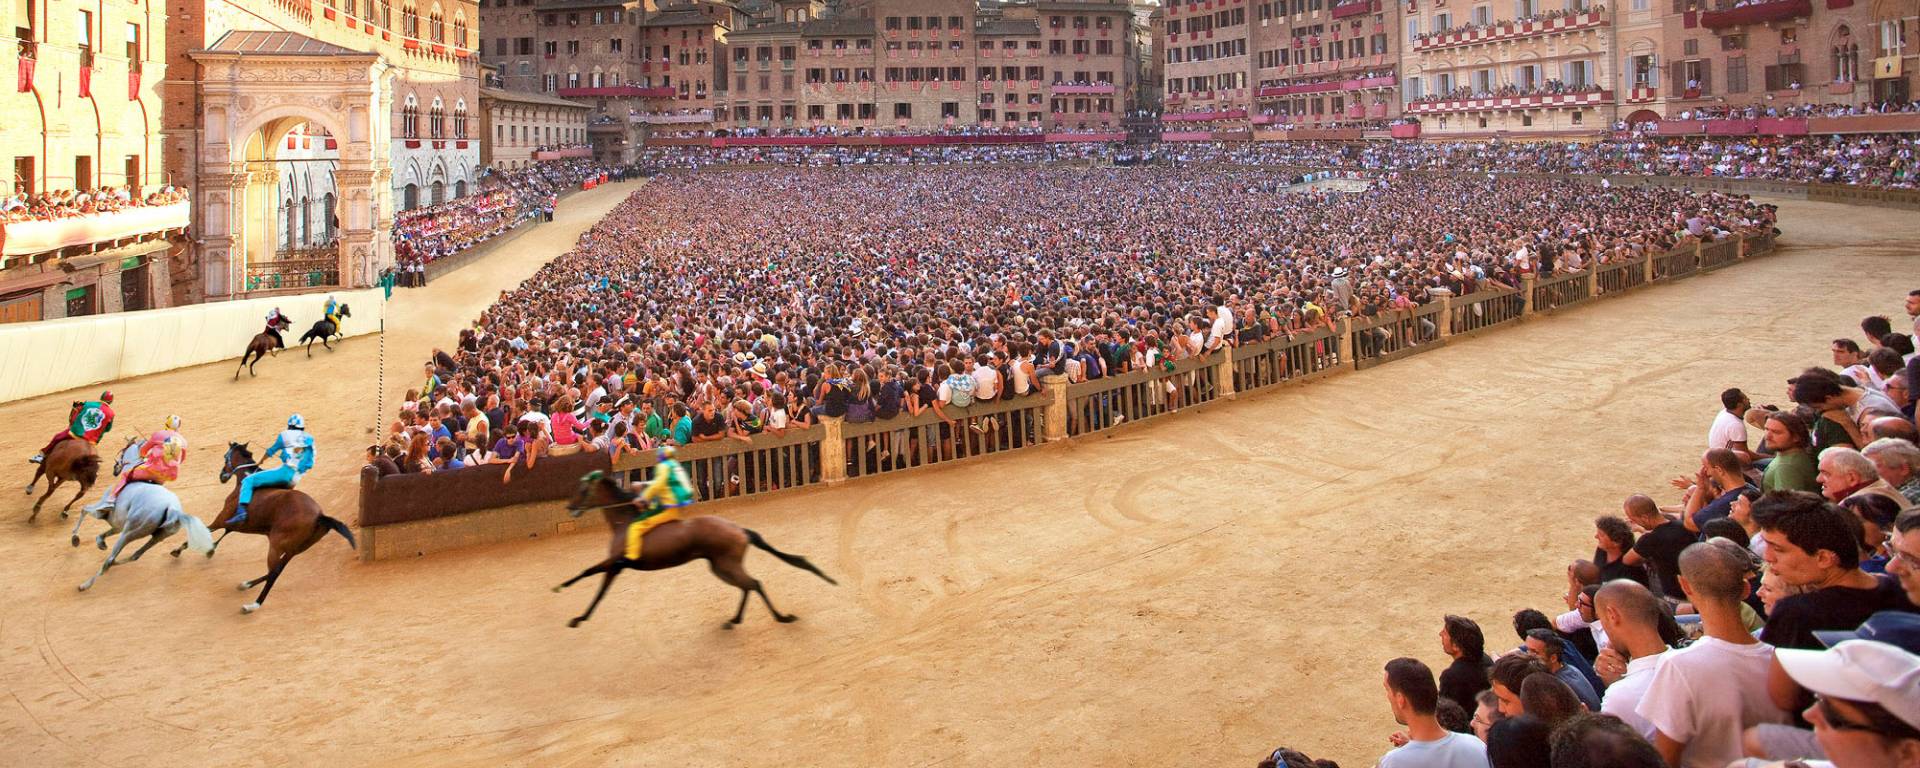
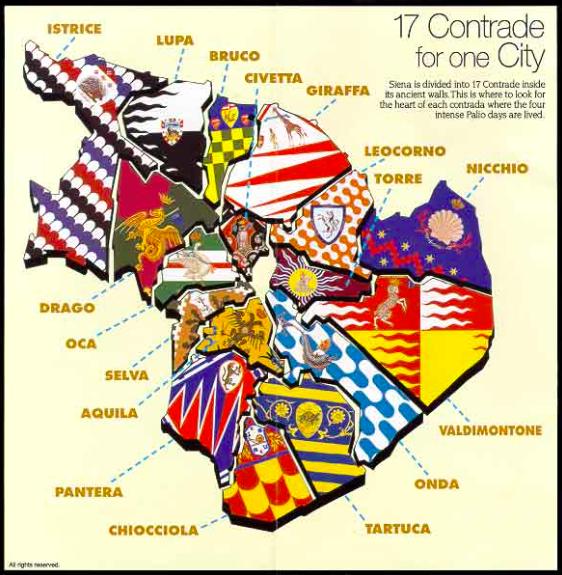
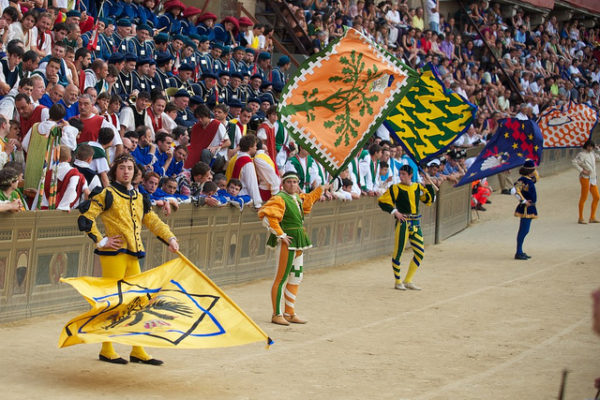
Everything in Siena is based on these races and the culture and tradition behind them. The whole city is divided in 17 districts also known as Contrade.
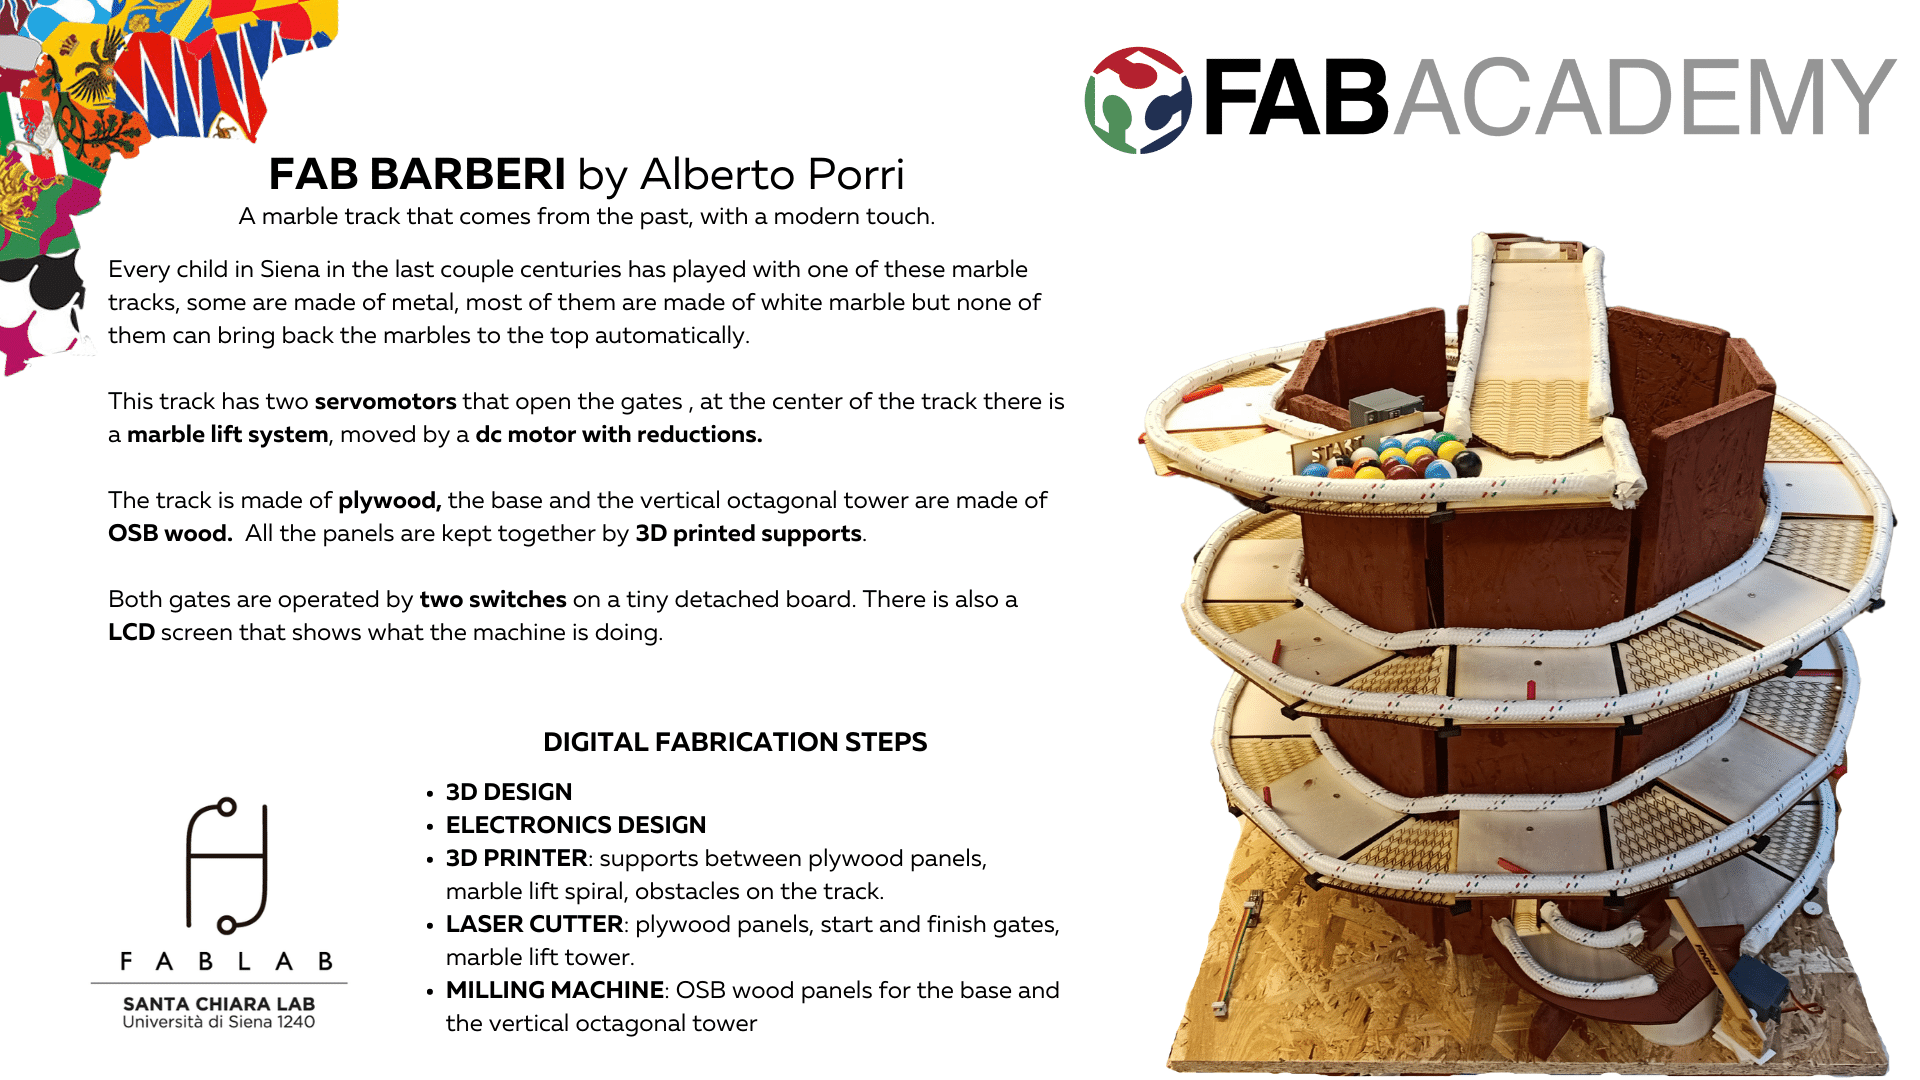
Every child born and raised in Siena has played with la pista dei Barberi, which is a marble track that emulates the real horse race.
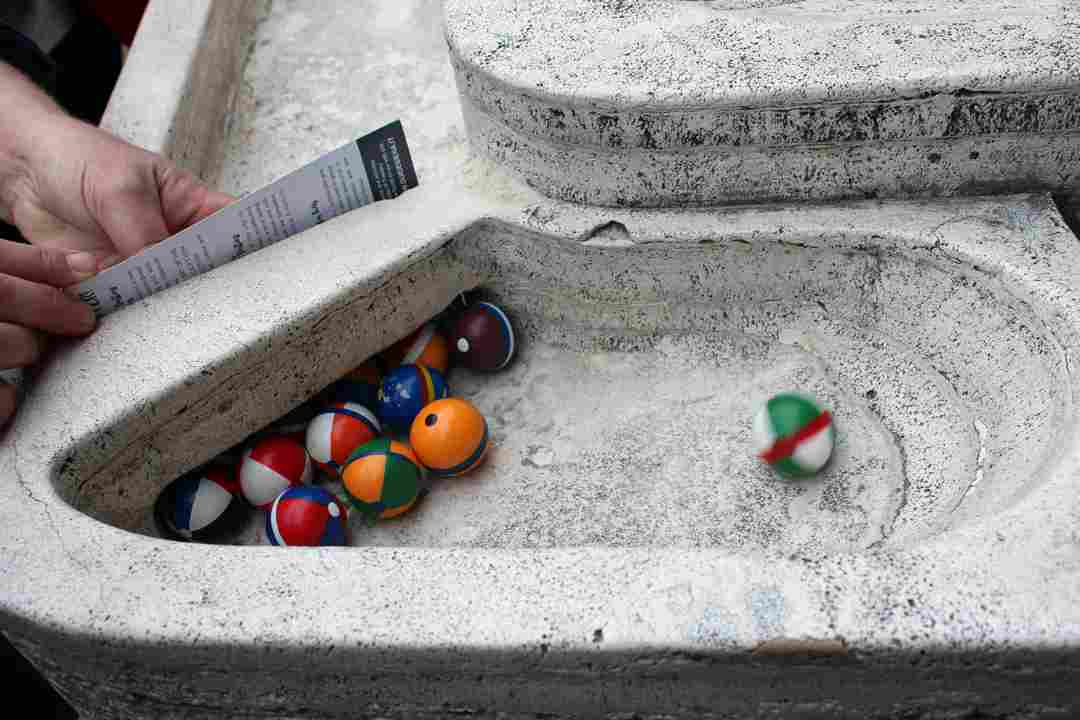
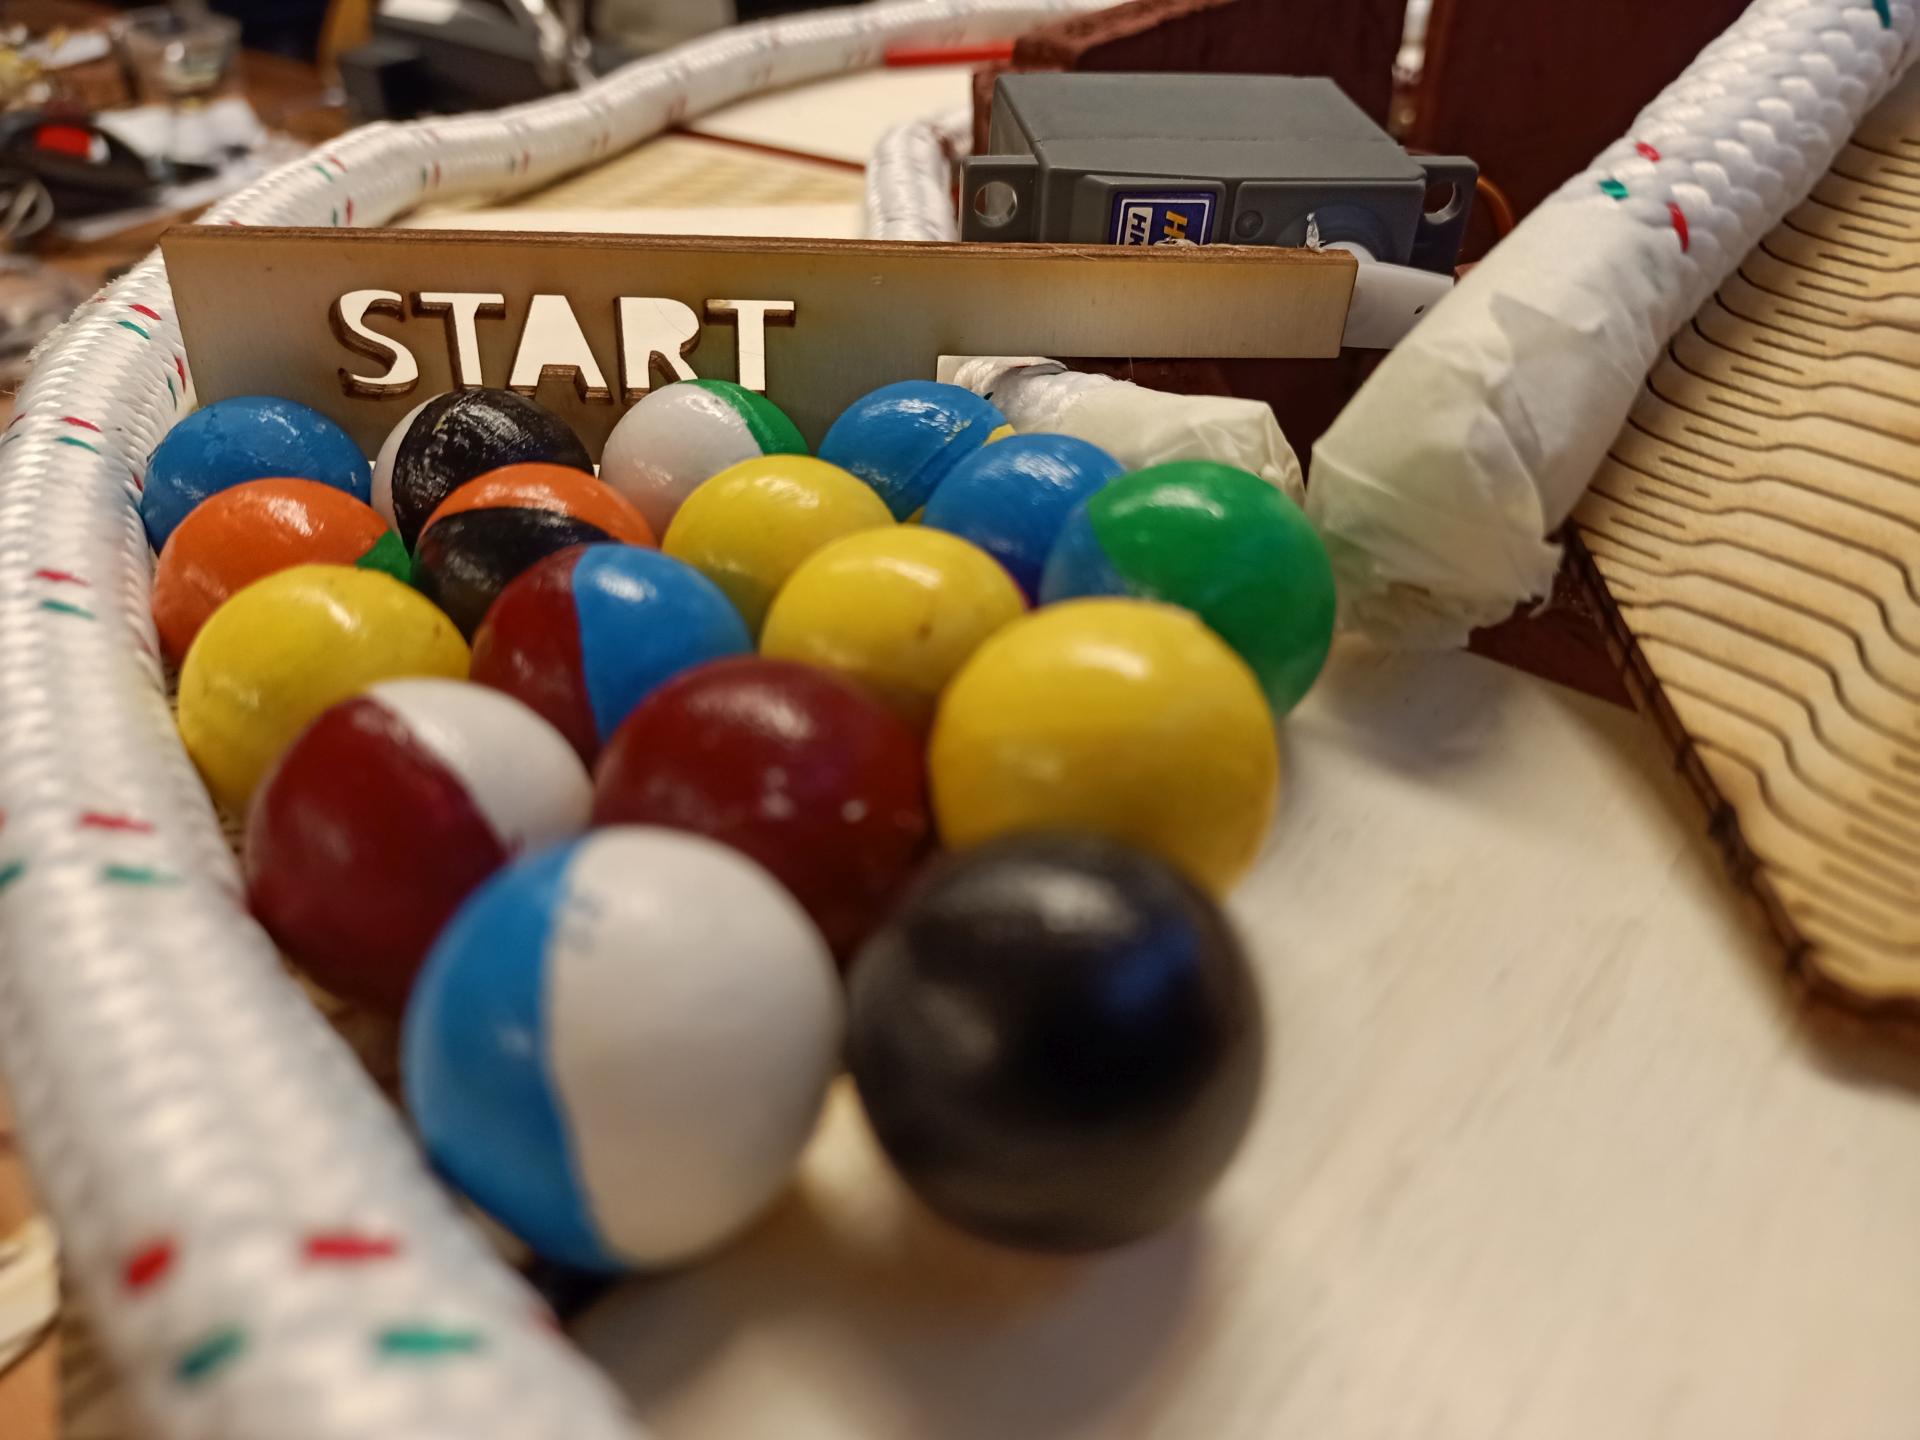
Instead of running with jockeys and horses, these marble tracks use tiny wood balls, known as Barberi with the Contrada’s colors, so that children can see their Contrada compete against each other.
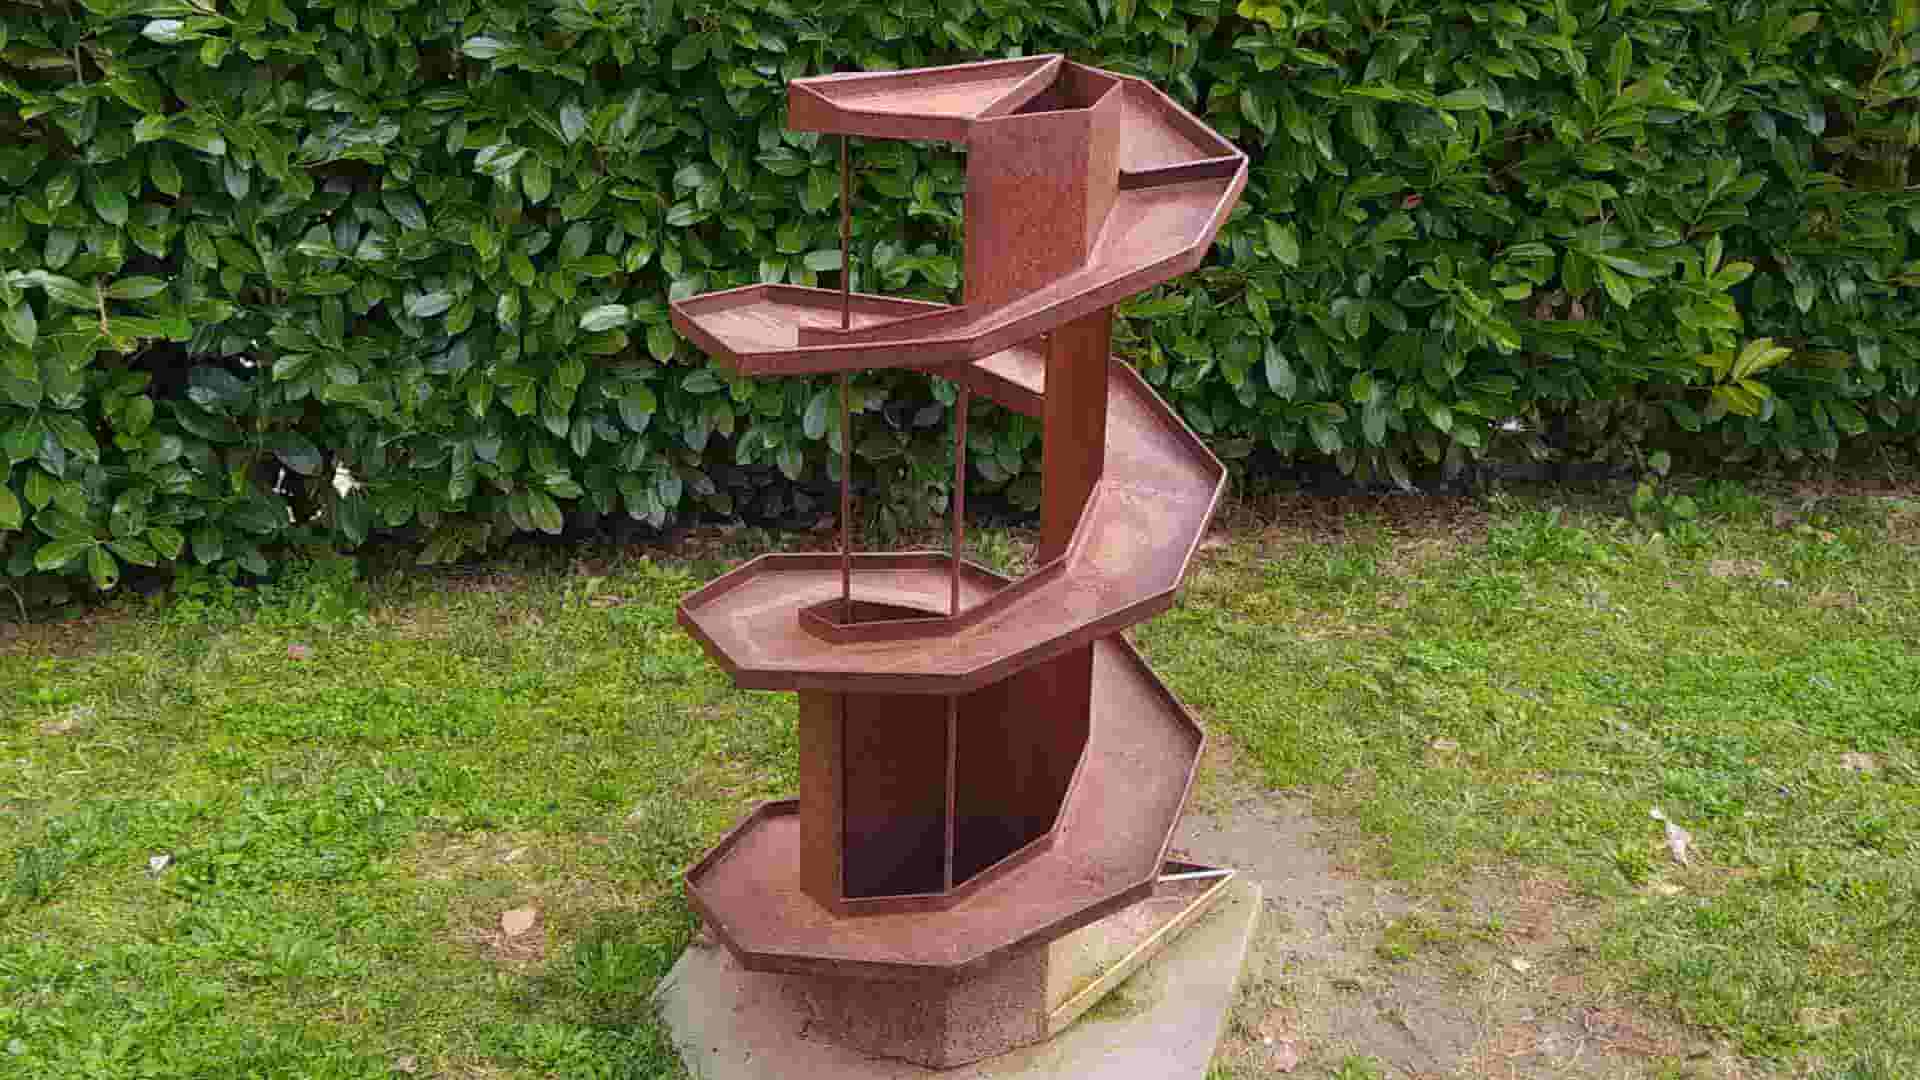
The Palio lasts three laps and so the marble track has a structure that tries to reply the laps. The race starts on top, then all the marbles race down to the bottom.
The last section of the track gets narrower so that there can only be a winner. And that’s it, this is how a traditional Pista dei Barberi works.
Marbles go back and forth only if children grab them and place them back at the starting line, ready to race again.
This is how it worked, until today.
Fab Barberi automatically brings back the marbles to the top. When they reach the finish line all the marbles are held in place by an automatic gate moved by a servomotor.
If the switch connected to the servo is pushed, the automatic gate at the bottom opens and lets all the marbles roll to the center of the structure through a slide.
The tunnel leads to the central section, where there is a Archimedes’ screw that brings the marbles all the way back to the top thanks to a DC motor with reductions.
At the top of the track there is another automatic gate, also moved by a servomotor. that opens only when the button is pushed.
Electronics production
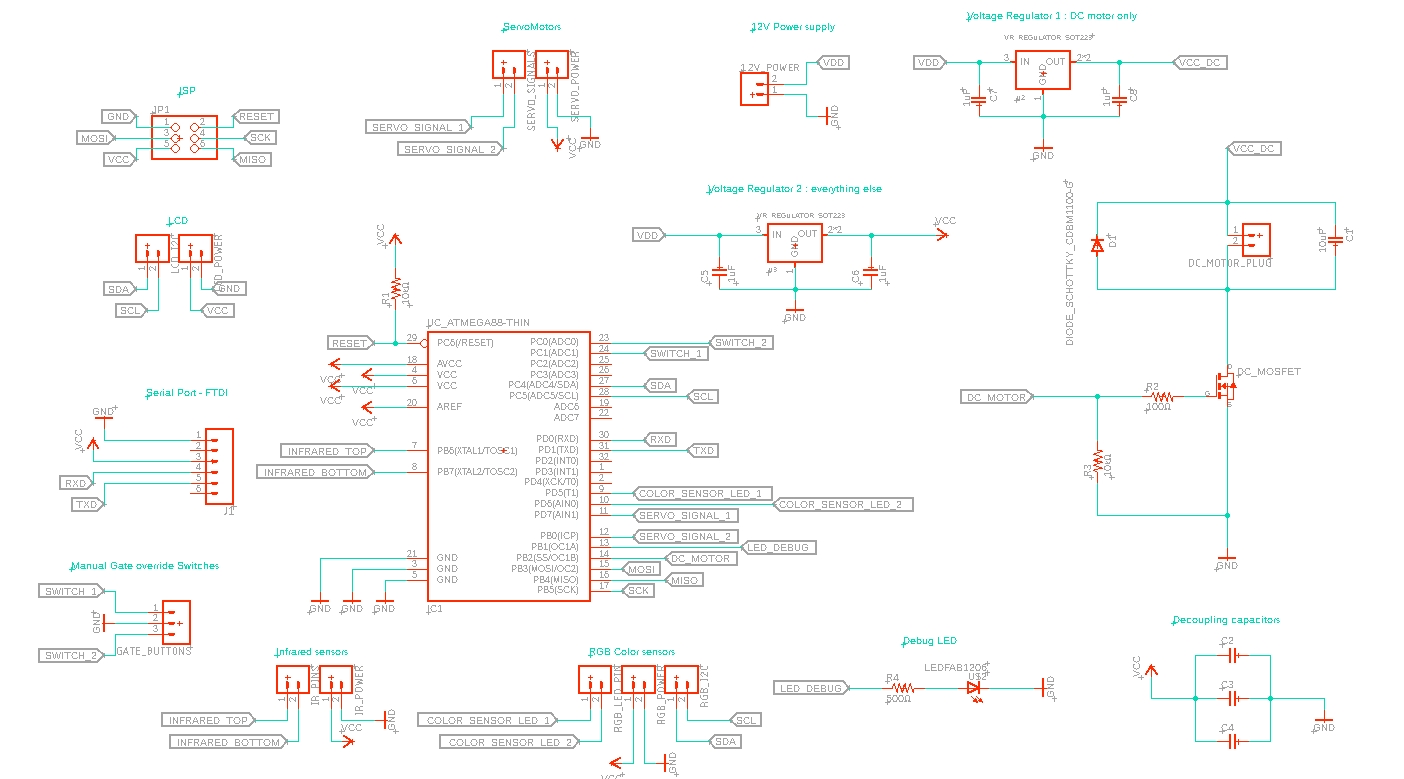
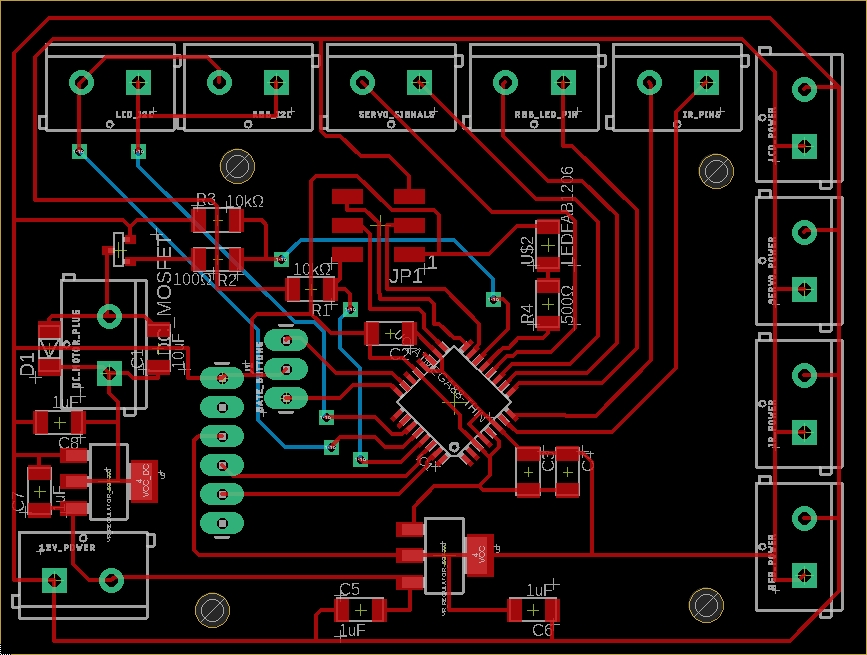
This is the main PCB schematic (downloadable here):
This is its routing (downloadable here):
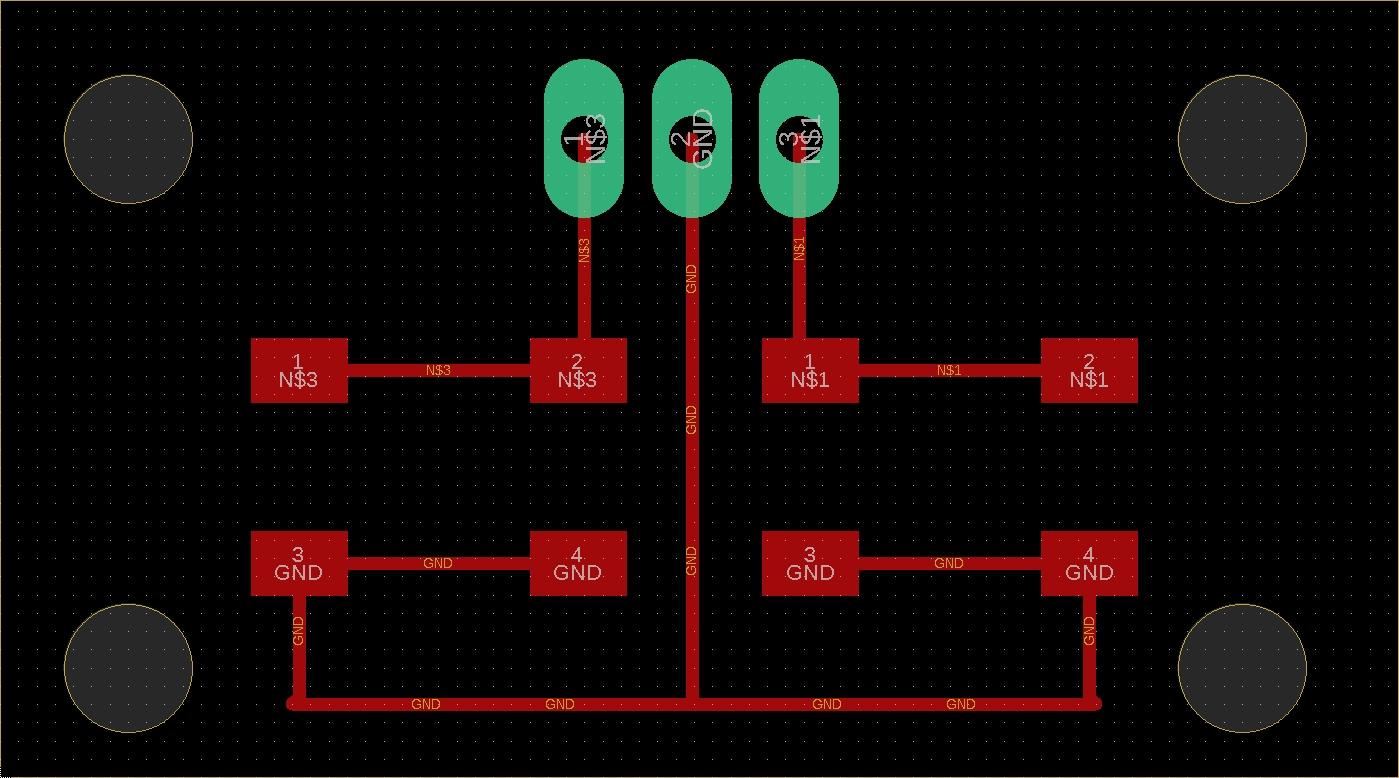
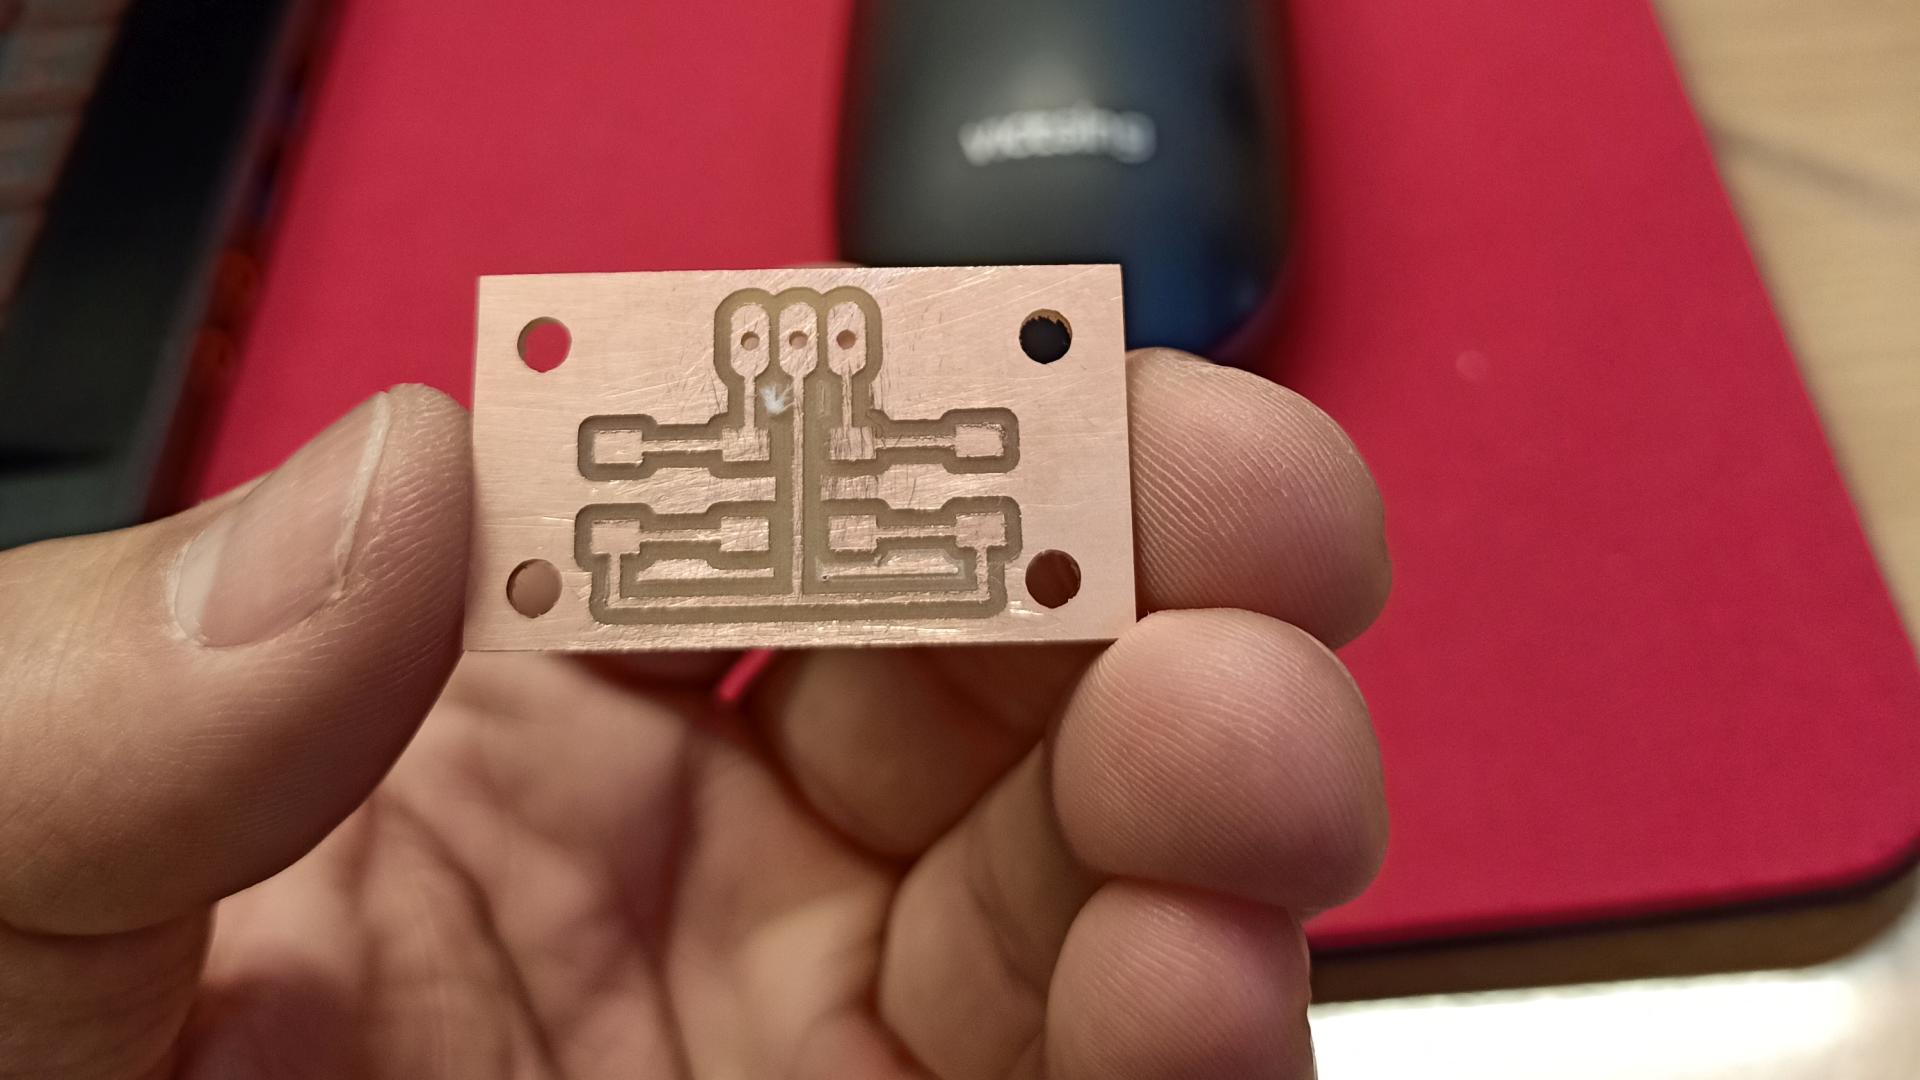
This is the tiny switch board’s schematic (downloadable here):
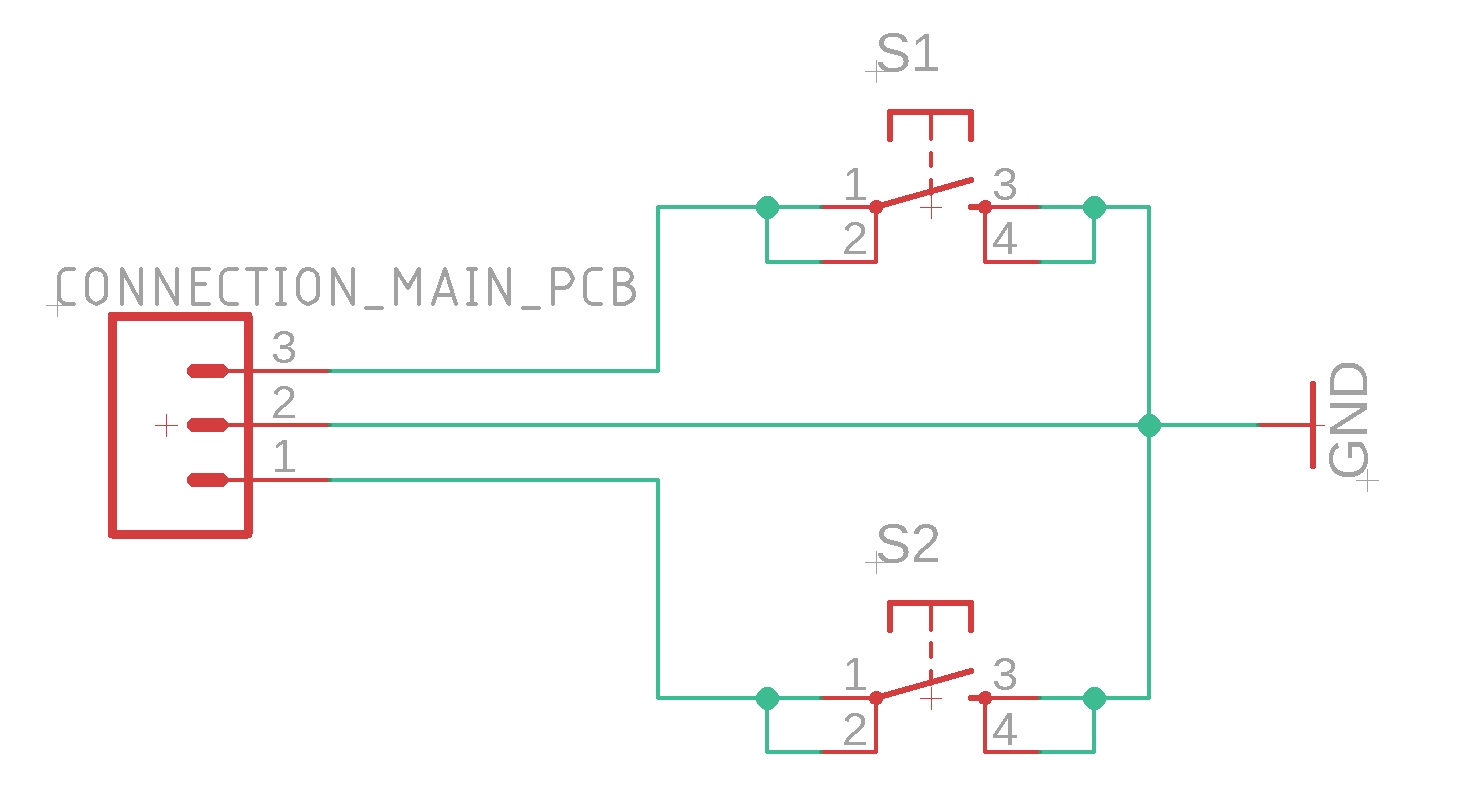
This is its routing (downloadable here):
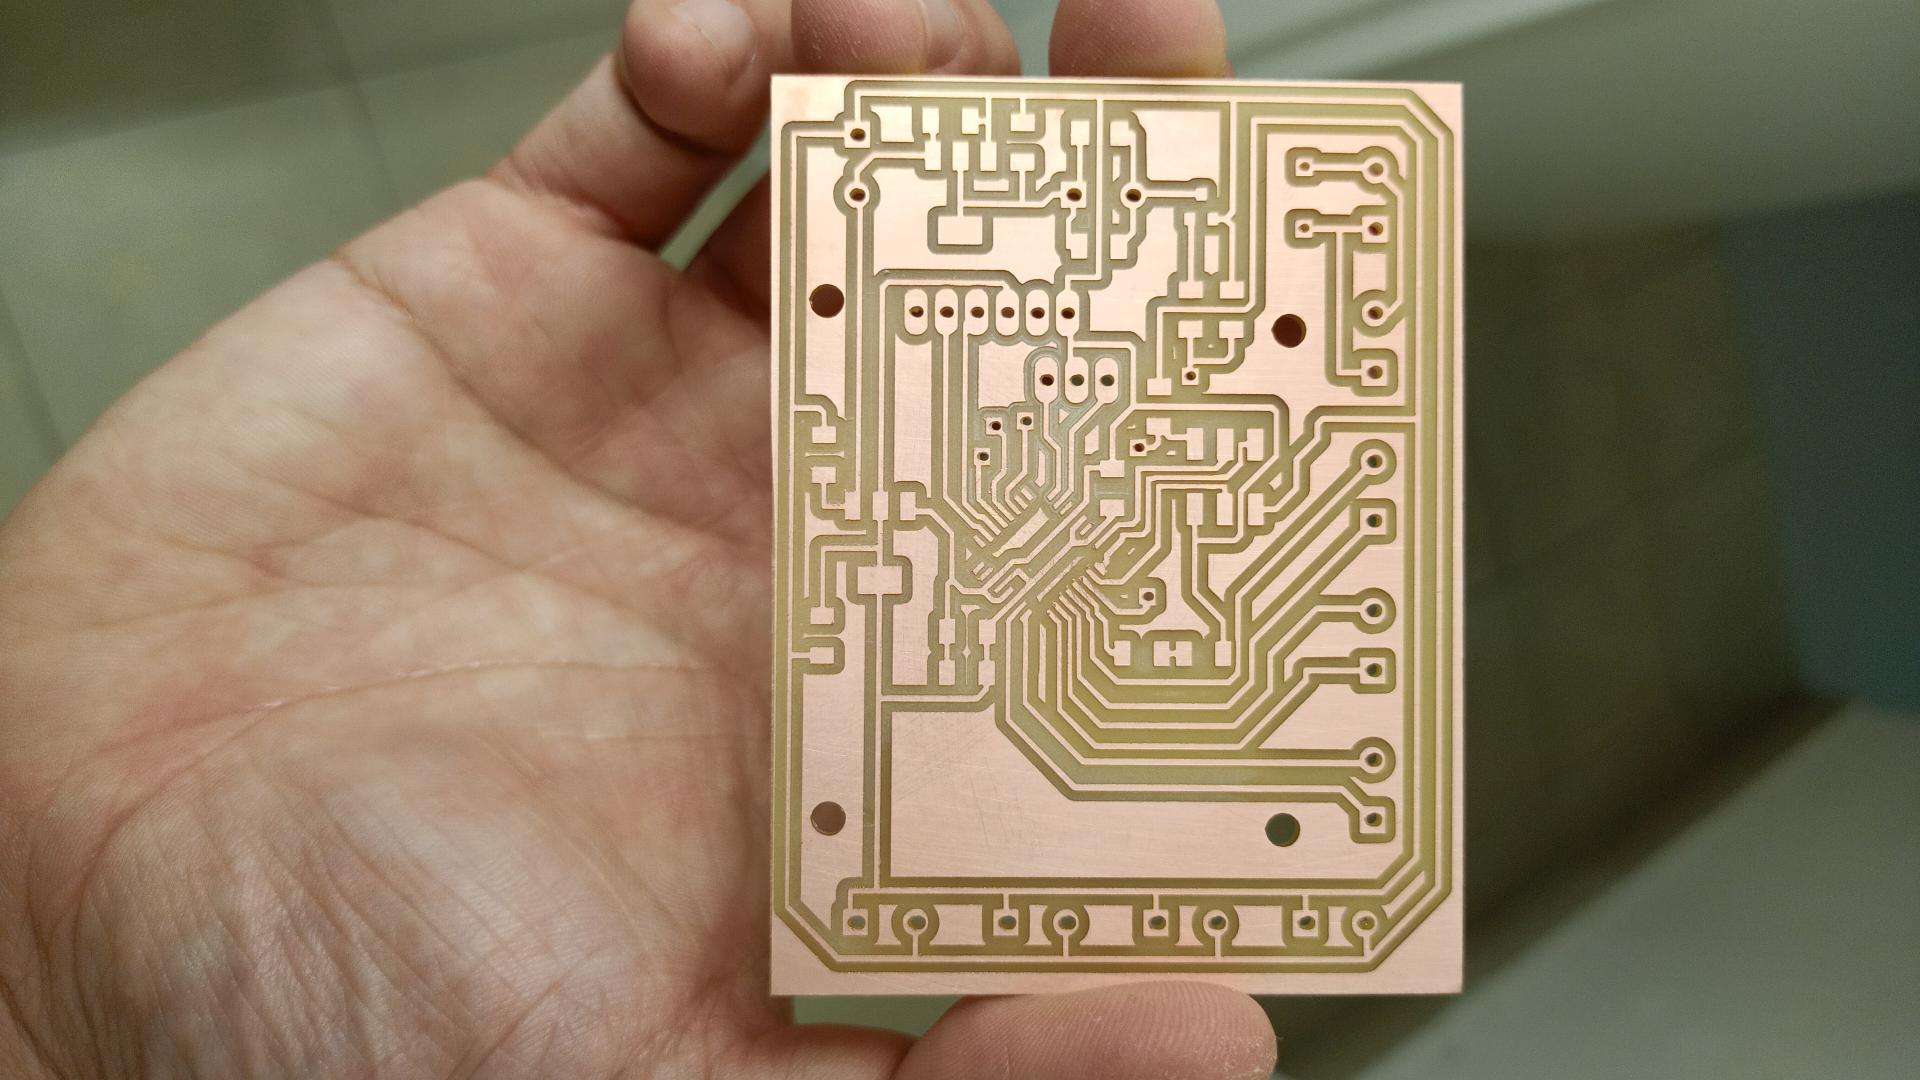
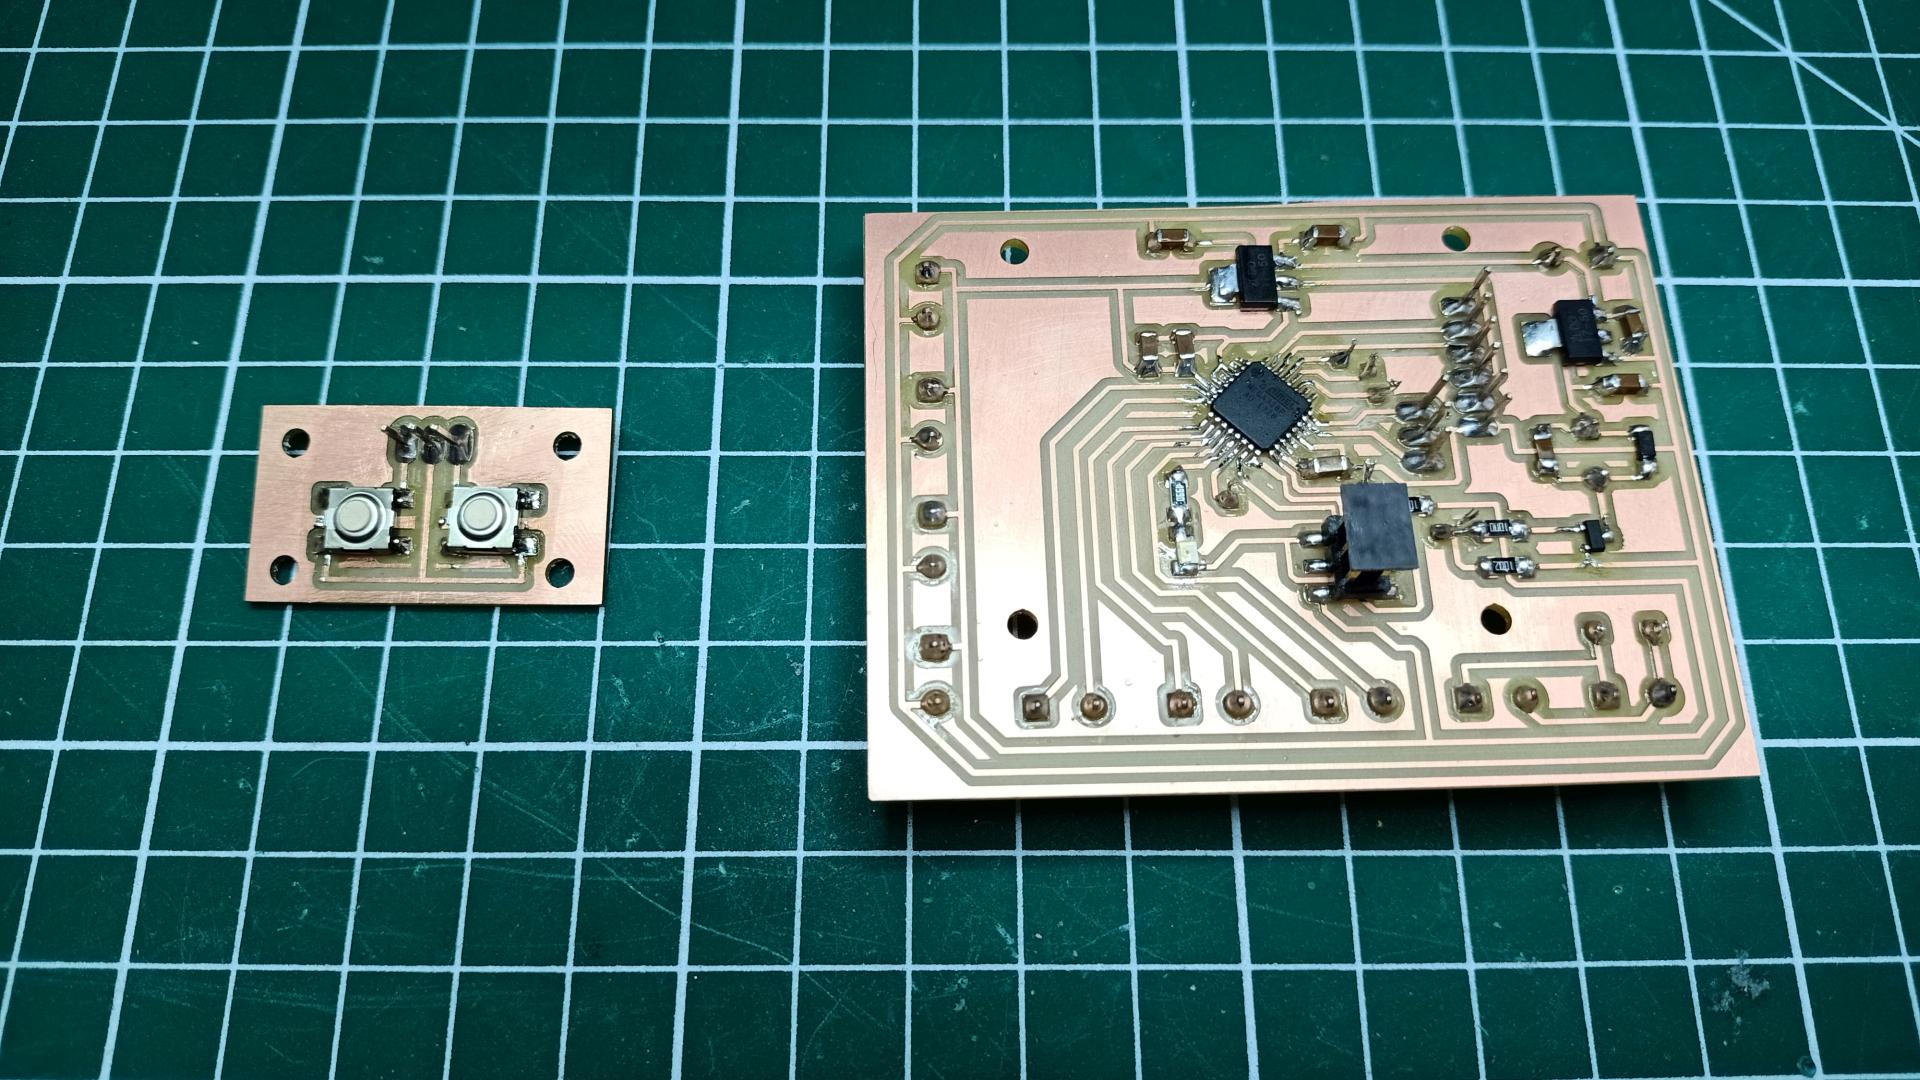
Here’s how the main board looks after it has been cleaned:
This is how the tiny switch board looks like:
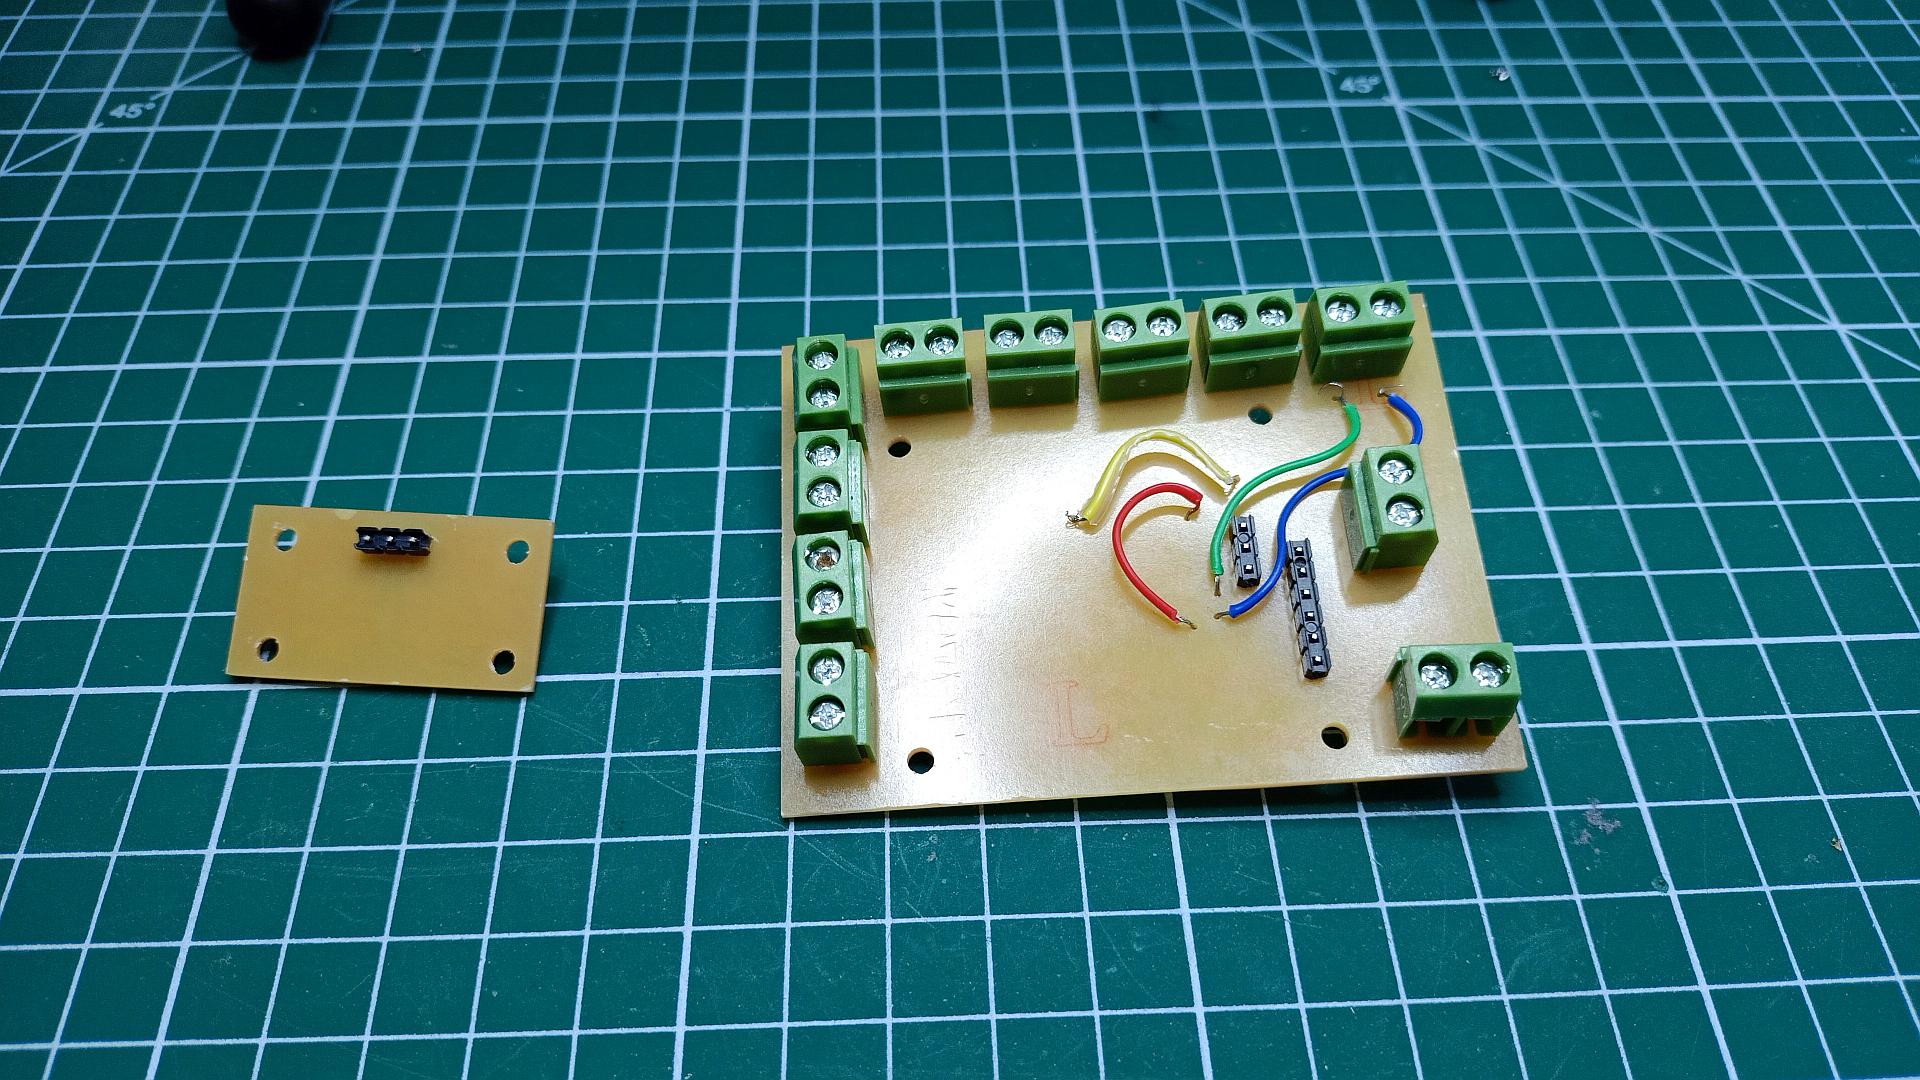
This are the boards ready for the project:
Code
// including all the libraries I need: servo, LCD with I2C and common I2C

#include <Servo.h>
#include <Wire.h>
#include <LiquidCrystal_I2C.h>

// set the LCD address to 0x27 for a 16 chars and 2 line display
LiquidCrystal_I2C lcd(0x27,16,2);

//setting the servos
Servo servoStart;
Servo servoFinish;

// the following variables are unsigned longs because the time, measured in milliseconds, will quickly become a bigger number than can be stored in an int
// the debounce time; increase if the output flickers
unsigned long debounceDelay = 100;
// the last time the output pin was toggled
unsigned long lastDebounceTime = 0;

// setting the pins connected to the buttons
const int pinBottoneStart = 15; //A1
const int pinBottoneFinish = 14; //A0

// setting the DC motor pin
const int pinMotore = 10;

// setting the servomotors pins
const int pinServoStart = 7;
const int pinServoFinish = 8;

// setting the initial and final state for both buttons, they will move from 100° to 20° when I'll press the buttons.
const int angoloStartChiuso = 100;
const int angoloStartAperto = 20;
const int angoloFinishChiuso = 100;
const int angoloFinishAperto = 20;


void setup() {
  // setting the pullup resistors for both buttons pins
  pinMode(pinBottoneStart, INPUT_PULLUP);
  pinMode(pinBottoneFinish, INPUT_PULLUP);

  // setting the DC motor pin as an output
  pinMode(pinMotore, OUTPUT);

  // setting the LCD's initial state
  lcd.init();
  lcd.backlight();
  lcd.setCursor(0,0);
  lcd.print("Initializing...");
  delay(100);

  // setting the servomotors' initial state
  servoStart.attach(pinServoStart);
  servoFinish.attach(pinServoFinish);
  delay(100);
  servoStart.write(angoloStartChiuso);
  servoFinish.write(angoloFinishChiuso);
  delay(1000);
  detachAll();

}

void loop() {
  // If the button connected to the servo at the bottom of the track is pushed, both servomotors move.
  // The one at the bottom lets the marbles reach the central section, the one on top goes down in order to block them at the beginning of the track.
  // Meanwhile the LCD says "Loading Barberi..." and the DC motor starts moving.
  if ((digitalRead(pinBottoneFinish) == LOW) && ((millis() - lastDebounceTime) > debounceDelay)) {
    lastDebounceTime = millis();
    lcd.clear();
    lcd.print("loading");
    lcd.setCursor(0,1);
    lcd.print("barberi...");

    servoFinish.attach(pinServoFinish);
    servoFinish.write(angoloFinishAperto);
    delay(100);

    servoStart.attach(pinServoStart);
    servoStart.write(angoloStartChiuso);
    delay(100);

    digitalWrite(pinMotore, HIGH);
  }
  // If the button connected to the servo on top of the track is pushed, both servomotors move.
  // The one at the bottom goes down so that the marbles won't reach the central section immediately, the one on top goes up in order to let the next race start.
  // Meanwhile the LCD says "Start" and the DC motor stops moving.
  if ((digitalRead(pinBottoneStart) == LOW) && ((millis() - lastDebounceTime) > debounceDelay)) {
    lastDebounceTime = millis();
    lcdStart();

    servoStart.attach(pinServoStart);
    servoStart.write(angoloStartAperto);
    delay(100);

    servoFinish.attach(pinServoFinish);
    servoFinish.write(angoloFinishChiuso);
    delay(100);

    digitalWrite(pinMotore, LOW);

  }
}

// setting the function to detach all the pins connected to the servomotors
void detachAll() {
  servoStart.detach();
  servoFinish.detach();
}
// setting the function to clear the screen and write Start on the LCD
void lcdStart() {
  lcd.clear();
  lcd.print("START");
}
Assembly
You can check all the progress of the assembly process throughout the weeks here.
Future implementations
Since the board has already room for them, I would like to use the RGB sensors so that the LCD can show who’s the winner of the race. I would also consider the use of Infrared sensors for both gates, so that everything behaves like if someone pushed the switches on the tiny board, but in a completely automatic way.