Wildcard Week
For this week I decided to make a toy car out of metal, using our water jet cutter, the Wazer.
The wazer is a 2d cutting machine, so I started off by finding a model I wanted to make, and found a free one of a DeLorean at papertoys.
I downloaded the pdf, imported it into Rhino and started redrawing it.
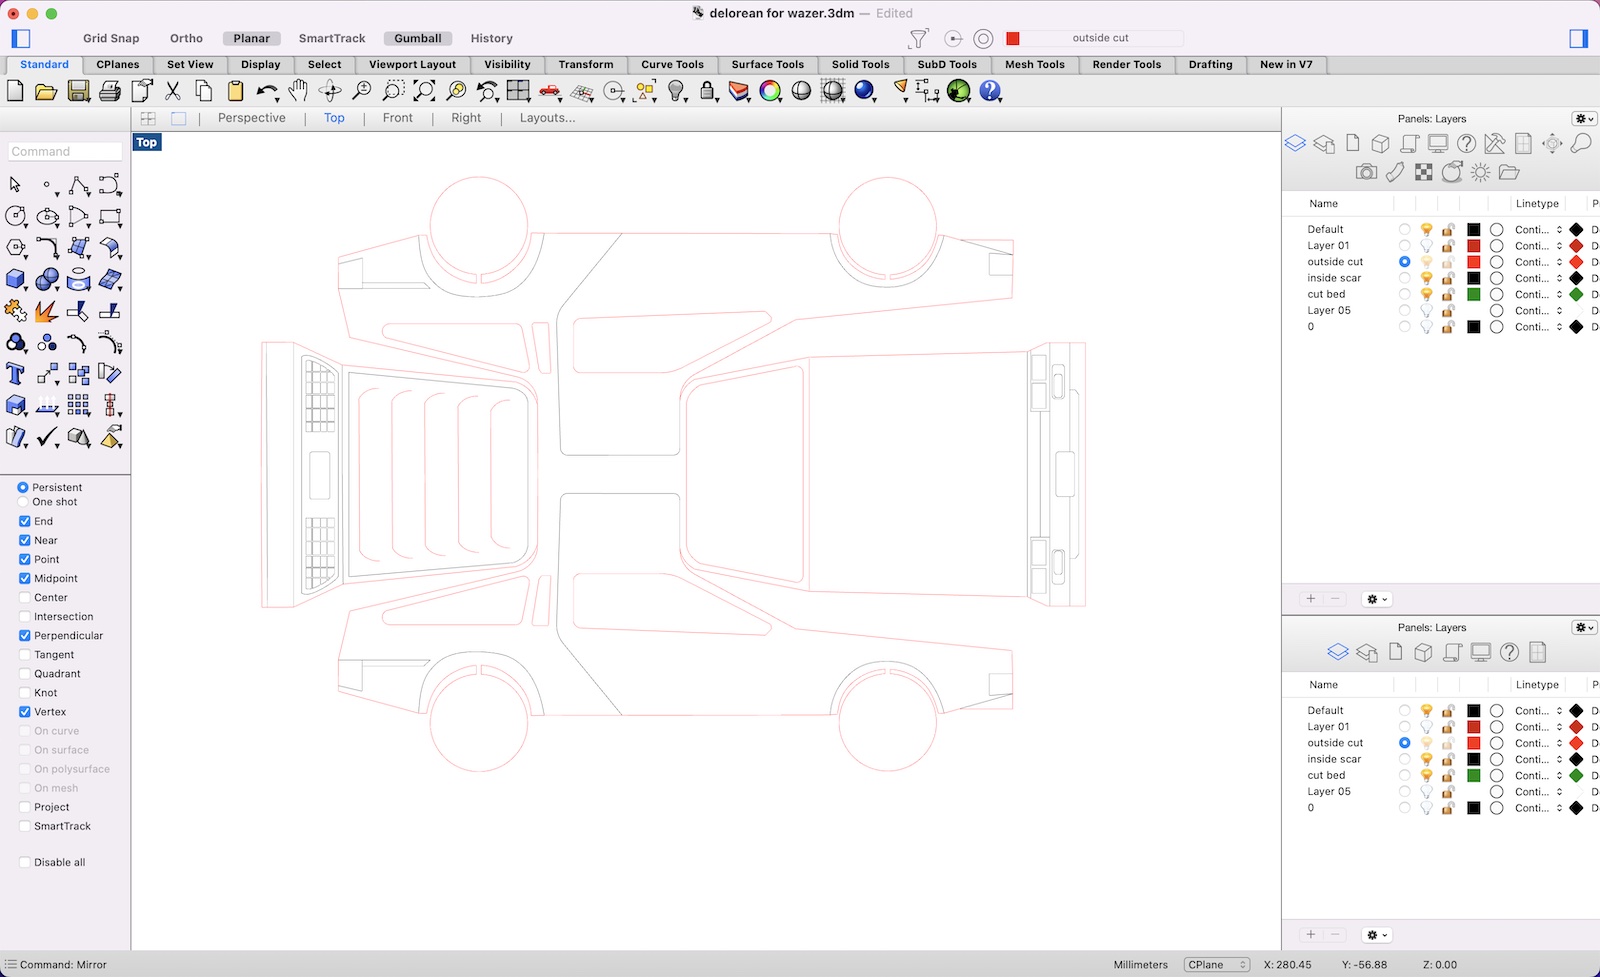
I added wheels to the outside cut and made two layers, one for everything I wanted cut, in red, and another, in black, for little design features, where I would speed up the cut so that it just scarred the metal and not cut through.
I exported each layer separately in DXF format and prepared the jobs in wazers online software, Wazer Cam.
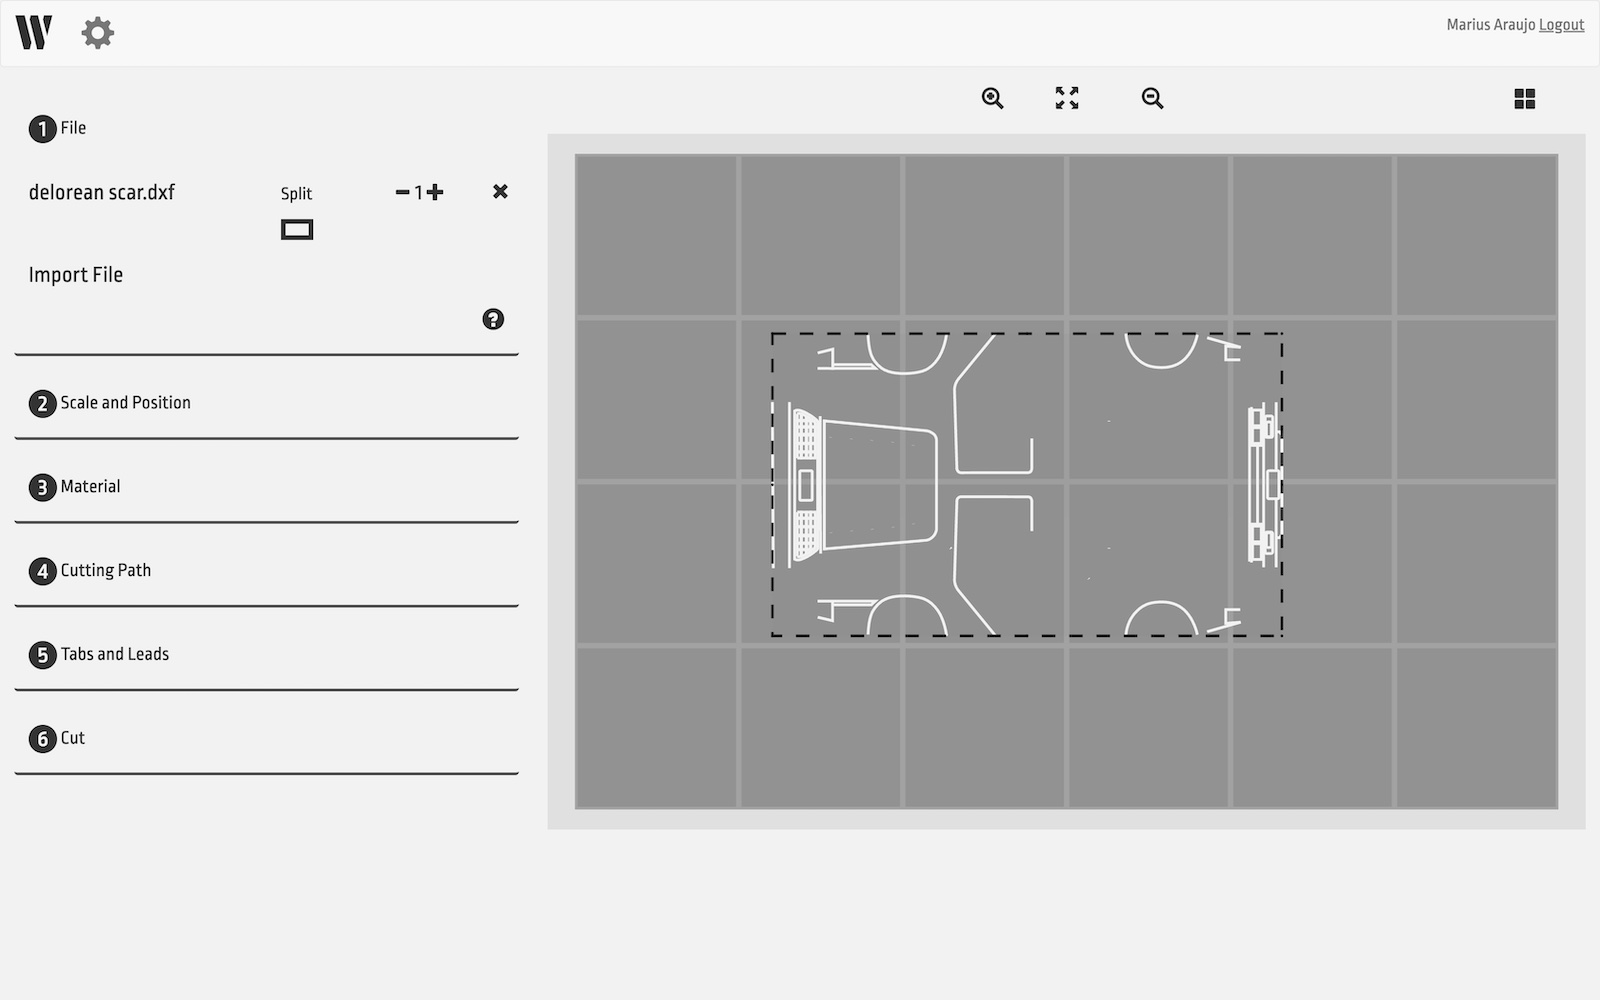
Here I imported the details DXF file, placed it approximately in the middle of the work area and proceeded to select the cutting settings. I noted the scale and position, but it wasn’t useful later, as the cuts file is bigger and had to be aligned manually.
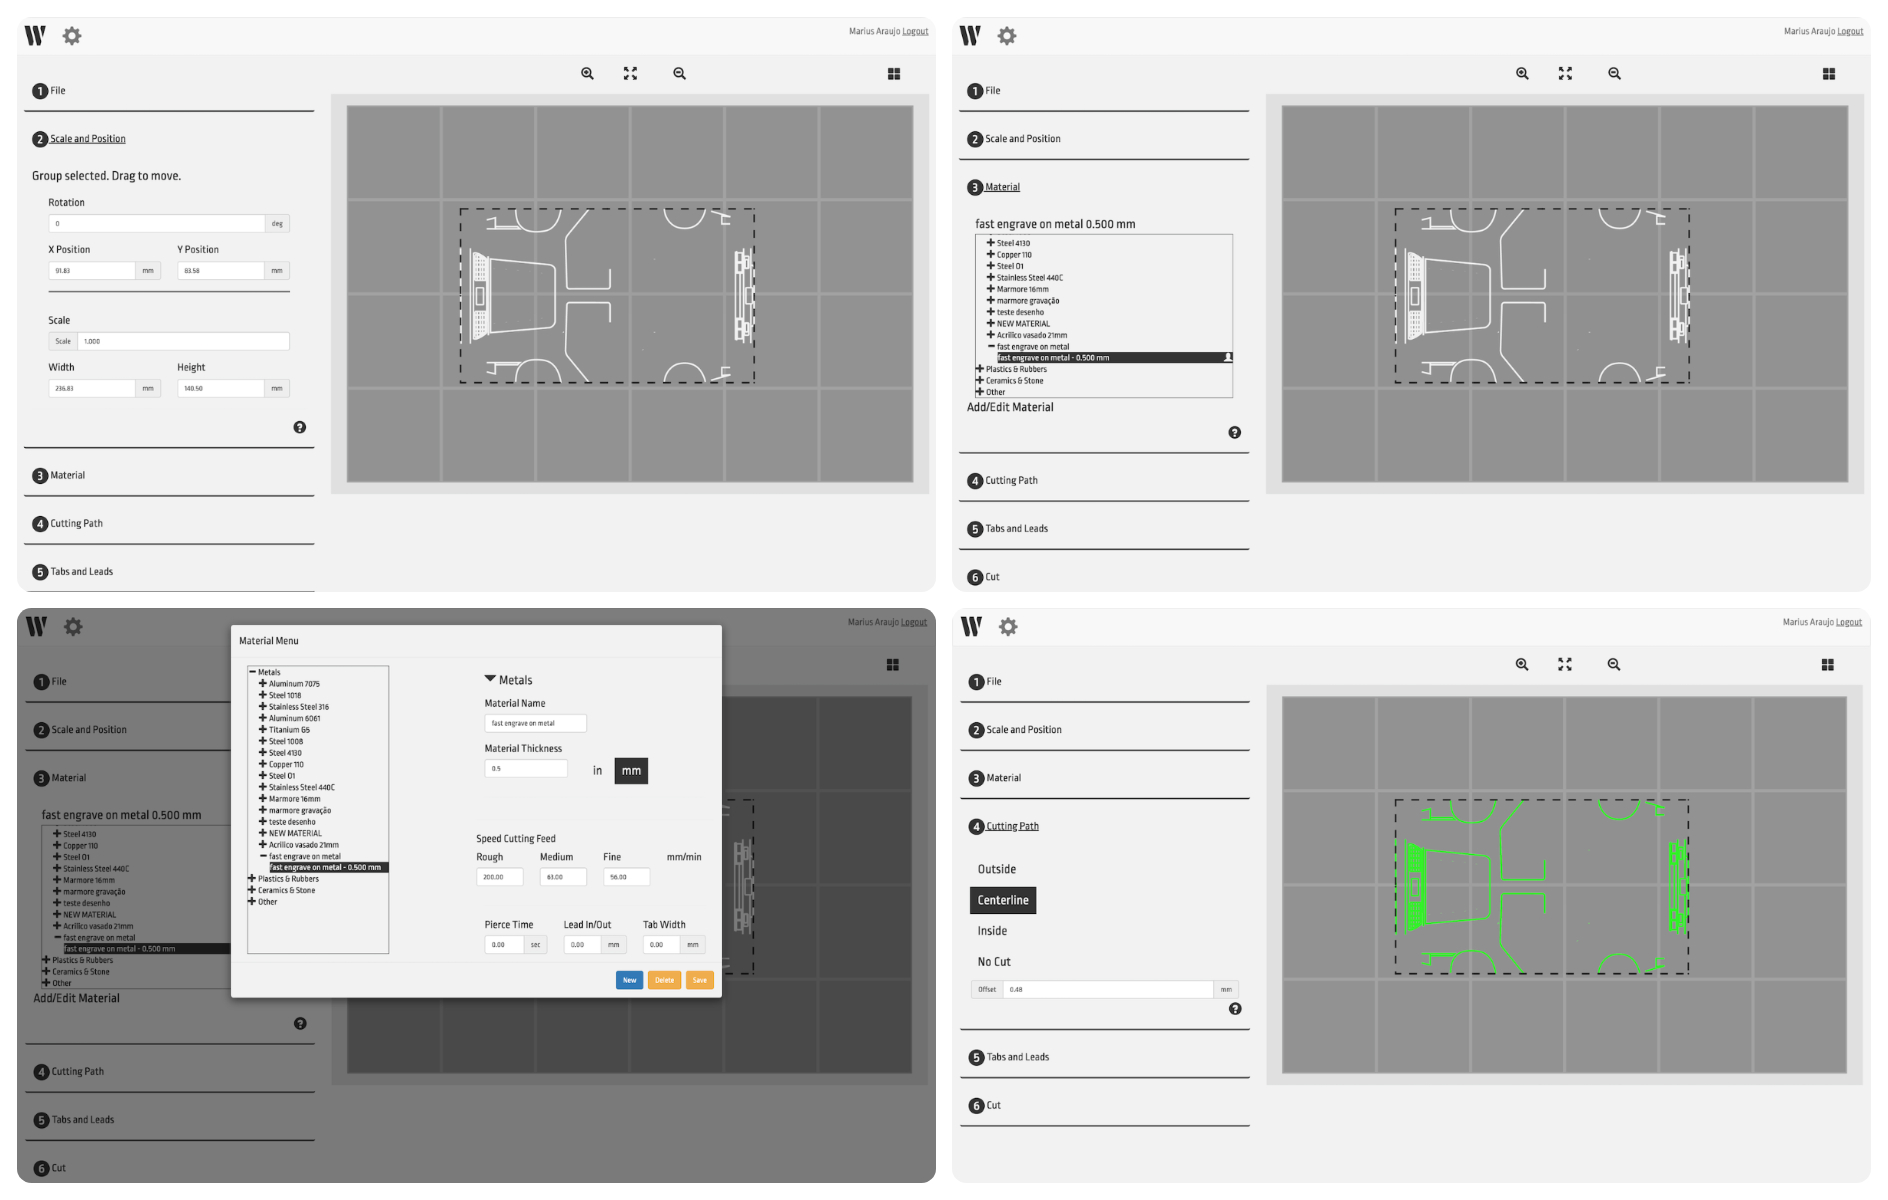
I then created a new material template in order to accelerate the movement, so that the water jet would just mark the metal, without cutting through it. Then I set the cut up to be on Centerline to match the drawing.
After this, I exported the job. Wazer Cam generates a gcode file, which is saved to an sd-card and that goes to the machine for processing.
I still had to make the second job, which needed to be aligned with the first; this would be the actual cut job, which would separate the model from the rest of the metal sheet.
I imported the second DXF file and manually aligned it with the first, picking a point where they matched.
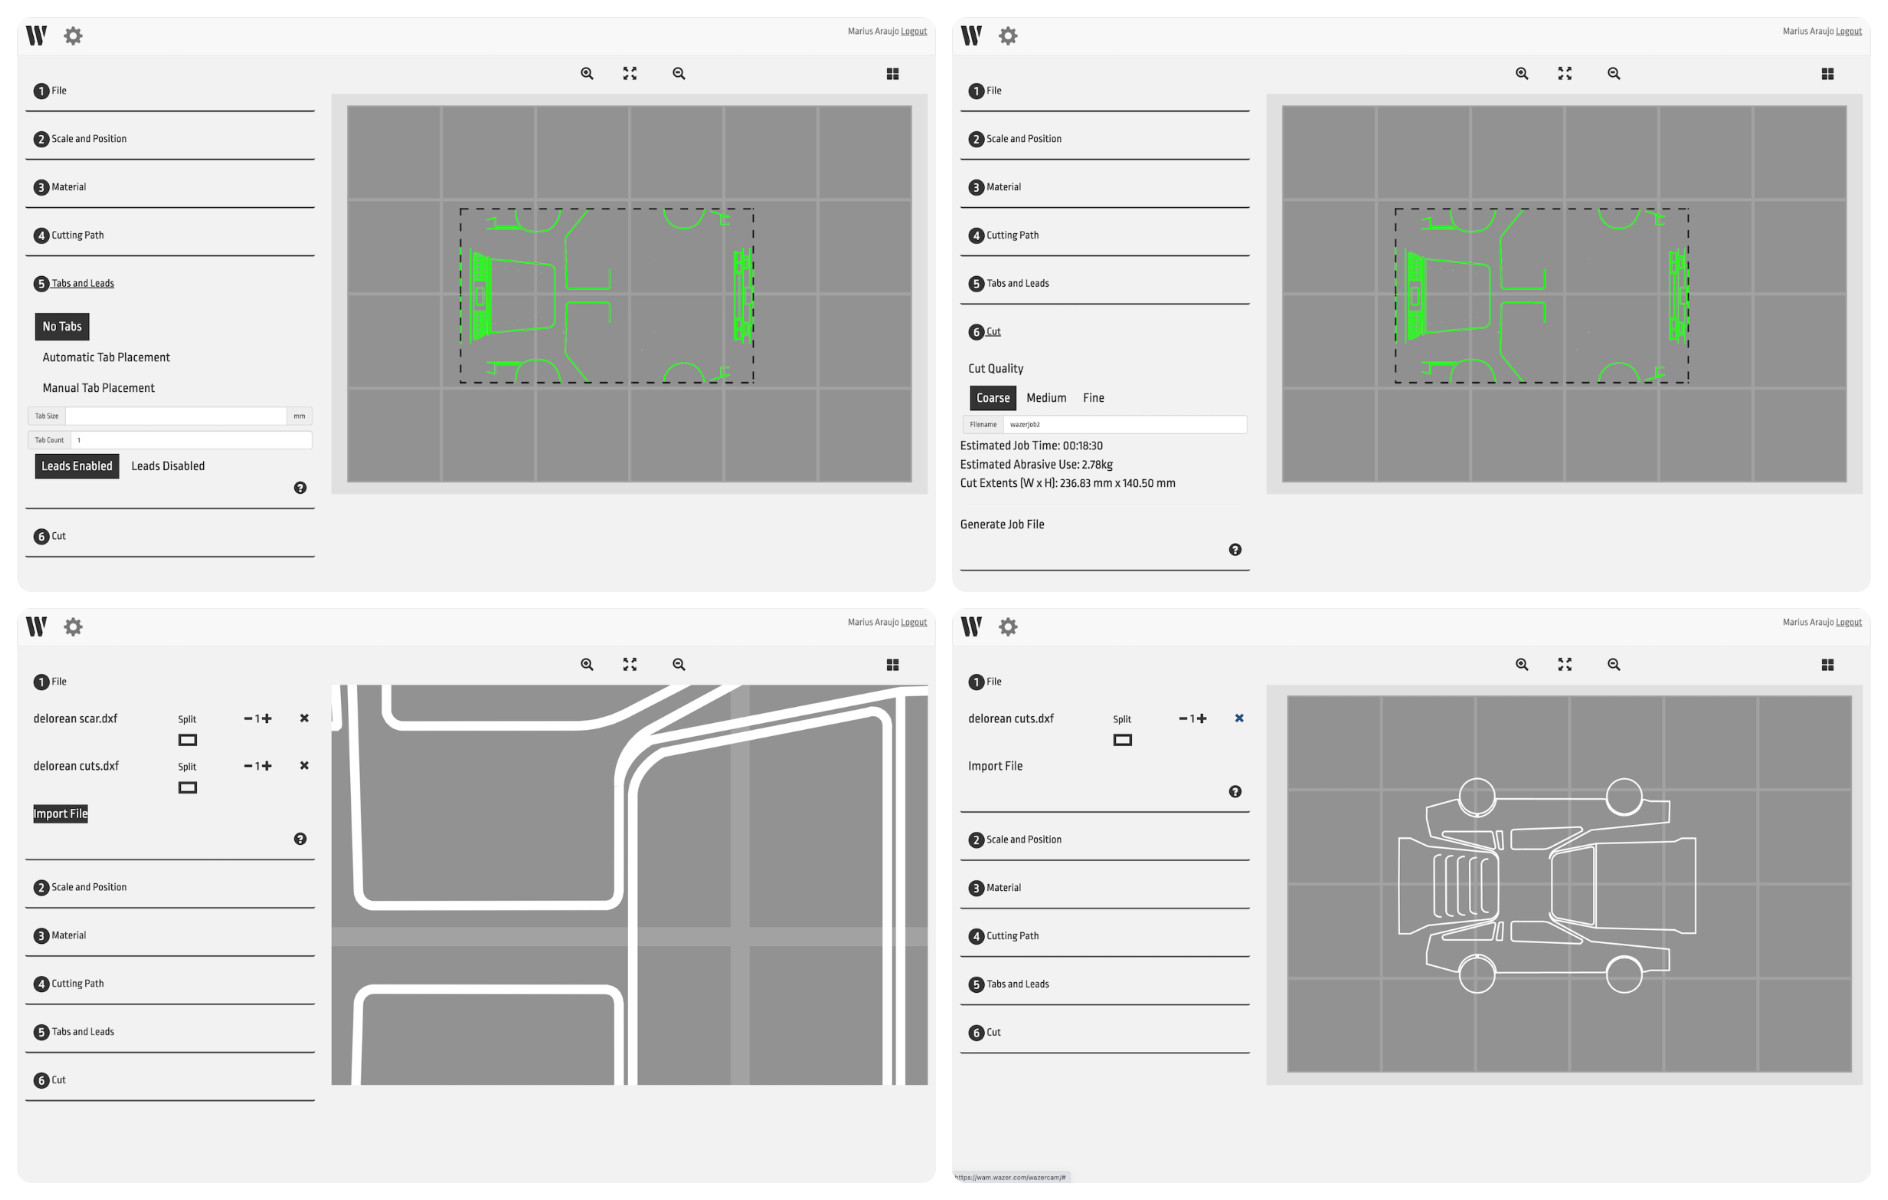
Once I was happy with the placement, I deleted the first engrave job and proceeded with the steps to select the material template, which was for steel, and appropriately much slower than the engraving profile. I opted to cut on the outside of the line so that the cut would be dimensionally accurate.
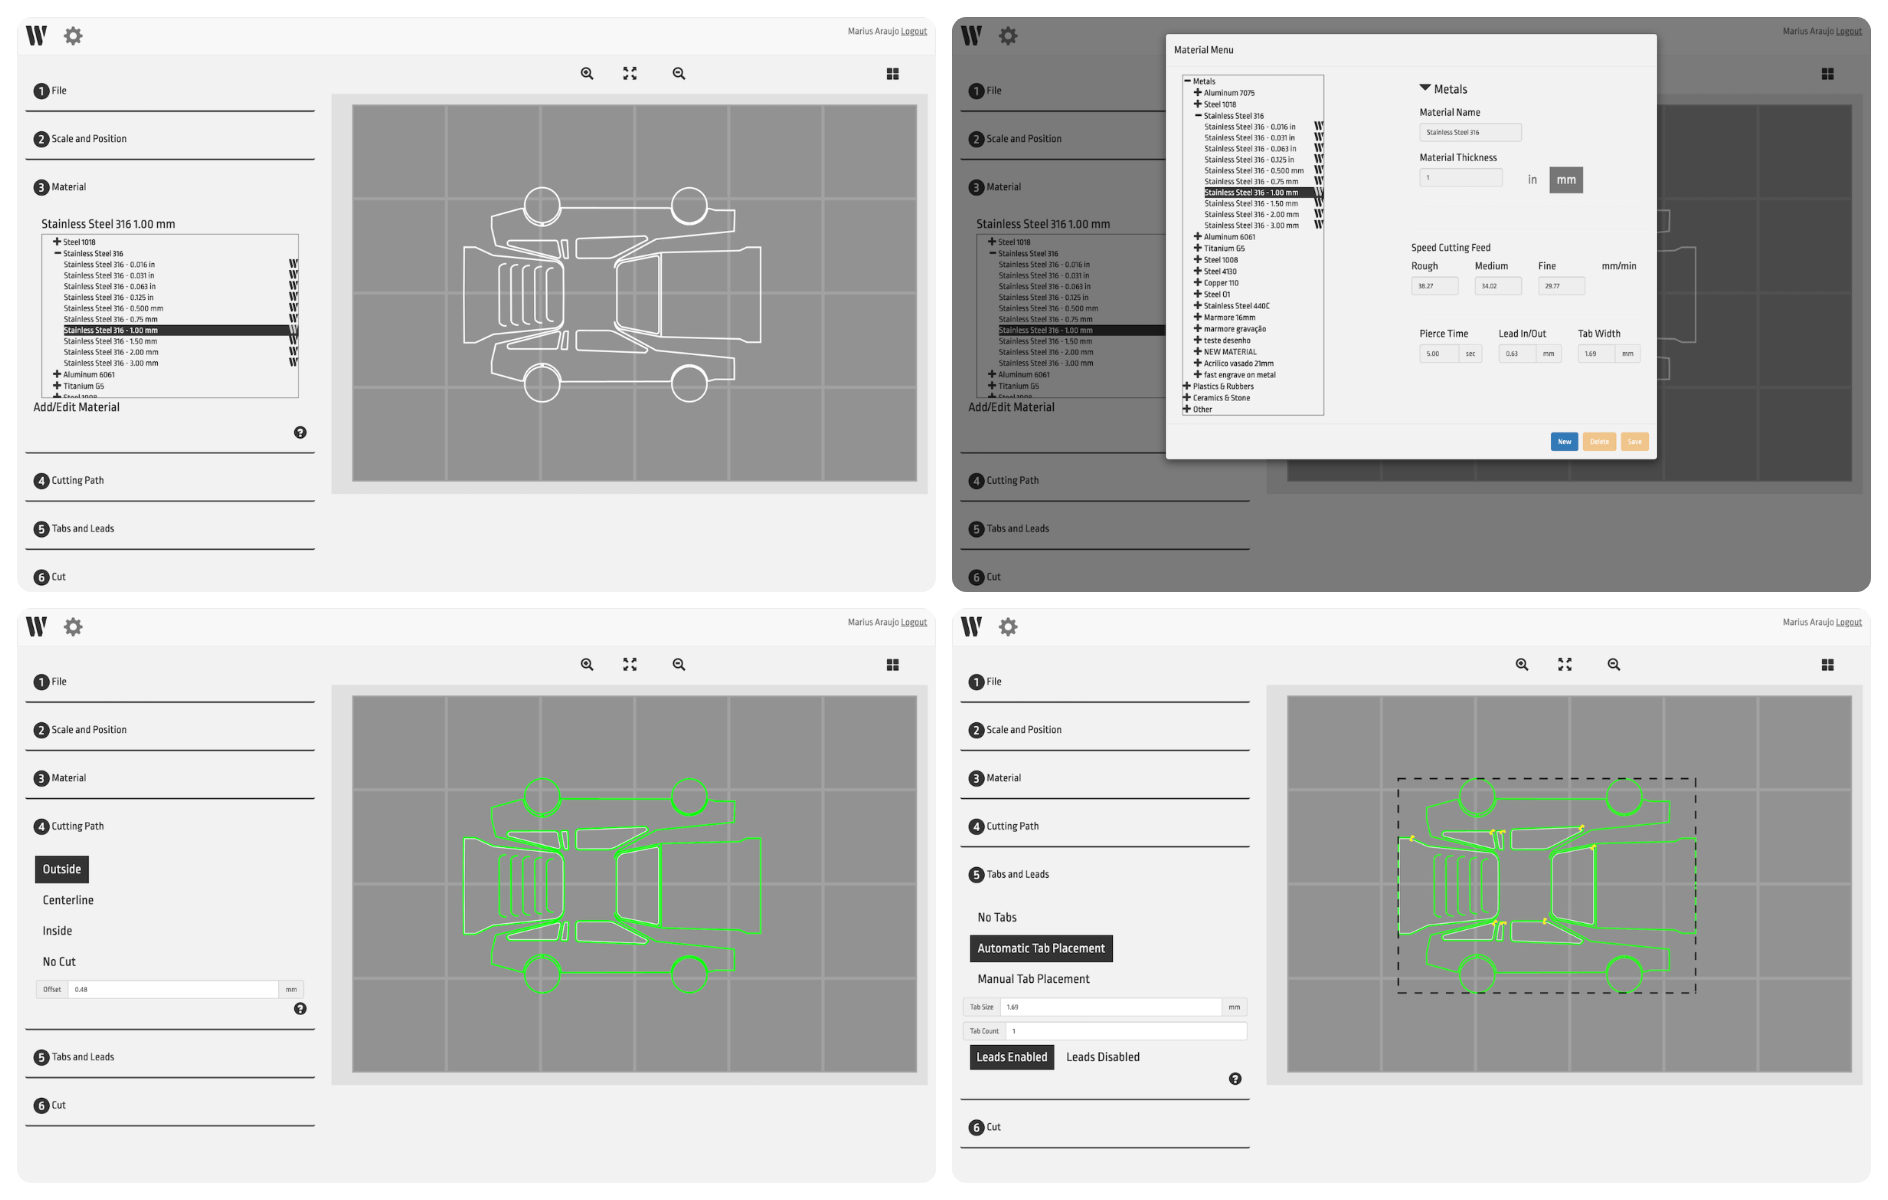
I chose A coarse cut because I could file any shavings from the edges after, it was a bit faster and would waste less abrasive material.
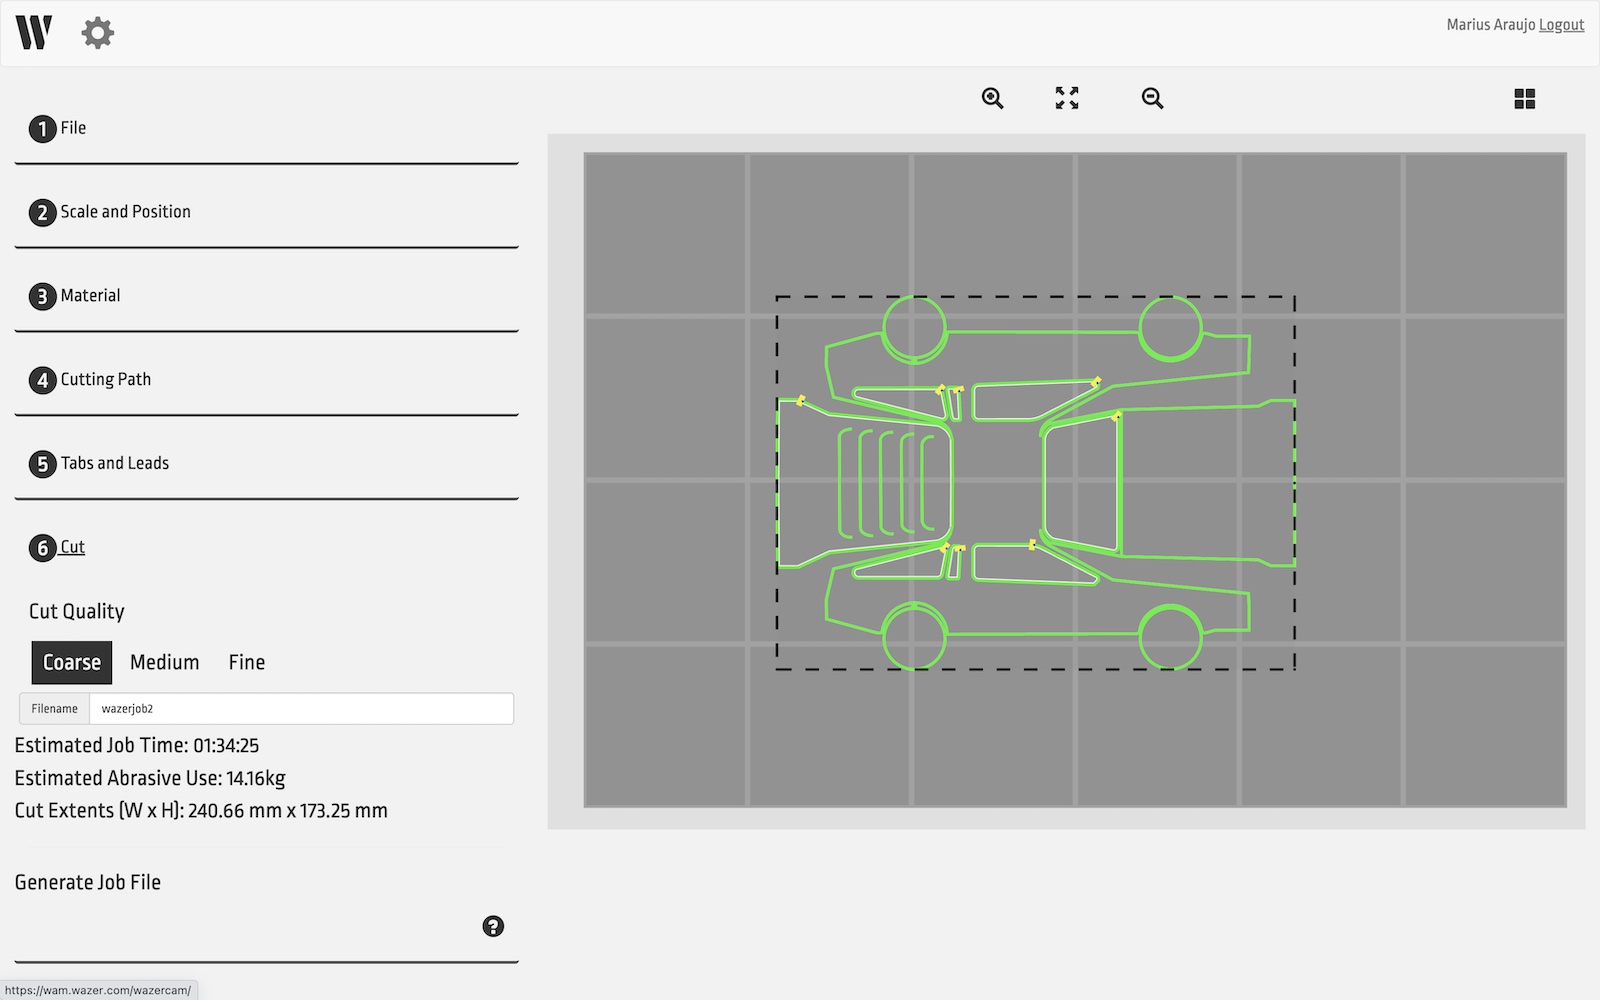
I saved the second gcode file on the sd-card, and headed over to the machine.
I fixed the metal sheet to the work area with screws, set the appropriate nozzle height and ran a dry-run to make sure the nozzle was on top of the material for the whole job.
I filled up the hopper with abrasive sand and made sure the water level was good, as well as water pressure was ok.
Once I was confident all the settings were ok, I let the machine run the first job.
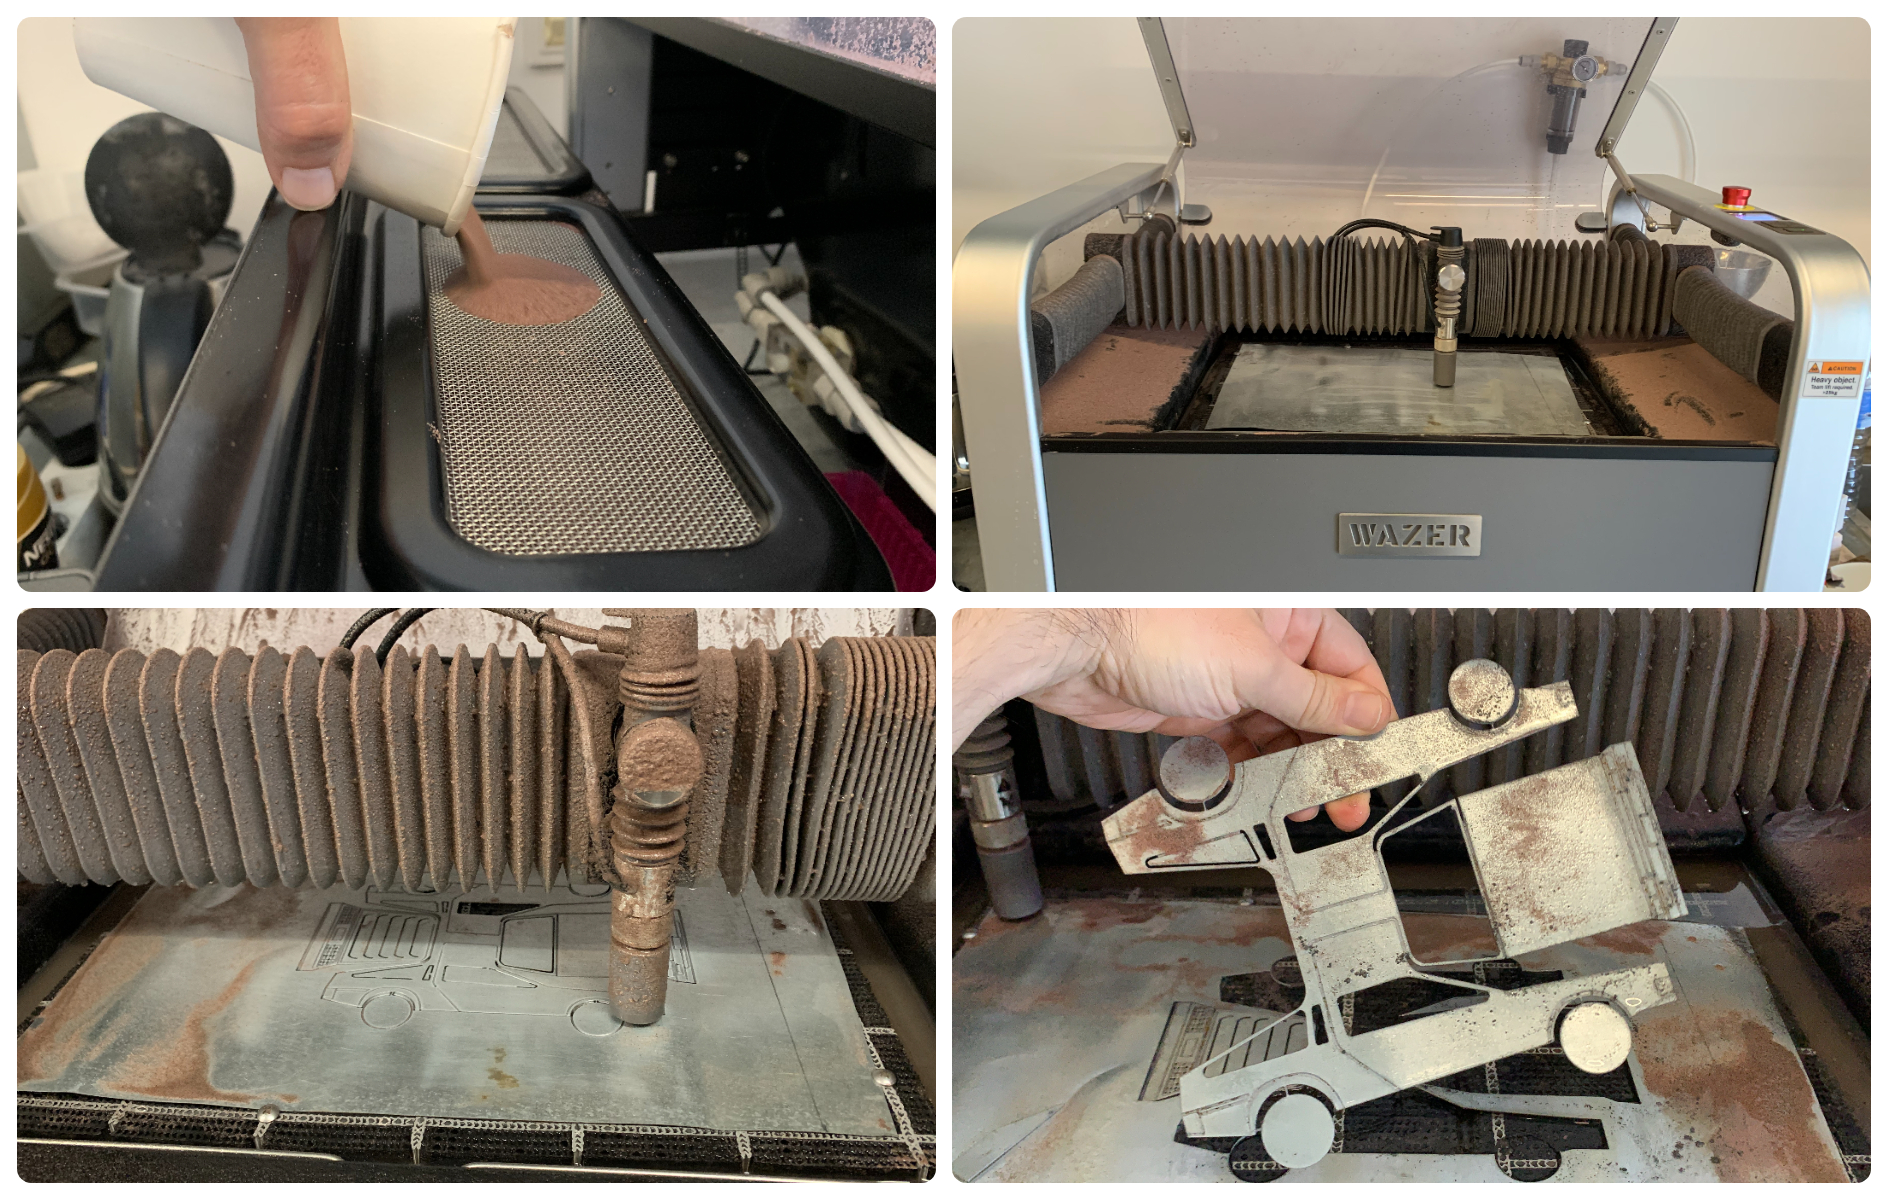
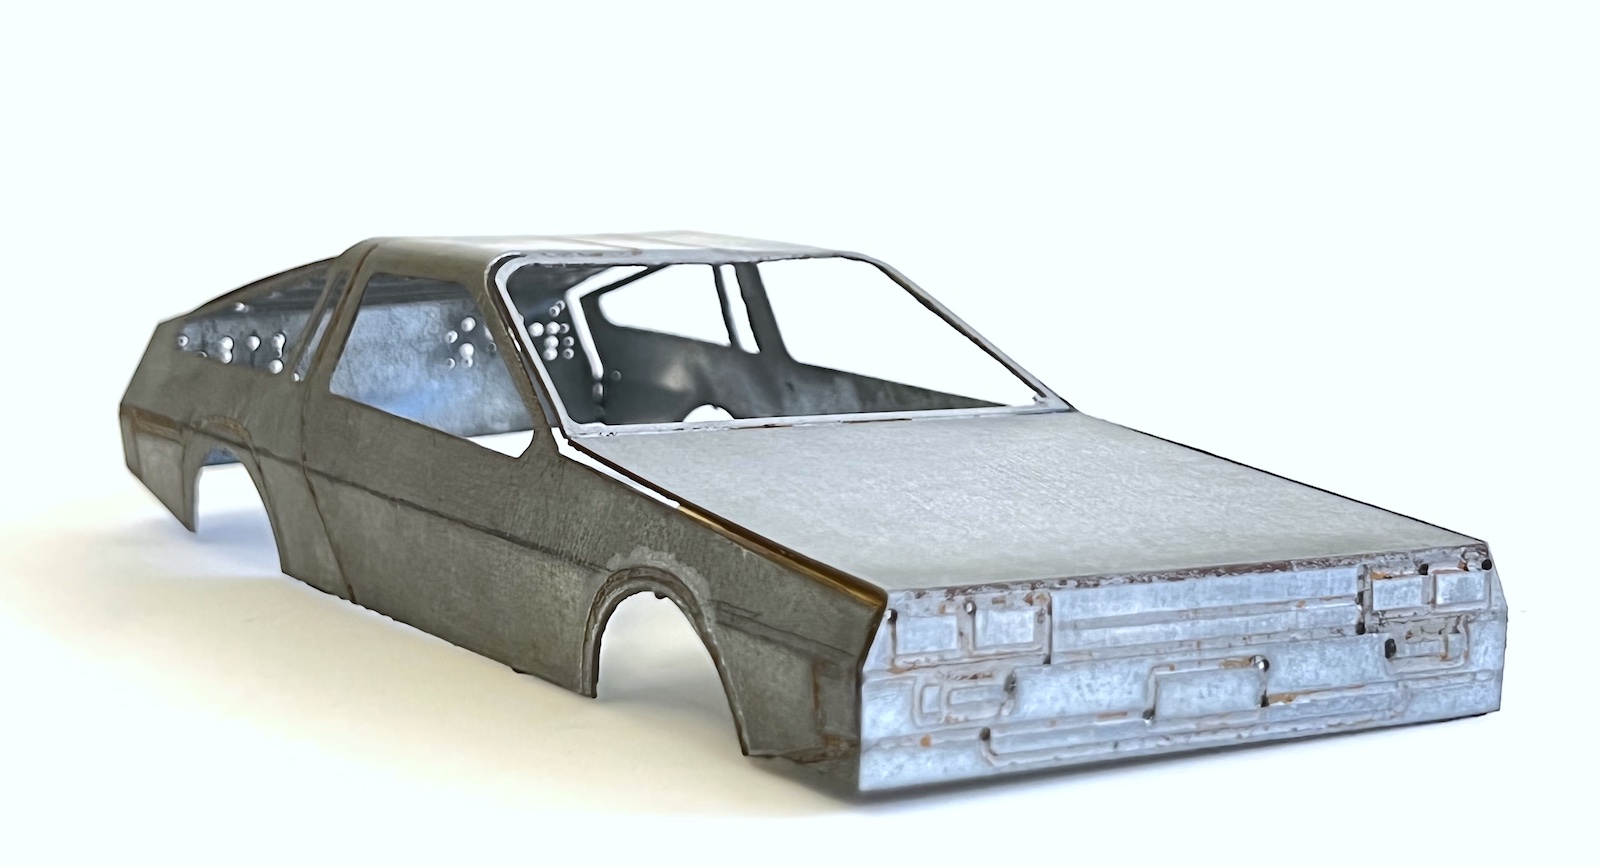
After the first cut, I ran the second one, and the result can be seen above. I made a mistake while redesigning the shape, which was that I had the trunk as a separate piece. It wasn’t intended, I’d redesign the shape so that it remained attached to the main body.
Cautions
One thing to keep an eye out for is that when the machine is starting the cut, the water sprays back up before it perforates the material. Once it’s through, the jet cuts the material and goes through it, no longer spraying up. In this case, because I was only scarring the material, there was a lot of spray coming back up and one needs to be careful not to stand at the edges of the machine, as some of the water and sand can leak through the edges. But it was fine, I just had to clean the sand afterwords.
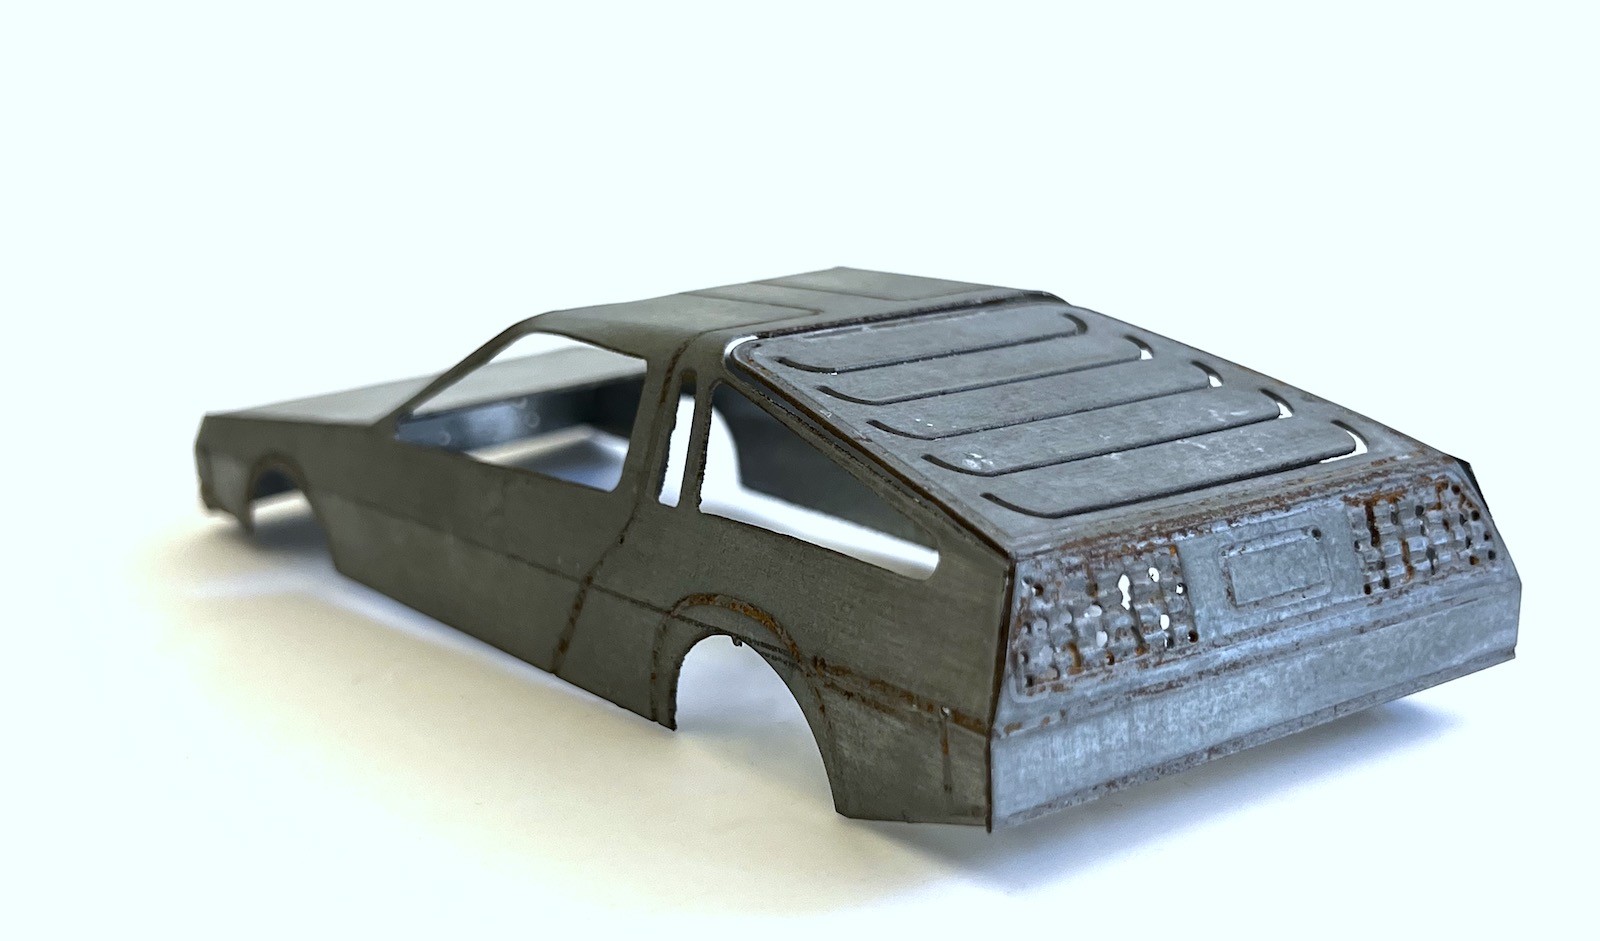
Once I had the metal sheet cut, I filed the burr in the edges and sanded it. Then it was time to bend it. This isn’t as easy as it would seem, because it’s hard to apply force in the right areas only; it’s easy to bend it wrong. So I fixed the sheet metal model in a vise, with a metal rod to carefully guide a curvature into the bend.
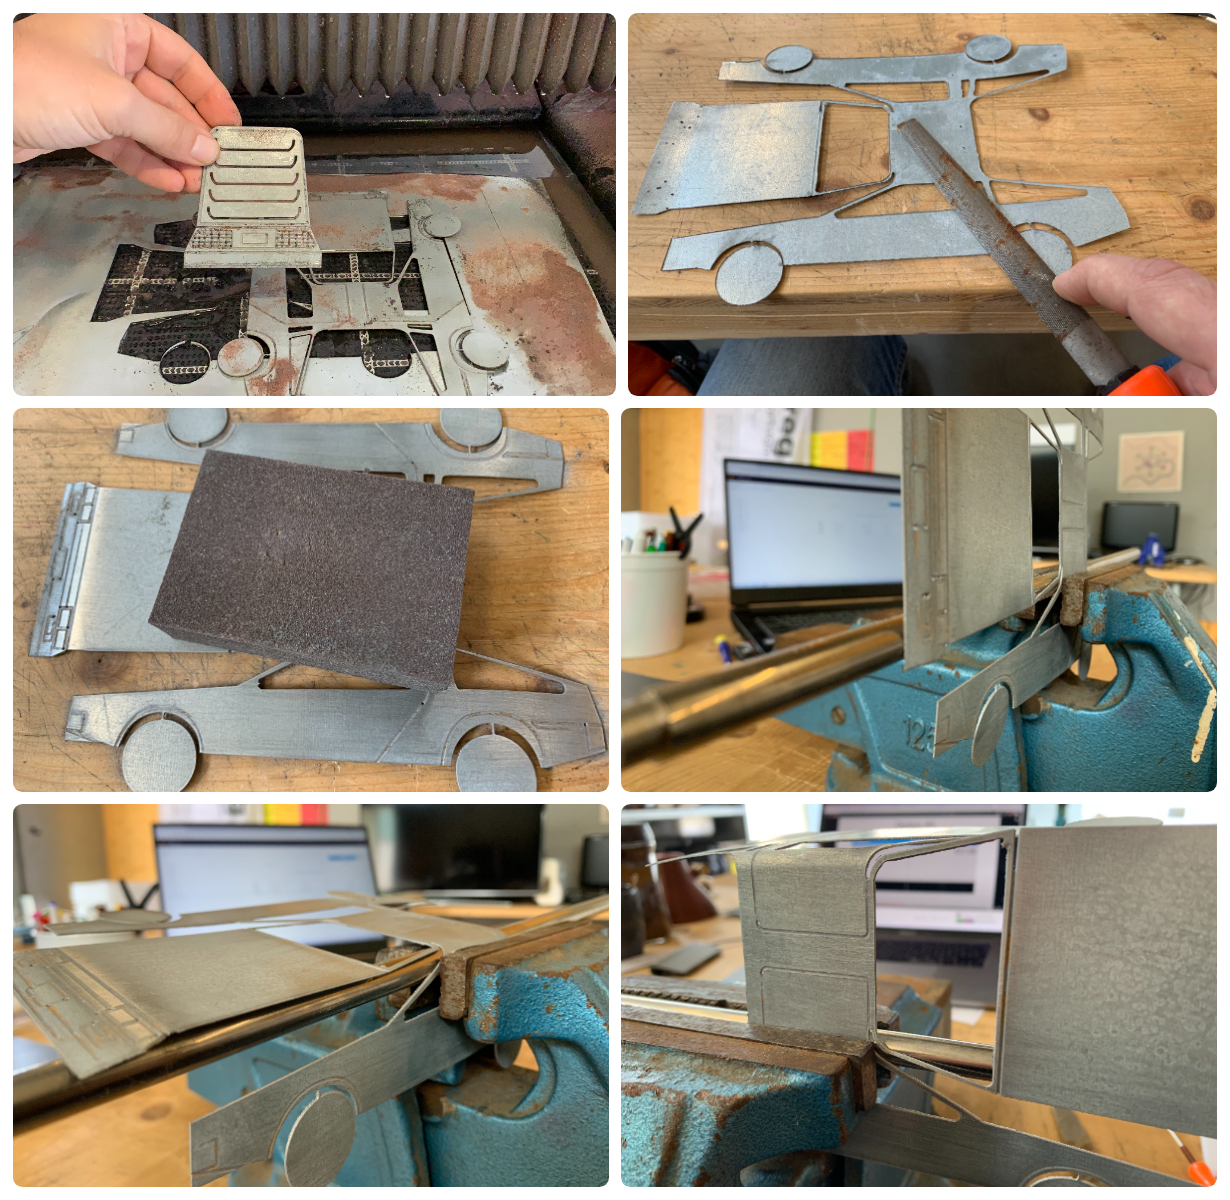
And this is the final result, after another bend on the side panels. Unfortunately the wheels broke off, the connection was too thin. Then again, they didn’t look great…
Now I need to work on interior modeling and 3d printing, windows laser cutting acrylic, and maybe recycling the wheels of an old toy. Work in progress.
Files
DeLorean details in DXF Format
DeLorean cuts in DXF Format
And also in more open format:
DeLorean details in SVG Format
DeLorean cuts in SVG Format
Checklist
Learning outcomes:
-
Demonstrate workflows used in the chosen process
-
Select and apply suitable materials and processes to do your assignment.
Have you:
-
Documented how you made your creation
-
Described problems and how you fixed them
-
Included your design files and ‘hero shot’ of the result