Project management
Fab Charter
I have read the Fab Charter. I agree with the core spirit of the charter, but find that it would be interesting to specify which, if any, type of Creative Commons License work developed at FabLabs defaults to, as well as maybe links to more information on each topic. For example: how, specifically, are commercial projects developed at FabLabs expected to benefit it, other than direct machine time revenues, for example.
This week we were tasked with getting comfortable with git, following a git tutorial, start this website to document our progress, and proposing our preliminary final project, which I’m documenting in it’s specific section.
Git
I started with Git & Github Crash Course for beginners on youtube, following the first steps, to install git via Homebrew in my laptop. I then realized we’re using Gitlab, not GutHub, and decided to investigate the differences here.
The steps I outline below are copied from this tutorial by Eduardo Chamorro, Fab Lab Barcelona I later found, which serve as very good reference.
- Install git
bash
   brew install git
- Add your Git username
bash
   git config –-global user.name “YOUR_USERNAME”
- Configure my email address for uploading
bash
   git config -–global user.email “marius@uevora.pt”
- Check if you have an RSA SSH KEY already
bash
   cat ~/.ssh/id_rsa.pub
If you see a long string starting with ssh-rsa, you can skip the ssh-keygen step
I then followed this tutorial to generate a ED25519 SSH key, which I understand is more secure than RSA, and set it up in GitLab, as I’d completed the previous steps during the first tutorial I followed. I also checked my Fab Guru Luís Carvão’s Version Control for Newbies tutorial, which I thought was quite clear, even if related to GitHub.
- Generate a new ED25519 SSH Key
bash
   ssh-keygen -t ed25519 -C "marius@uevora.pt"
- Adding an SSH key to your GitLab account
- Copy my public SSH key to the clipboard with this command
bash
   pbcopy < ~/.ssh/id_ed25519.pub
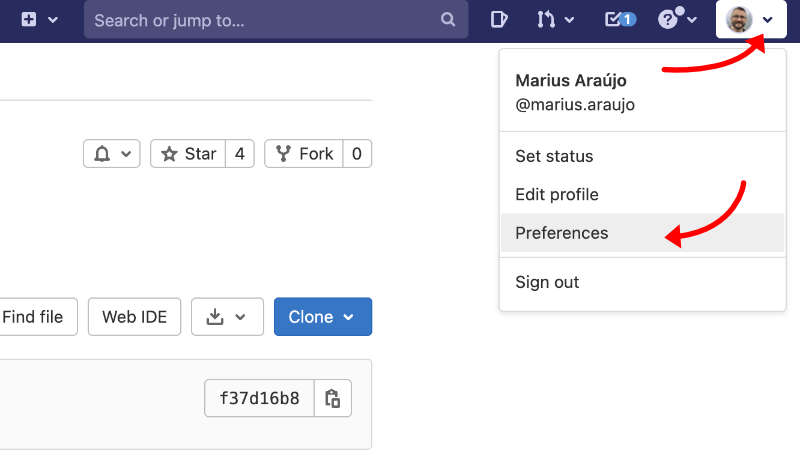
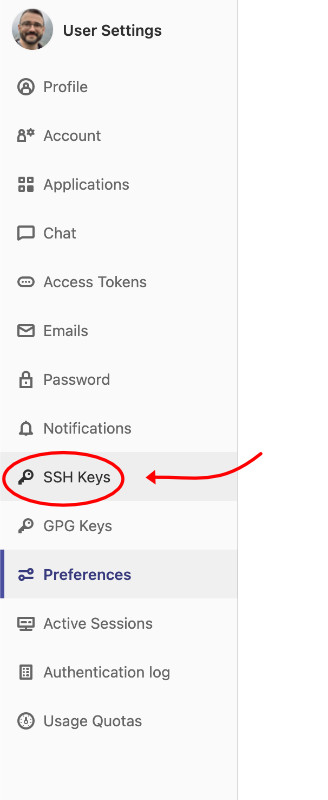
- Add your public SSH key to your GitLab account by doing the following:
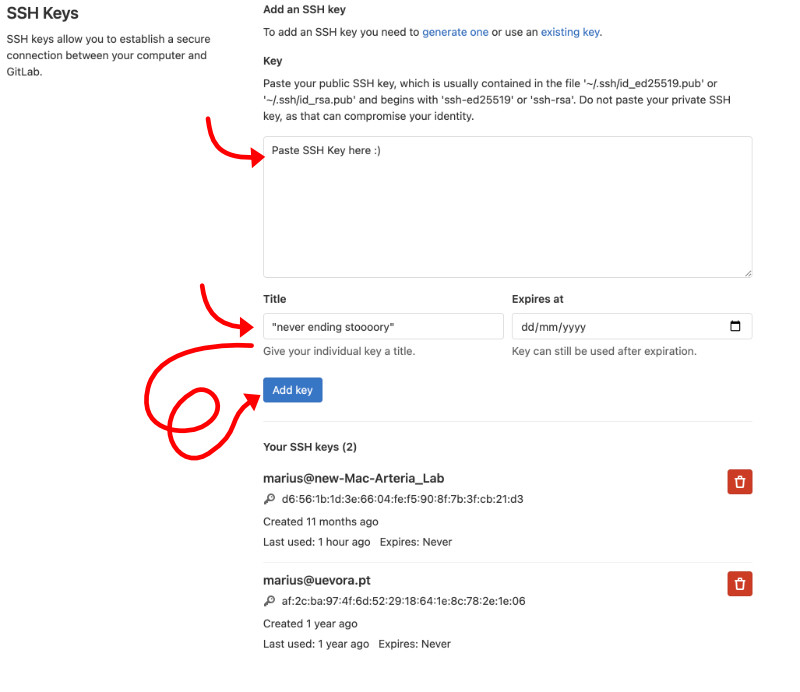
I already have two keys for two different computers.
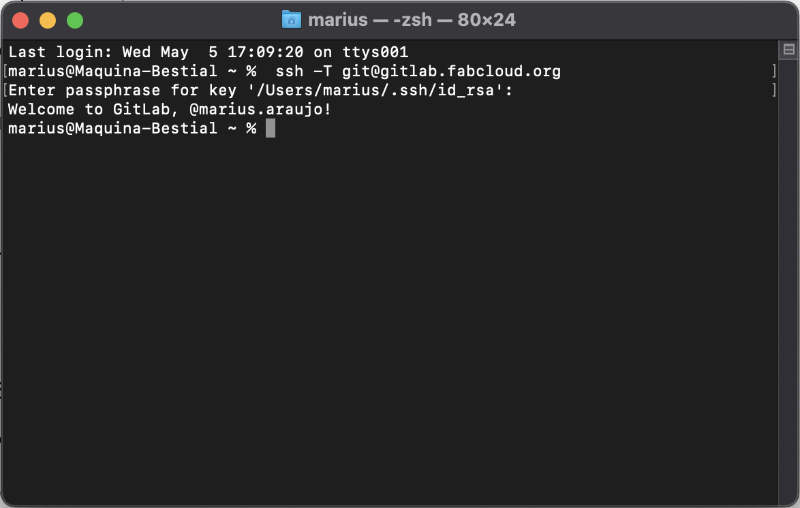
- Testing that everything is set up correctly with our GitLab’s instance domain: I’m on a mac, so I open terminal (get used to this: press CMD+SPACE, type term and press ENTER to open terminal):
bash
   ssh -T git@gitlab.fabcloud.org
Push Mantra
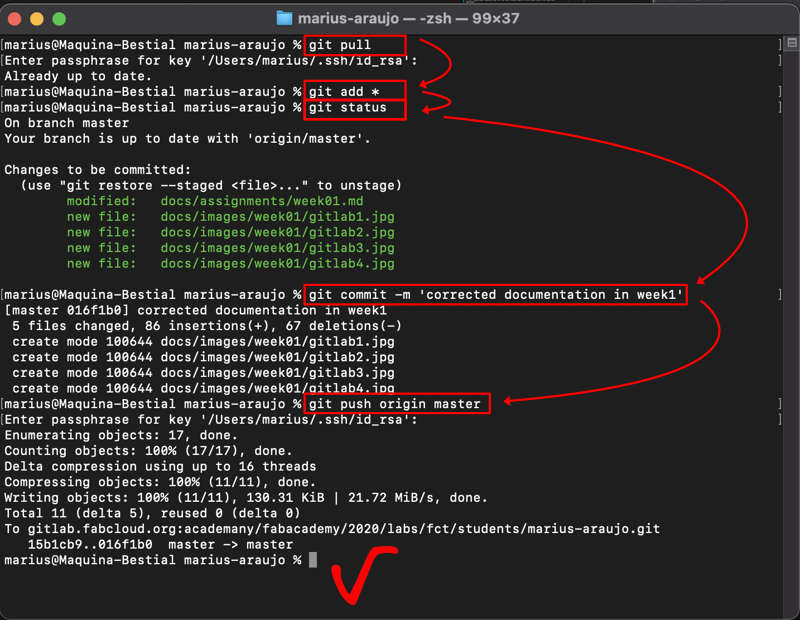
From Luís Carvão’s tutorial I learned of the Push Mantra, which one should follow when wanting to push changes back to the repository, and general Good Practices for working with repositories:
cd ~/Desktop/your_github_dir_name
git pull
git add /path/and_name-of-the-file_you-want-to-update
git status
git commit -m 'short description of the changes you made'
git push origin master
Good Practices
- keep your files small and manageable (definitely less than 10Mb per commit)
- use short names for your file names
- always use small case words on your file names
- never use special characters when naming a file
- never use spaces when naming a file, as spaces are also special characters
- be careful with hidden files like .DS_Store in OSX.
When a commit goes wrong
Because, let’s face it, we’ll forget some file that’s larger than 10Mb, try to commit and it not only fails, it’ll stay in the list and nothing will work. Then you’re frustrated, don’t know what’s happened, don’t want to bug your instructors (but really should) and then it’s the same old reply when Neil randomly calls you: my documentation is late because I couldn’t upload, there’s something wrong with my git and we all know how everyone loves that. So, remove whatever file was too large and do this:
git reset HEAD^
And try again with the Mantra. You may have to repeat it a few times until it works.
Also, if you happen to delete files locally and want to pull them back from gitlab into your local repository, before you commit the deletion to GitLab, this command does that:
git checkout .
Editing this Website
After setting up Git, I used Terminal to create a new folder where I wanted to create the copy of my academy personal repo, so as to edit it offline.
mkdir fabacademy
cd fabacademy
I then used git clone with my repo url, which I got at the website, copying the ssh url under Clone
git clone git@git@gitlab.fabcloud.org:academany/fabacademy/2020/labs/fct/students/marius-araujo.git
Once the copy was cloned to a local folder, I proceeded to open Visual Studio Code and added the project folder to the workspace.
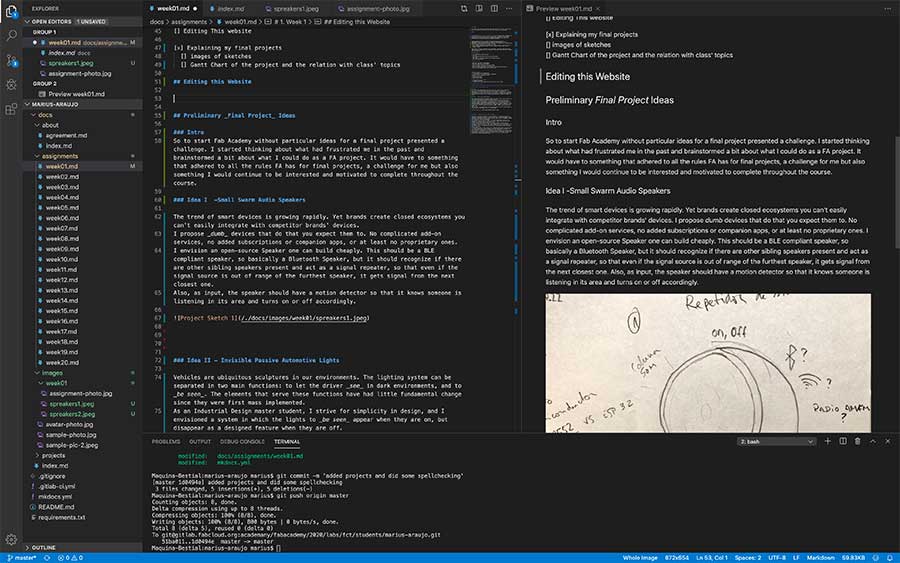
With this editor, editing MkDocs is easy, there’s code markup and a real time preview, which is very helpful to see results immediately.
There’s also a tree view of all the files in the project, and an integrated terminal window that makes it easy to follow the Git Mantra to push files back to the Repo.
There are many references on MkDocs, which is a great and easy language to produce static websites such as this without having to master HTML. Some of my references for learning or just checking commands are listed below:
Finally, I optimized images with Photoshop’s “save to web” feature, as I was unable to install ImageMagick on my current machine due to an old version of Homebrew. I finally uninstalled brew and re-installed it, which finally allowed me to install ImageMagick. I’ll use that in the future.
Document often, push often.
2022
A New look
One thing that’d been bugging me for a while was that I wished I could add a lightbox to the images in my documentation, a way to open them larger than inline with the rest of the text. I also wanted to customize the look a little.
I had looked into Hugo for a remake of the website in previous years, but I had to succumb to the evidence that I’m not a coder and it’d take me too long to wrap the whole thing around my head. This year I spent some time finding out if I could add that feature without starting everything from scratch. I found a couple of MkDocs extensions for that purpose and finally decided to go to Mattermost and ask Julian Galimore, Fab Academy Developer and IT Guru, if he had tips on the issue. I didn’t have the confidence to tackle this on my own, and he was really helpful in pointing me in the right direction, debugging my mistakes along the way, and reassuring me that if I broke something we could always go back and fix it. In a nutshell, I learned to ask for help more often and be less shy about it :D
I had several issues with my repository, mainly because I was stuck in Mkdocs Material theme version 5 since 2020 and wanted to upgrade to the current V8. I had tried editing the requirements.txt, copying the contents from a current student, Aurore Kubica, whose website had caught my attention at some point.
It didn’t work because I had to also edit the mkdocs.yaml file and didn’t know about it. I went back to Aurore’s repo and blatantly compared my old file to hers, copying and pasting elements, and editing them to my specifications. I checked Squidfunk’s interactive Material setup guide, and changed some of the look and feel of my website a bit more to my liking. That is what you see now, which differs from the white and blue default canvas I was stuck with for so long.
Along the way, I followed the instructions for the Light-gallery markdown Extension that I wanted to add, as Julian advised. It mainly consisted of creating a theme folder structure in my documentation, copying some html, javascript, CSS, font and image files into their corresponding sub-folders and editing the requirements and mkdocs.yaml files accordingly. Instructions like that I can follow ^^D
I still had some trouble getting my CI/CD pipeline to pass, but as I analyzed the reported errors, I edited the mkdocs.yaml file until it did pass, removing the offending elements. I’m happy with the result for now
Now I’ll have to replace the images in my documentation with a new link style. In 2020 I learned that in order to center an image in the page I had to make a table like this:
||
|:--:|
| Description |
Resulting in something like this:
 |
|---|
| Final Project preliminary render |
The new light-gallery extension works by referencing the images a little differently:

which looks like this and it is what you’ll see from now on.
2024 Update
This year I noticed that the light-gallery plugin wasn’t working propperly and broke the pipeline, so I replaced it with Julian’s recommendation GLightbox.
This MkDocs plugin has this syntax for caption attributes:
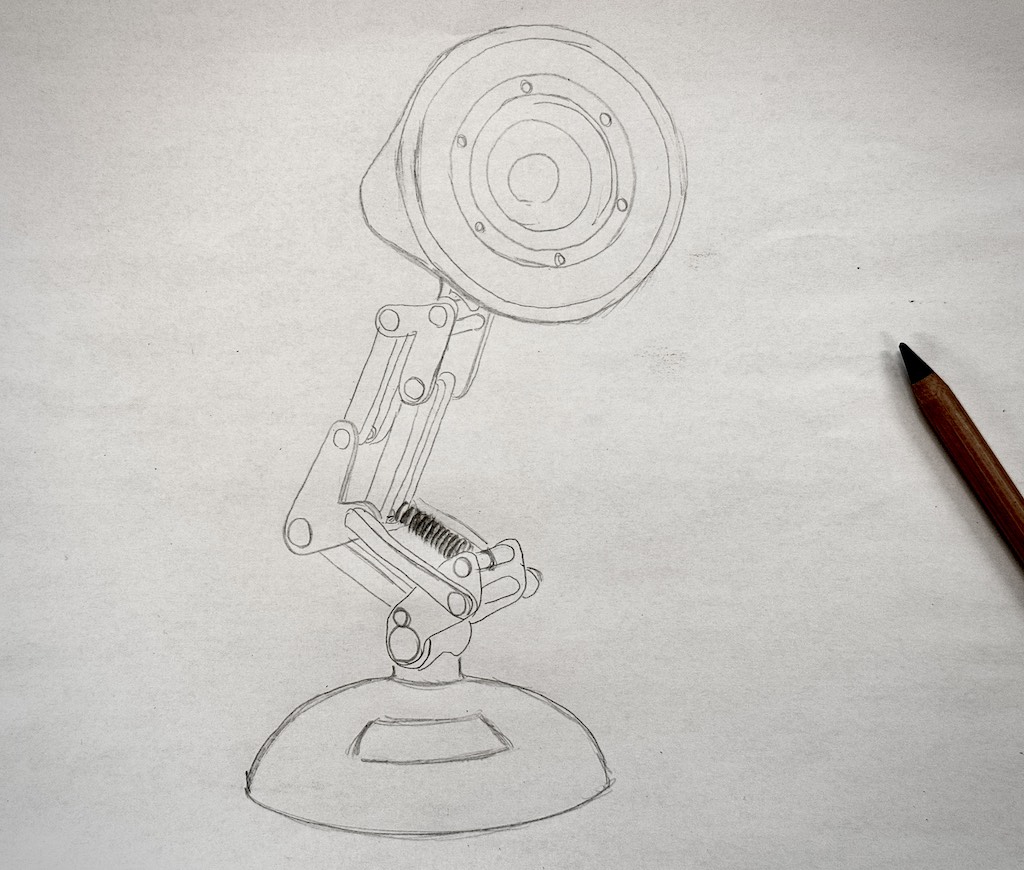
{ data-title="Marius' Final Project Sketch, 2024." data-description="Inspired by Pixar's Luxo Jr., Marius' Final project will attempt to mix the lighting powers of a lamp with the entertainment powers of a speaker" }
And will look like this
Checklist
Assignment
-
Build a personal site describing you and your final project.
-
Upload it to the class archive.
- Work through a git tutorial.
Learning outcomes
-
Explore and use website development tools
-
Identify and utilize version control protocols
Have you?
-
Made a website and described how you did it
-
Introduced yourself
- Documented steps for uploading files to archive
- Pushed to the class archive
- Signed and uploaded Student Agreement