
Project developement
Add an output device to a microcontroller board you've designed, and program it to do something
measure the power consumption of an output device
For my final project I want to use servo motor in order to move lasers in a space. The servo motors will be in a Box and differents box will be created in order to place them in a space. The finality of this project is to create a dynamic scenography for concert or exhibition.
Then I will need to create some boards that will be able to control servo-motor. I decided to make first try using ATTINY 85.
The servo motor are controlled with PWM signal. A PWM signal is a digital signal (OV or 5V) with variations of the high level signal.
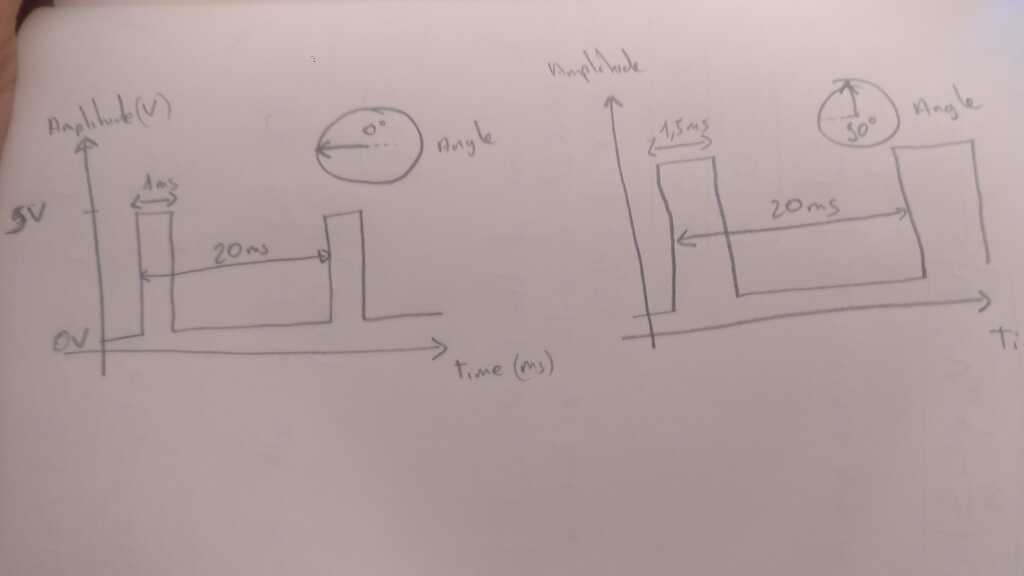
As I explain on my little skecth, the signal will be a periodic signal of 20ms and in it there is a high peak during a certain time. Then servo motor will interpret the signal in a angle beetwen 0° to 180°.
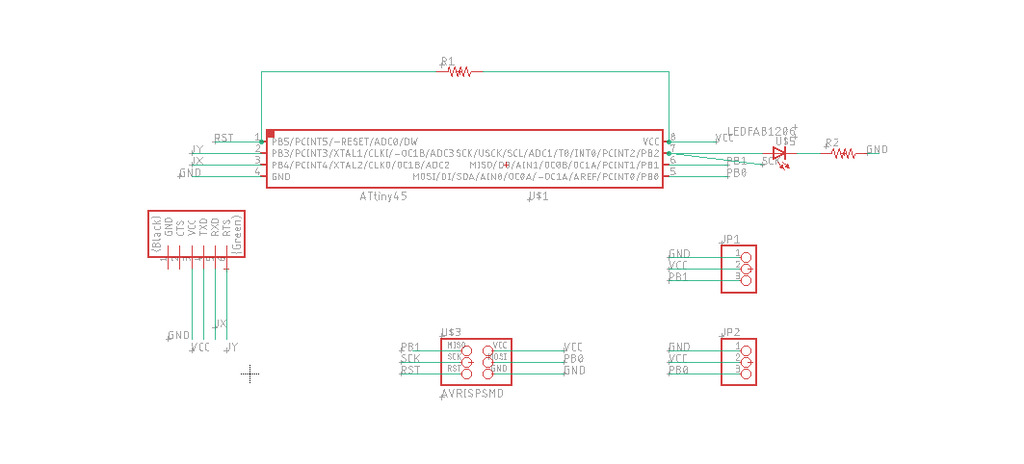
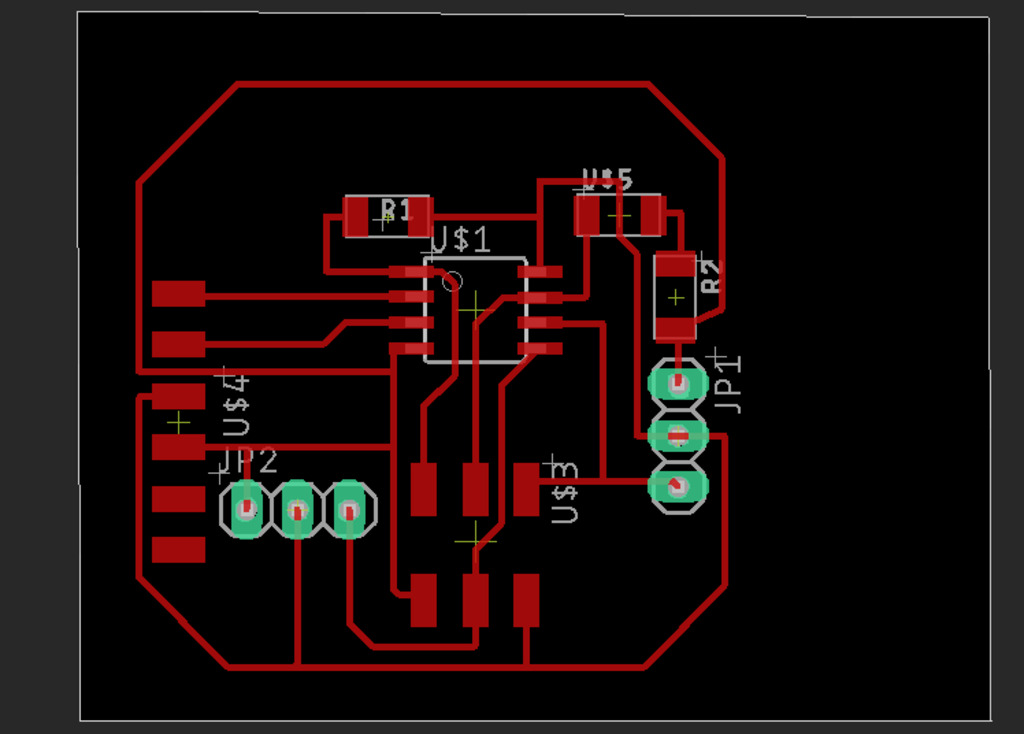
The design of the board will be pretty basic. The servo motor are powered with 5V like the atiny then I dont need to add a power management part on the board.
As I explain in the Input device week I add a 10K Ohm resistor beetwen VCC and RST pin in order to power on the tiny when the circuit is powered.
Then I need to add the ISP in order to flash and program the tiny. The ISP connector will be connected to the MISO, MOSI, SCK, RST, VCC and GND pin of the tiny.
I also add a FTDI connector in order to monitor some information if need it ! The FTDI connector is connected to pin PB3 and PB4 and if need it I will use a Software Serial communication. In fact you can emulate serial communication with every pin of the attiny usign the Software Serial librairy. But also I will be able to connect a joystick and read the value in order to move the servo motor.
Then the last thing is to add the connector for the two servo-motor. They will be connected to PWM pin in order to be able to control them.
And basically, this is what looks the board :

Okay, I was thinking that is part will be the easiest part of the week but I was totally wrong. I was thinking to use Servo.h library but the ATtiny85 just has 2 8-bit timers and no 16-bit timer, but the Servo-library relies on having a 16-bit timer available.
Basically, this is not a very big problem. The solution is to use a different library based on a 8-bit timer. And hopefully a lot of people have been confronted to this problem and created this kind of library.
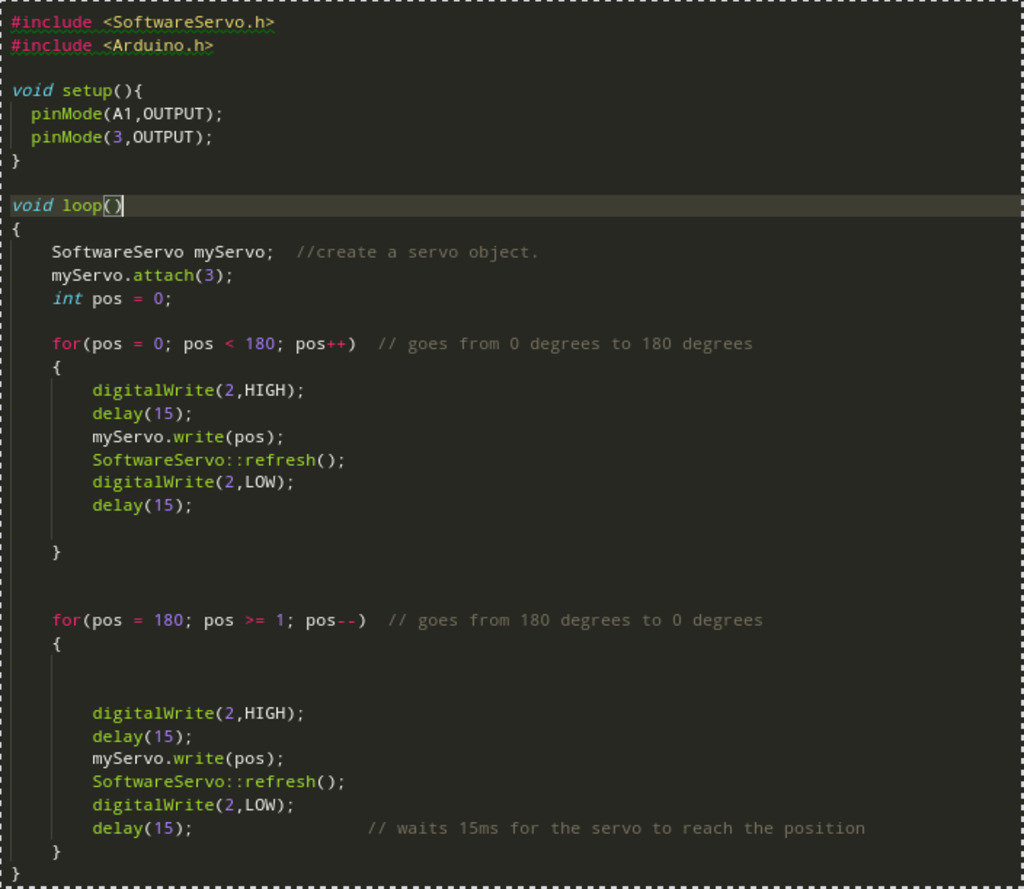
One of them is Software Servo library. This library as I said is based on 8 bit timer and then I should be able to control my Servo motors with it.
This is the little code I wrote in order to sweep the to servo motor from 0° to 180°
And this i sthe result :
As you can see this is really bad... At this state I don't know why but the servo move very slowly and instead of sweeping, it stop.
Okay, then let's try to debug it !
The firts thing that I have tried is to check if it was not a power supply problem. The 5V of the USB connector could be the problem. Then I powered the board using a stabilized power supply. The problem was always the same.
Then I was thinking that the library that I choose was not so good. Then I have tried a different 8-bit timer library that allow to control servo motor. The second library that I have tried is called Servo 8-Bit. But the result was exactly the same...
The next that try that I made is about the setup of the internal clock of the tiny. I got a lot of clock problem in the precedent week using attiny then I decided to try to setup the fuse manually.
In first time I have tried using the Arduino IDE but it didn't change anything...

Thanks to Stephane Muller, he explain how I could be able to setted up with platform IO by adding some upload flags. The setup of the flag will be made in the "upload flags" section of the configuration file of the platform IO project. But at this state I still need to know what I need to put in it.
Then he showed me a very useful website called Fuse calculator. This Website is very useful because in it you can chose beetwen a lot of differents ATMEL micro controller. Then you just have to chose a configuration (clock, reset and many other things) and it will give you the AVRDUDE flags to add.
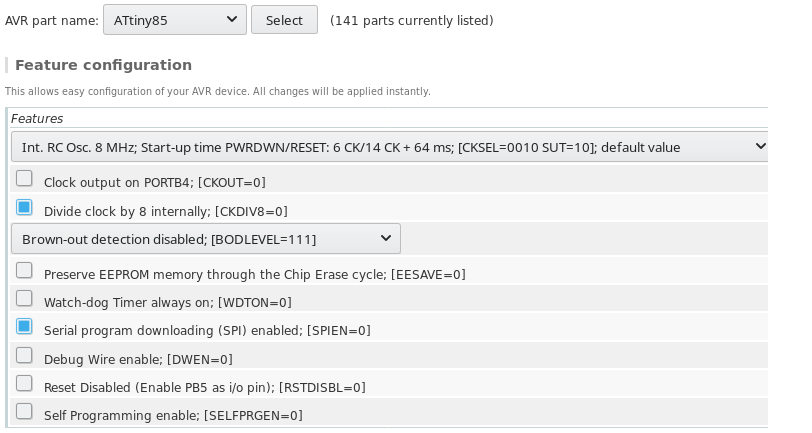
Then in the bottom of the page the avrdude flags :

ANd finally, this how to implement it in platform IO :

Unfortunately, it didn't change nothing to... But I'm very happy because I learned something very useful with fuse calc !!
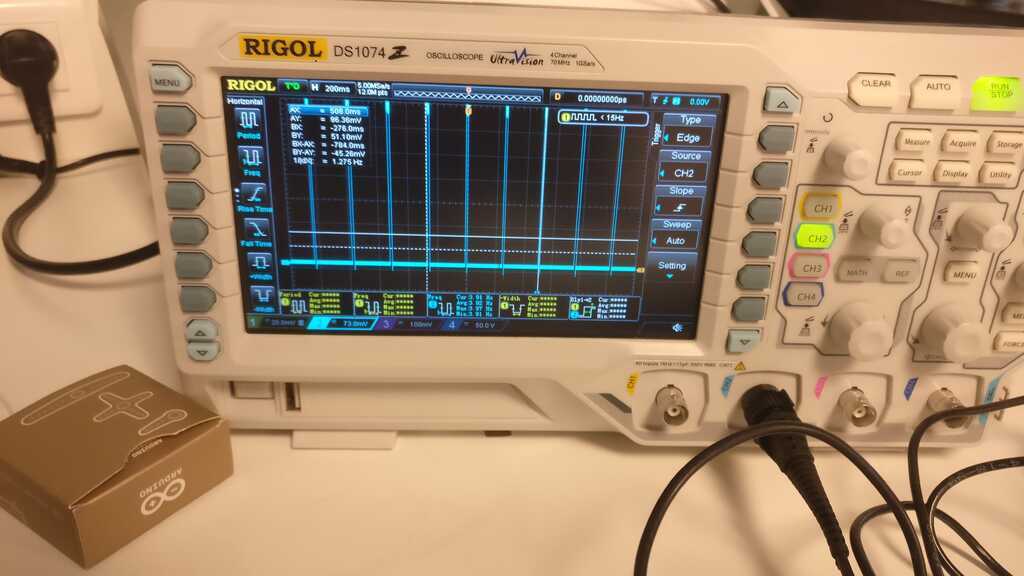
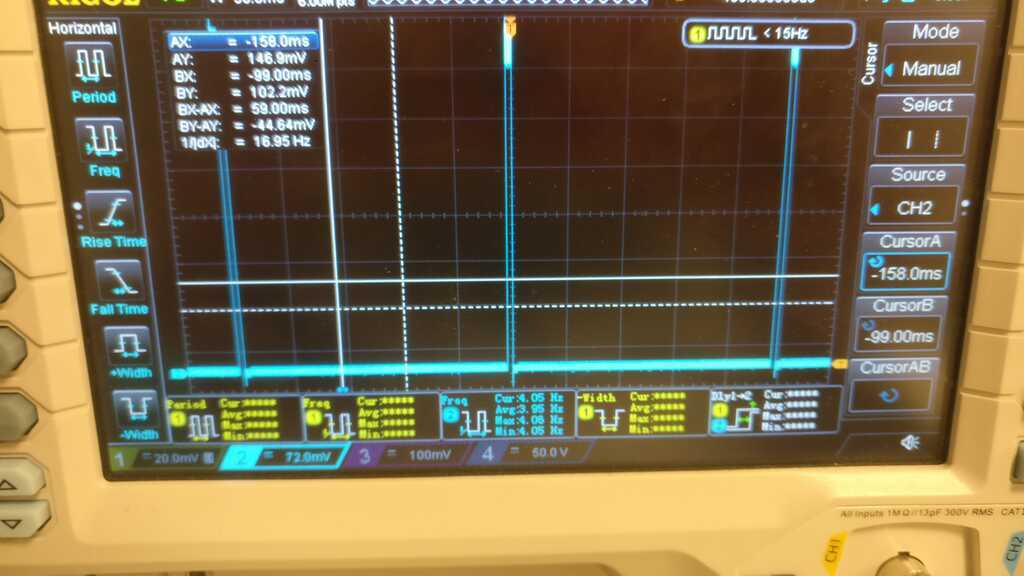
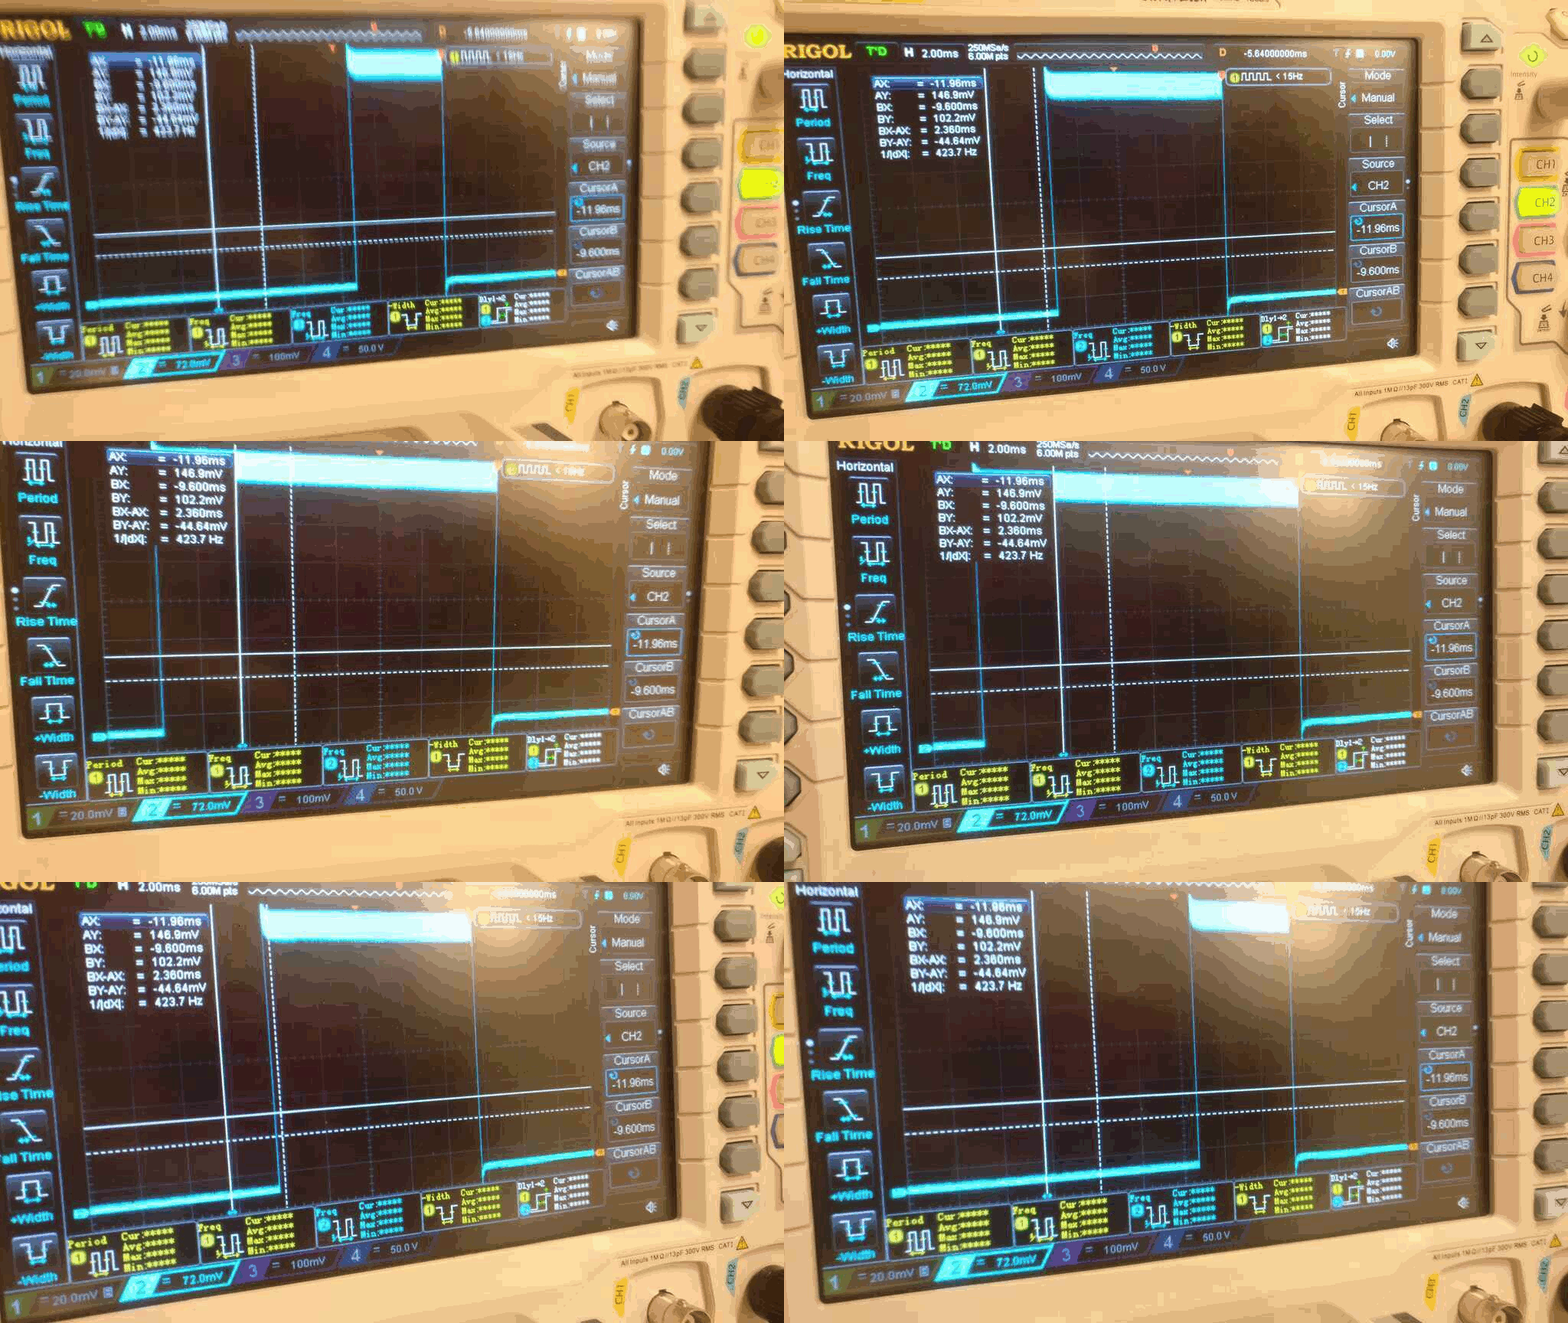
Also, during all of my test I have monitored using an oscilloscope the output signal from the tiny... As yo can see the signal seems to be good but don't know why it didn't work...
The ESP8266 is in a way the little brother/sister of the ESP32 that talked about in the Input Device week. Basically, the esp8266 is less more powerful, have less GPIO pins and and don't have bluetooth module included.
But the ESP8266 is still a very powerful microcontroller, in it you found a wifi module 802.11 b/g/n support and 802.11n support (2.4 GHz), up to 72.2 Mbps. You also found a analogic to digital converter 10-bit. The ESP8266EX integrates a Tensilica L106 32-bit RISC processor, which achieves extra-low power consumption and reaches a maximum clock speed of 160 MHz. The maximum programmable space accessible in Heap + Data section is around 50 kB. And there is also an external SPI flash and supports up to 16 MB memory capacity.
Yep, litle brother but still powerful !
In the precedent section I explain that the problem is initialy coming from the 8-bit timer of the tiny 85 then why I just don't use something like ATMEGA that have a 16-Bit timer? Because, I want to be able to control my servo motor through a wifi connection.
The ESP8266 is then the perfect choice for me !
The esp8266 have a lot more features than a tiny but there is a lot of more thing to add in order to be able to use it. Like the esp32, the esp8266 have differents mode in it. Basically, the two main mode are the program mode and the run mode, that are controled with some GPIO pins.
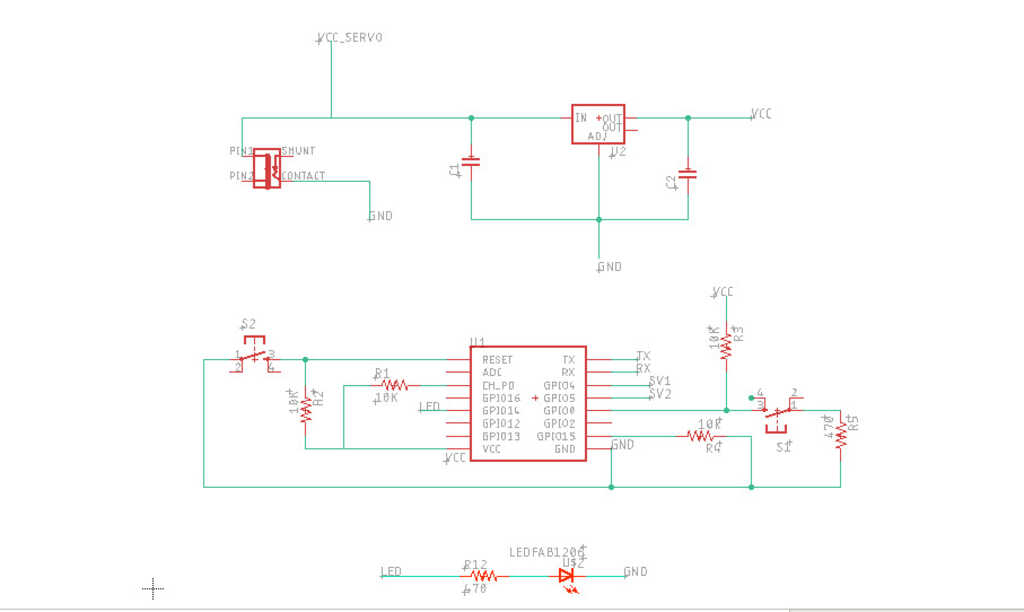
After some searches, this what I will put on my board :
Now let's talk about the power supply of the ESP8266. The esp is powered with 3.3V power supply and my servo motor are powered in 5V. Then I need also to add a voltage regulator. I will use a LM33 LDO that work with two capacitor.
This how look the schematic of the board. In the top you can see the powering part with jack connector and the LM33 LDO. And under this part you can see the esp8266 part with all of the resistor and the buttons.
Here you can found the EAGLE library of the ESP8266.
Now, let's talk about how I will control my servo motor.
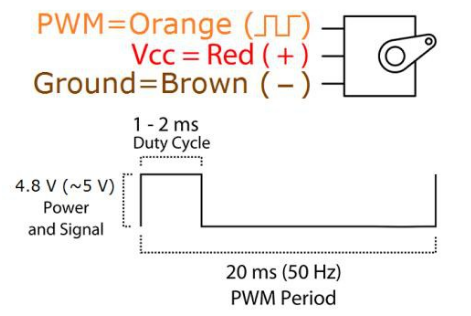
As we can see in the datasheet, the PWM signal from the micro controller should be something about 5V but the ESP8266 have a logical output signal of 3V3.
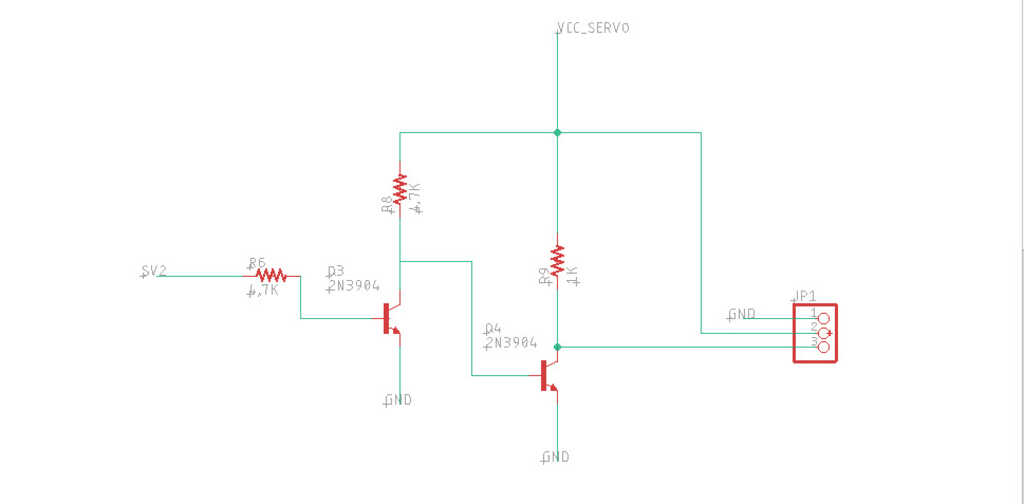
Looking on internet I found some people that control the servo with a 3V3 PWM but I want to try make the things right. Then I have found a little circuit that allow you to boost a PWM signal from 3V3 to 5V using 2N3904 NPN transistor.
Here this the circuit :
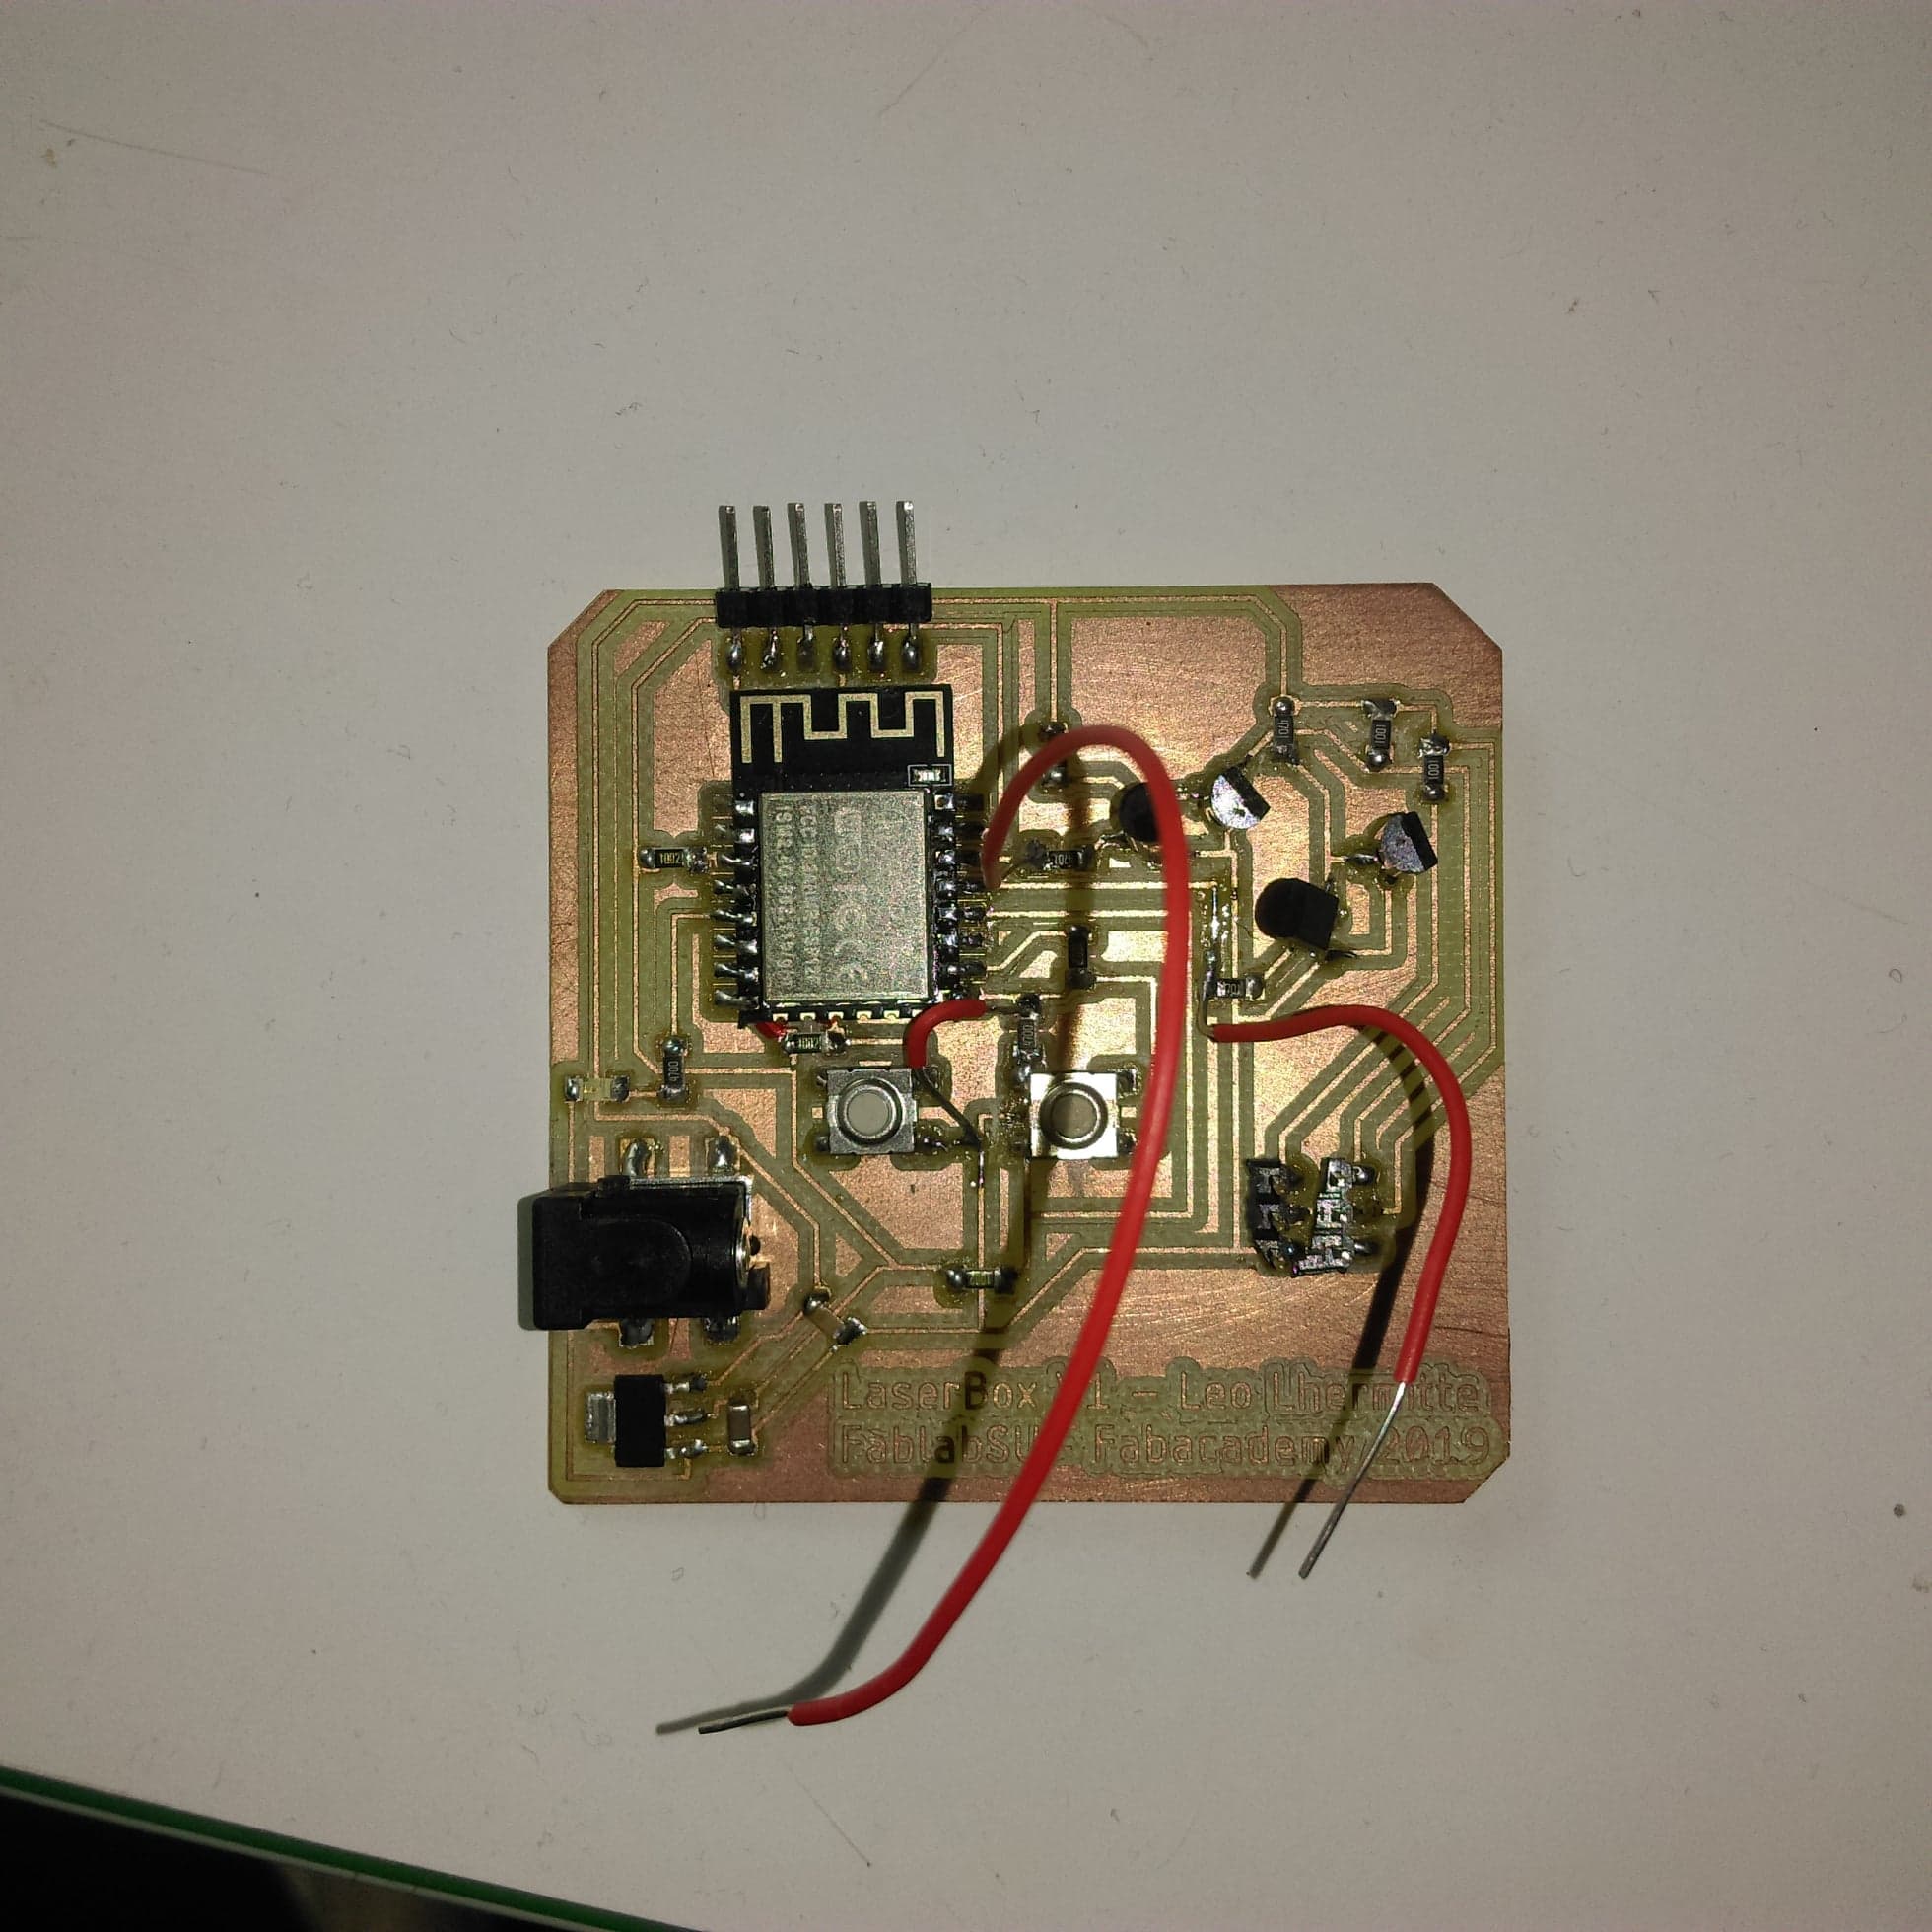
And finally, after some time of routing this how look the board ! As you can see I have also added an FTDI connector in order to be able to program the board.
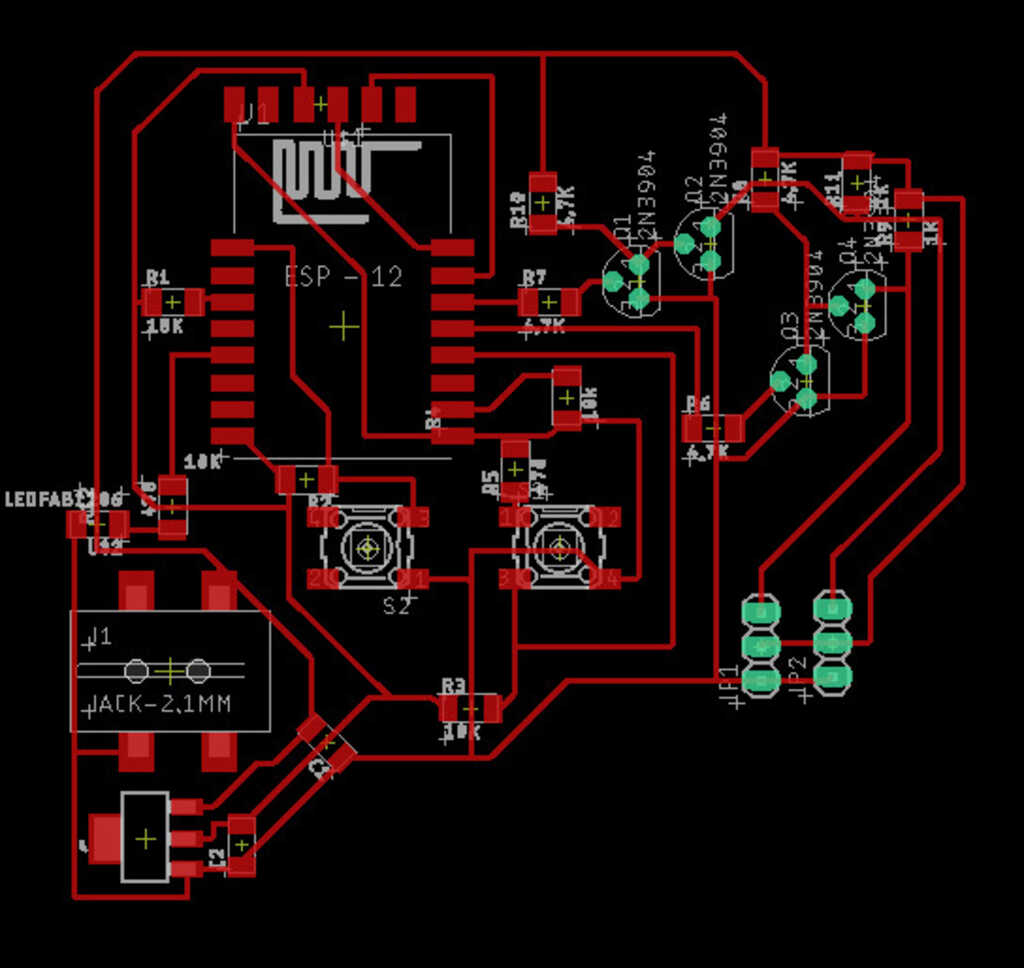
And this is how look the board :
Basically, the esp can be program with micropython as I explain in the programation week. But here I want to try to program it in C arduino using the Arduino IDE.
Then the first thing to do is to add the into the additional boards manager the URL of where is the esp8266 library for arduino. https://arduino.esp8266.com/stable/package_esp8266com_index.json
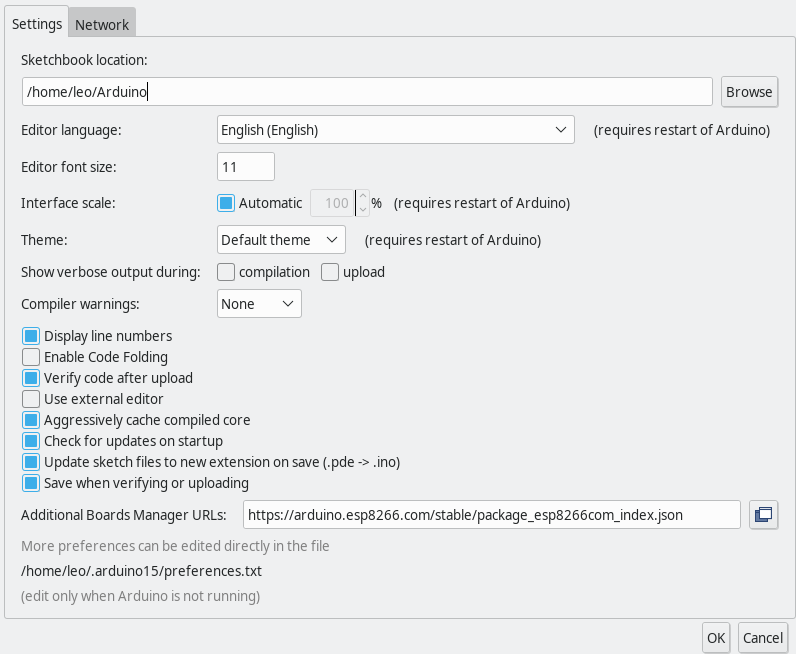
Then click on validate and go to Tools > Boards Manager. And search fied fill it with esp8266 and install the library.
Now you should be able to see something like this :
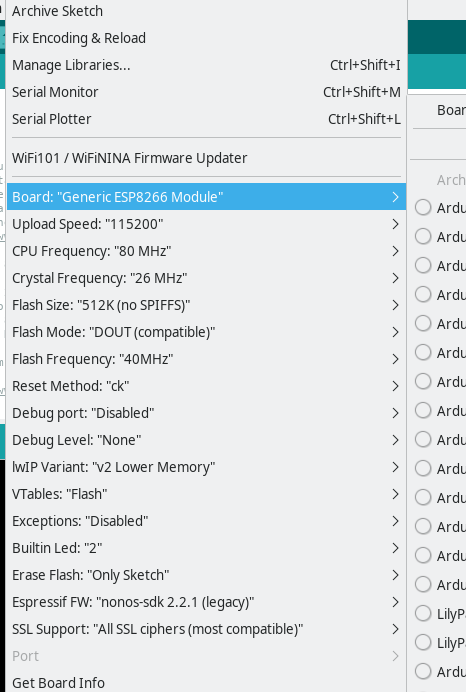
As I show in the image chose the esp8266 generic board and all of the other parameters should be good by default.
Now when you will try to upload the board just push program button low during the reset of the board. The IDE should be able to connect itself to the board.

After some test I'm still not able to move my servo motor... Then I decided to look the PWM signal getting out from the transistor circuit and there is only noise. Then I solded 2 wires before the NPN circuit and connected it to my servo motors and it works \O/
Here the code that I use :
#include < Servo.h>

Servo servo1;

void setup() {
  // put your setup code here, to run once:
    servo1.attach(4);
    servo1.write(0);


}

void loop() {
  // put your main code here, to run repeatedly:
  int i;
  for(i = 0;i <=180;i++){
    servo1.write(i);

    delay(5);
  }

  for(i= 180;i>=0;i--){
    servo1.write(i);

    delay(5);
  }

}