Nilton Anchayhua Fab Academy 2015

sudo apt-get install python-tk
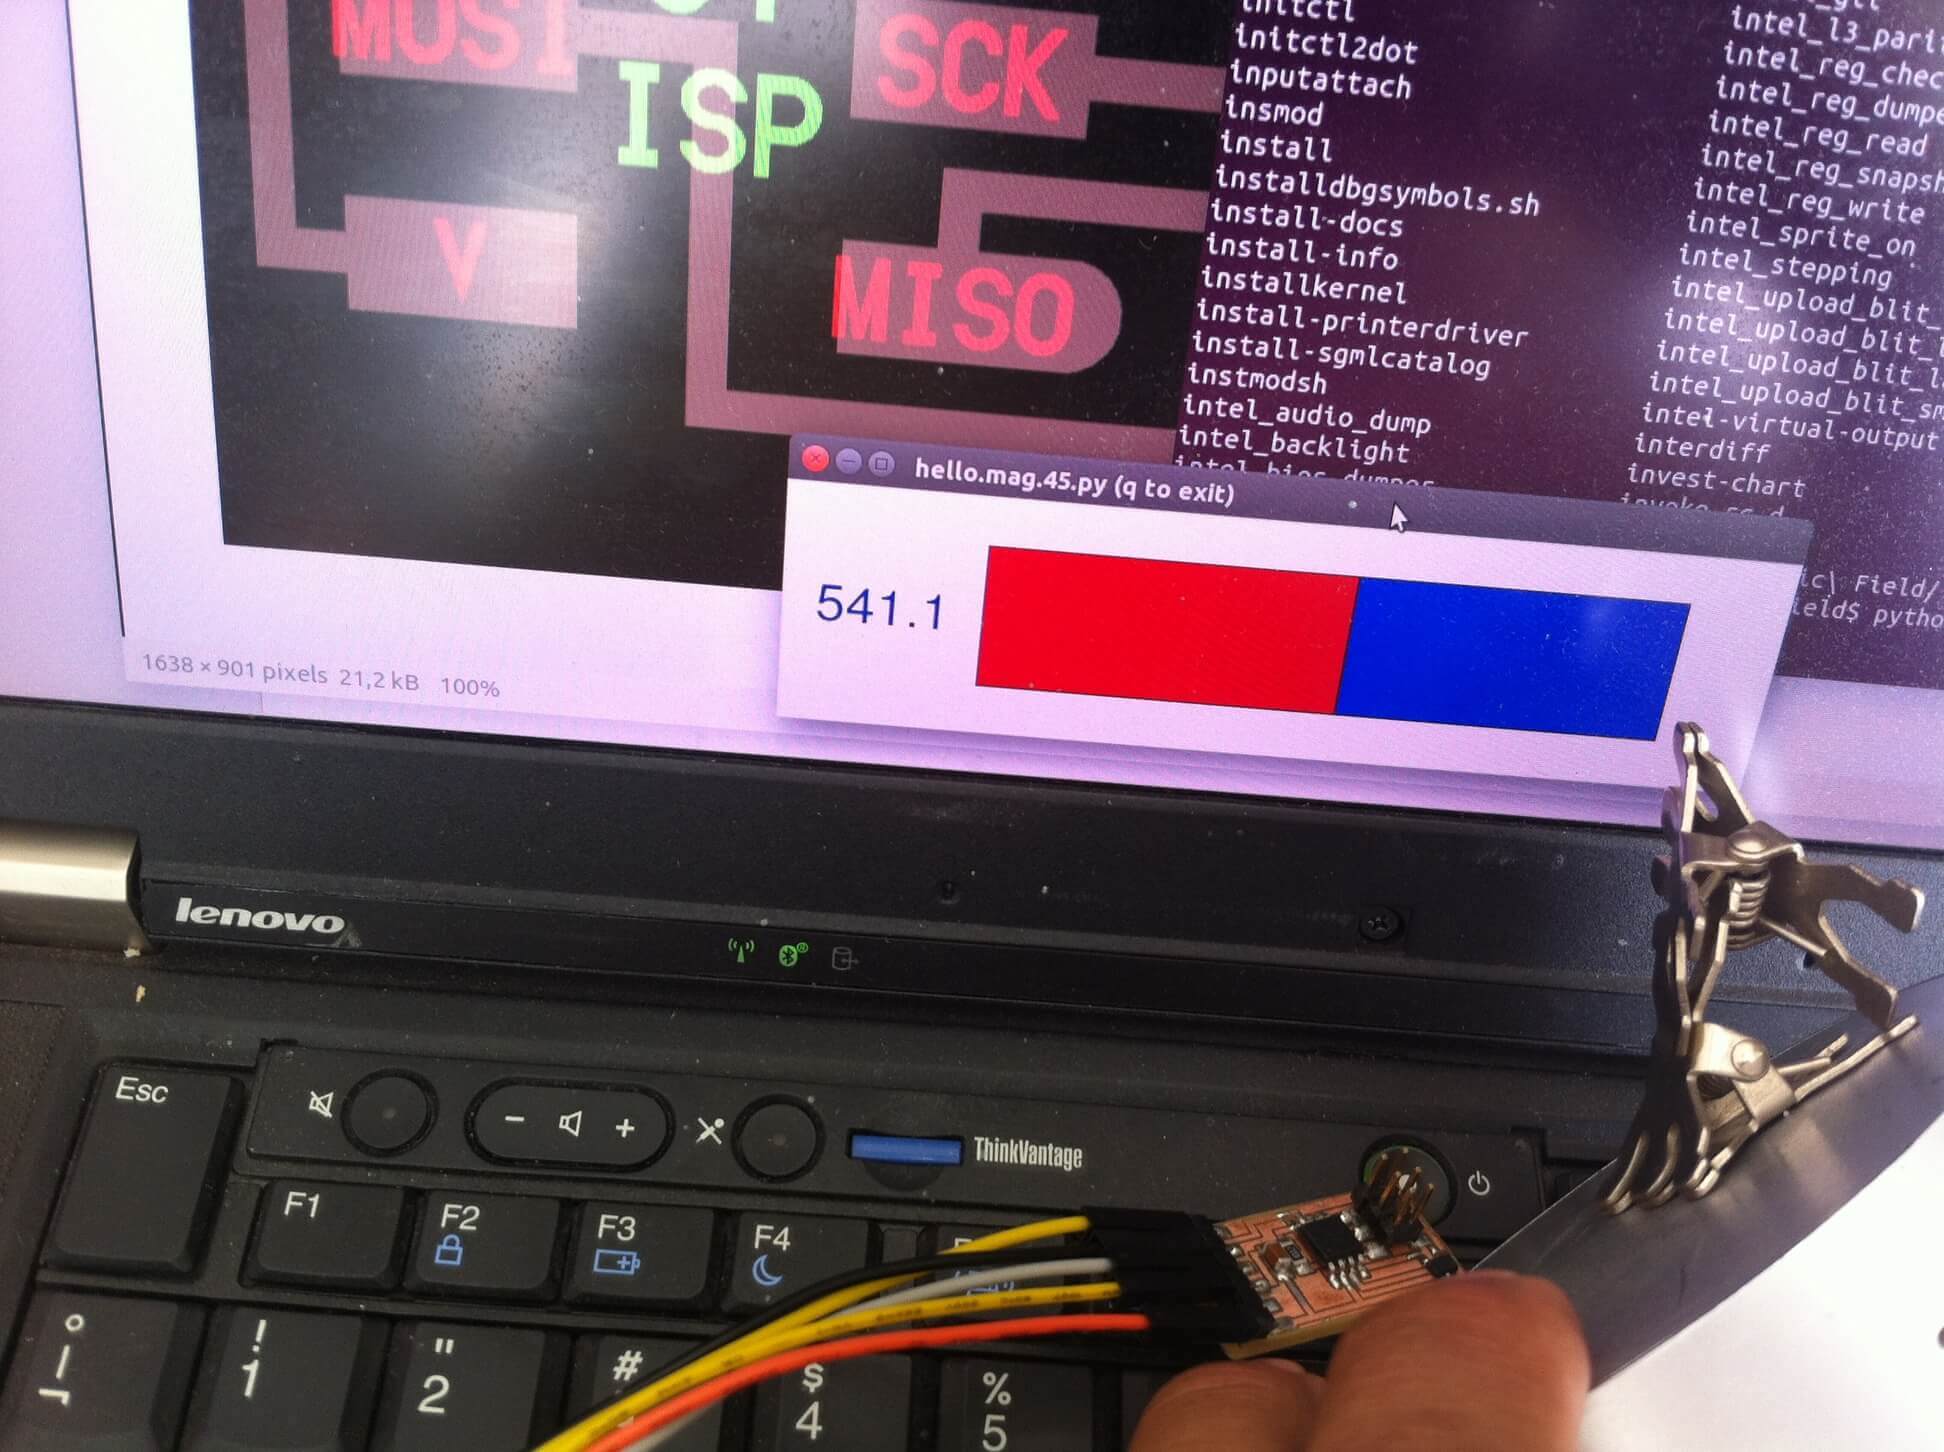
python hello.mag.45.py /dev/ttyUSB0but if you don't know the serial port you need to enter:
ls /dev/ttyUSB*and you will see the serial port actives.

            int main(void) {
   //
   // main
   //
   static uint16_t count;
   static uint32_t accum;
   //
   // set clock divider to /1
   //
   CLKPR = (1 << CLKPCE);
   CLKPR = (0 << CLKPS3) | (0 << CLKPS2) | (0 << CLKPS1) | (0 << CLKPS0);
   //
   // initialize output pins
   //
   set(serial_port, serial_pin_out);
   output(serial_direction, serial_pin_out);
   //
   // init A/D
   //
   ADMUX = (0 << REFS2) | (0 << REFS1) | (0 << REFS0) // Vcc ref
      | (0 << ADLAR) // right adjust
      | (0 << MUX3) | (0 << MUX2) | (1 << MUX1) | (0 << MUX0); // ADC4
   ADCSRA = (1 << ADEN) // enable
      | (1 << ADPS2) | (1 << ADPS1) | (1 << ADPS0); // prescaler /128
   //
   // main loop
   //
   while (1) {
      //
      // accumulate samples
      //
      accum = 0;
      for (count = 0; count < nsamples; ++count) {
         //
         // initiate conversion
         //
         ADCSRA |= (1 << ADSC);
         //
         // wait for completion
         //
         while (ADCSRA & (1 << ADSC))
            ;
         //
         // add result
         //
         accum += ADC;      //  ACCUM IS 32 BITS STATIC VARIABLE AND ACCUMULATE THE SUM OF THE ADC VALUE OF A 100 SAMPLES
         }
      //
      // send framing
      //
      put_char(&serial_port, serial_pin_out, 1); //THIS STAGE SHOWS THE WAY TO SYNCHRONIZE THE COMMUNICATION
         }                                          //WITH THE INTERFACE PROGRAM IN PYTHON
      char_delay();
      put_char(&serial_port, serial_pin_out, 2);
      char_delay();
      put_char(&serial_port, serial_pin_out, 3);
      char_delay();
      put_char(&serial_port, serial_pin_out, 4);
      char_delay();
      //
      // send result
      //
      put_char(&serial_port, serial_pin_out, (accum & 255));   //THIS STAGE SHOWS THE COMMUNICATION TO SEND 3 BYTES OF THE ACCUM
      char_delay();                                             // TO THE INTERFACE, ONLY THE 3 LOW BYTES OF THE 4 BYTES
      put_char(&serial_port, serial_pin_out, ((accum >> 8) & 255));
      char_delay();
      put_char(&serial_port, serial_pin_out, ((accum >> 16) & 255));
      char_delay();
      }
   }
def idle(parent,canvas):
global filter, eps
#
# idle routine
#
byte2 = 0
byte3 = 0
byte4 = 0
ser.flush()
while 1:
#
# find framing
#
byte1 = byte2
byte2 = byte3
byte3 = byte4
byte4 = ord(ser.read()) // HERE, IT WAIT THE RIGHT COMMUNICATION WITH THE PROCESSOR
if ((byte1 == 1) & (byte2 == 2) & (byte3 == 3) & (byte4 == 4)):
break
low = ord(ser.read()) // READ THE LOW BYTE OF THE ACCUM
med = ord(ser.read())
high = ord(ser.read()) // READ THE HIGH BYTE BUT THE BYTE 3, REMEMBER THAT THE BYTE 4 DOESN'T READ
value = (256*256*high + 256*med + low)/nsamples // REBUILD THE LOW 3 BYTES OF THE ACCUM
x = int(.2*WINDOW + (.9-.2)*WINDOW*value/1024.0) // THE VALUE IS IN THIS EQUATION TO GROW UP WITH THE WINDOWS OF THE MEASURMENT
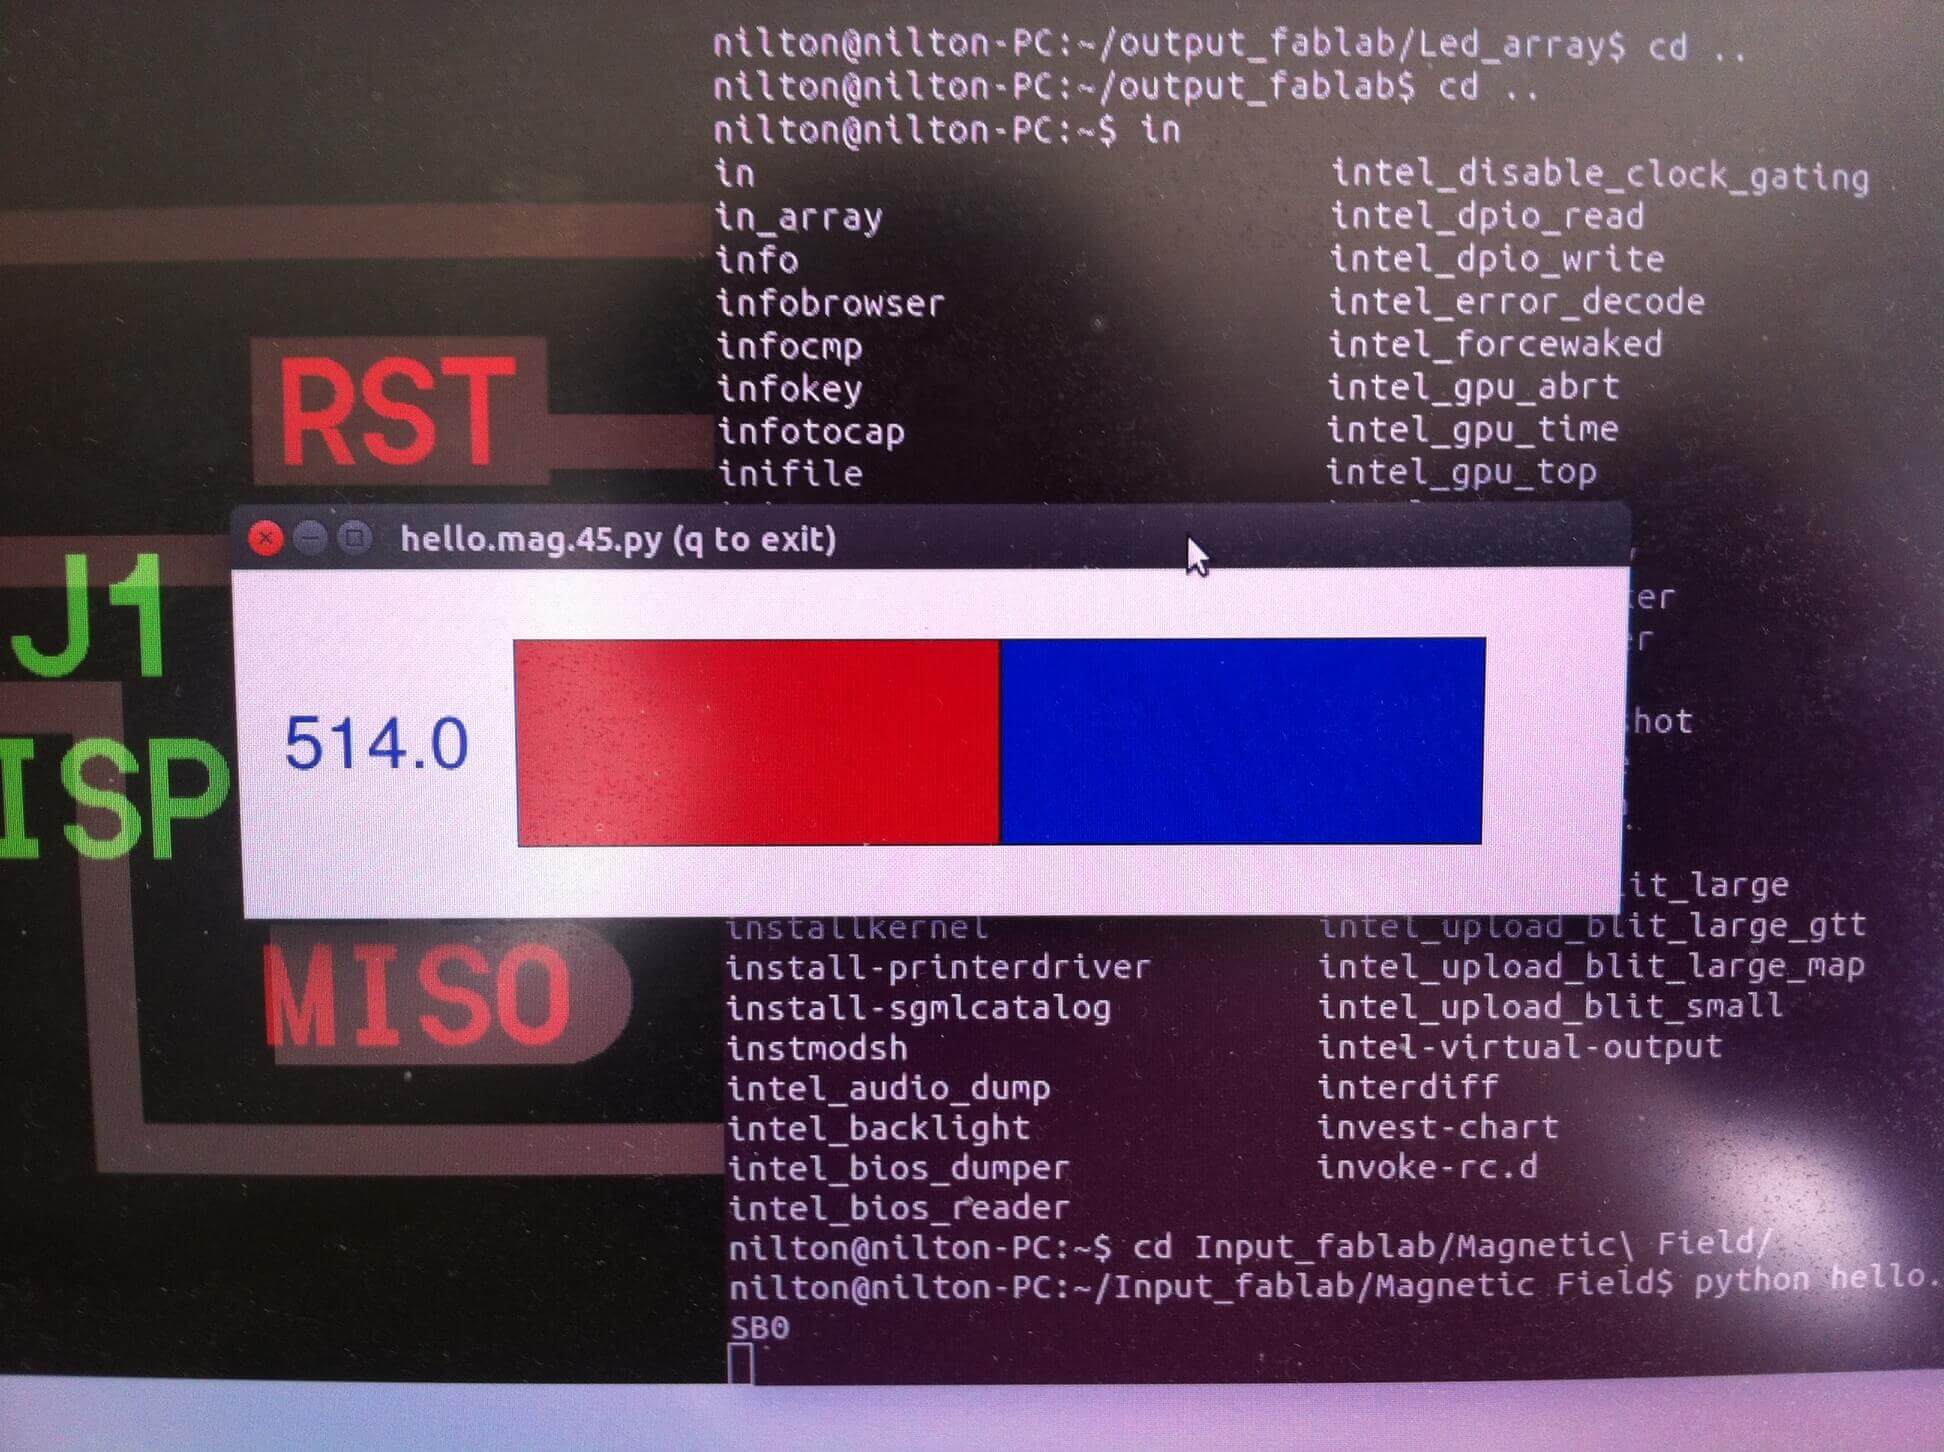
canvas.itemconfigure("text",text="%.1f"%value)
canvas.coords('rect1',.2*WINDOW,.05*WINDOW,x,.2*WINDOW)
canvas.coords('rect2',x,.05*WINDOW,.9*WINDOW,.2*WINDOW)
canvas.update()
parent.after_idle(idle,parent,canvas)


              from Tkinter import *
from numpy import log
import serial

WINDOW = 1000 # window size
eps = 0.5 # filter time constant
filter = 0.0 # filtered value

def idle(parent,canvas):
   global filter, eps
   #
   # idle routine
   #
   byte2 = 0
   byte3 = 0
   byte4 = 0
   ser.flush()
   while 1:
      #
      # find framing
      #
      byte1 = byte2     this code I think it's for synchronize the communications
      byte2 = byte3
      byte3 = byte4
      byte4 = ord(ser.read())
      if ((byte1 == 1) & (byte2 == 2) & (byte3 == 3) & (byte4 == 4)):
         break
   low = ord(ser.read())
   high = ord(ser.read())
   value = 256*high + low
   if (value > 511):
      value -= 1024
   V = 2.5 - value*5.0/(20.0*512.0)
   R = 10000.0/(5.0/V-1.0)
   # NHQ103B375R5
   # R25 10000 (O)
   # B (25/85) 3750 (K)
   # R(T(C)) = R(25)*exp(B*(1/(T(C)+273.15)-(1/(25+273.15))))
   B = 3750.0
   R25 =  10000.0
   T = 1.0/(log(R/R25)/B+(1/(20.0+273.15))) - 253.15
   print T
   filter = (1-eps)*filter + eps*T
   x = int(.2*WINDOW + (.9-.2)*WINDOW*(filter-20.0)/10.0)
   canvas.itemconfigure("text",text="%.2f"%filter)
   canvas.coords('rect1',.2*WINDOW,.05*WINDOW,x,.2*WINDOW)
   canvas.coords('rect2',x,.05*WINDOW,.9*WINDOW,.2*WINDOW)
   canvas.update()
   parent.after_idle(idle,parent,canvas)

#
#  check command line arguments
#
if (len(sys.argv) != 2):
   print "command line: hello.temp.45.py serial_port"
   sys.exit()
port = sys.argv[1]
#
# open serial port
#
ser = serial.Serial(port,9600)
ser.setDTR()
#
# start plotting
#
root = Tk()
root.title('hello.temp.45.py (q to exit)')
root.bind('q','exit')
canvas = Canvas(root, width=WINDOW, height=.25*WINDOW, background='green')
canvas.create_text(.1*WINDOW,.125*WINDOW,text=".33",font=("Helvetica", 24),tags="text",fill="#0000b0")
To change the color of windows you can change the fill parameter
canvas.create_rectangle(.2*WINDOW,.05*WINDOW,.3*WINDOW,.2*WINDOW, tags='rect1', fill='#b00000')
canvas.create_rectangle(.3*WINDOW,.05*WINDOW,.9*WINDOW,.2*WINDOW, tags='rect2', fill='#0000b0')
canvas.pack()
root.after(100,idle,root,canvas)
root.mainloop()  This is the loop mode like while loop in c program
