- Home
- My Assignments
- Project Management - Complete
- Computer Aided Design - Complete
- Computer Controlled Cutting - Complete
- Electronics Production - Complete
- 3D Scanning and Printing - Complete
- Electronics Design - Complete
- Embedded Programming - Complete
- Computer-controlled Machining - Complete
- Molding and Casting - Complete
- Input Devices - Complete
- Output Devices - Complete
- Composites - Complete
- Networking and Communications - Complete
- Interface and Application Programming - Complete
- Applications and Implications - Complete
- Mechanical and Machine Design - Complete
- Invention, Intellectual Property, and Income - Complete
- Final Project
27th March 2015 - Coding the board
First thing I did was install the arduino environment
(easy!). Then I had to install the necessary files so that
the program could also put code onto ATtiny chips. This was
done by following this tutorial.
After that, Emma, our instructor, gave me a crash course in
using the arduino environment and putting some code onto a
board (which she did excellently considering I am currently
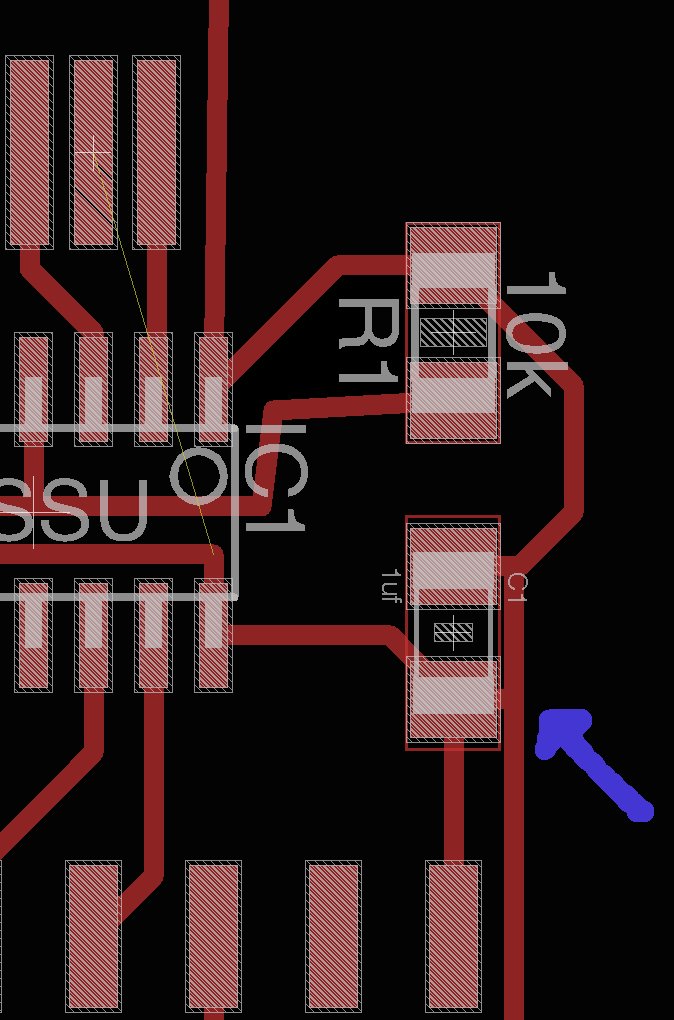
playing catch up!). However when it came to putting code
onto my own board we discovered a huge short in the
circuit... so huge in fact that it was even in the schematic
that I had designed. Below you can see where the short was
in the design (pointed out by a crudely drawn arrow):
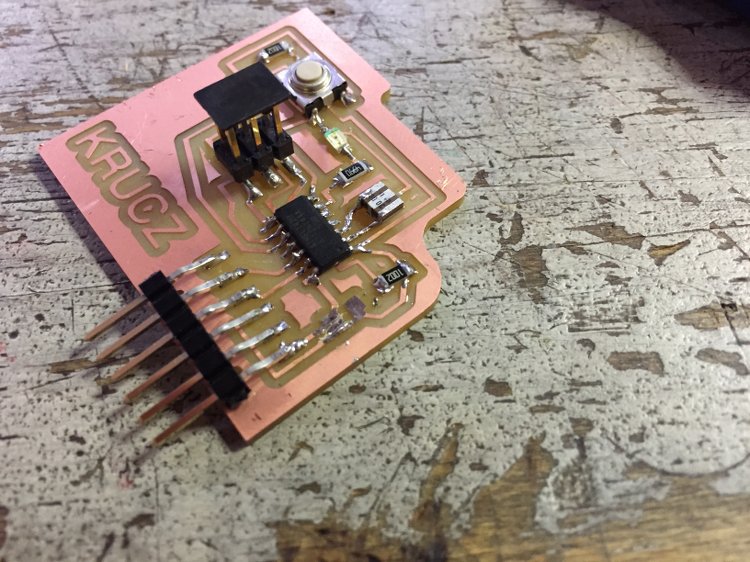
This was easily rectified. I removed the capacitor, dug out
the offending trace with a blade, and put the capacitor
back. Amazing what one stray trace can do to an entire
board! Below, you can see the offending trace mid-operation.
Once the issue was rectified I came across a rather novelty
issue. The lack of compatability between the USB 2.0 of the
programmer and the USB 3.0 of my laptop. This was rectified
by borrowing a USB extension cable (USB-male to USB-female).
The first program I used was the basic example file provided
by the software called "Blink". Once the correct pins have
been assigned in the code, the LED blinks:
/*
  Blink
  Turns on an LED on for one second, then off for one second, repeatedly.

  Most Arduinos have an on-board LED you can control. On the Uno and
  Leonardo, it is attached to digital pin 13. If you're unsure what
  pin the on-board LED is connected to on your Arduino model, check
  the documentation at http://arduino.cc

  This example code is in the public domain.

  modified 8 May 2014
  by Scott Fitzgerald
 */


// the setup function runs once when you press reset or power the board
void setup() {
  // initialize digital pin 13 as an output.
  pinMode(13, OUTPUT);
}

// the loop function runs over and over again forever
void loop() {
  digitalWrite(13, HIGH);   // turn the LED on (HIGH is the voltage level)
  delay(1000);              // wait for a second
  digitalWrite(13, LOW);    // turn the LED off by making the voltage LOW
  delay(1000);              // wait for a second
}
Now that I had managed to make the board do something, it was time for me to start fiddling around with the code and make it do something slightly more interesting. The next piece of code adjusted how fast the LED was blinking depending on whether the button was pushed or not:
void setup() {

  pinMode(7, OUTPUT);
  pinMode(3, INPUT);
}

void loop() {
  if(digitalRead(3) == LOW){
  digitalWrite(7, HIGH);
  delay(200);
  digitalWrite(7, LOW);
  delay(200); }
else{
digitalWrite(7, HIGH);
  delay(500);
  digitalWrite(7, LOW);
  delay(500);
}
}
Finally, I attempted to code the board so that you push the button, the light turns and stays on, then if pushed again the light goes off and stays off. I also coded it to send a message to the computer saying "LED on" or "LED off" respectively. This was a tad harder to achieve, but with the help of Zaerc, designer of our programmer, we had it done in a jiffy!
#include <SoftwareSerial.h>

SoftwareSerial mySerial(0, 1); // RX, TX
 boolean led_status;

void setup() {

  pinMode(7, OUTPUT);
  pinMode(3, INPUT);
  led_status = false;
  mySerial.begin(9600);
  mySerial.println("Hello, world?");
}


void loop() {

if(digitalRead(3) == LOW){

 if(led_status){
  digitalWrite(7, HIGH);
   led_status =false;
   mySerial.println("LED on");
}

else{
  led_status = true;
  digitalWrite(7, LOW);
  mySerial.println("LED off");
}
delay(500);
}


}
So that concludes my work on the Embedded Programming assignment. It was far less daunting than I initially thought, which is a great relief! I wish I was more ambitious with the board that I designed. However, as I am playing catch up, I thought it best just to do the basic board and come back to it later.