This week we look at how to make Interfaces which make it easier to control various things such as the input and output devices we have made. This will be good fun as it will make our devices more appealing to use.
Assignment:
write an application that interfaces with an input and/or output device
6th May 2015 - Processing!!
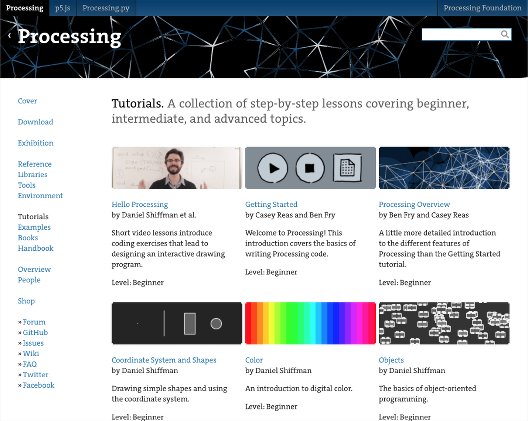
As I am new to this area of programming I went with the beginner's program known as processing. You could say it is the arduino of application writing! So I could become more familiar with how the language is structured, I went to their website and started looking though their tutorials:
Reading the first few showed me how to makes shapes etc, but for communication with an input or output device, I think it will be more appropriate to grab an existing piece of code and edit it accordingly.
8th May 2015 - Example code found!
I decided that I will make some sort of an interface which will be able to control my bluetooth board from the week before. After a small amount of digging, I found a great page with an example of bluetooth communication using processing. Take a look.
This code sends a command when one of the buttons are pressed. To make it compatible with my board I changed the commands it sends and the port that it sends the command to. This was the code I ended up with:
// From Arduino Playground tutorial: http://www.arduino.cc/playground/Learning/Tutorial01//import class to set up serial connection with wiring boardimport processing.serial.*;
Serial port;
//button setupcolor currentcolor;
RectButton rect1, rect2;
boolean locked = false;
voidsetup() {
//set up windowsize(200, 200);
color baseColor = color(102, 102, 102);
currentcolor = baseColor;
// List all the available serial ports in the output pane. // You will need to choose the port that the Wiring board is // connected to from this list. The first port in the list is // port #0 and the third port in the list is port #2. println(Serial.list());
// Open the port that the Wiring board is connected to (in this case 1// which is the second open port in the array) // Make sure to open the port at the same speed Wiring is at 115200bps (default for BlueSMiRF modem)
port = new Serial(this, "/dev/tty.HC-05-DevB", 9600); //use the serial device that blueman has setup// Define and create rectangle button #1int x = 30;
int y = 100;
int size = 50;
color buttoncolor = color(153, 102, 102);
color highlight = color(102, 51, 51);
rect1 = new RectButton(x, y, size, buttoncolor, highlight);
// Define and create rectangle button #2
x = 90;
y = 100;
size = 50;
buttoncolor = color(153, 153, 153);
highlight = color(102, 102, 102);
rect2 = new RectButton(x, y, size, buttoncolor, highlight);
}
voiddraw() {
background(currentcolor);
stroke(255);
update(mouseX, mouseY);
rect1.display();
rect2.display();
}
void update(int x, int y) {
if(locked == false) {
rect1.update();
rect2.update();
}
else {
locked = false;
}
//Turn LED on and off if buttons pressed where//H = on (high) and L = off (low)if(mousePressed) {
if(rect1.pressed()) { //ON button
currentcolor = rect1.basecolor;
port.write('2');
}
elseif(rect2.pressed()) { //OFF button
currentcolor = rect2.basecolor;
port.write('1');
}
}
}
class Button {
int x, y;
int size;
color basecolor, highlightcolor;
color currentcolor;
boolean over = false;
boolean pressed = false;
void update()
{
if(over()) {
currentcolor = highlightcolor;
}
else {
currentcolor = basecolor;
}
}
boolean pressed()
{
if(over) {
locked = true;
returntrue;
}
else {
locked = false;
returnfalse;
}
}
boolean over()
{
returntrue;
}
void display()
{
}
}
class RectButton extends Button {
RectButton(int ix, int iy, int isize, color icolor, color ihighlight)
{
x = ix;
y = iy;
size = isize;
basecolor = icolor;
highlightcolor = ihighlight;
currentcolor = basecolor;
}
boolean over()
{
if( overRect(x, y, size, size) ) {
over = true;
returntrue;
}
else {
over = false;
returnfalse;
}
}
void display()
{
stroke(255);
fill(currentcolor);
rect(x, y, size, size);
}
}
boolean overRect(int x, int y, intwidth, intheight) {
if (mouseX >= x && mouseX <= x+width &&
mouseY >= y && mouseY <= y+height) {
returntrue;
}
else {
returnfalse;
}
}
This example only had two buttons so I one controls the red led and one the green led:
My next step will be to add more to the code to improve the interface.
9th May 2015 - Further developments...
Today I have added a few more buttons to the code that I have been using. This also involved altering the arduino code used. All I did was use "if" and "else if" statements to assign the characters that control the board.
Here is the updated arduino code:
/*This code will run the bluetooth as slavepressing 1 turns on led 4pressing 0 turns off led 4*/
#include <SoftwareSerial.h> //Software Serial Port
#define RxD 3
#define TxD 2
#define DEBUG_ENABLED 1
SoftwareSerial blueToothSerial(RxD,TxD);
int led1 = 7;
int led2 = 6;
int led3 = 8;
voidsetup()
{
pinMode(RxD, INPUT);
pinMode(TxD, OUTPUT);
setupBlueToothConnection();
pinMode(led1,OUTPUT);
pinMode(led2,OUTPUT);
pinMode(led3,OUTPUT);
digitalWrite(led1,HIGH);
digitalWrite(led2,HIGH);
digitalWrite(led3,HIGH);
}
voidloop()
{
char recvChar;
while(1){
//check if there's any data sent from the remote bluetooth shieldif(blueToothSerial.available()){
recvChar = blueToothSerial.read();
if(recvChar == '1'){
digitalWrite(led1,LOW);
digitalWrite(led2,HIGH);
digitalWrite(led3,HIGH);
}
elseif(recvChar == '2'){
digitalWrite(led1,HIGH);
digitalWrite(led2,LOW);
digitalWrite(led3,HIGH);
}
elseif(recvChar == '3'){
digitalWrite(led1,HIGH);
digitalWrite(led2,HIGH);
digitalWrite(led3,LOW);
}
elseif(recvChar == '4'){
digitalWrite(led1,LOW);
digitalWrite(led2,LOW);
digitalWrite(led3,LOW);
}
elseif(recvChar == '5'){
digitalWrite(led1,HIGH);
digitalWrite(led2,HIGH);
digitalWrite(led3,HIGH);
}
}
}
}
void setupBlueToothConnection()
{
blueToothSerial.begin(9600); //Set BluetoothBee BaudRate to default baud rate 38400
blueToothSerial.print("\r\n+STWMOD=0\r\n"); //set the bluetooth work in slave mode
blueToothSerial.print("\r\n+STNA=HC-05\r\n"); //set the bluetooth name as "HC-05"
blueToothSerial.print("\r\n+STOAUT=1\r\n"); // Permit Paired device to connect me
blueToothSerial.print("\r\n+STAUTO=0\r\n"); // Auto-connection should be forbidden heredelay(2000); // This delay is required.//blueToothSerial.print("\r\n+INQ=1\r\n"); //make the slave bluetooth inquirable
blueToothSerial.print("bluetooth connected!\n");
delay(2000); // This delay is required.
blueToothSerial.flush();
}
And here is the new Processing code:
// Based on Arduino Playground tutorial: http://www.arduino.cc/playground/Learning/Tutorial01//import class to set up serial connection with wiring boardimport processing.serial.*;
Serial port;
//button setupcolor currentcolor;
RectButton rect1, rect2, rect3, rect4, rect5;
boolean locked = false;
voidsetup() {
//set up windowsize(350, 150);
color baseColor = color(0, 0, 0);
currentcolor = baseColor;
// List all the available serial ports in the output pane. // You will need to choose the port that the Wiring board is // connected to from this list. The first port in the list is // port #0 and the third port in the list is port #2. println(Serial.list());
// Open the port that the Wiring board is connected to (in this case 1// which is the second open port in the array) // Make sure to open the port at the same speed Wiring is at 9600bps for HC-05
port = new Serial(this, "/dev/tty.HC-05-DevB", 9600); //use the serial device that blueman has setup// Define and create rectangle button #1int x = 30;
int y = height/2;
int size = 50;
color buttoncolor = color(153, 0, 0);
color highlight = color(255, 0, 0);
rect1 = new RectButton(x, y, size, buttoncolor, highlight);
// Define and create rectangle button #2
x = 90;
y = height/2;
size = 50;
buttoncolor = color(0, 153, 0);
highlight = color(0, 255, 0);
rect2 = new RectButton(x, y, size, buttoncolor, highlight);
// Define and create rectangle button #3
x = 150;
y = height/2;
size = 50;
buttoncolor = color(0, 0, 153);
highlight = color(0, 0, 255);
rect3 = new RectButton(x, y, size, buttoncolor, highlight);
// Define and create rectangle button #4
x = 210;
y = height/2;
size = 50;
buttoncolor = color(153, 153, 153);
highlight = color(255, 255, 255);
rect4 = new RectButton(x, y, size, buttoncolor, highlight);
// Define and create rectangle button #5
x = 270;
y = height/2;
size = 50;
buttoncolor = color(0, 0, 0);
highlight = color(102, 102, 102);
rect5 = new RectButton(x, y, size, buttoncolor, highlight);
}
voiddraw() {
background(currentcolor);
stroke(255);
update(mouseX, mouseY);
rect1.display();
rect2.display();
rect3.display();
rect4.display();
rect5.display();
}
void update(int x, int y) {
if(locked == false) {
rect1.update();
rect2.update();
rect3.update();
rect4.update();
rect5.update();
}
else {
locked = false;
}
//Select if(mousePressed) {
if(rect1.pressed()) { //Red button
currentcolor = rect1.basecolor;
port.write('3');
}
elseif(rect2.pressed()) { //Green button
currentcolor = rect2.basecolor;
port.write('1');
}
elseif(rect3.pressed()) { //Blue button
currentcolor = rect3.basecolor;
port.write('2');
}
elseif(rect4.pressed()) { //White button
currentcolor = rect4.basecolor;
port.write('4');
}
elseif(rect5.pressed()) { //OFF button
currentcolor = rect5.basecolor;
port.write('5');
}
}
}
class Button {
int x, y;
int size;
color basecolor, highlightcolor;
color currentcolor;
boolean over = false;
boolean pressed = false;
void update()
{
if(over()) {
currentcolor = highlightcolor;
}
else {
currentcolor = basecolor;
}
}
boolean pressed()
{
if(over) {
locked = true;
returntrue;
}
else {
locked = false;
returnfalse;
}
}
boolean over()
{
returntrue;
}
void display()
{
}
}
class RectButton extends Button {
RectButton(int ix, int iy, int isize, color icolor, color ihighlight)
{
x = ix;
y = iy;
size = isize;
basecolor = icolor;
highlightcolor = ihighlight;
currentcolor = basecolor;
}
boolean over()
{
if( overRect(x, y, size, size) ) {
over = true;
returntrue;
}
else {
over = false;
returnfalse;
}
}
void display()
{
stroke(255);
fill(currentcolor);
rect(x, y, size, size);
}
}
boolean overRect(int x, int y, intwidth, intheight) {
if (mouseX >= x && mouseX <= x+width &&
mouseY >= y && mouseY <= y+height) {
returntrue;
}
else {
returnfalse;
}
}
You can see it all in action here!! (and here is the code)
That concludes my assignment work for this week. However, as I have finished early, I will try to work out how to use the GPS module and maybe make an interface for it.