6th February 2015 - Exploring New CAD
Following up my quest to become better at time
management, I have given myself an hour to look at
previously unseen CAD programs. This will then
contribute towards becoming
familiar with them and contribute towards deciding
what I will use to render my final project. The
first I will look at is GIMP as it was strongly recommended.
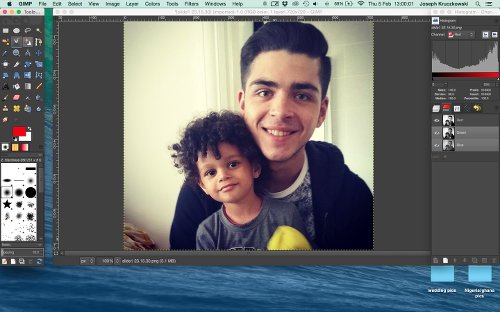
GIMP
GIMP is know for being a "versatile graphics manipulation
program" and is able to work with an array of file
formats including as JPEG, GIF and PNG.The user
interface is very versatile with the tool bar,
image and other features in three separate windows. I
found this useful and easy to work with. The tools
are self intuitive with a decent description of
each one if you hover over them. I gave them a
quick try to see how well they work and, with
practice, a lot can be achieved with the tools.
Two tools that stood out for me were the "Smudge
Tool" and the "Scissors Select Tool". The smudge
tool is great as you can push the pixels around as
if they were particles of sand. The scissors
select tool is also useful as it is able to recognise the object you
are trying to select (great for making your friend
look like he has the body of a gorilla!).
The time taken to download GIMP, play with it and
do a short write up has taken me about 40 minutes. Hopefully I can
keep this sort of pace up with the more complex
programs. I will most likely
use this software for something during the course
of the program; but for rendering my final
project, I doubt it will be of much use.
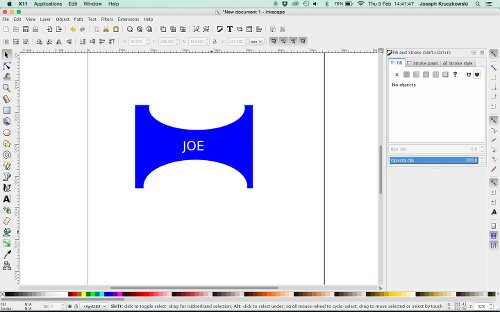
Inkscape
Another strongly recommended program is Inkscape.
This is great for making vector images and is easy
to use once one is familiar with it. There is a
good choice of tools with which you can make your
desired image. I also uses real world units such
as millimeters, which is useful for creating an
image to be cut by a machine. Later in the course
I will definitely be using it for the computer
aided machinery, but for rendering my final
project at this early stage, it will only be to
make diagrams. This try out was much quicker to
write up as I had already looked at using this in
the past.
These two two programs are examples of 2D and
2.5D CAD programs. I now need to look at 3D CAD
programs. This is a much more complex area. Some
3D CAD works based on stitching lots of little
shapes together to render the desired form. This
is okay, but very often is drastic changes need to
be made the user must start from scratch (which is
a pain!). Other programs will use functions stitched together; that
way, the form can be manipulated much more easily.
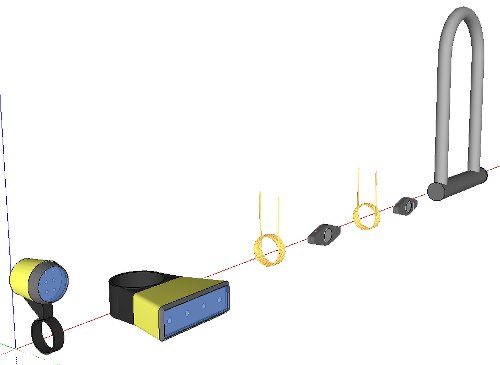
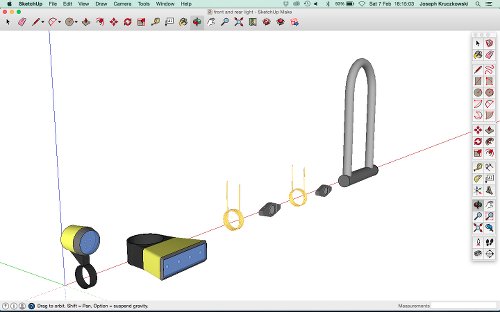
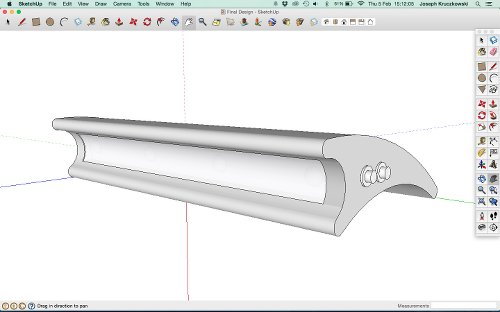
SketchUp
SketchUp is my favorite
3D CAD program! That is partly because it the only
3D CAD program I have reasonable experience in. I
have used it to render a few previous projects in
order to display my design in a corresponding
portfolio (check out one of my previous projects
below). It's principle is the one based around stitching lots of shaped
together rather than functions. Another great
feature is the 3D warehouse where you can download
other peoples creations. It will come in handy if
I wish to add a rendered design to a downloaded
bike. As I am quite experienced in using this, I
would rather learn to use a CAD program which is
based around using functions. But I am very likely
to use this still to help convey the idea of my
project. Again, this write up was very quick and
easy as I didn't have to play around with it
first.
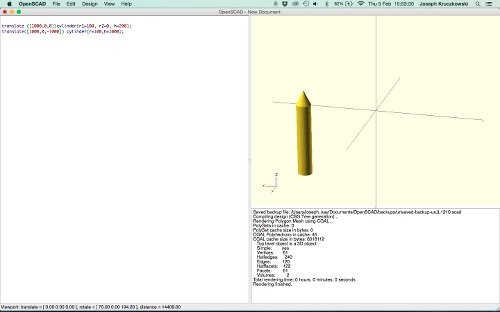
OpenSCAD
OpenSCAD is a big change from SketchUp. You code
your file almost like HTML or css, then have it
rendered by the program. I have spent a short time
looking at it and it will take some practice and getting
used to. The idea is you can make all the shapes
you need by using different forms of cubes,
spheres and cylinders. In the screenshot below, I
made a pencil shape from two cylinders. This
software is great, but I am unsure about how I
could use it to render my final project at this
early stage. Perhaps some more practice with the
program will inspire me. It will certainly come in
useful later on in
the course. I spent close to an hour looking at
this and writing up about it because it was so new
to me.
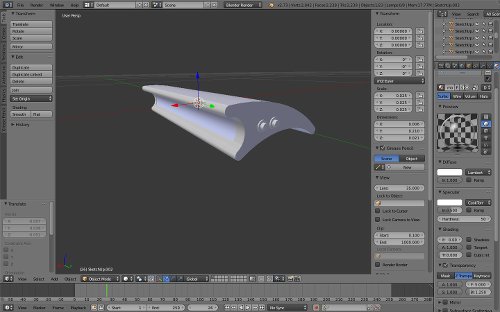
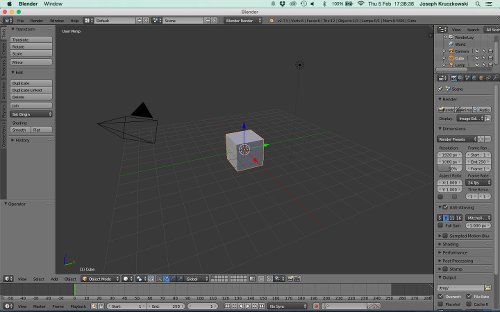
Blender
Blender is ideal for animating a rendered
project. It has lots of controls which will take
time to get used to
but, once mastered, will prove very useful. I will
definitely use it to render the concept of my
project as is very difficult just to render my
project through making 2D and 3D CAD models. Check
out the user interface below.
I still have yet to look at another CAD program
called Antimony. Unfortunately I have had trouble
installing it so will try to do it another time.
It is somewhat similar to OpenSCAD and Blender in
terms of manipulating shapes. But, it cannot
render a design further than its shape. For
example, you cannot change the colour of the
shapes created. I will hopefully do a write up in
tomorrows documentation.
Planning How I Will Render My Project
Now that I have looked at a number of CAD programs,
I now need to decide what programs I will use and
how. Because my project is about a system
involving 3 elements (a Bike Lock, an App and a
Tracking Device), I think it is important to
render the concept of it as well as the hardware
involved. To render the concept, Blender is the
perfect program as it is so expressive. Because
the project is still at the concept phase, trying
to model everything accurately will be difficult.
However, because the main aim of the assignment is
to become familiar with the different programs, I
will model each of these as best as I can.
After some brain storming, I have come up with
the following:
Hand sketch and annotate EVERYTHING before
modelling on the computer. (a personal rule of
mine)
Decide on dimensions for all elements so that the
proportions are correct between
different programs.
The system as a whole will be modeled and animated in
blender.
The animation will be made into a short clip using
kdenlive, another highly recommended program for
video editing.
The app should be modeled
using a combination of Inkscape, GIMP and Blender.
The lock and tracker will be rendered using a
combination of OpenSCAD and Blender.
Present it all in an upcoming entry.
My initial sketches
Here you can see some of my doodling which will
help me to render my project. So far I have
sketched all elements and can now start to render
it in the various programs. The only thing I still
need to sketch out is how I will render my project
in the form of an animation.