2. Project management
This week I worked on defining my final project idea and started to getting used to the documentation process.
This page is about getting used to the documentation process.
Git and Gitlab
Git is a version control system for distributed programming originally programmed by Linus Thorvalds. It was used for Linux operating system source code version control.
I prefer using git based source control systems over Google Drive based systems because I have more experience using git based source control systems. There are Google Drive based version control systems available, but they are not very popular. The fact, that we were asked to use FabAcademy’s Gitlab probably also is a contributing factor for my decision. Git supports multiple users and makes it possible to trace the changes back. With git it is possible for multiple developers to develop separate parts of the program while being able to compile it. It also makes it possible to experience with one’s own options how to solve problems when developing software with other programmers.
The useful and meaningful commit messages help to trace the changes later and have a more complete picture how the development process has proceeded.
I like an option to lock a file so that no-one else can edit it. When used right, this is a very good way for avoiding merge conflicts and force the used of designed apis and interfaces between code parts. In Git you can’t lock a file, but I can live with that. This is a problem when you have multiple people editing the code. In Google Drive based system you would immediately see, when someone else was editing the file. In Git there is no way knowing it. Desipite of its problems, lot of people use Git and this is a good reason to use it in collaborative environments. There are also other options, like subversion which has the file locking option.
GitLab is a single application for implementing a git version control repository. Github server is another common way to host a git repository. Gitlab used for Fab academy is on its own server.
1.1 Setting up the repository
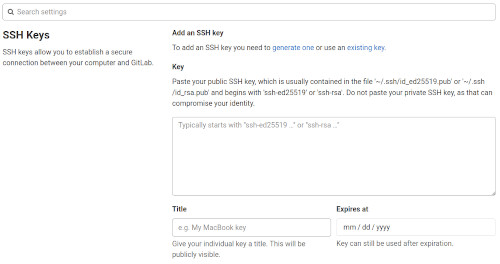
In order to have an access to GitLab I had to generate the keys. I did it by following the instructions and reading the manual page for ssh.
ssh-keygen -t ed25519 -C "fablab"
Ssh-keygen creates private and public key files. They provide secure communication between a client workstation and Gitlab server. In a Linux system the keys are stored under .ssh directory in the user’s home directory. The public key required for encrypting is delivered to the service. The private key required for decrypting is kept safe.
Then I used more command to see the key and pasted the key to the page by first displaying it on screen.
Setting and delivering the key made it possible for me to clone the documentation page from the repository. I set up a directory, moved to the directory and then cloned the repository.
The URL used for fetching the code was found from GitLab page of the repository under Clone menu (Clone with SSH).
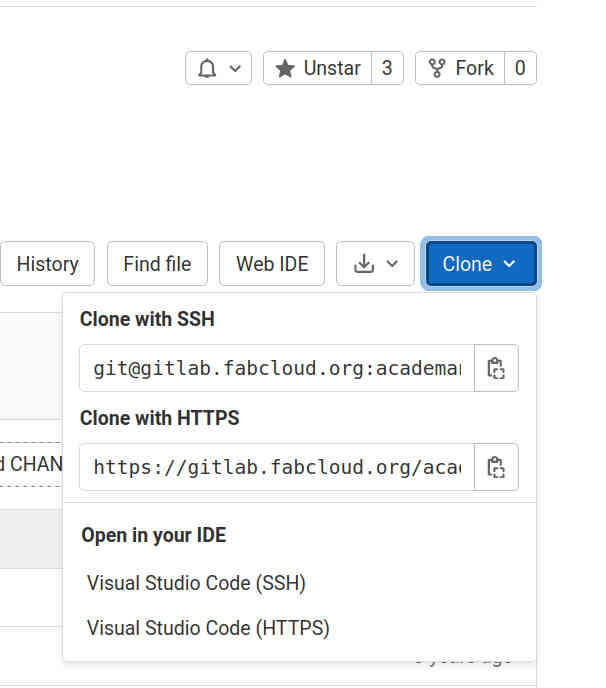 .
.
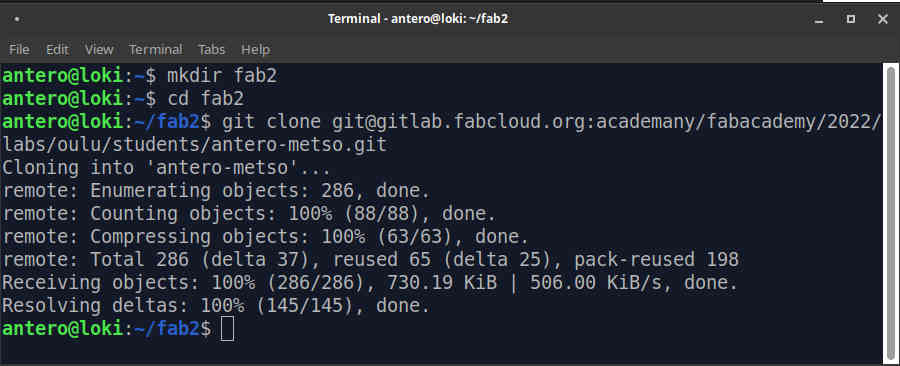
Then I was ready to clone the repository from the GitLab server.
 mkdir fab
 cd fab
 git clone git@gitlab.fabcloud.org:academany/fabacademy/2022/labs/oulu/students/antero-metso.git
I have used git before, so my username and email address were already set. Email is removed from the description manually for spam avoidance reasons.
git config --list

user.email=x.x@x.com
user.name=Antero Metso
core.repositoryformatversion=0
core.filemode=true
core.bare=false
core.logallrefupdates=true
remote.origin.url=git@gitlab.fabcloud.org:academany/fabacademy/2022/labs/oulu/students/antero-metso.git
remote.origin.fetch=+refs/heads/*:refs/remotes/origin/*
branch.master.remote=origin
branch.master.merge=refs/heads/master
1.2 Selecting the tools
I selected the emacs editor for editing the textual documents. I selected gimp as tool for editing images and ffmpeg as a tool for editing video. As a backup I decided to use google drive tools because of the secondary cloud access.
I don’t make selections for CAD tools at this point, but I am aware that I may have to modify my toolset in the future. The selections are based on my familiarity with the tools and because my main OS is Ubuntu Linux. The tools can also be used in Windows 10 (32-bit) on my laptop.
For the editor I installed mkdocs support, “Markdown Mode for Emacs” by Jason Blevins. More information about markdown mode can be found here. The installation itself was done by installing required packages to the system.
 sudo apt-get update
 sudo apt-get install elpa-markdown-mode emacs-goodies-el
After the modifications, the mode was available from the editor. It worked like other comparable modes in Emacs.
The author has published a book about the mode, but there appeared to be an unofficial manual available as well.
1.3 Modifying the repository
I had to configute the site configuration file and add new files to the document tree in order to create the documentation web pages.
Modifying mkdocs.yml
I modified the mkdocs.yml site configuration file just by replacing the theme name by readthedocs as suggested on the lecture as one alternative. I did not read the manuals to see, if some other changes would actually been logical to do, but I am aware I made changes without understanding the full effect of my change and that I may have to modify the file more later. However, the layout itself seems fine for me.
theme:
  name: readthedocs
I also modified the lines requiring my name, removed extra social media sites and added the ResearchGate link and finally ended to these changes for this week.
# Replace the text below to customize your site
site_name: Antero Metso - Fab Academy
site_description: Fab Academy documentation site for Antero Metso
site_author: Antero Metso
copyright: Copyright 2022 Your name - Creative Commons Attribution Non Commercial

site_url: https://fabacademy.org/2022/labs/oulu/students/antero-metso/

extra:
  # Set your own social media below (or remove)
    social:
        # For other social icons at https://squidfunk.github.io/mkdocs-material/setup/adding-social-links/

    - icon: fontawesome/brands/linkedin
      link: "https://www.linkedin.com/in/antsu/"

    - icon: fontawesome/brands/researchgate
      link: "https://www.researchgate.net/profile/Jouni-Metso"

    - icon: fontawesome/brands/twitter
      link: "https://twitter.com/jounime"
Afterwards I noticed that “Your name” was left to the copyright line. I changed it to “Antero Metso” instead. This information is now shown in all my pages.
1.4 Pushing the changes to the version control system
Git appears to be the most common version control system used today in student projects. I recently used Git in GameLab studies.
I created the key for the system as described earlier. Then I delivered the key to repository and managed to clone the repo.
git clone git@gitlab.fabcloud.org:academany/fabacademy/2022/labs/oulu/students/antero-metso.git
Then I made some modification to the files in order to test the git. After making the modifications I checked the changed by using the status command:
git status
Command “git status” is used for displaying the working tree status. According to the Git unix manual page, it displays paths that have differences between the index file and the current commit, paths that have differences between the working tree and the index file, and paths in the working tree that are not tracked or set to be ignored by Git). The first are what you would commit by running git commit; the second and third are what you could commit by running git add before running git commit.
Git commit creates a commit with all the files in the index area in the local repository. I need to use git add in order to add files to a new commit, even if they are created in the working directory. The files won’t go in the commit automatically.
In practice, “git status” tells you if you should “git pull” before pushing and if there are local files or changes available in the working tree to be added to the commit before creating commit and pushing the files to the server. “git add” adds files to the commit. “git rm” can be used to remove the files from the working tree, if they are no longer needed in the code. Commit kind of freezes the current working tree status in the local repository. In practice, this is done to push the edited files covered by the commit to a remote git server. Git push actually does the transfer of information to the server and sets a new stored status point for the project in the remote server containing the filed defined with “git commit” command.
The command returned the branch name (‘origin/master’), list of changes not staged for commmit and list of untracked files. Then I added the modified files to the commit by using git add \<filename with relative path inside commit> and finally created a commit:
git add index.md
git add ../mkdocs.yml
git add images/week01/nok_lores.jpg
git add images/week01/obey_lores.jpg
git add images/week01/obey_lores2.jpg
git add images/week01/warpeace_lores.jpg
git commit -m "First test for week 1 assignment"
After creating the commit I pushed the results to the repository.
git commit -m "First test for week 1 assignment"
git push
The repo and committing to it appeared to work and the web page changed accordingly. I continued by using the same method for the next commits. I used git rm command to remove some unused test files.
I also updated the avatar picture to GitLab, wrote some info about myself, modified my status emoji and set the time zone correctly.
1.5 About me document - about/index.md
My web pages for documenting my FabAcademy progress and results will use Mkdocs. “MkDocs is a fast, simple and downright gorgeous static site generator that’s geared towards building project documentation.” MkDocs generates the web pages automatically from Markdown source files by using a single YAML configuration file for setting up the page.
Mkdocs uses Markdown format in description of the web pages. Markdown is a lightweight markup language for creating formatted text using a plain-text editor. It is designed to be human-readable than for example html with all its tags is. For example, italics can be described by single underscores or asterisks. Markdown is supported in a wide variety of applications, like Discord and Microsoft teams Chat. Markdown has different variants. For example, GitHub uses a superset of standardized Markdown.
mkdocs.yml
There’s a single configuration file named mkdocs.yml in the document directory structure. This document contains site information and some common properties for all the pages. For example, the theme of the page is defined here. The Theme contains general layout, including look and feel desing for the site. There are some predesigned but still configurable layout options available for the site. I chose to use ReadTheDocs theme with default options.
Workflow for designing the web page
The workflow for editing the site consists of editing the documents in my local working tree. Most of the documents were written in MkDocs and edited in Emacs editor. The documents as well as images and other files were then pushed to the site to the Fab Academy GitLab MkDocs server by git commands. The Fab Academy server then automatically converts the MkDocs documents to a working web site. This transform takes some time depending on the workload of the site. The downside of this transformation process is that there is some delay between creation of the site and seeing if the result is intended.
CI/CD
The automatic transformation from source files to working web page can be descirbed as Continuous Integration / Continuous deployment. The configuration file for this process is called .gitlab-ci.yml file at the root of the repository. It defines the CI/CD jobs. “When the source code is pushed to the remote repository, following the instructions defined in .gitlab-ci.yml file, Gitlab executes the mkdocs to generate the HTML code and deploys it in a Web Server.” (explanatory correction recommended by the instructor)

I didn’t use any features requiring new runners implementing additional features for the site, so the default configuration file for the site worked for me.
Creation of the web page
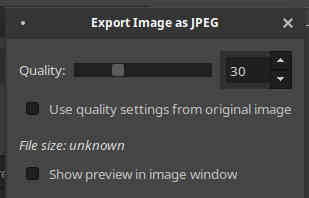
I used emacs as an editor and gimp for image processing for About me - section. I decided to have a separate folder for images (docs/images/about). I wrote a short bio about me as a newspaper delivery person and added some pictures. The pictures were full-sized images. I resized the images and lowered the quality in order to reduce the disk space required and in order to meet GitLab commit limits. I decided that about 500x n pixels resolution with 30% quality settings produce decently sized pictures.
I added some links and some images to the document. Example how to add links:
It is located at [67°40'0
.01" N 24°53'60.00" E](https://latitude.to/map/fi/finland/cities/kittila).
Example how to add images:

1.6 More detailed Git Workflow with screenshots
Here is the desciption of basic workflow in git.
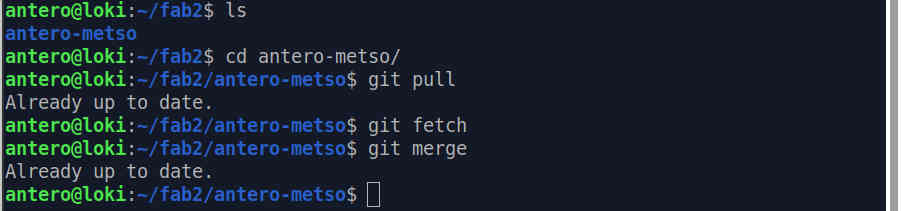
First thing to do when you have a repo is to clone the repo:
 Then every time you start working your repo and you have pushed the repo before, pull it. Someone else might have made changes. Pull fetches the changes and merges them to the source directory.
 If there were changes, you would merge.
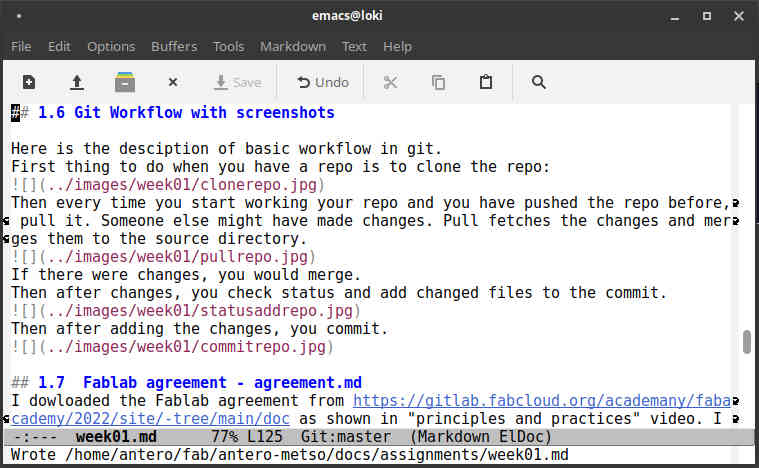
Some changes made and save in emacs editor.
Then after changes, you check status and add changed files to the commit.
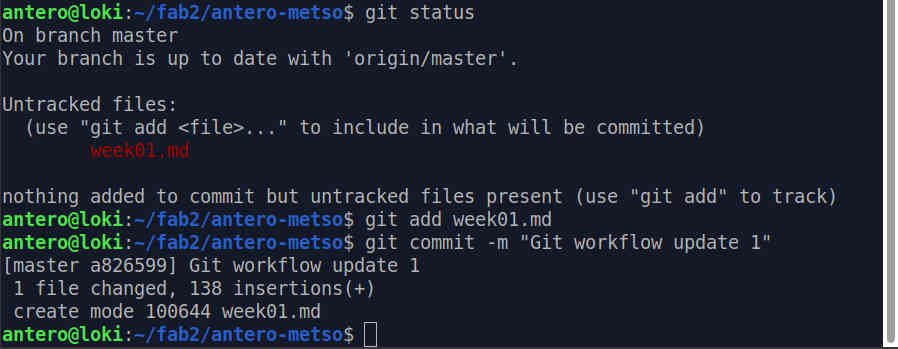 Then after adding the changes, you commit.
Now, I have another, previous clone of the directory. I go there and update its code by doing fetch and merge.
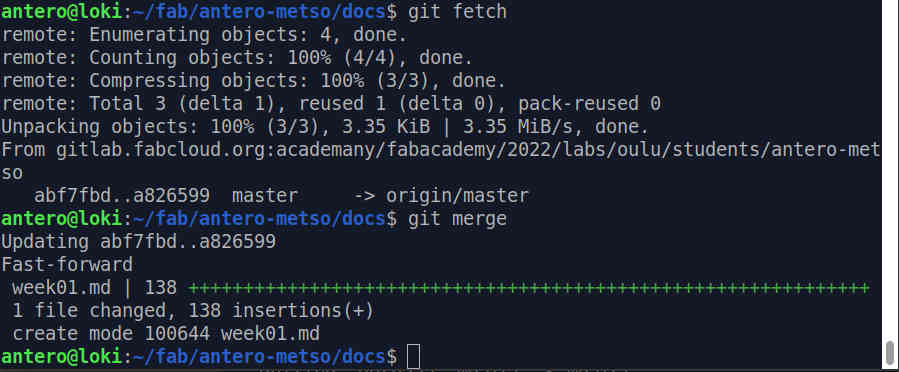 I added some screenshots to this first repo, so I need to see what has changed.
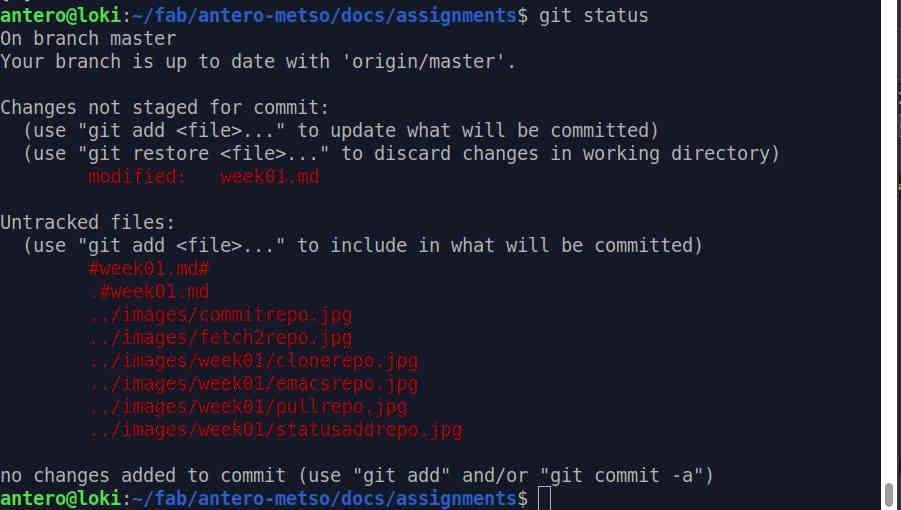 Now I need to add the modified or missing files to the commit.
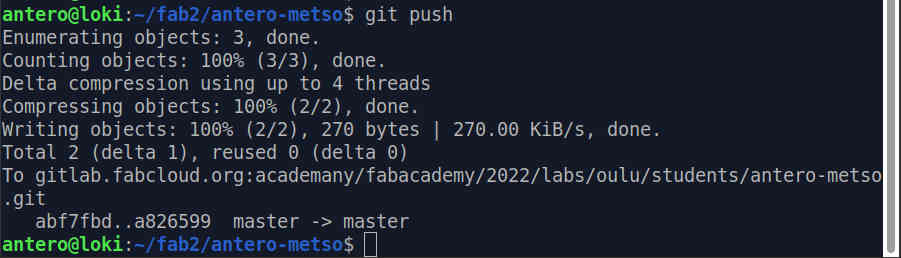
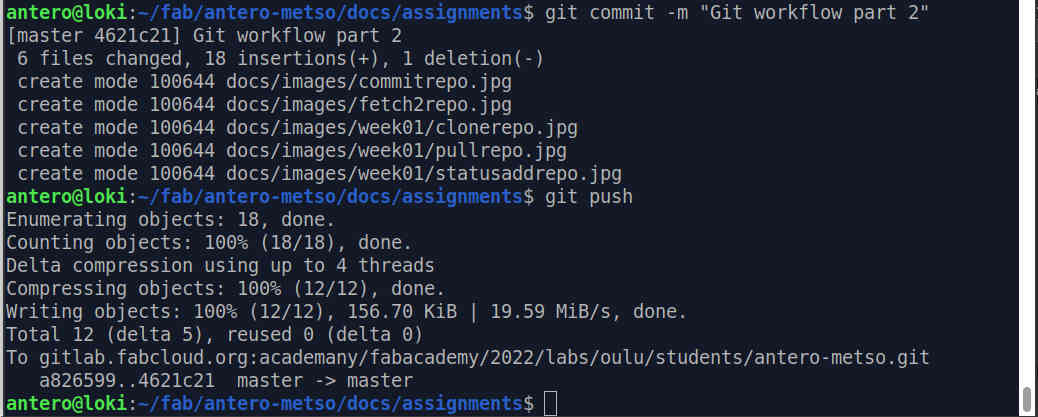
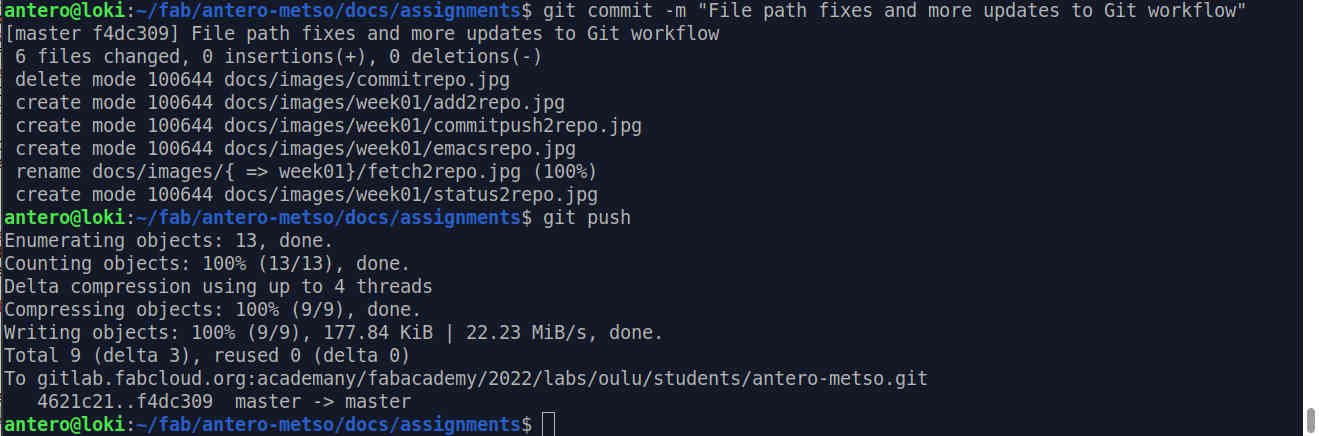
 Then I commit the changes to the repo and push it.
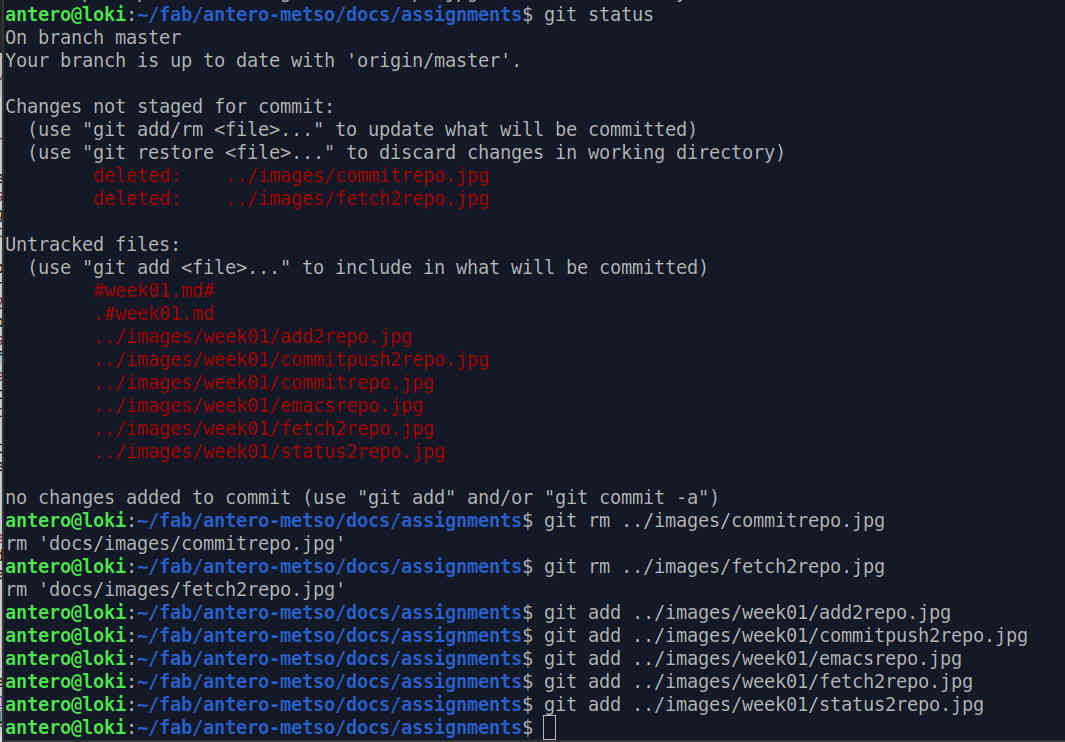
This would be fine now, but I intentionally made a mistake. There are two files in wrong directory, so I need to move the files and remove duplicates from the repo.
Move files:
Get status to see what needs to be done, remove extra files and add new files. Note that I have been documenting the process, so there are new files now to add to the commit.
Then I commit and push.
After that the process continued by adding the last pictures, saving this file and checking if there were errors in the document. Now this document has covered most of the common git commands, including removing files.
Creating and deleting repo are left out in purpose, because errors in doing it could be fatal to the project. It is quite self evident how to do it anyway.
1.7 Fablab agreement - agreement.md
I dowloaded the Fablab agreement from https://gitlab.fabcloud.org/academany/fabacademy/2022/site/-tree/main/doc as shown in “principles and practices” video. I deleted the placeholder document and then renamed student.md to agreement.md and signed it.
2 What did I learn?
First, the final project ideas are discussed in the Final Project document.
Markdown and CI/CD as a concept are kind of new for me, so I learnt that I don’t know a lot about Markdown. I had used git before and I had edited live web pages before, so at this basic level there were not much wow-experiences so far.
In documentation side, marking down everyting I do is hard. Finding solutions to small problems online is automatic for me, so writing anything down as a problem to document is difficult. I am sure there will be enough real problems to document later.
2.1 Problems
The first real problem in Markdown was that the links I added to the document did not work. They didn’t appear blue as they should have and clicking the links did nothing. I made some modifications, like tested adding alt tags for some links. The links began to work, but I am pretty sure nothing I did fixed the problem.