18. Project development
WEEK 18
This week we are developing the Final Project and since I had completed my Table Design and production I decided to work on the actuator itself using the NEMA 17
What tasks have been completed, and what tasks remain?
Utilising the previous weeks I did a lot of the basic designing and testing work as we progressed through the course of 6 months. Using trello.com I kept track of the progress of works…

And this is where I am at the start of the project development week…

I need to finish designing and testing the actuator and for it I will need to design and 3D print a gear reduction pulley that way the NEMA17 will have sufficient torque to lift the table
What’s working? What’s not? What questions need to be resolved?
So far everything is working to our expectation. Now we need to find whether the NEM17 will have enough torque to lift the table using a gear reduction pulley which is my this weeks task to manufacture and test and only then will I be able to find a solution to make it more efficient.
Gear Reduction Pulley
Since the NEMA 17 may not be have enough torque to lift the table I decided to start making the gear reduction pully on Fusion 360
I started by making making the teeth of a gt2 pulley by using these dimensions then by using the circular pattern tool I arrayed it…

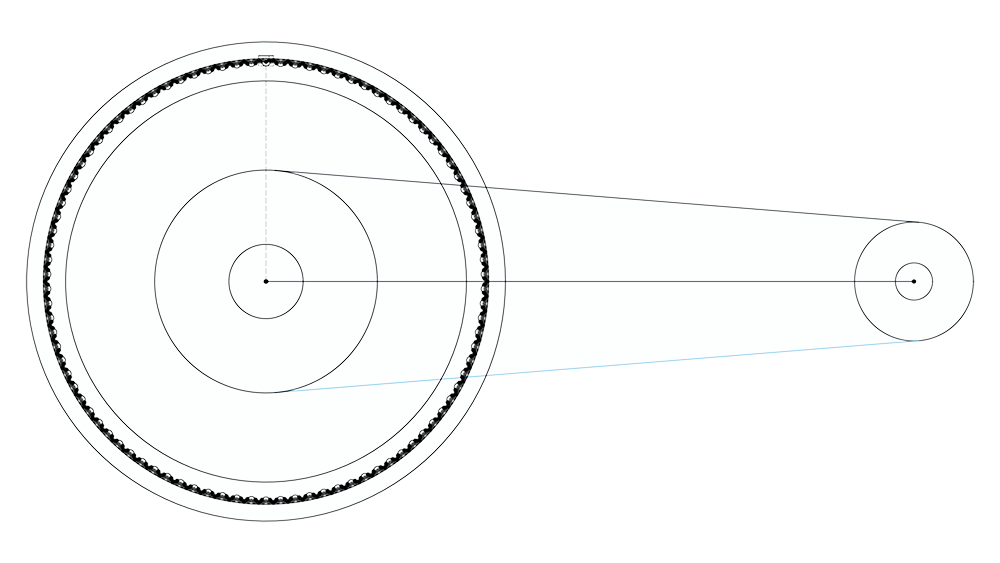

Then using the extrude tool I extruded the pulley…


I also extruded the belt and also the pulley that attaches to the motor just for reference which will be useful for designing later…

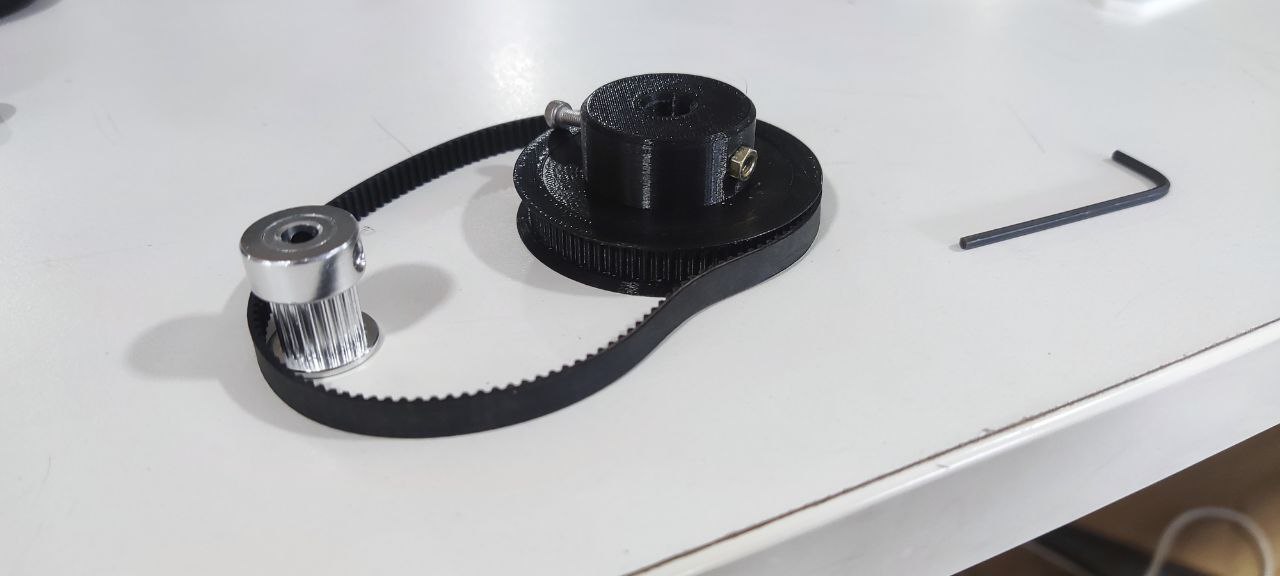
I 3D printed it using the Prusa…

 Post print…
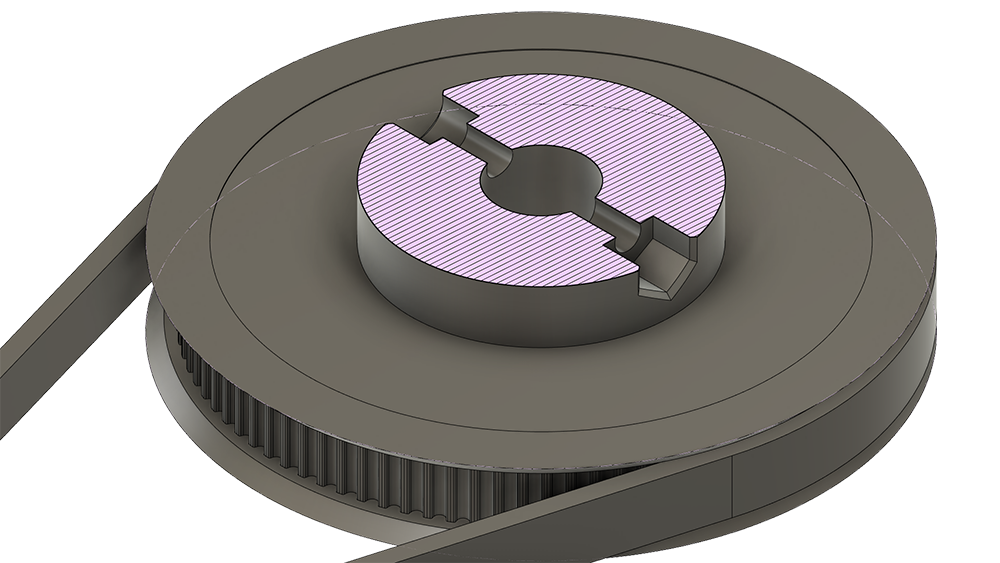
Since there wasn’t a proper way to clamp it onto the threaded rod I came up with an idea. The idea to lock the pulley with the threaded rod was to drill a hole into the rod and placing a nut and bolt through this pulley that way the pulley and threaded rod both dont have any slipping issues under high load…
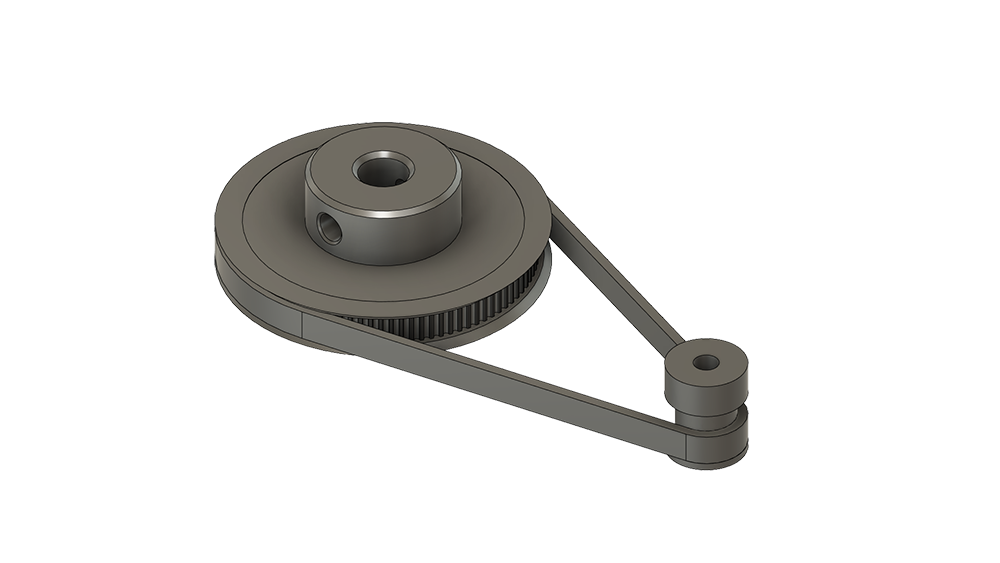 Final Product ready to print…
Then made the assembly…
Actuation Plate
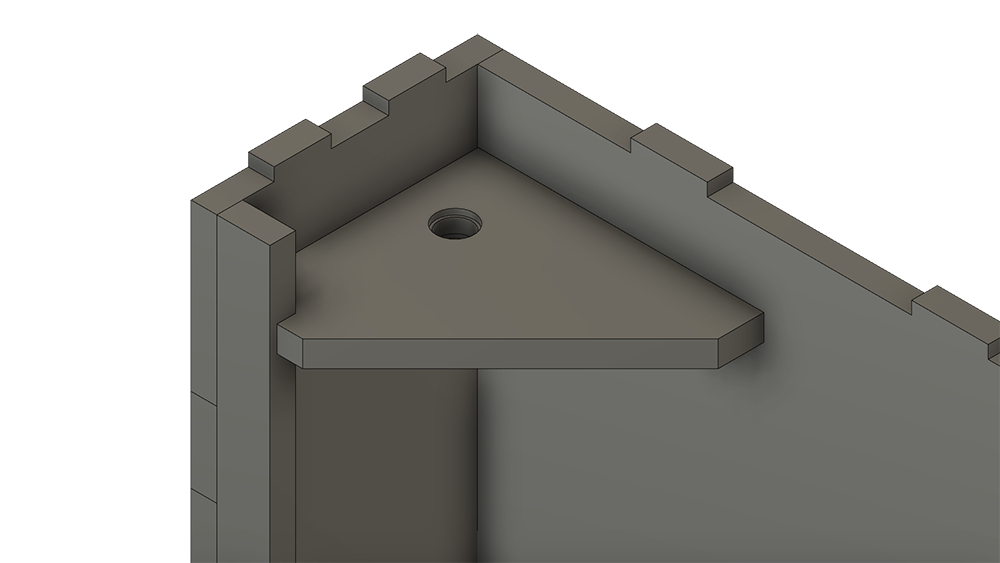
I also started off designing an actuation plate that will be attached to the legs of the table
I started by first adding a sketch of triangular plate that attaches to one leg of the table and also to the back panel of the table I also added a whole to seat the bearings from both above and bottom…

Then I used the derrive tool to add the pulley and placed it…

Next I placed a model of the NEMA 17…

Since the shaft wasn’t long enough I made a pocket to seat the motor and also designed it in such a way we can slide and lock it so that we can controll the tension on the belt…


We cut this actuation plate using the ZUND because we needed to mill both top and bottom and since the ZUND has the option to register feature which we can use to re-align the plate and mill on the bottom side…
Cutting the top side…
Cutting the Bottom side…
In Wildcard Week I have shown how to align the sides of our stock using the register tool in the ZUND
Assembly
Now that our actuation plate is ready we can start assembling the parts
Actuator Assembly
Then this setup was attached to the actuation plate…
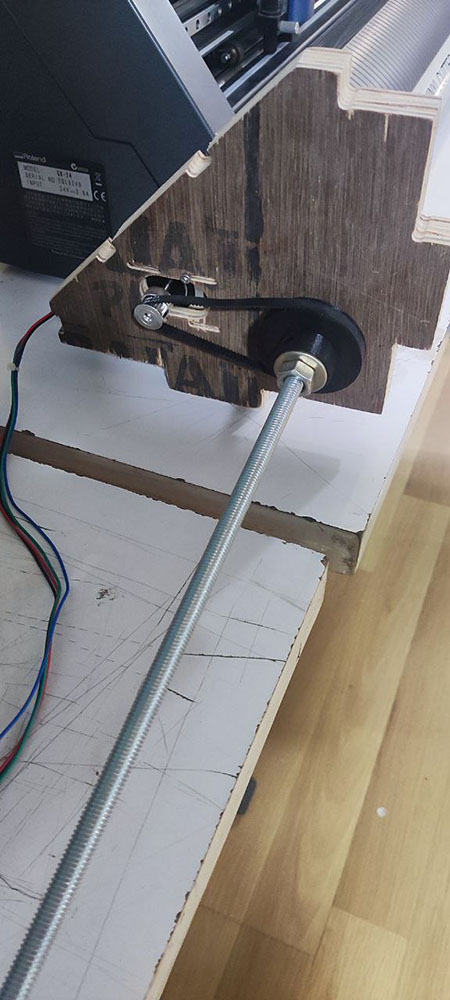
Though the pulley is working fine I decided to increase the number of teeth on the pulley and then we attached it to the final assembly onto the table…

Testing
Since I tested the stepper motor in the Output Week I editted the code to go one direction for a few rotations
Testing the actuator...
I then placed the joystick under the table towards the right side of the table
I have covered how I communicated the joystick with the Stepper motors in Networking and Communication Week
We used the RAMPS board to test it…
Time has been sped up
What have you learned?
-
Though we were able to use the RAMPS board to lift it, and later when we tried to use the board I made it wasn’t working as effectively and hence will rectify this in the next cycle of development
-
We have also learnt that we would need a stepper motor that has got more torque or else we can just use a DC motor and an encoder and then use that assembly for lifting and lowering the table much faster and more effieciently and I will be looking forward to do that in my next cycle
-
I have also decided to change from using a joystick to using a capacitive touch buttons for lifting the table in the next cycle
