15. Wildcard week
WEEK 15
This week’s assignments are:
- To design and produce something with a digital fabrication process (incorporating computer-aided design and manufacturing) not covered in another assignment, documenting the requirements that your assignment meets, and including everything necessary to reproduce it.
ZUND

Using the ZUND I initially wanted to try making a jewellery box which can be cut and folded using cardboard.
Using the sheet metal section I made this design
 Final Design
Once I finished the design for the jewelry box and exported it to “.dxf” now its time to cut.


The ZUND has modular interchangable routing heads
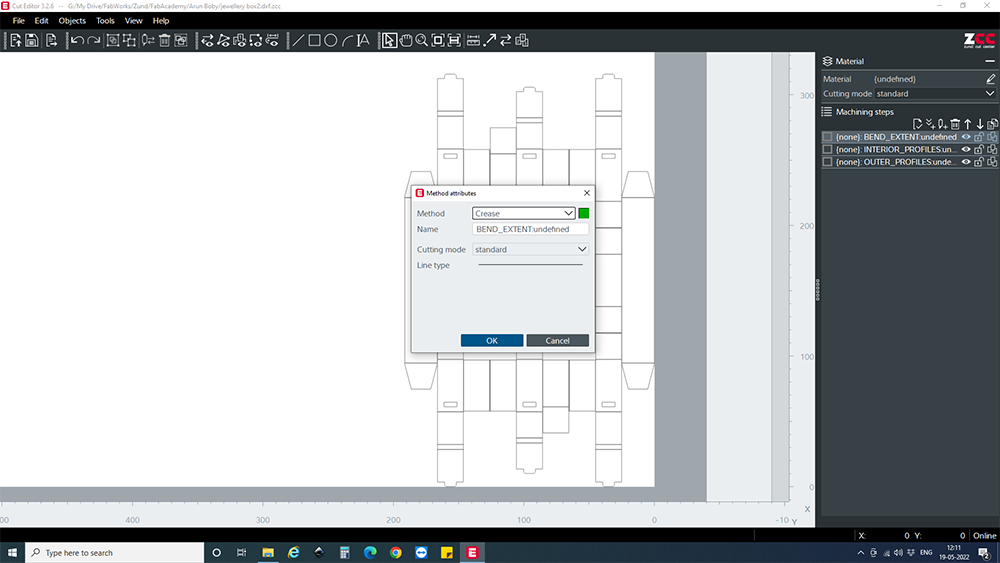
First I imported it into “Cut Editor 3.2.6.”

Now we can select each attribute under “Machining steps” and give it a method such as Score, Crease, Engrave etc., so first we will add creases to the vectors that needs to fold…


Now we can give Thru-cut for the interior vectors…


And finally give Thru-cut for the exterior vectors…


And when you set everything to visible it will look like this

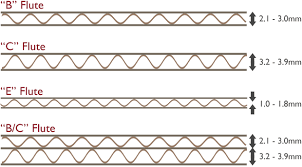
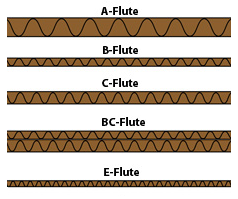
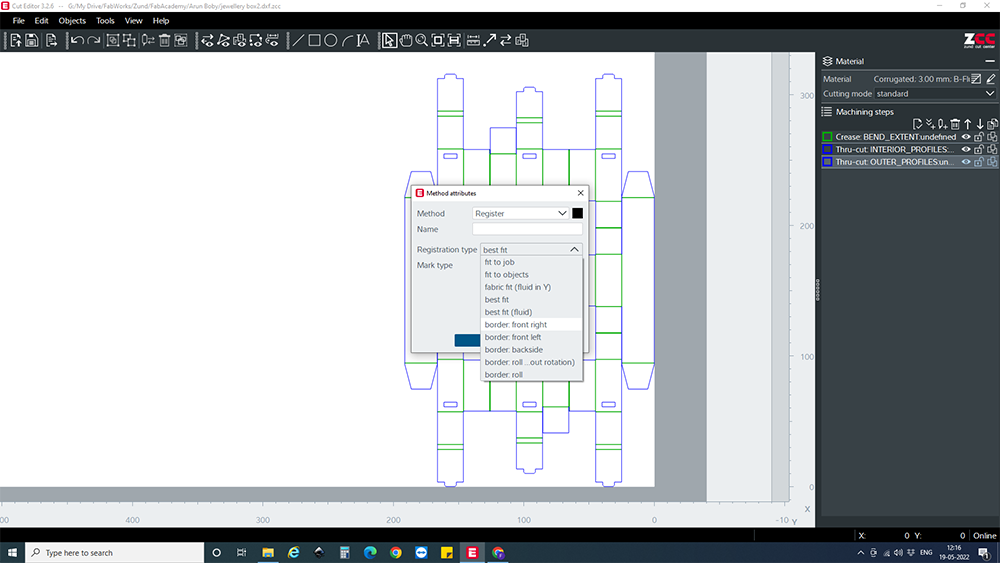
Now we can select and set the material attributes and since we’re using 3mm B-Flute Corrugated CardBoard we can select it…


Now we can set “Cutting mode” to “Standard”…

Now that we have all the required Machining steps we can add an extra step that will find the X and Y edges of the cardboard using its camera module and register it to find its origin point by clicking add new machining step and set it to “Register” and for “Registration type” we can select “border: front right”…

Under “Tools” in the Toolbar we can select “Optimization” to clean up the vectors from overlapping lines and join the vectors…


Using the “Numerical geometry” window we can move our vectors a little be away from the corner so we can get clean cuts throughout the edges


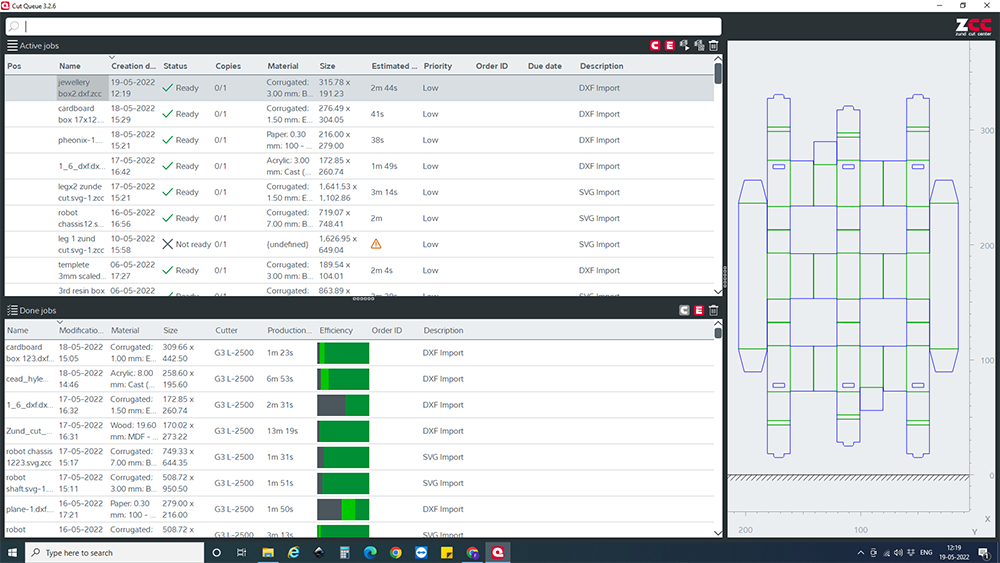
And Finally we can click “Send to server” so that it gets added to the Cutting Queue

By openning the “Cut Queue” we can select our file from the queue and by double-clicking, it opens in the “Cut Center” app where we can give the cutting parameters and send the file into the machine…

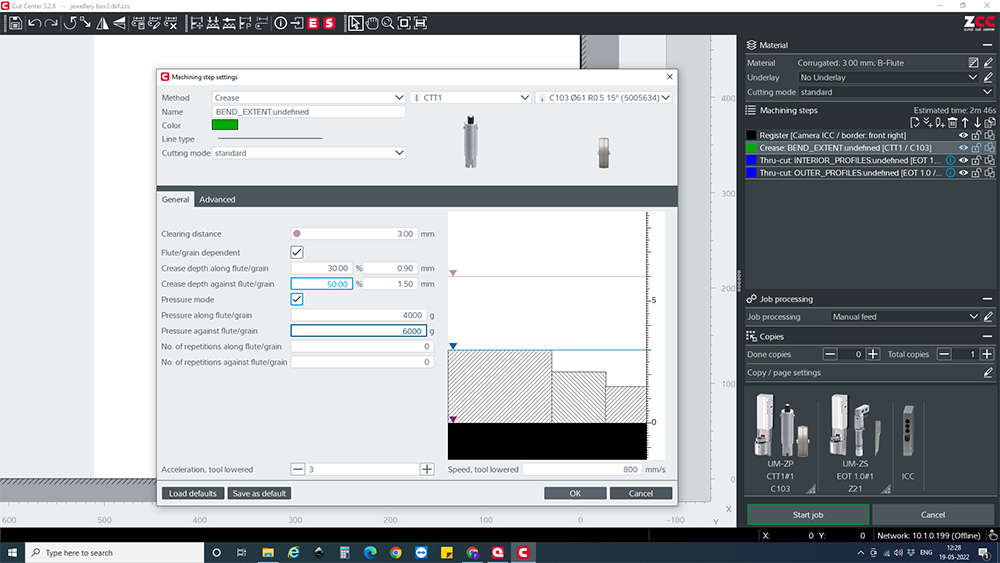
Once it opens in the Cut Center we can select the underlay on the side panel. Since I didnt use the underlay I selected “No Underlay”

By clicking machining step we can we can give it more attributes such as change the feed, speed, pressure, etc.,…


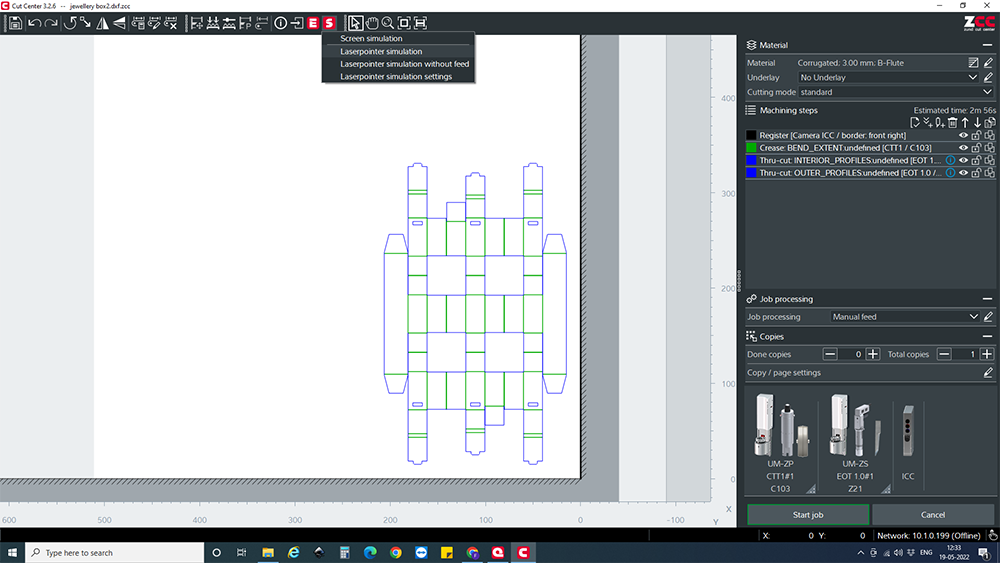
And finally we can click on the Screen simulation which will make the machine run the file but using the laserpointer…

To set it to “Online Mode” we must press the button on the Panel on the machine…
Also a good time to load the sheet…

Since we have added the Register machining step we need not align the sheet exactly parallel to the machine
Now we can run the simulation…
Now when we run the machine will run the Register step to find the edges as so…


And finally we can hit “Start Job”
Once its done we can remove it from the the bed and start folding…


Not the best after folding it into shape and a lot of debugging is needed till its a perfect product