14. Interface and application programming
WEEK 14
This week’s assignments are:
- To write an application that interfaces a user with an input &/or output device that you made
- To compare as many tool options as possible(Group Assignment added HERE)
NetBeans IDE

Netbeans IDE is a developement environment that uses Java which I was a little familiar with from backk in the school days(almost 9 years back). So I just wanted to brush up my old skills by using NetBeans once again and also have the advantage of being familiar with the environment
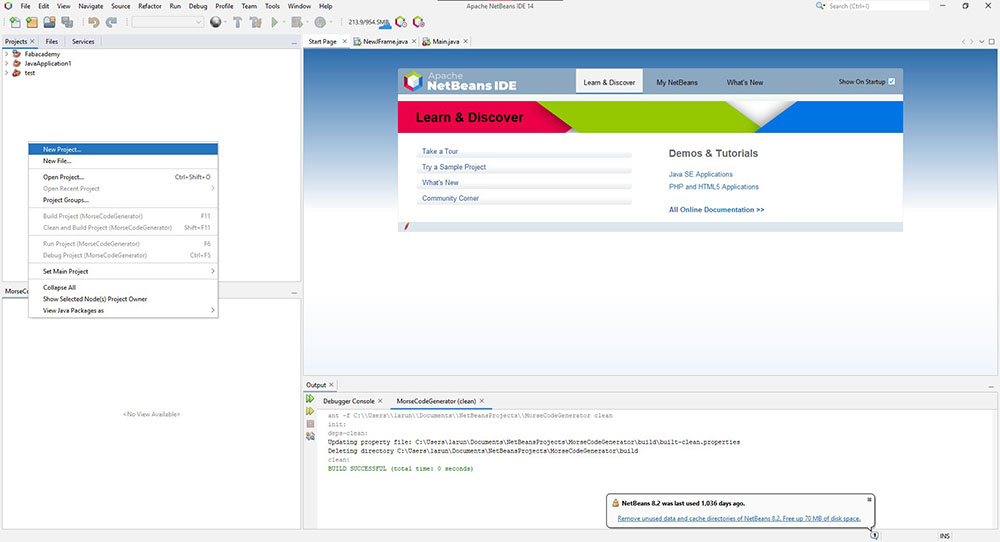
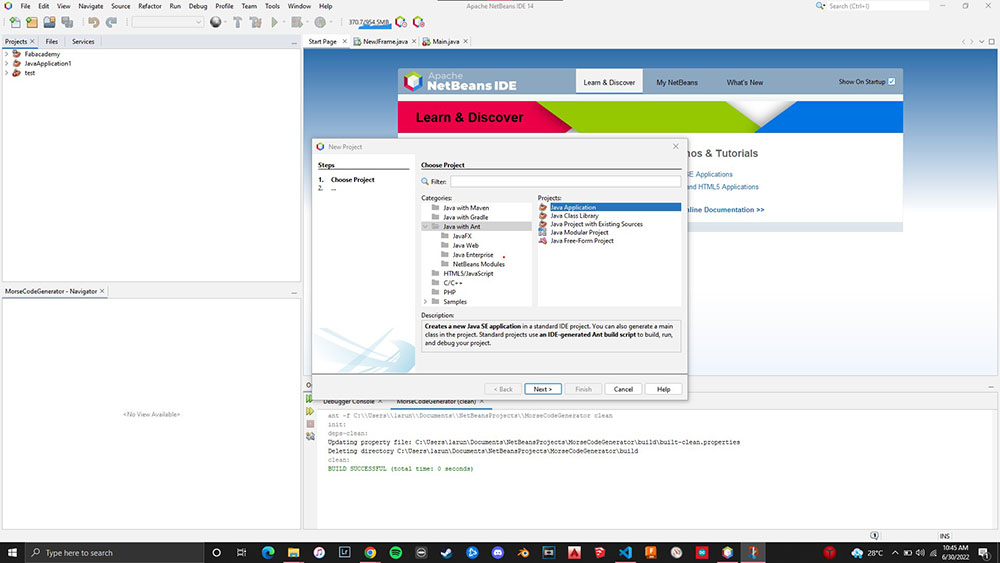
So I started by creating a new java application (Java with Ant) project

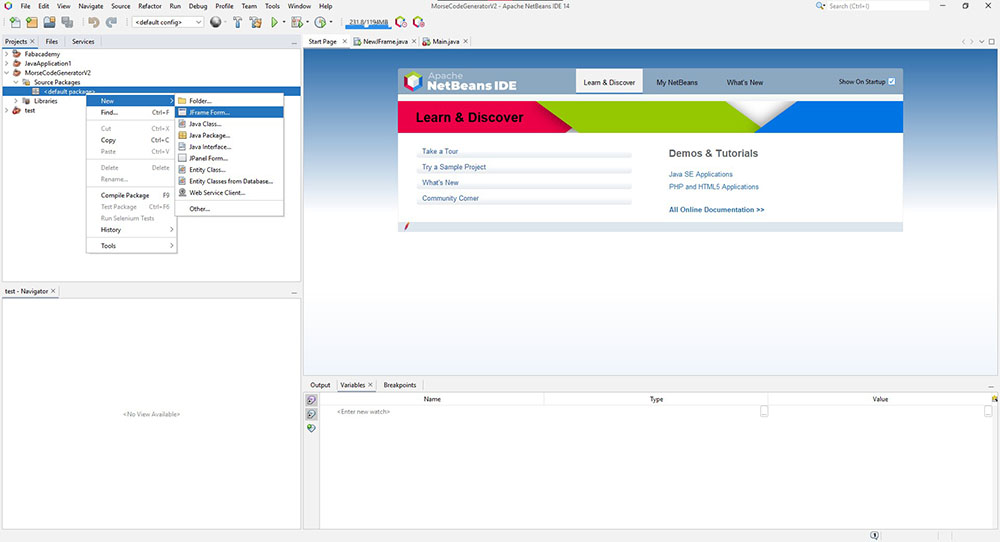
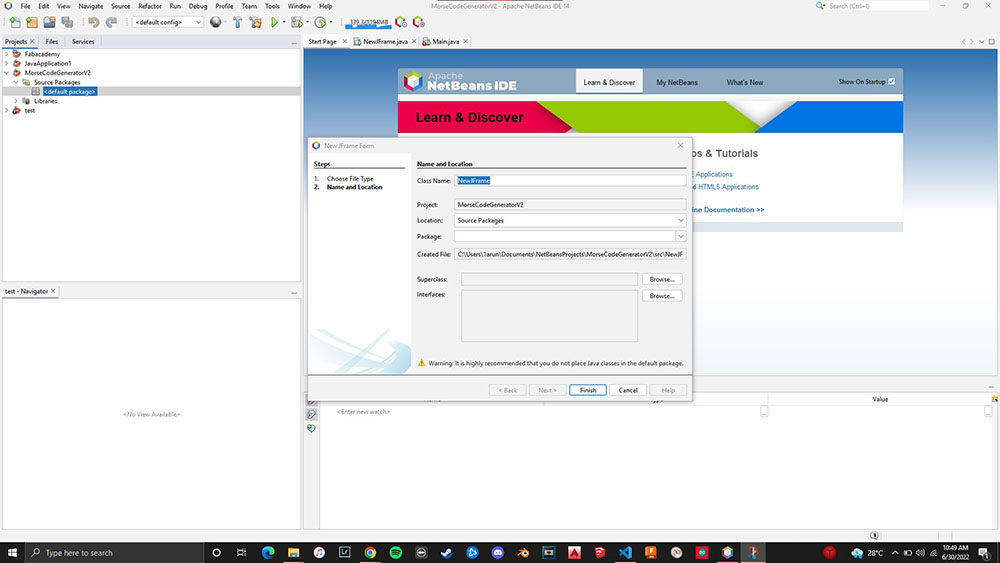
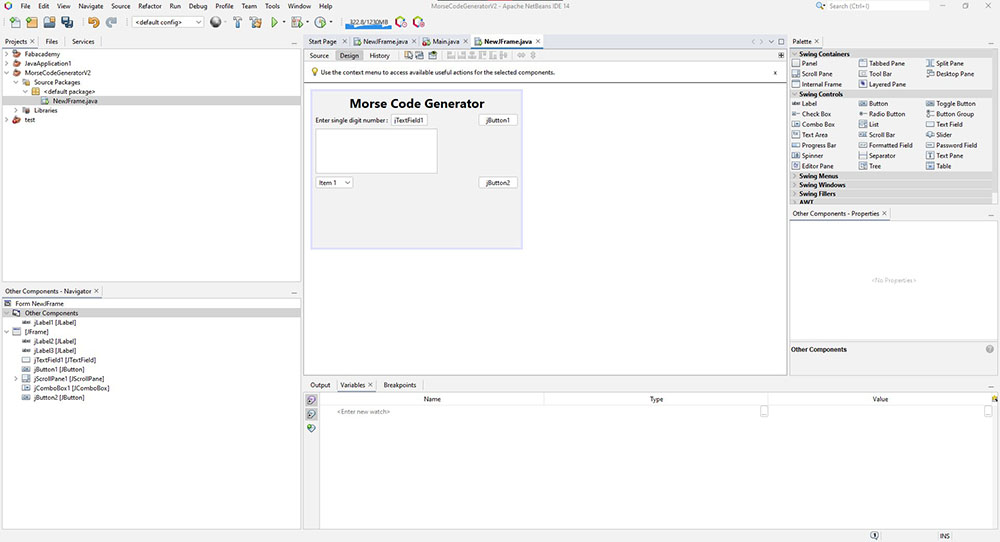
Then I created a JFrame Form…
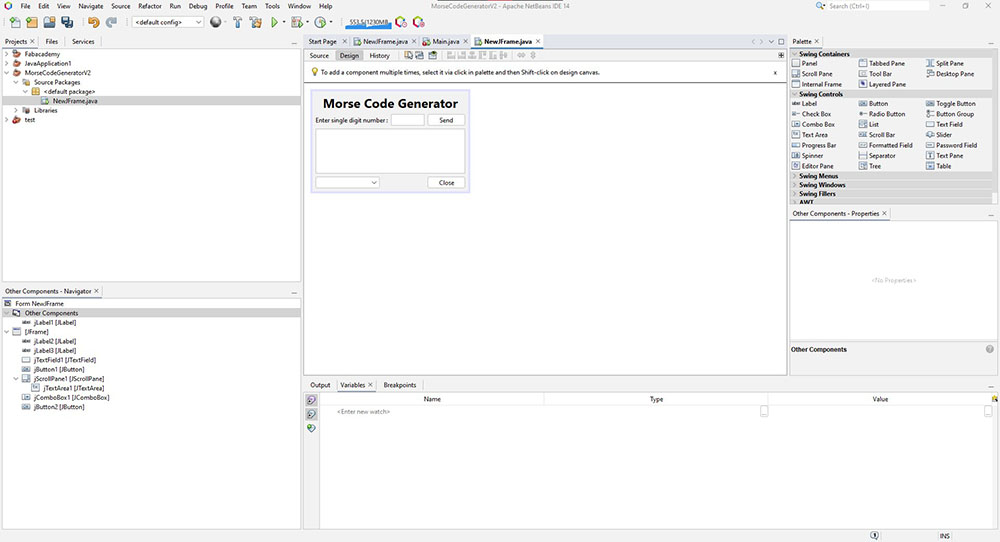
Now I dragged and dropped all the necessary textfields, textareas, buttons, etc., from the Palette on the right hand side and cleared the text from the text fields and named the buttons and also reshaped the Window…
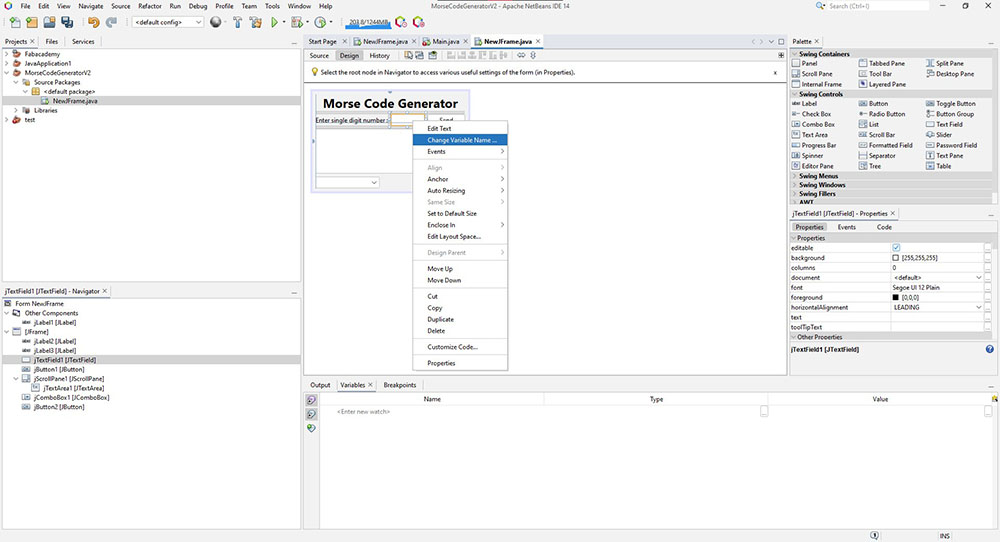
By right-clicking on each component we can rename its variable name so its easier to find them while writing the code…
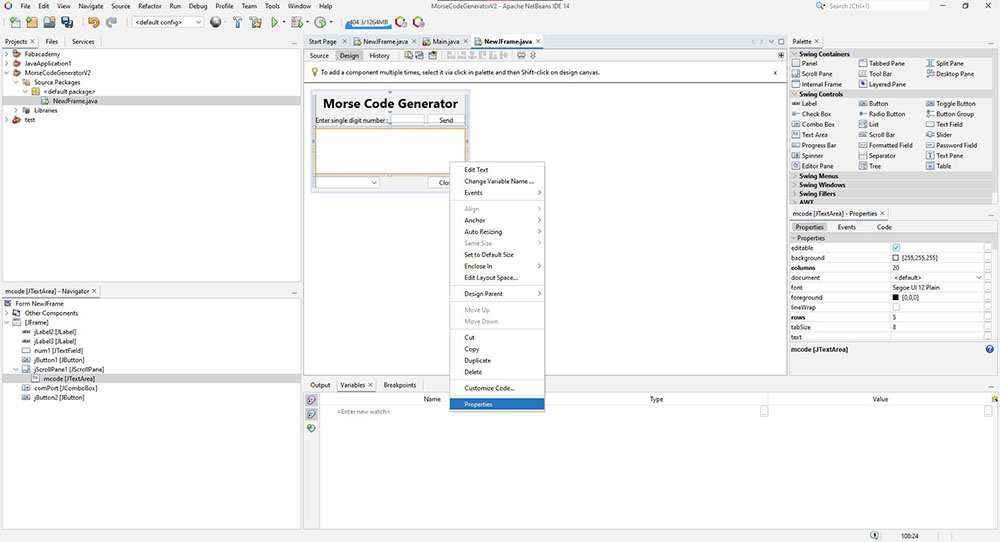
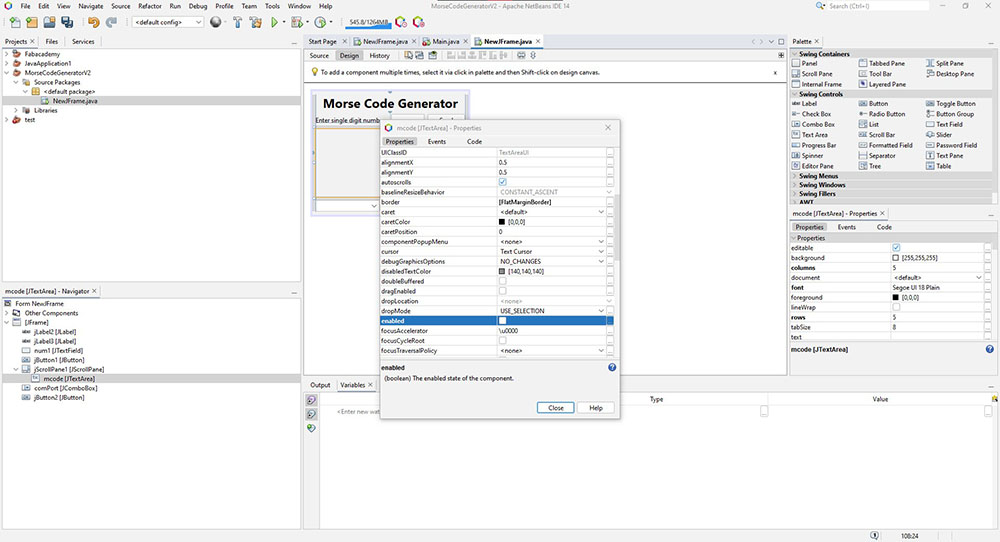
Since we dont want the user to be able to edit the Text Area we can go to its properties and uncheck the “enabled” checkbox…
Now lets get to the coding part. Since the easiest code is for closing the window I wrote the code for the “Close” button first…
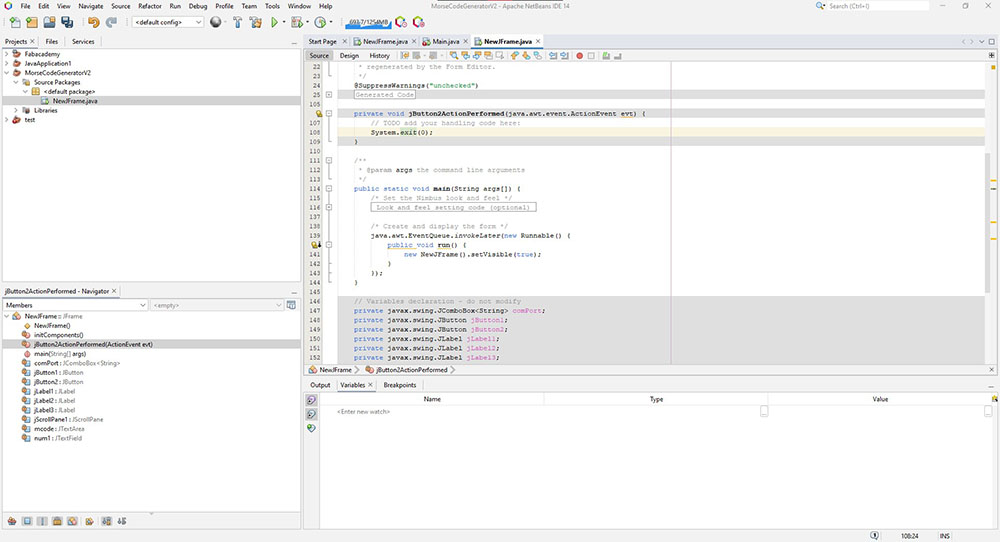
System.exit(0);
To go to the source code we can right-click on “Close” button and selecting “actionPerformed[jButton2ActionPerformed]” in “Events”>”Action” or by simply by double-clicking the “Close” button
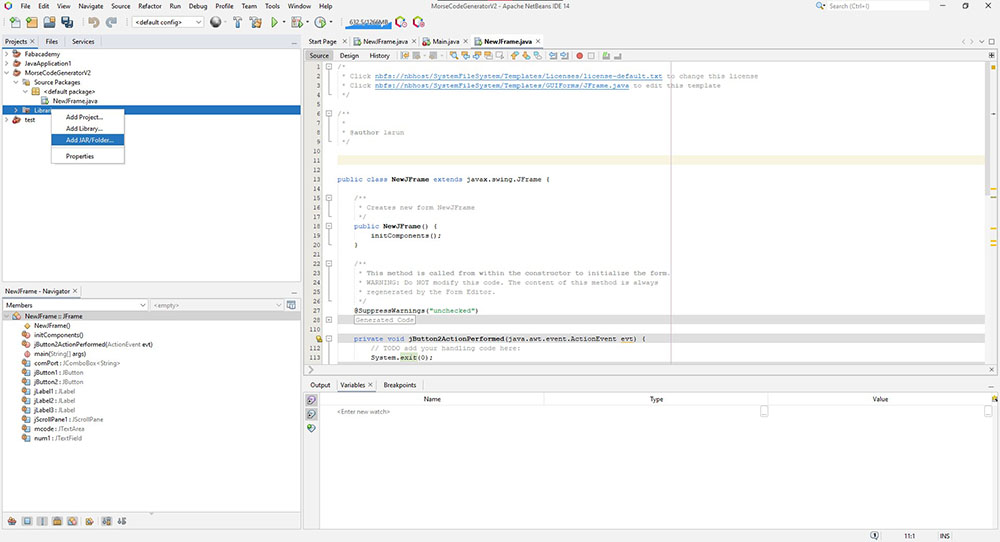
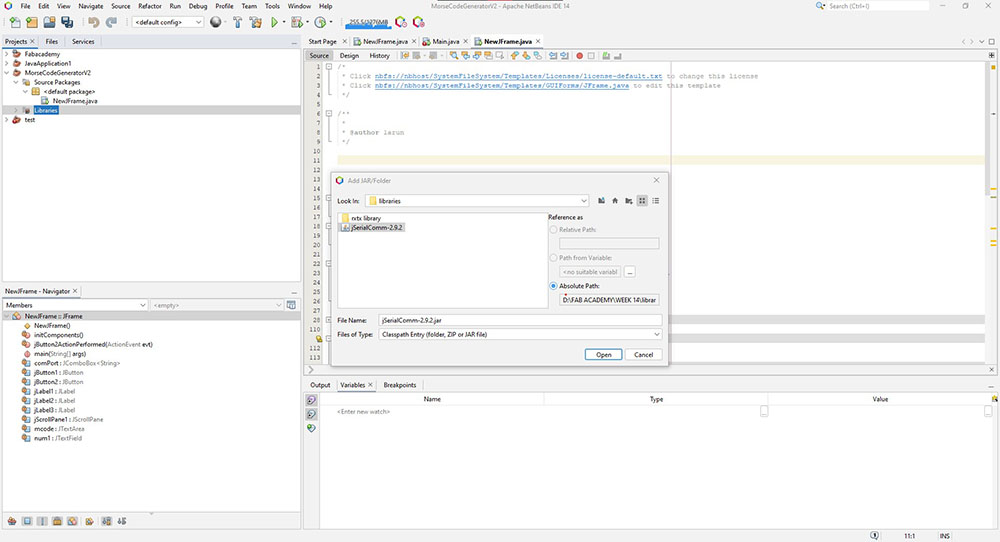
Now since we need to make this communicate using serial communication we have to download the jSerialComm library and then add it to our project lirary by right-clicking “Libraries”>”Add JAR/Folder…” and then we can select the downloaded “.JAR” file…
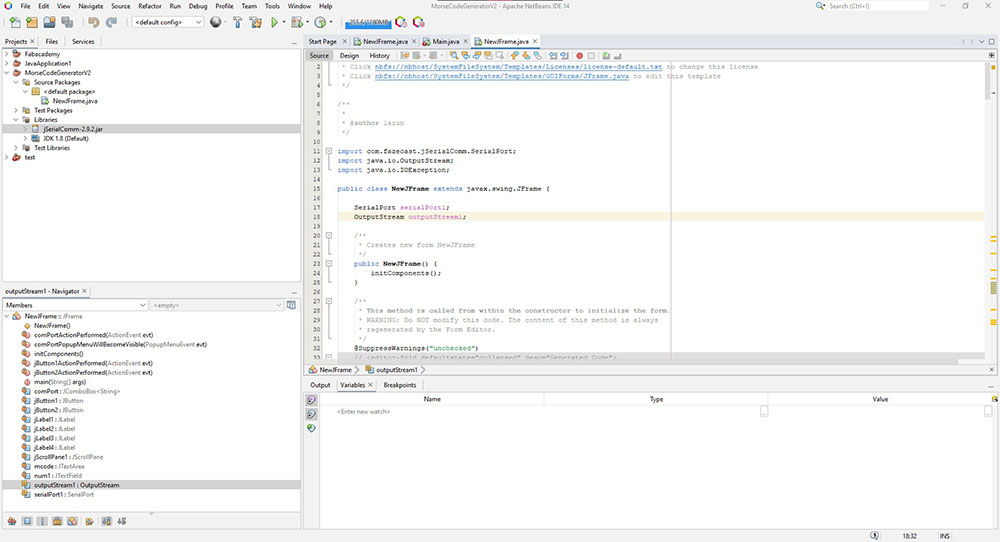
Now that we have added the library in our project we must initialise it in our source code…

import com.fazecast.jSerialComm.SerialPort;
Now we need to add the COM PORTS to the ComboBox so that the user can select the appropriate COM PORT, to do so we go to its properties and select our combobox(“comPortPopupMenuWillBecomeVisible”) beside “popupMenuWillBecomeVisible” in the “Events” tab…

Then I added the following code that clears all the items in the combobox then checks for the COM PORTS and adds them into the combobox one by one…
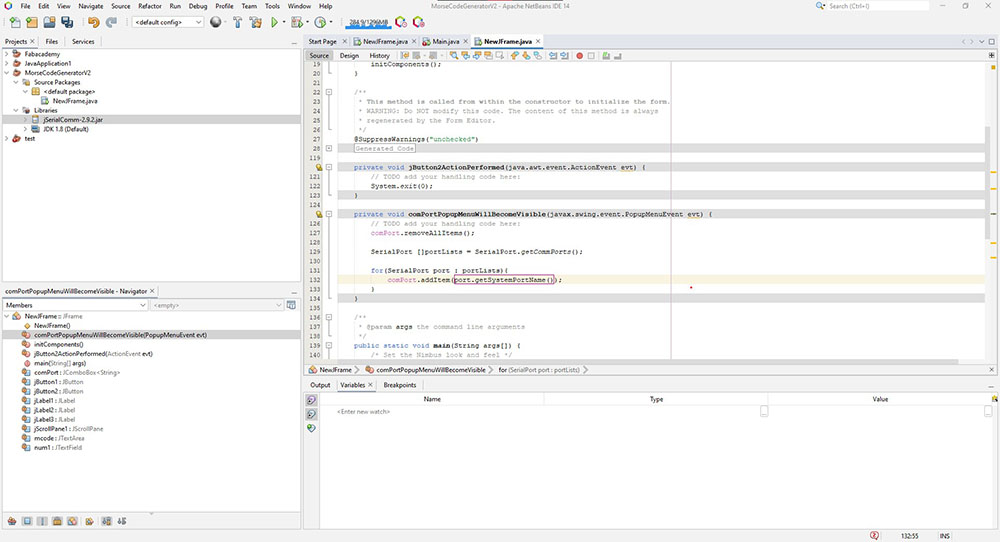
comPort.removeAllItems();

SerialPort []portLists = SerialPort.getCommPorts();

for(SerialPort port : portLists){
    comPort.addItem(port.getSystemPortName());
    }
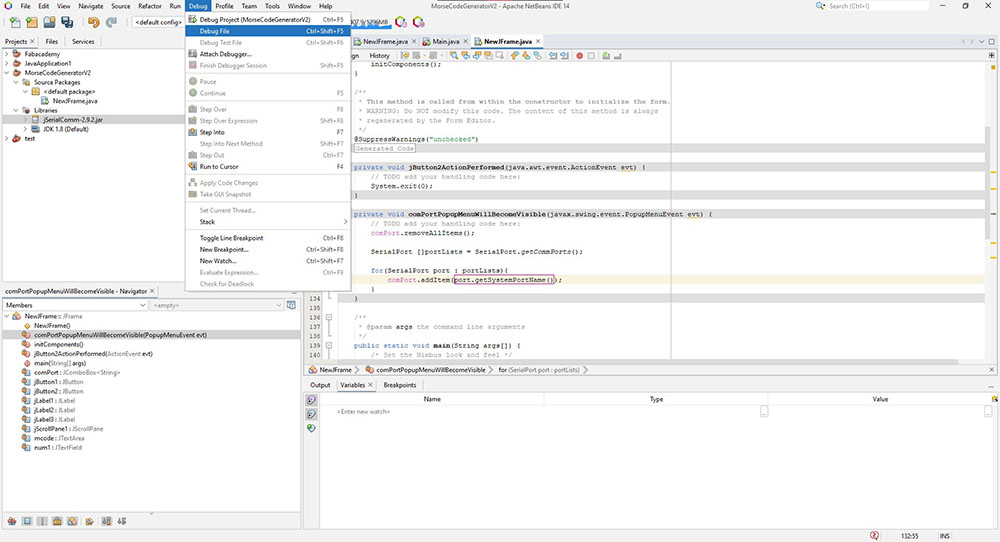
Now lets try Debugging the file to see if it is adding the COM PORTS…
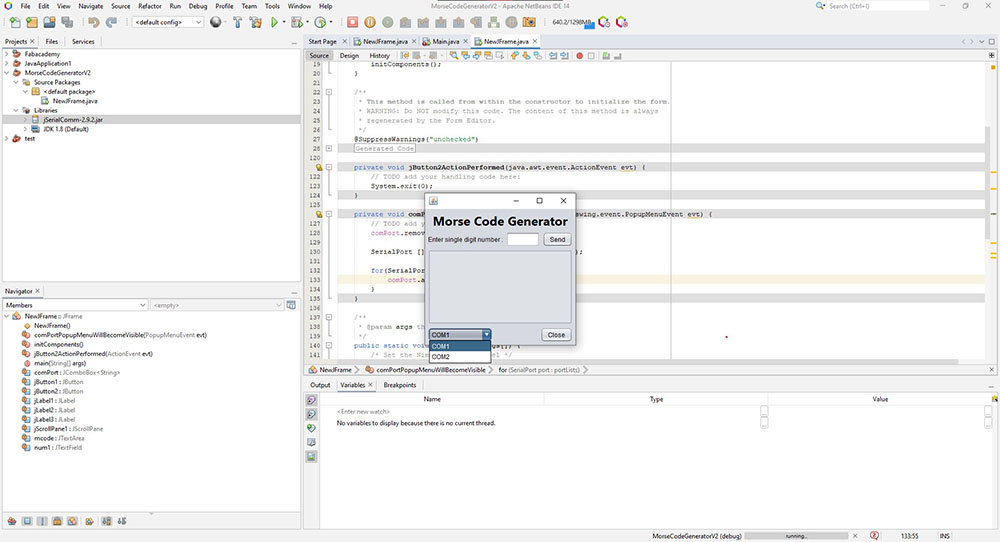 We can see that the COM PORTS are getting added
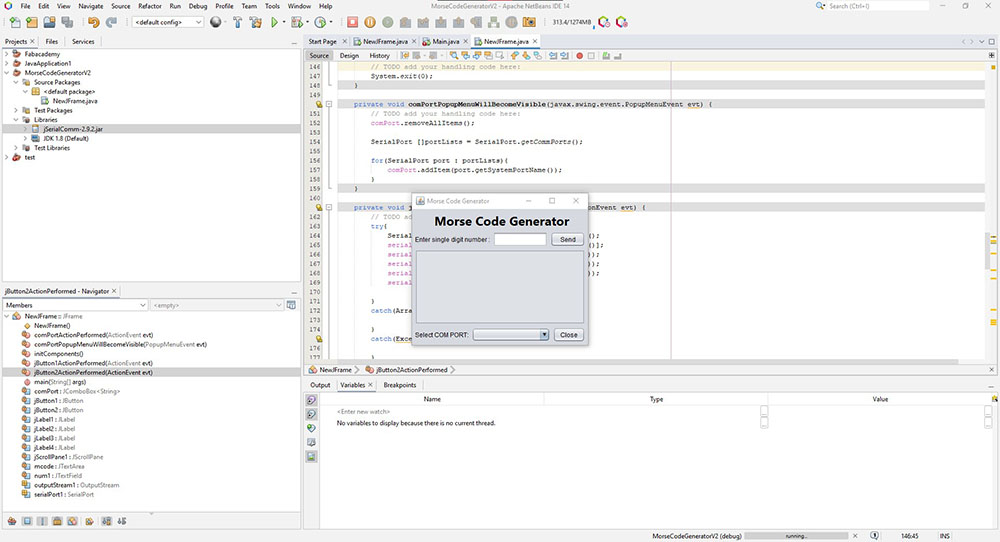
I also added a label so that a user can see where to click…
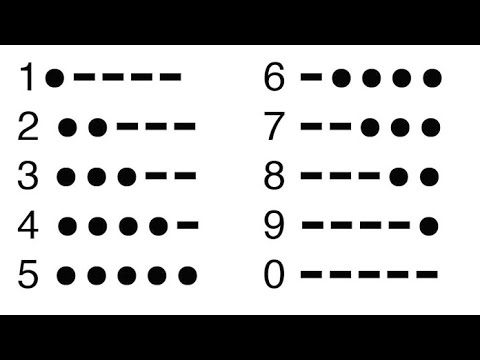
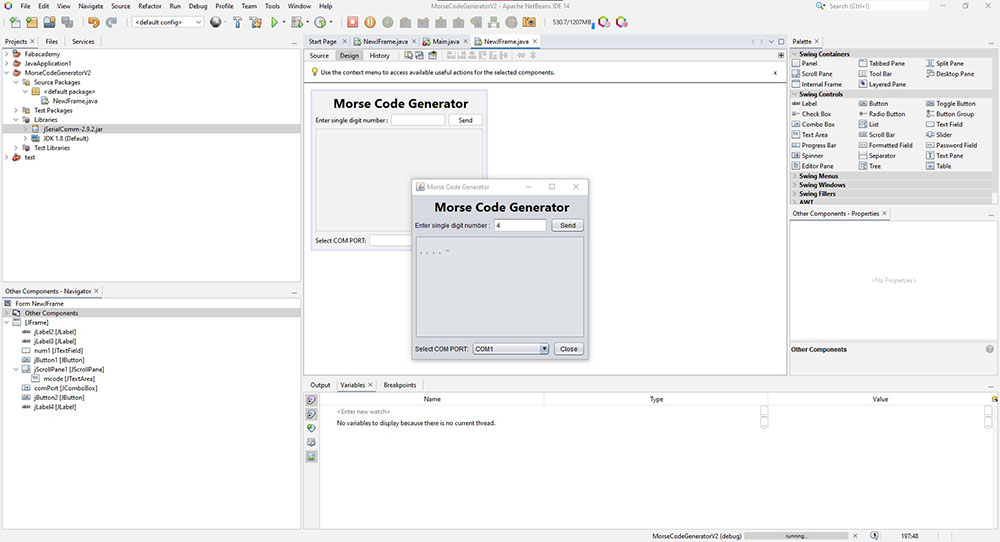
Now to write the main code which returns in dot and dashes when we input a number…
int userInput = Integer.parseInt(num1.getText());

switch (userInput){
    case 0 : mcode.setText("- - - - -");break;
    case 1 : mcode.setText(". - - - -");break;
    case 2 : mcode.setText(". . - - -");break;
    case 3 : mcode.setText(". . . - -");break;
    case 4 : mcode.setText(". . . . -");break;
    case 5 : mcode.setText(". . . . .");break;
    case 6 : mcode.setText("- . . . .");break;
    case 7 : mcode.setText("- - . . .");break;
    case 8 : mcode.setText("- - - . .");break;
    case 9 : mcode.setText("- - - - .");break;
    default: mcode.setText("Enter single Digit Number");break;
        }
And it returns the code…
Now we must add a code such that it sends these character to the serial monitor
Firstly we import the output stream…
import java.io.OutputStream;
import java.io.IOException;
We must also initialise the Serial port and output stream…
SerialPort serialPort1;
OutputStream outputStream1;
I then used the following code to be able to send the characters through serial monitor…
private void jButton1ActionPerformed(java.awt.event.ActionEvent evt) {
    // TODO add your handling code here:
    try{
        SerialPort []portLists = SerialPort.getCommPorts();
        serialPort1 = portLists[comPort.getSelectedIndex()];
        serialPort1.setBaudRate(Integer.parseInt(9600+""));
        serialPort1.setNumDataBits(Integer.parseInt(8+""));
        serialPort1.setNumStopBits(Integer.parseInt(1+""));
        serialPort1.openPort();
    }
    catch(ArrayIndexOutOfBoundsException a){

    }
    catch(Exception b){

    }

    outputStream1 = serialPort1.getOutputStream();
    String dataToSend = "";

    int userInput = Integer.parseInt(num1.getText());

    switch (userInput){
        case 0 : mcode.setText("- - - - -");break;
        case 1 : mcode.setText(". - - - -");break;
        case 2 : mcode.setText(". . - - -");break;
        case 3 : mcode.setText(". . . - -");break;
        case 4 : mcode.setText(". . . . -");break;
        case 5 : mcode.setText(". . . . .");break;
        case 6 : mcode.setText("- . . . .");break;
        case 7 : mcode.setText("- - . . .");break;
        case 8 : mcode.setText("- - - . .");break;
        case 9 : mcode.setText("- - - - .");break;
        default: mcode.setText("Enter single Digit Number");break;
    }
    dataToSend = mcode.getText();

    try{
        outputStream1.write(dataToSend.getBytes());
    }
    catch(IOException e){

    }
    serialPort1.closePort();
}
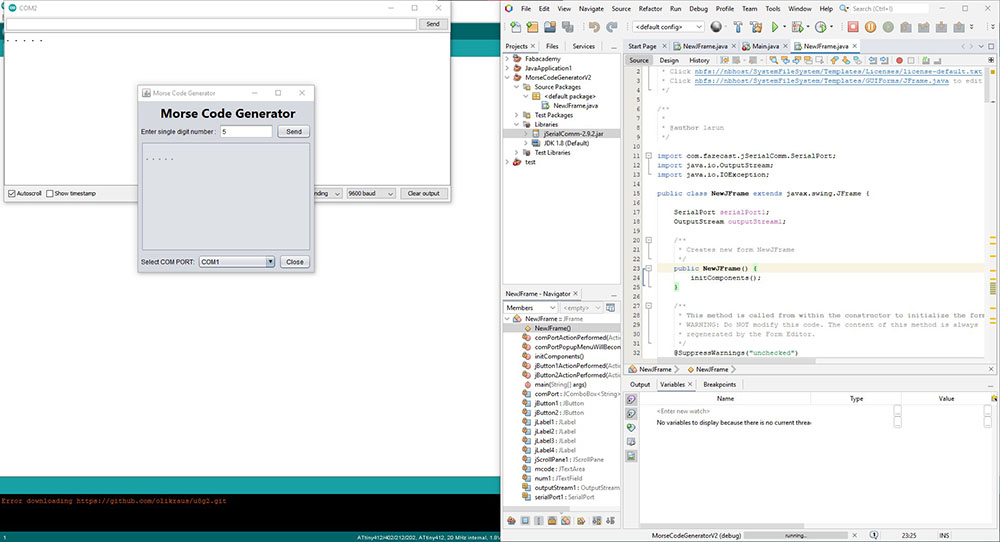
Now to write a code for receiving the characters to our board…
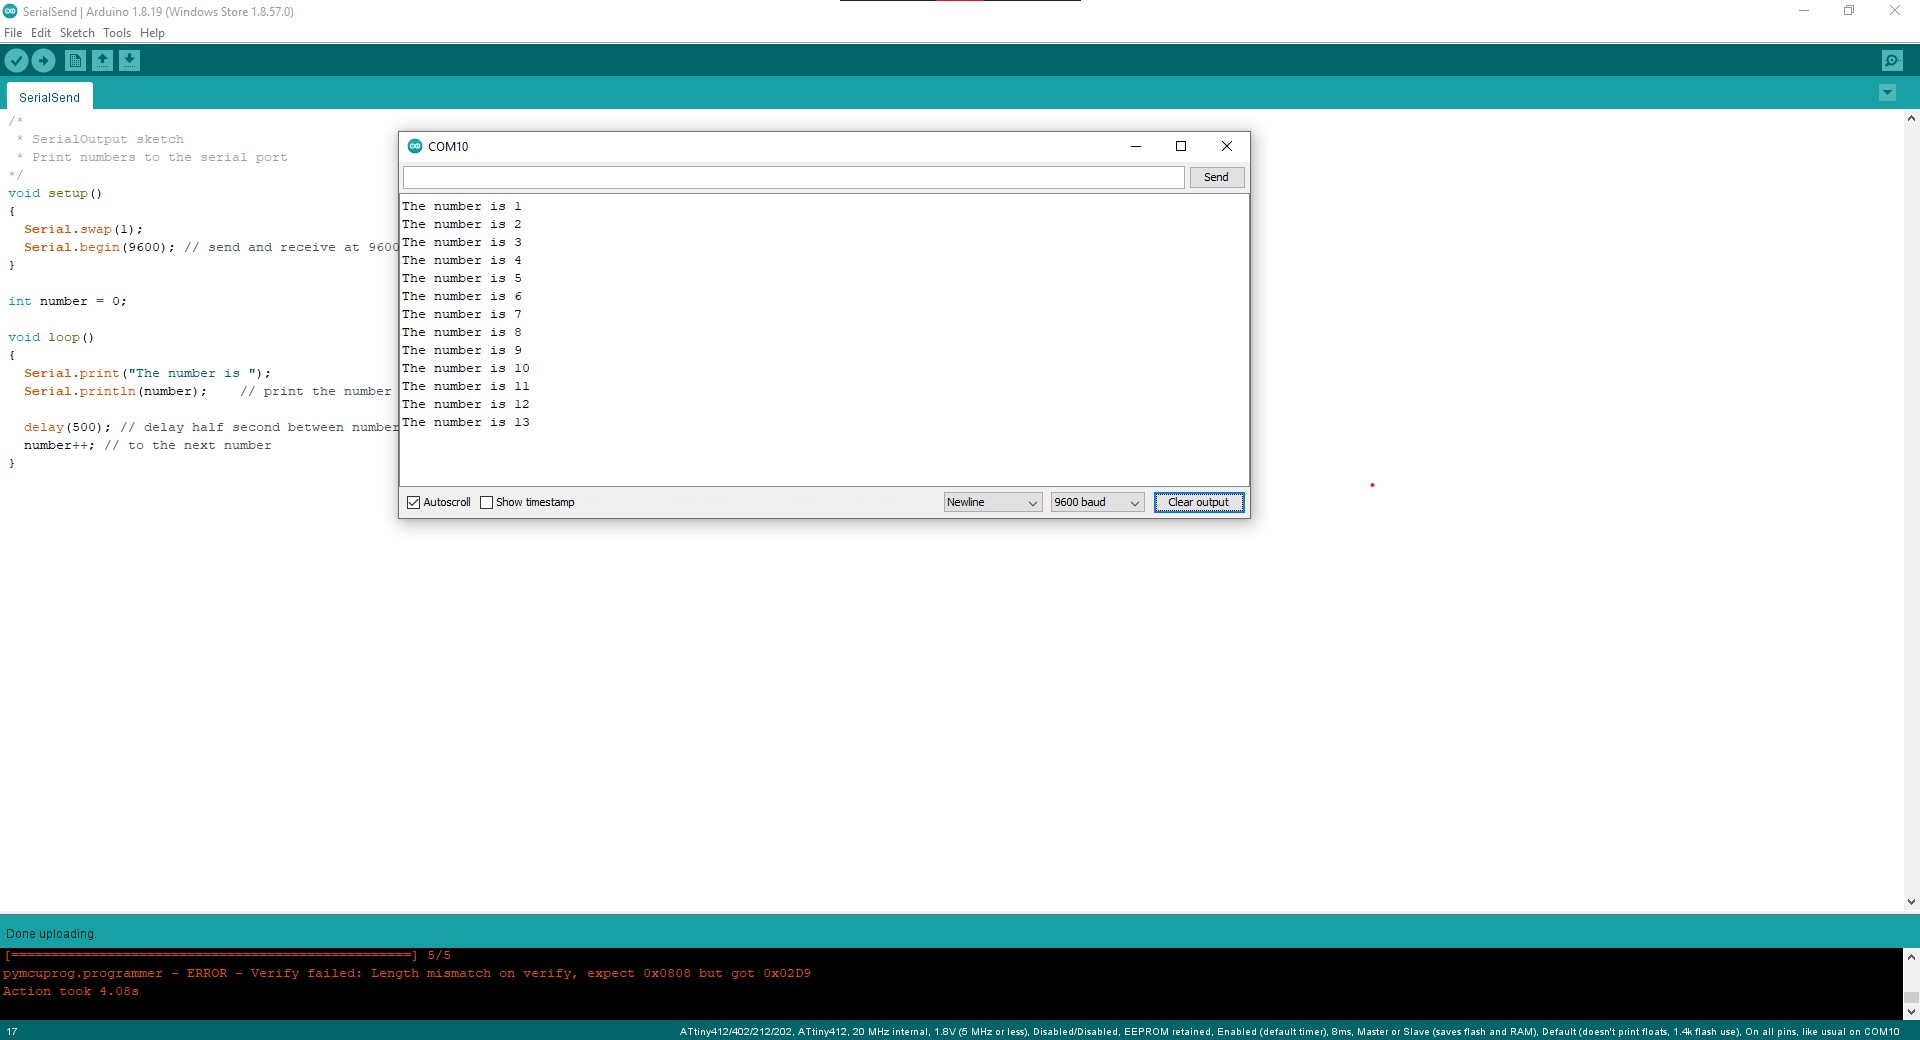
So to start with serial communication I started with a simple code I followed HERE
Code for Sending
/*
 * SerialOutput sketch
 * Print numbers to the serial port
*/
void setup()
{
  Serial.swap(1);
  Serial.begin(9600); // send and receive at 9600 baud
}

int number = 0;

void loop()
{
  Serial.print("The number is ");
  Serial.println(number);    // print the number

  delay(500); // delay half second between numbers
  number++; // to the next number
}
Next I tested a code for Receiving
/*
 * SerialReceive sketch
 * Blink the LED at a rate proportional to the received digit value
*/
const int ledPin = 4; // pin the LED is connected to
int   blinkRate=0;     // blink rate stored in this variable

void setup()
{
  Serial.swap(1);
  Serial.begin(9600); // Initialize serial port to send and receive at 9600 baud
  pinMode(ledPin, OUTPUT); // set this pin as output
}

void loop()
{
  if ( Serial.available()) // Check to see if at least one character is available
  {
    char ch = Serial.read();
    if(ch >= '0' && ch <= '9') // is this an ascii digit between 0 and 9?
    {
       blinkRate = (ch - '0');      // ASCII value converted to numeric value
       blinkRate = blinkRate * 100; // actual blinkrate is 100 mS times received digit
    }
  }
  blink();
}

// blink the LED with the on and off times determined by blinkRate
void blink()
{
  digitalWrite(ledPin,HIGH);
  delay(blinkRate); // delay depends on blinkrate value
  digitalWrite(ledPin,LOW);
  delay(blinkRate);
}
Once I uploaded it to the board I needed to send values to the board using the program I made and I had to change up the code a little
outputStream1 = serialPort1.getOutputStream();

String dataToSend = "";
String mc = "";

int userInput = Integer.parseInt(num1.getText());
switch (userInput){
    case 0 : mcode.setText("- - - - -");mc = "0";break;
    case 1 : mcode.setText(". - - - -");mc = "1";break;
    case 2 : mcode.setText(". . - - -");mc = "2";break;
    case 3 : mcode.setText(". . . - -");mc = "3";break;
    case 4 : mcode.setText(". . . . -");mc = "4";break;
    case 5 : mcode.setText(". . . . .");mc = "5";break;
    case 6 : mcode.setText("- . . . .");mc = "6";break;
    case 7 : mcode.setText("- - . . .");mc = "7";break;
    case 8 : mcode.setText("- - - . .");mc = "8";break;
    case 9 : mcode.setText("- - - - .");mc = "9";break;
    default: mcode.setText("Enter single Digit Number");break;
}

dataToSend = mc; //instead of sending the dots and dashes I sent the values as characters that way it will be more easier for the board to receive it
Now that we are able to send from the program and recieve into the board I decided to add a switch case and to test it I only wrote the code for 0…
/*
 * SerialReceive sketch
 * Blink the LED at a rate proportional to the received digit value
*/
const int ledPin = 4; // pin the LED is connected to
int   blinkRate=0;     // blink rate stored in this variable

void setup()
{
  Serial.swap(1);
  Serial.begin(9600); // Initialize serial port to send and receive at 9600 baud
  pinMode(ledPin, OUTPUT); // set this pin as output
}

void loop()
{
  if ( Serial.available()) // Check to see if at least one character is available
  {
    char ch = Serial.read();

    switch(ch){
      case '0' : dot();dot();dot();dot();dot();break;

    }

  }
  //blink();
}

// blink the LED with the on and off times determined by blinkRate
void blink()
{
  digitalWrite(ledPin,HIGH);
  delay(blinkRate); // delay depends on blinkrate value
  digitalWrite(ledPin,LOW);
  delay(blinkRate);
}

void dot(){
  digitalWrite(ledPin,HIGH);
  delay(200);
  digitalWrite(ledPin,LOW);
  delay(200);
}

void dash(){
  digitalWrite(ledPin,HIGH);
  delay(600);
  digitalWrite(ledPin,LOW);
  delay(200);
}
Since that was a success I moved on to writing the rest of the code and the result is as follows…