9. Molding and casting
WEEK 9
This week’s assignments are:
- To review the safety data sheets for each of your molding and casting materials, then make and compare test casts with each of them(Group Assignment added HERE)
- To design a mold around the stock and tooling that you’ll be using, mill it (rough cut + three-axis finish cut), and use it to cast parts
Design Phase
Using the Form tool in Fusion360 I tried making my mold based on McLaren’s car custom paint samples

So after I made my end product I placed it in a block to get my silicon cast
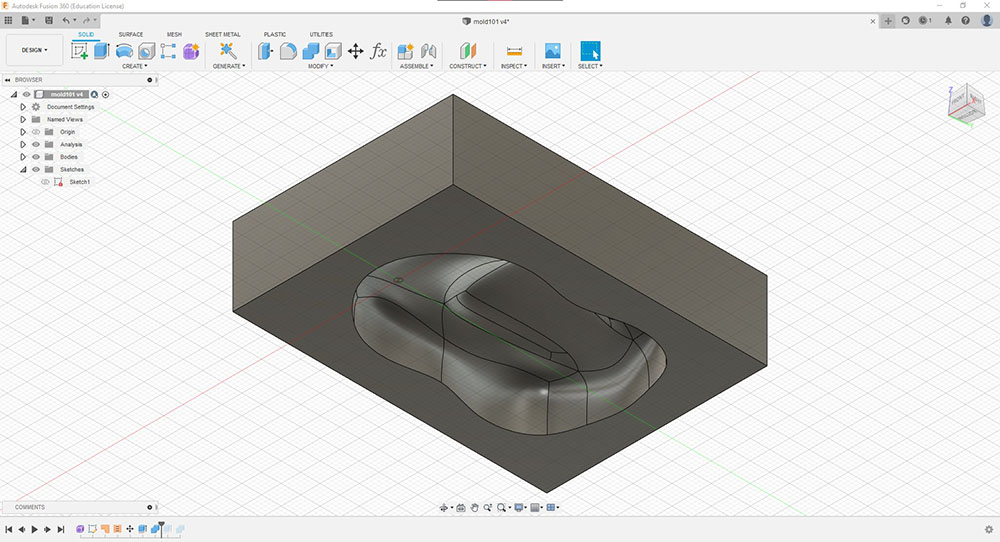
And then I placed that cast inside another bigger block to get my wax mold which I will be milling

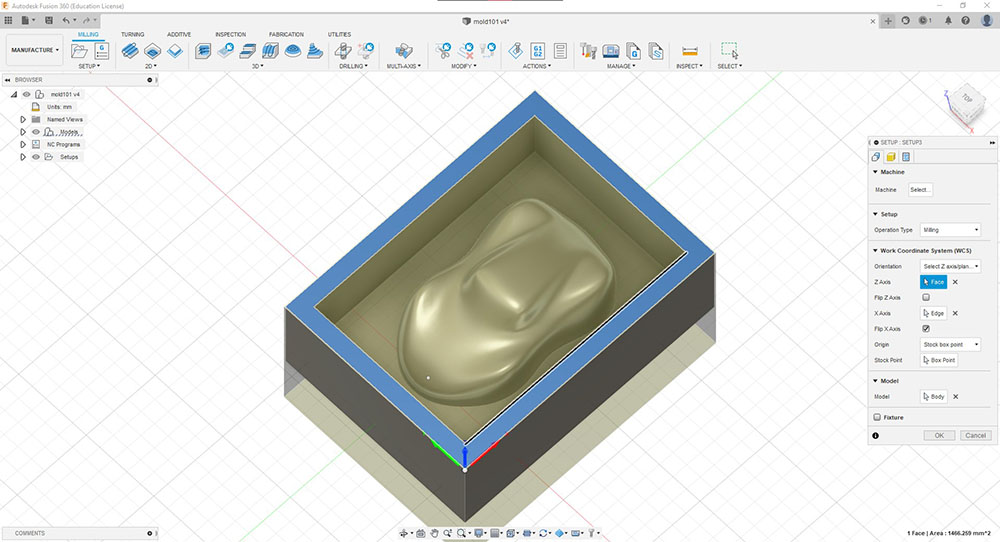
Once my design was ready I decided to make the CAM files within Fusion360 so I went to the “MANUFACTURE” tab. To setup our CAM we start by clicking “Setup” under the “Milling” tab in the Toolbar and a window pops up, where we can select the operation type, axes, origin point etc.,
First I selected “Select Z axis/plane & X axis beside “Orientation”, then I selected the face to give reference to the Z axis and also selected the inner edge to give reference for the X axis and selected the Origin point by clicking the “Box Point” button beside “Stock Point” and selected the respective vertex where I wanted to set the origin point
Next I went to the “Stock” tab in the same window and selected “Fixed size box” beside “Mode” and gave the appropriate size of the stock

In the “Program” tab you can name your setup and add comments

Now we can start adding our toolpaths
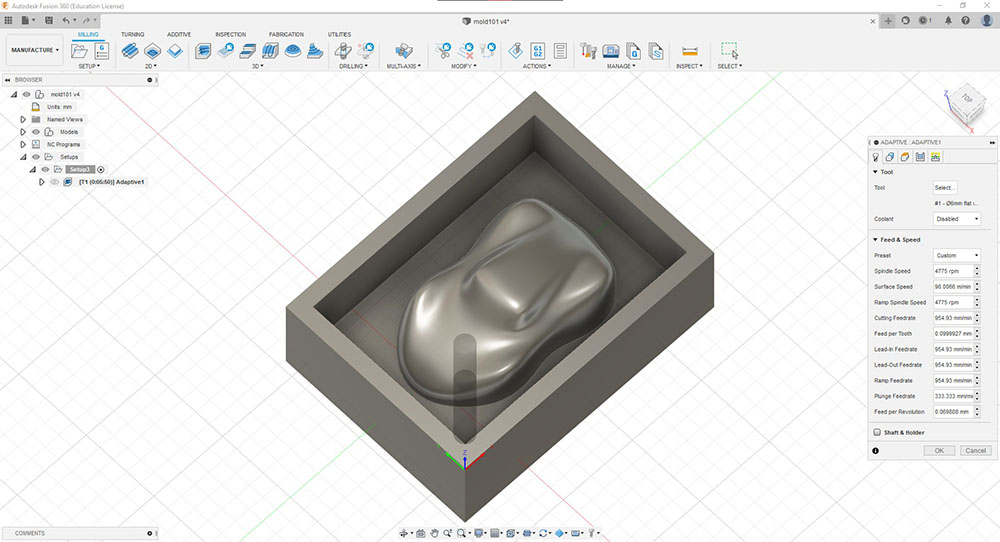
First I started with an adaptive toolpath so that it uses a big toolbit such as the 6mm flat end mill toolbit to clear out the main areas with some offset that way when a smaller toolbit is used it can clear more effectively and efficiently with keeping the wear minimal
Here is the setup I used…


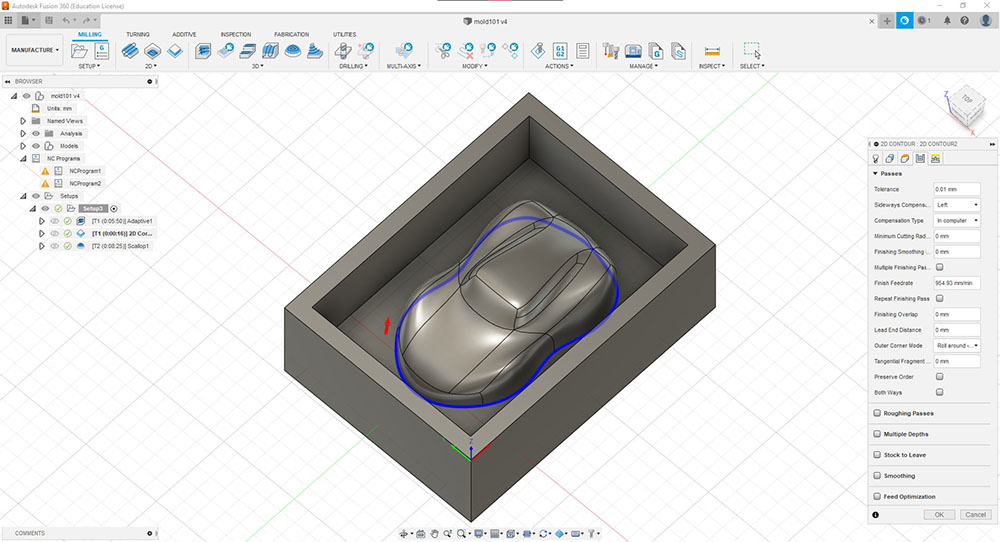
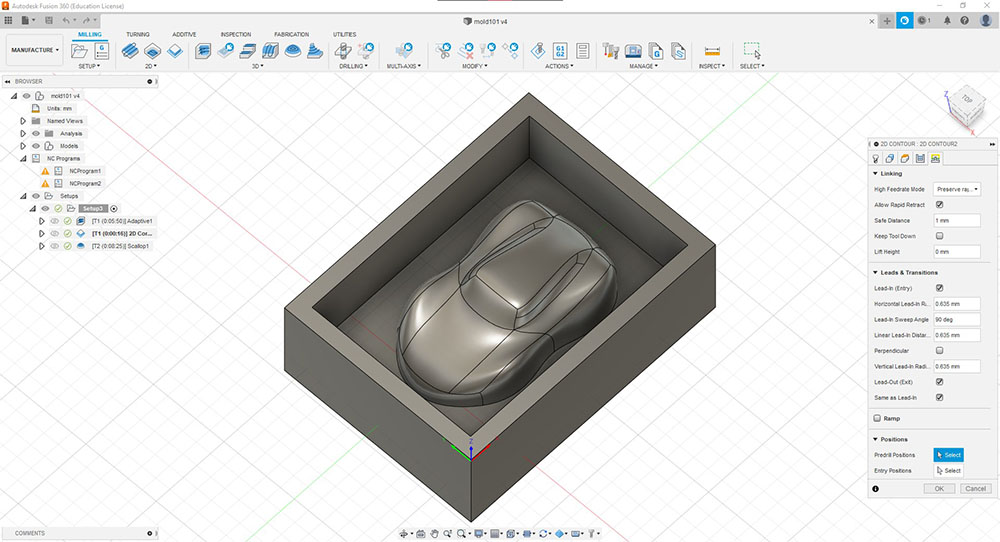
Then I added a 2D contour to get a clean cut around the edges of the model
Here is the setup I used…


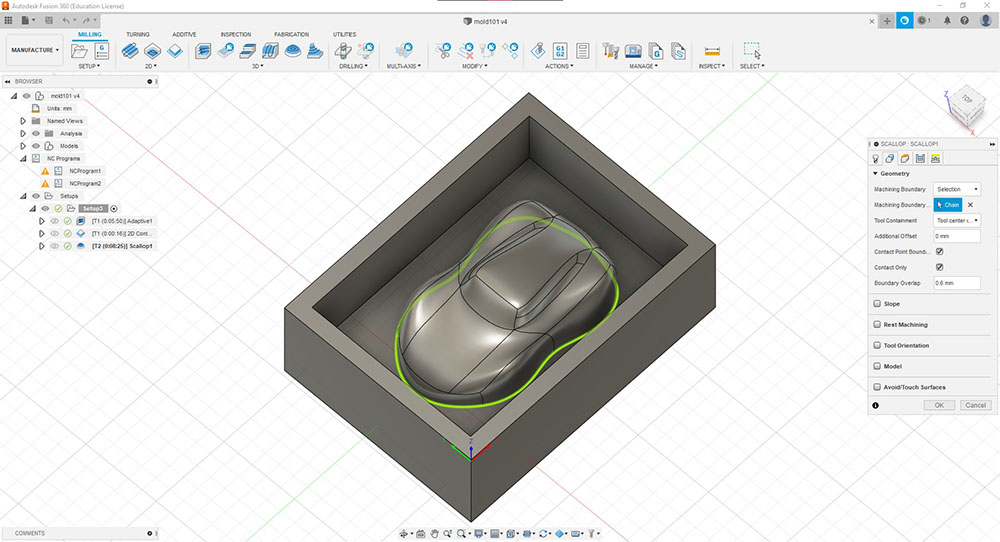
And finally I added the “Scallop” toolpath with a ball end mill toolbit
Here is the setup I used…


And finally we can run a simulation to see if we are on the right path
ProtoTRAK

ProtoTRAK
We used the ProtoTRAK RMX CNC to mill the molding wax to make our cast
We started by placing the molding wax and clamping it down using the wise and then we can turn ON the machine by long pressing the Power button to the bottom right of the display

Now to ZERO the machine we first remove the collet/tool holder to ZERO the spindle head that way we can have a reference in the future while changing the toolbit. To do so we first press the tool release button releases the tool holder

Once we have removed the tool holder we can then press JOG

Then once we have the head near the wise we can use this lever to lower the spindle head even further…
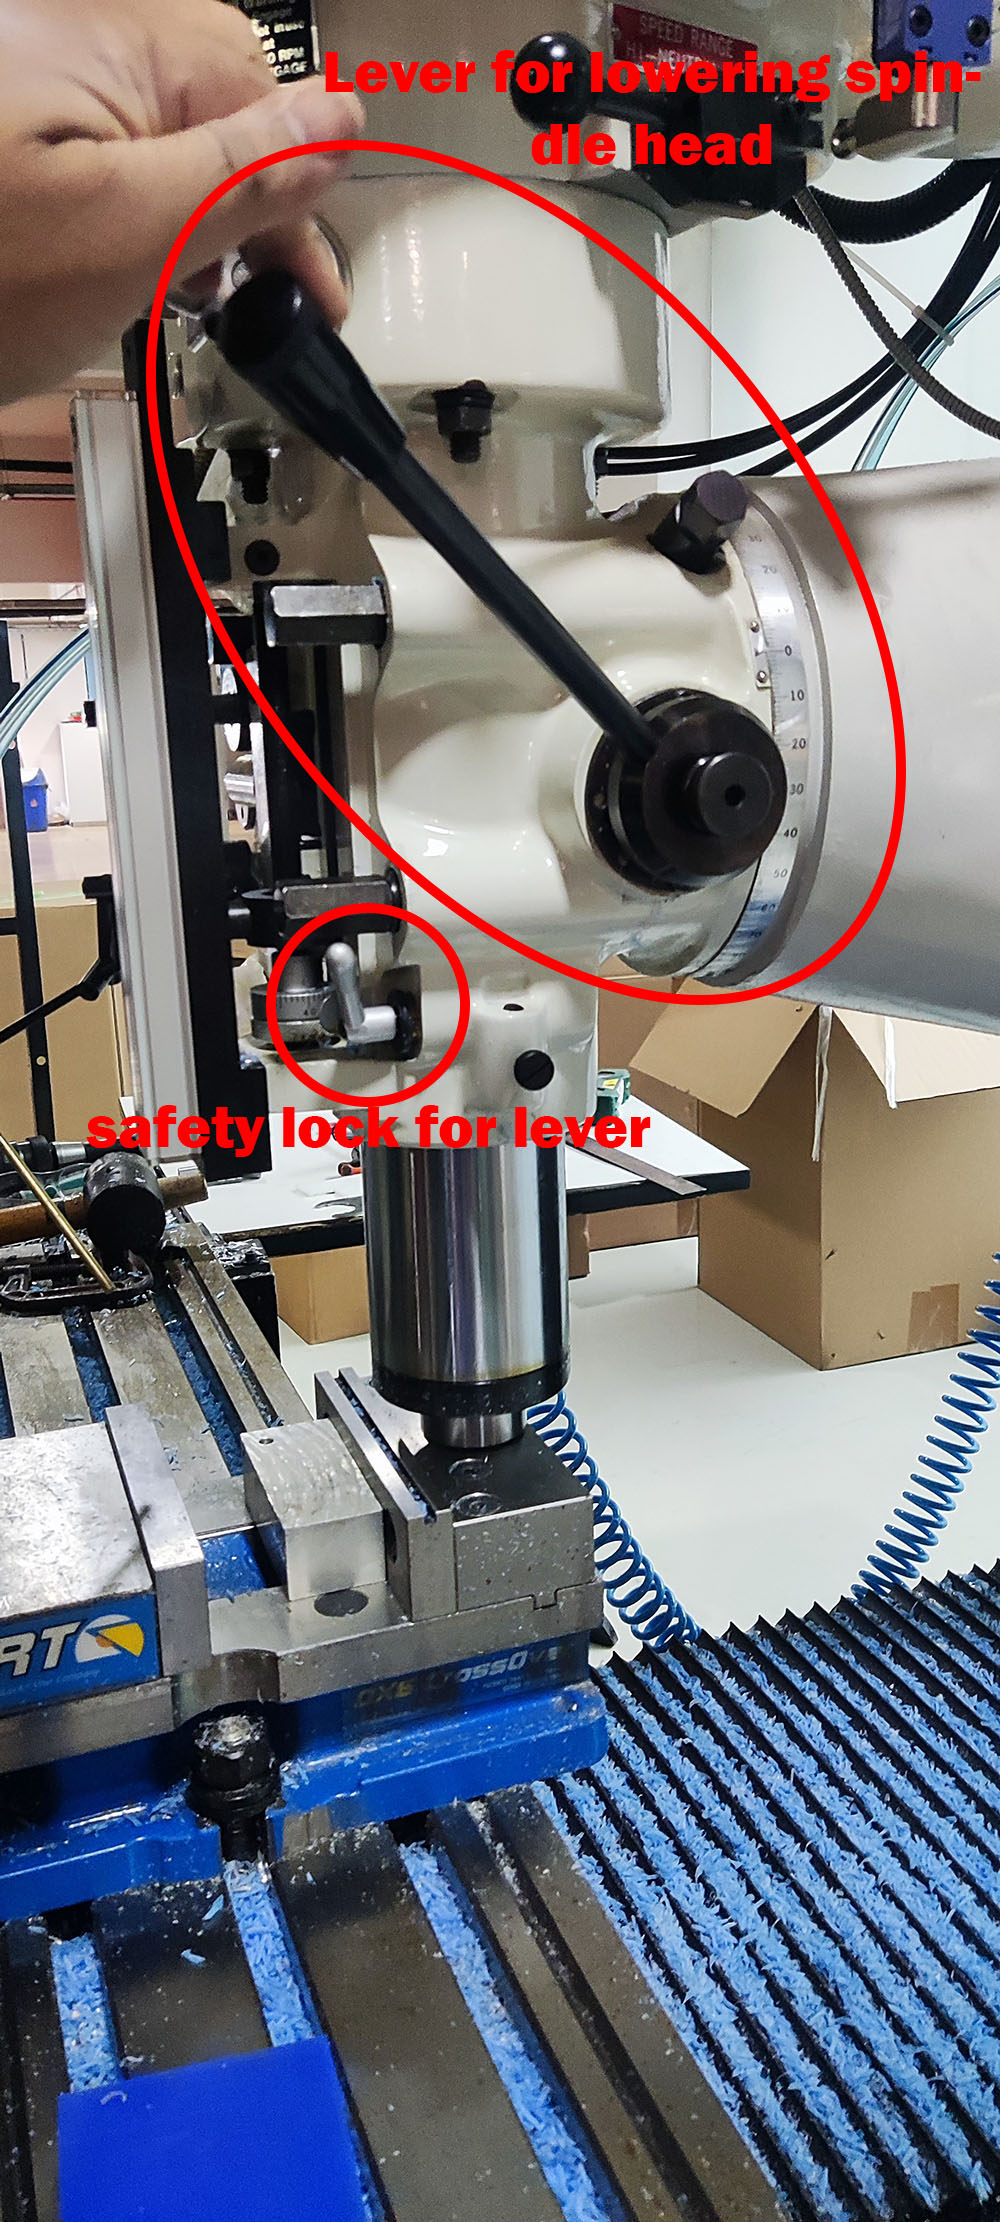
Once we pull down the lever and the spindle head touches a rigid surface(in this case the wise) we can then zero the spindle head firt by tapping “BASE” in the “TOOL TABLE” menu on the touch display and then by pressing the “ABS SET” button by the display, the machine sets the base of the spindle head…

Similarly once the toolbit is inserted we can ZERO the toolbit by letting it touch the same rigid surface and by tapping “Z OFFSET” on the display for setting the offset and by pressing the “ABS SET” button we can set the offset of the toolbit
Now to set the origin of the stock we inserted the edge finder tool and set the spindle to 600 rpm
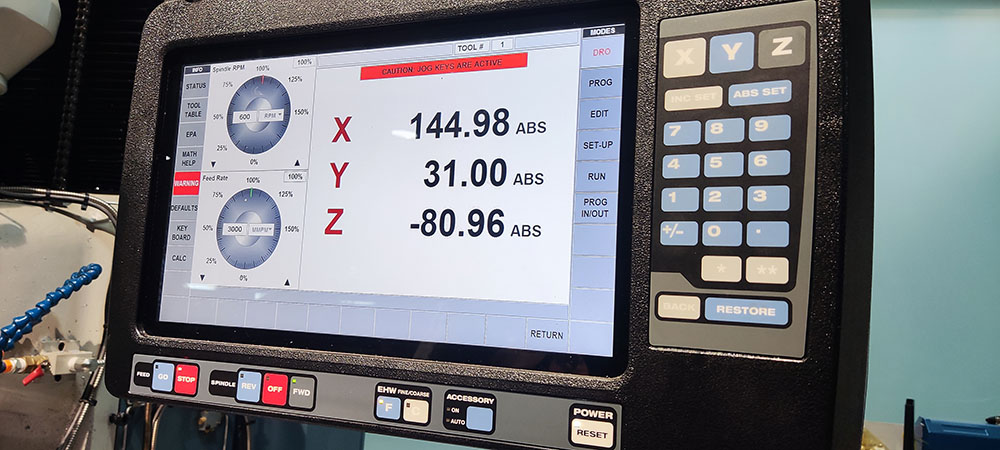
By using the control wheels we can make the tool just touch the stock. Once the tool touches the stock we can press on the X or Y button to set the X or Y axis respectively and the by pressing “ABS SET” button, we have successfully stored the stock’s origin data and the machine is ready to run the file
Notice how the tool dislocates just after touching it, this tells us that we have to subtract 10um The tool tip radius must also be subtracted before hitting the “ABS SET” buton
The Y axis can be set by pressing the Z button and then pressing the “ABS SET” button when the tool touches the surface of the stock
Now to run the file, first we tap the “PROG IN/OUT” button on the screen to load the file into the machine

Once the file is loaded we can tap on “CNC RUN” on the screen, then press the “REV” button to start the spindle then we can press the “GO” button below the screen
Timelapse of milling the wax
Final product
Casting
Now that we have our mold milled and ready its time to make the cast for which we used SORTA-Clear™ 37. Since it is a 1:1 mix ratio we took 2 clear glasses and made a marking by pouring the same volume of water as how much we would need for the cast into the 2 cups equally

After we marked we then disposed the water and poured PART A into one cup and PART B into the other and finally poured it into another cup and mixed it thoroughly
 Make sure not to lift the stick too high which causes bubbles to form within the cast liquid
And finally we poured it into our wax
Make sure not to lift the stick too high which causes bubbles to form within the cast liquid
And finally we poured it into our wax


After 24 hours of curing we removed the cast and this is what we got
Now to make our final pour we used Smooth-Cast™ 305 which also has a 1:1 mix ratio so we followed the same instructions as mentioned above


After about 3-4hours we can finally remove the cast and we have our final product
 This is what happens when the resin bubbles up
 Bottom side