6. 3D printing and scanning
create and print a voronoi strukture with the varionator
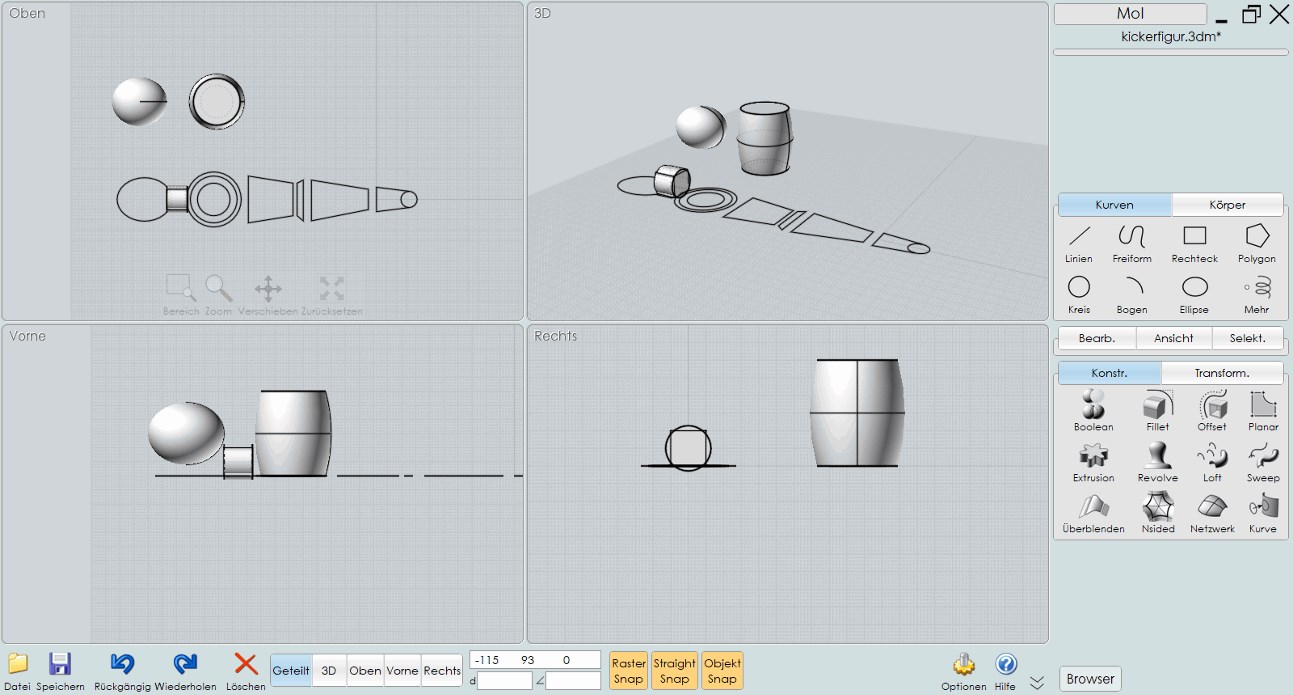
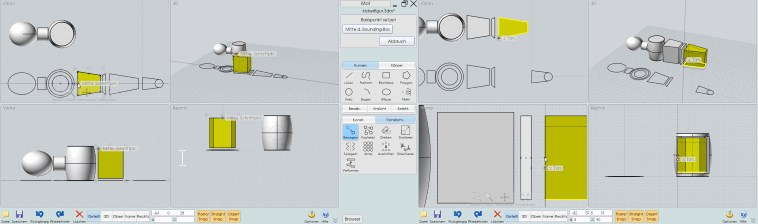
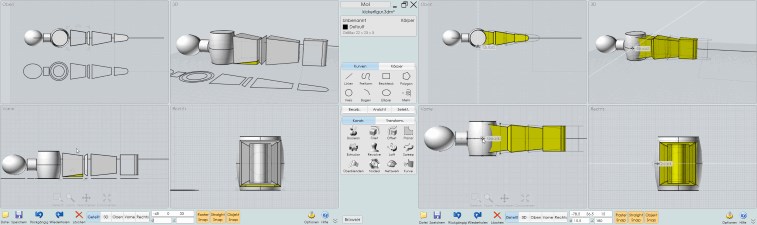
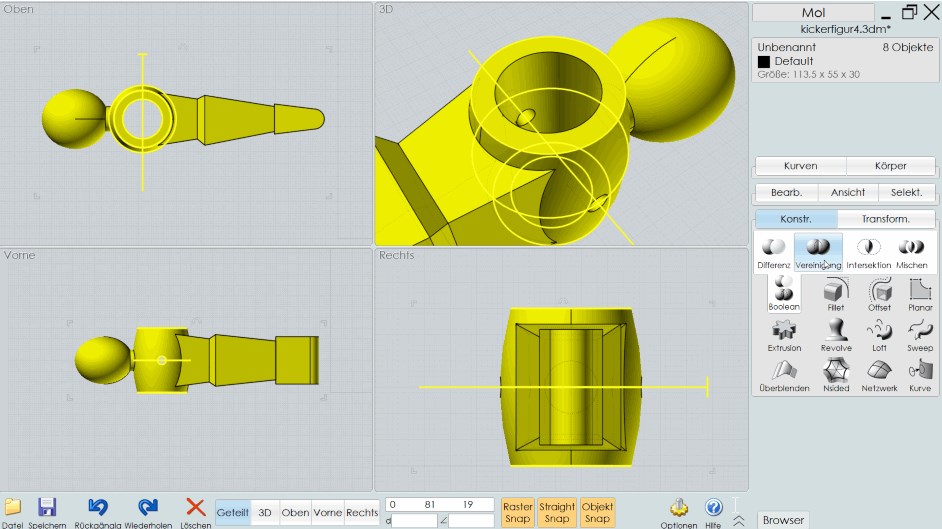
To make this weeks assignment, I first draw a football figure in the programm MOI.
drawing

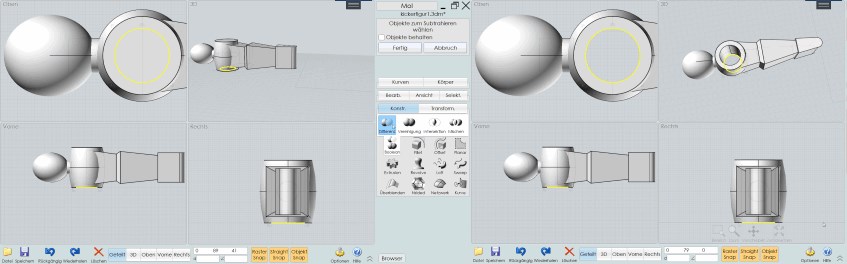

export STL
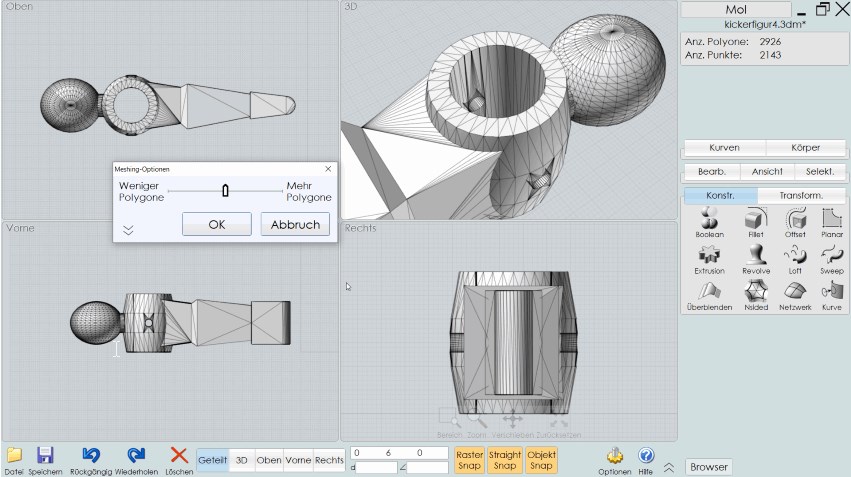
Then I export the file as a Stl.
voronator and slicing

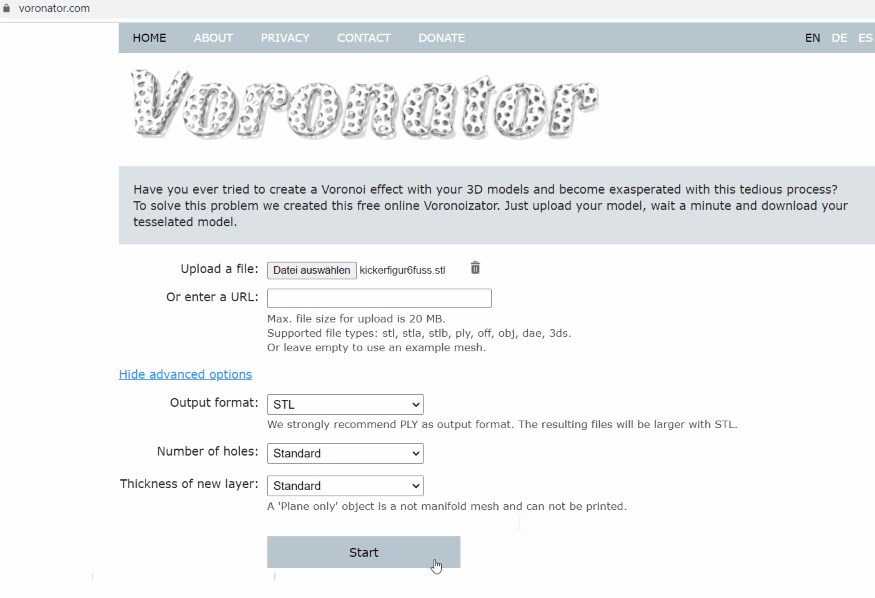
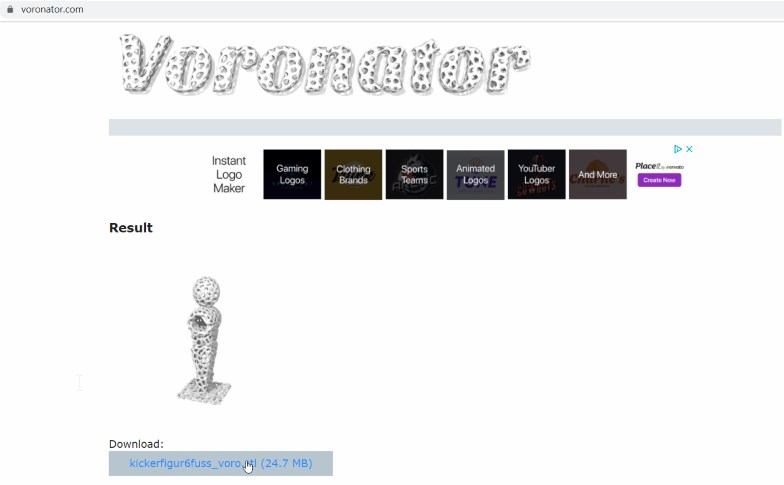
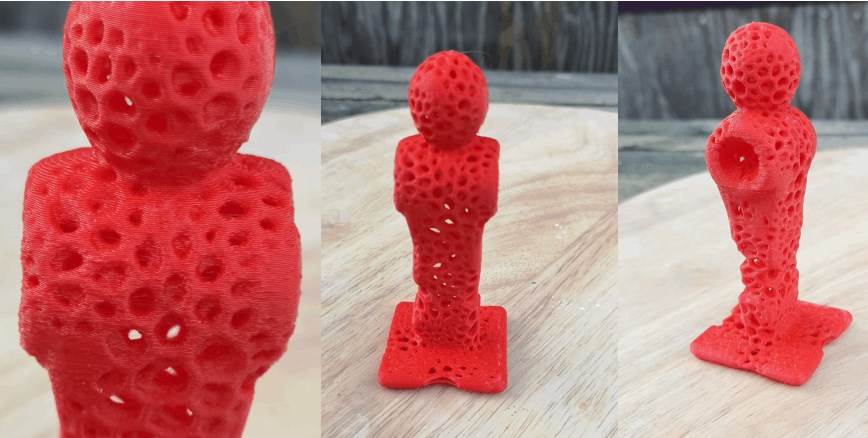
Afterwards I try the Voronator, here there is the possibility to upload an STL file and to provide it with Voronoi patterns and then to download it again.
The result is a file that can best be produced using the 3D printing process.
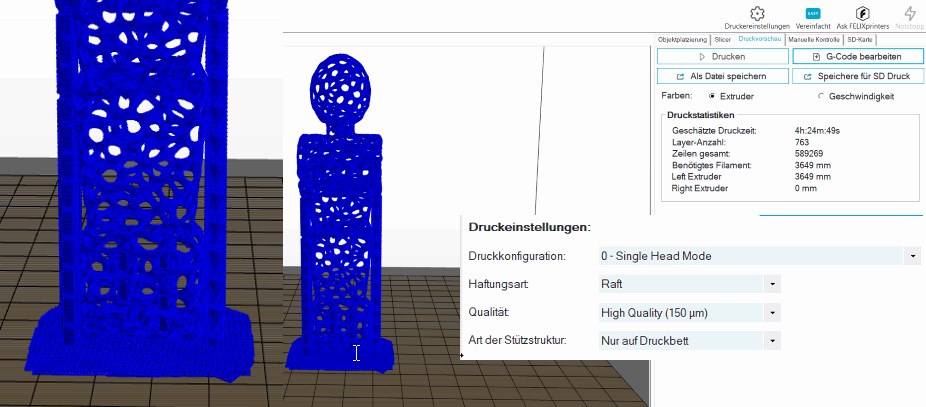
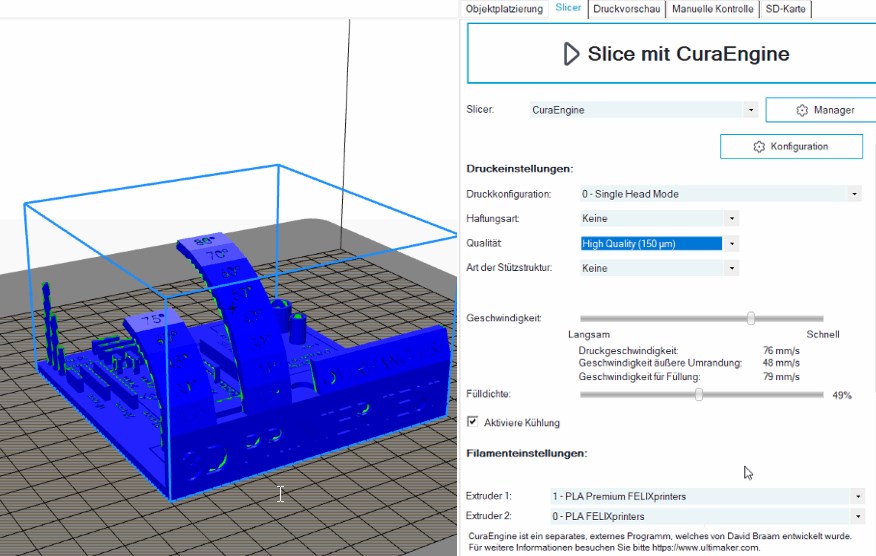
Since the figure has no foot on which to stand independently, the slicing program offers me a lot of support.
But since I don’t want any support in this form, I draw another foot under the kicker figure.
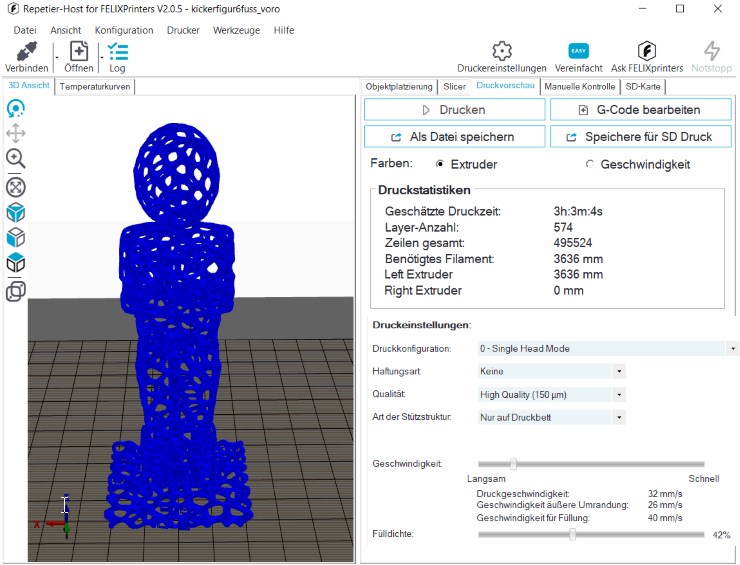
And create a new voronoi file.
Now I can manage without outside support.
print
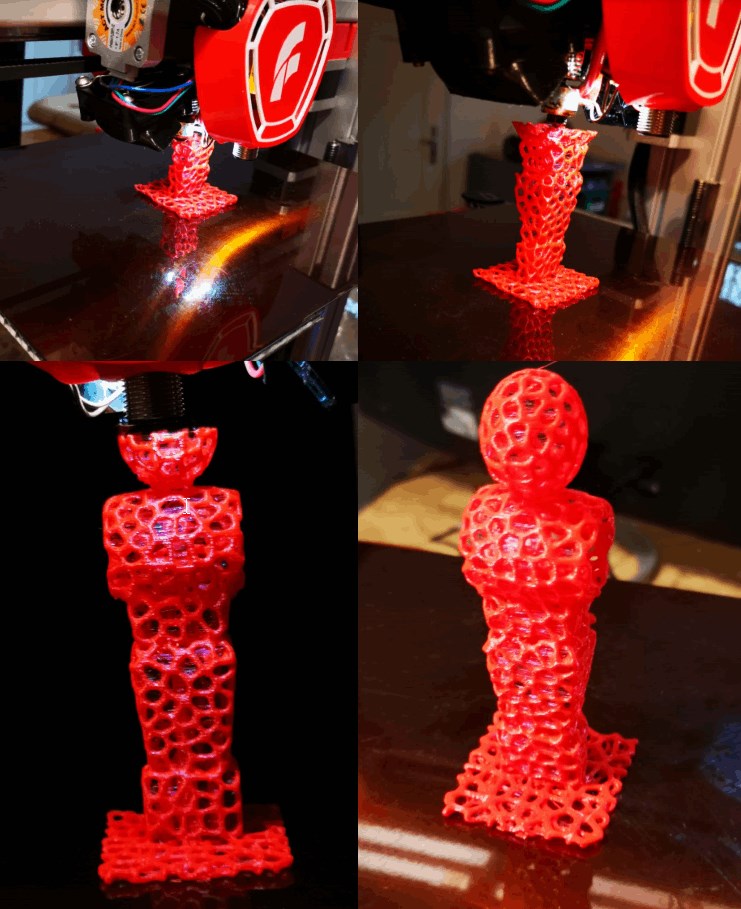
why additive manufacturing
The processing for subtractive design is made very difficult by the non-parallel voronoi structures in the double-walled area. For this reason, additive manufacturing is recommended here.
create and print voronoi with fusion 360 and meshmixer
In order to have more influence on the process and the design of the voronoi network, I import the .3dm file from moi to fusion. I can edit the file in fusion without any problems.
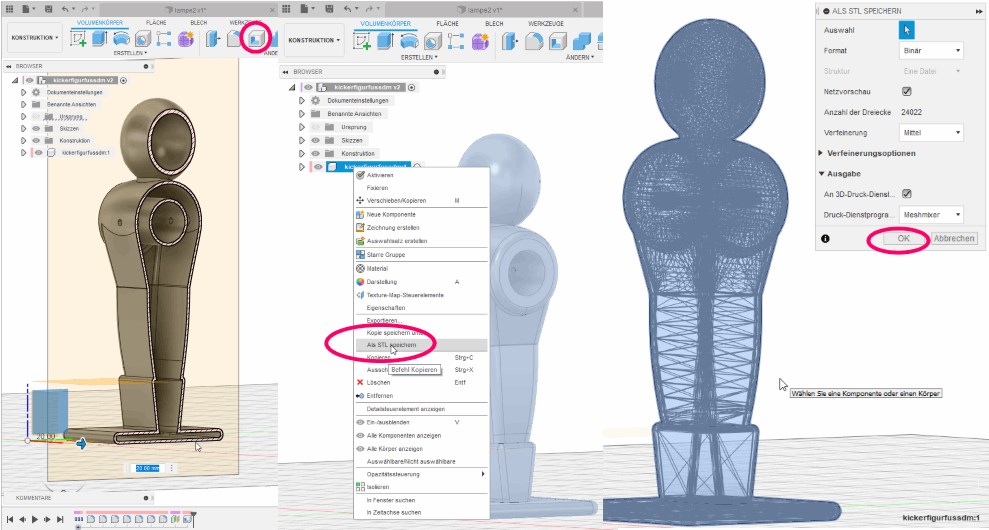
In terms of the process, I create a cavity in the figure that is double-walled due to its material thickness. I save this as a stl and open it in the mesh mixer.
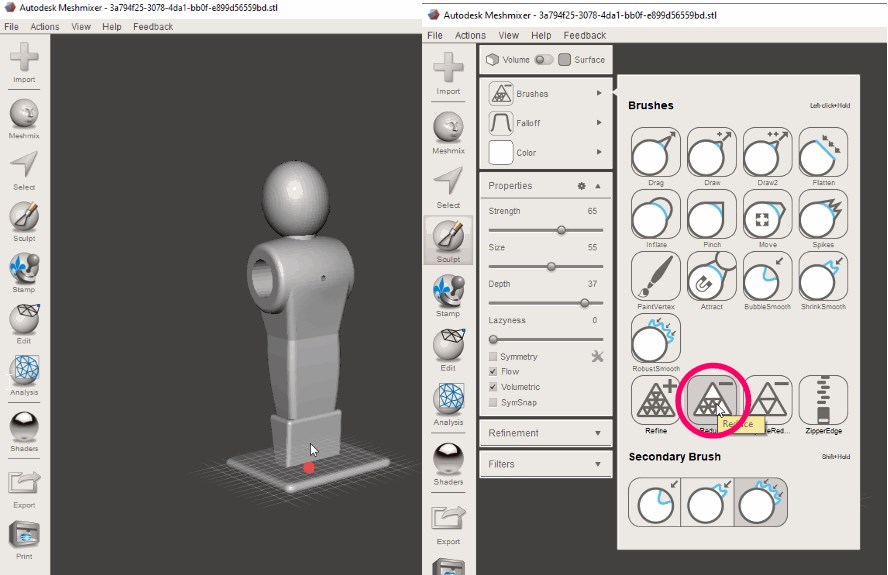
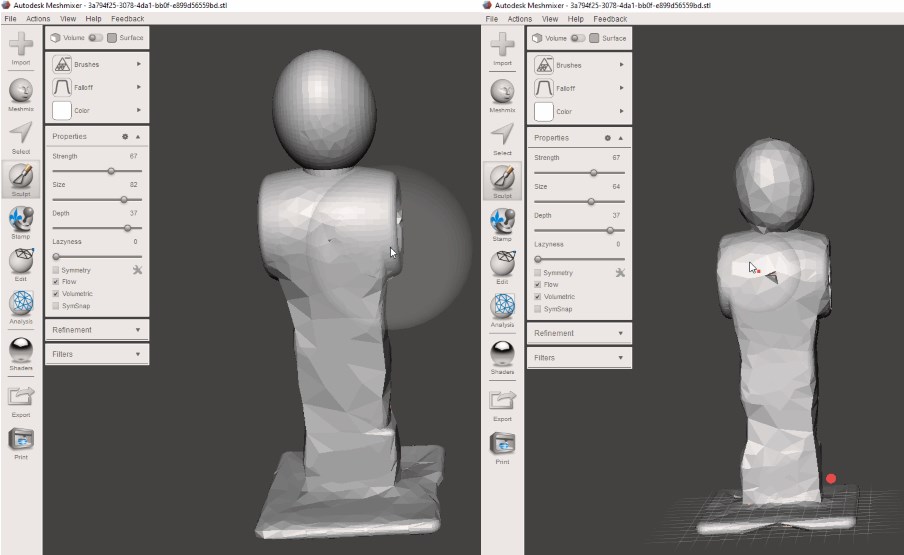
Now, under sculpt, I reduce the network subdivisions according to my wishes.
Under make pattern I set dual edges.
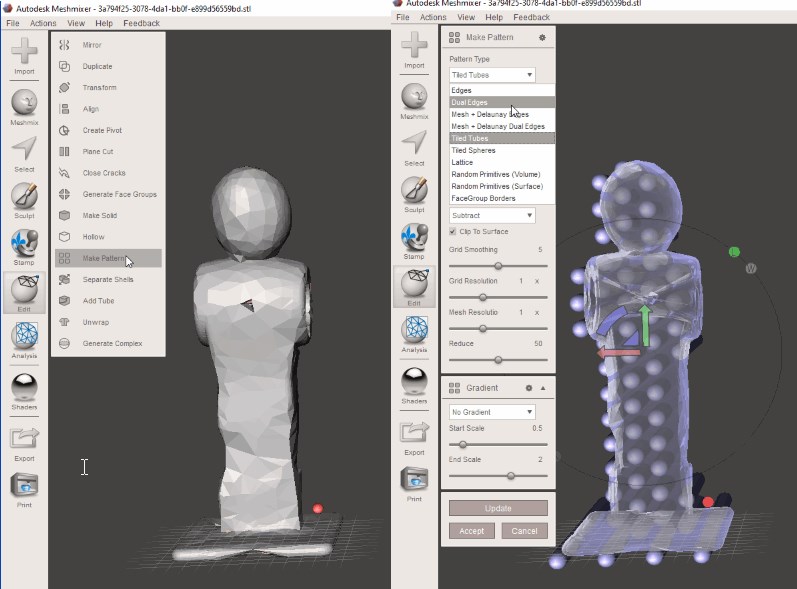
Now I can play with the settings and continue to influence the development process.
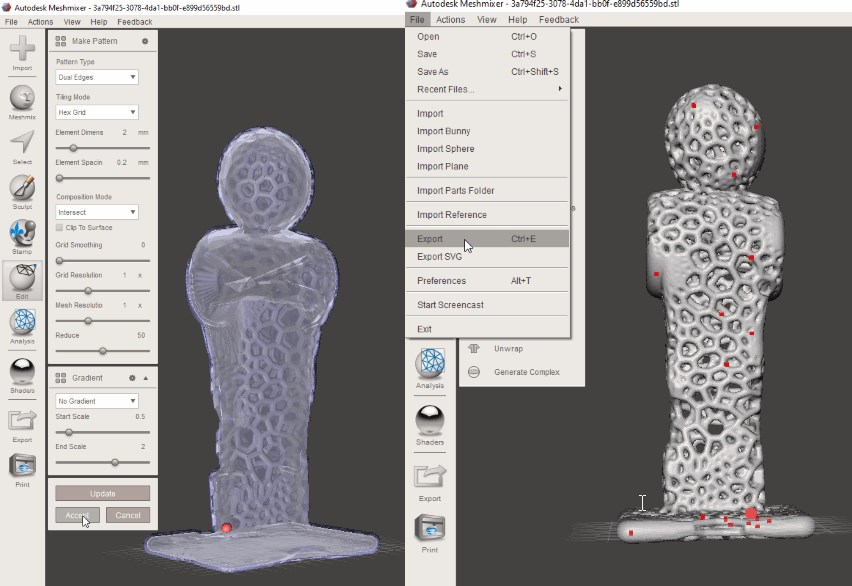
After I have decided on the settings and have accepted them, I export the .stl file to print it out.
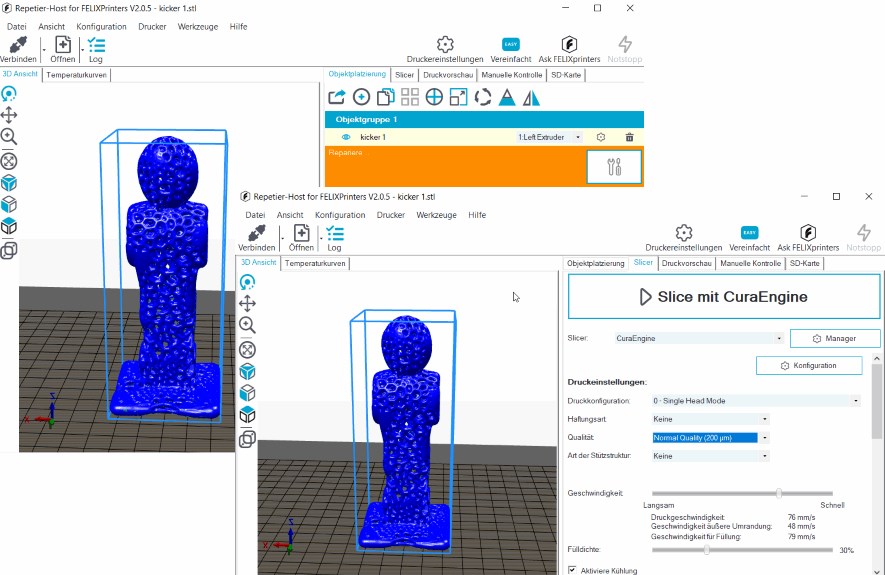
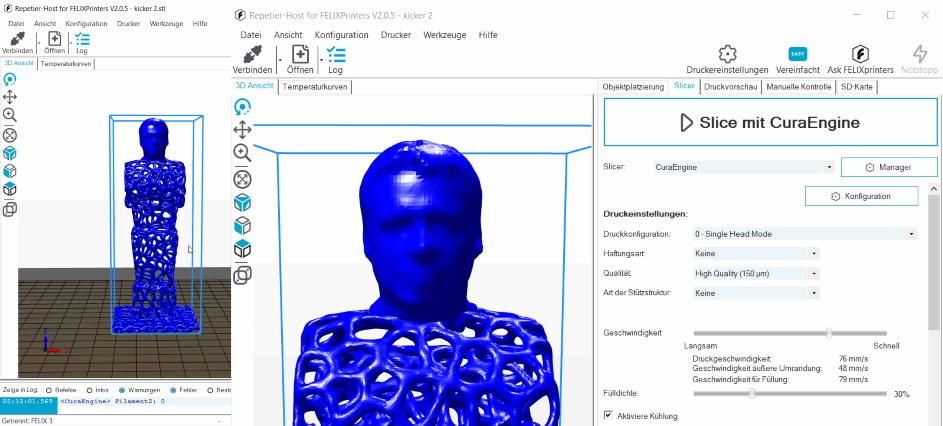
After I moved the .stl file to the repetierhost, it tells me that the file should be repaired.
with my consent, he does this and I create the g code.
mix two .stl figures in Meshmixer
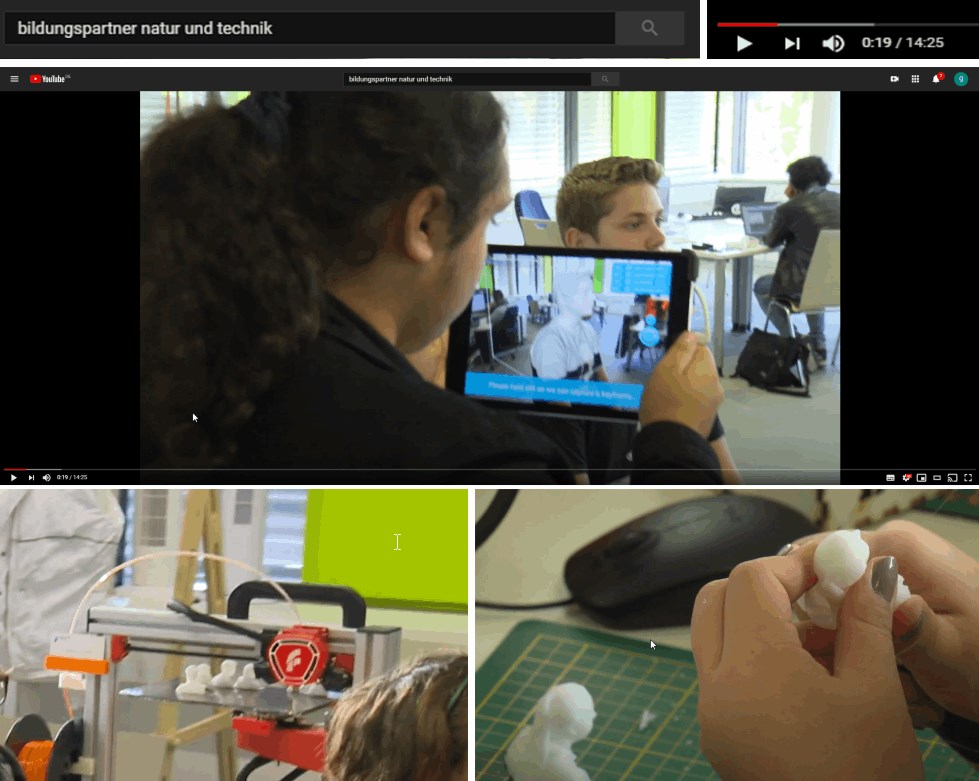
Since I still have a scanned file of mine that was created in our workshop “Die Digitale Manufaktur” at the Rhein-Waal University of Applied Sciences with Marc Kohlen, the idea occurred to me to exchange the head on the voronoi figure for mine. In the following video you can see how the students scan themselves and print out their heads. The students also scanned me in this context. I am now using this scan to replace the head.
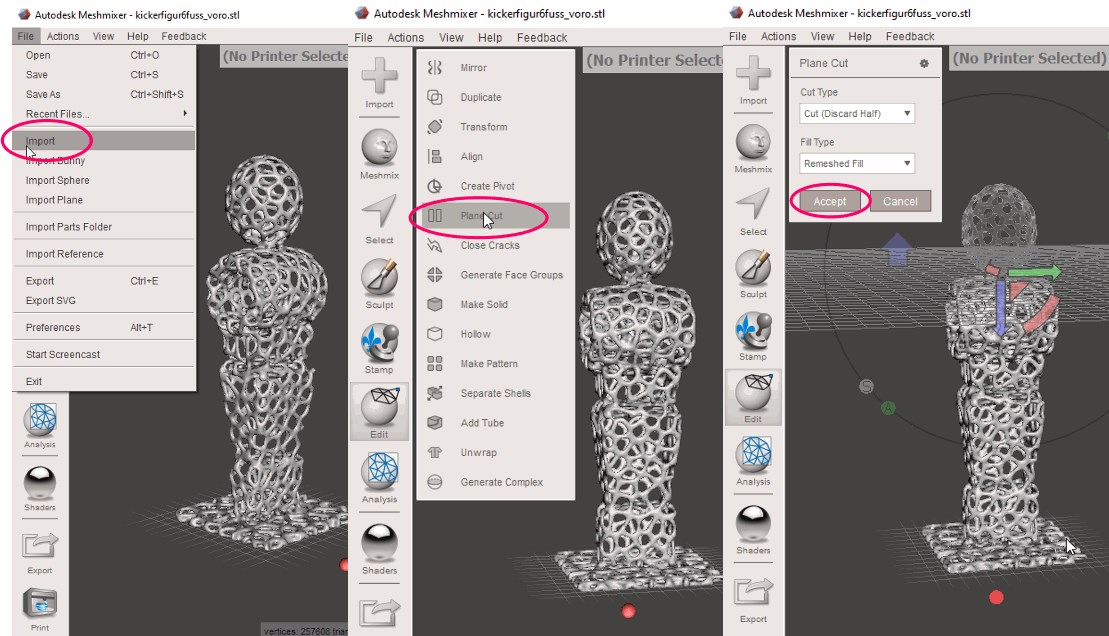
To do this, I import the .stl figure and cut under Edit with panel cut the head.
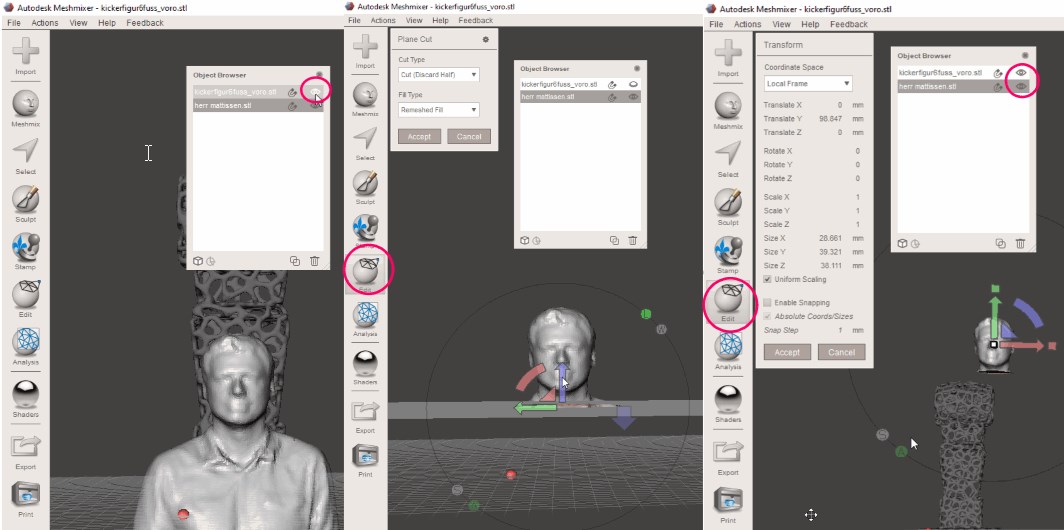
Now I import my .stl scan and cut off the head again, but keep it to put it on the figure. So that the other figure is not cut through with panel cut, I deactivate it by switching off the view in the object browser.
In the next step, I go to Transform under Edit and can move the head to another position.
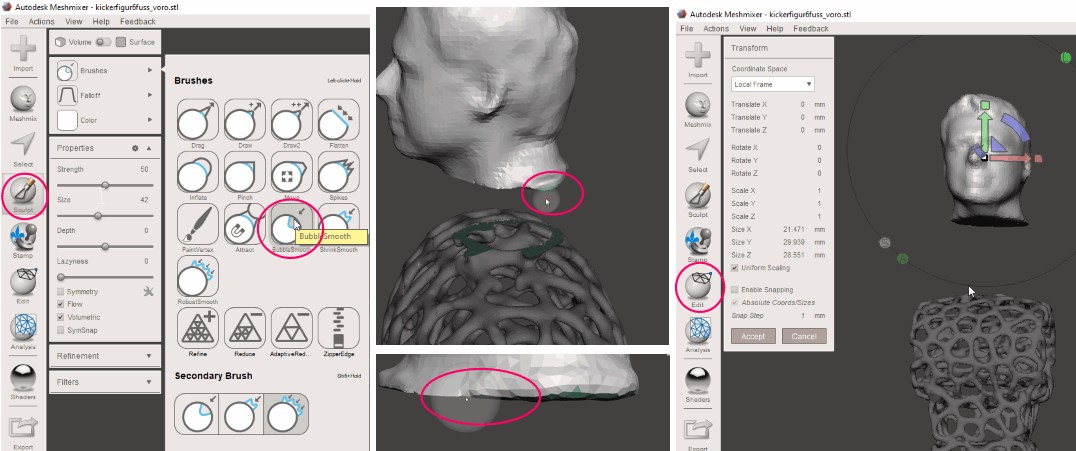
I use sculpt to round off the sharp edges so that the transition is a little softer. I repeatedly go to edit => transform and move the head to the place where it should be placed.
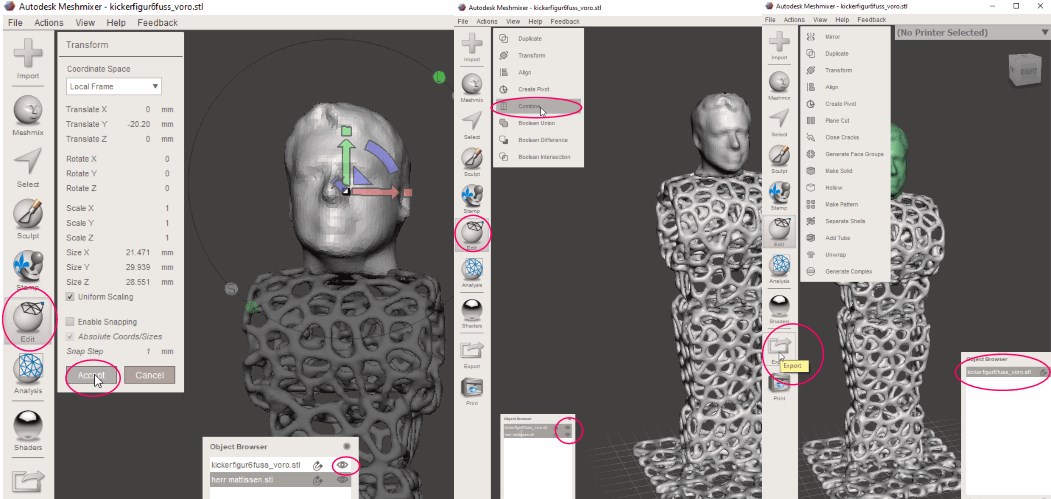
After setting, I accept and mark both figures in the object browser. Now I combine both figures and see again in the object browser that the two figures have become one.
I save this again as .stl to print it out.
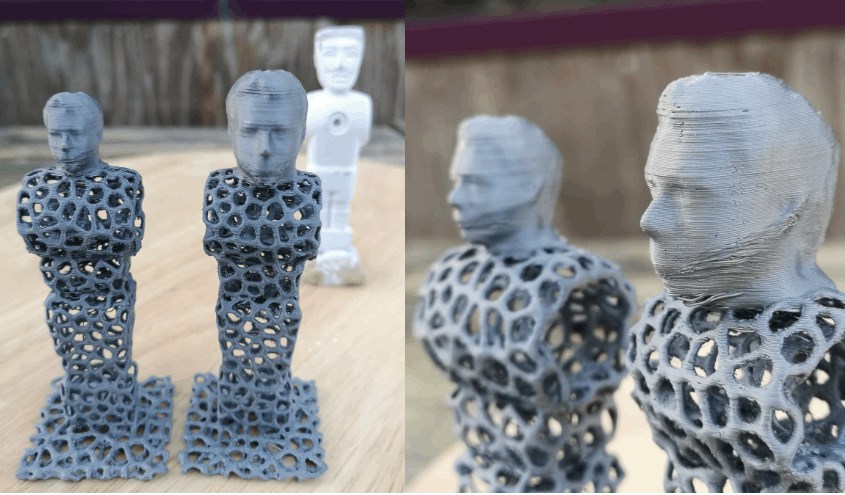
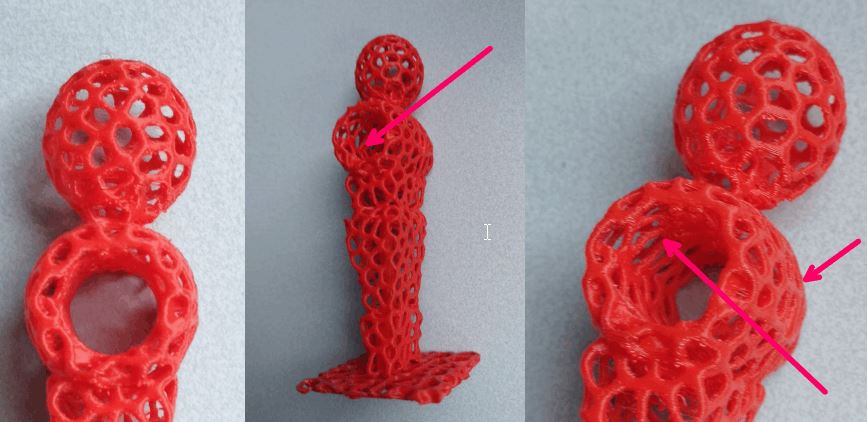
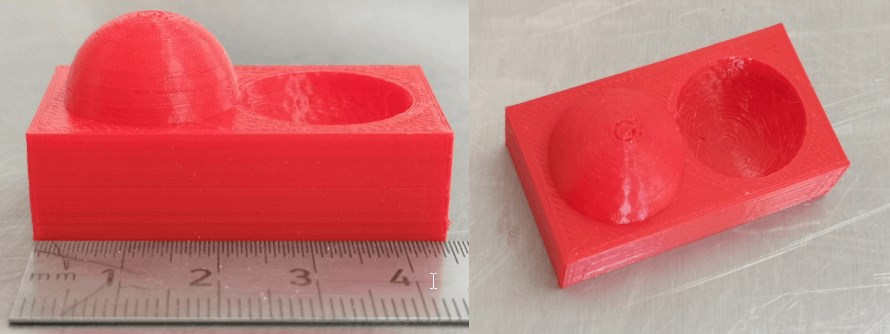
Often times, overhangs are not as accurate.
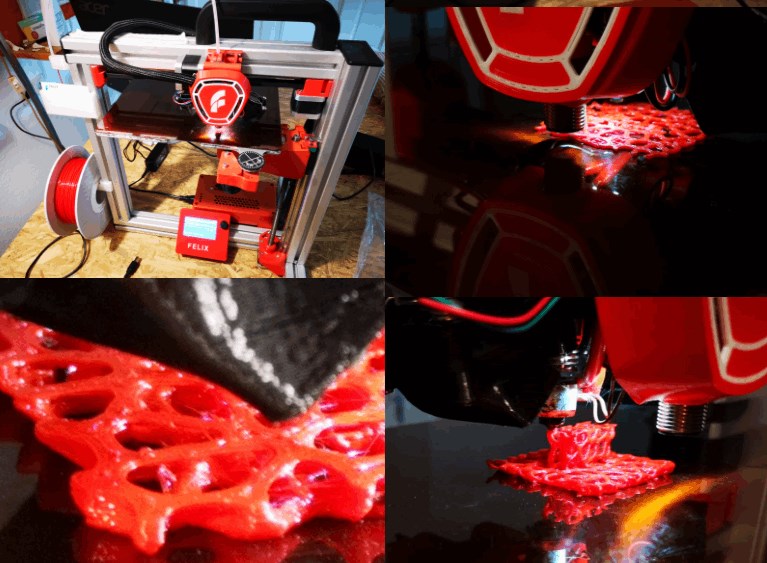
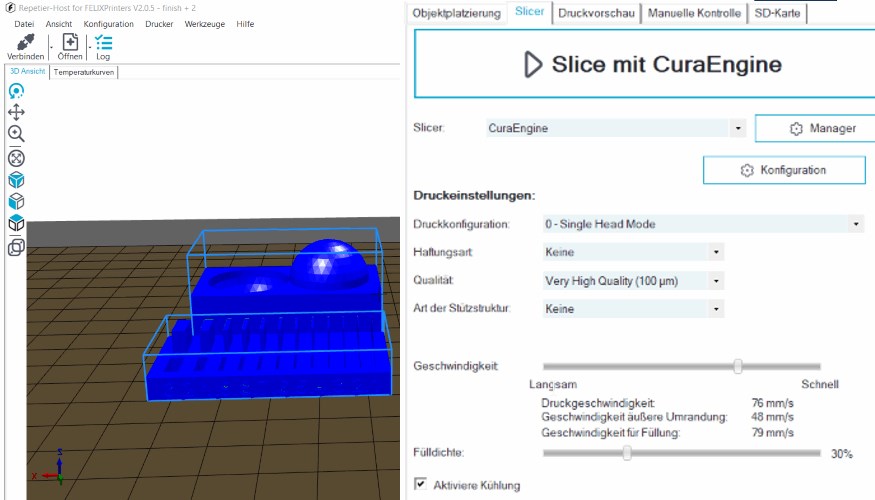
the printer
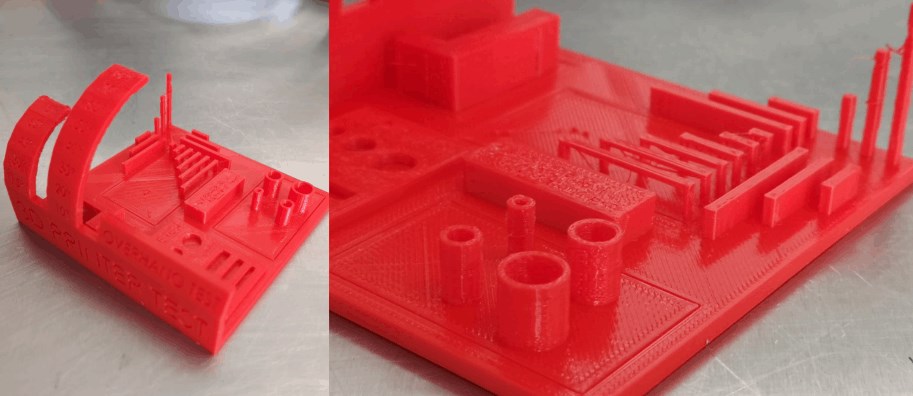
some test printings
Scanning
SHINING 3D PRO+
calibration and first tests
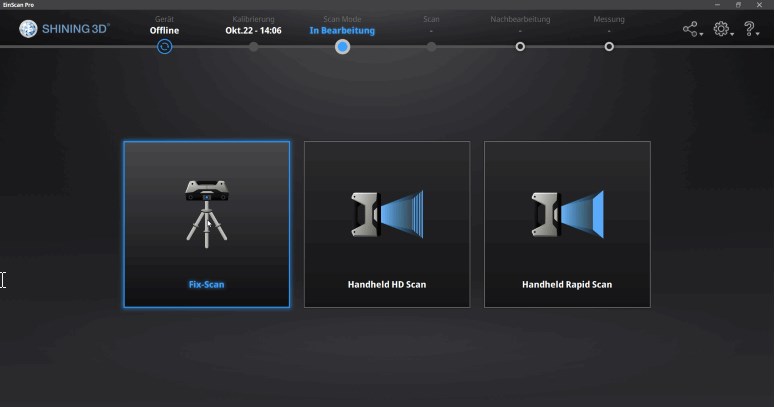
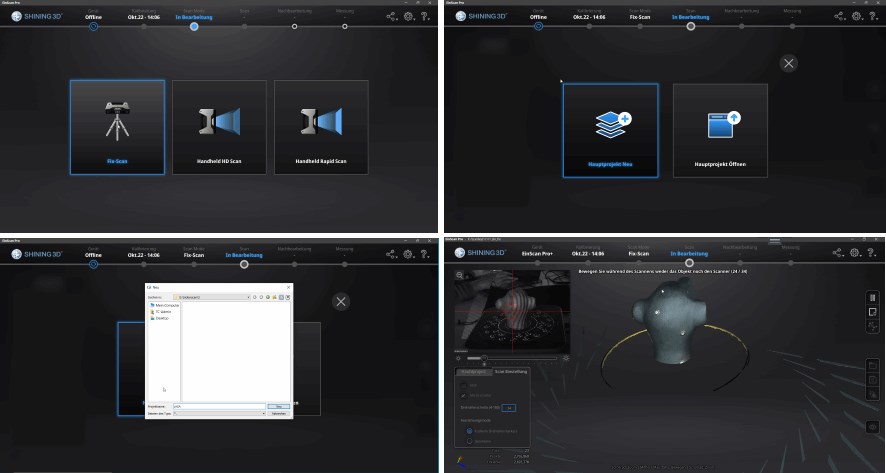
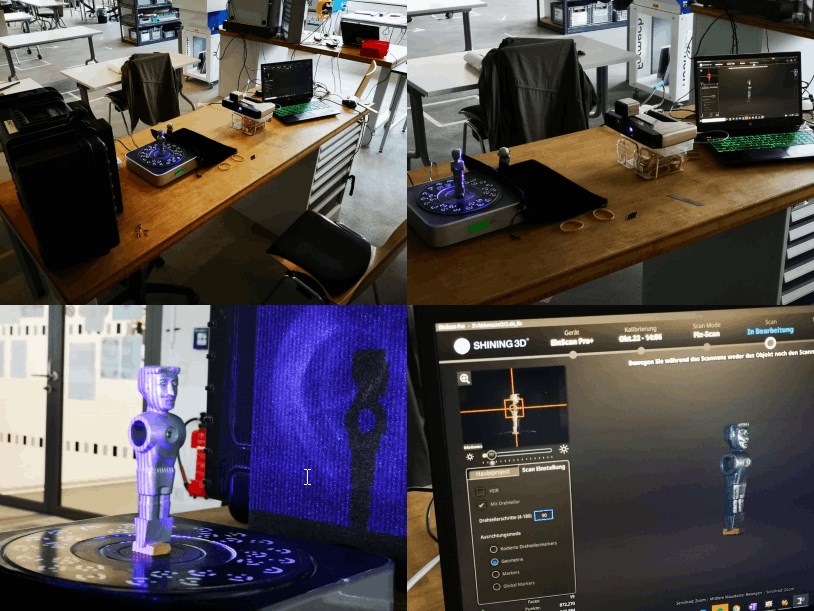
First I scan with the structured light scanner shining 3d pro +.
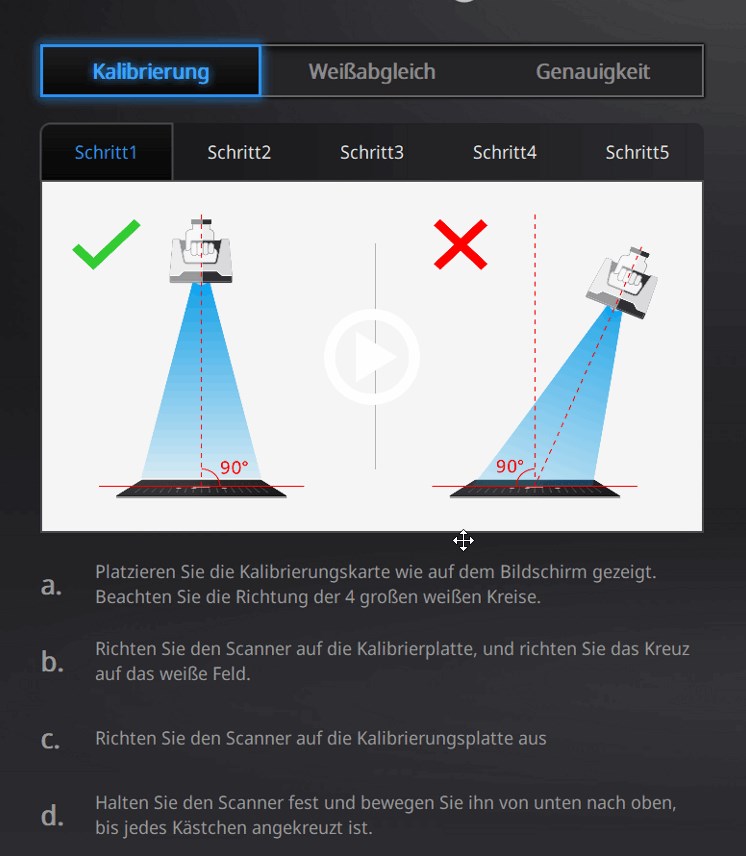
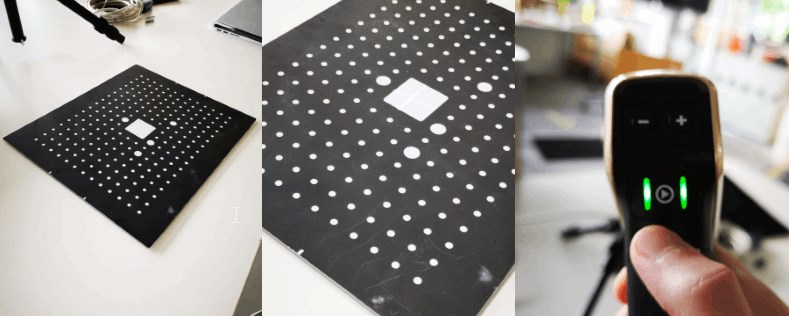
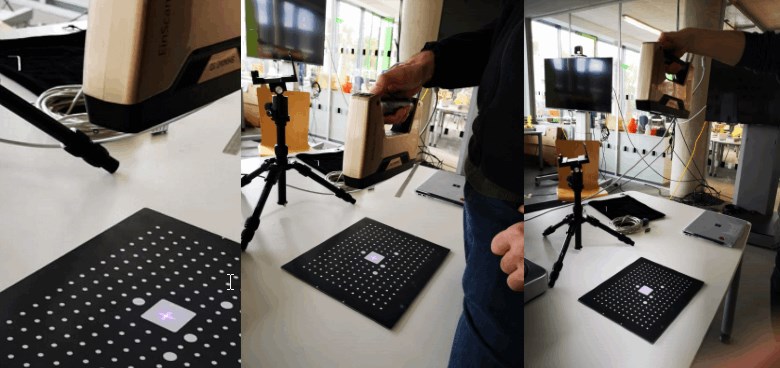

This must first be calibrated. To do this, I follow the instructions on the screen.
After a few attempts, he accepted the distance adjustments.
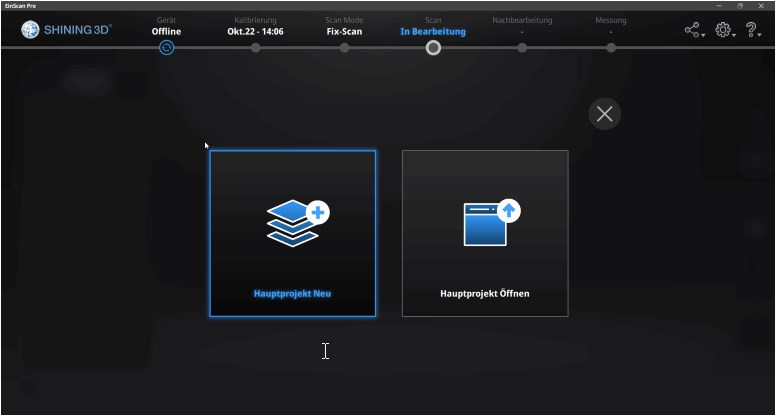
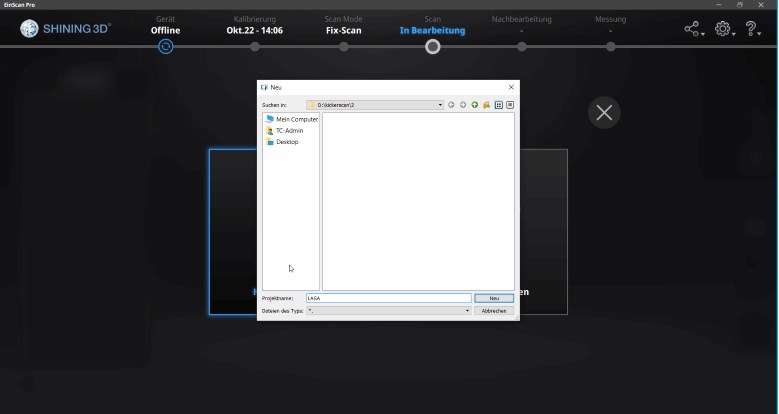
Now I am guided through the menu and make decisions about the settings. First try is the mascot of the state garden show in kamp-lintfort.
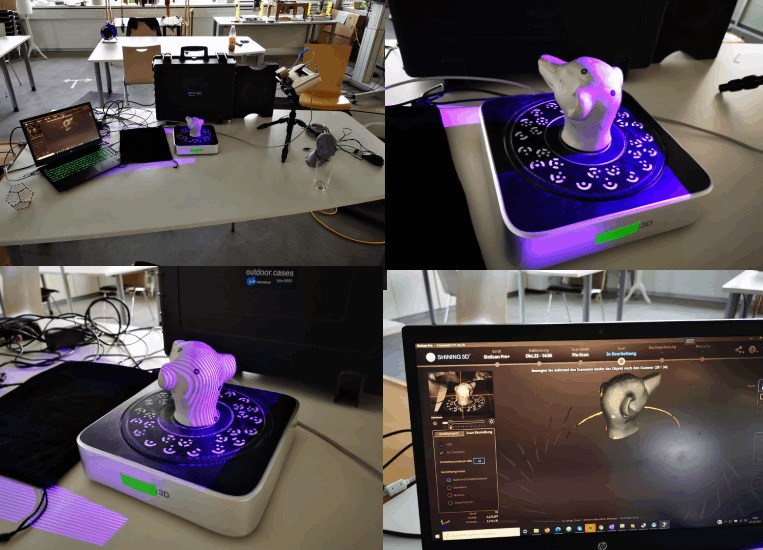
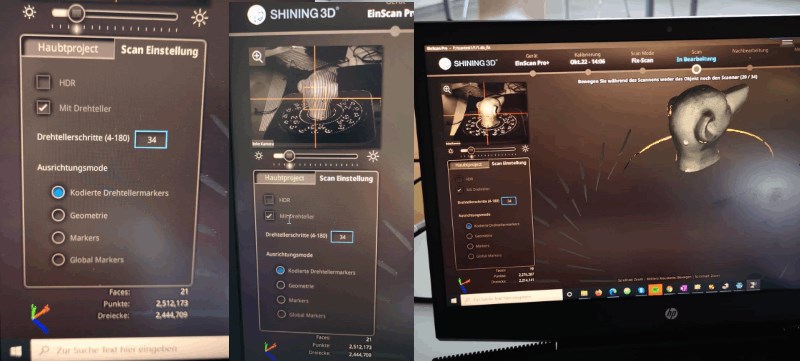
Seems to be working. I just don’t like the reflections on the plastic plate and the background. I adjust the setting until everything fits. I put black velvet in front of the reflective surface.
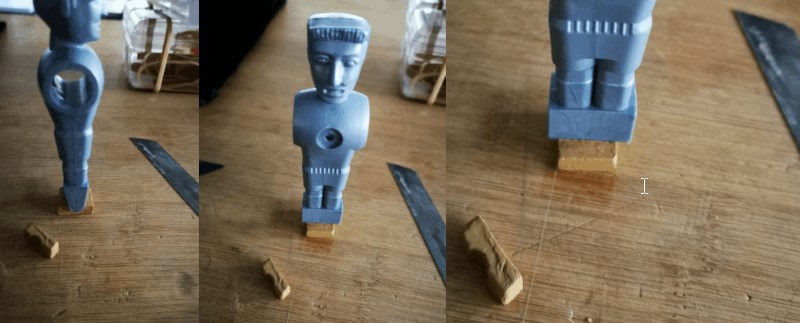
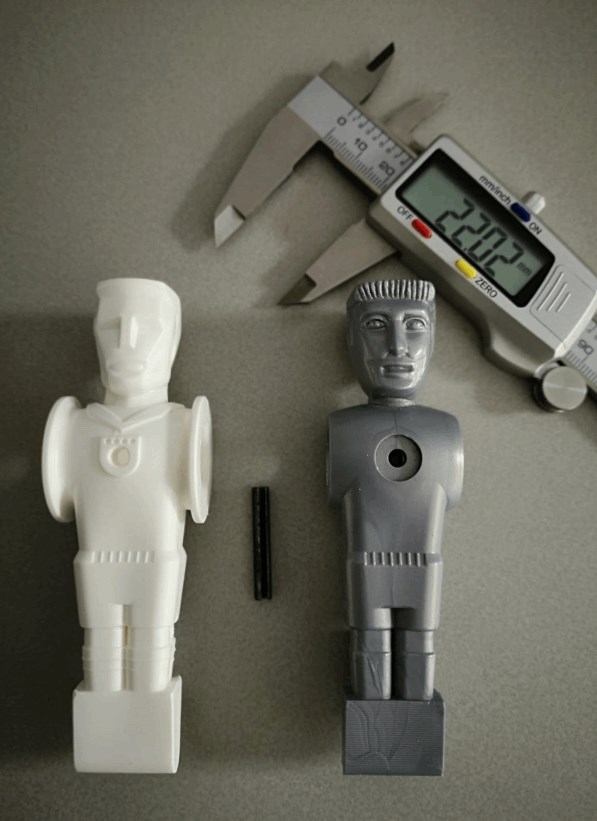
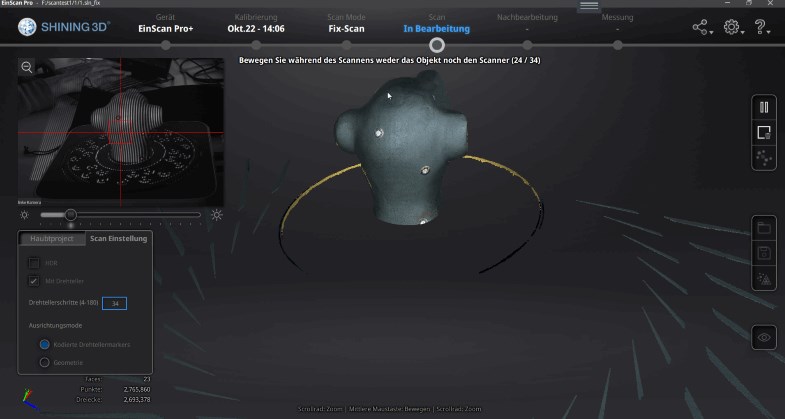
Now I am preparing the kicker figure for the fix scan. Since it does not stand on its own, I form a small foot and place it in the middle of the rotating platform.
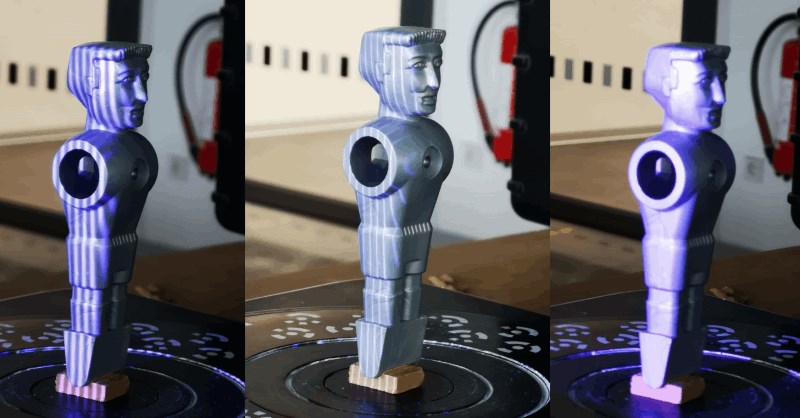
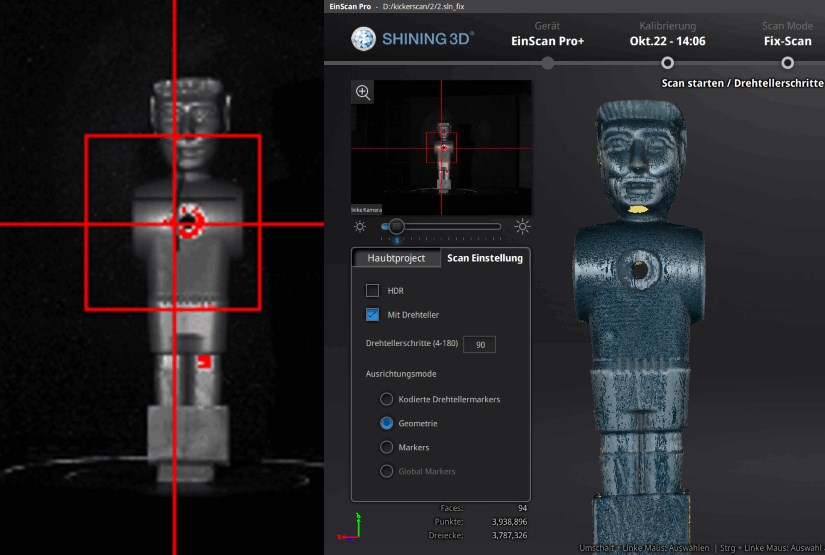
I try to bring the scanner so high that there are no undercuts. So that everything could be captured. To do this, I take the hole in the spring steel clip, which in turn is in the middle of the armholes.
I decide for 90 steps at 360 degrees and start the scan.
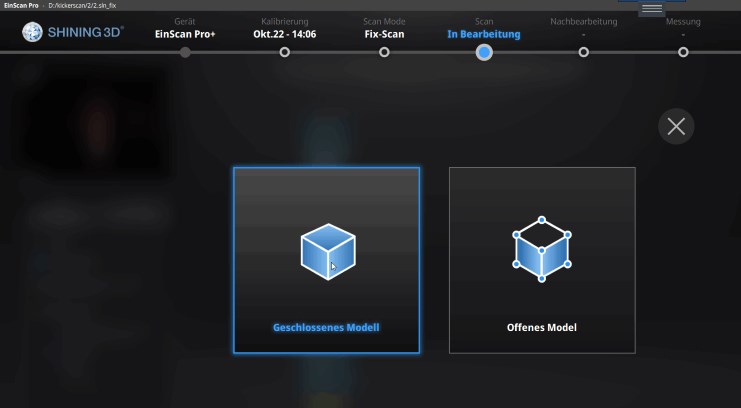
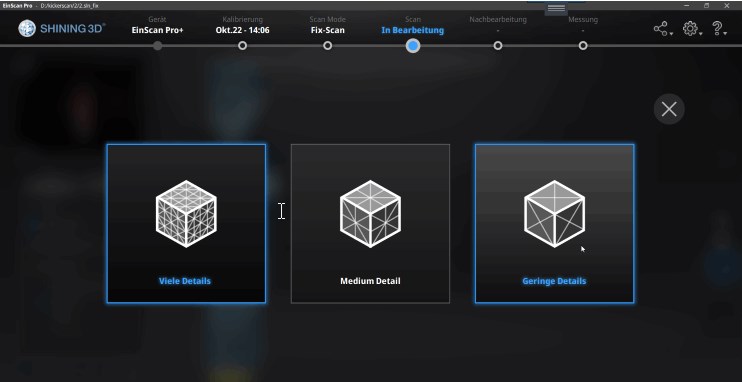
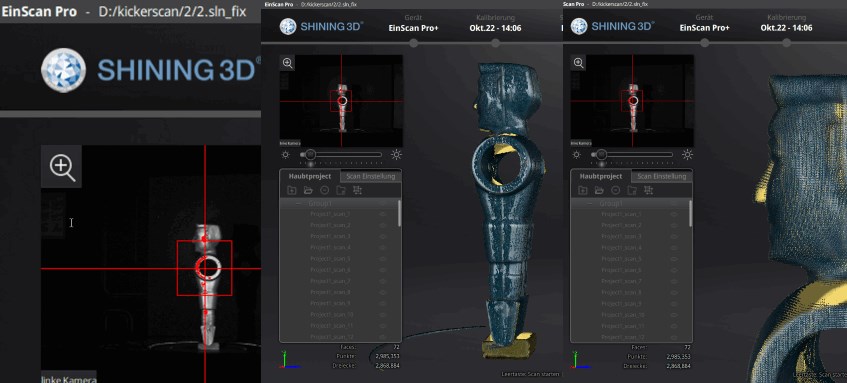
Now I am guided through the menu, opting for a closed model and for medium detail.
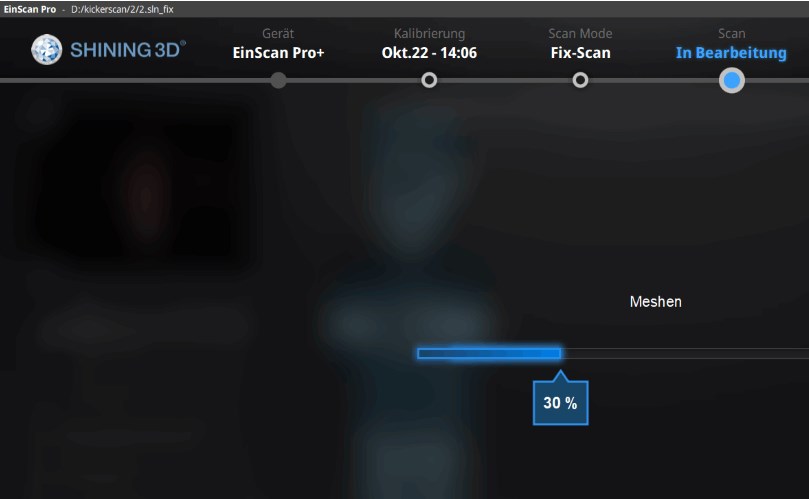
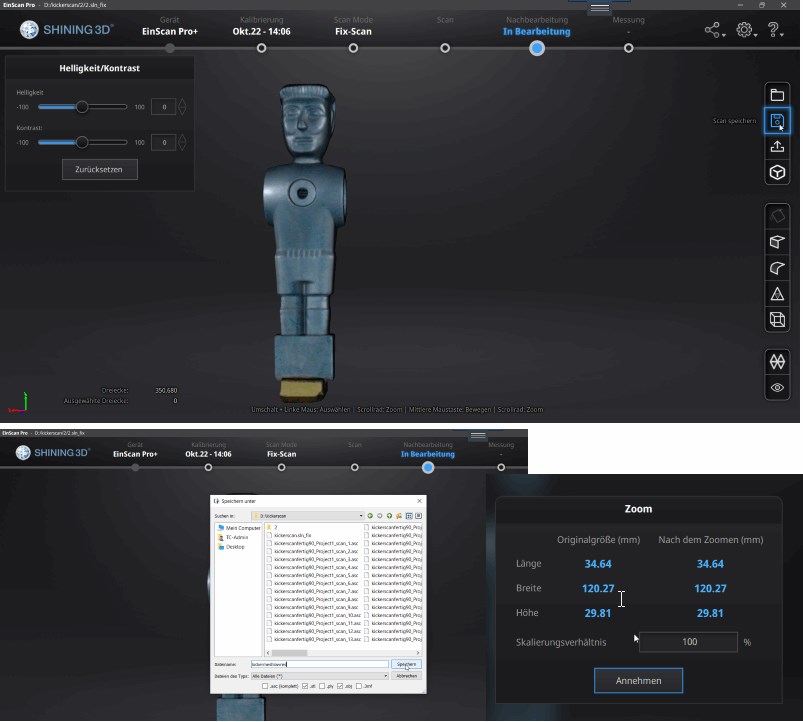
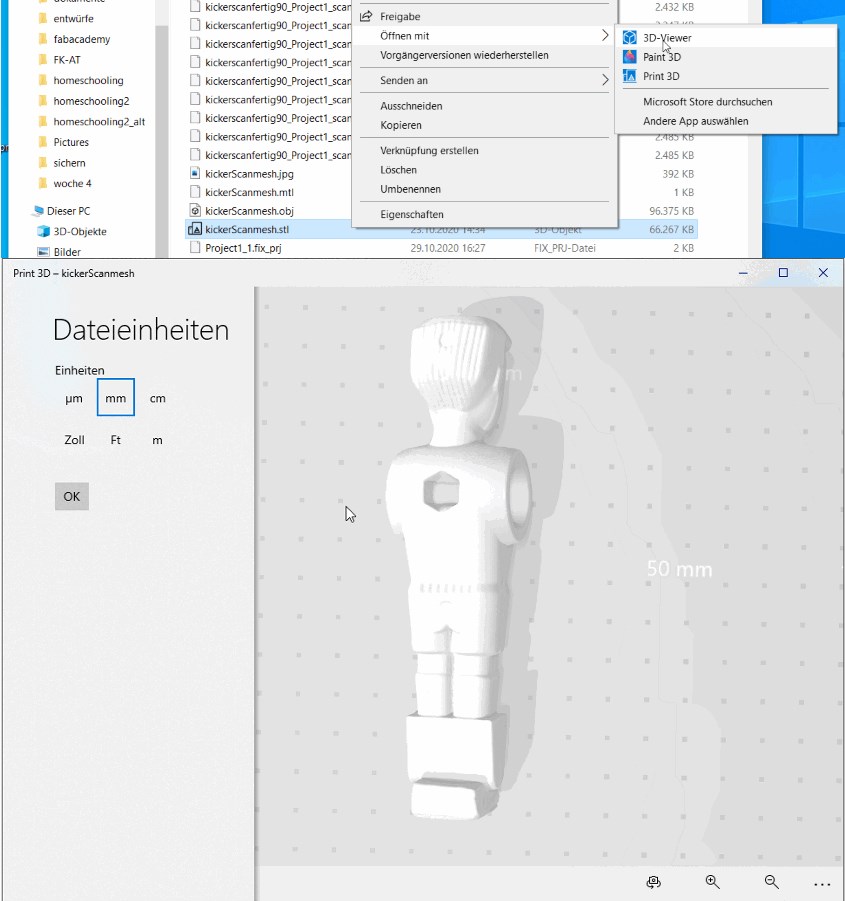
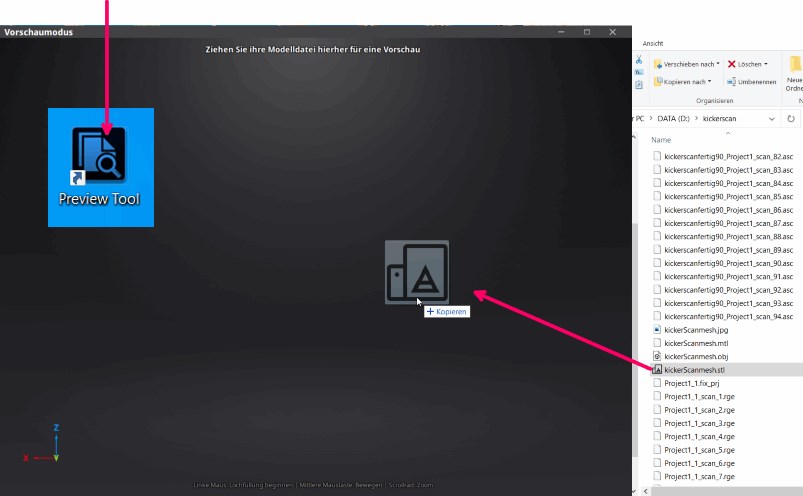
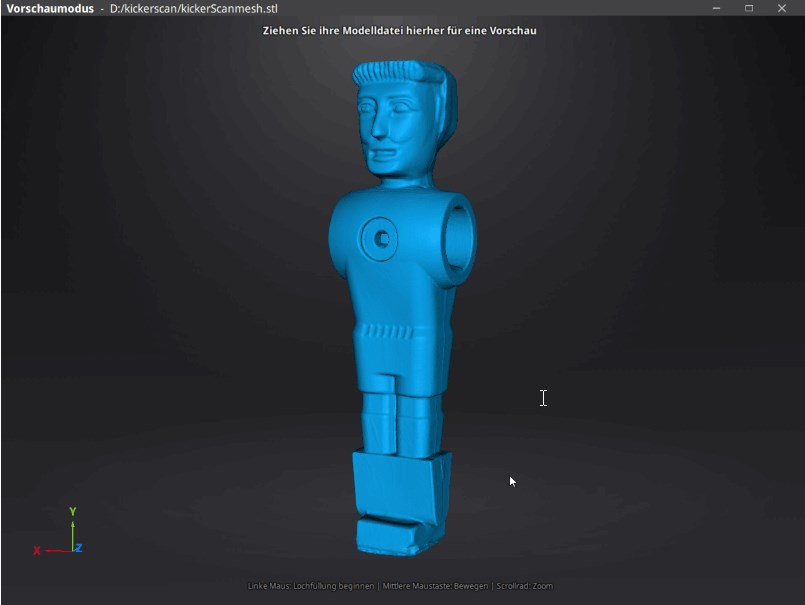
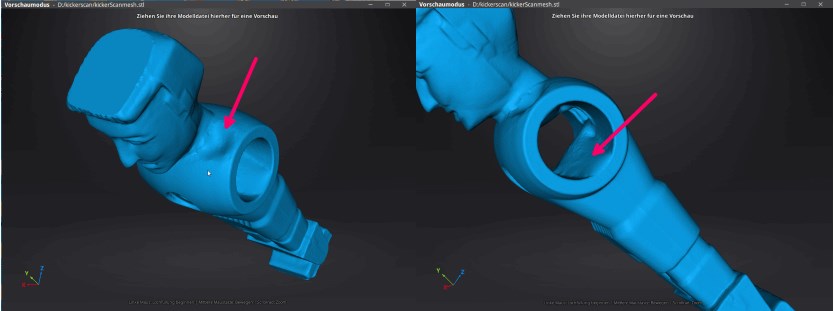
After meshening, I can save the file as an STL and view it in the 3D viewer. Or check them out in the preview.
Although I thought that the curves might be sufficient, he made small indentations on the shoulders and calculated excess material in the hole for the rod.
Unfortunately, I didn’t have the time that day to scan from a different angle. The scan would then probably be more precise at the relevant points.
test the tof sensor from the huawei mate 20 pro
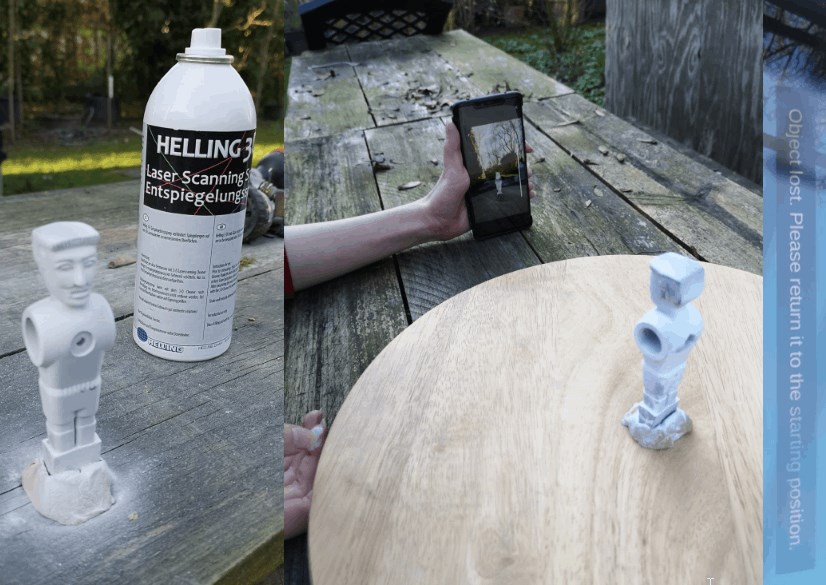
After a few unsuccessful attempts to scan the foosball figure, I try again with anti-reflective spray. I put the figure on a turntable and slowly try to scan it. Unfortunately, it doesn’t link this time either. I get reports very often that the object has been lost.
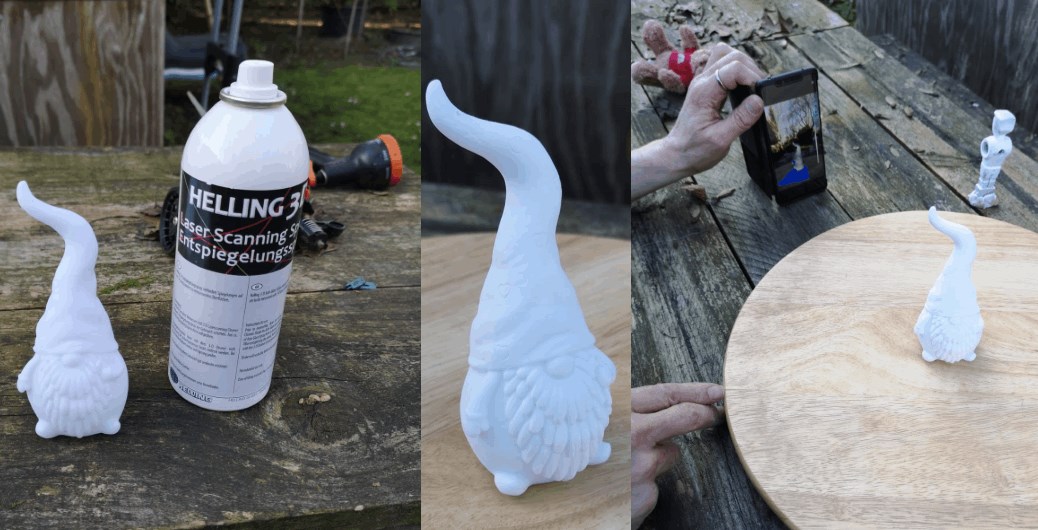
My next try is with this gnome. The scan was unsuccessful with artificial light in the evening. I am curious whether it will work with anti-reflective spray in daylight.
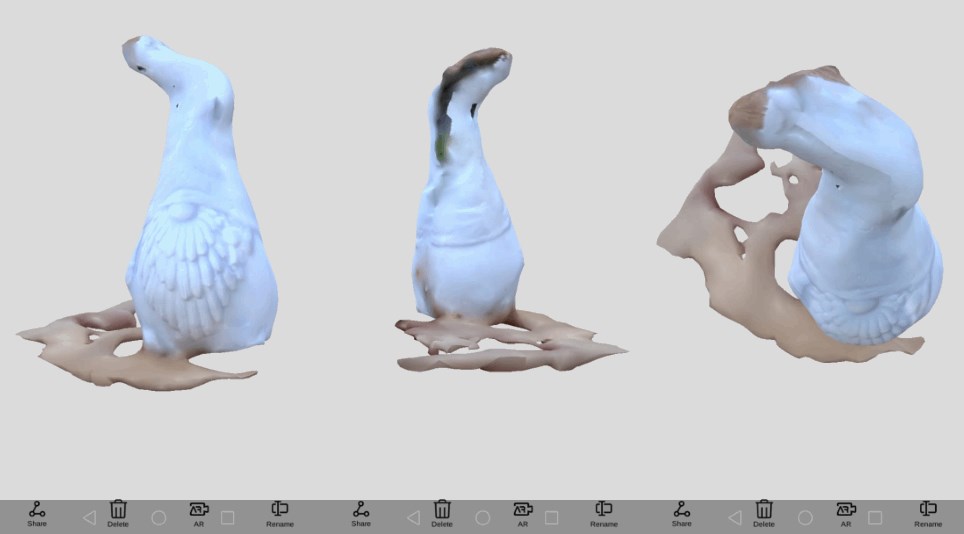
After a few less successful attempts, I am not entirely dissatisfied with the result. However, it seems that you need a feeling and some practice to get good results. A tripod would probably also be very helpful.
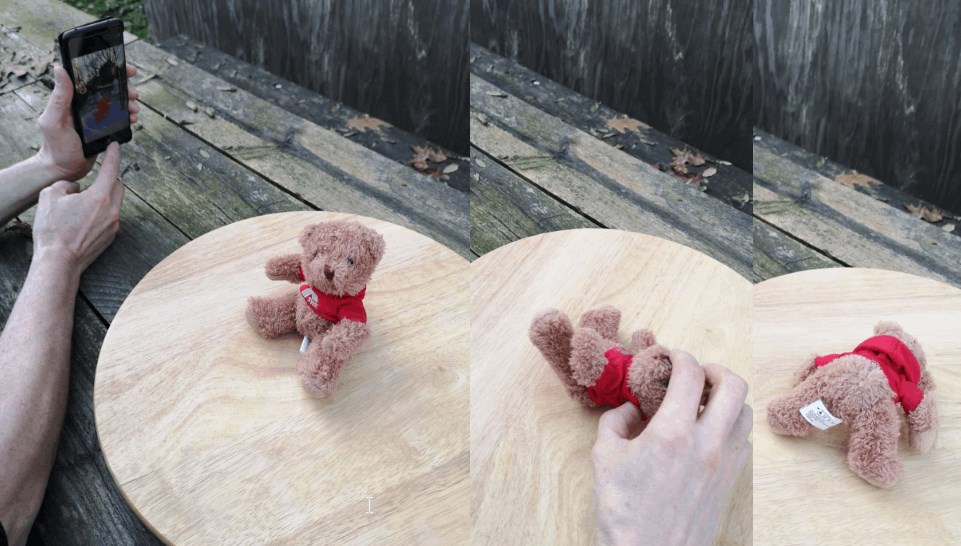
Scanning a teddy or soft toy works well in advertising. To see if that’s the case with me too, I try this one.

Here you can say it works very simply as demonstrated; it seems that fluffy things are easier to scan.
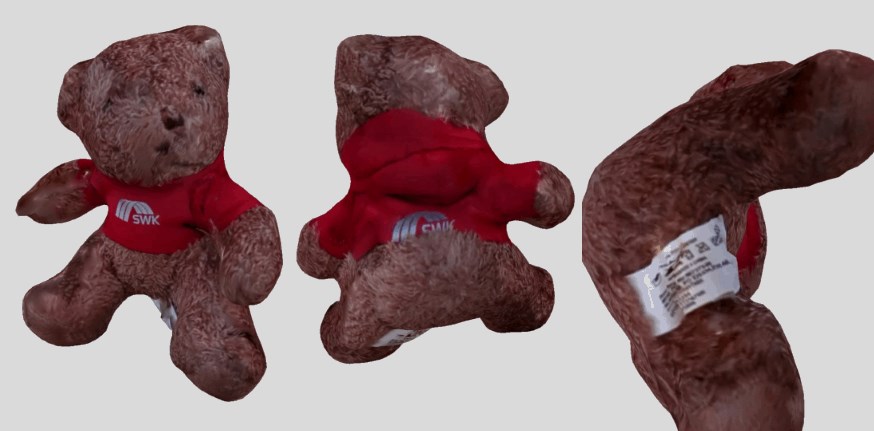
The result is comparatively good.

Tests to scan my daughter’s head still seem to need a little practice. But we will make the next attempt in daylight and cloudy skies. Another problem could be that everything has to be scanned in up to a certain percentage in order to have the file calculated. Since you cannot scan from below at the point of the neck, it could happen that you do not get to the point at which the calculation is made.
To be continued ......
scanning with the iSense
Since the I Sense does not work in connection with an Ipad at the moment, I take the scan that we made together with the children in class in the FabLab of the Rhein-Waal University of Applied Sciences. This is where the recordings were made that show us, Marc Kohlen the students and me with our working group “Die Digitale Manufaktur”.
useful videos
useful links
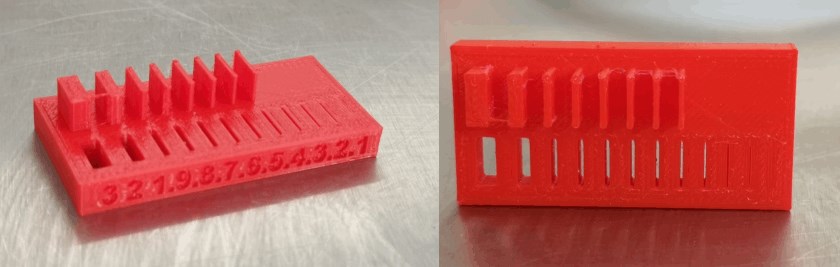
group assignment - 3D scanning and printing
On the following page we tested the design rules for the 3d printer with the group.