Week 9+10:
Mechanical/Machine Design
This week we have been asked as an assignment to team up to design a machine. We have been thinking with colleagues some ideas but finally the winner has been: "battle" robots. We will not make them fight far from it, but we would like to deactivate them in some way (by pressing a button, touching something, or similar).
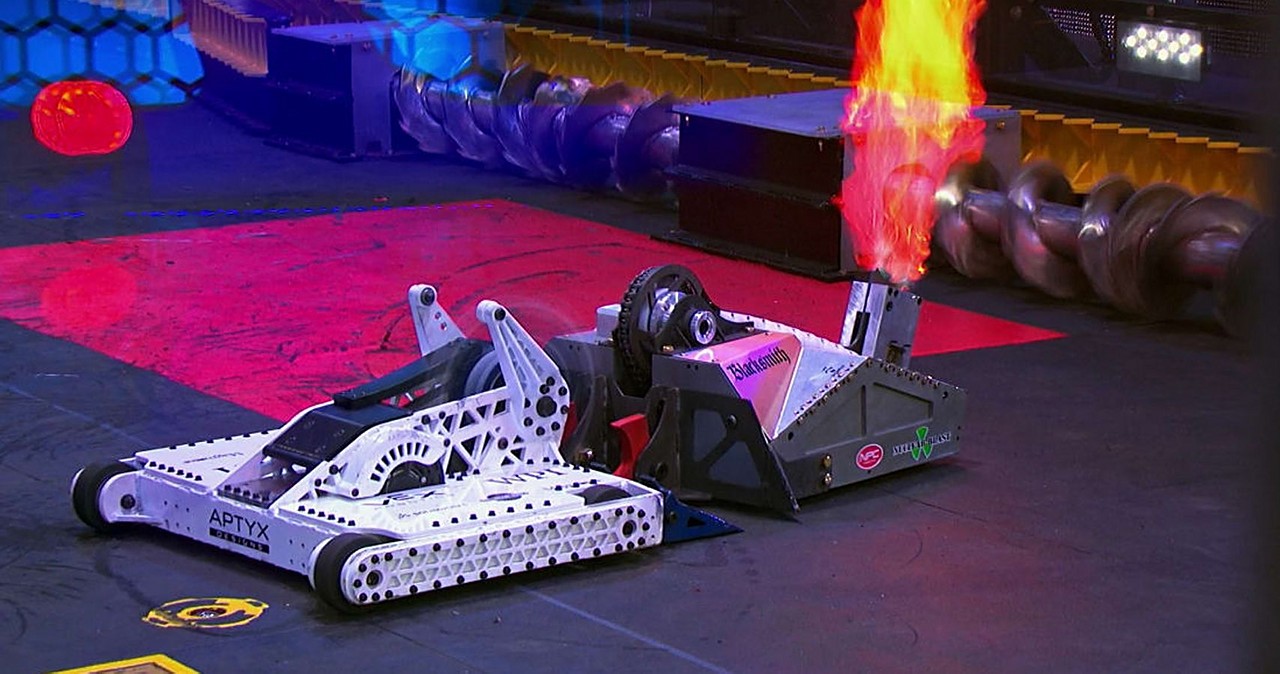
To adjust to the parameters of the assignment and also create fair rules of the game, we have thought that all machines have an equal basis for all, but that each team thinks of a mechanical system to use as a tool.
The idea seems super cool to me! I think we can have a great time, even if they involve a lot of work. I think the fact that the idea motivates us will make us take it a lot more seriously. We also want to have a "fight", which seems like no but we haven't started yet and the teams are already teasing each other.
The assignments for this week are:
Mechanical Design Assignments:
• Design a machine that includes mechanism+actuation+automation
• Build the mechanical parts and operate it manually
• Document the group project and your individual contribution
Machine Design Assignments:
• Actuate and automate your machine
• Document the group project and your individual contribution
Awesome Machines
In the links that you have here below you can find the websites of the three machines that we have made this week:
Game Rules
For the game to be fair and we were just discussing during one morning those aspects that all the machines had to comply with, how we could deactivate other machines and what materials we would use.
Here are the rules of the game that we finally decided.
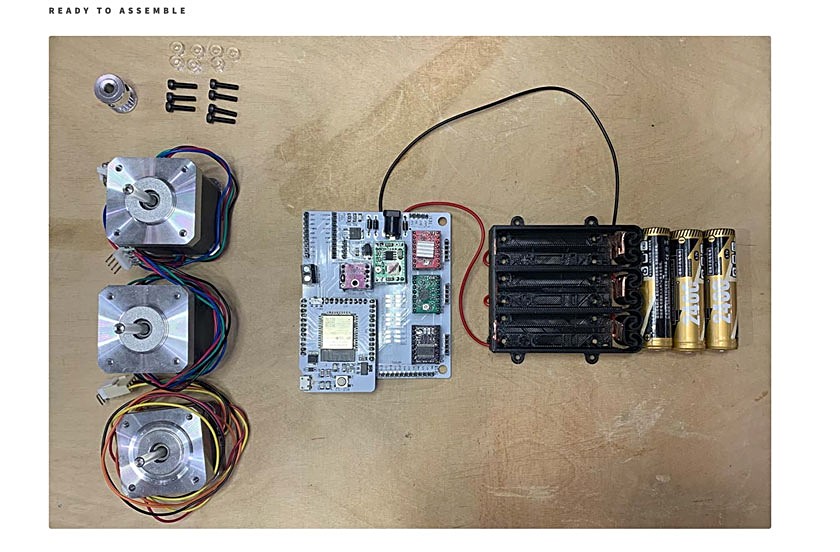
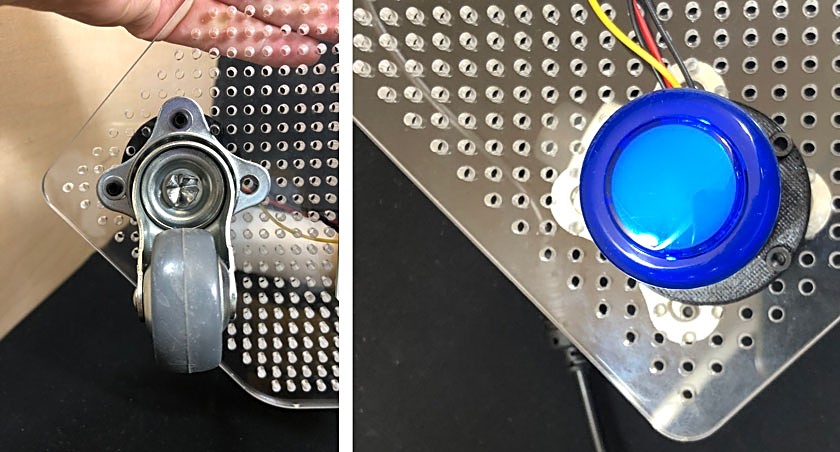
- All machines will have the same common base. This will include two motors (XY), the electronics, an illuminated button and a tool that will be activated by the Z motor.
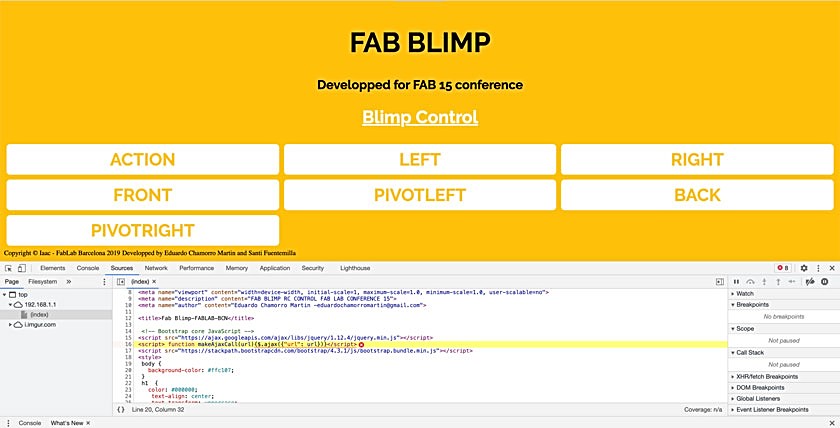
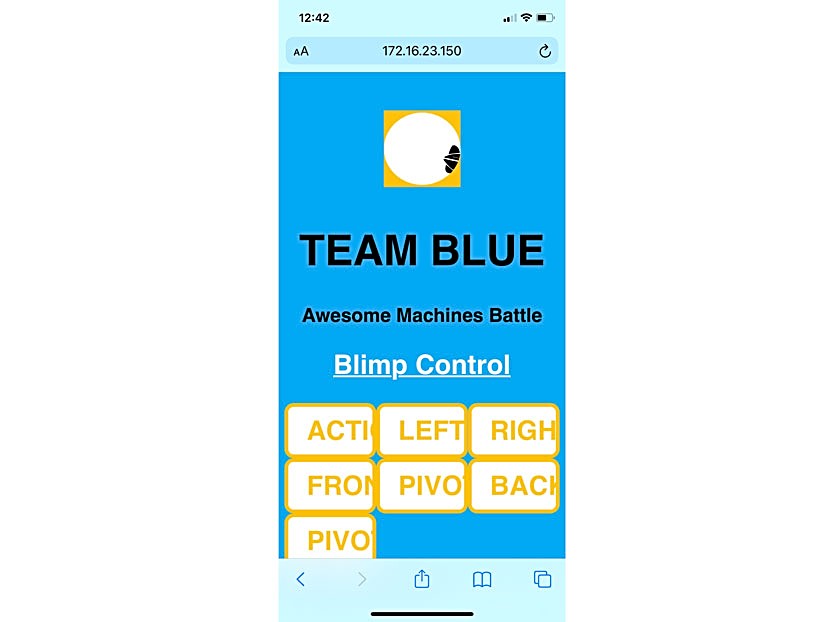
- The machines will be controlled from a mobile phone through an application.
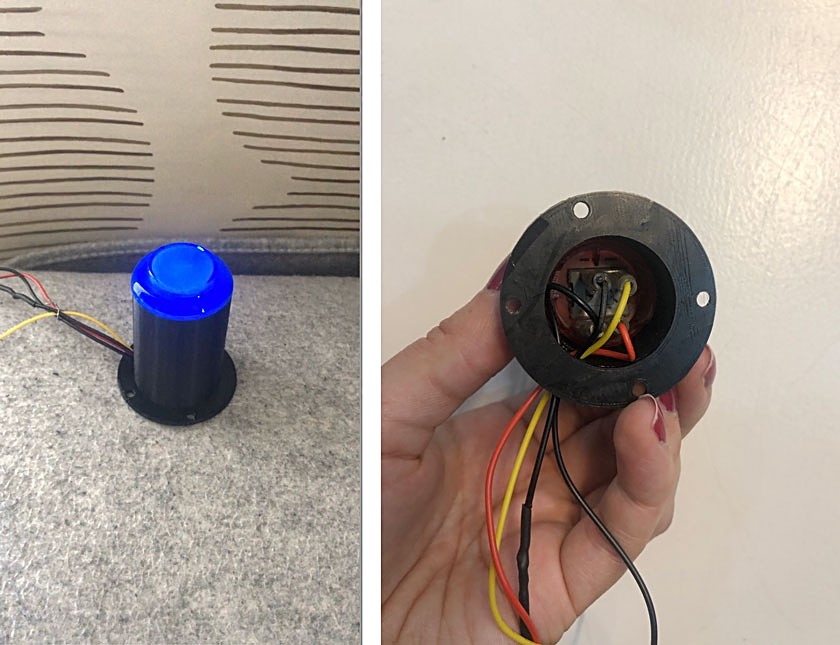
- The weak point of the machines will be an illuminated button that will remain lit while the machine is on. When the button is pressed, the machine will shut down and the button will blink.
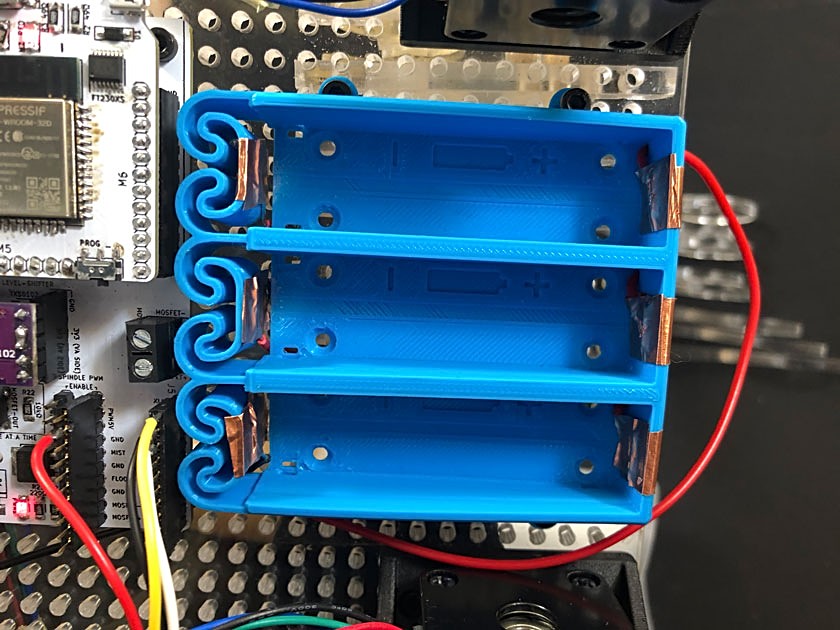
- All machines will be built from the Barduino and its CNC shield. Power will be provided by a set of 3 250mAh Li-ion batteries.
- There will be three teams, which will highlight their color in the button light (Red, Green, Blue)
- Fair play will be the norm and unsportsmanlike attitudes will not be accepted.
- Have fun and may the best win !!
Body
In this part of the machine we all worked together, the nine of us, to try to move forward as quickly as possible and that each team had time to work on their tools with a certain time margin of error. Below you have a small Gantt of how we distribute the tasks.
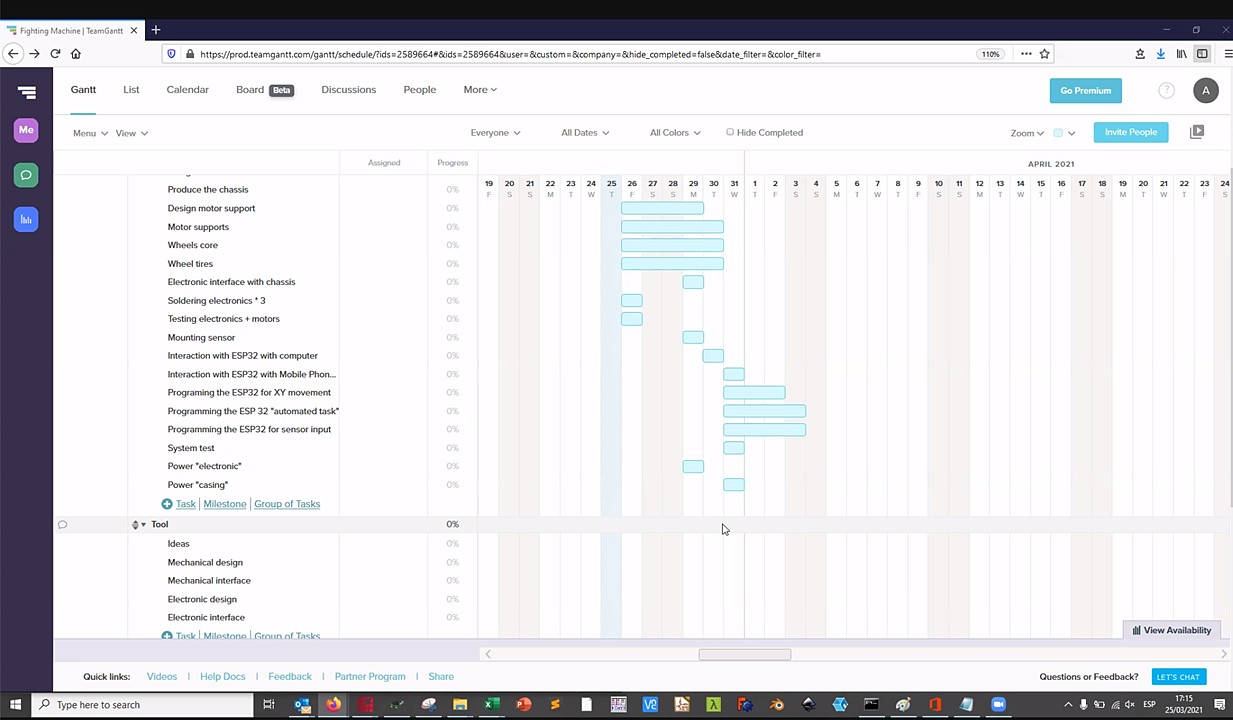
So that you have a more realistic vision of what we were doing, in WhatsApp we were writing down all the tasks we did and who did them. Review the following list of tasks.
- Barduino+ shield kit preparation: Nil, Lynn and Marc
- Barduino+ kit - Soldering: All of us
- Fabblimp firmware + adaptation: ADRIEN
- ESP32 debbuging (TX RX, voltage regulator) : adrien
- PWM(JUMPER) oscillo : adrien
- stepper motor control : Tarek
- Millis : Tarek
- pull-down solving : Carla
- pull-down : tarek
- button : adrien
- Driver calibration: Carla + Nil
- Steper test: Carla+ Nil
- base design: Marc + Diego
- base cutting: Diego + Marc
- Assembling tests: Diego + Nil
- motor support/printing: Gerardo
- button support: Design Diego / Printing Gerardo
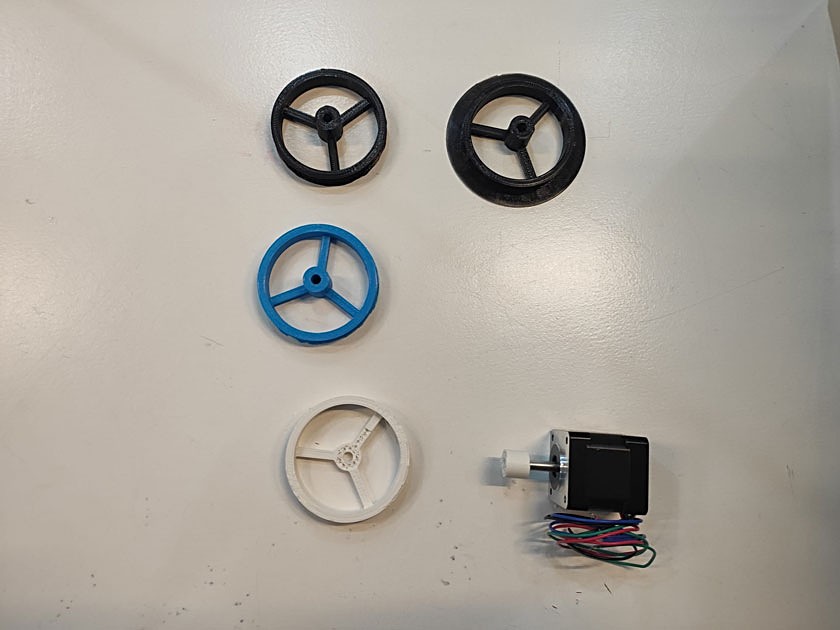
- wheels: design and print, Gerardo
- battery housing: Design Diego / printing and soldering , Gerardo
- soldering : All of us
- CNC SHIELD : carla
- Barduino : Adrien
Let's go now reviewing the parts that make up the body one by one.
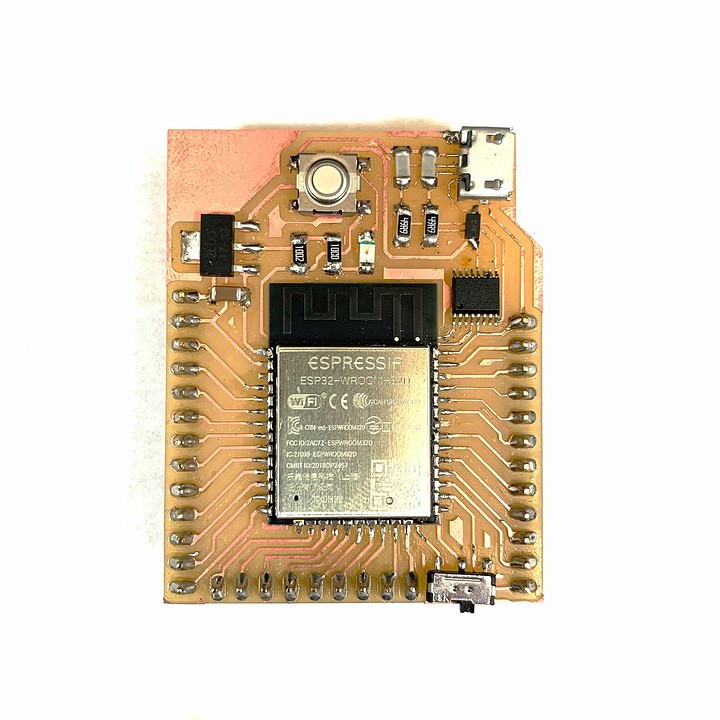
Barduino
Check all the Barduino process here
Check all the Barduino Repo here
CNC Shield

Check all the CNC Shield process here
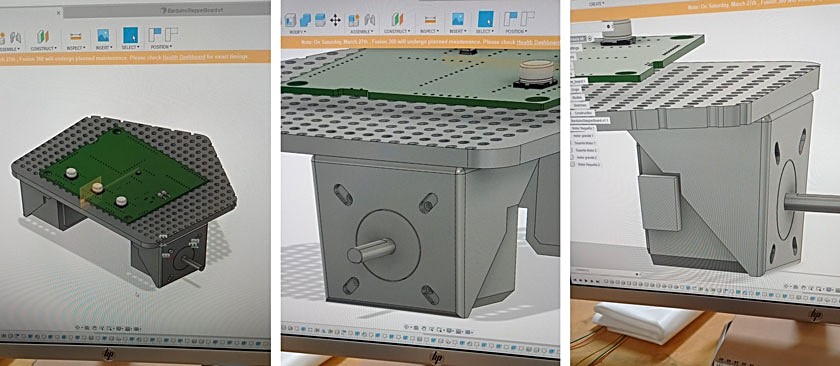
Motors and 3d printed casing
Check all the Motors and 3d Print process here
Battery Case
Check all the Motors and 3d Print process here
Base
Motors and Wheels
Check all the Motors process here
Button
Check all the PWM with ESP32 here
Check all the Button Programming here
All Components
Interface and Application

Tool
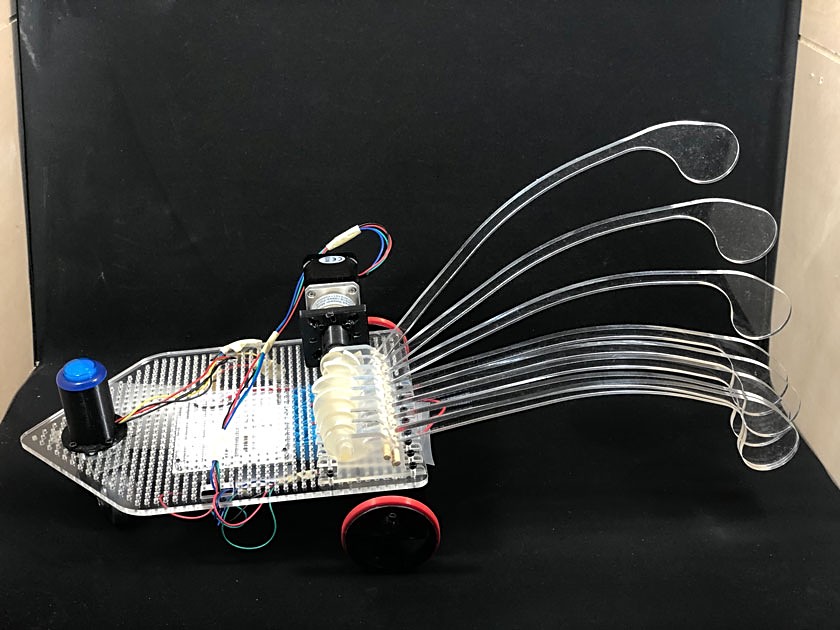
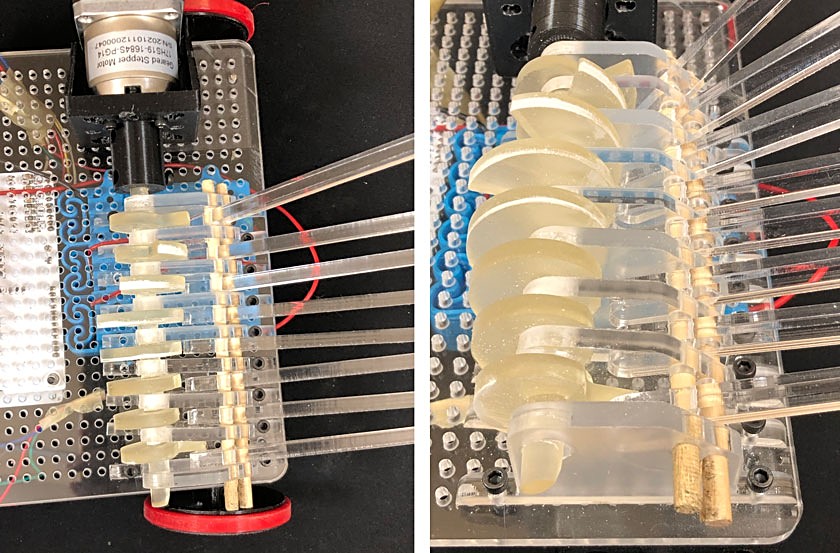
The tool that our team designed consists of a stepper motor crankshaft that moves different elongated pieces in a sequence. The idea is that on action the different “fingers” will aim for the oponents button from a wider range.
On our Team we worked together to define how the tool was going to be and how to build it.
Marc was in charge of modelling the base for all the Teams and in addition he created a 3D model and simluarion of our tool. He also laser cut the bases and pieces for the crankshaft, 3D printed the motor supports.
Carla was in charge of the electronics and the interface. I created this tutorial document to help my peers to assemble and setup their boards. HOW TO BARDUINO + CNC SHIELD
Nil (me) was in charge of the crankshaft and making sure that all components coming from other class members were ready for us to build our Fabot. That included the battery pack, and recharging batteries.
Final Assembly
Operate the tool by hand
Not enough torque for the crankshaft to spin
Finally working!
Awesome Machine 2: video
My Contribution
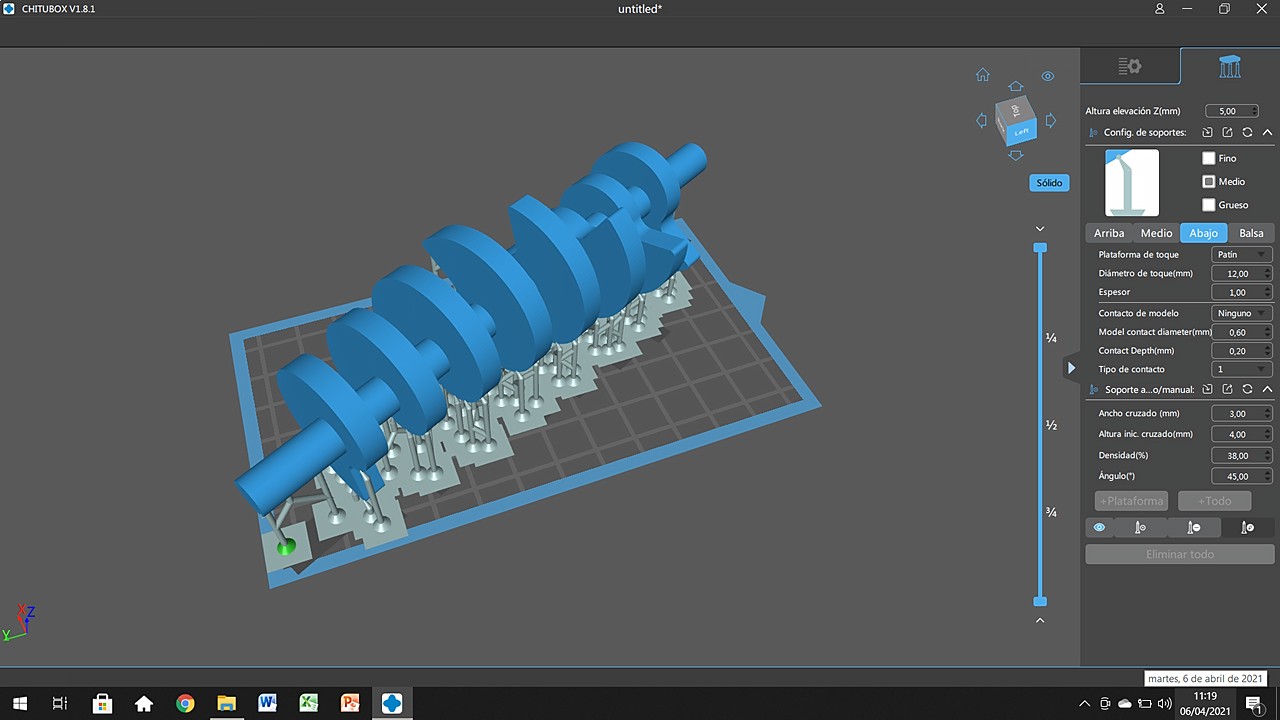
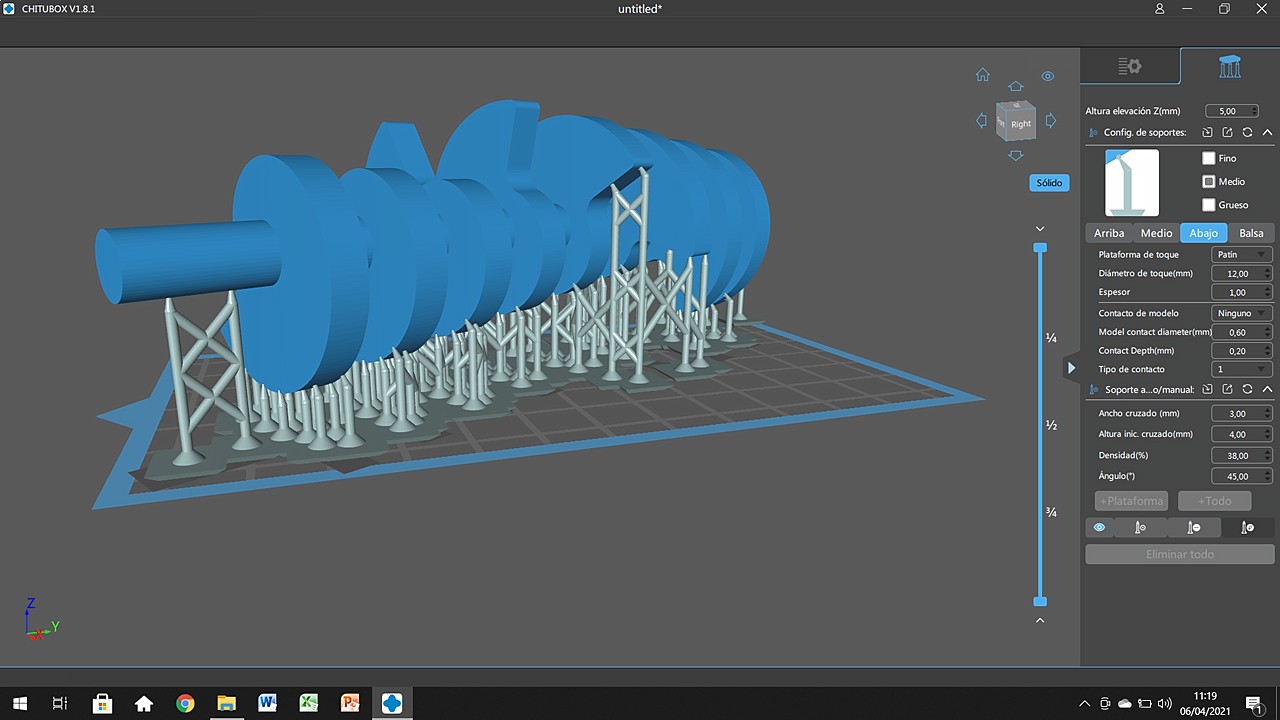
Drive Shaft
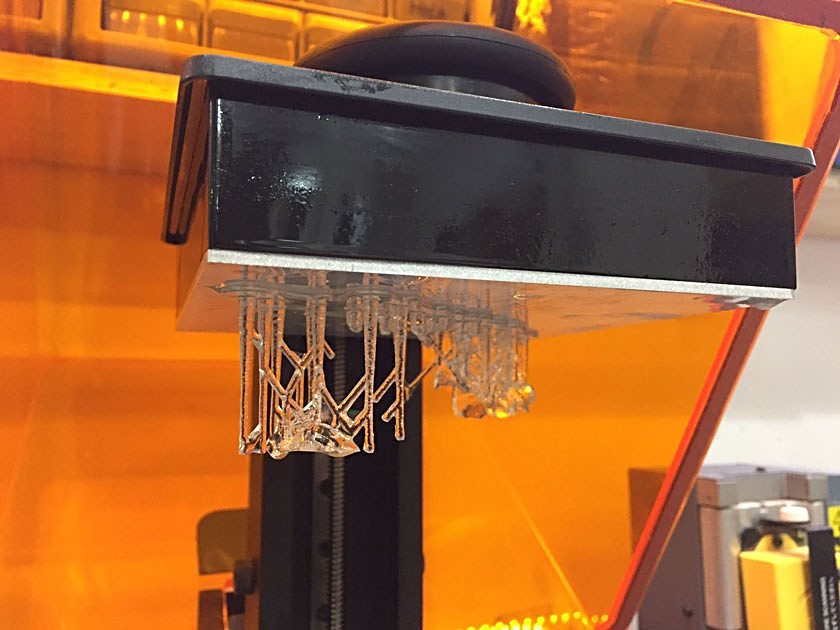
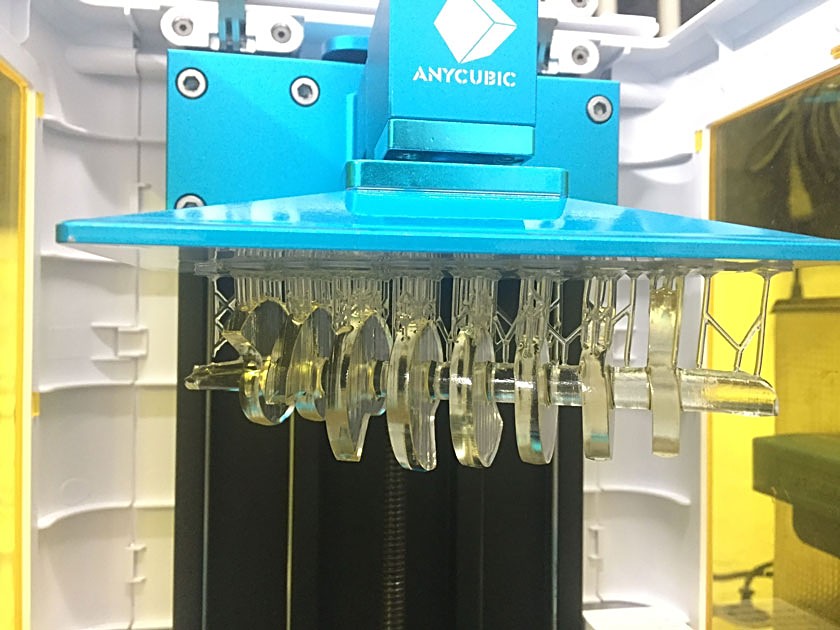
My most important contribution to our team's tool has been the SLA 3d printing of the drive shaft that makes the rods fall with which we hit the buttons of the other teams.
Chitubox
Printing 1: Formlabs (failed)
Printing 2: Anycubic Photon S (success)
Results
Calibration of motor drivers
On the other hand, we had to configure all the motors and their respective drivers so that the voltage level at which they work was adequate. This process is done through the following tools:
- Multimeter
- Motor driver
- Screwdriver
- Cables with clamp
The job is to anchor the positive wire to the screwdriver and multimeter. With the negative touch a GND and look for the voltage value that makes the motor rotate correctly without skipping steps or below its operating voltage.
Between Carla and I we gradually calibrated them all until the kits were configured so that the motor drivers and motors worked correctly together.
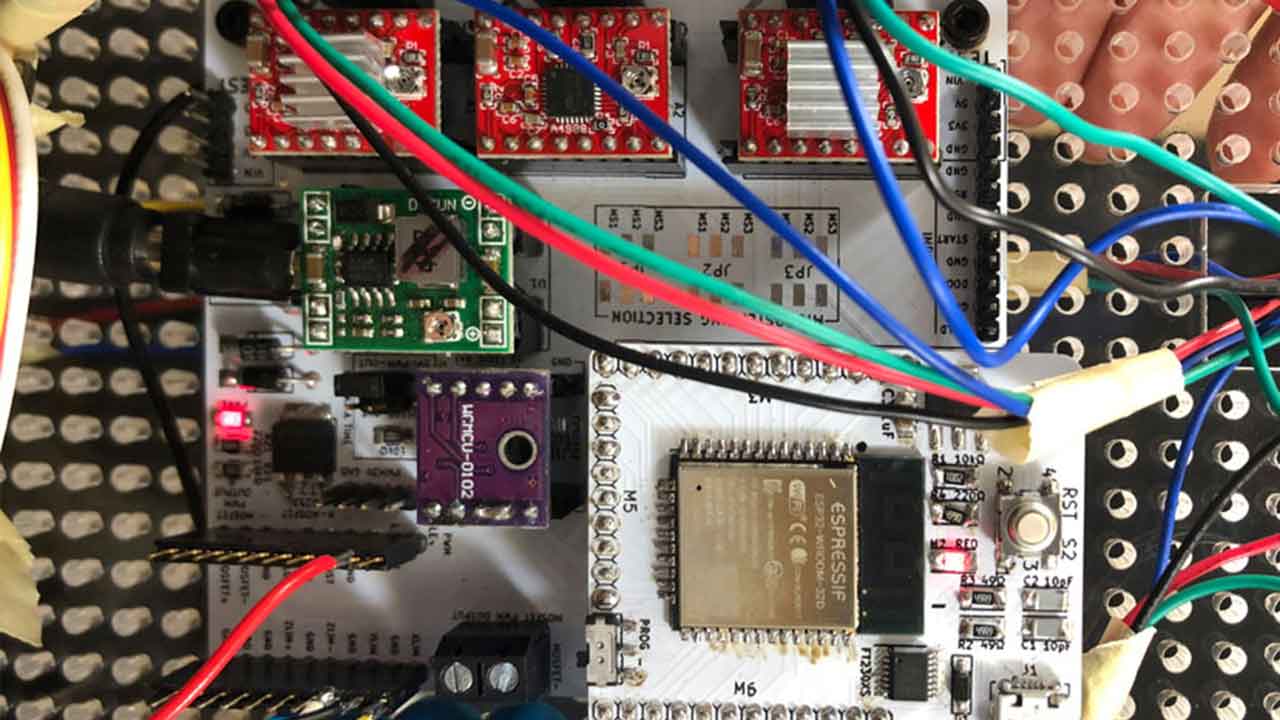
Barduino Soldering
Another of the tasks in which I collaborated was the soldering of the Barduinos: we were three teams so we needed 3 barduinos and 3 shields. In my case I soldered and debugged the barduino and shield of our equipment. It was not a complex process but it was long, there were many components to find in the inventory and then weld each one correctly in place.
The steps we followed were:
- Find the Fab Lab Barcelona repository of Barduino version 2.2.
- Find the BOM and the Barduino schematics. Also some images of how the components go and where they soldered.
- Lynn and I, prepared all the components for the Shield and Barduino, for each team in the LAB.
- With the help of Edu we soldered the Barduinos and little by little we debugged until they worked correctly.

Hand activated prototype
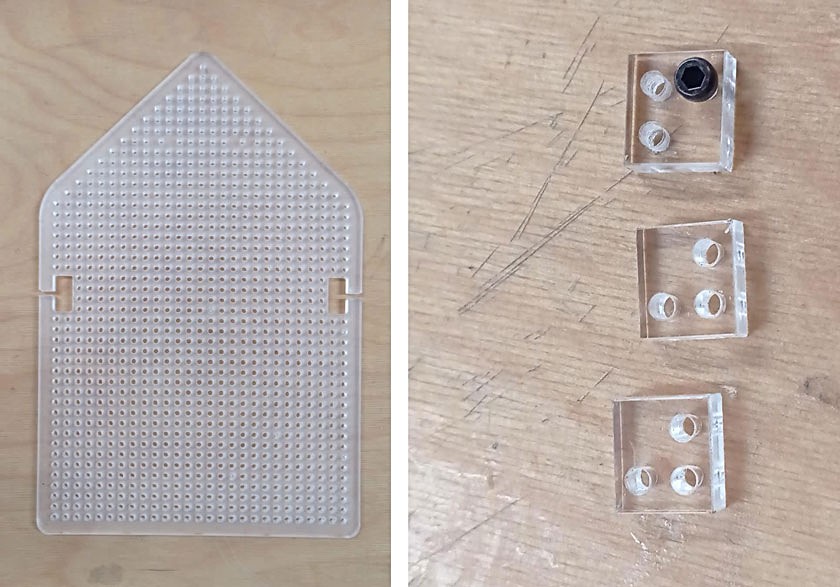
Last but not least, I think that the most important contribution within my team, between Marc and I prototyped the mechanical system of our tool in wood and methacrylate.
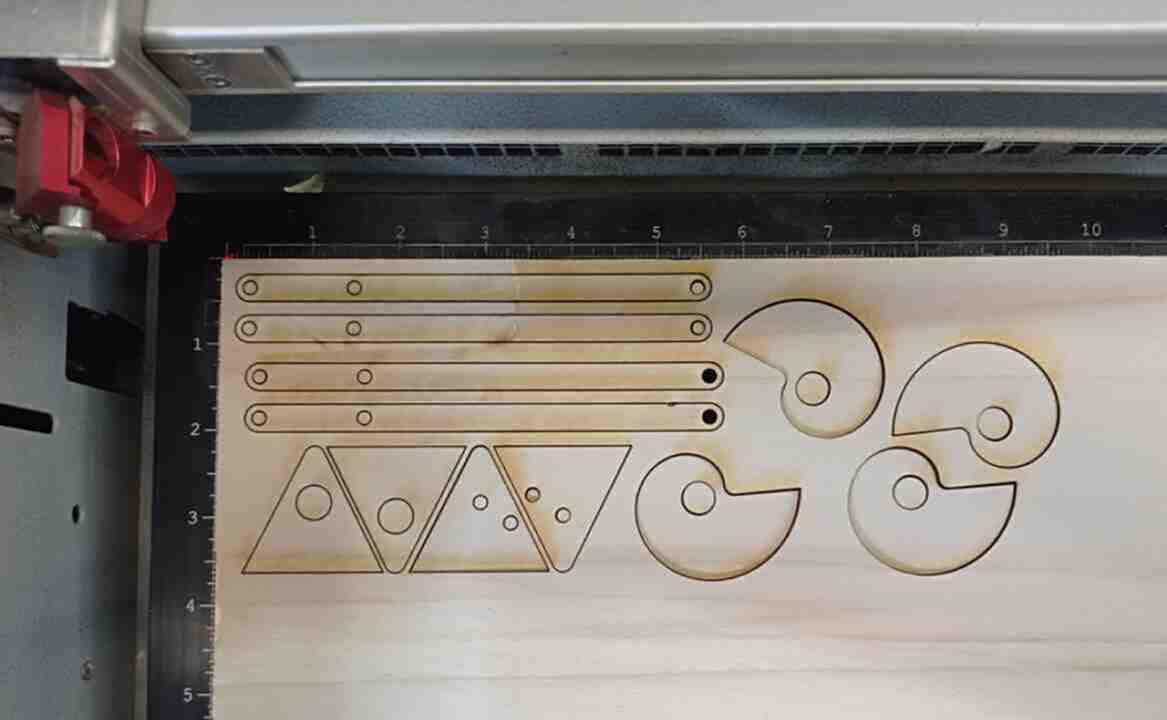
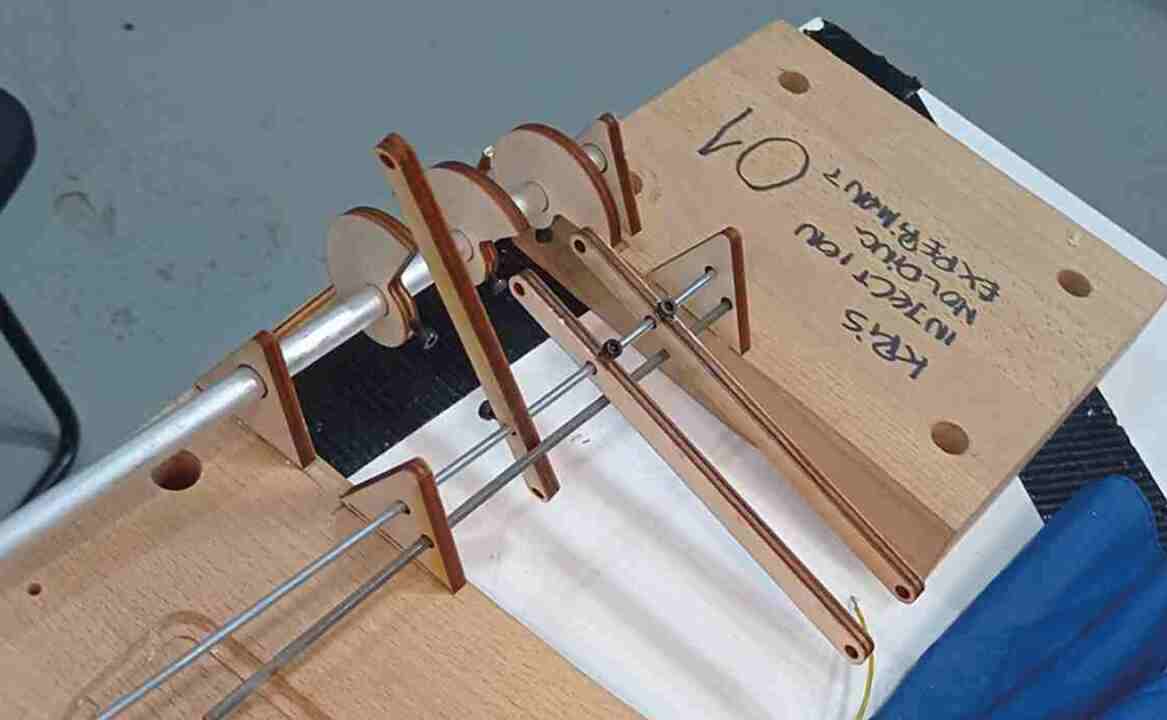
This first attempt with breechoow helped us to size the components and see if our calculations and measurements were correct. Once we were clear that this was feasible, we started printing the transmission shaft and cutting the pieces with methacrylate.
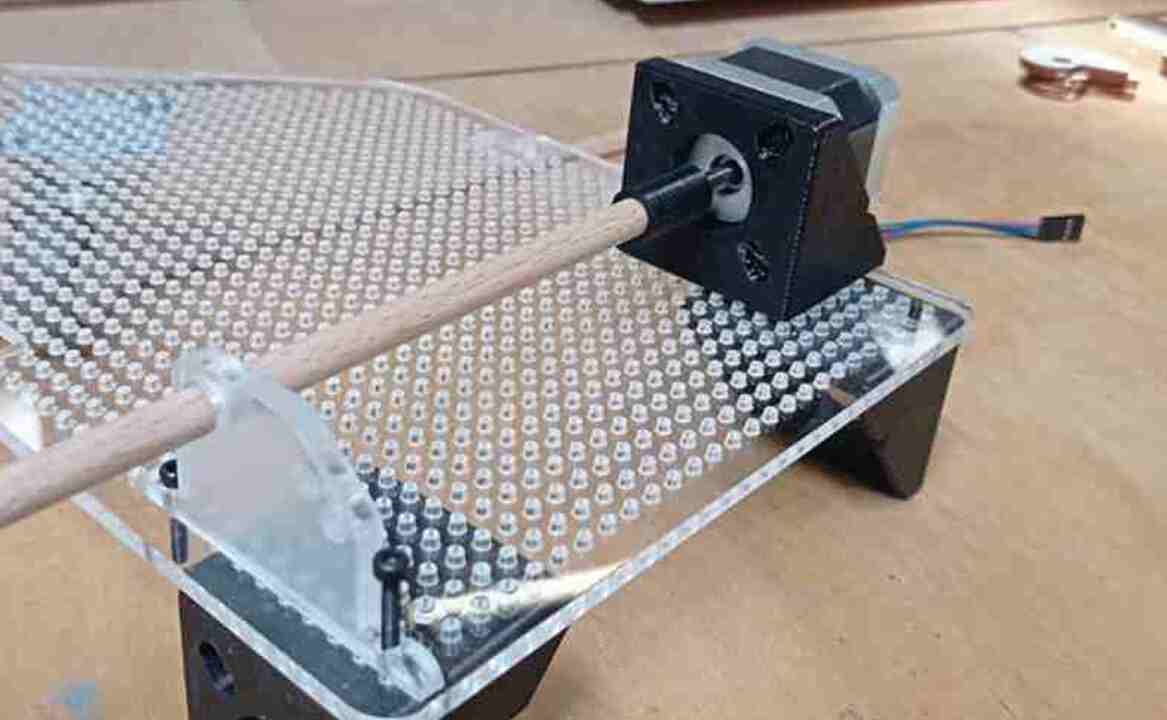
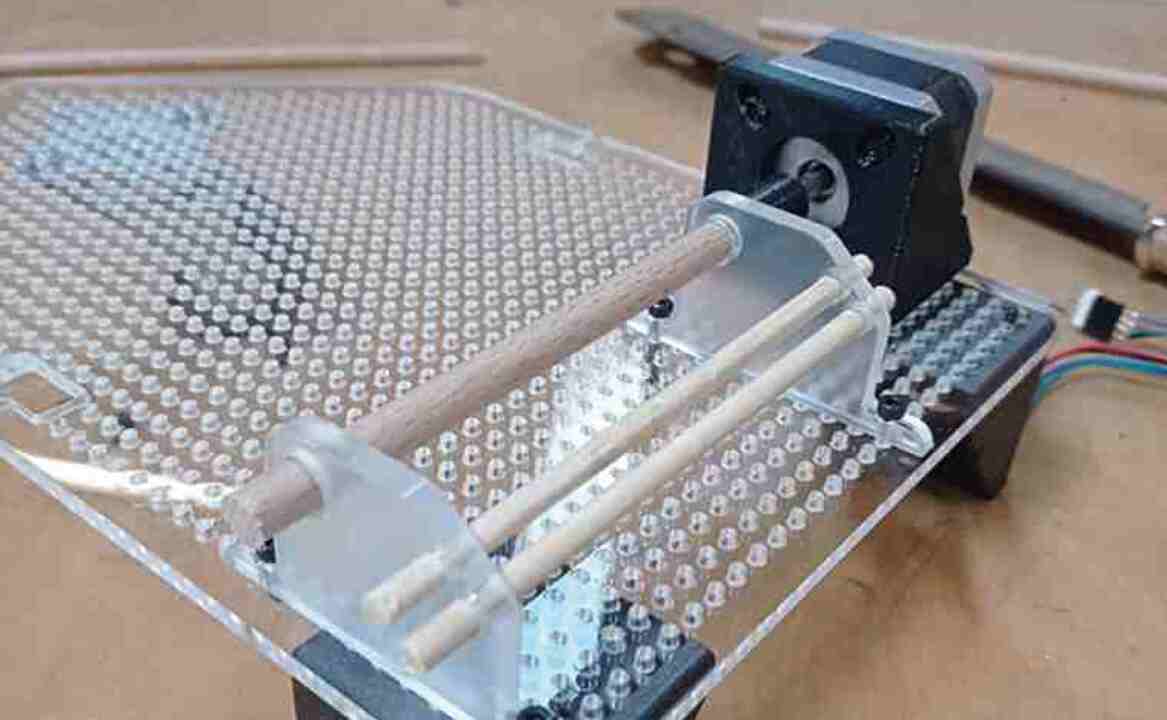
Here is a small video of how we got it to work while activating it by hand.
Conclusions
The conclusions of this week revolve around two different concepts: own learning as always and lessons learned from teamwork. In order not to get too excited about this week's learnings (which have been many), check the following list where I list them in a schematic way.
Learning Income
- I think that having focused my efforts on SLA and SLD technology in the 3D printing week has paid off in this one with the printing of the driveshaft.
- I have learned a lot about the possibilities that communication between devices can offer in projects that require user control.
- It's maybe silly, but grabbing the cable clamp to the screwdriver to calibrate the drivers seemed like a great trick!
- I have found very interesting the work that my colleagues have done with the interface of the motors by means of the Blimp to control the steps of the machine and the fact that they have achieved it is a tremendous thing.
- I think this week is the first time I have seen the brutal capabilities that digital manufacturing offers to engineers. At first, I always take everything to design, but the engineer in me this week has been amazed. In a matter of days we have gone from a few pieces of methacrylate and four motors to having a functional machine that does everything we had designed. The speed with which you can go from ideas to products is impressive.
- I was unfavorably surprised, how easy it is to burn components when working with engines. On several occasions the Polulu have burned because of too high voltages and some engines also because of carrying more load than they were capable of supporting.
Teamwork
- Working as a team is never an easy task, but I think we have done it quite well. There have been moments of frustration but in general it has gone well.
- It has been curious to me, that we have all known each other since the beginning of the Academy, but that I work better with some colleagues than with others. In some cases, I have empathized better with those I have less confidence than with those who are closest to me.
- But in general I think we have done a good job and that the idea of racing has pushed us even further.
It has been a super stressful, frustrating and tough two weeks, but in the end I think we have done a great job. We have known how to work as a team, the machines work and we have a great time making them fight.
Original Files
Link to Awesome Machine 1 files from this week.
Link to Awesome Machine 2 files from this week.
Link to Awesome Machine 3 files from this week.
What to improve for next assignments?
These two weeks have been a real madness. We had to coordinate in small groups, but also among all of us to get all the content developed. Really crazy. If to that you add that during Easter Break I have been moving to Barcelona from my hometown ... You can imagine the level of stress that I have been managing these last 14 days.
I do not consider that I have to improve things for the next few weeks since this enormous peak of stress has been derived from extraordinary situations. Anyway, I would like to do a bit of self-reflection and see what things could have gone better.
What went well?
We had fun & struggled because of the challenge: It was the most ambitious project we developed so far and yet the one it felt we had less time to produce because of the easter break.
A lot: I feel I was able to learn a lot while troubleshooting as well as from working with my peers.
What could be better?
I've had the feeling of multitasking a lot. As I did not have long periods of time to dedicate to specific tasks, like Marc and Carla. I have dedicated myself more to a lot of little things.
I liked to take a part and develop it all myself. The feeling is like nothing in the machine is my doing, because I haven't done everything myself. Instead, working on a lot of things has given me a great overview of the Awesome Machines.