Week 12:
Molding and Casting
This week we return to the topic of manufacturing. I have to admit that this week I was excited since the beginning of the FabAcademy. I've done a few things before, but in an unprofessional and rushed way. I would like to do like last week, start little by little understanding key concepts and gradually increase the difficulty.

I am not too clear for this week if the size of the components can be a problem, because it seems that the milling process is very long and we do not have many machines. Anyway, I'm still thinking about what I could do. Normally I have worked with cement and the finishes have never mattered much to me, but this time I would like to take my molding game a little further.
I would like to have a good understanding of the molding and casting system, because I believe that with the wide range of materials that you can use for casting, this is a powerful tool for prototyping. I also consider that if your skills are good, you can consider producing casted models that can be very close to a final industrial product.
The assignments for this week are:
Group assignment:
• Review the safety data sheets for each of your molding and casting materials.
• Then make and compare test casts with each of them.
Individual assignment:
• Design a mold around the stock and tooling that you'll be using.
• Mill it (rough cut + (at least) three-axis finish cut).
• Use it to cast parts.
Group Assignment
Although we have all taken different directions during the week, materials and finishes, Adrien my partner has done a great job of putting all the information possible under the same framework on his website. Full credit to him for the work !!
Individual Assignment
Documenting while I was working last week worked great for me and I want to keep the same project management scheme. That is why I want to go step by step understanding all the concepts clearly and making decisions calmly. It is a mistake that I have made often during the academy: trying to go too fast and making mistakes.
The first thing to do is see what resins and casting materials we have to decide which ones to work with.LET'S GO!!!!
Casting Materials
To follow the workflow proposed by assignments, first I am going to see what materials we have for casting and I will decide which ones I want to work with. In the following table, you have the most interesting and some general characteristics.
| Material | Vendor | Material Type | Price |
|---|---|---|---|
| Easyl 940-FDA | Feroca | Petroleum plastic | 22 €/kg |
| Platsil FS-20 | Feroca | Petroleum plastic | 34,44 €/kg |
| Easyfoam 300 | Feroca | Petroleum plastic | 11,20 €/kg |
| Hydrocal White | Feroca | Petroleum plastic | 3,4 €/kg |
| Dragon Skin 10 Fast | Smooth-On | Petroleum plastic | 38,83 €/kg |
| Smooth Cast 327 EU | Smooth-On | Petroleum plastic | 44,13 €/kg |
| Mold Star 20T | Smooth-On | Petroleum plastic | 38,22 €/kg |
| Foam It! 4 Black | Smooth-On | Petroleum plastic | 26,16 €/kg |
| Colofonia | Químics Dalmau | Bio plastic | 7,20 €/kg |
| Crushed Gelatin | Químics Dalmau | Bio plastic | 17,20 €/kg |
| Xanthan gum | Químics Dalmau | Bio plastic | 14,90 €/kg |
| Cornstarch | Químics Dalmau | Bio plastic | 5,75 €/kg |
Idea
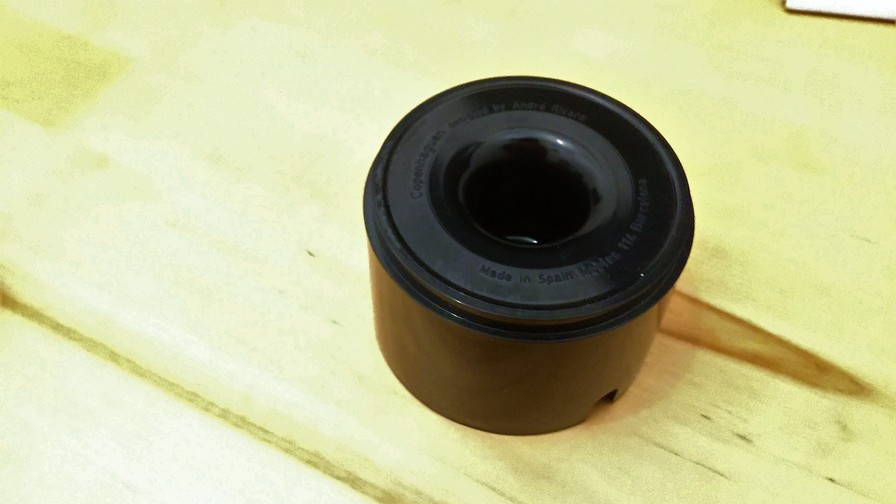
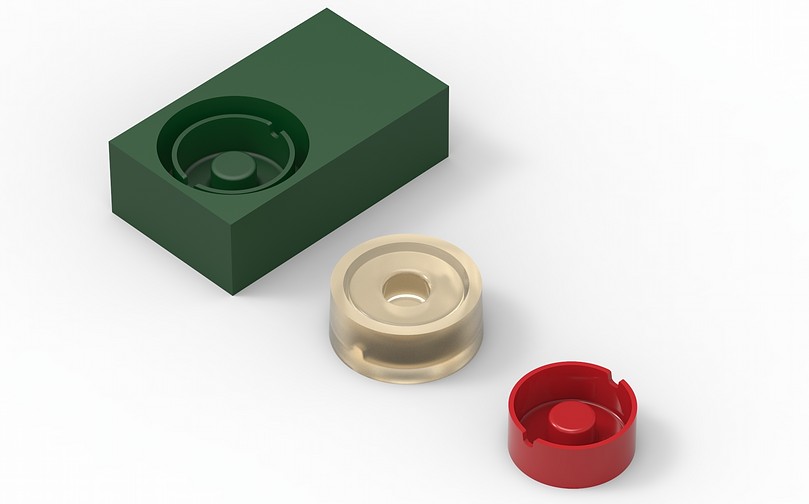
As a model I would like to use the Copenhagen ashtray by André Ricard for Mobles 114 (1966). It is one of the milestones of industrial design in Barcelona and the starting signal for 50 years of tradition in design. A few years ago they gave me the black version of the product, but I never wanted to use it because of its price and the sentimental value it has for me.
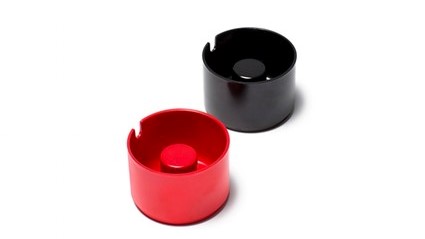
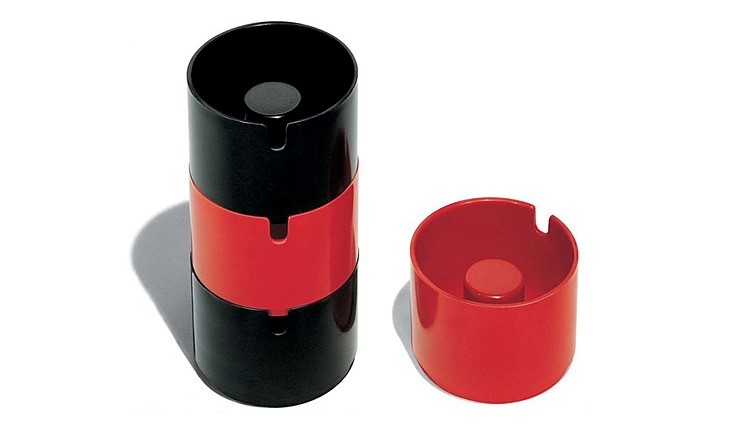
I would like to reproduce it as it is, but I think that would be insulting to the designer, and go against the principles of intellectual property. Therefore, I prefer to modify the design based on the production system. The original ashtray was made by injection of bakelite, with two half mold dies. I will do my rendering in a one-sided mold, sacrificing the stacking property of the original. You may have to make a few more changes due to the mold development process.
End Mills
The next table does not have much to do with the assignment of the week, because the end mill measures and the different typologies are not something that a priori is going to have a great impact on the design I have chosen. Anyway I think it is a good idea for the future to have a small comparative table of measurements of the end mills that we have in the Lab.
| Diameter inch | Diameter mm | Flutes | Tip Shape | Vendor |
|---|---|---|---|---|
| 1/100" | 0,254 | 2 | Flat | Carbi-Universal |
| 1/64" | 0,397 | 2 | Flat | Carbi-Universal |
| 1/32" | 0,794 | 2 | Flat | Carbi-Universal |
| 1/32" | 0,794 | 2 | Ball | Carbi-Universal |
| 1/16" | 1,587 | 2 | Flat | Carbi-Universal |
| 3/32" | 2,381 | 2 | Flat | Carbi-Universal |
| 3/32" | 2,381 | 2 | Ball | Carbi-Universal |
| 3/32" | 2,381 | 2 | Stub | Carbi-Universal |
| 1/8" | 3,175 | 4 | Flat | Carbi-Universal |
| 1/8" | 3,175 | 4 | Ball | Carbi-Universal |
3D Design
I'm still having trouble with modeling in Rhino, so this week when milling and curing times can be long, I'll be doing modeling in Solidworks to keep things simple.
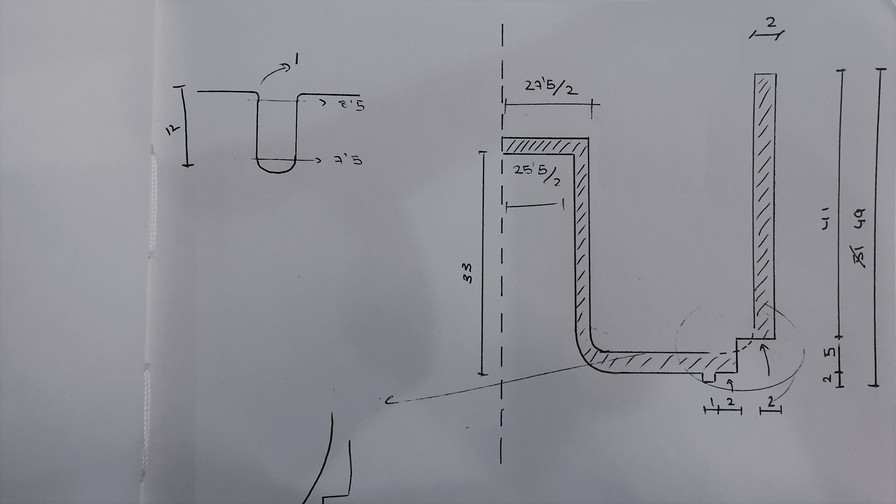
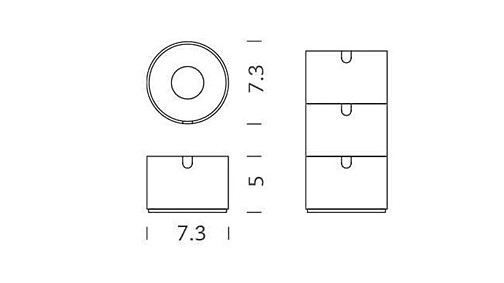
With all the measurements taken, I started the drawing process in solidworks. Here are some simple renderings so you can see the final result of the modeling.
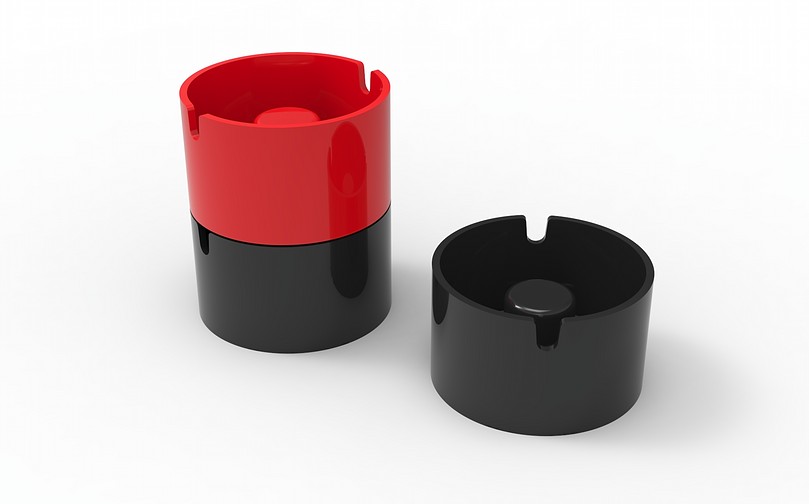
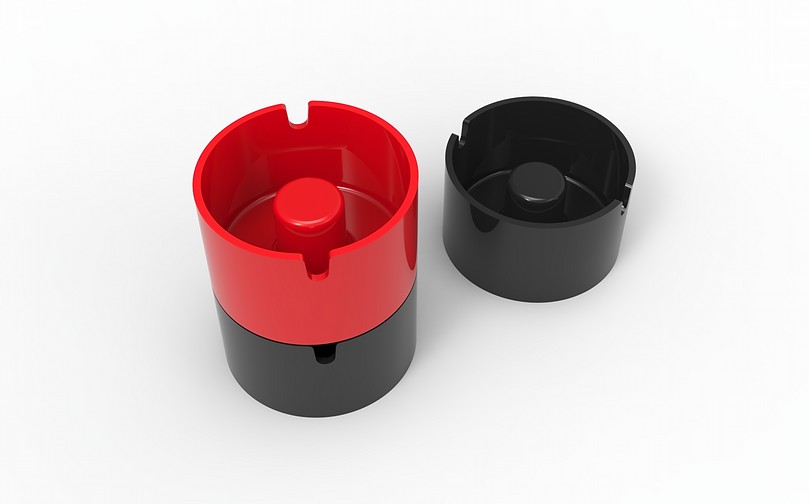
To get an idea of how all the molds and parts would work out, I decided to render the three major stages of development as well. It would be great to be able to recreate these photos at the end of the week as a comparison of the expected result and the final result. Hopefully they look a lot alike !!

Now that it seems that I will finally be able to use the CNCs, we begin with the technical development of the files. We are a lot in the Lab and we only have 2 CNCs, so the wait has been long.
CAM with Modella Player 4
At this point, I will do a step-by-step, because I think it will be very useful in the future. It can also help other students like me understand the process of working with 3d milling.
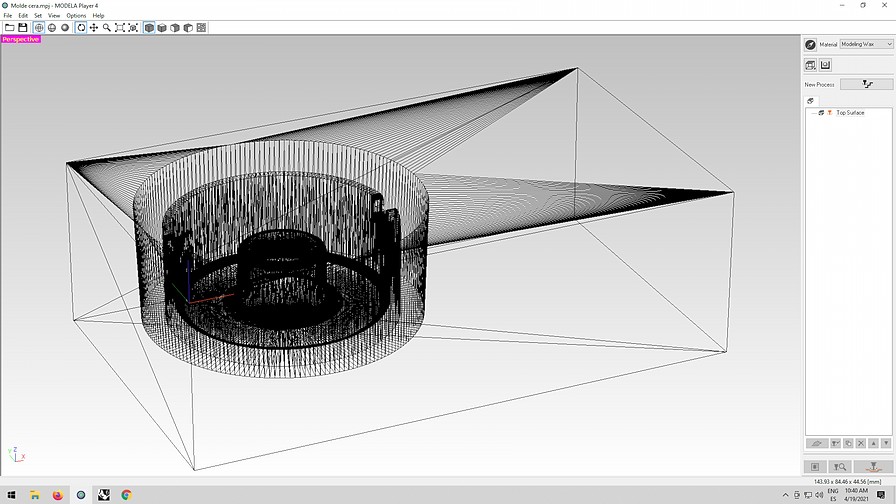
1. Import the file in .stl format to Modella Player 4. Place part and origin in the desired place.
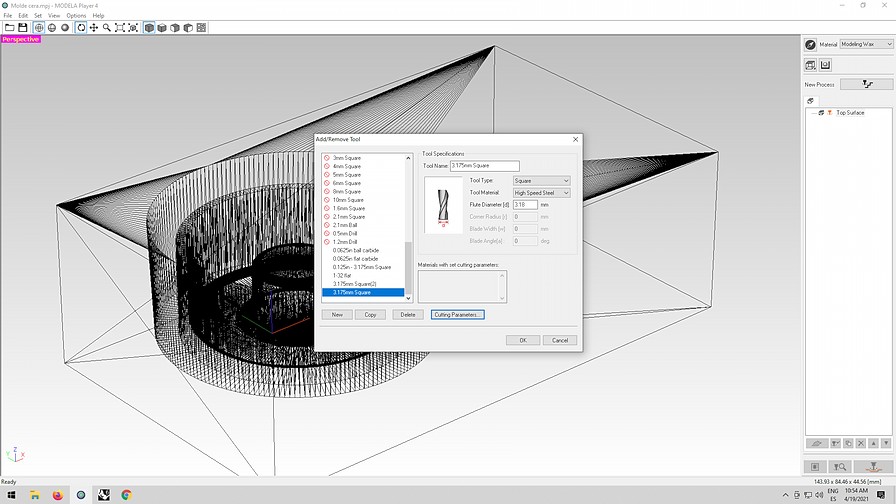
2. Select the machine you are going to use and create the tools you will use.
3. We create the Roughing layer by selecting the area of action, depth of cut. Everything is positions in space, which must embrace your design. As tighter, less cutting time.
4. We open the drop-down of tools and choose the one we need for Roughing from the ones we created before.
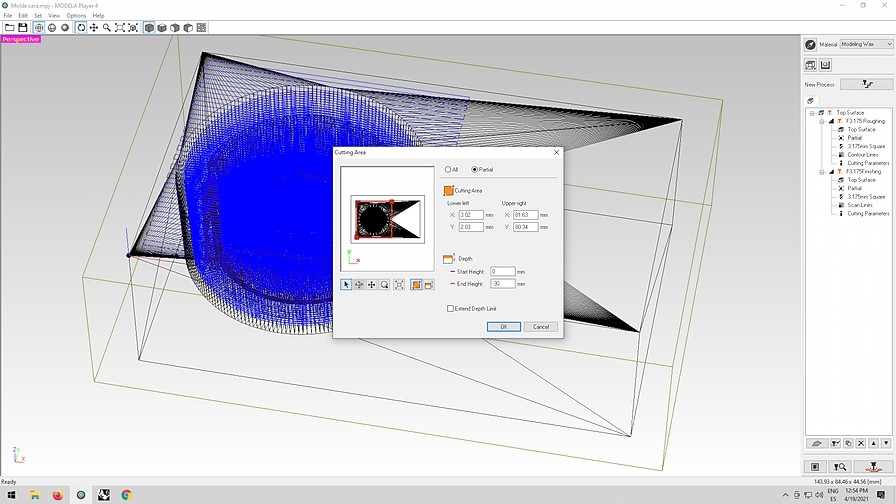
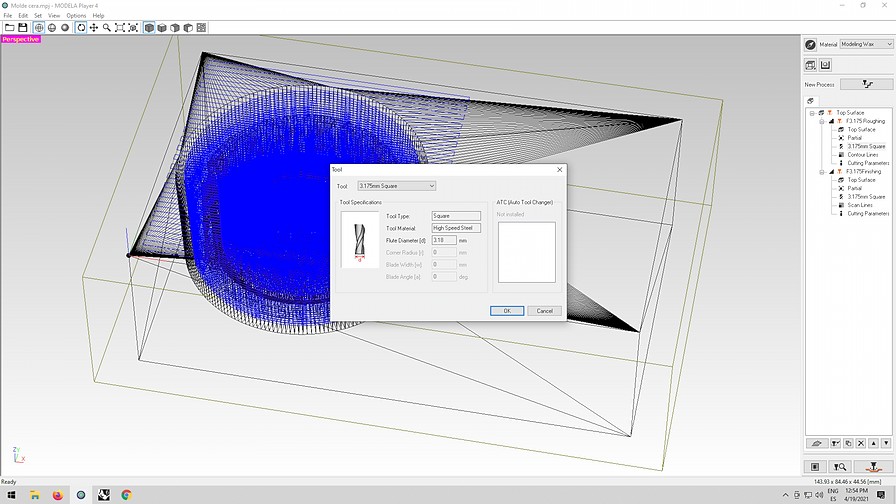
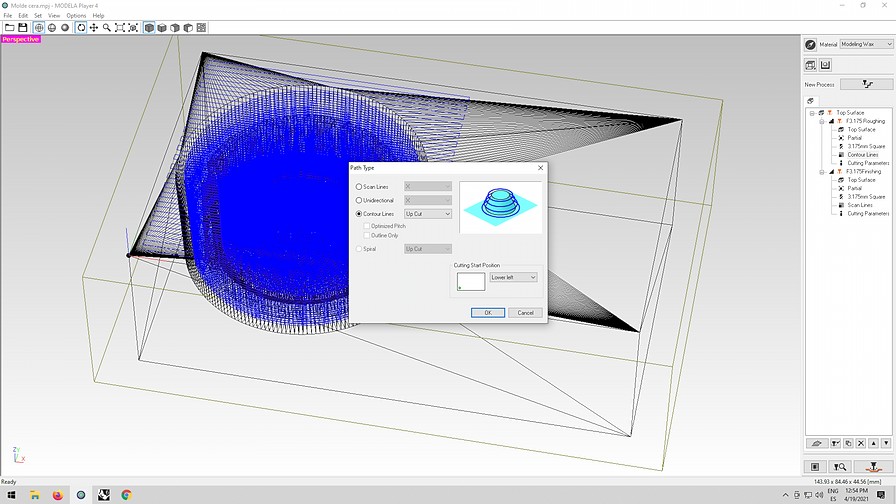
5. Choose the cutting path among the possible options. Scan Lines, Unidirecctional, Contouring and Spiral).
6. Choose the parameters of the tool's behavior during milling. In our case we use the default ones because our CNC is not customizable closed source.

7. Revisar el corte con el simular del programa en 2D para comprobar que todo irá bien.
8. Same process as 7, but with the 3D viewer for better visualization.
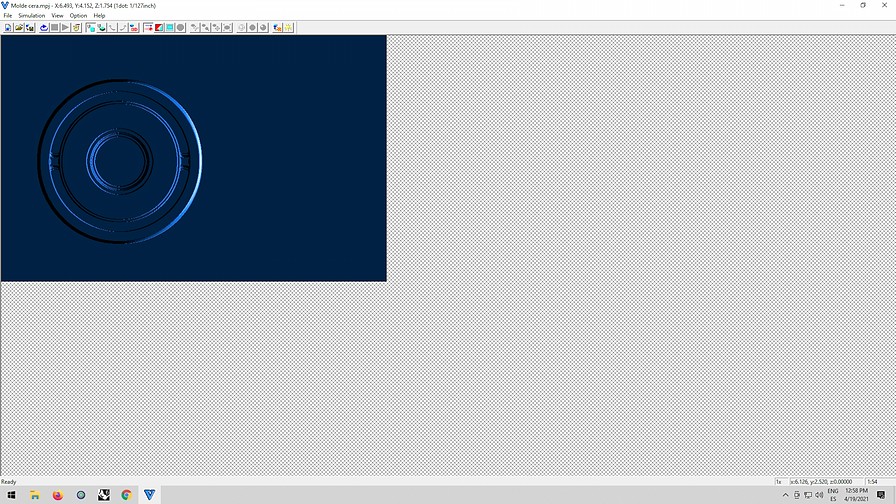
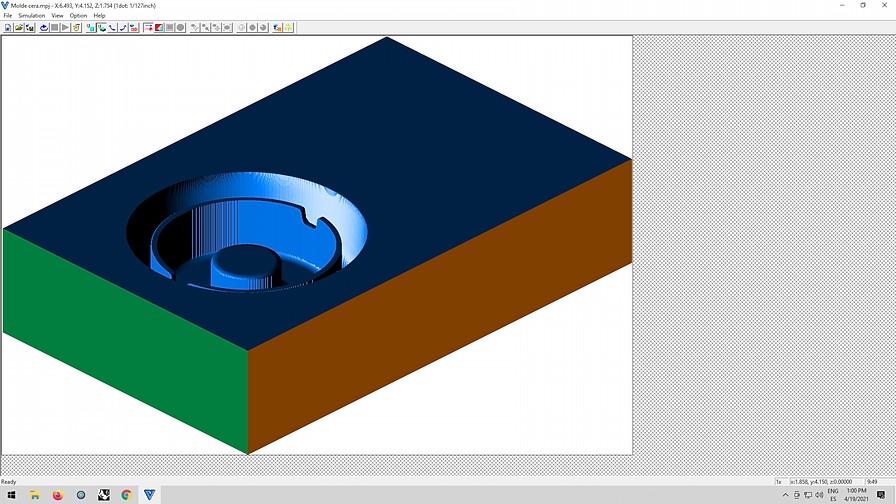
The files are promising and from the simulations I see on the screen, it seems that the result should be good. Let's see when I finish Roland what result I get. Next you have a small block so you can see the milling process.
My Settings
In order not to put too much data in the previous section, here are the exact settings that I have used for my Roughing and Finishing process.
Roughing
| Setting | Value |
|---|---|
| Process | Roughing |
| Tool | 1/8" (3.175mm) Flat 4 Flutes |
| Cutting Area | Partial |
| Path Type | Scan Lines X axis |
| XY Speed | 13.2 mm/s |
| Z Speed | 7,39 mm/s |
| Spindle | 10579 rpm |
| Cutting Amount | 0.94 mm |
| Path Interval | 1.91 mm |
| Finish Margin | 0,94 mm |
| Milling Time | 2:37 h |
Finishing
| Setting | Value |
|---|---|
| Process | Finshing |
| Tool | 1/8" (3.175mm) Flat 4 Flutes |
| Cutting Area | Partial |
| Path Type | Scan Lines X+Y axis |
| XY Speed | 19.49 mm/s |
| Z Speed | 19.49 mm/s |
| Spindle | 7000 rpm |
| Cutting Amount | 0.2 mm |
| Path Interval | 0.2 mm |
| Finish Margin | 0.0 mm |
| Milling Time | 2:23 h |
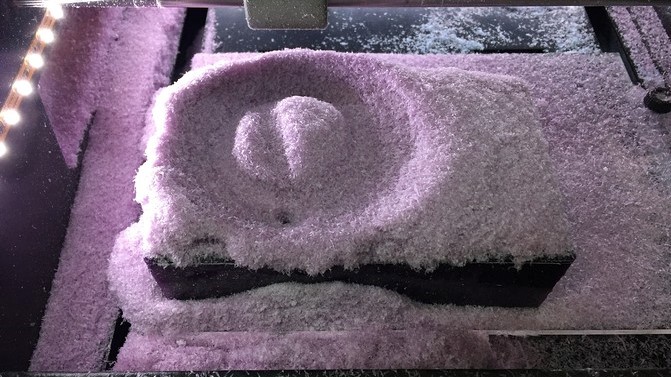
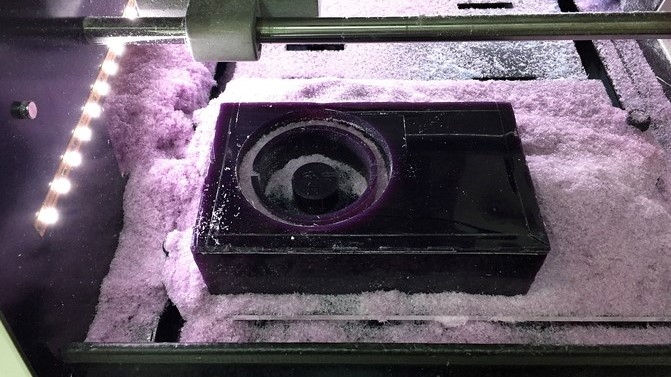
Milling Process
By having such deep geometry, the milling process took for ages. Well not much, but anyway as I am short of time it has seemed an eternity.Still, the roughing result was great and with great precision. I have to admit that I was expecting the roughing something more "rough". Here are some images of the process and final result of the Roughing.
It was already super late when I was able to launch the finishing file, so that night was a long time wondering if everything would have gone well or not. Fortunately, the next morning when I arrived at the Lab the result was unbeatable. Gritting my teeth on Monday paid off. Here are some images of how this last process turned out.
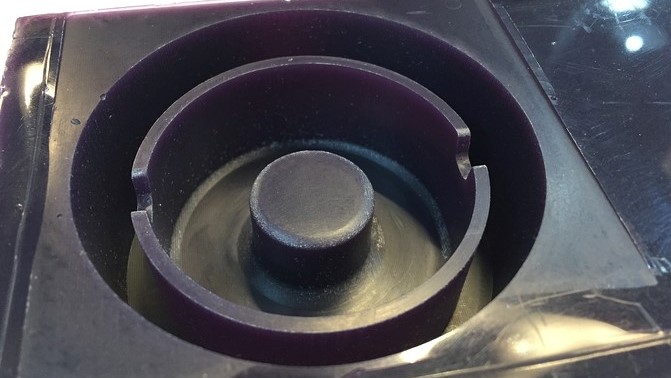
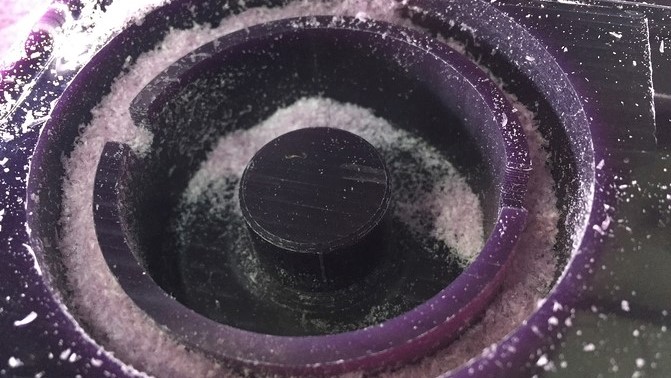
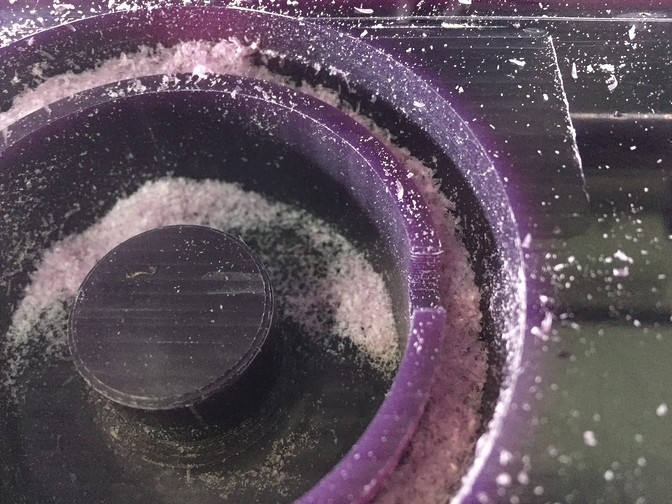
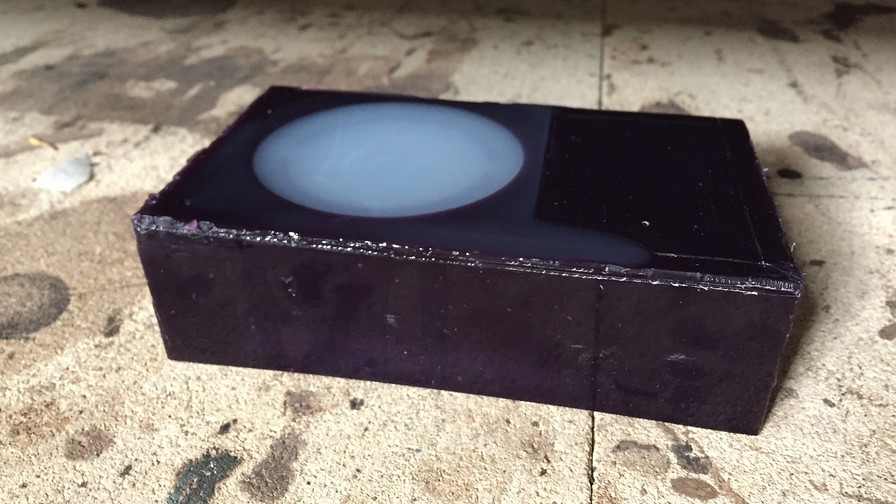
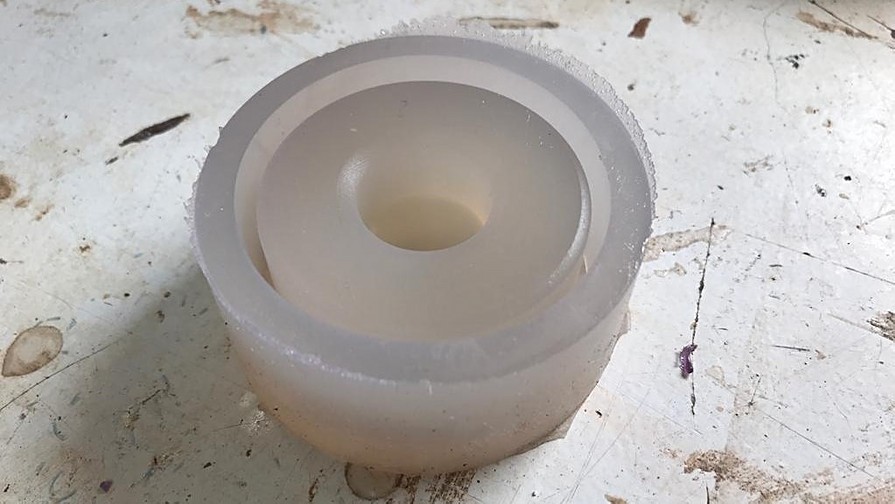
Female Mold Casting
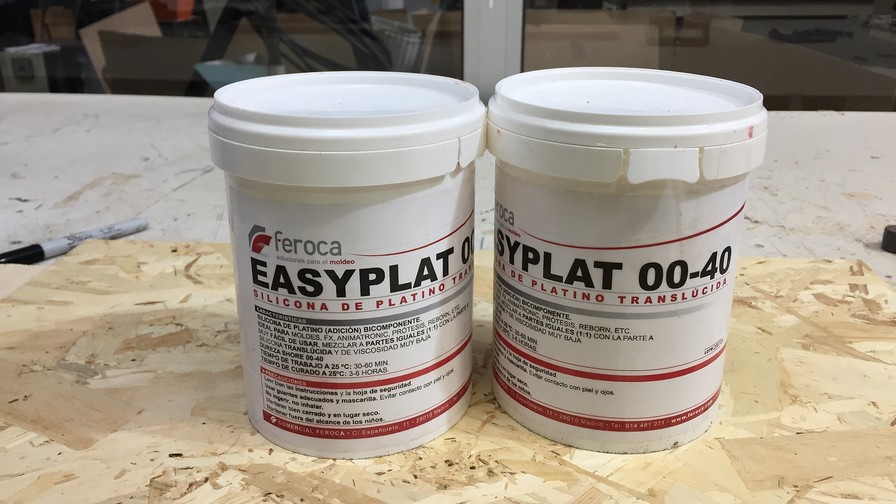
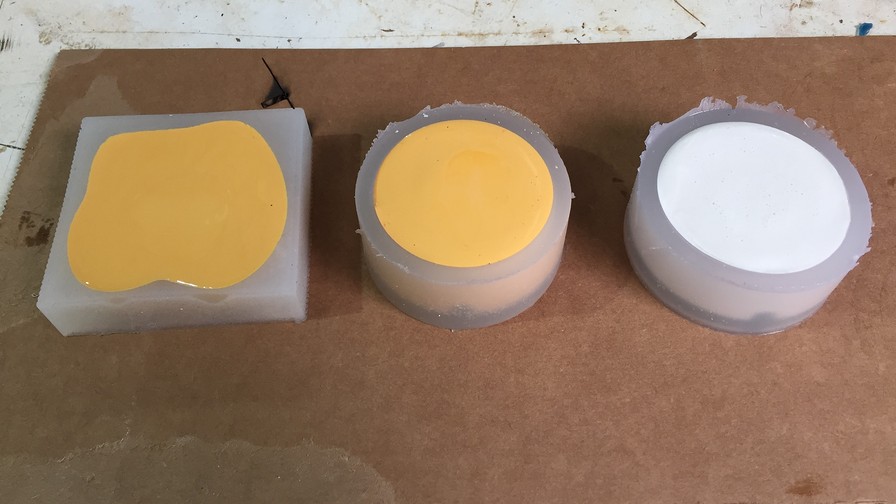
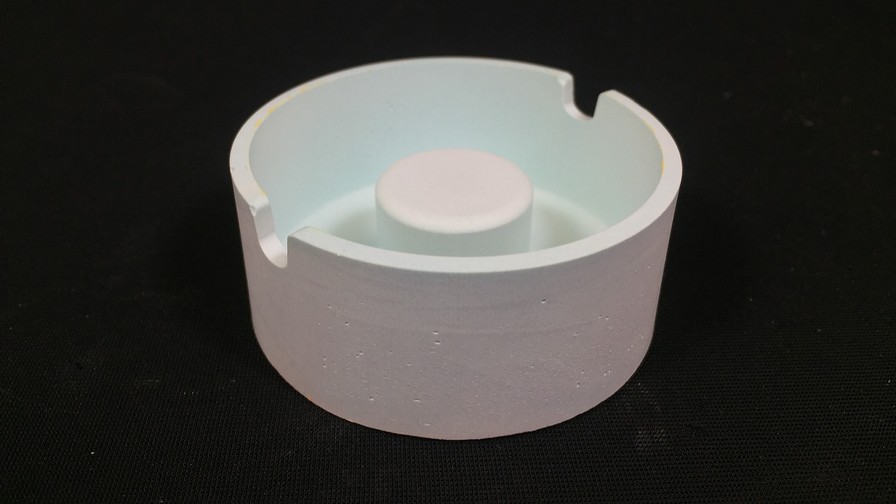
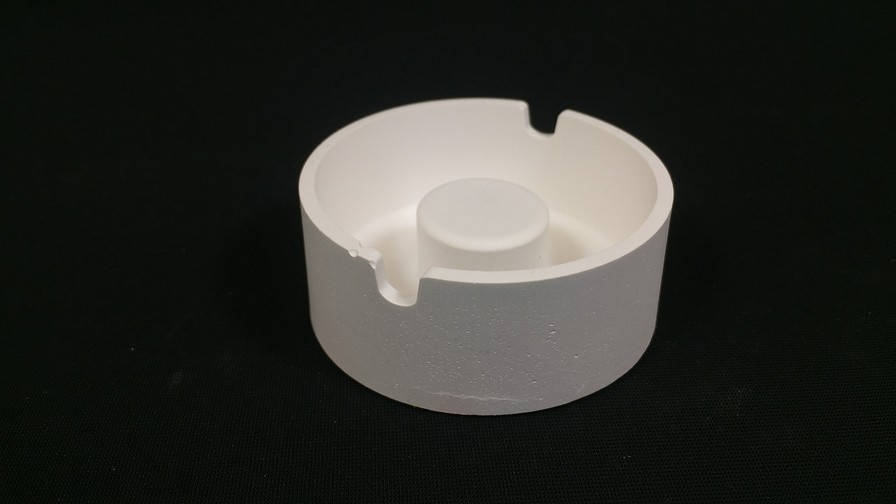
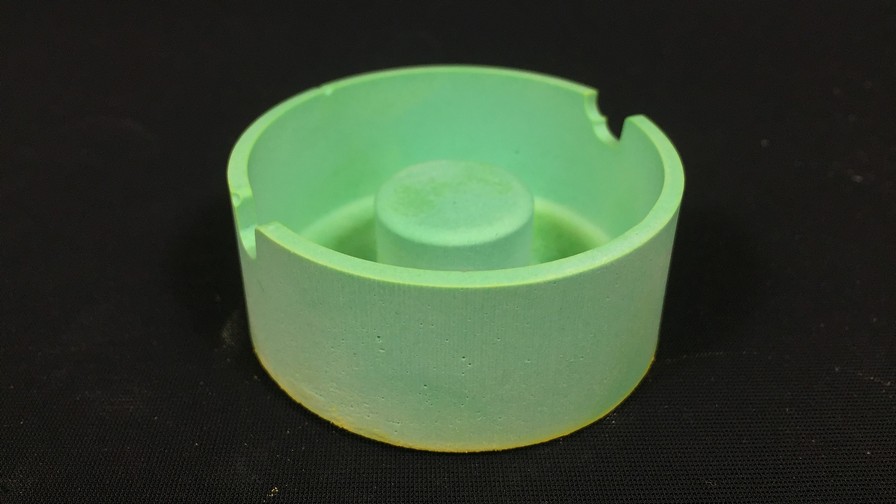
Here at last the Science Stuff begins, it was about time !!!! For now I am going to do a first test with a semi-rigid silicone to see how the demoulding process is going. Specifically, I am going to use the platinum-based silicone Feroca Easyl 00-40. Here are some images of the process.
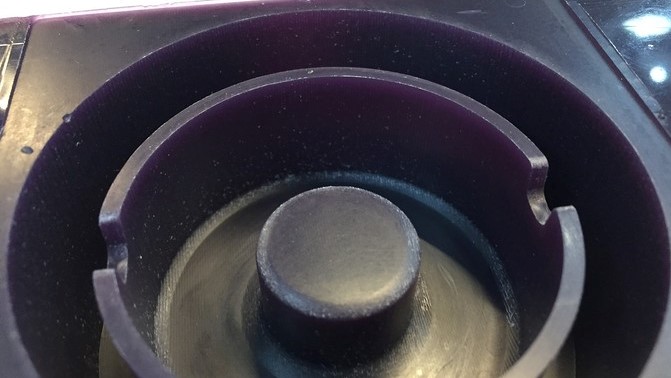
The casting was easy but the curing time of 3-6 hours is too much for me. I am already delayed this week because of the CNC to wait that long now. Reviewing the product datasheet I see that you can cure it in an oven at 80-100 degrees for about 1 hour. According to the datasheet, the curing varies according to volume, humidity and temperature, so that time can vary. To keep it under control I turn the oven up to 100 degrees and there I turn it off and put the mold inside. So even though time is lengthening, I don't risk the wax melting.
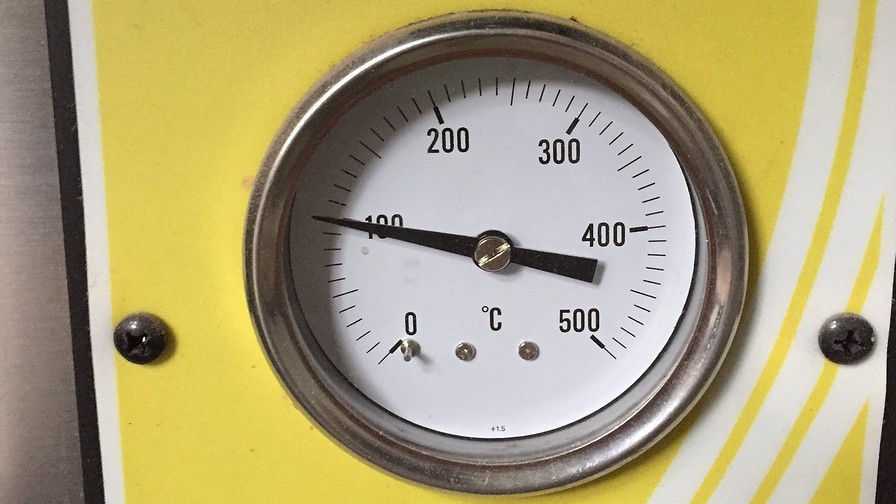
I check it at about 45 minutes and it seems to be cured, but being so deep compared to my peers, I prefer to leave it in the oven at around 80ºC for another 30-45 minutes. I think that reducing from 6 hours to 1:30 hours is a success, I am not in such a hurry. Here are some images of the result after that time.
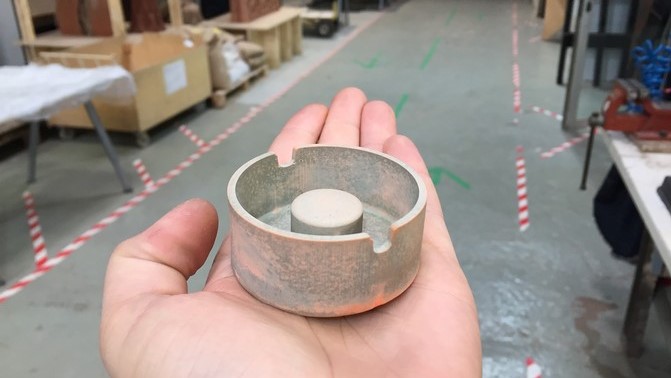
Male Mold Casting
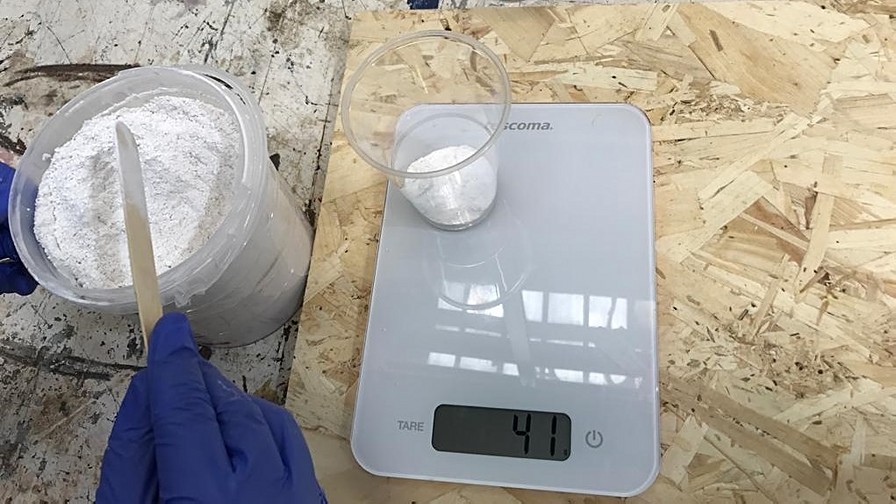
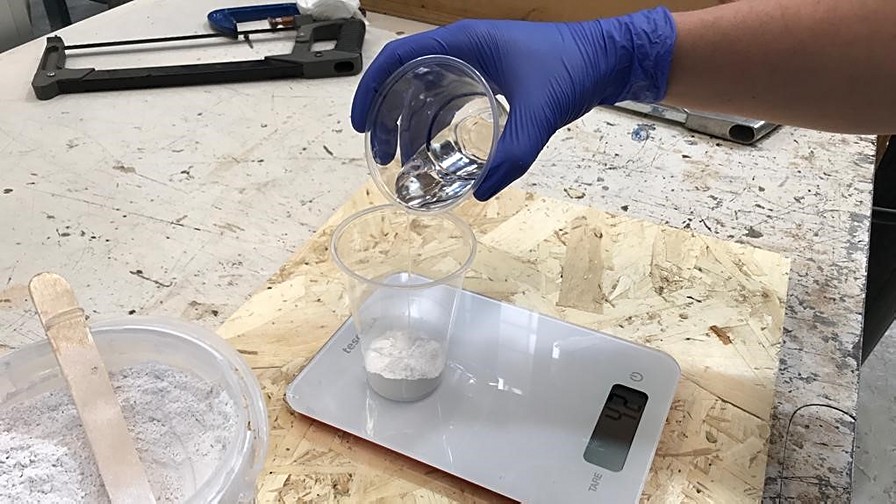
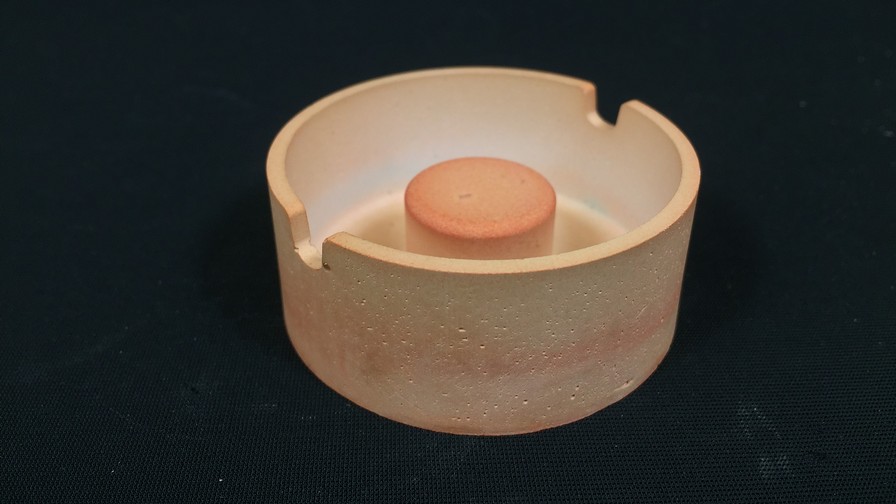
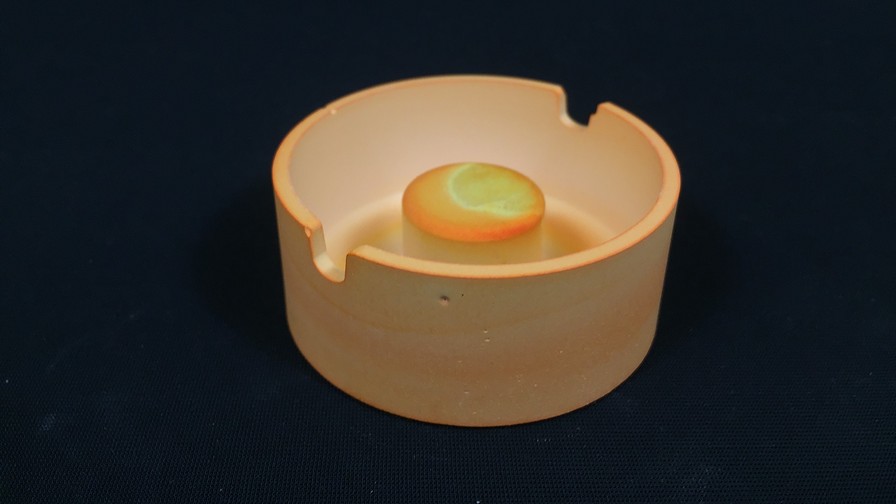
Having chosen a hard-soft-hard workflow, the options for the final casting are not too many. Most of the resins that you will find in the table above on the web are soft. Within the range of hard I prefer the Feroca Hydrocal. Reading its datasheet (super short because there are no safety data for it, it is basically cement+plaster) seems like a hard plaster that I believe will look awesome with some tints mixed. I want to achieve a brutalist stone look.
The mixing of the material is simple, it is 100 parts of powder for 45 parts of liquid. Anyway, I consider the result to be too thick for my thin-walled model, so I raise the ratio to 100/60. It is much more fluid and I feel more secure that way. As they are not potentially toxic components, there is no problem in altering the proportion.
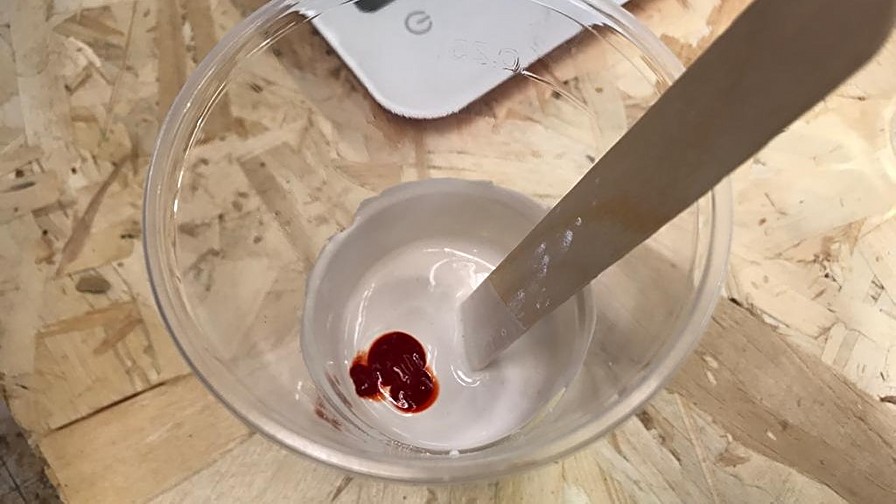
Before pouring into the mold, and according to the datasheet, this material can be tinted to taste. For the first pour I want to achieve the effect of cement, even if the material is not. The gray color we have is not very close to cement so I mix red and dark green until I get the right gray.
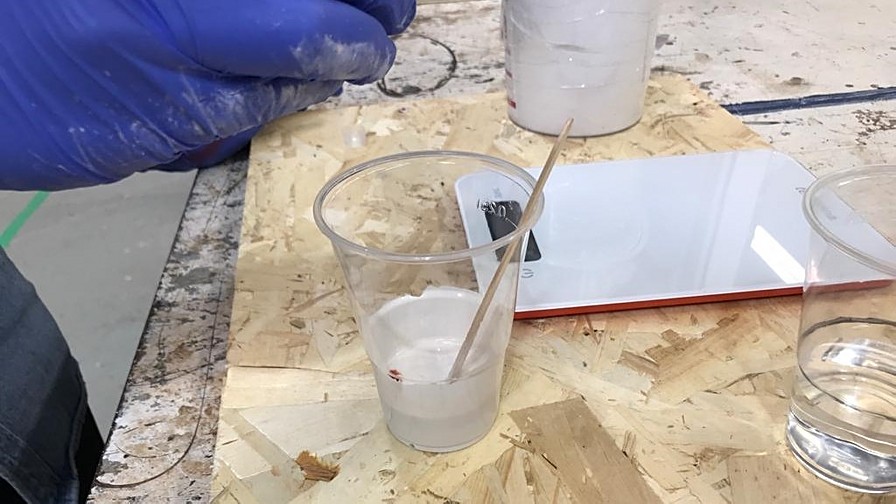
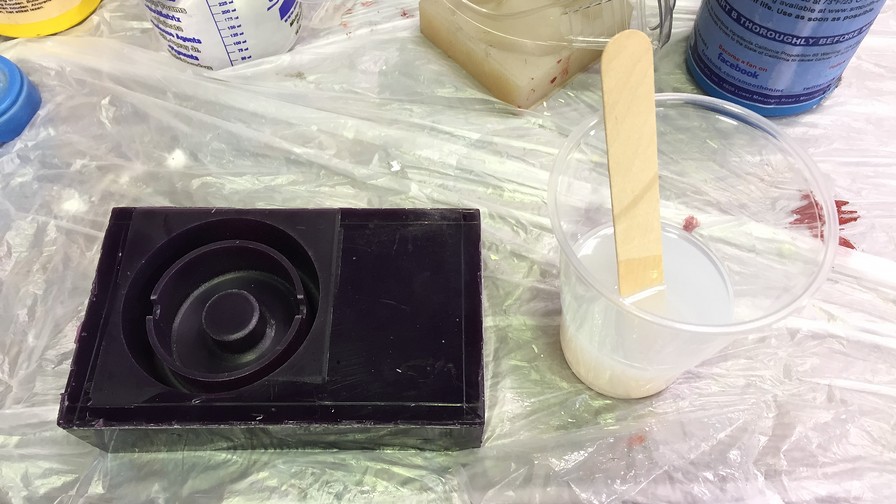
After mixing it for a long time (less than 25 minutes, material curing time), I pour it into the mold with the thinnest possible thread of liquid to avoid bubbles as much as possible. The appearance is good and now it only remains to wait for about 25-60 minutes to unmold.
Extra Stuff
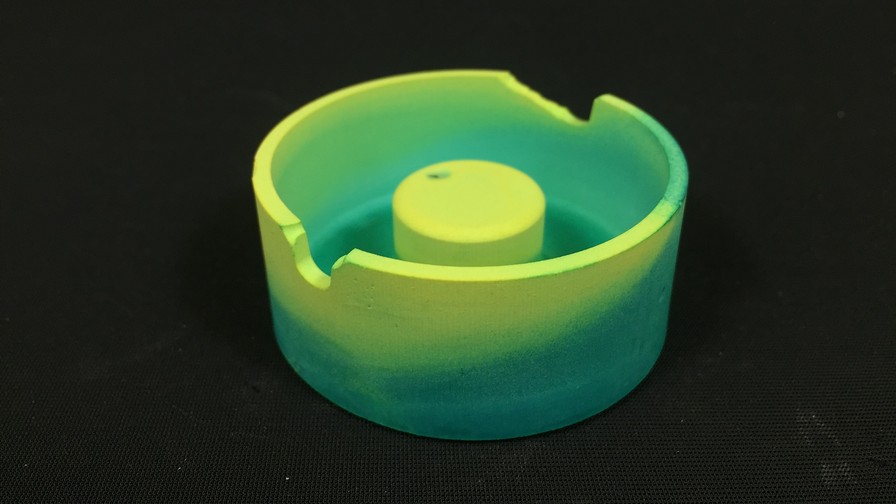
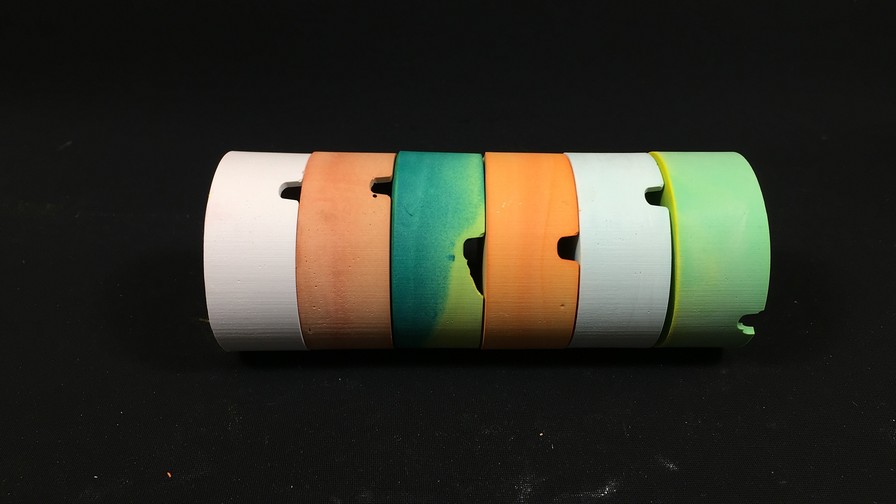
Before I show you the final result of my week, I want to show you something. It turns out that the behavior of the material in front of the dyes is great and in the Lab we have many colors. As someone close to art, I need to try those colors hahaha. In addition to the pour that I showed you a moment ago, I have done 4 more washes in different colors (but always with the Hydrocal).
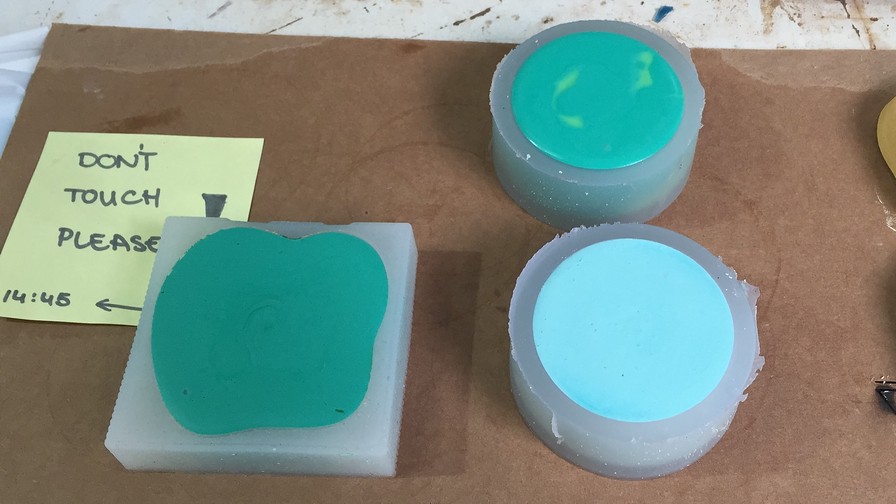
As you can see in the first image, I did a wash in the ivory white of the material itself and another in saffron. Then the madness got out of hand and I tried to achieve a marbled finish between apple green and strong turquoise. Trying to get the turquoise I saw the baby blue below and couldn't resist making one in that finish.
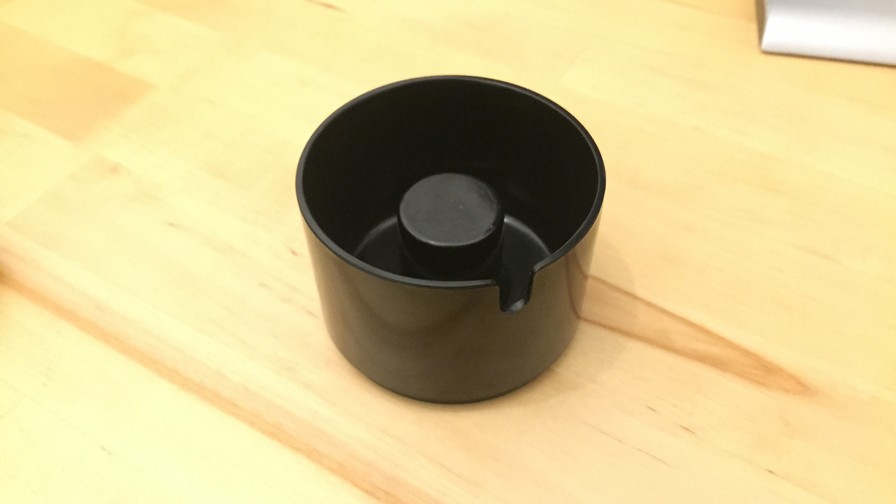
Final Results
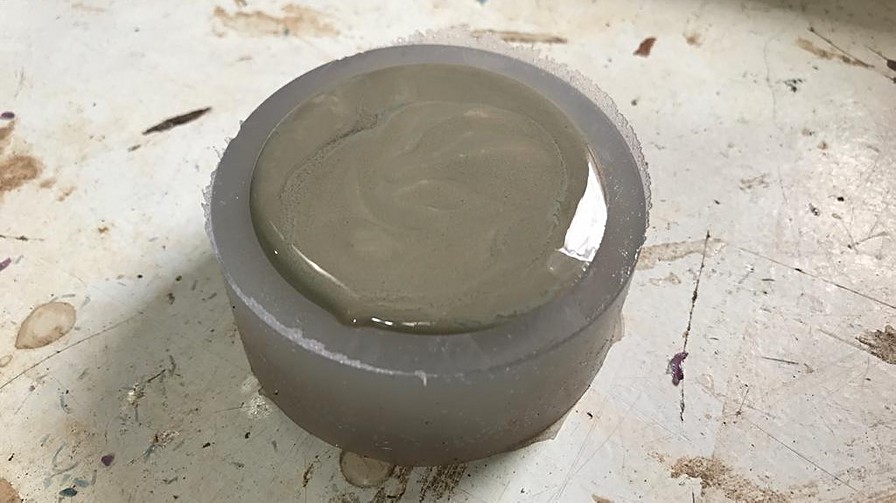
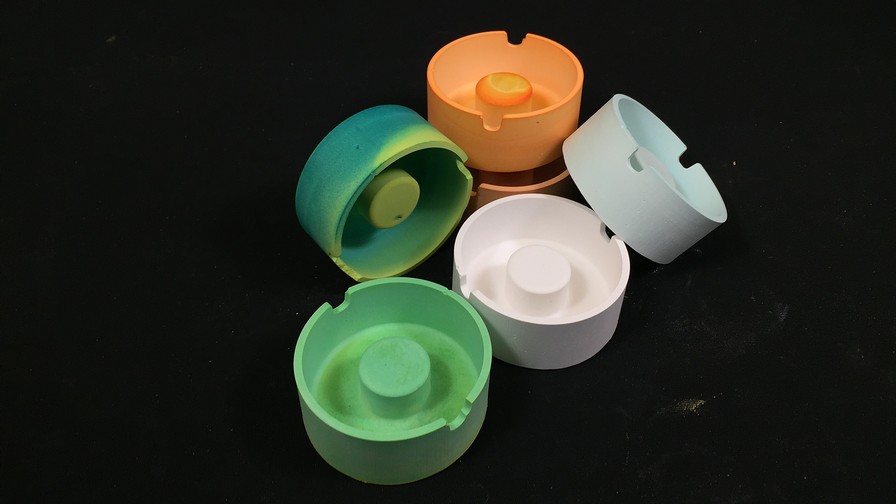
Finally the final results that I have been wanting to teach you all week! Let's start with the result of the first piece, that of the brutalist finish. I have to admit that I was not quite convinced because the red has left some areas too orange. I shouldn't have mixed the color properly.
Surprisingly, this morning when I returned to the Lab, I saw that the colors had lost saturation or had literally changed color. As an example, look at the gray / orange tone that the one in the photo above has and the totally orange color that it has taken now. It's the one in the lower right corner.
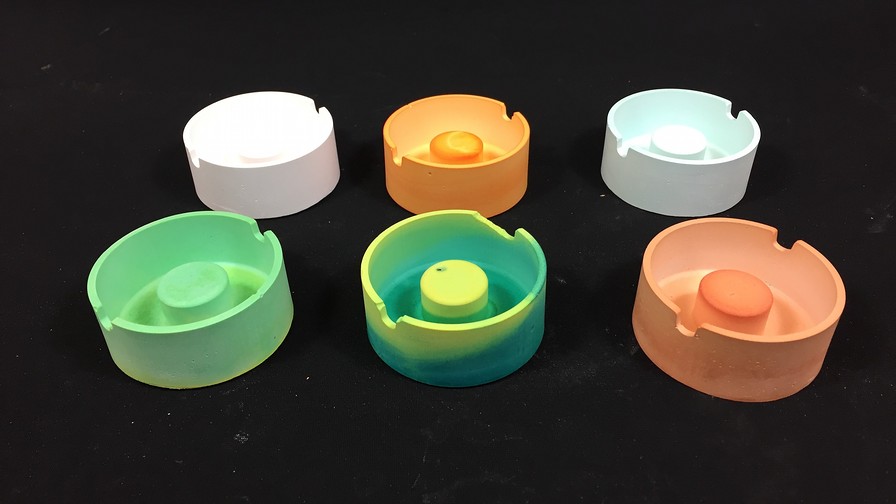
The same has happened to all of them, but I still think they are brutal !! I am very happy with the result of the week, although I could still improve the technique because in many of the cigarette holders, bubbles have been caught during the curing time. It is normal since the material is thick and the walls are thin, but I think it could be improved by studying the desired texture and vibrating the mold.
Conclusions
The most important conclusion of this week is the time it takes to prepare the molds, compared to how quickly the resins make up the final piece. I'm not saying that the curing time is short, but compared to the milling process these are negligible. I consider the molding and casting system to be very useful, but that it involves a great deal of preparation and trial-and-error knowledge. It is very likely that the first wash is not good, although it is an apprenticeship, at the same time it can be somewhat frustrating if you do not master the technique.
On the other hand, I want to highlight the need to prepare the designs taking into account many factors. In our case, in this process of milling wax for the first male mold, the soft casting for the female mold and then the final casting, you have to take into account many factors that determine your design. In my specific case, I had to take into account the dimensions of the model and scale them. Consider the size of the tool and take it into account for offsets. The viscosity of the material to enter the thin walls of the ashtray. I could go on with some more but I think you understand what I mean.
Original Files
Link to Original files from this week.
What to improve for next assignments?
I think the problem with this week has been the same as during the CNC week (2.5D), we are too many for few machines. The feeling has been a bit bitter, because for example on Monday I was waiting for 6 hours to be able to use one of those machines. This is not understood as a complaint, but as a personal reminder that when we have assigments with a long machining time, it is better to start fast and finish slowly, not the other way around.
What to keep an eye on during week 11?
· As always, stay positive and want to have fun.
· Continue documenting how these last two weeks. I think my documentation has taken a leap forward.
· Better manage the difficulty. I always like to do projects that motivate me and they tend to be more complex than necessary. I do not consider it to be a mistake, but I have to be more good at managing that extra complexity.