Week 5:
3D Printing and Scanning
3d printing and scanning week looks promising. I have already printed some of my models, but never had the chance to be hands on during all the steps of the process. I usually sent the .stl files to the printing shop and only went there to pick them up. Hopefully I will be able to learn all the steps and won’t have to rely on others for that.
On the other hand, scanning has always intrigued me, because I used some low profiles apps, but I don’t understand the in-depth process behind the technology. At first sight, it doesn’t seem to be hard, but I believe you have to be really careful to obtain a decent mesh file.
I have some cool and engaging ideas for this week, but I hope I don’t end up being frustrated because of all the complexity involved during the week. I am going to start with the group assignment, then jump to the individual modeling process and finally try to scan something as good as possible.
The three assignments for this week are:
Group assignment:
• test the design rules for your 3D printer(s).
Individual assignment:
• Design and 3D print an object (small, few cm3, limited by printer time) that could not be made subtractively.
• 3D scan an object (and optionally print it).
Group Assignment
It has been a month since we met each other at the Lab and it is favoring the work of group assignments: now we try to organize ourselves and cover as many relevant aspects as possible. This week, for example, we have decided to choose each of us a different printer than the ones we have in the Lab. Of course, we will all print the same file, in order to carry out a very extensive comparison of the systems and results.
Each one of us, tried to choose the most interesting printer for each or maybe the one that fitted more its own interests. The final distribution of the printers has been the following:
- Creality Ender 3 0.4mm nozzle FDM (Carla)
- Prusa MK3 0.4mm nozzle FDM (Diego)
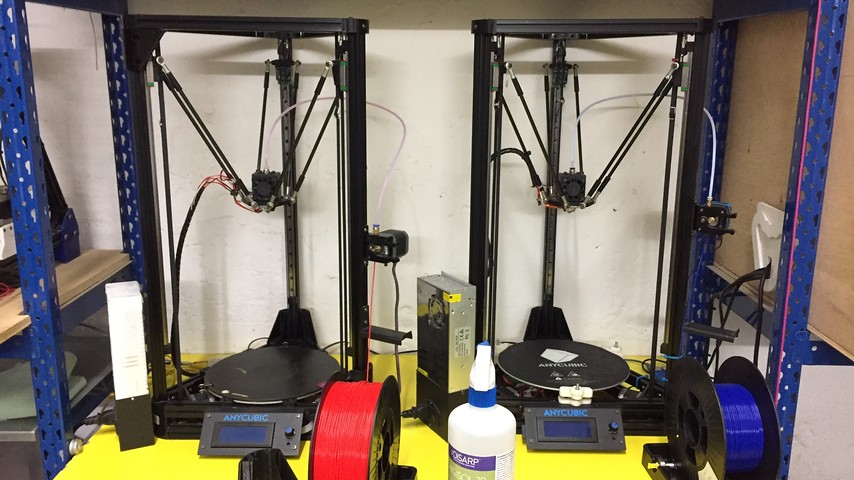
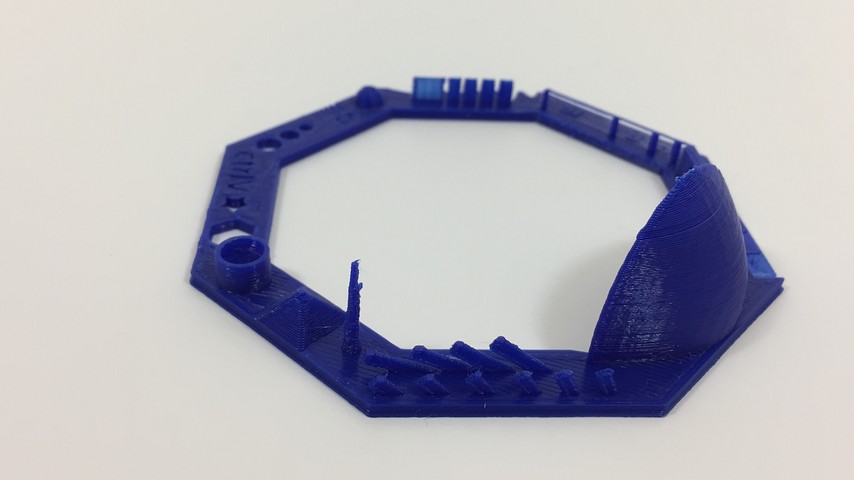
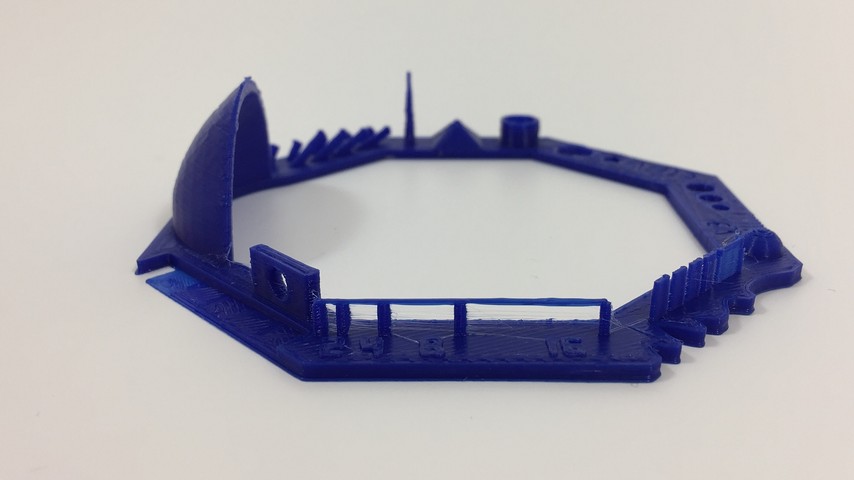
- Anycubic Kossel (Delta) 0.4mm nozzle FDM(Gerardo)
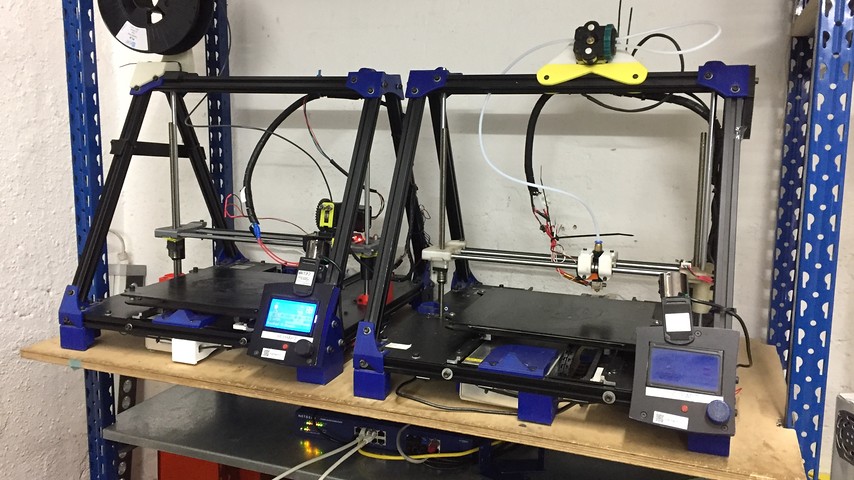
- RepRap 0.6mm nozzle FDM (Adrien)
- Creality CR-10S5 1.0mm nozzle FDM(Tarek)
- RepRap 0.4mm nozzle flex filament FDM (Dennis)
- Photon S 0.6mm nozzle SLA (Nil)
The desviation from the model tests should give us some information about the characteristics and settings from every machine. The espected results were the following:
Creality Ender 3 0.4mm nozzle FDM
Carla with her home printer achieved one of the cleanest and sharpest results. As it is a personal printer, the experience that the user has with it and the knowledge of its behavior is also relevant.
The settings for the print are:
- Filament: PLA
- Filament diameter: 1.75mm
- Nozzle: 0.4mm
- Layer Height: 0.2mm
- Infill: 20%
- Supports: no
- Extruder Temperature: 215ºC
- Bed Temperature: 60ºC
Prusa MK3 0.4mm nozzle FDM
Prusa produces some of the best commercial printers right now. For prices between € 200-1000, the performance of these printers is great. They are fast, simple, but at the same time powerful and above all fast. Print times in relation to quality are great.

The settings for the print are:
- Filament: PLA
- Filament diameter: 1.75mm
- Nozzle: 0.4 mm
- Layer Height: 0.2mm
- Infill: 20%
- Supports: no
- Extruder Temperature: 215ºC
- Bed Temperature: 60ºC
Anycubic Kossel (Delta) 0.4mm nozzle FDM
Bowden motion printers totally change the look and feel of 3D printers. In this case, the motors always move on the Z axis of the plane, but by means of software they respect the correct movement of the extruder.
The settings for the print are:
- Filament: PLA
- Filament diameter: 1.75mm
- Nozzle: 0.4mm
- Layer Height: 0.2mm
- Infill: 20%
- Supports: no
- Extruder Temperature: 220ºC
- Bed Temperature: 60ºC
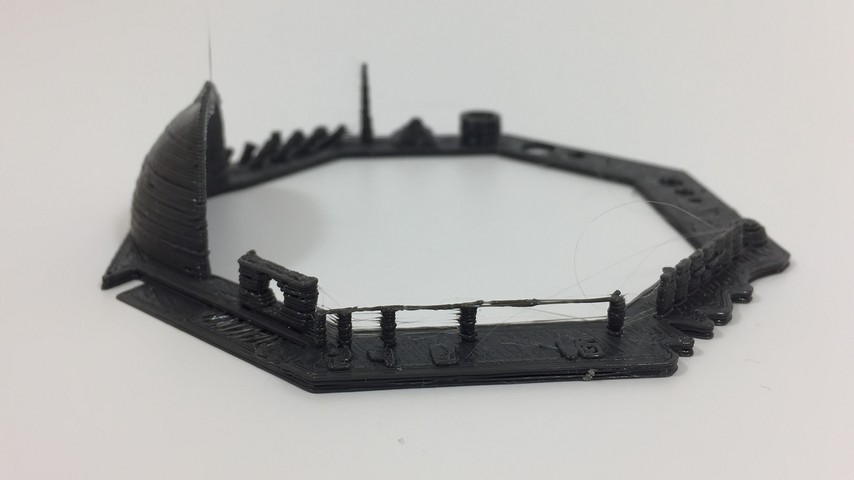
RepRap 0.6mm nozzle FDM
The 0.6mm reprap is one of the oldest printers that we have in the Lab. It is evident how the years and use have meant that the results are not the best. In addition, the 0.6mm nozzle for a piece of this size is too large and the resolution suffers.
The settings for the print are:
- Filament: PLA
- Filament diameter: 1.75mm
- Nozzle: 0.6 mm
- Layer Height: 0.2mm
- Infill: 20%
- Supports: no
- Extruder Temperature: 250ºC
- Bed Temperature: 40ºC
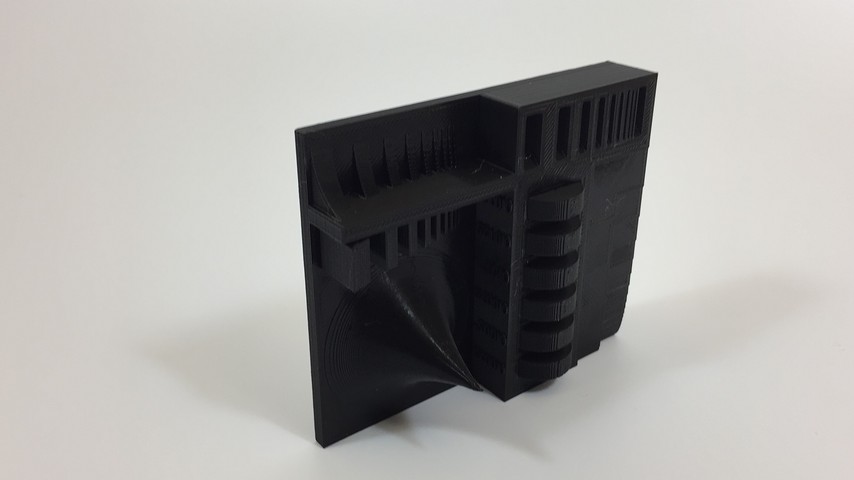
Creality CR-10S5 1.0mm nozzle FDM
This printer is designed for large parts. Its large base already gives clues, but as a 1.0mm head is mounted, the speed with which it adds material is incomparable with the others. On the contrary, it is giving many problems both of leveling the base, and of seals in the extrusion.
The settings for the print are:
- Filament: natural PLA
- Filament diameter: 1.75mm
- Nozzle: 1.0mm
- Layer Height: 0.2mm
- Infill: 20%
- Supports: no
- Extruder Temperature: 220ºC
- Bed Temperature: 60ºc
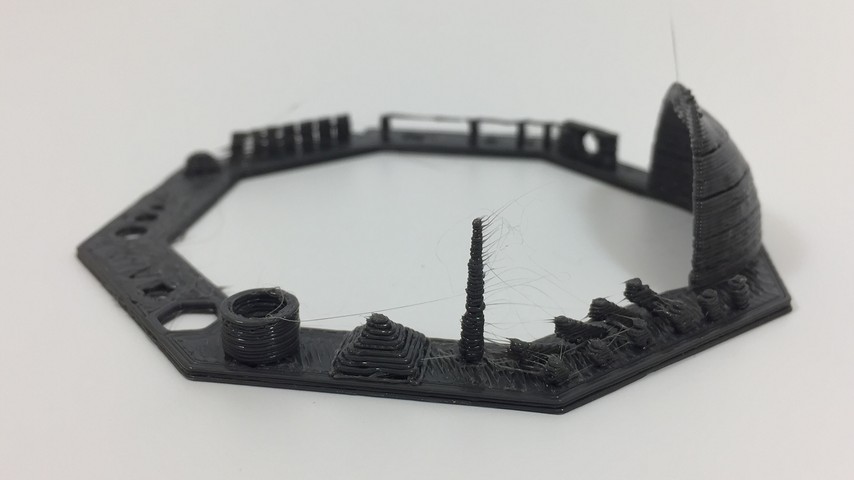
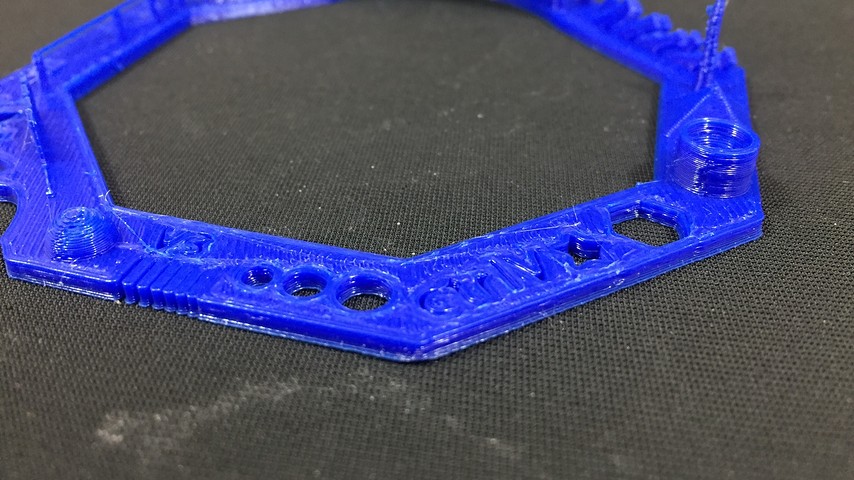
RepRap 0.4mm nozzle flex filament FDM
The reprap with flexible filament is another world, we must add the age of the printer, with the strange behavior of the flexible filament. This one appears to be more fluid than the others and responds rather poorly to defined textures. In addition, the overhangs do not work well, due to the low viscosity of the filament.
The settings for the print are:
- Filament: Flex
- Filament diameter: 1.75mm
- Nozzle: 0.4mm
- Layer Height: 0.2mm
- Infill: 20%
- Supports: no
- Extruder Temperature: 240ºC
- Bed Temperature: 40ºC
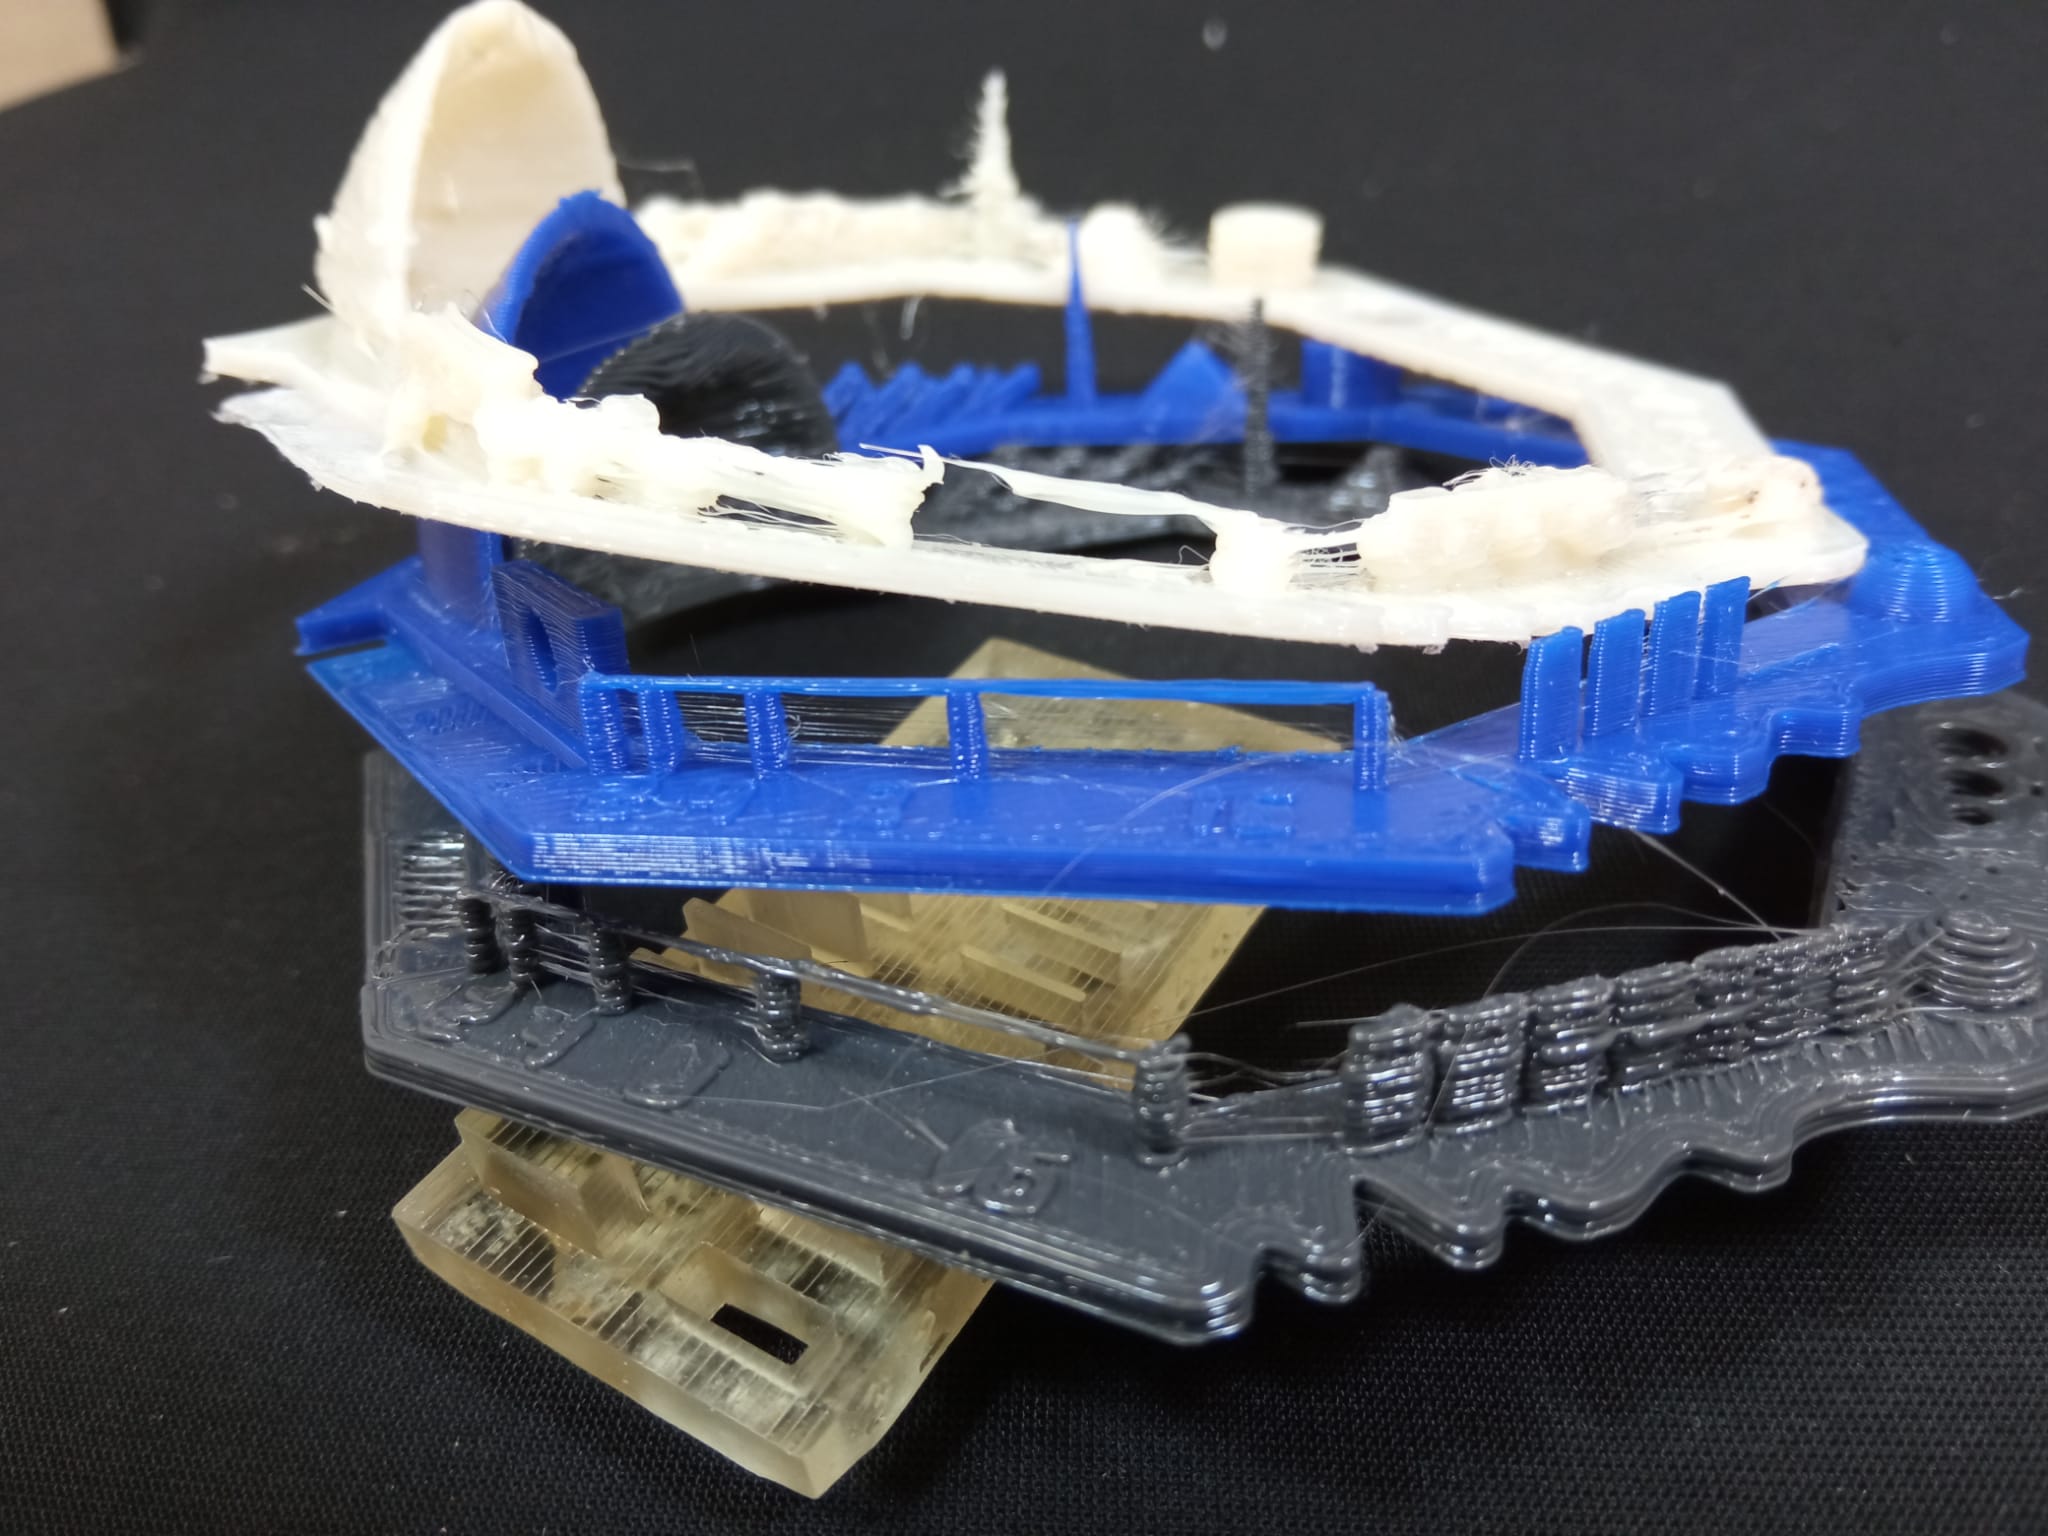
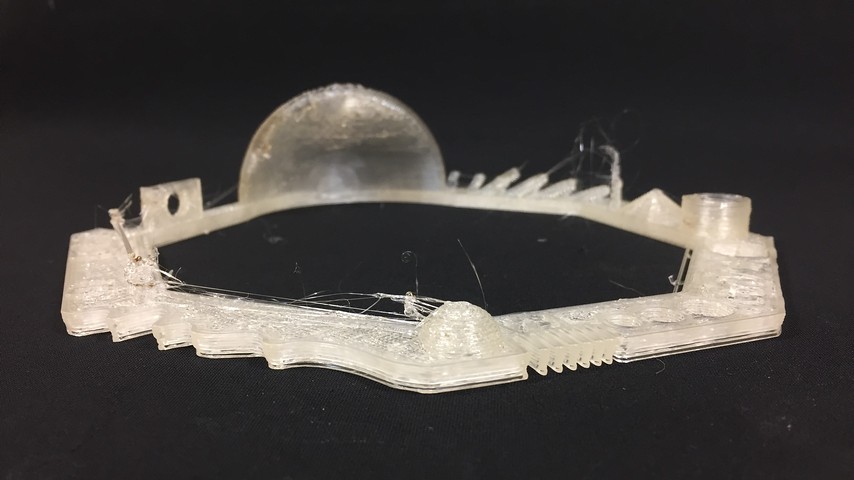
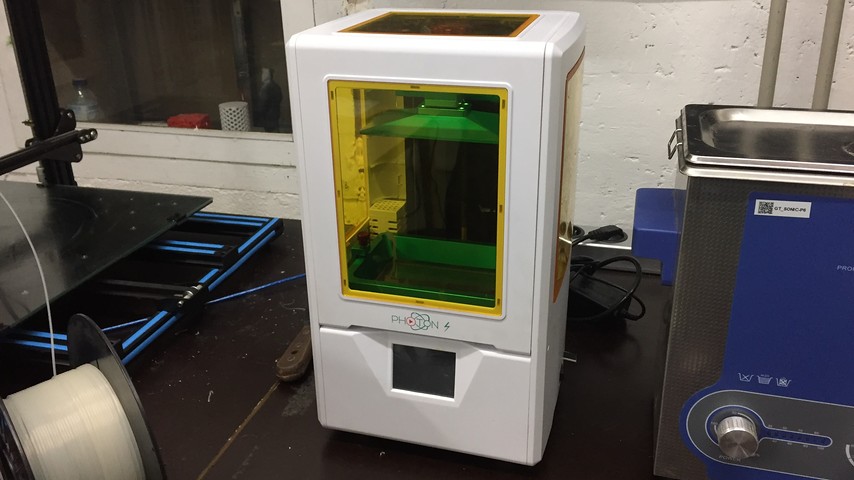
Anycubic Photon S 0.6mm nozzle SLA
Resin printers are not comparable to filament printers. The technologies are so different that I don't think we can compare them, but we can understand them. For that, in this technique we will go into more depth including errors and the use process.
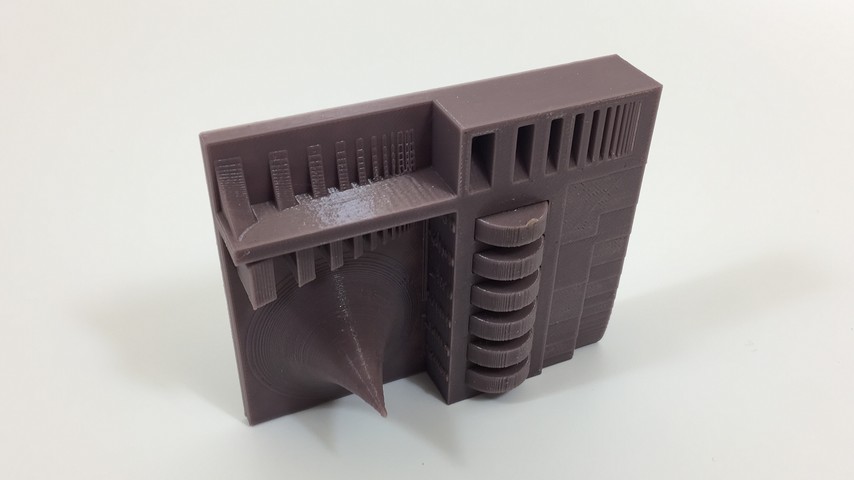
1st Test
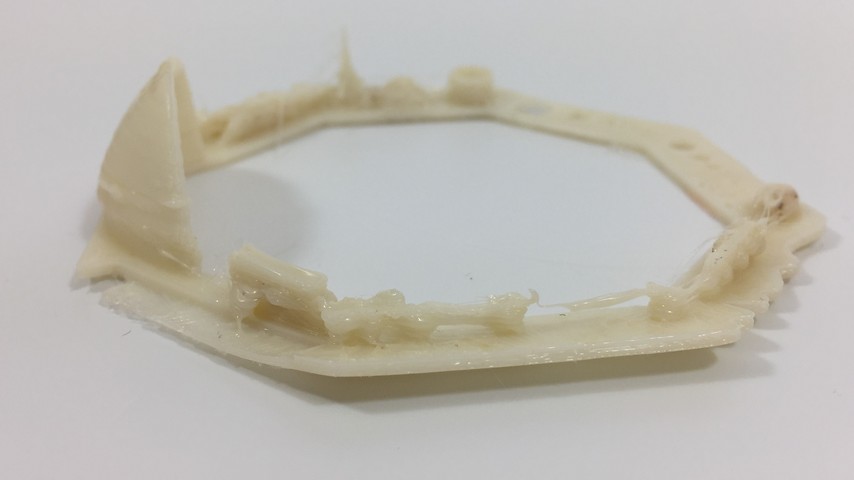
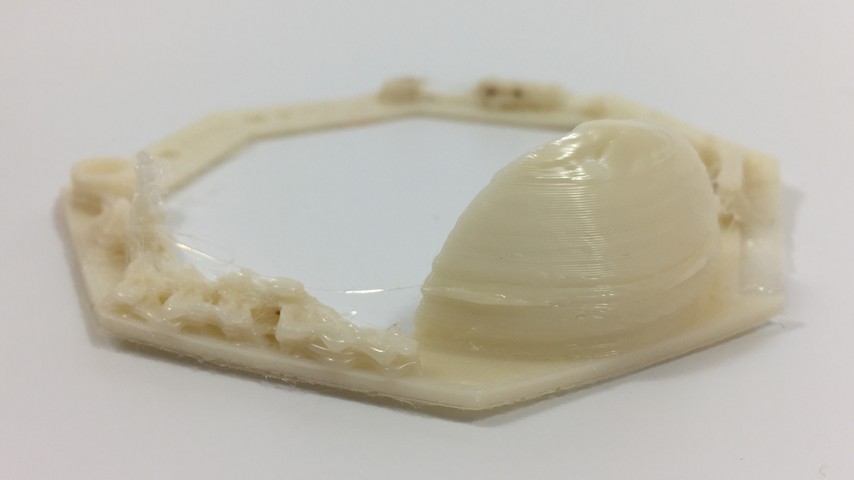
All the prep work is much easier with the resin: fill the tray, level the base and print. But the supports are much more complex. Simply by the nature of the technique, in which the model is hanging, the brackets are vital to keep the model glued. That's what went wrong during the first print. The supports were too short and the entire area closest to the base became solid mass. I think it is because the resin could not escape during drying and it was hardening in continuous layers.
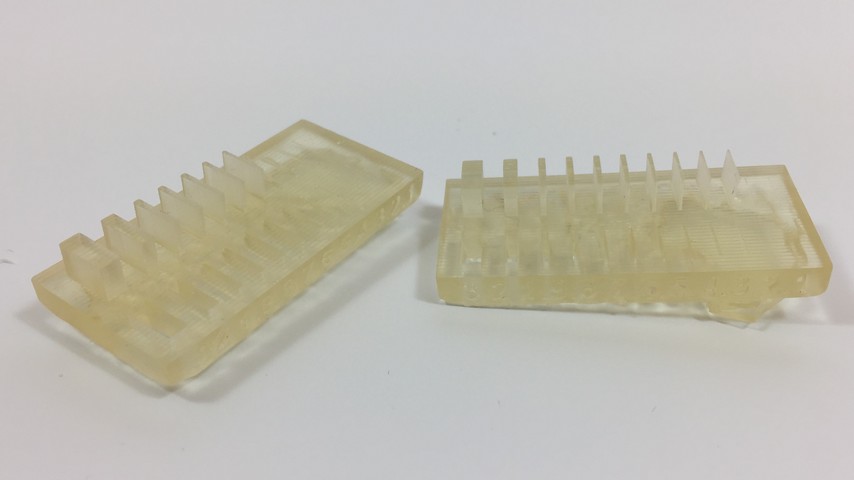
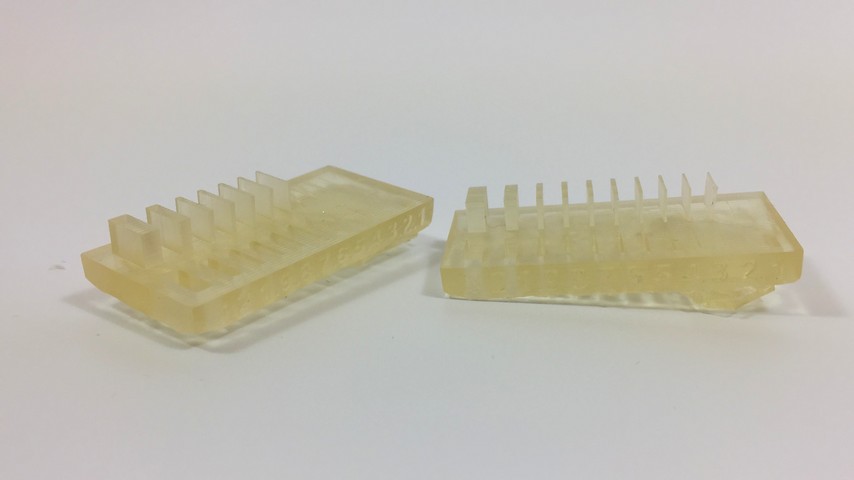
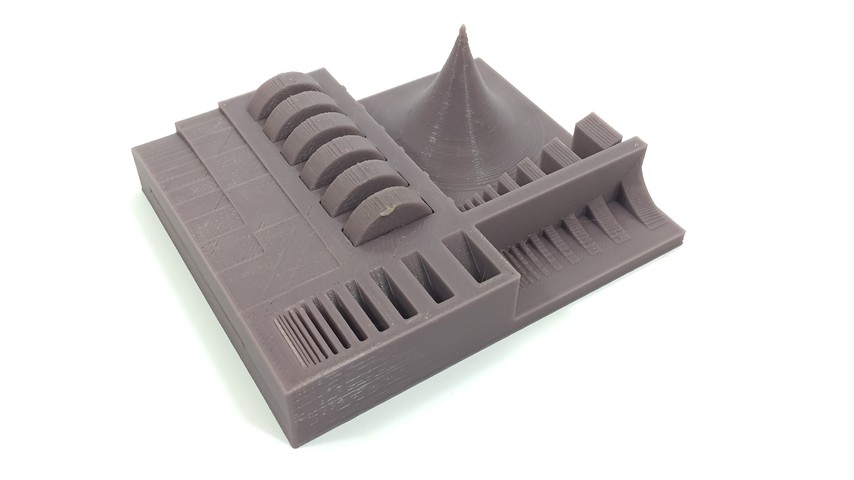
2nd Test
For the second test, in addition to changing the support parameters to be taller and finer, I also had a better understanding of the curing process:
- Carefully peel off the models from the base with a soft spatula.
- Without touching it too much soak it in alcohol for 5-10 minutes.
- Repeat the previous step, but in new and clean alcohol. This is how we remove excess resin.
- Place it in the alcohol and ultrasound bath for 10-20 minutes.
- Remove the brackets carefully. If they are well designed they should come loose easily.
- Place it in the UV oven for the time required for curing. With small pieces, between 15-30 minutes.
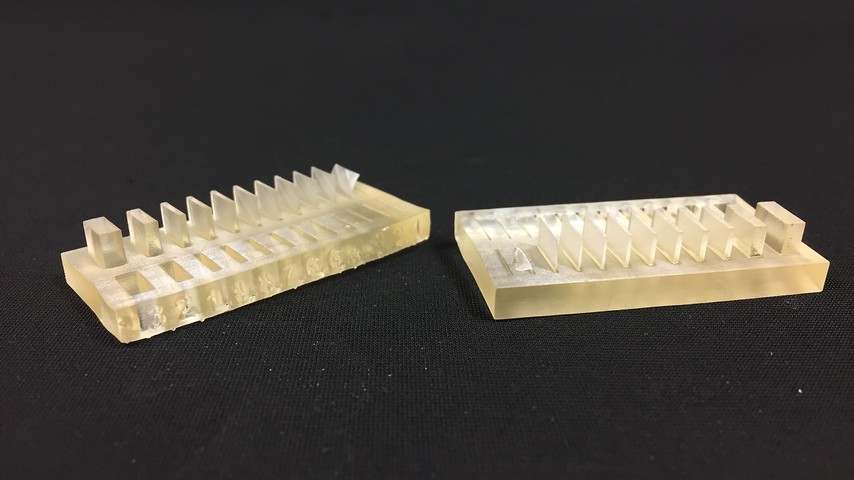
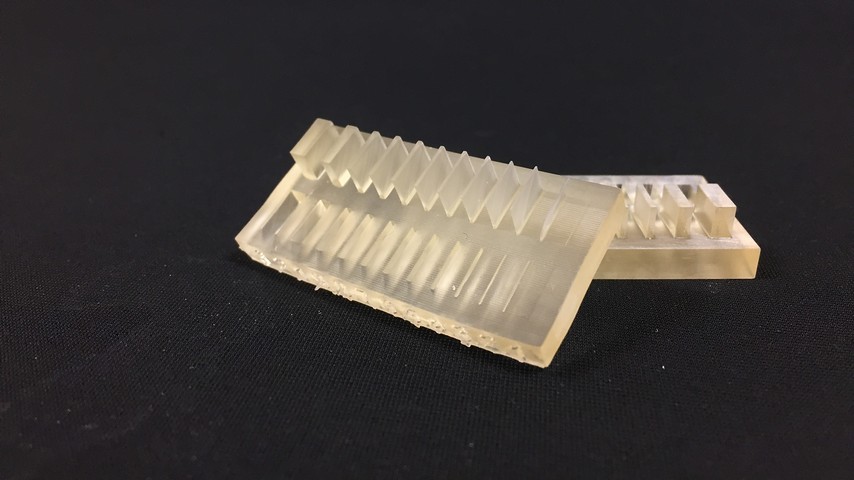
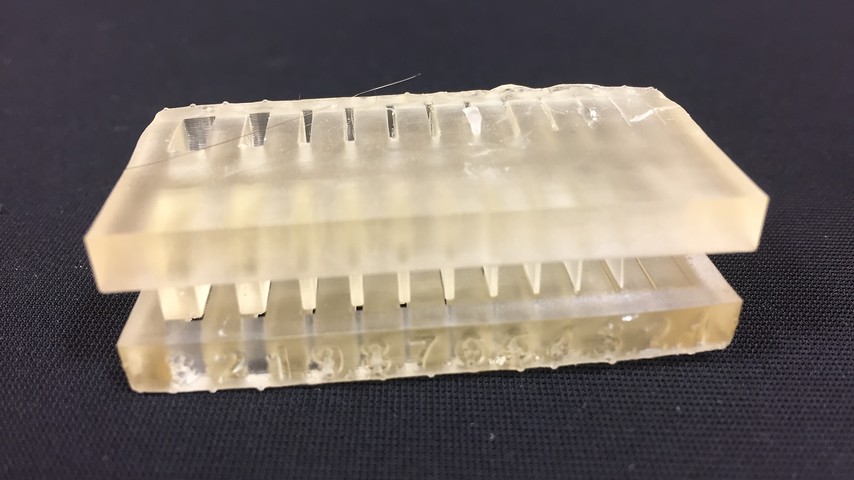
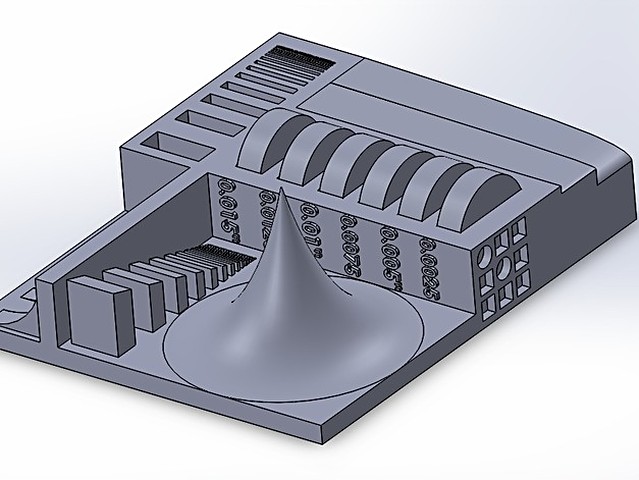
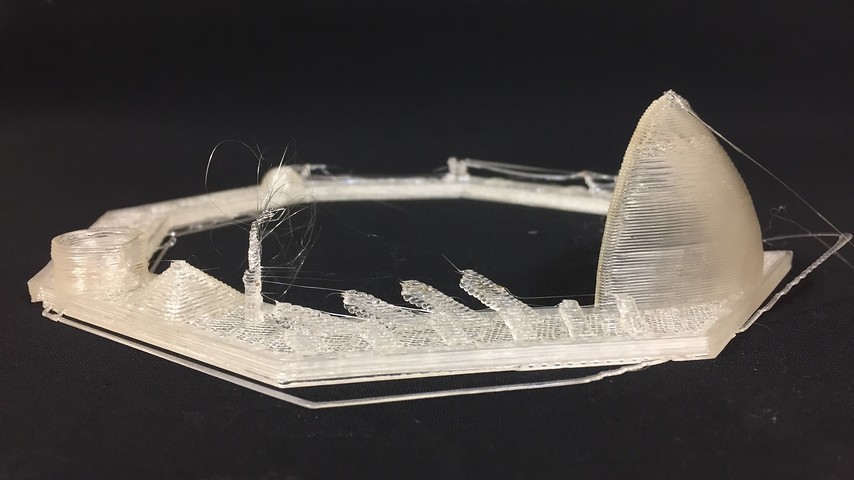
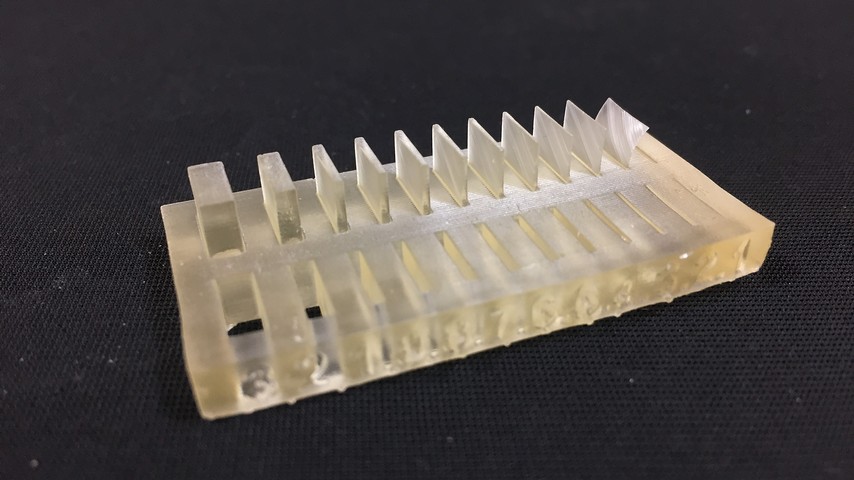
This time the tests were much clearer and more defined than during the first test. However, the tolerances are remarkable and cannot be inserted into each other.
Investigating and analyzing the test parts, the only fin that has not appeared in the print is the 0.1mm one. Therefore we can consider that the general tolerance of the printing method is between 0.1 and 0.2mm.
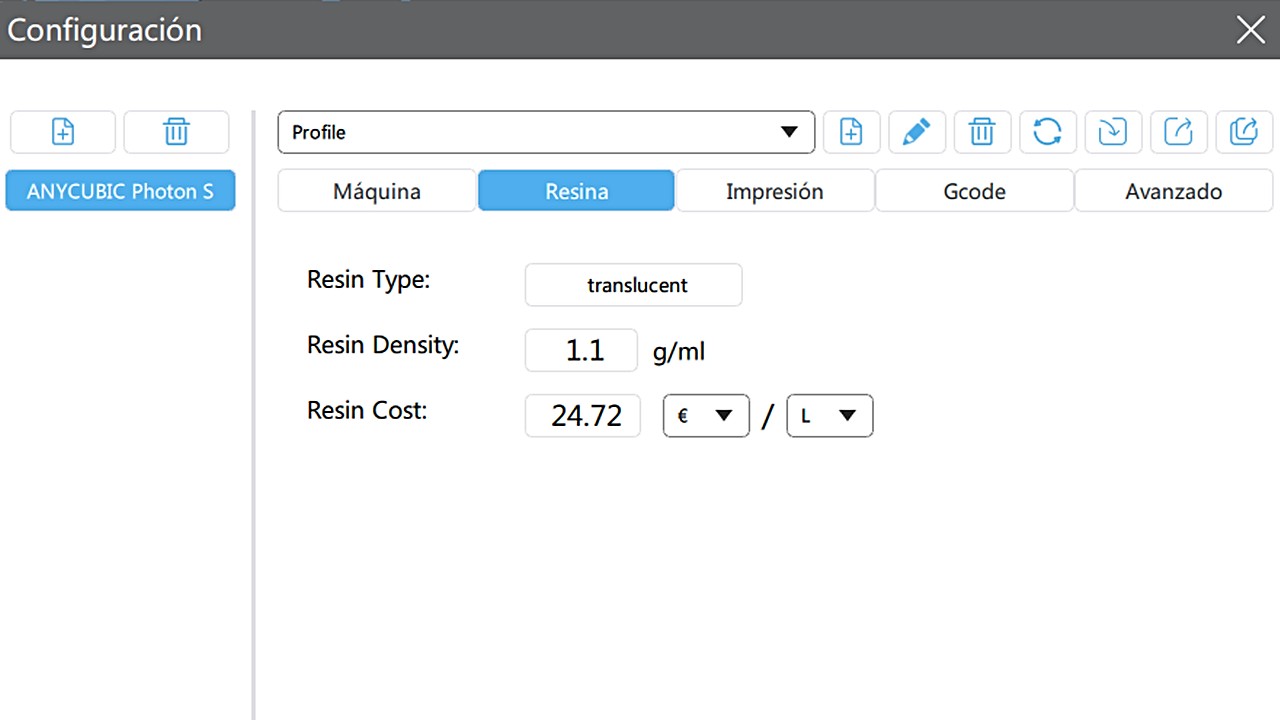
The settings for the print are:
- Layer Height: 0.1mm
- Resin: Translucent
- Platform Curation: 60s
- Layer Curation: 8s
- Supports: yes
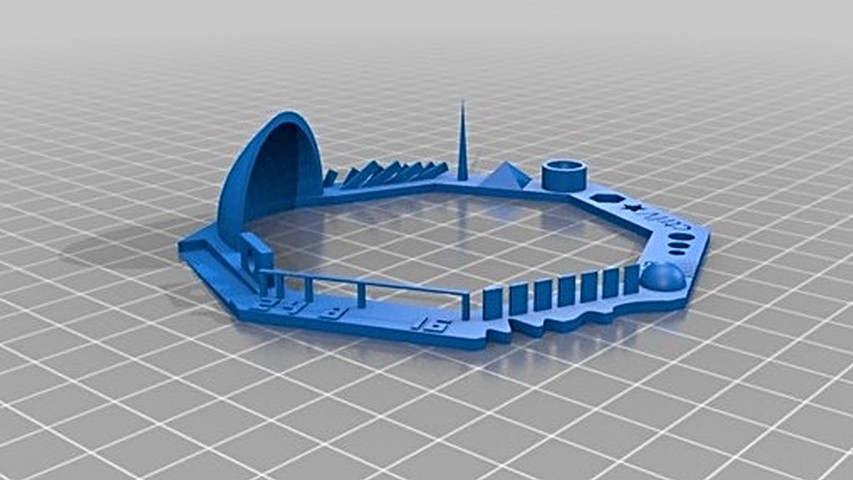
Global Comparison
To not make a massive and super dense text for the final comparisons between them, I have preferred to break the big issue into smaller aspects. This is in order to make this comparisons way more understandable and easier to comprehend.
Filament vs. Resin
The FDM is a much more robust technique than the SLA, but this does not mean that the latter is ruled out. Each of them has its peculiarities, strong points, weak points.
The FDM stands out for its reliability and for the amount of material that can be worked during printing. Depending on the characteristics of the printer, the models may have functional dimensions.
On the other hand, the SLA, stands out in the high fidelity in the small details. The dimensional tolerances are much smaller than in FDM, but so is the useful space of the base. They are usually small for various reasons: the LCD screen, the amount of resin and its price ...
Bowden vs. Direct extrusion
Direct extrusion moves the filament and the extruder in the same piece. This will eventually providing more confident and secure movement to the printer.
Unlike a direct extrusion machine, a Bowden extruder is mounted on the printer’s frame. It pushes and pulls filament through a long PTFE Bowden tube and into the hot end. This translates into more freedom of movement but with less control over the filament.
Nozzle: 0.4 vs. 0.6 vs 1.0 mm
The larger the nozzle, the more material deposits and the faster it can move around the contours. That ends up resulting in lower definitions, but offset by lower print times.
A thinner nozzle extrudes less material per layer, but by moving more slowly it makes up for the wait with higher definitions.
For fast and safe printing with normal PLA or ABS filaments for example, Bowden may be the best.
On the other hand, if your objectives are robustness, multifunctionality and time is not a problem. The Directe offer all these parameters.
Normal filament vs. Flex filament
Conclusions
- The technology you use to make your impressions will fully understand the way you have to understand the modeling and printing process.
- The size of the nozzle creates a balance between surface finishes / definition / printing time. It is important to understand which nozzle is mounted on your machine and to make the necessary adjustments so that the printing is correct.
- According to your needs or the design you want to print, you must understand the machine. Know if it is Bowden or Direct, the behavior of the filaments and what temperatures are suitable. The manufacturer information is important, but not fixed. Adjustments will be necessary almost 100% of the time
- The experience in 3D printing comes from the trial-error system. There is no perfect manual on how to print, but your mistakes will make you learn more and more.
- This technology is useful for small product batches, for prototyping, or for sizing objects that would not otherwise be manufacturable. Instead, I don't think it can compete with industrial performance. To what extent is the customization offered by 3D printing better than replicating products quickly as the industry currently offers?
Individual Assignment
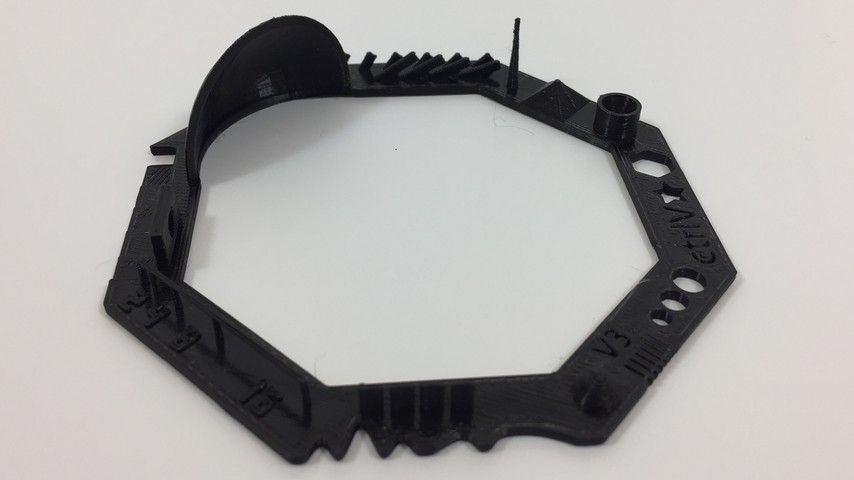
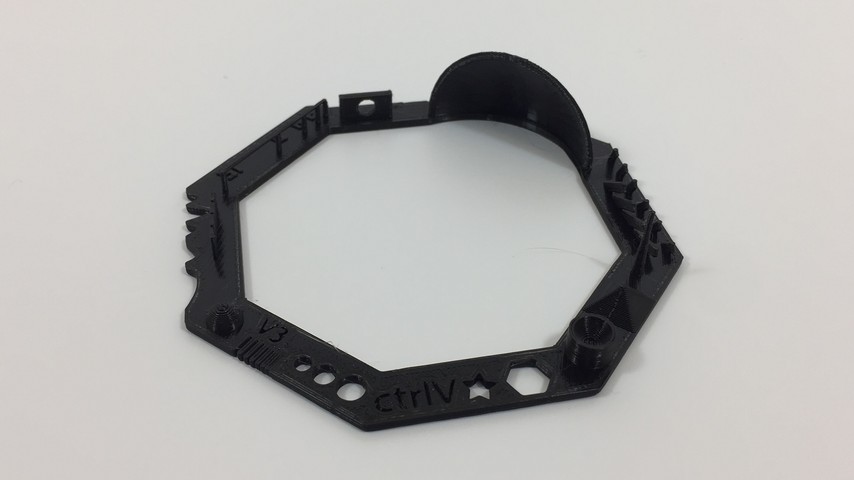
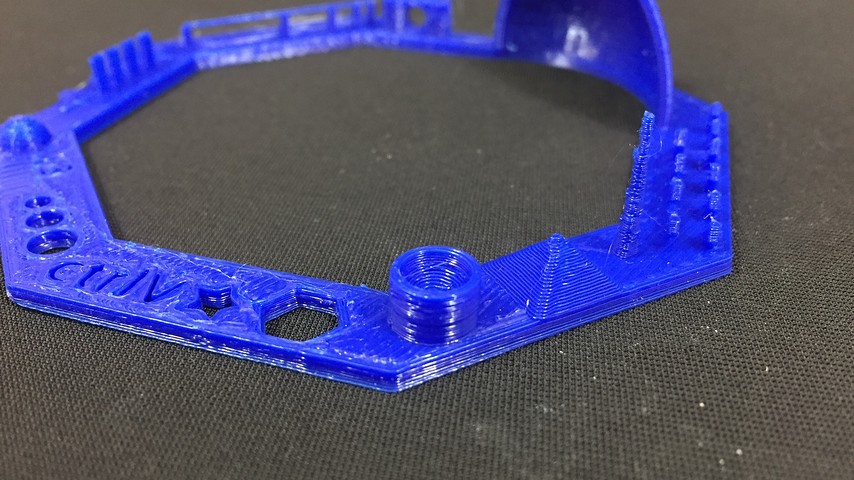
Signet Rings
For the modelling and printing assignment I tried to take advantage of the week 2: CAD models I did. Specifically from the signet rings that I designed. I have always liked jewelry from a technical point of view and I finally have a chance to make my own.
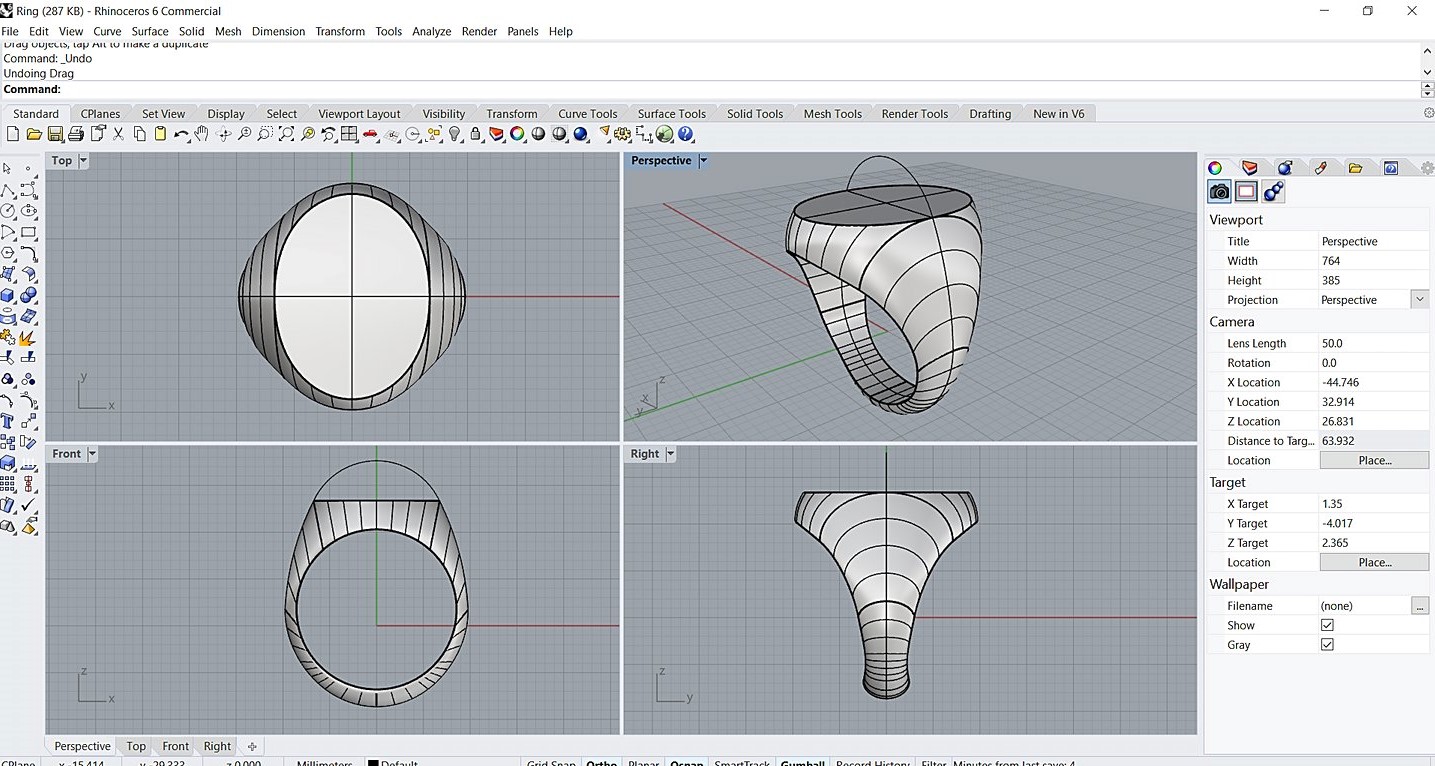
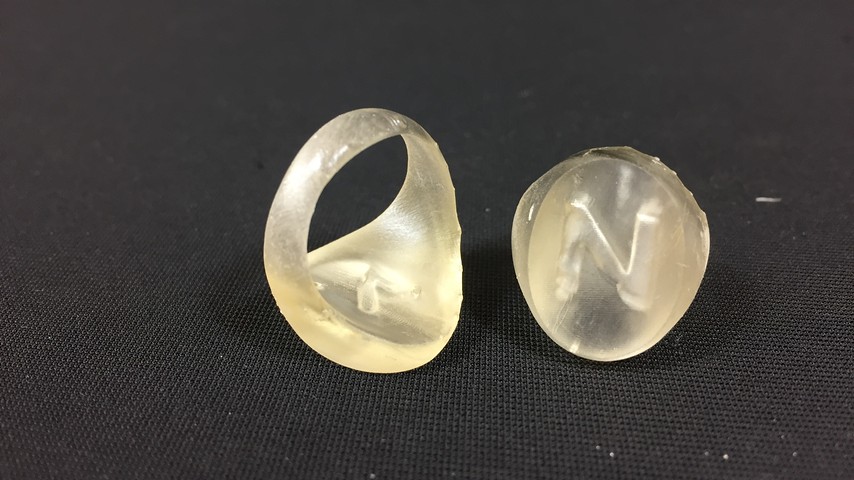
In order to meet the requirement that it cannot be manufactured with subtractive methods, I deconstructed the ring by translating the signet inside the ring, instead of etching it onto the surface.
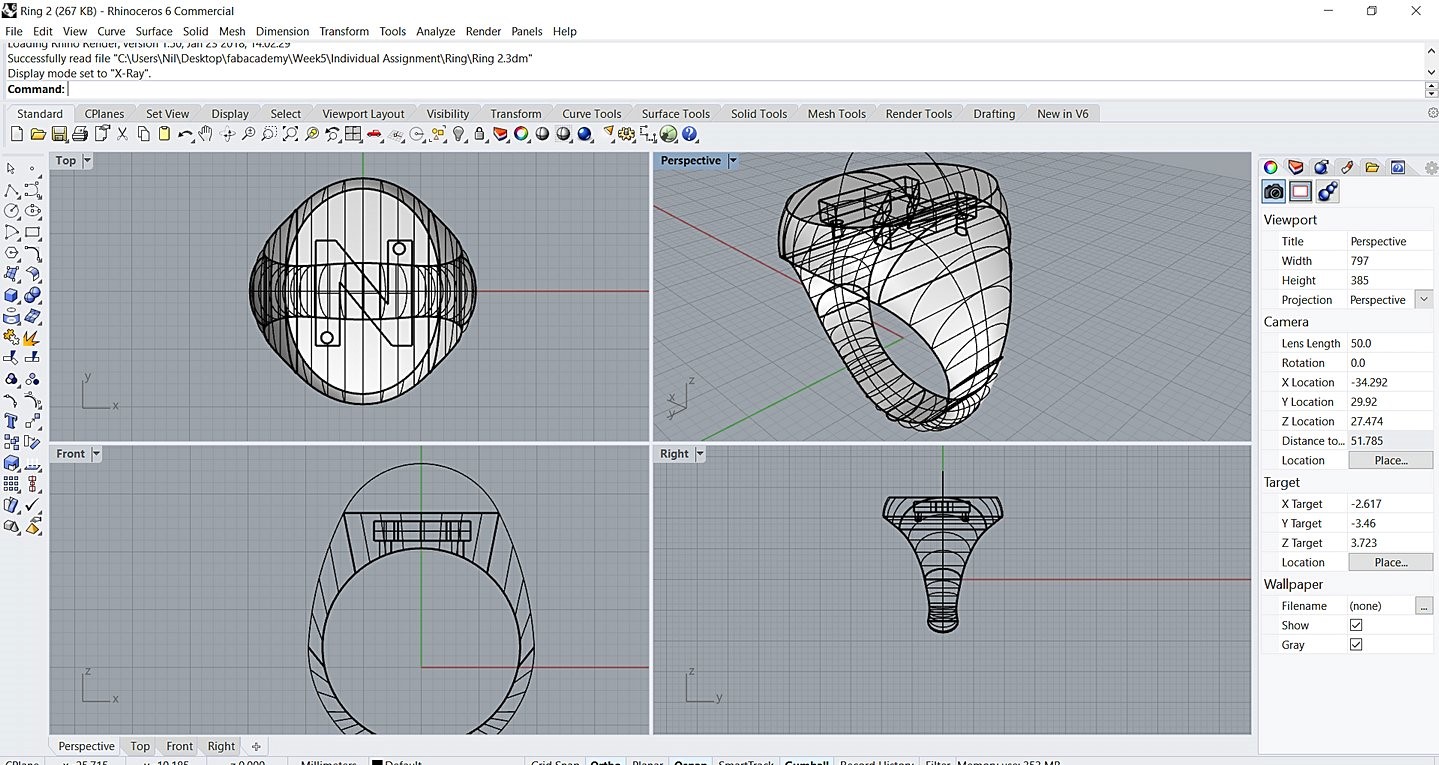
As you can see by comparing the photos, the change consists in introducing the N into the volume of the ring. That makes it impossible to manufacture by subtractive methods. I hope that with the resin and the holes that I have left to let it escape, you can see the clearly empty N within the geometry.
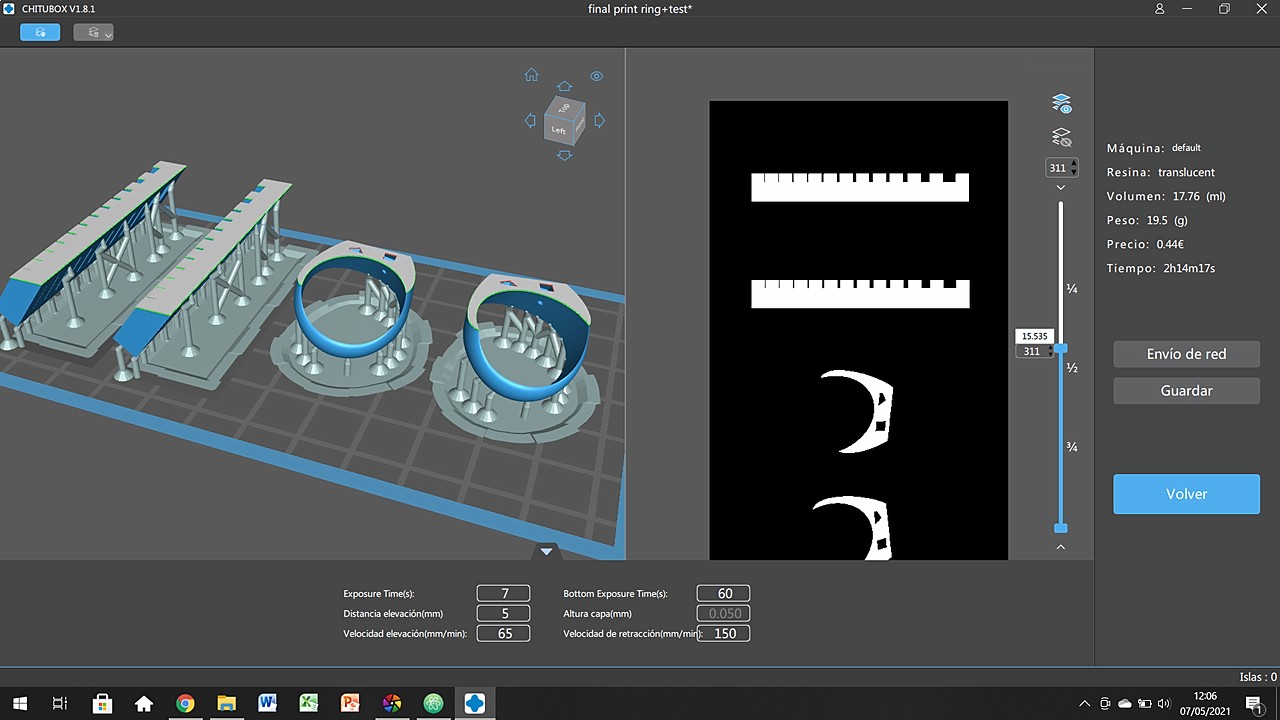
Chitubox
For the Photon, we cannot use the same software as for the FDM printers, so I have downloaded and installed the Chitubox. This software is specialized for Stereolithography printers such as SLA or LCD. The interface basically lets you position the models, scale and move them, weigh supports and make the final Slice.
In the following image you have the way in which I placed the models for the group assignment and for my signet rings. I tried to get the lowest possible height to reduce printing times, I lose enough margin for the supports to work properly.
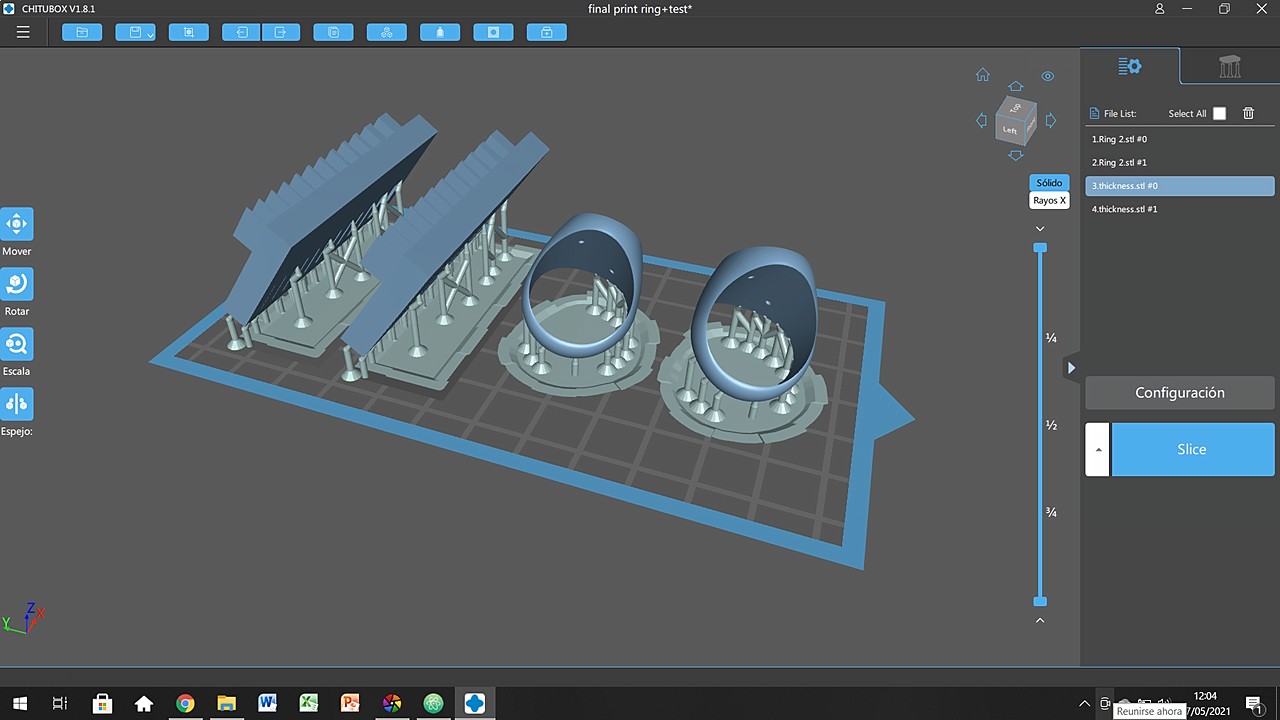

As you can see in the images, the supports are a super important part of these printers. The bases must be held by vacuum to the printer plate, so their design is very relevant. It is also a slight balance between a good grip, but also being able to take them off once the print is finished.
I think that with the settings of fine support, raft for the bases and the thickness of the supports everything should go well.
Settings
As I was saying a moment ago, settings are very important in 3D printing. That is why below you have a series of images so that you can see the settings that I have used.
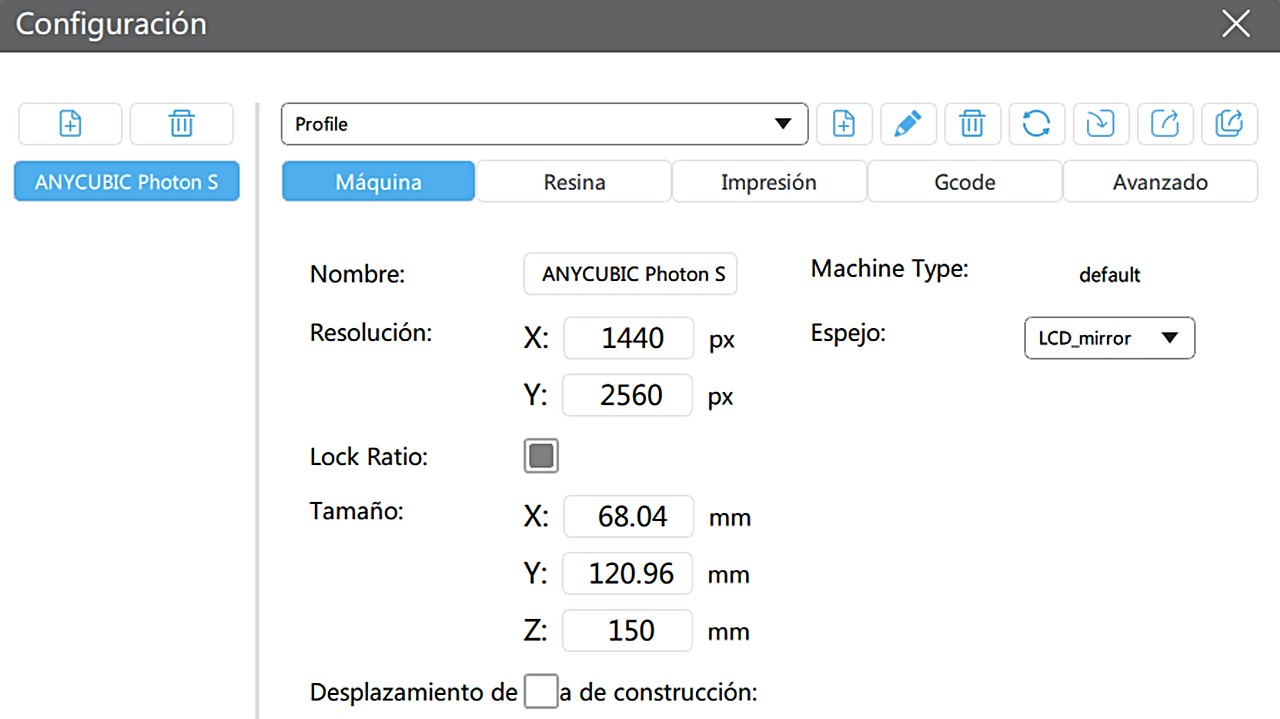
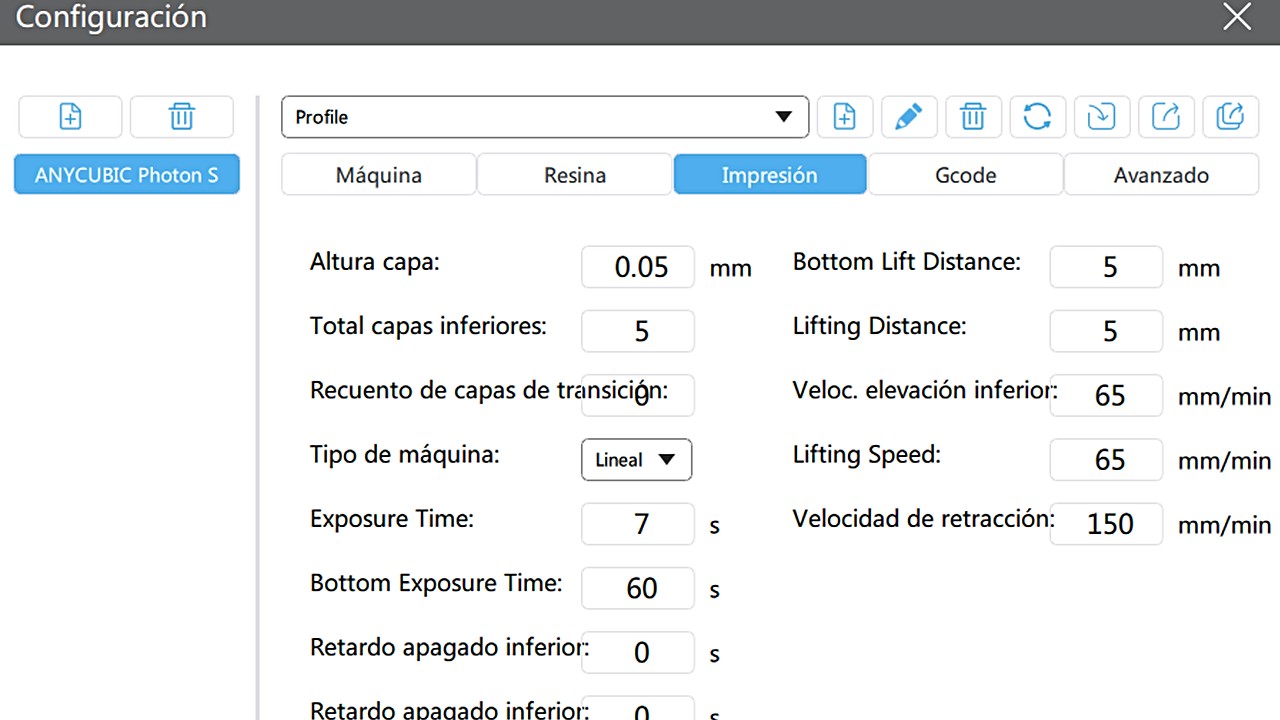
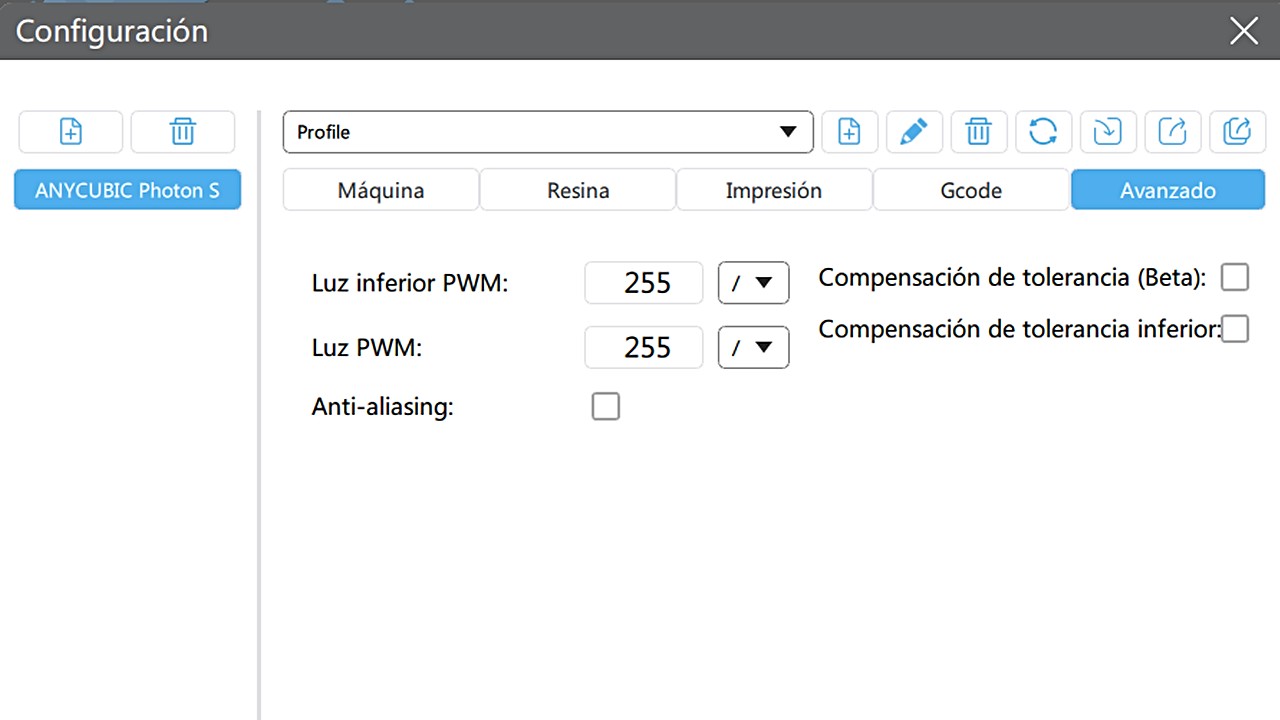
The important settings are in the third image. To decide which values were more important, I took into account the following design restrictions:
- Sticking with the base is produced by vacuum, therefore it is important that these layers are perfect and their continuity is as homogeneous as possible. Those layers cure much longer to make it stiff, and strong right from the start. For that reason I choose 60 seconds, almost 10 times more than in the middle layers.
- The layer height of 0.05mm comes from the need that the jumps between them are not noticeable to the eye. Compared with the FDM that are in the ten of a millimeter it is interesting to take advantage of the fact that the SLA can work in the hundredth of a millimeter. I consider it to be one of the great advantages of this technology over those of FDM.
- For the supports, the best way to work with them is to tilt the model so that the supports are minimal but also ensure that they will not merge with each other. As you can see, I lift the model from the base half a centimeter so that does not happen. The lean is a double-edged sword because the taller the model, the more layers and the longer. But on the contrary, the inclination helps the impression to be better and have less chance of failure.
- Finally the speeds. 65mm / s and 150mm / s are the default values, but I consider them adequate. It is good that when it enters the resin the speed is low to avoid bubbles and to let possible impurities escape on the surface of the resin. On the other hand, the exit speed is interesting that it comes out fast to avoid over-curing and also save time. In this process, errors do not usually occur since the laser or LCD is not activated.
I hope I can use this technology later because I have never had the opportunity and I see it super interesting.
Slice and Uploading
Once the settings are ready and everything else seems to be correct, the program calculates the necessary layers and you can see them through a preview on the screen (see the image). It's interesting to be able to see how the print will work so clearly. It is a great help that these softwares offer.
When I consider that I am ready to print, I save the program in the format compatible with the printer and place the file on the SD card and we are ready to print!
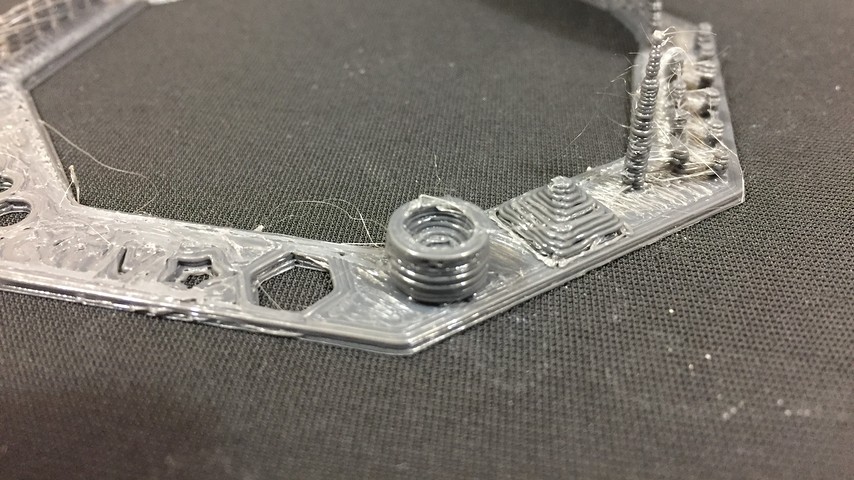
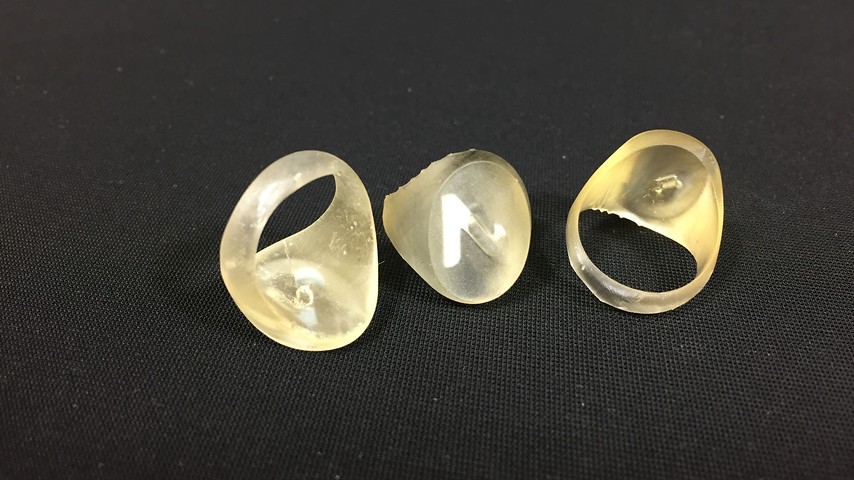
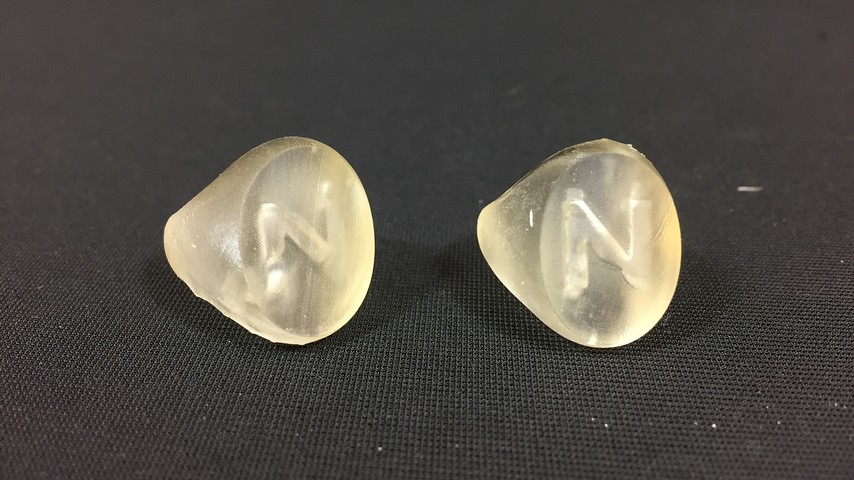
Iteration 1
Being my first time using SLA / resin printers, a lot of things went wrong, but still I think the result was not bad. The most important mistakes made during the first iteration are listed below:
- By only making a hole in the letter N, the resin inside the bubble could not be exchanged for air. Also the diameter of the hole was too small.
- The measurement I took of my little finger was not correct. I pressed too hard on the caliper. It should be at least 1mm larger to be able to carry it comfortably.
- The curing process was uneven on the rings because of the position in which I placed them in the UV bath. In some I lost the transparency, in another I could not empty the bubble ...
Hopefully the following pictures will throw some light to my explanations.
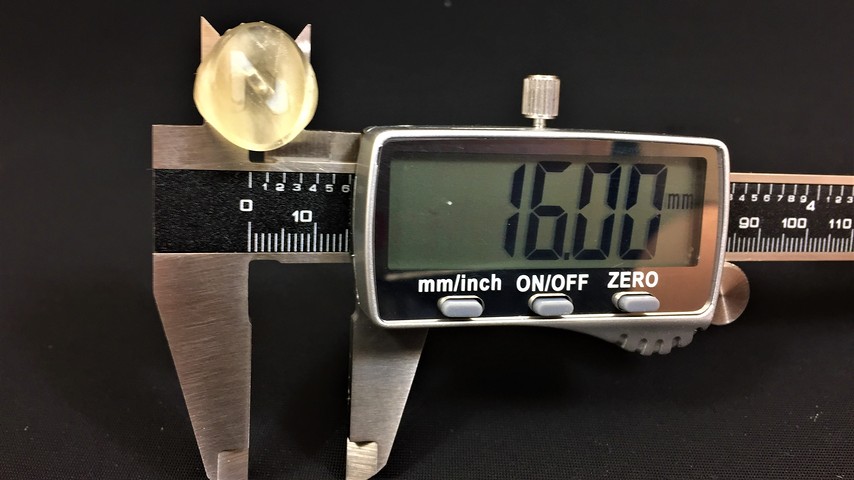
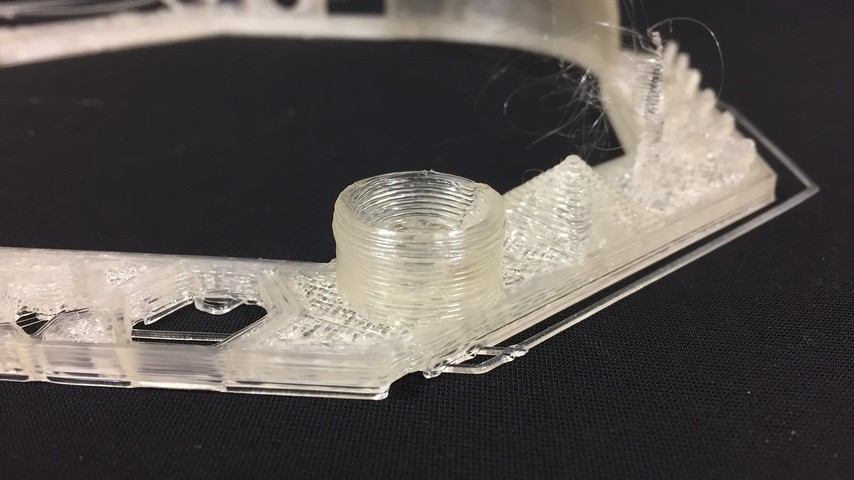
Iteration 2
For the second attempt, I resized the model, taking the correct measurement. I also redesigned the resin drainage system with two holes at the ends of the N.
Curiously, the model turns out to be a little smaller than I expected and although I can put it on, it is tighter than I expected.
With resin printing, I have a bit the same feeling as with 3D scanning. I find it a great tool, but at the same time I think it is not up to the task in some moments.
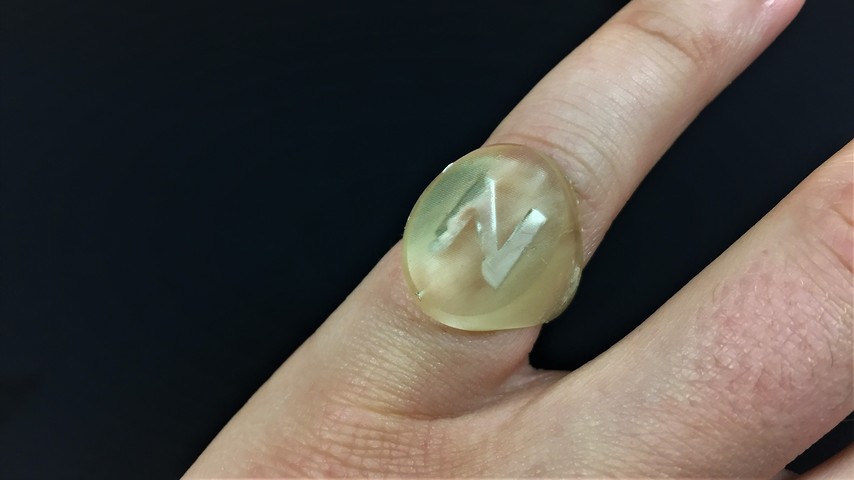
Anyway, I am delighted with the result and I think that this printing technique raises some possibilities, which, if controlled, are incredible.
Hero Shots
3D Scanning
I thought the 3d scanner would be the easiest part of the week, but it has not been like that at all. It has turned out to be a lot more complicated than it seemed at first.
It seems that the smallest detail outside of your control will end up meaning that the software does not generate the mesh correctly. I have tried to scan 4 objects in different ways and applying the lessons I was learning from mistakes. But I do not consider that the result is the expected general in any of them.
Photogrammetry Basics
Photogrammetry consists of making a hemispherical dome of photographs around an object. For that we must take many photos in the form of a "segment" around the object. By segment I mean that we will go around the object, throwing photos from top to bottom and following a pattern of distances and photos.
Later these photographs are uploaded to Meshroom so that it finds the positions in which the photos have been taken and seeks to match the geometries between photos. In this way we can generate a 3-dimensional image from successive 2-dimensional images. It is an interesting but very complex technique. Changes in lighting, focus or just poor information will result in failed models. You will see how many times I have failed during the week trying to get a good result.
Software
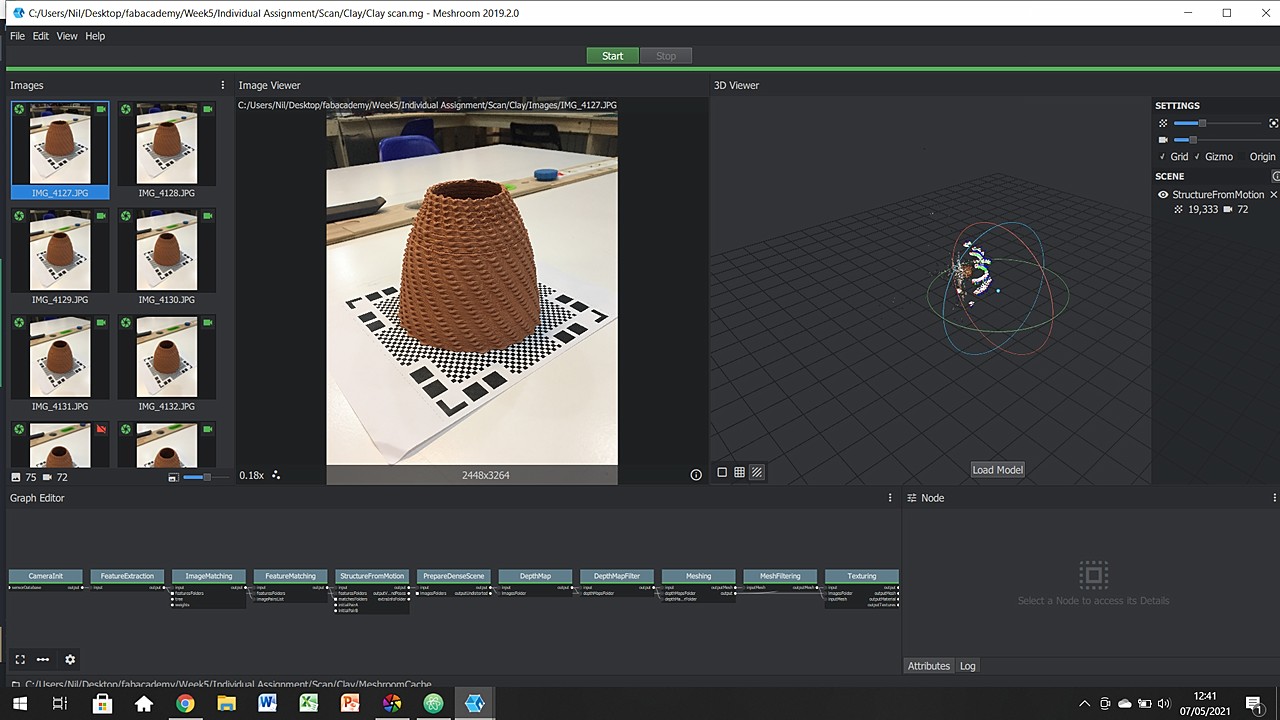
The program that I have decided to use is called Meshroom. Basically what this program does is collect large amounts of images of the object you want to scan and places them in position by means of shape recognition, to generate the 3D model that you will see later on the web.
As you will see in the images below, the program recognizes the images and offers you feedback on whether it is understanding them or not. Then below you see how the nodes are working one after another generating the document. When finished, the right tab opens where you can see the 3D model along with the position where the photo was taken.
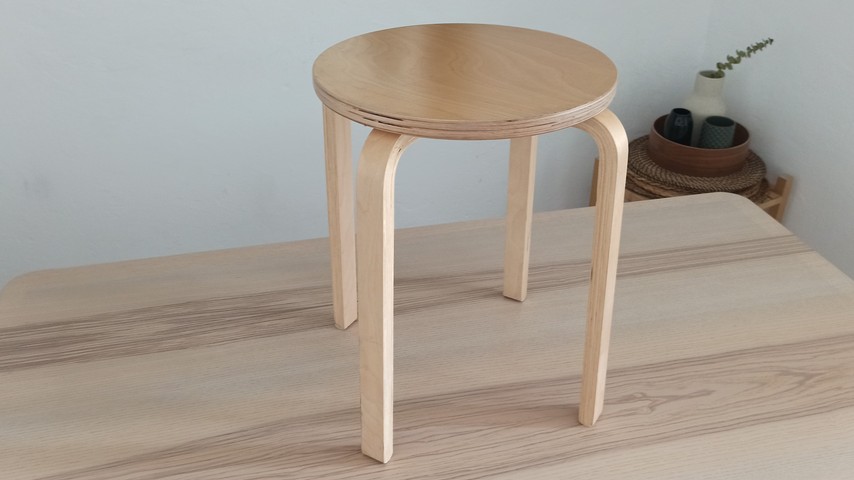
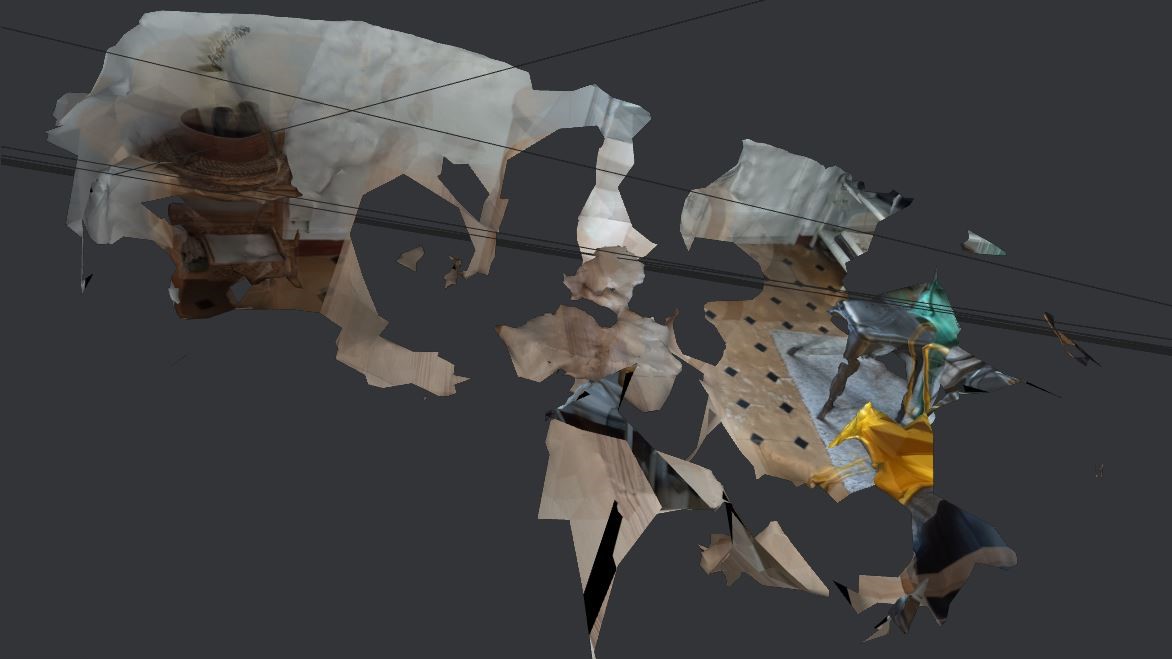
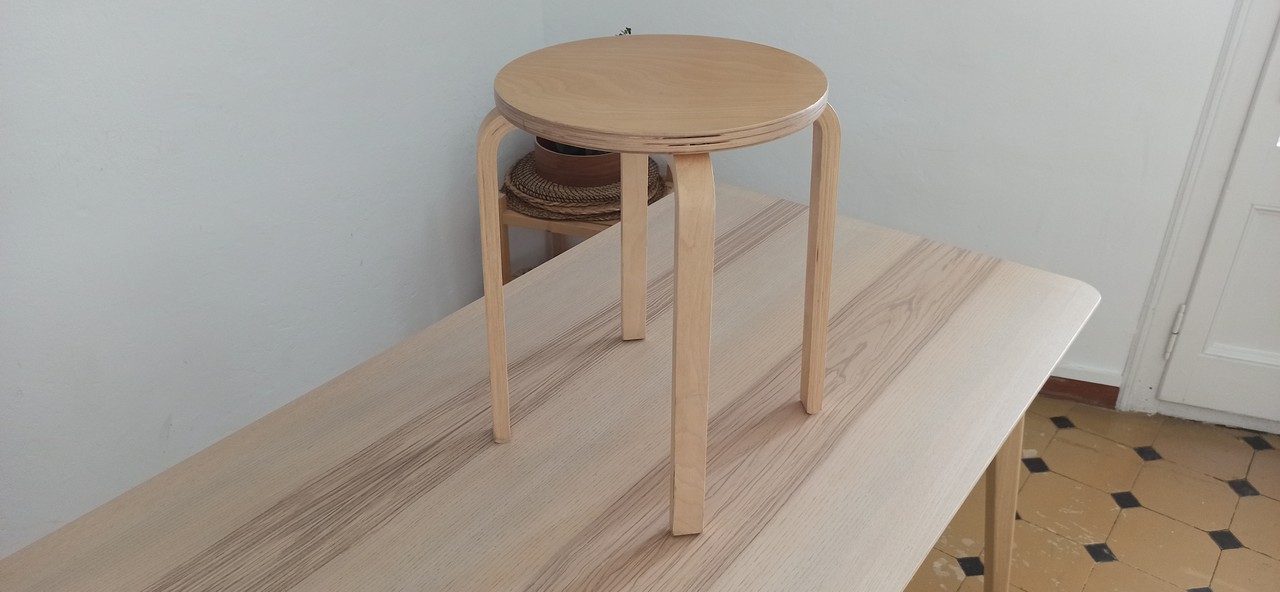
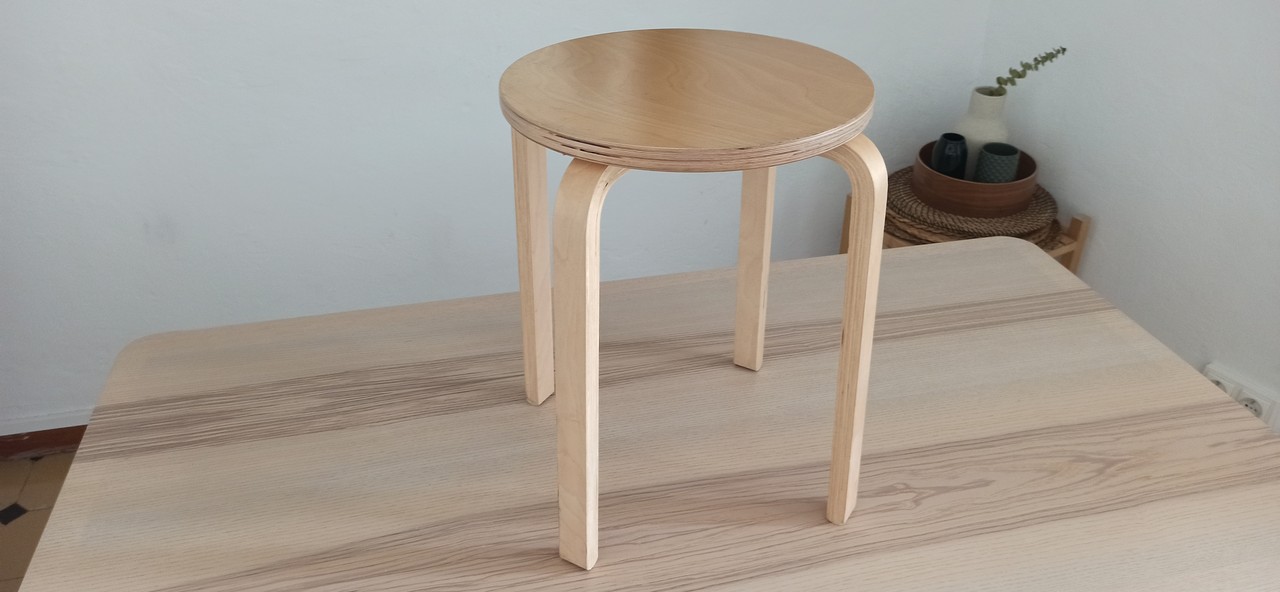
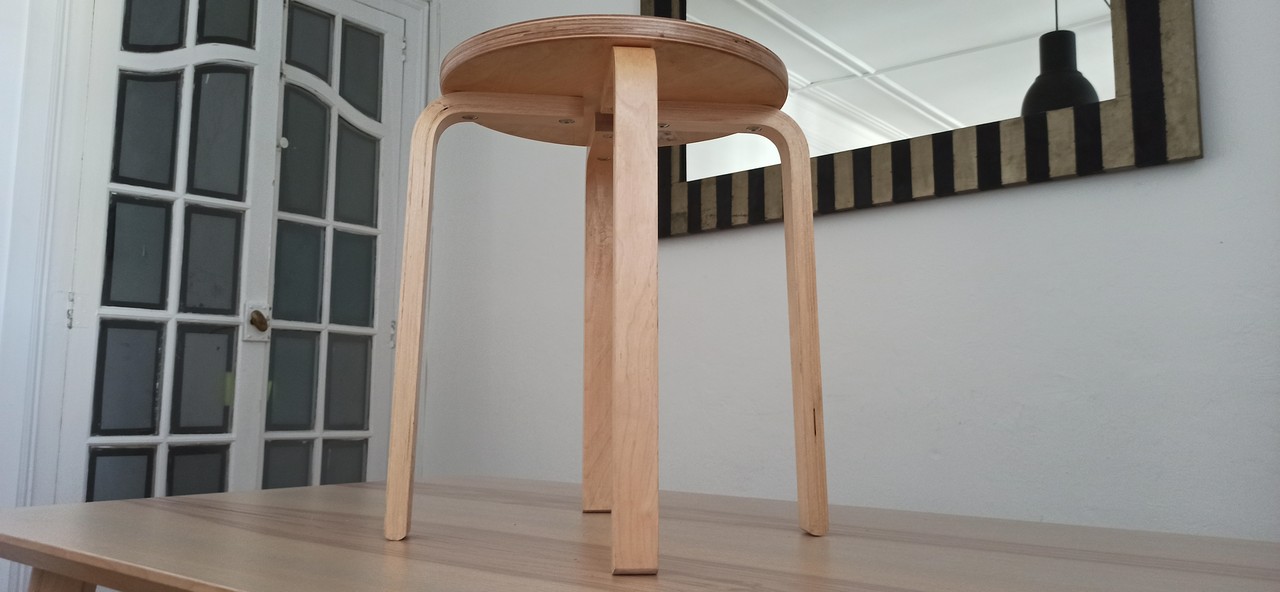
Iteration 1: Stool
In this case I have had to attach a photograph of the original model, to be able to convey the expected shape.
- ISO in my camera was not blocked.
- Background and object were almost the same color and texture.
- Didn't take enough images.
- Meshroom discarted major part of the images.
- There was no references for the software to position the model.
Having worked with photogrammetry, I had to take a lot of photos from multiple perspectives around the object to be scanned. So that you can see a little better how I did it, here are some of them:

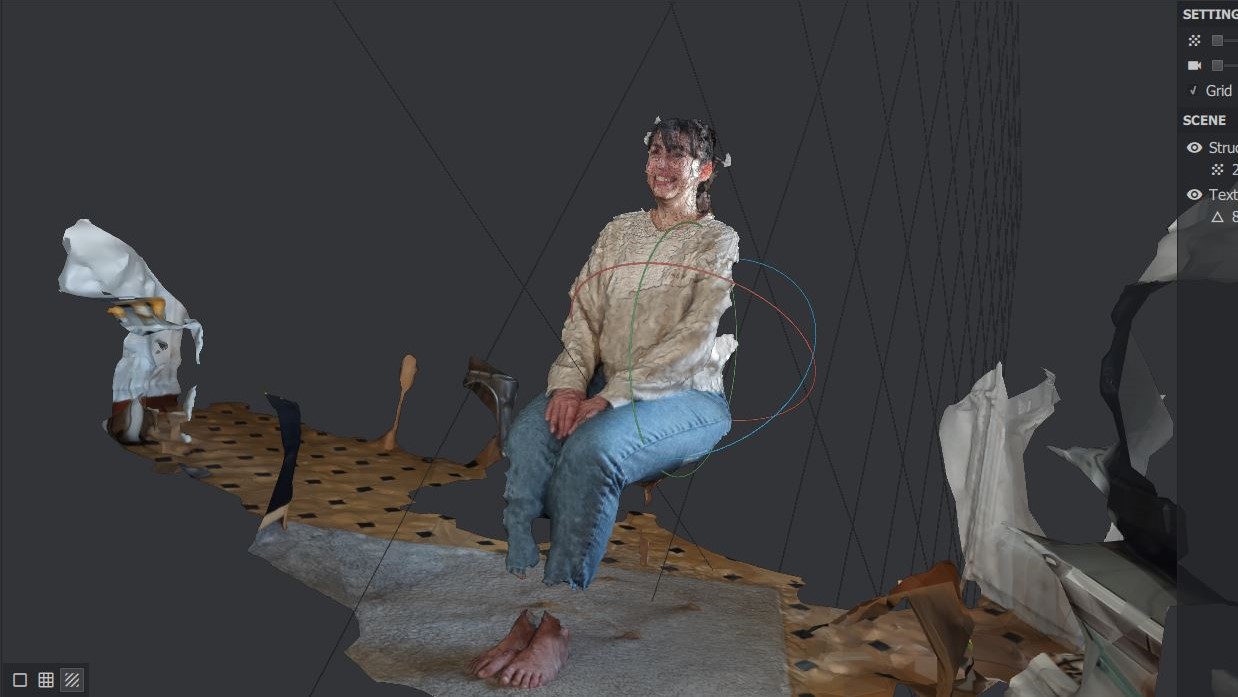
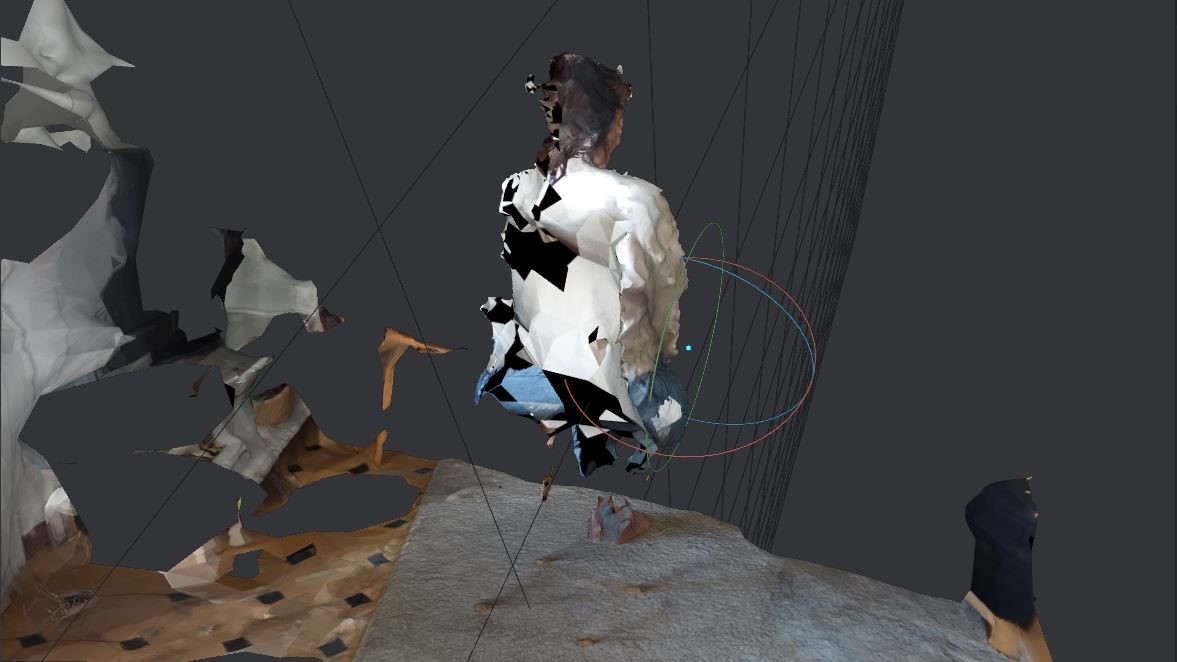
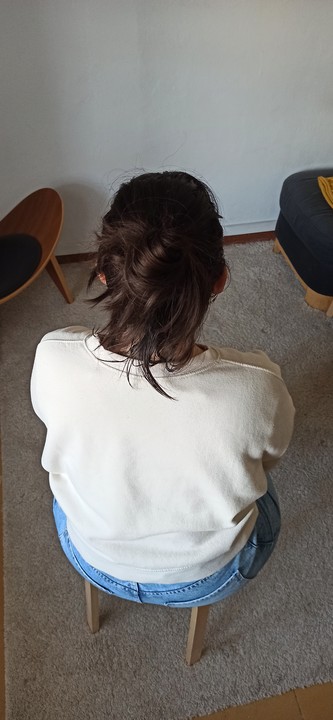
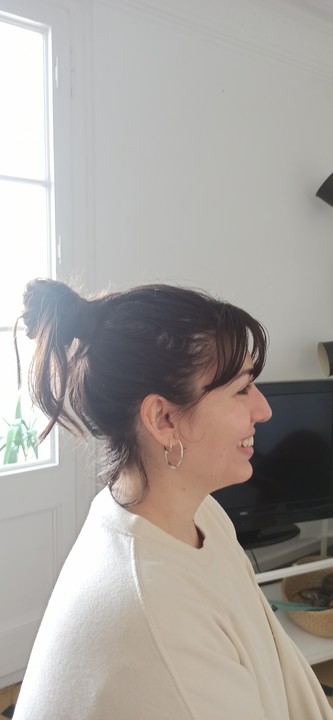
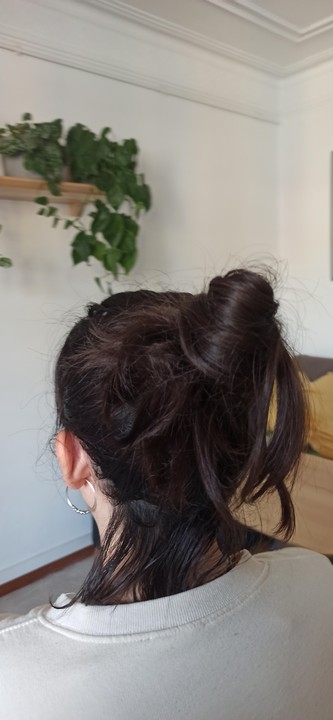
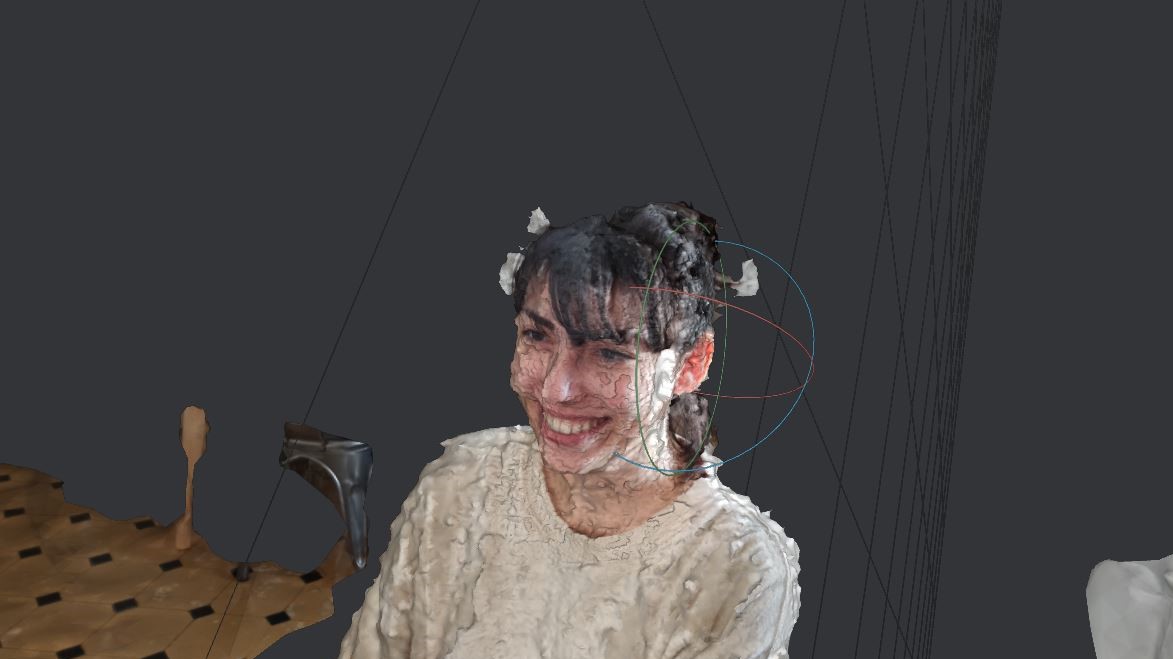
Iteration 2: Marta
This other scanner was much better, but my friend's sweater and the wall were practically the same color.
Having worked with photogrammetry, I had to take a lot of photos from multiple perspectives around the object to be scanned. So that you can see a little better how I did it, here are some of them:
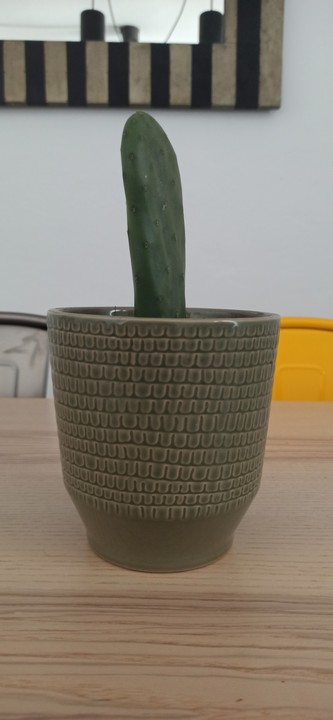
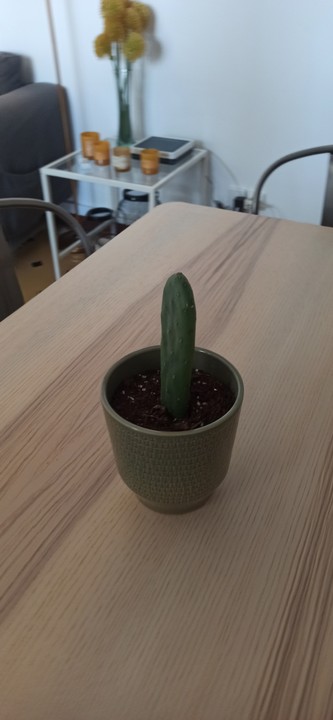
Iteration 3: Cactus
With the cactus, the images were better shot, the ISO was locked, and the colors generated good contrast. In contrast, the slightly shiny texture of the pot made the software misunderstand the geometry.
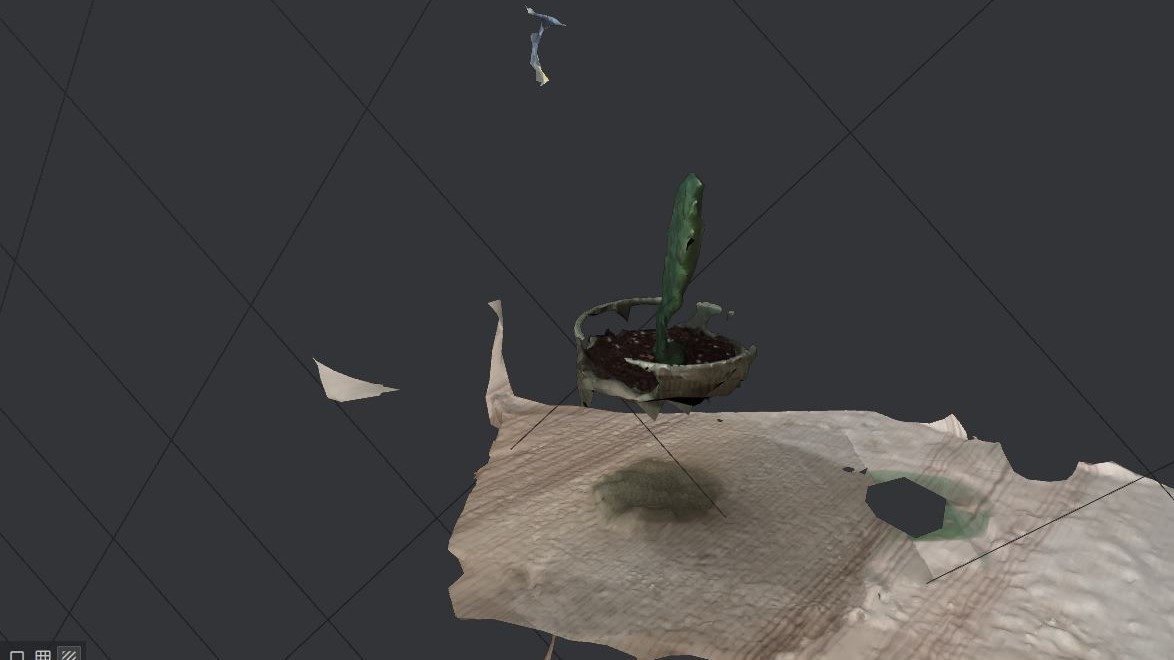
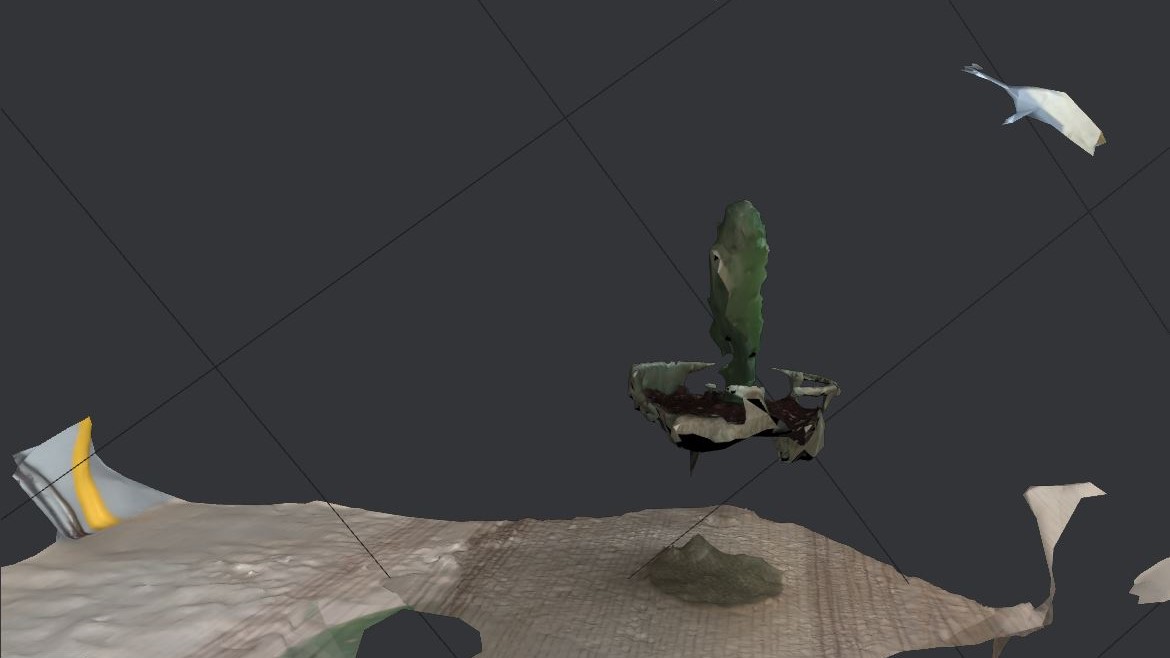
Having worked with photogrammetry, I had to take a lot of photos from multiple perspectives around the object to be scanned. So that you can see a little better how I did it, here are some of them:
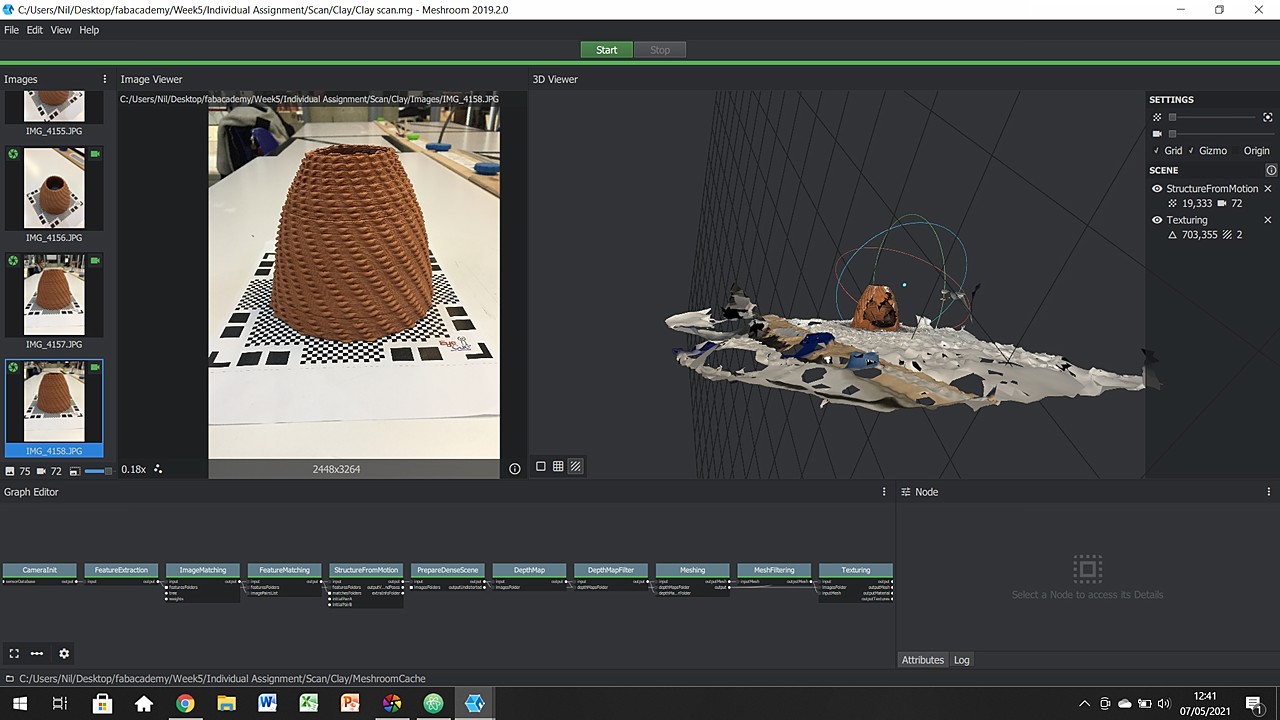
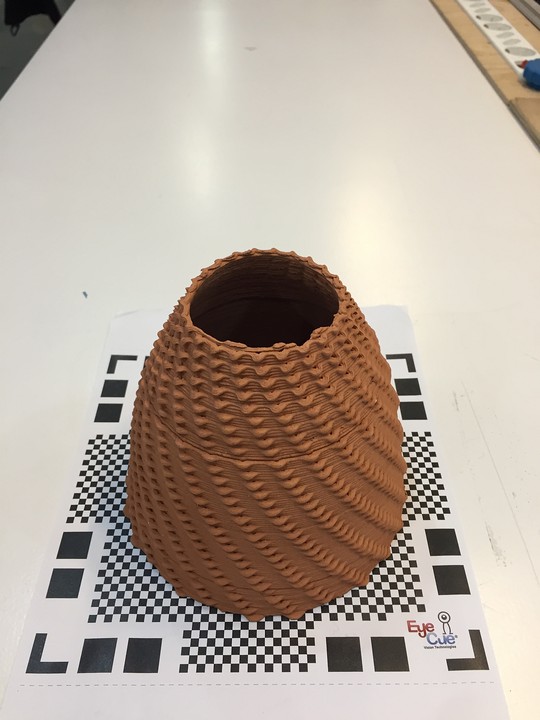
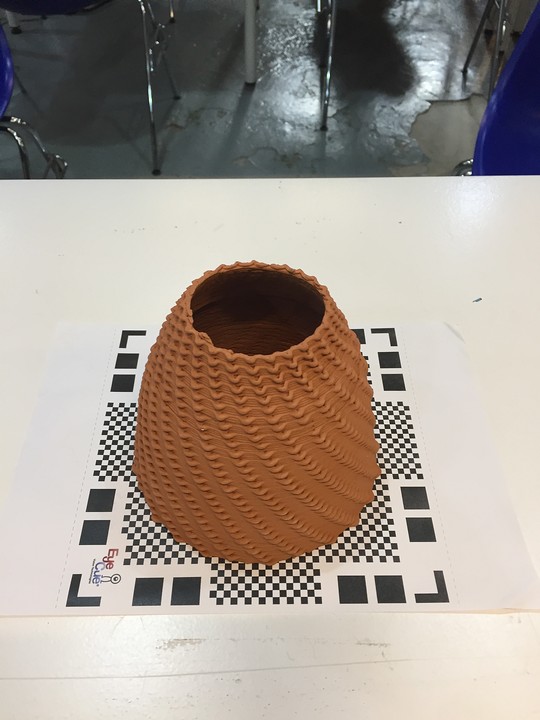
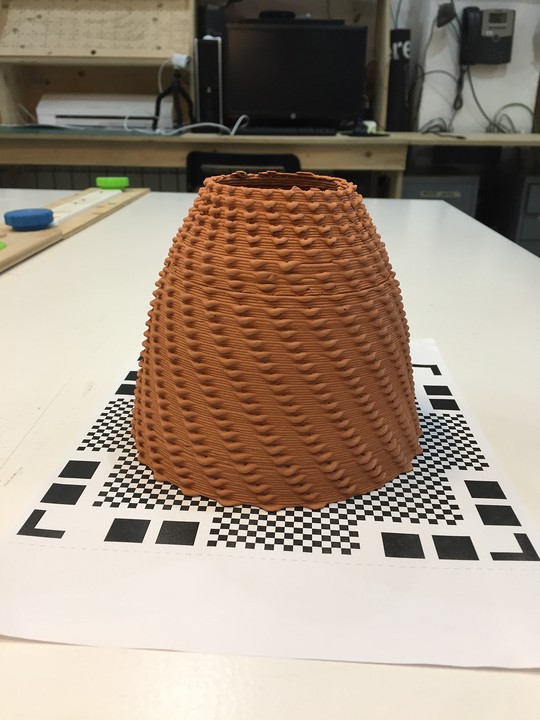
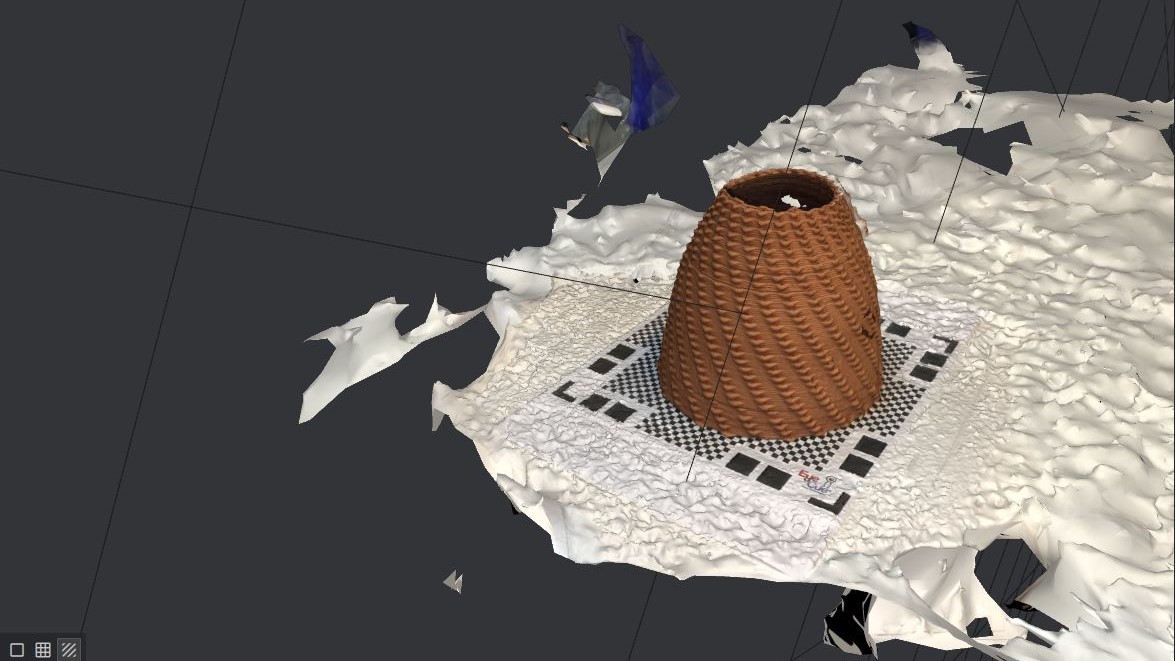
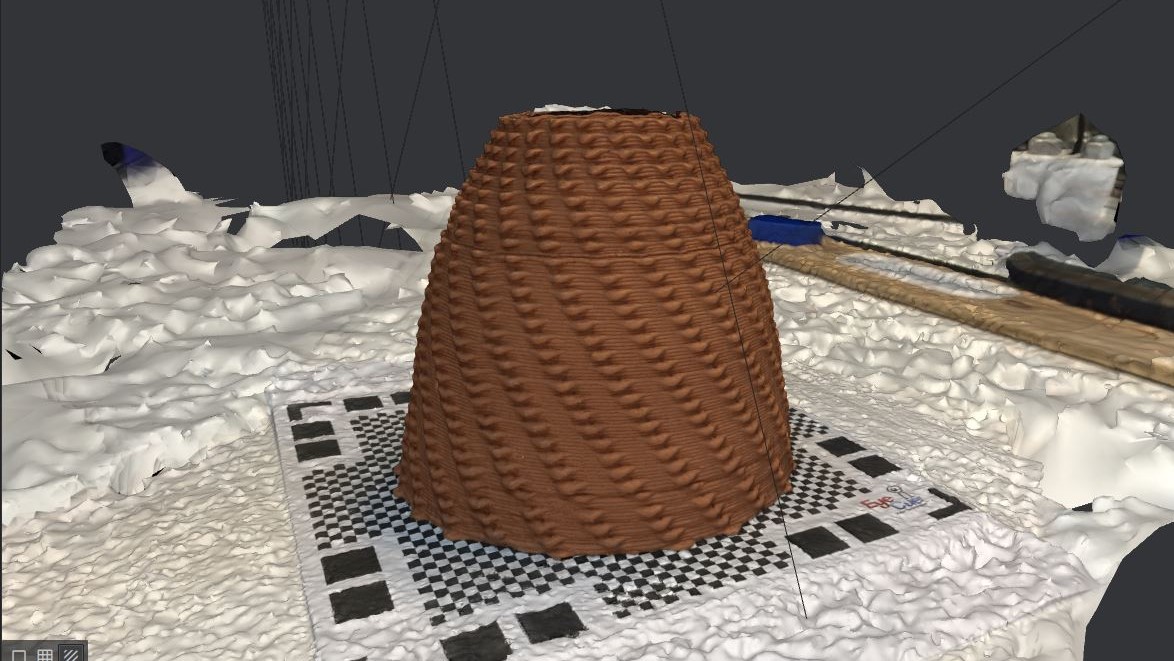
Iteration 4: Clay
With the clay screen I thought that all the errors were overcome and I even put a spatial reference template. Unfortunately when the software tried to create a vacuum in the bulkhead, it broke the mesh. Anyway, in some parts, the definition and textures are great.

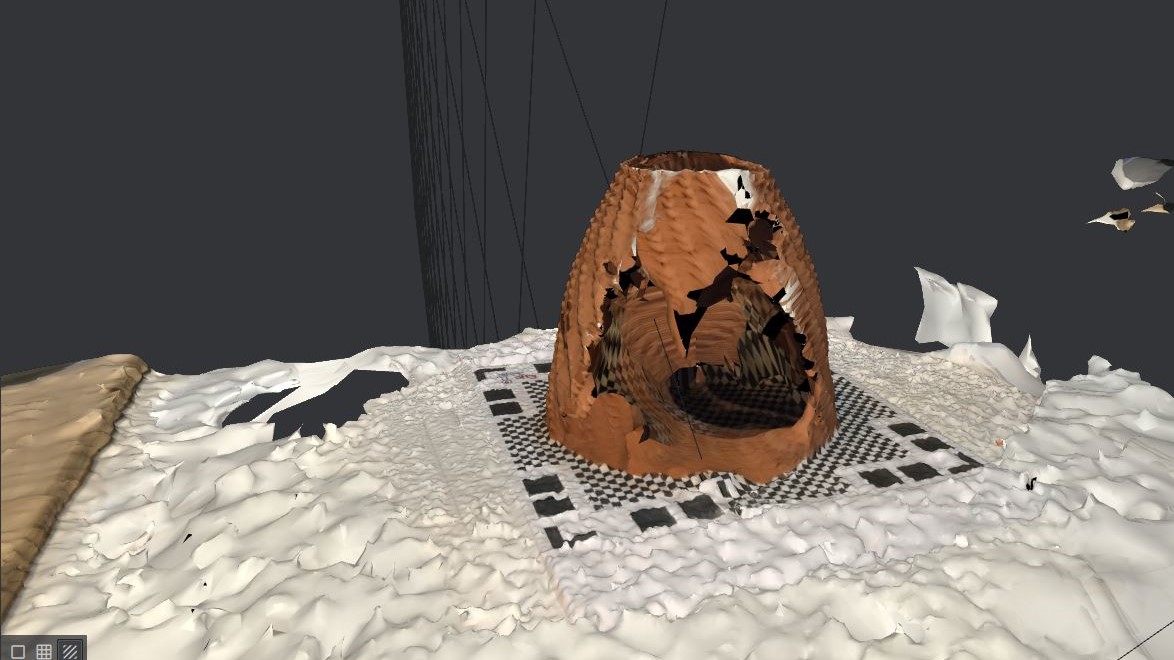
Having worked with photogrammetry, I had to take a lot of photos from multiple perspectives around the object to be scanned. So that you can see a little better how I did it, here are some of them:
Hero Shots
I don't think I can call these hero shots, but they are areas of the scanners that stand out above the rest.
I would like to highlight Marta's face and the texture of the clay. In both cases, the number of images was very high, the texture of the model was high, and the lighting was adequate.
Conclusions
As final conclusions of 3d scanning technology:
- The technology (photometry) is not yet at an adequate level of development. It is not a tool for all audiences yet.
- There are too many things to take into account for the results to be correct (light, texture, color, material, position, references, camera ...)
- It is always necessary to work the mesh after scanning, to obtain good enough results.
- I think he has a long way to go, and that alternatives such as triangulation or lasers are harder and more effective tools.
Original Files
Link to Original files from this week.
What to improve for next assignments?
This week has been great! I have never been able to use 3D printers so freely and with so many different types. I think the time management has been good and that the teamwork has improved a lot with the other weeks. I think that I am finally adapting correctly the system of working in spirals.
What to keep an eye on during week 6?
· Keep working in spirals.
· Use my commute time to develope the texts for the website.
· Try to improve even more the teamwork with my collegues.