20. Project development
Introduction
One of the important issues i observed is to implement a new way to teach science by using some tools where technology is involved. We usually buy different equipment or material in the vast market for those items. Now i am relating a robot previously used for some classes and involve it with a subject like science.
Previous background
I based my project in a Beebot robot which is commonly used to introduce programming and i combine it with a science class.
Objective
I will create a robot with a shape of an animal that will be able to detect its own habitat.
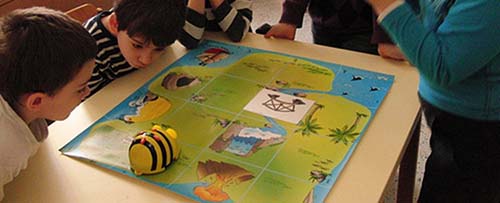
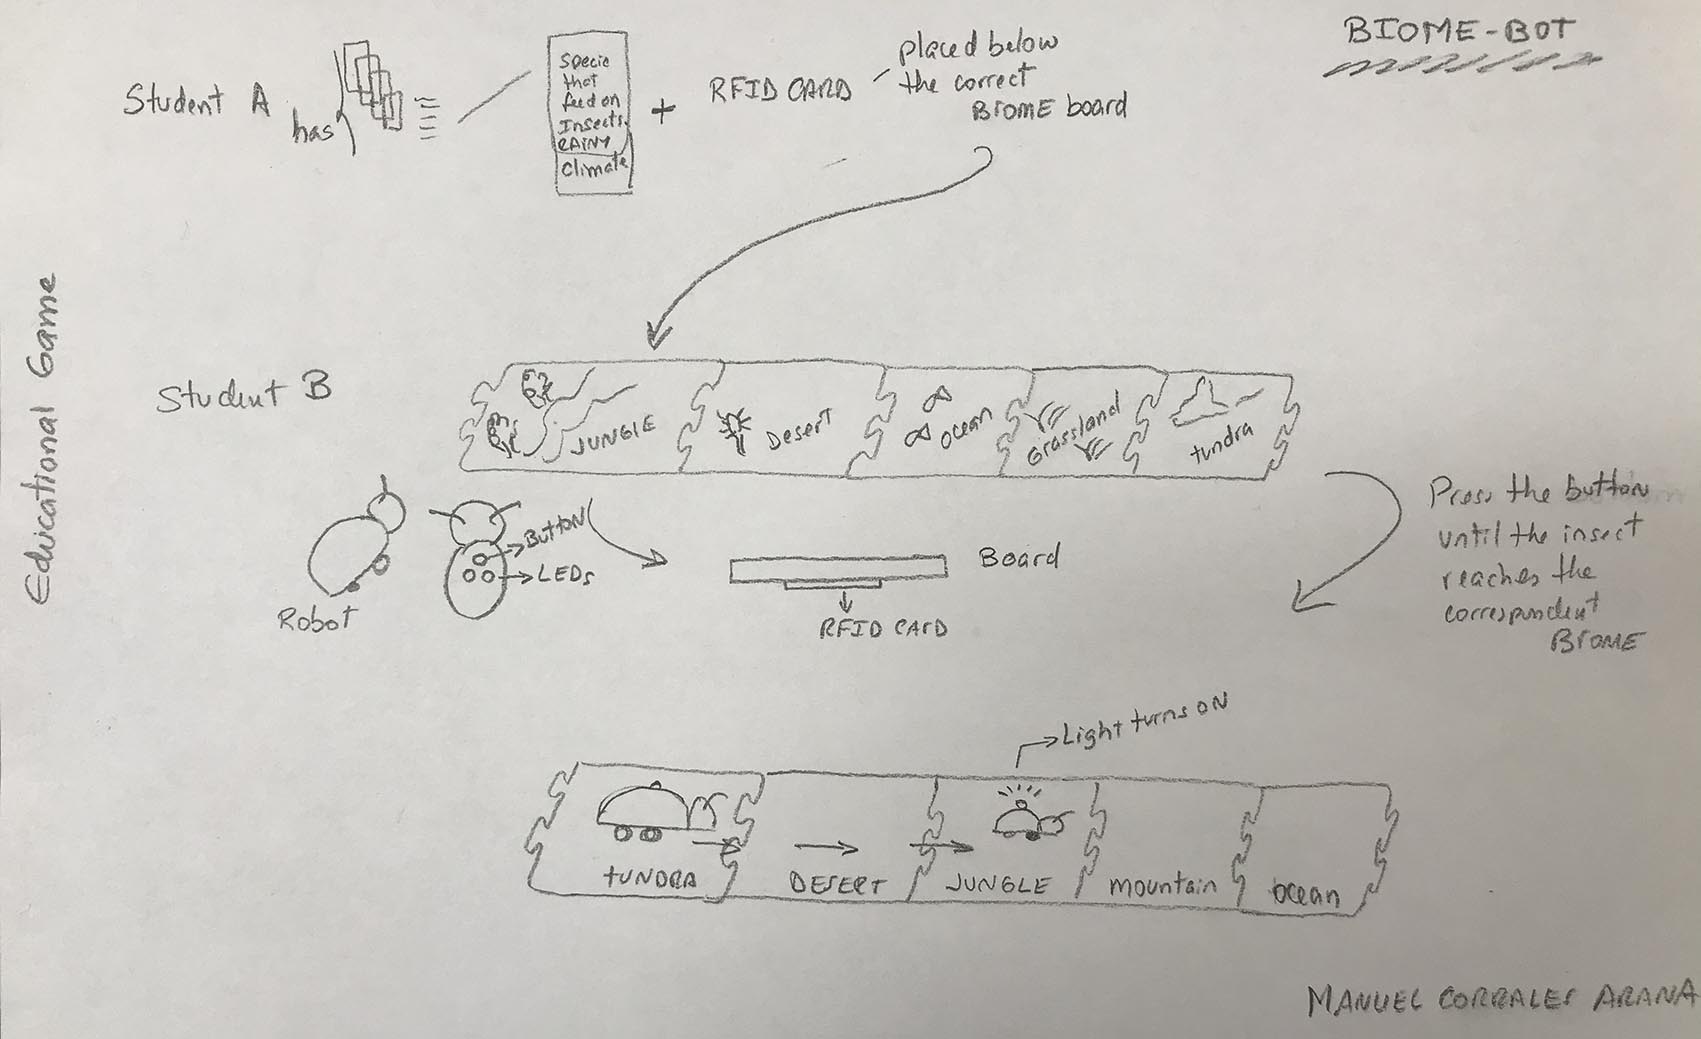
This project has to do with STEM Culture where technology is used to teach science. I will use this STEM project as a game for middle school students where one student will prepare the 6 boards containing the desing of different biomes or natural areas and will place a RFID Card below one of them. She will tell some characteristics of a specific habitat and the other student will answer by letting the robot to move to the corresponding board. If the green led turns on, then she has arrived to the answer, else the habitat doesn´t match those characteristics.
Planning my work
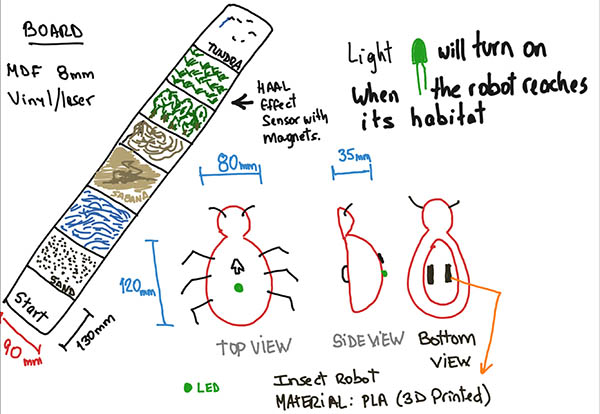
Sketching the project - Sketch 1:
a. Board.
To make my sketch i use Showme

Here my sketchs
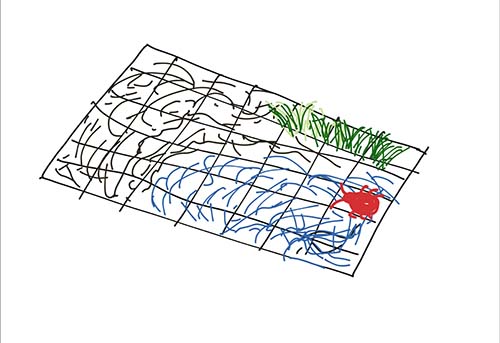

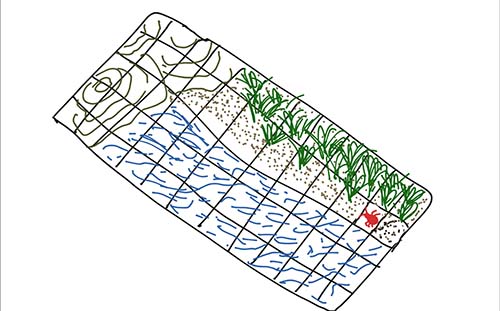

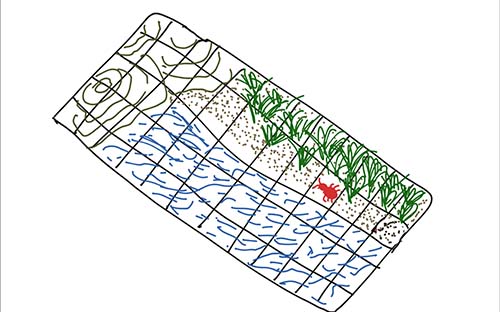
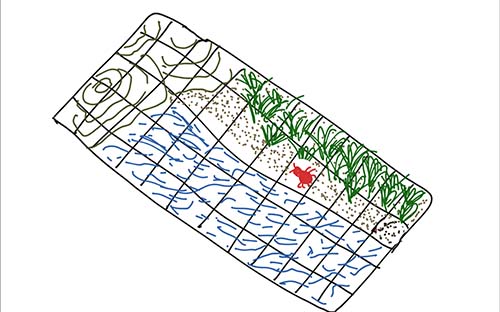
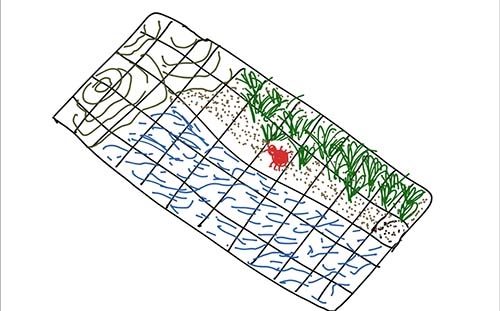
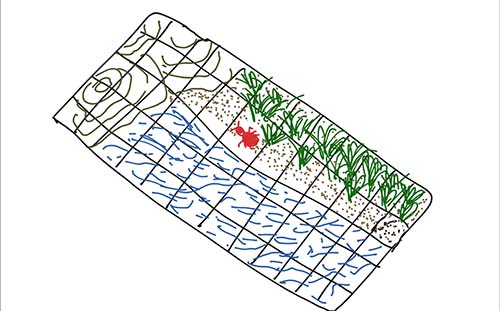

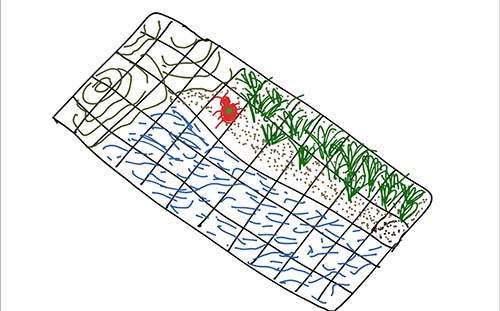
When the animal robot gets into its habitat, a green light turns on.
Here the final sketch worked on Adobe Illustrator There are going to be
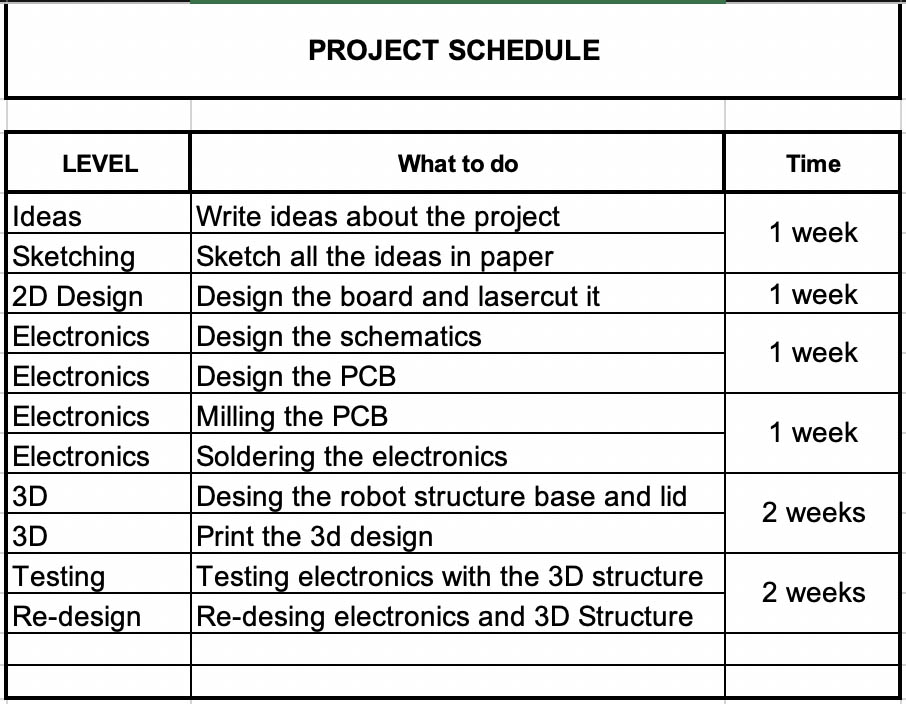
| DIMENSION | Each square | # of Squares |
|---|---|---|
| Width | 50 mm | 12 |
| Height | 50 mm | 08 |
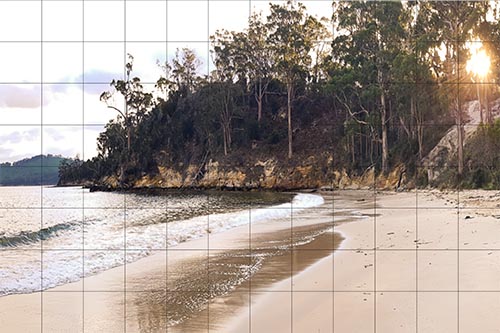
Image of a beach which has three different habitats:
| Seawater | Sand | Green area |
|---|---|---|
One big question that i have is whether to start with the electronics or with the 3D printing of the animal robot. If i work on the animal robot structure first, means that is need to work on the electronics accordng to the size of the 3D structure. By the other hand, if i start with the electronics, i have to do it the smallest as posible to let it enter in a small 3D structure, so its a little complicate to decide but i started with both, meaning that probably i need to resize the strucrure if the electronics doesn´t fit exactly.
b. Robot.
The design of the Insect or animal was done in Fusion 360. Here the step by step modelling.
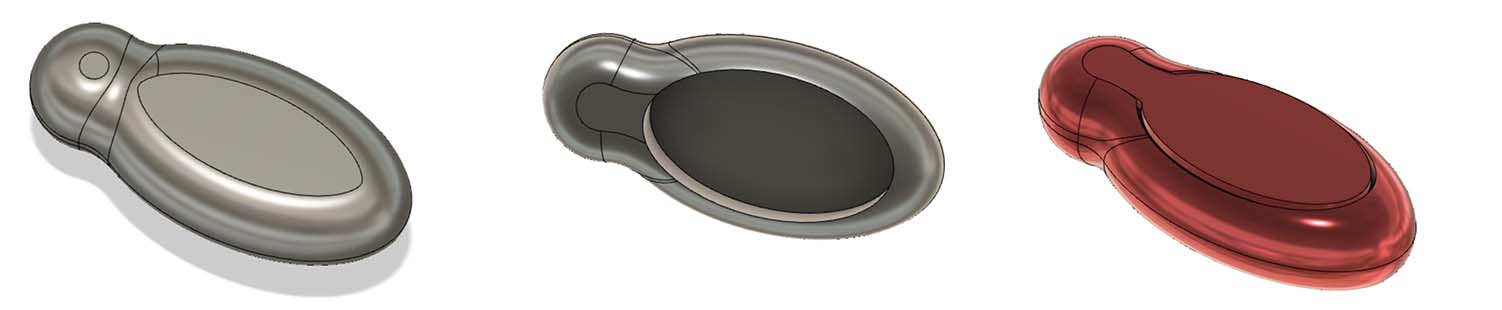
Once i printed in a 3D Makerbot Replicator Printer i notice that is going to be difficult to inser the electronics.
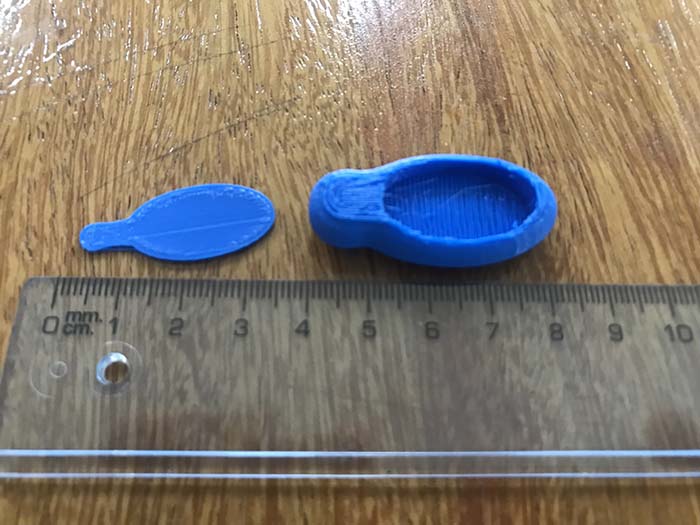
So i decide to redo my project.
Sketching the project - Sketch 2:
a. Board.
To make my sketch i use Showme
| DIMENSION | Measures | Each square | # of Squares |
|---|---|---|---|
| Lenght | 1000 mm | 120mm | 08 |
| Width | 800 mm | 80mm | 10 |
b. 3D Insect Model
After design the robot insect as a model i notice some errors like the interior space that may hold the electronics and circuit board which is small and need to be redesigned.
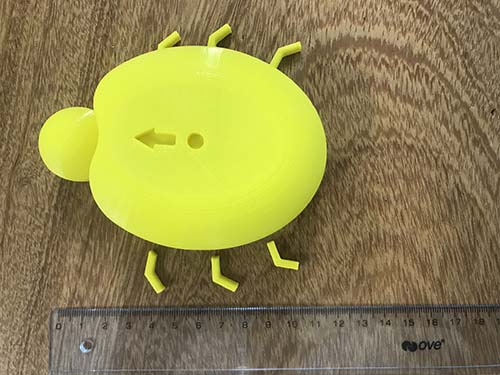
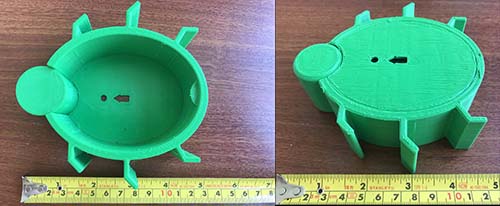
Second trial adding more space in the interior.
3D Printing Insect Model from Manuel Corrales Arana on Vimeo.
After i noticed that the diameter of the hole where the electronic will be in was short i redisigned it.
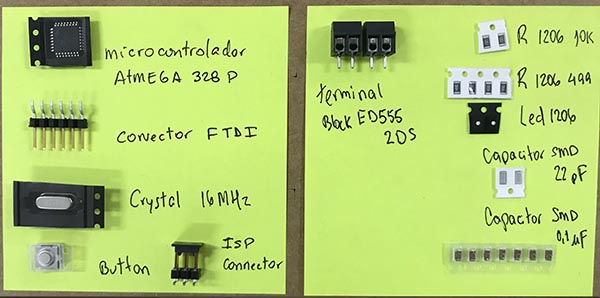
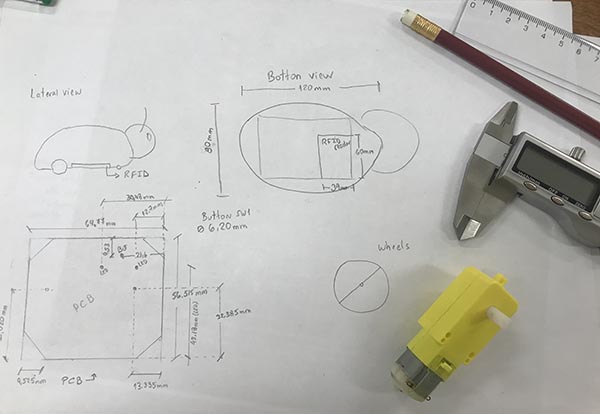
c. Electric/Electronic components and measurements. Some important electronic components that do take volume to be consider in the design of the robot.
| ITEM | Measures | Quantities |
|---|---|---|
| BATTERY 9V | 60mm x 27mm x 16mm | 01 |
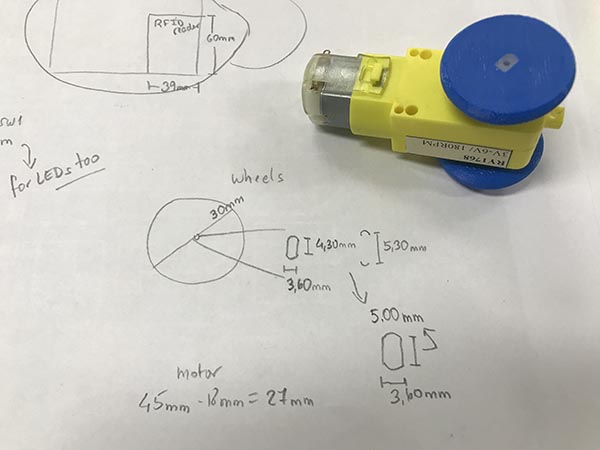
| Motor RY1768 3V-6V 180RPM | 72mm x 40mm x 23mm | 01 |
| Atmega328 P-AU | 01 | |
| X1 16MHZ | 01 | |
| Capacitor SMD 0.1uF | 07 | |
| Capacitor SMD 22pF | 02 | |
| RFID Interface | 01 | |
| AVR ISP 6 pinS | 01 | |
| FTDI | 01 | |
| Terminal block ED555 2DS | 02 | |
| Switch tactile button SKRGAFD010 | 01 | |
| lED 5mm | 02 | |
| lED 5mm | 02 | |
| Resistor 1206 10K | 02 | |
| Resistor 1206 499r | 04 | |
| PIN Header 1206 499r | 04 | |
| MOSFET-N-CH 30V 1.7A | 01 | |
| BUTTON | 01 | |
| 3.3V REGULATOR | 01 | |
| 5V REGULATOR | 01 | |
| LED 1206 | 02 |
d. Other Materials
| Qty | Description | Price | Link | Notes |
|---|---|---|---|---|
| 1 | MDF board 5mm | $9 | MDF 4mm | Cutted 100cm x 60cm |
| 1 | PLA Filament |
FINAL DESIGN
After delivering different issues of my project i redo it and is as follows.
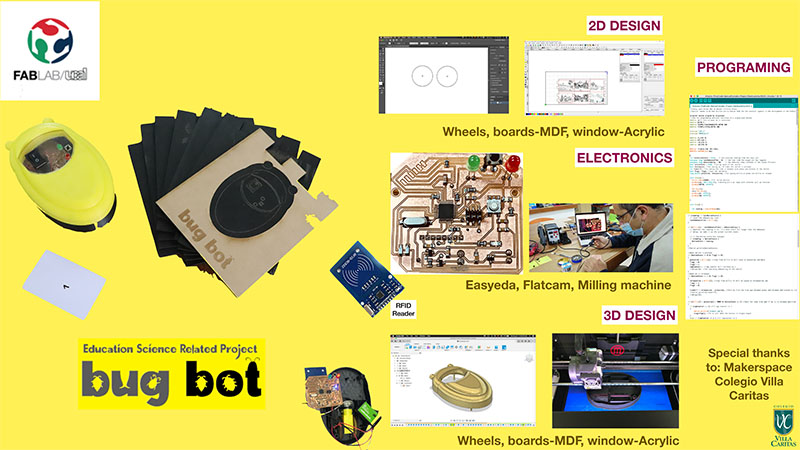
EDUCATIONAL ECOSYSTEM GAME
PARTS TO BE DESIGN FOR MY PROJECT | STRUCTURE | SOFTWARE (CAM) | CAD | |:------:||:------:||:------:| | BASE Design| Using Illustrator|Laser cutter| | 3D ROBOT STRUCTURE | FUSION 360| 3D PRINTER | ELECTRONICS | Easyeda| Roland Milling machine
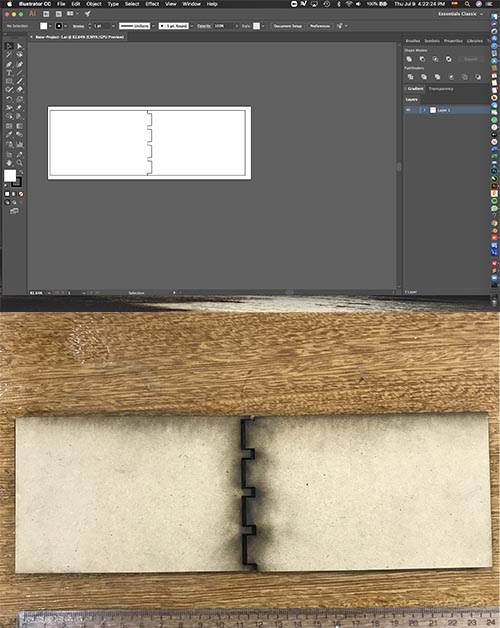
DESIGNING THE BASE
I use illustrator to build the base where the animal robot will move. I try first using 5mm MDF but it was a little messy in the boarders and i need to pass twice throught the Laser Cutter machice to cut it. Seems a little burned.
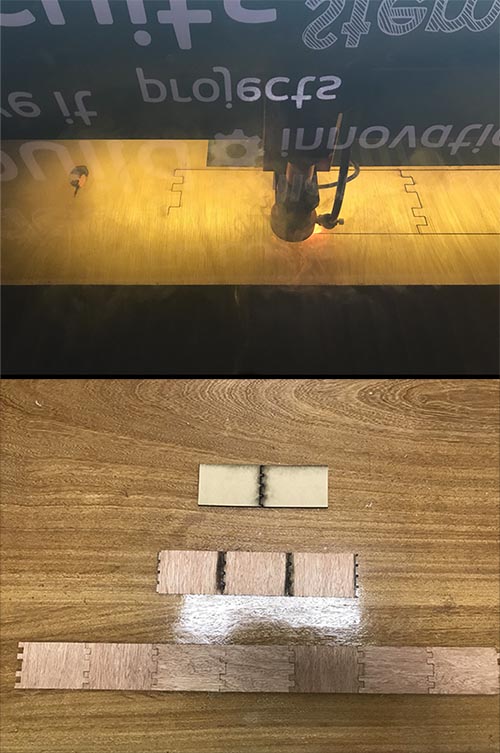
We try different materials and finally due to the strengh and the most easiest to cut i use 4mm plywood build like a puzzle.
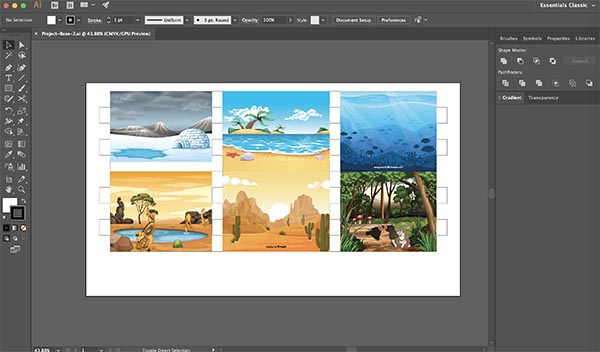
This model seems to be too short and simple, so i decide to change by using the same idea but instead of being a simple path with a robot, make it like a game where one girl has several cards with quesitons that makes her partner to asnwer by moving the robot. If the robot reaches the right position light will turn on meaning that tha answer is the correct one because the robot arrives to the correct environement. I use free images from Freepik using vectors.
I test how the vectorized images will be in cardboard and in 3mm MDF.
Laser cutter: Boss Laser LS 1630 Scan Power: 10% Speed: 300mm/s
I choose 3mm MDF for the base of the game.
| SCAN - ENGRAVE | CUT |
|---|---|
| POWER 10% | 60% |
| SPEED 300mm/s | 40mm/s |
3D Printing Insect Model from Manuel Corrales Arana on Vimeo.
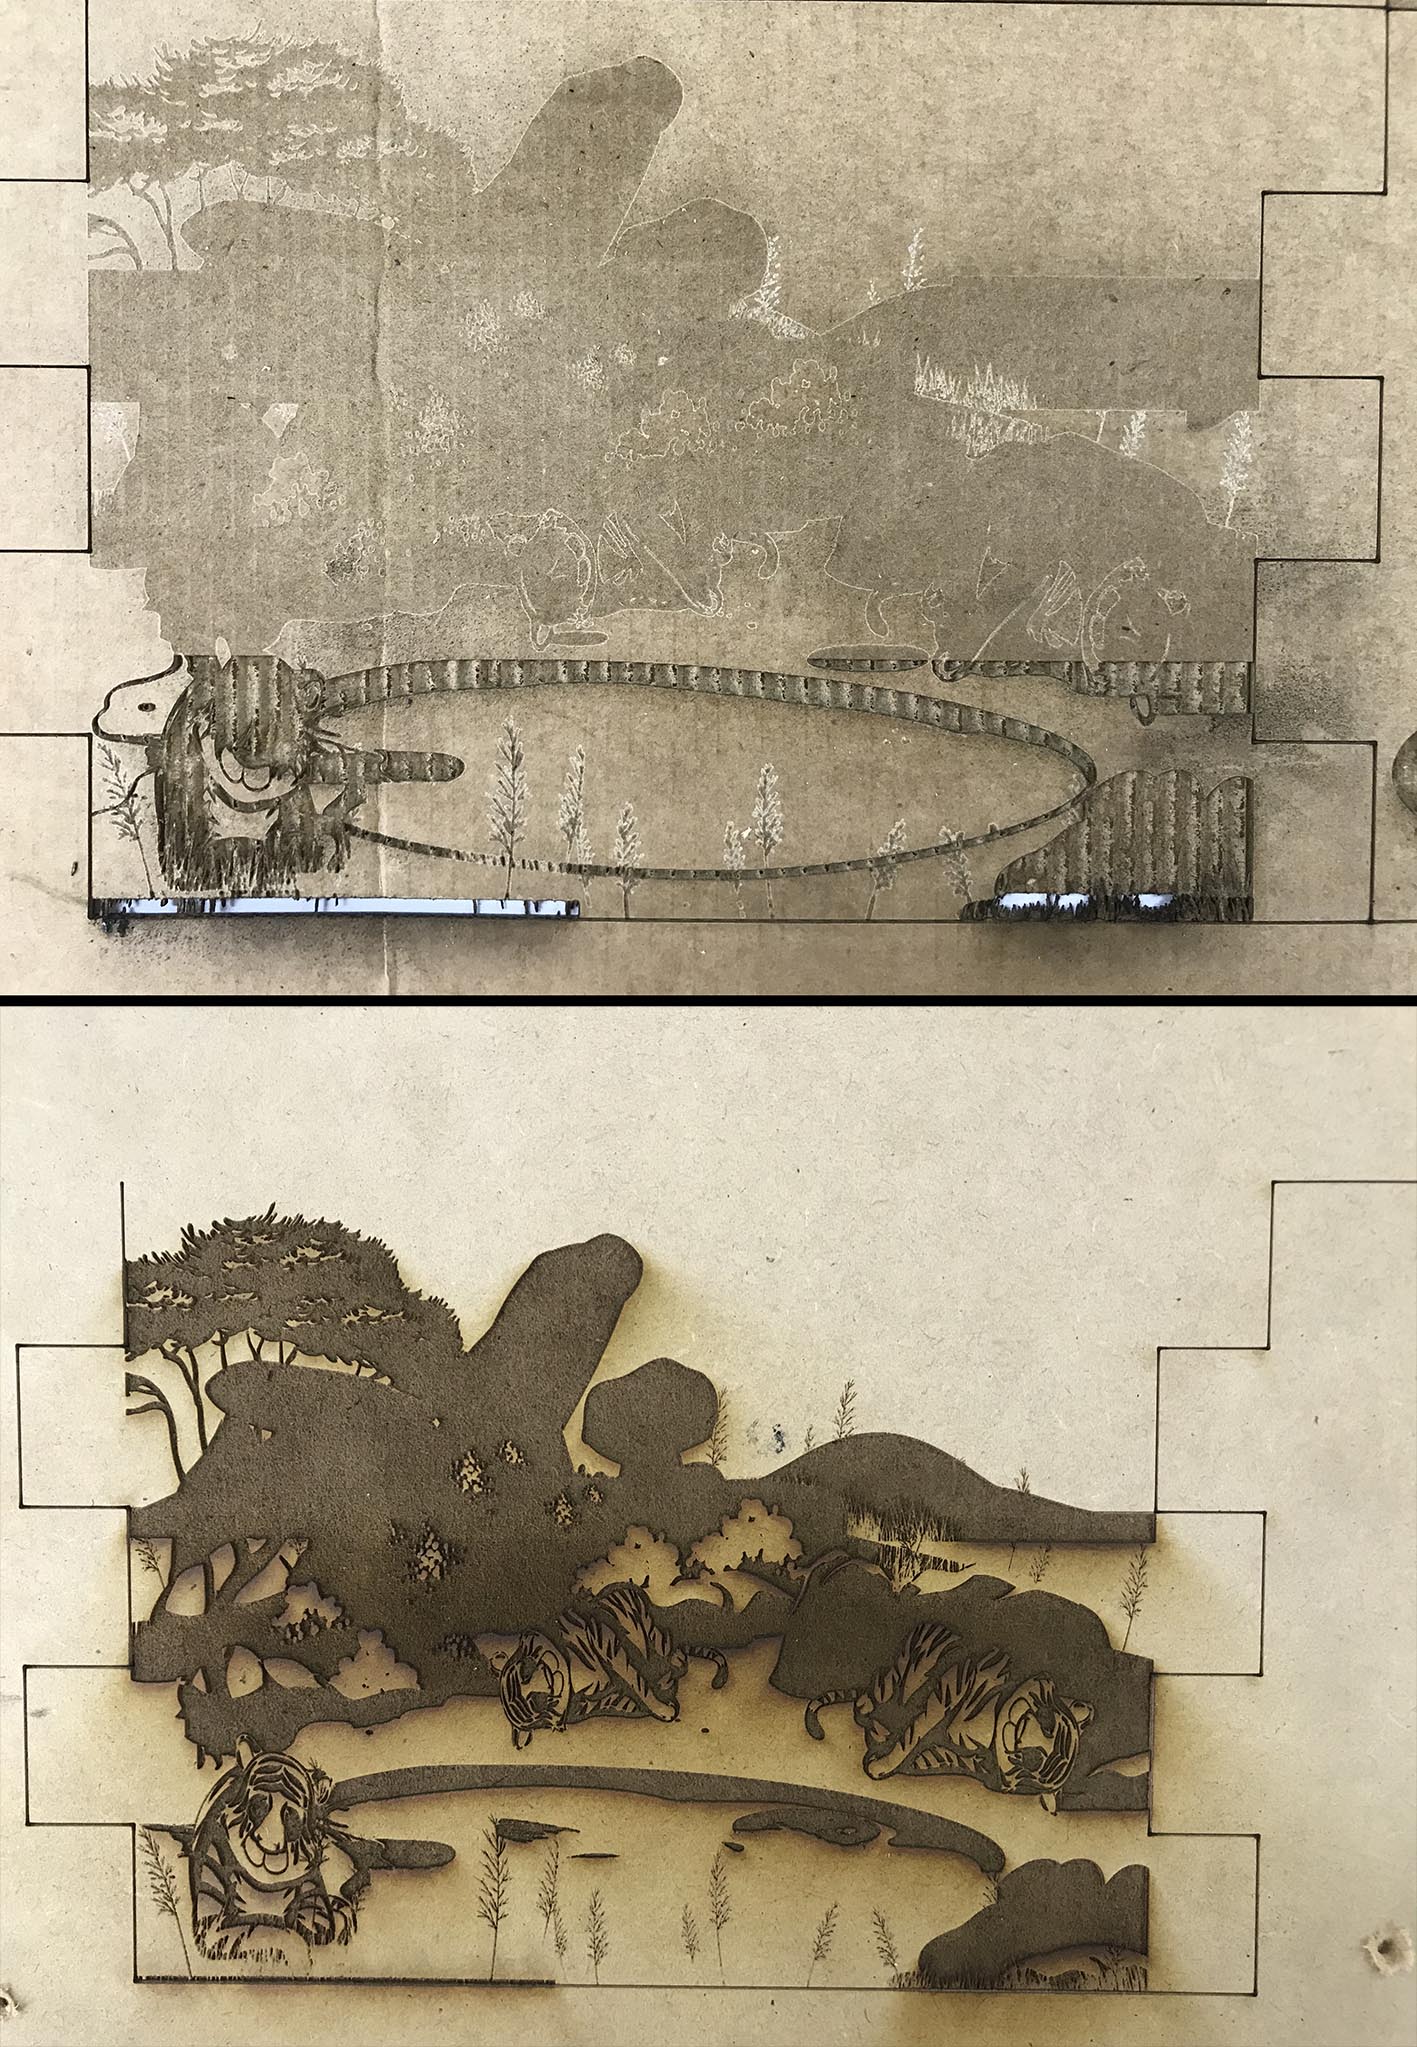
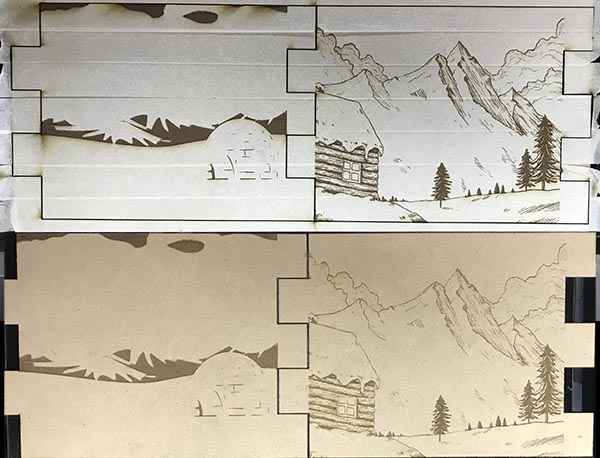
Then i use masking tape to cover the 3mm MDF for having a clean image beacuse the laser engraving usually stains the surroundings of the images, so with this tape i will have a more clean image.
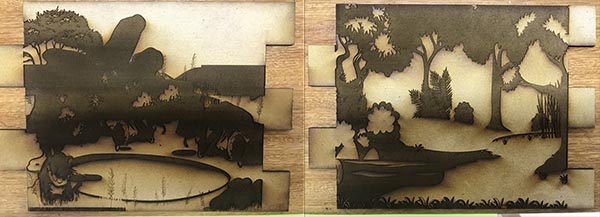 Biomes: Grassland and Jungle
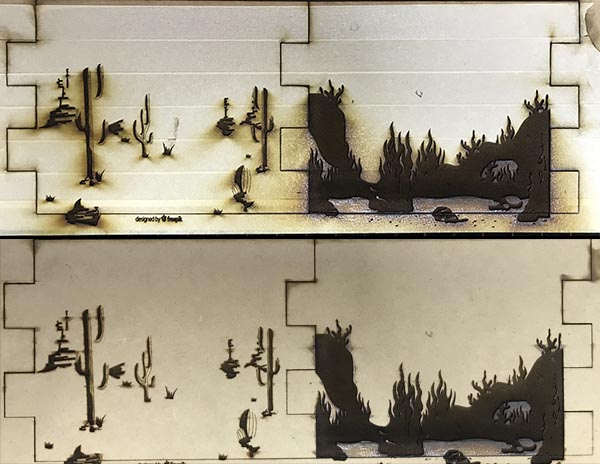 Biomes: Desert and Ocean
Here the comparison of the engraving by covering the MDF with maskin tape.
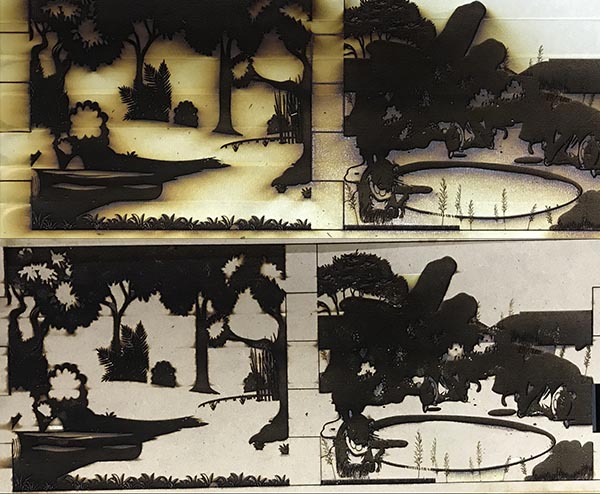 Biomes: Jungle and Grassland done again.
 Biomes: Tundra and Mountains or highlands.

The final puzzle with all the pieces of the different Biomes.
After the configurati##DESIGNING THE ELECTRONICS
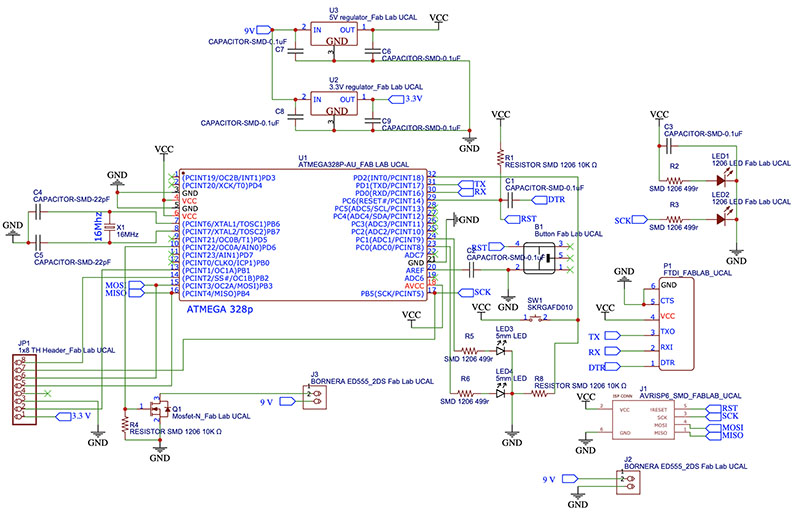
I print the schematics to check it that everything is ok, then i go with the PCB.
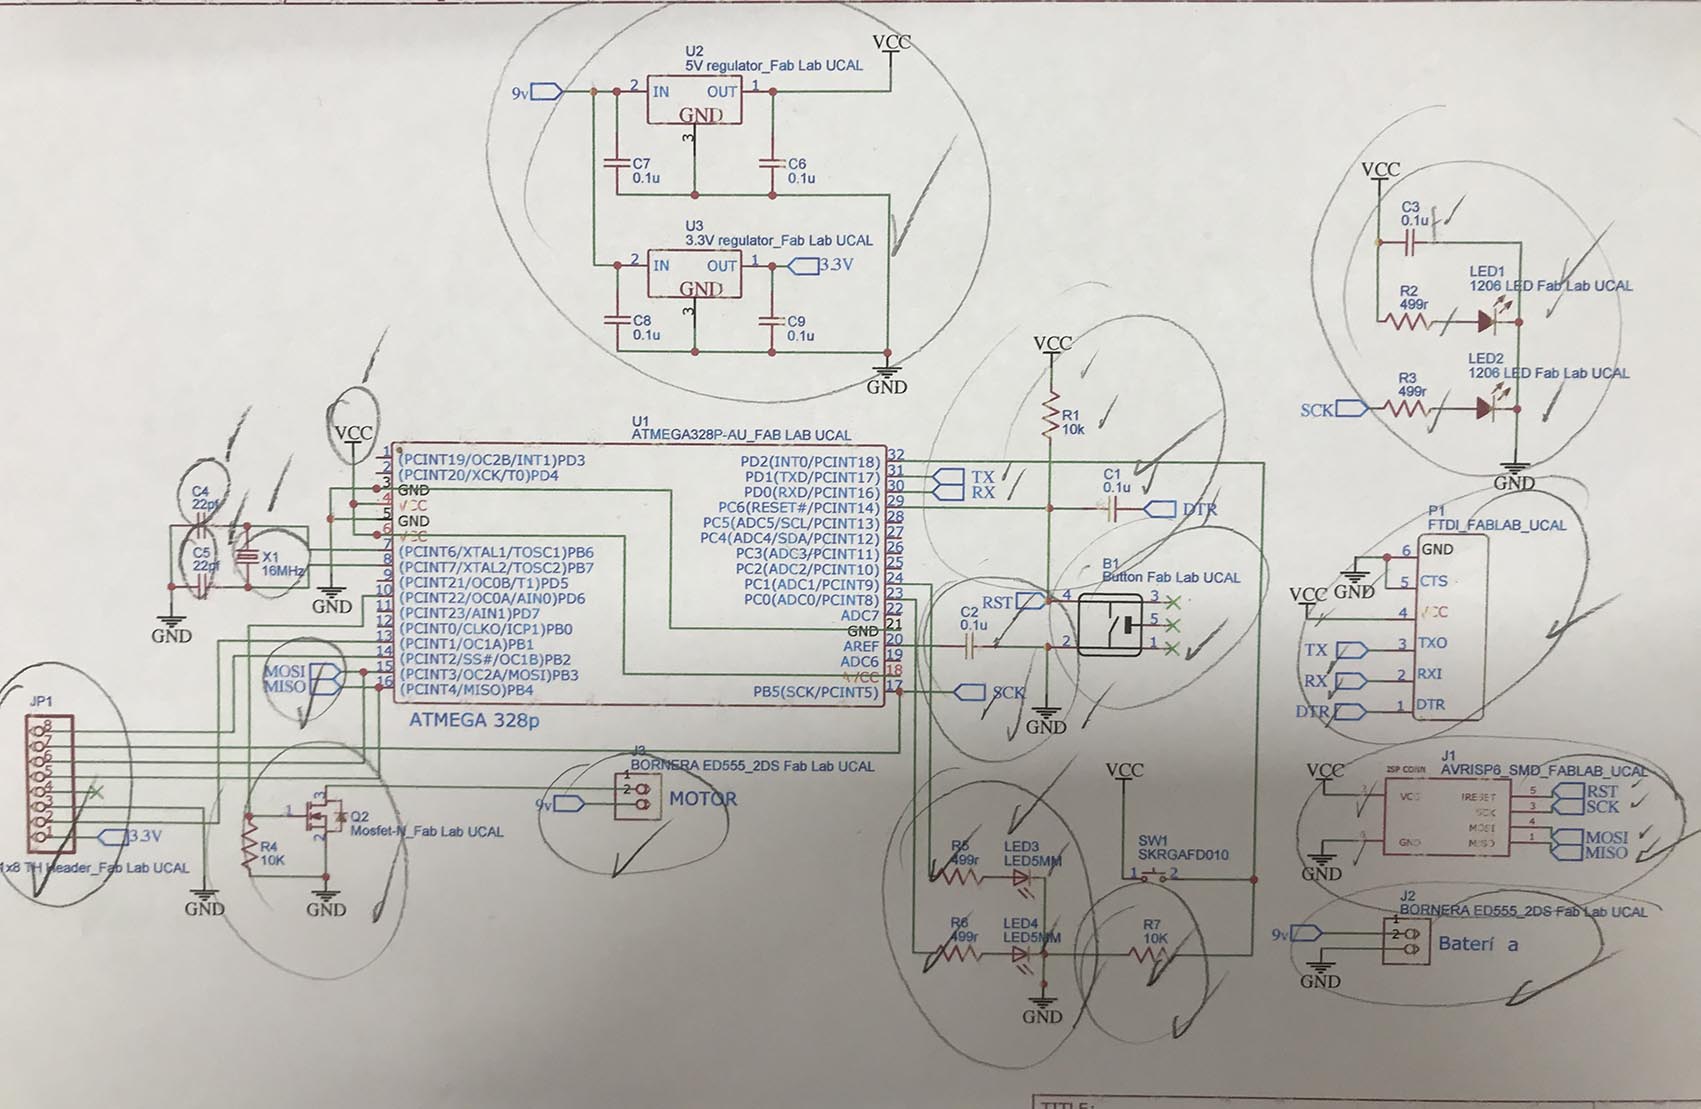 Schematics done in Easyeda online free software
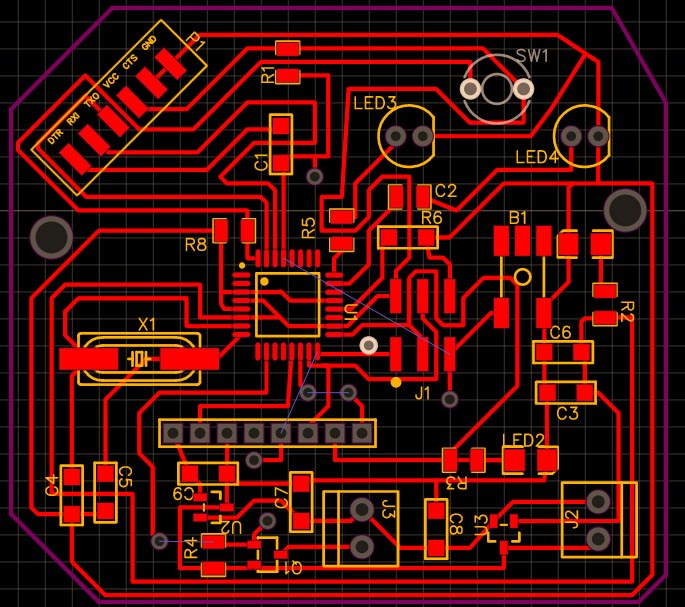
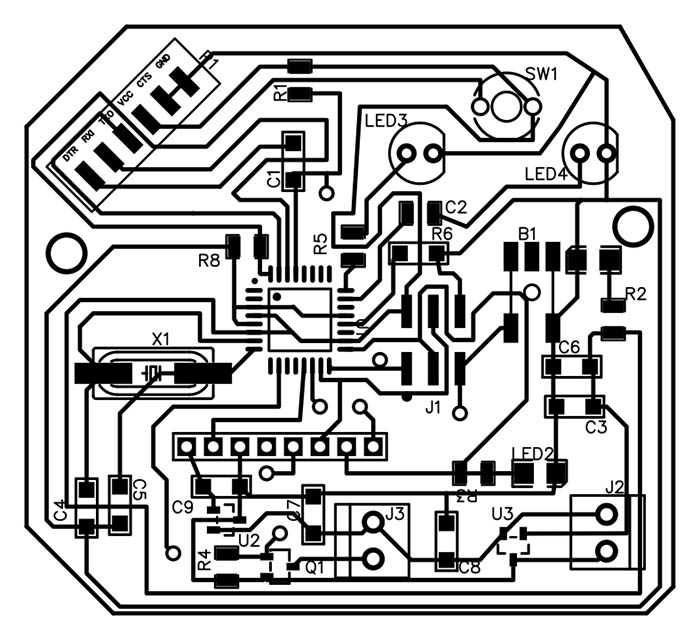
PCB done in Easyeda
The Gerber view
The Gerber format is an open 2D binary vector image file format. It is the standard file used by printed circuit board or PCB industry software to describe the printed circuit board layers: copper layers, solder mask, legend

I make some corrections to the PCB because some traces were to close and i have to condiser that the RFID has to be a little far away from the LEDs connections. I draw the lines that measures the position of the LEDs and that of the holes.
Now the processing of my PCB done in EasyEda by Flatcam First Open Flatcam and in the options section, i select the units in mm. Then i open the Gerber file that contains the information about the Traces. Open Gerber We have to add the configuration of the Milling machine as follows for the traces. Endmill of 1/64
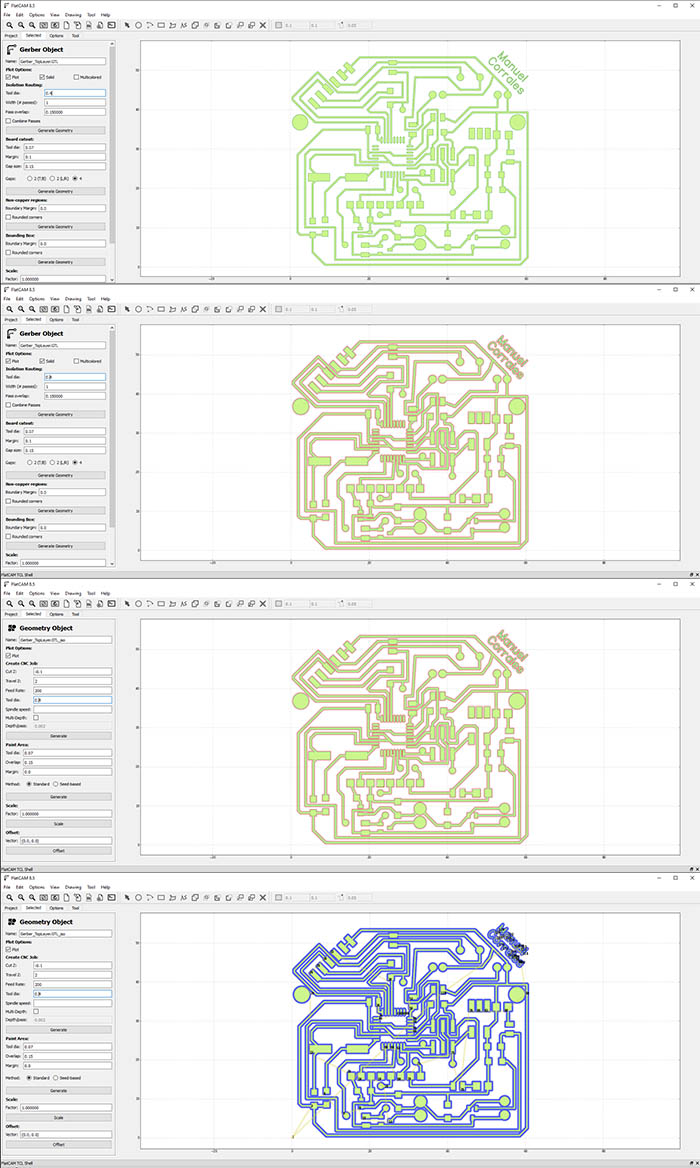
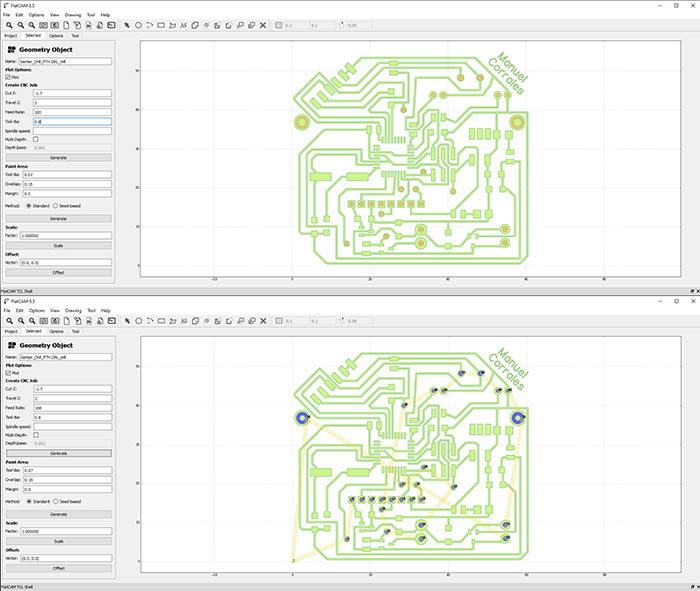
on of the traces, i continue with that of the holes. Endmil of 1/32
Finally the configuraion of the border. Same endmill as holes.
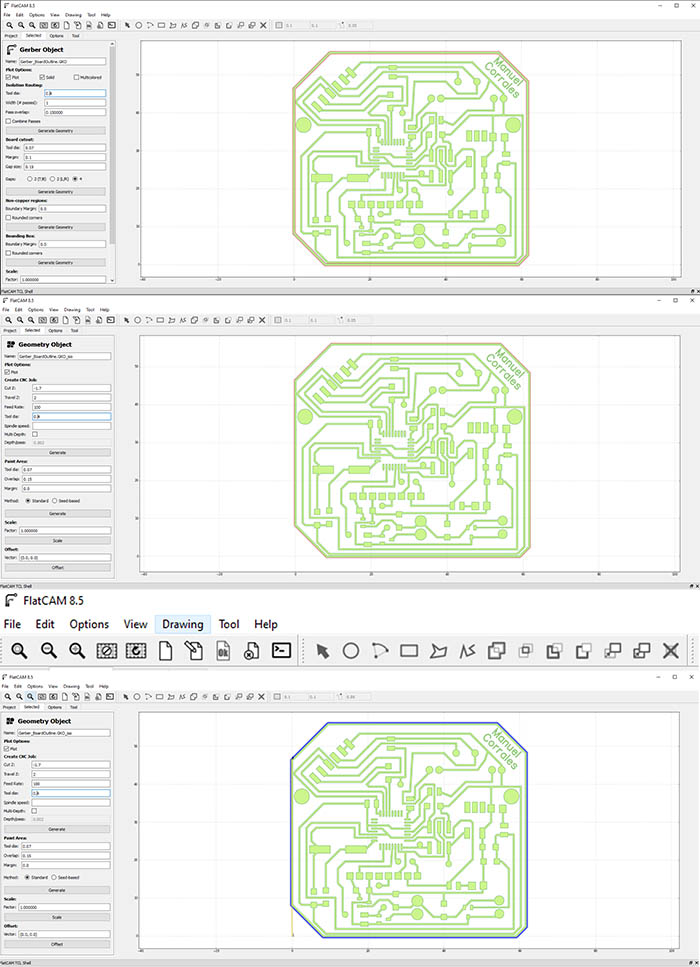
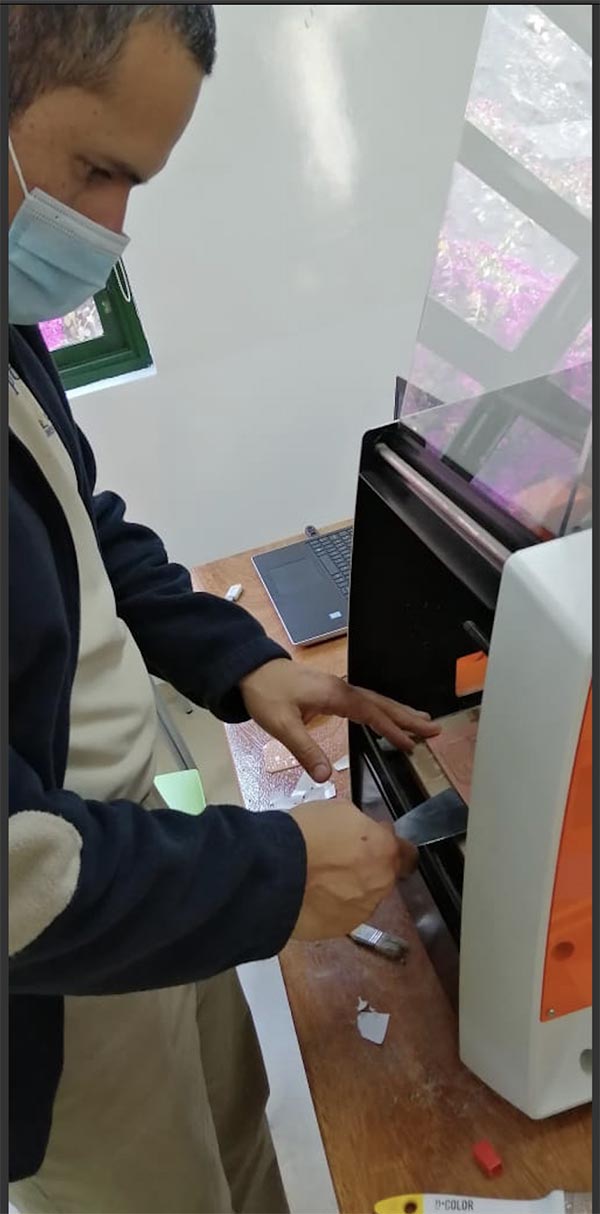
After having all the archives for drilling the PCB i use the Milling machine to make my PCB
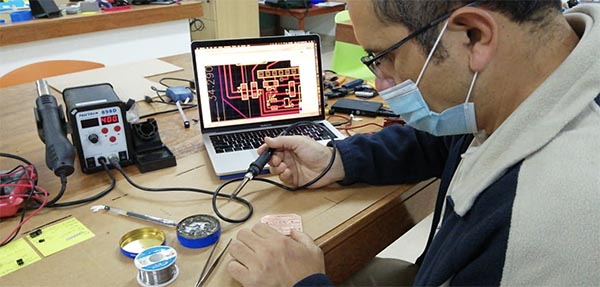
I started the next step: Soldering all the micro components. First place all the electronics in my table, the soldering station, and safety equipment.
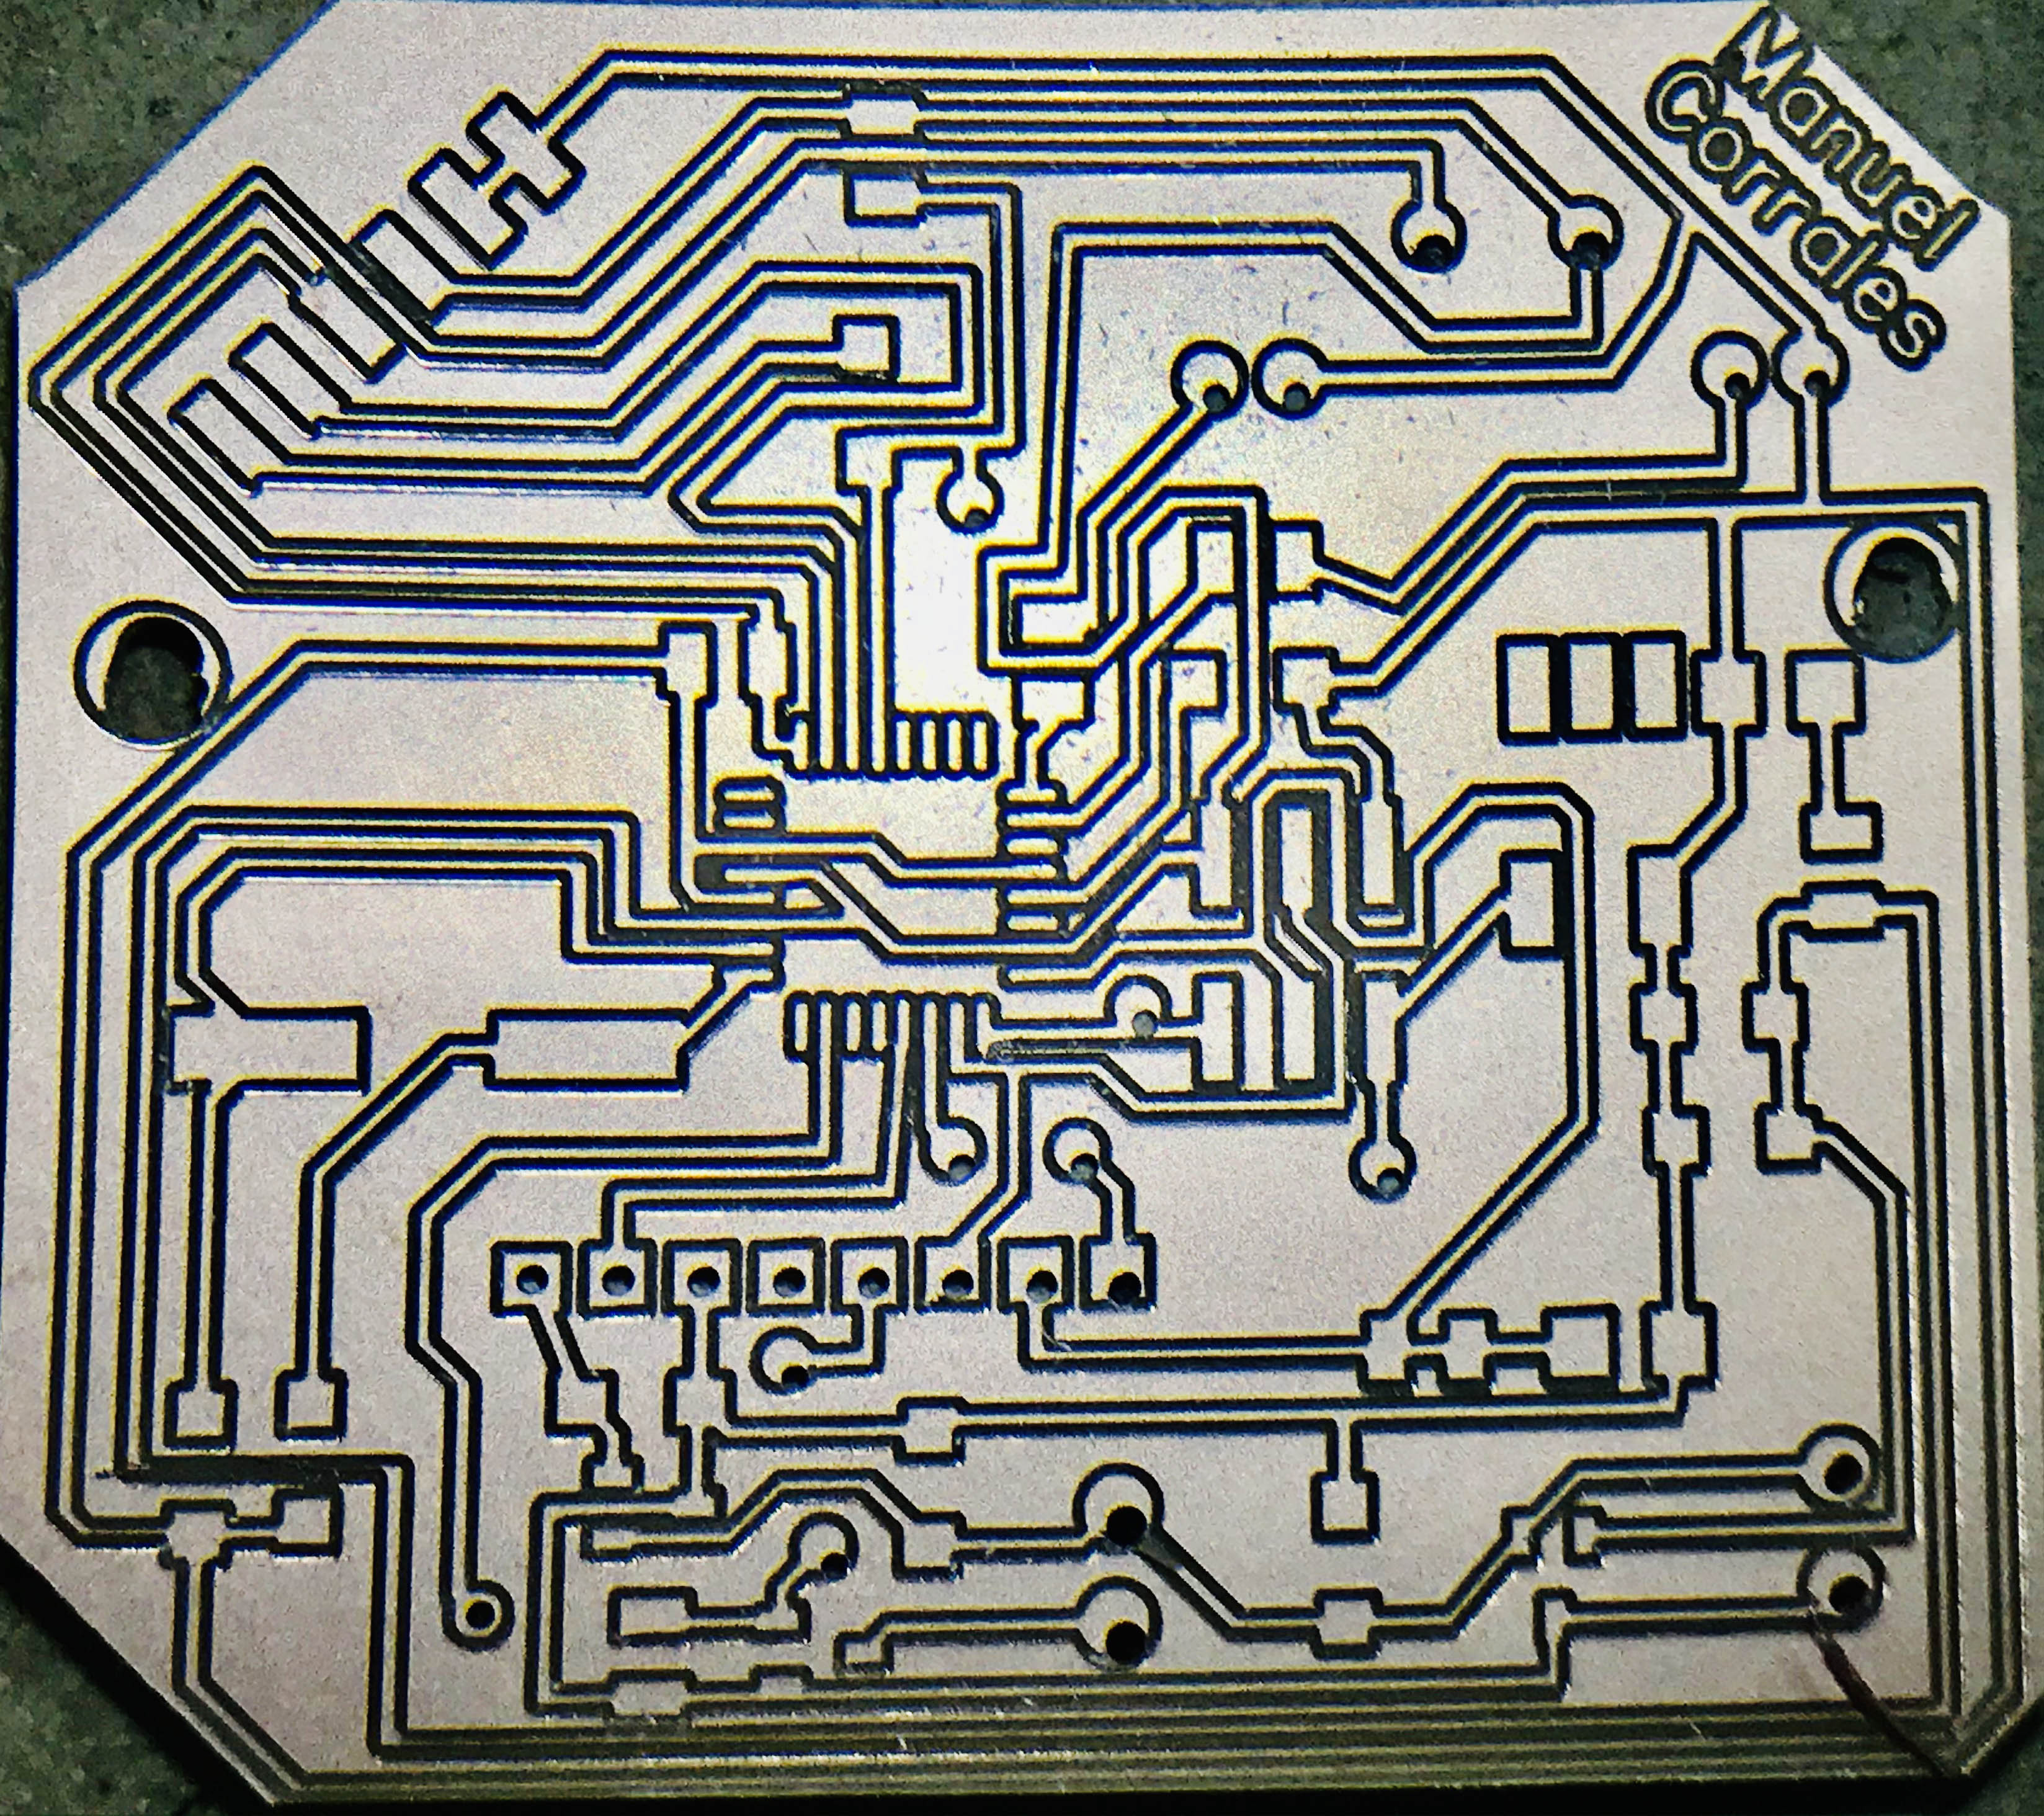
This is the new PCB done where i improve some conections didn´t done.

Then i start soldering all the components.

TESTING THE RFID CARD WITH ITS READER IN ARDUINO The RFID reader is attahed to the Arduino UNO and when the White RFID Card is attached to the reader, the blue led turns on.
Testing the Arduino with RFID Reader and Card from Manuel Corrales Arana on Vimeo.
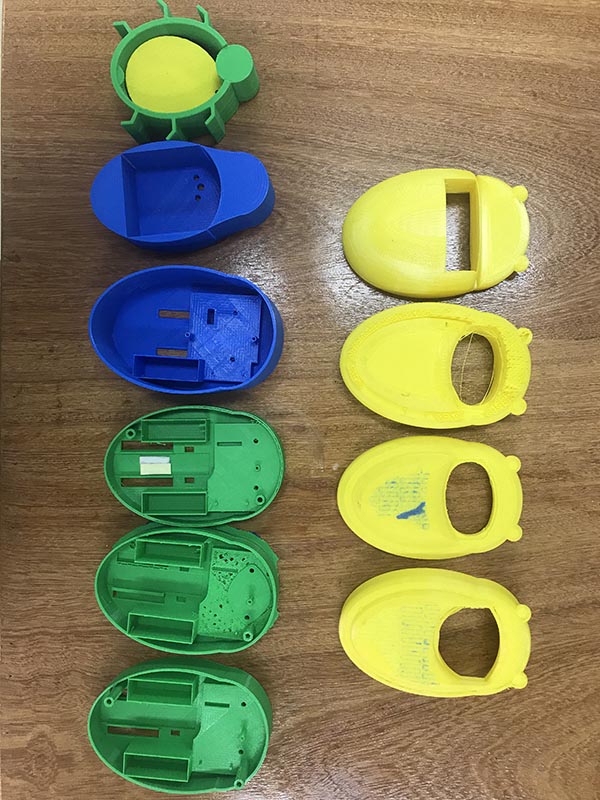
DESIGNING THE INSECT-BOT IN 3D
Sketching of the model
I start to 3D print the two wheels that will be attached to the motor.
I did several models becauses some of then didn´t work due to: - Forgot to add one space for the battery. - Increase the altitude of the base. - Re size the hole for the wheel in the front. - Re size the space to hold the RFID Sensor. - Re size the space to hold the window in the lid.
Programming the robot
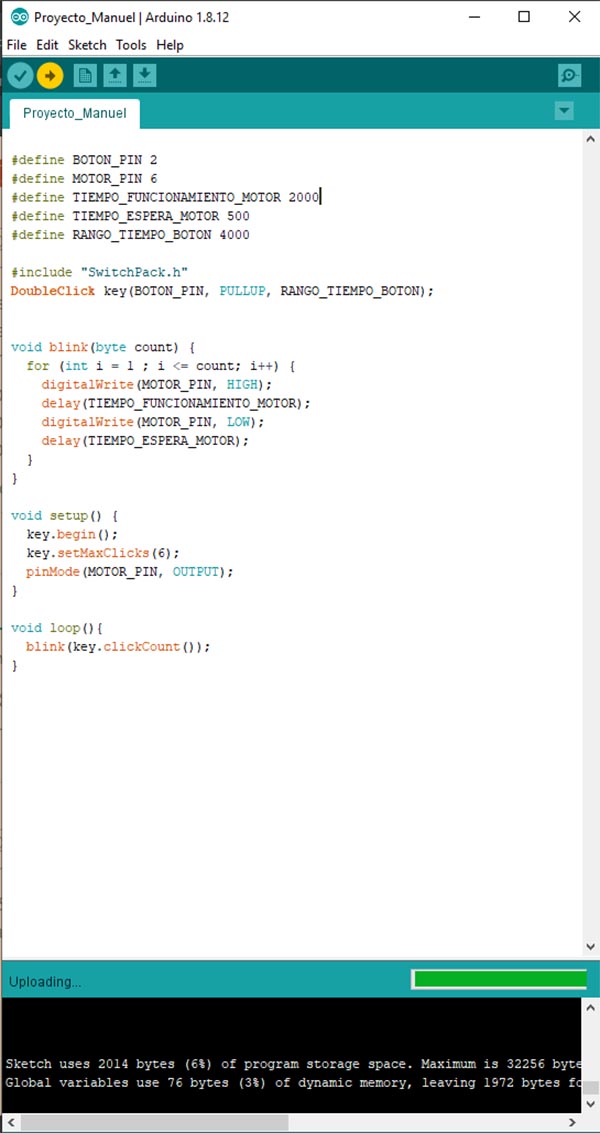
Testing the motor with the button.
Testing the motor from Manuel Corrales Arana on Vimeo.
Here the Arduino Code
But there is still a problem with the debouncing which has solved by using a debounce with leds found in internet and i added the RFID library and recode for the motor.
The complete arduino code with the Debounce included due to the button bounce plus the RFID Libraty and the gear motor. All in one.
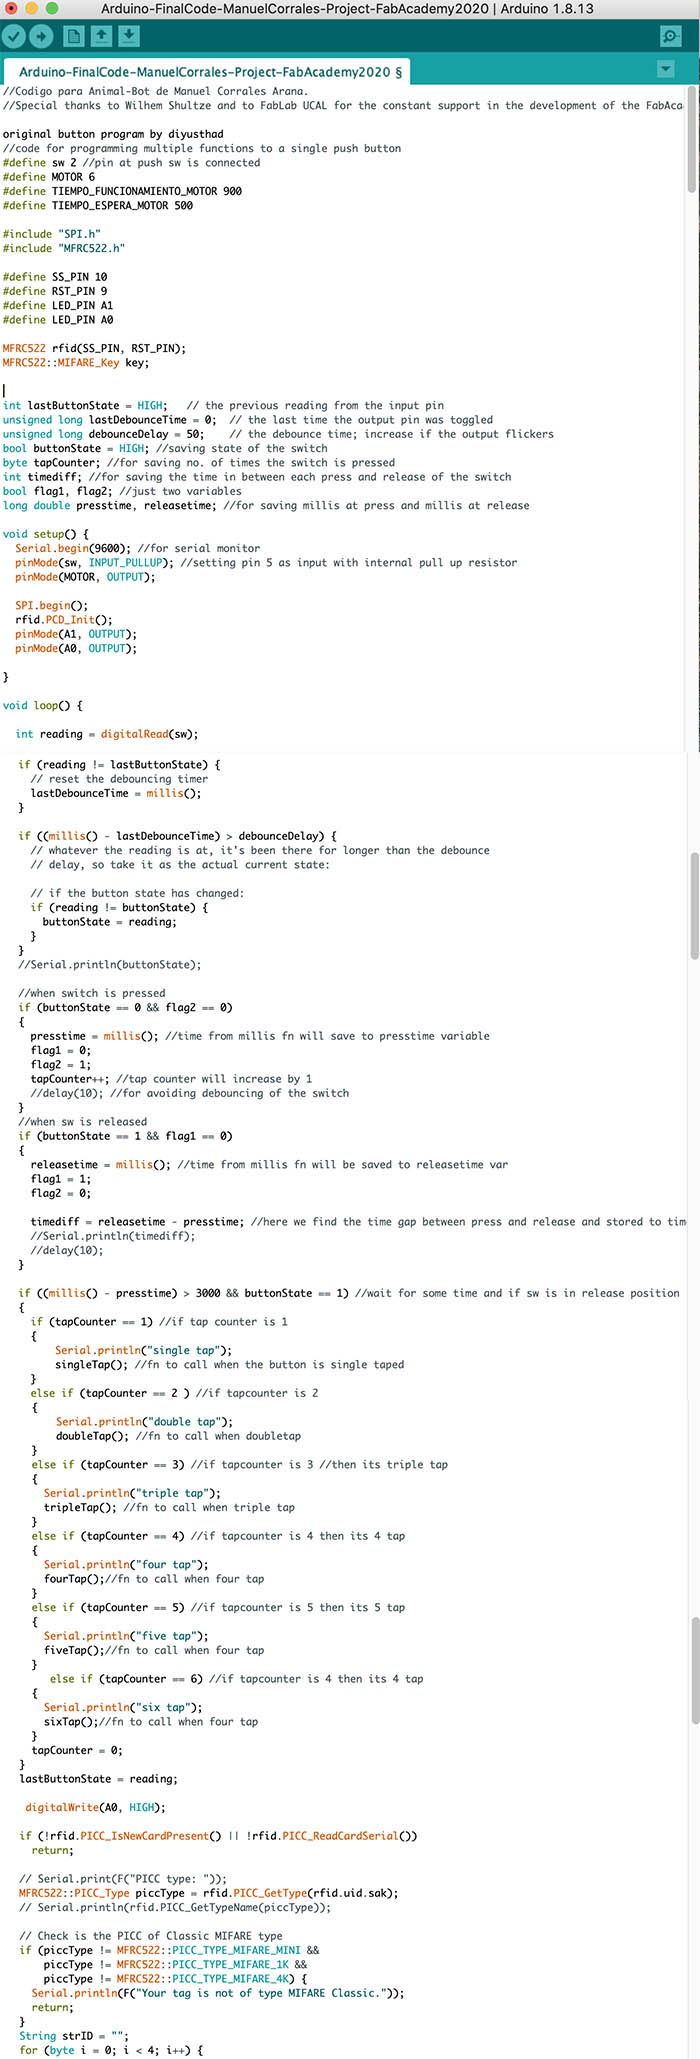
Bug-Bot-ArduinoCode-Debounce + Gear motor + Button
This little robot is my first robot done by myself with the guide of my instructor. Most of the materials where given by the FABLAB UCAL, some of them i bought and some by the Makerspace i lead at Colegio Villa Caritas. The aproximately cost is about $48 in electronic components with PCB. The aproximately cost is about $40 in 3D printing. The aproximately cost in 2D laser cutting is about $4
Some problems that i found was to determine whether i start with the 3D animal robot or with the electronics, meaning the PCB, so i decided to start first working with the electronics that took me almost 3 weeks and i drill 12 PCB due to different errors sicne the Easyeda design till the drilling, but as more the mistakes the best the learning.
Second i have to let it work and the second problem was about the bouncing of the push bottom, once i solve it by finding a lot of information of people dealing with the same issue, i have to continue with the code for the motor and the RFID card.
Third issue was the size of the wheel and the best material.
Then the window where the leds and buttom are going to be attached, and at the same time will allow to see the interior of the PCB.
FINISHED PROJECT
Final project - Slide
Final project - Video
Final Project from Manuel Corrales Arana on Vimeo.
Thanks for the great opportunity to work on this. Special thanks to my instructor Wilhem Shultze which supports me a lot and to Luis Perez my partner in this Fabacademy as well as to the facility of the Makerspace at Villa Carita´s High School where we complete this assingment in collaboration with the FABLAB UCAL.

This FabAcademy let me learn a lot of new skills and knwledge in the world of fabrication, as electronics, programming, understand how things are produced, how to assemble, how to do a digital project. All the different processess to build something are completely new for me.
This world is amazing, specially if what i did serve others.