8. Computer controlled machining
Group Assignment
Test runout, alignment, speeds, feeds, and toolpaths for your machine
Individual Assignment
Make (design+mill+assemble) something big
Introduction
Today I will talk about the software ‘’VCarve’’ that I use for the ‘’Shopbot’’ machine. Before getting into Vcarve I will show my arcade model that I made using Fusion 360 and steps I took while making it.
Designing the Arcade model
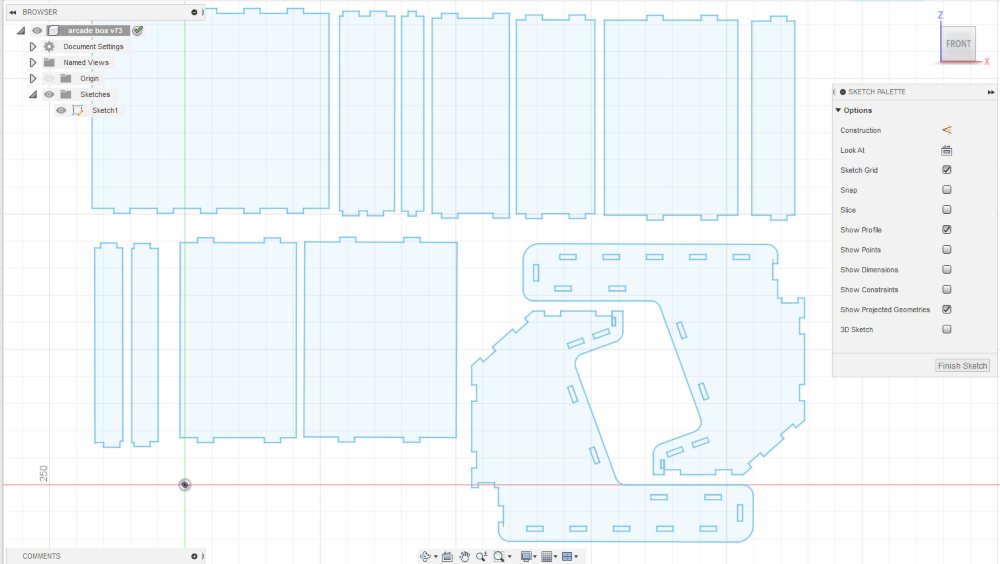
I made my arcade model using Fusion 360.
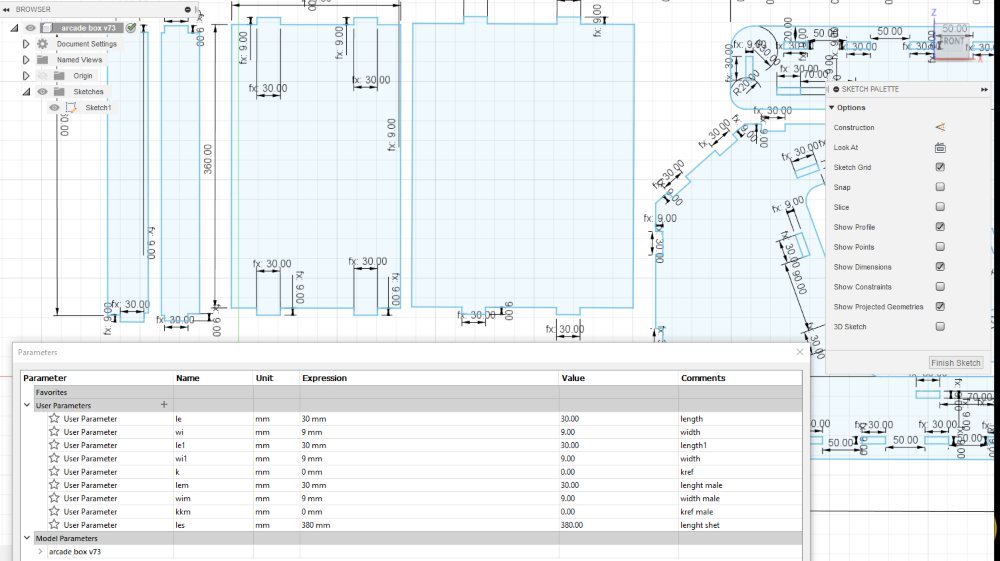
The parameters of my model can be shown at the bottom of the page.
My design is parametric and I can change the size of one parameter and it applies to all the parameters that I changed for example if I changed the thickness of the male press fit all the male press fit will change to the same plywood thickness size.
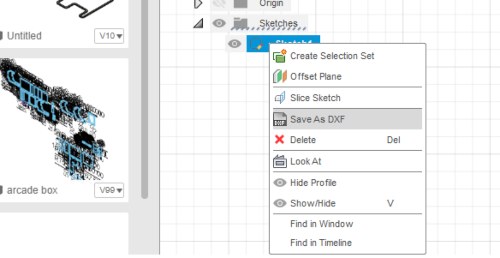
to export the my files, I projected the sketches, then saved the sketch as a DXF file by right clicking on the sketch in fusion and choosing save as DXF.
Model scale
I made this model scale to test my parameters and to see if the male press fits fit into the female press fits perfectly.
My model scale is ready to be used by the machine.
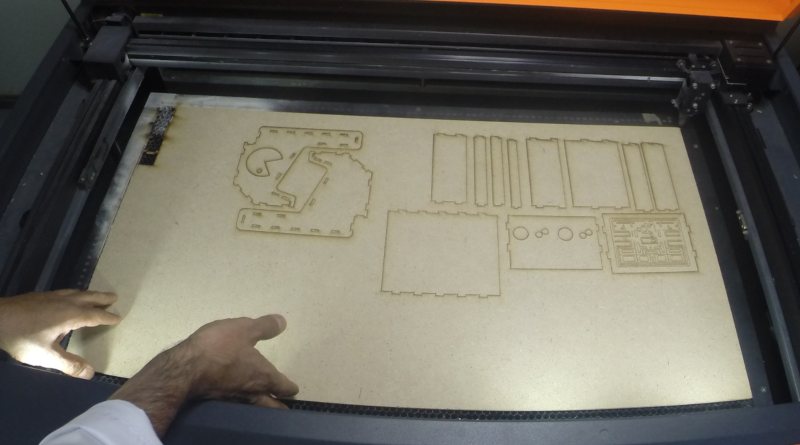
I made this model scale using laser cut machine and all the pieces are ready to be used.
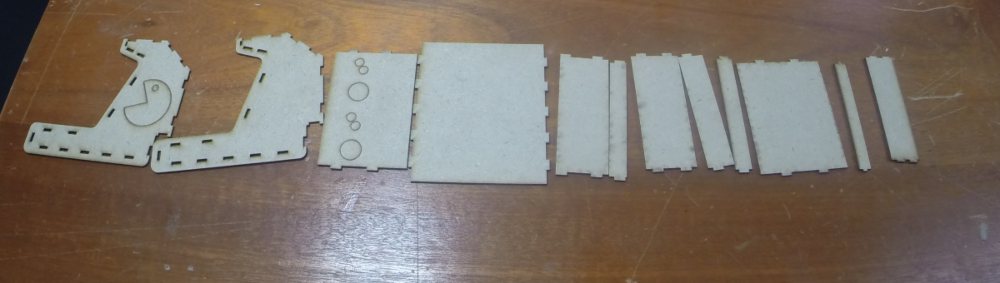
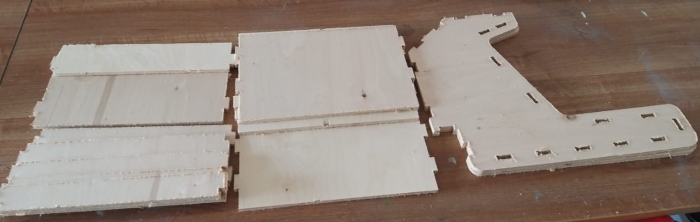
I assembled all the pieces on my table as shown above.
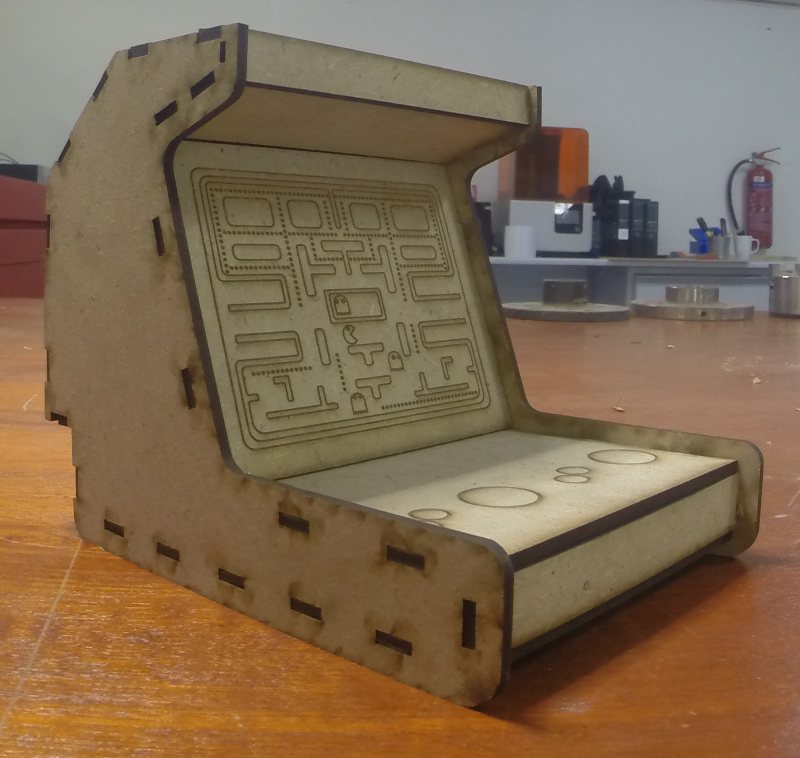
Here is the final product of the model scale I made using the laser cut machine.
Cutting by Shopbot
I am using the PRSalpha CNC shopbot machine. The following are the information regarding the shopbot: 1. Model name: PRSalpha 96-48
-
Cut / movement area : 2.49m x 1.27m x .2m
-
Foot print: 3.05m x 2.01m x 1.70m
-
Key features: step resolution of 0.0004”, position accuracy of +/- 0.002”, touch precision linear bearing on the moving gantry and reliable rack and pinion power transmission on each axis.
-
XY Move Speed : Variable, max. 15.24m/min.
-
Z Move Speed : Variable, max. 9.14m/min.
-
XY Positioning Speed : Variable, max. 45.7m/min.
-
Z Positioning Speed : Variable, max. 22.86m/min.
-
Step Resolution: 0.0127mm
-
Linear Cutting Force: Approximately 68 Kg
I will start explaining the steps I made using the Shopbot machine as shown below.
To insert my files into Vcarve, I clicked on file, import, then import vectors and I choose the DXF files exported from Fusion 360. then I placed my parts on the sheet neatly for the next steps.
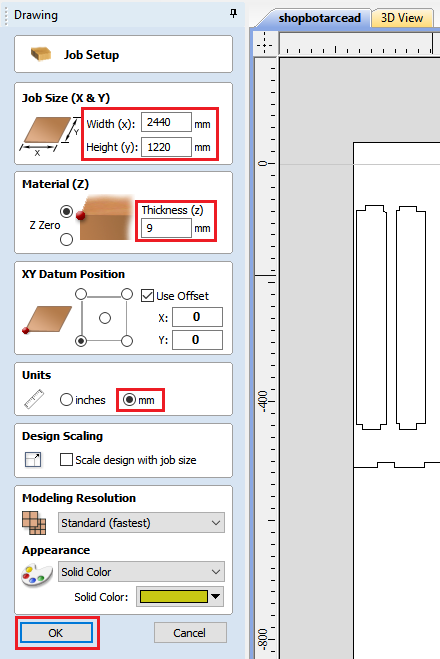
Now I have adjusted my dimensions for cutting by adding the following:
Width (x): 2440
Height (y): 1220
Units: mm
I set these setting to the size of the platform I am using for the machine.

I chose the circle option for drilling a hole onto my platform for support. I made the radius of the circle to 6 mm for the board.
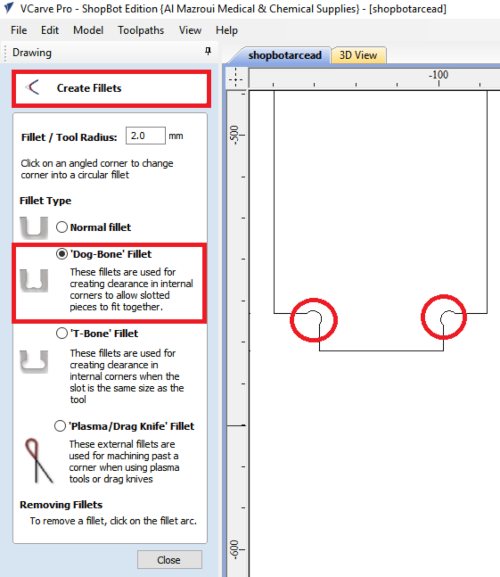
Now for the fillets I chose the Dog bone fillets to the male and female ends curved in order for them to fit into each other perfectly. I chose this setting because the milling bit will not give me a 90 degree angle and it will not fit into each other perfectly.
The chipload was selected according to the test we did in the group assignment. . The best settings I fell comfortable with was :
Spindle speed: 12000
Feed rate: 1500
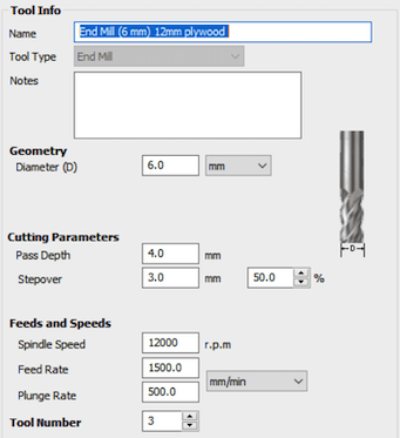
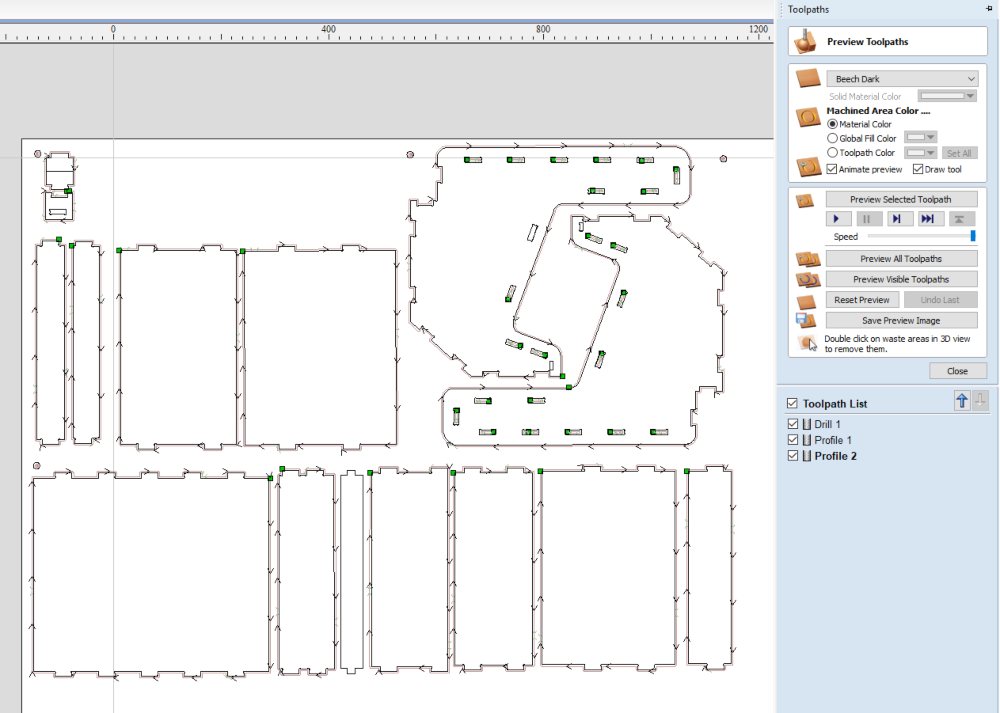
The settings used for operating the shopbot are shown in the picture above, I have used the following settings:
-
Spindle speed : 12000 RPM.
-
Feed rate : 1500 mm/min.
-
Plunge rate : 500 mm/min.
Now for the drilling option I chose ‘’Drilling Toolpath’’ and the ‘’Tools’’ and chose the ‘’End Mill (6mm)’’ as my drill to use.
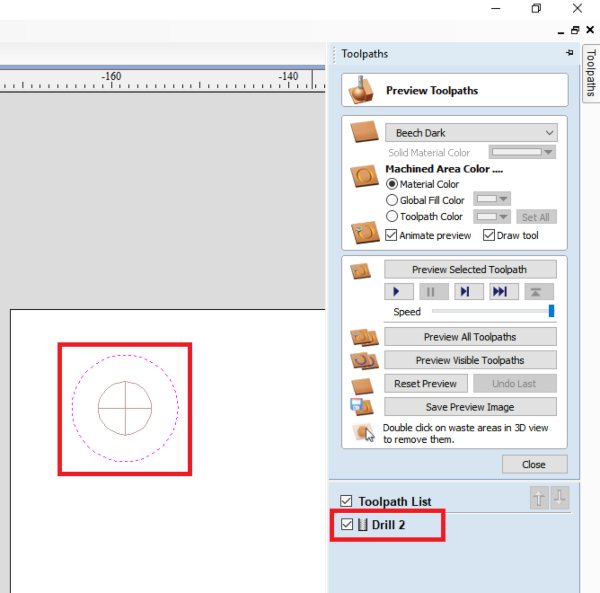
After the drilling settings have been made a file called ‘’Drill 2’’ is ready for the computer to be used by the machine. Because to fit the plywood into the shopbot I have to drill holes onto the plywood and I also have a drawing for the place for the drilling holes so they won’t overlap the arcade design.
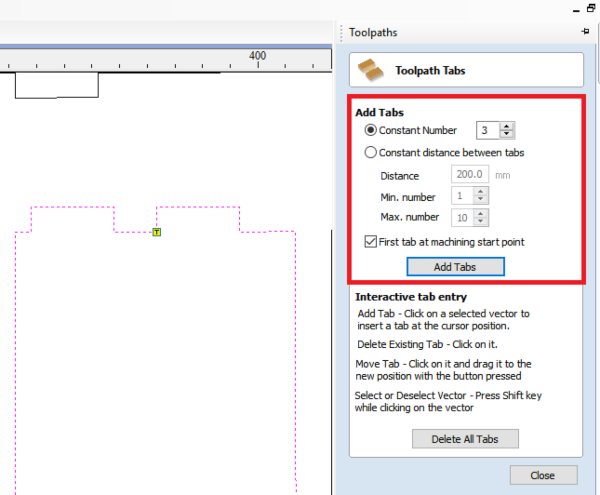
I added the tabs onto the piecese to help fix the piece onto the shopbot so the milling can cut without the pieces moving in place. After I finished milling I can seperate the pieces manually.
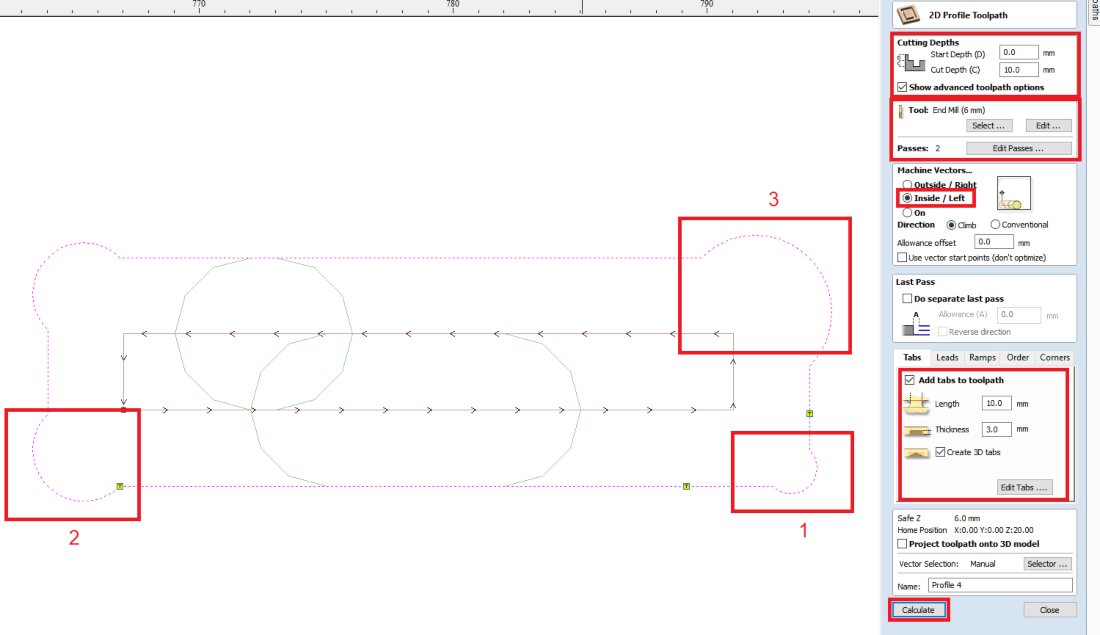
I added tabs for the inner pieces and as an example for the different sizes of the fillet I have assigned (1) with the size of 1mm and (2) with 2mm and (3) with 3mm to show the difference.
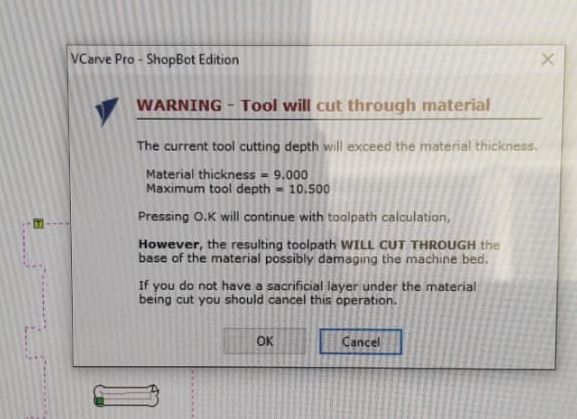
Due to the massive outbreak of the corona virus, our academy is closed until everything is better.
This message show up on my screen after I prepared the shopbot machine.
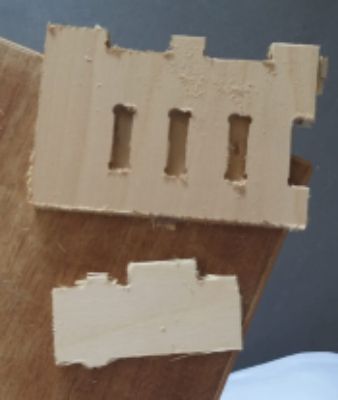
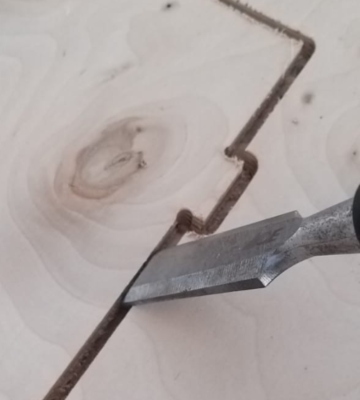
First, I made one male (30mm) and 3 females with different size press fit to test if the male snaps in perfectly in the female and is not loose or not tight. For the cover part of the model I made sure the male and female parts of the press fit stays in when joined.
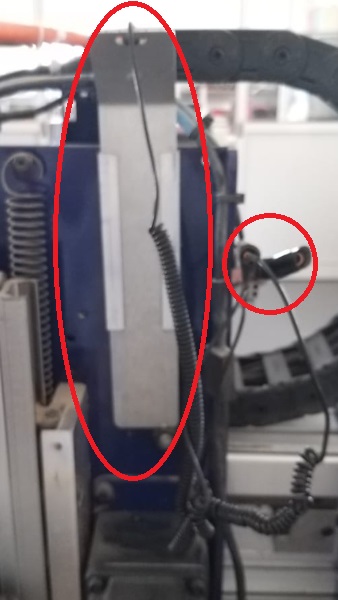
Place the milling point on the top right corner in the side that is close to me. I placed the electrical crocodile clip wire on the machine to transfer the electricity to the aluminium plate to make the zero Z axis.
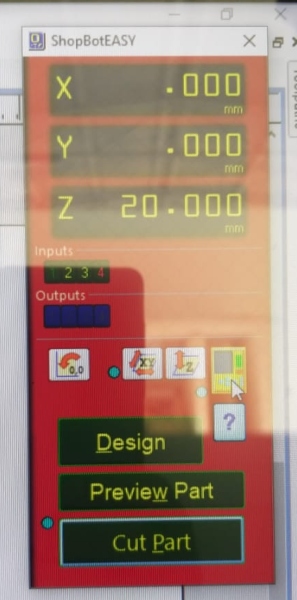
Now I click on “Cut Part” and then the machine started cutting the material. After I finished cutting I cleaned the area using a vacuum and I split the dog bone fillet and sanded the edges to make them smooth.
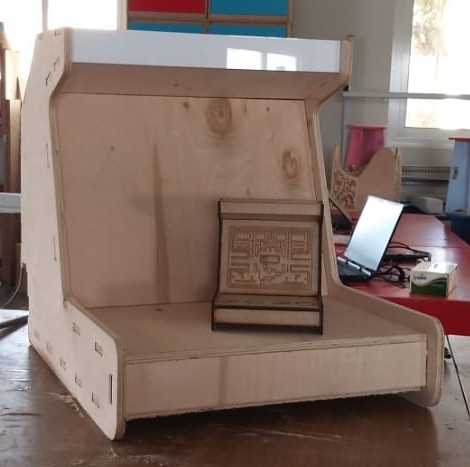
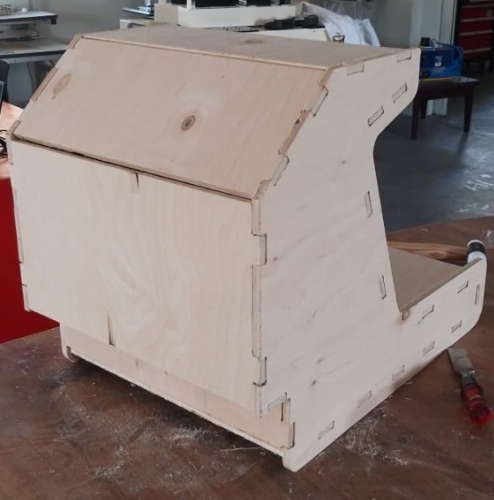
After that I press fit the pieces onto each other and the final product can be shown here.
Final Adjustments for the Arcade
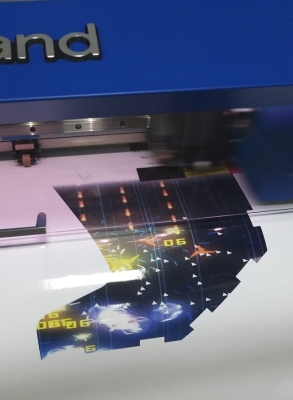
I printed a sticker to attach it on the sides of my arcade. The sticker is made out of vinyl.
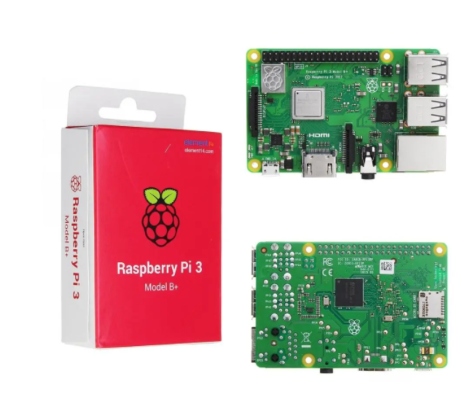
I used Raspberrypi and the hardware component of the arcade.
I also used Retropi as the software component for the arcade and you can download it here in this link.

This video is a tutorial that explains how I can operate the software of Retropie onto the hardware Raspberrypi.
The final product is shown below with all the stickers and I also added buttons, screen, and a joystick to control the commands.
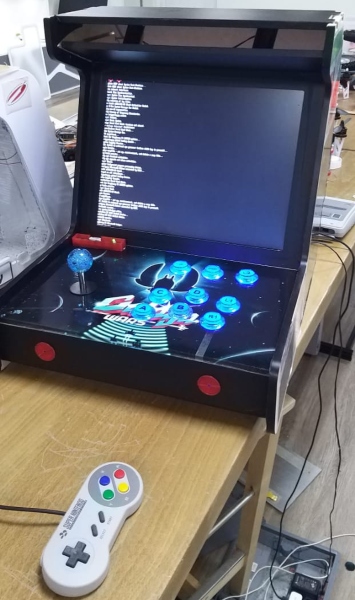
I will demonstrate the arcade by showing a video of me playing a video game on it.
Group assignment: Computer controlled machining link.

This work is licensed under a Creative Commons Attribution 4.0 International License.