5. Electronics production
FabTinyISP Minimal
The “FabTinyISP Minimal” is what we are going to build, an AVR programmer and also it needs an AVR programmer to build it. The ISP board is an in system programmer that can be attached to various boards and program them. I will be using the fab ISP to program my other boards throughout fab academy.
There are steps to follow for building it and use it later for programming. There are some components to obtain so you can build you FabtinyISP Minimal. The FabTinyISP is a “low-speed” USB 1.1 device it is one of the slowset of the USB. We will start cutting and building the USB from the beggining. The first steps will be cutting the boards ansd shaping it after that programming it and prepare the settings and make sure it is programmed as needed.
We can access all the details for the FabTinyISP here
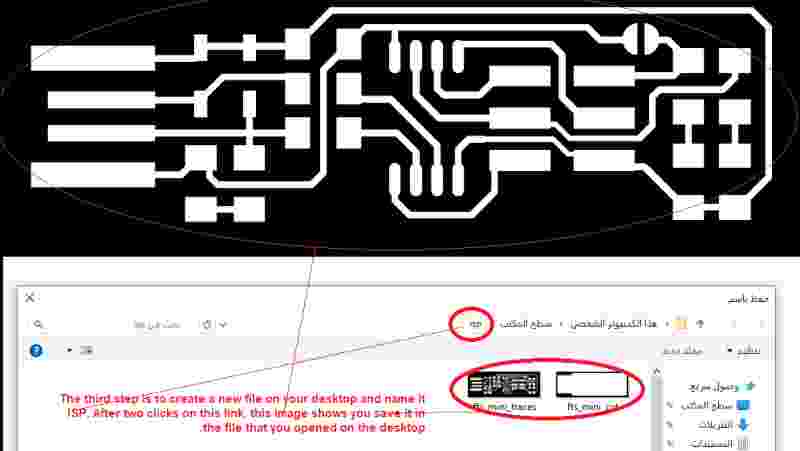
Traces:-
Enter the Fab website and save the image from the link below Traces (1000 dpi) than you can use the image for the cutting program.
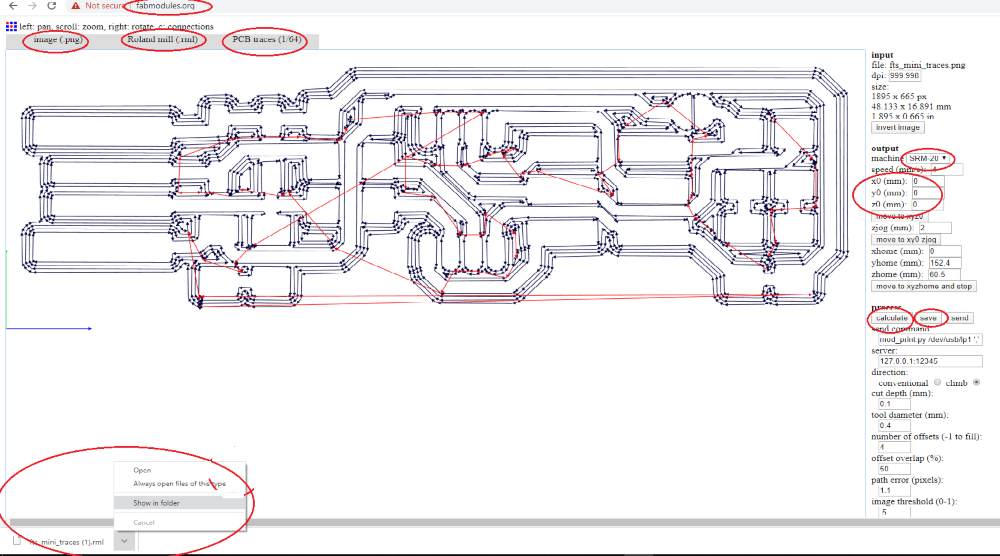
Enter the Fabmodules.org website to start entering the machine settings.
There will be steps to follow to input the machine settings.
-
In the input format chose ‘’image (.png)’’
-
For the output format chose ‘’Roland mill (.rm1)’’
-
In the process chose ‘’PCB traces (1/64)’’
-
Than in the output machine chose ‘’SRM-20’’ than change the X,Y &Z To:-
a. X0 (mm):0
b. Y0 (mm):0
c. Z0 (mm):0
- In the process than click on calculate and wait to see the changes after that you press on ‘’Save’’ to save the settings you did.
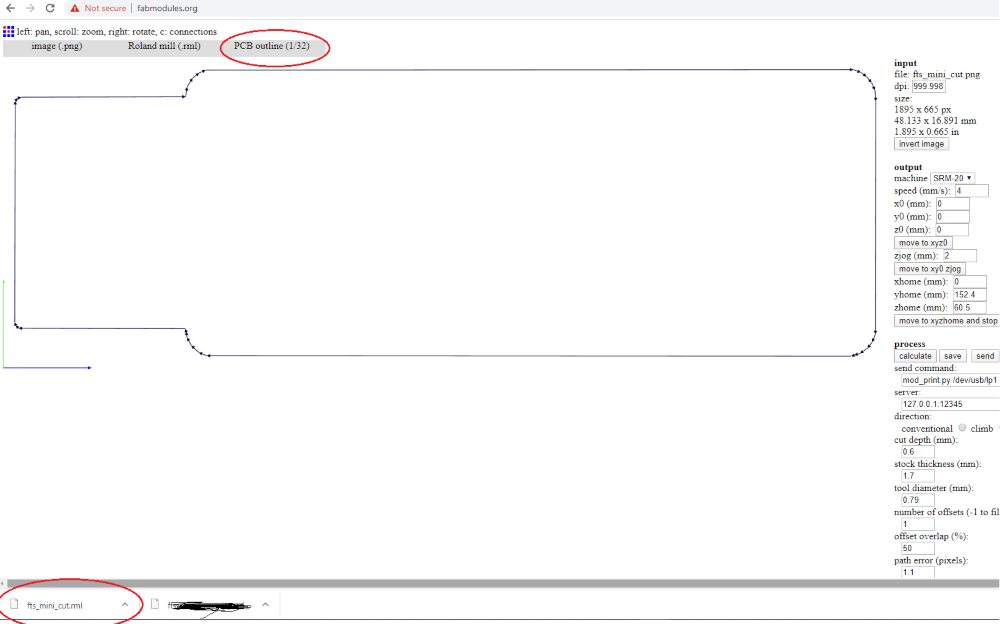
Outline:-
Enter the Fab website and save the image from the link below Outline (1000 dpi) than you can use the image for the cutting program.
Enter the Fabmodules.org website to start entering the machine settings. There will be steps to follow to input the machine settings.
-
In the input format chose ‘’image (.png)’’
-
For the output format chose ‘’Roland mill (.rm1)’’
-
In the process chose ‘’PCB traces (1/32)’’
-
Than in the output machine chose ‘’SRM-20’’ than change the X,Y &Z To:-
a. X0 (mm):0
b. Y0 (mm):0
c. Z0 (mm):0
- In the process than click on calculate and wait to see the changes after that you press on ‘’Save’’ to save the settings you did.
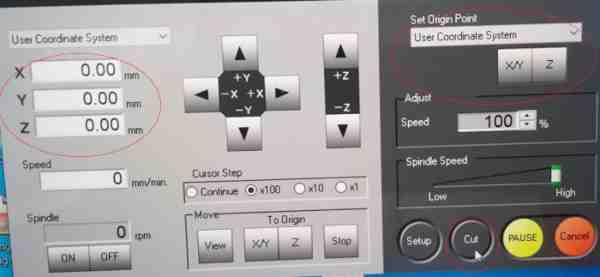
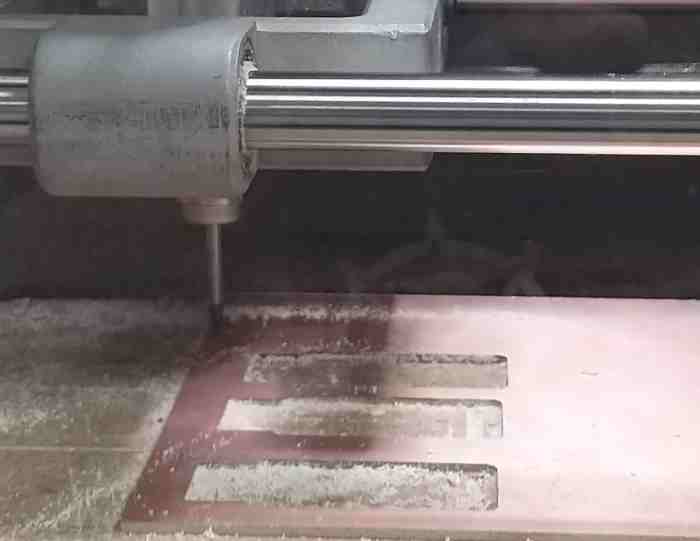
The setting for CNC machine (SRM-20)
The software i used the VPanel for the cutting machine I start by placing the PCB board in the cutting machine than I rest the machine settings to a new settings:- Move the cutting machine to reach the new starting point. Press X/Y to rest the settings when you place the milling bit in the starting point you want than it will be rest when the X and Y will show zero. The Z point I need to rest it manually by placing the milling bit in the point you want and press Z to show zero than it is ready to start cutting:-
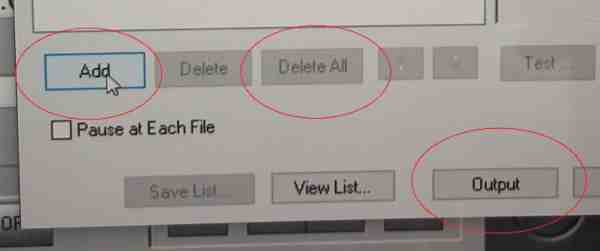
Press CUT to start cutting.S
After clicking on CUT a new window will show:-
-
First delete the old settings by clicking on delete all after click on add to download my settings that I made before. My settings will show the points I wanted to cut, all the points will be cut on the PCB board.
-
Press Output to start milling the PCB board.
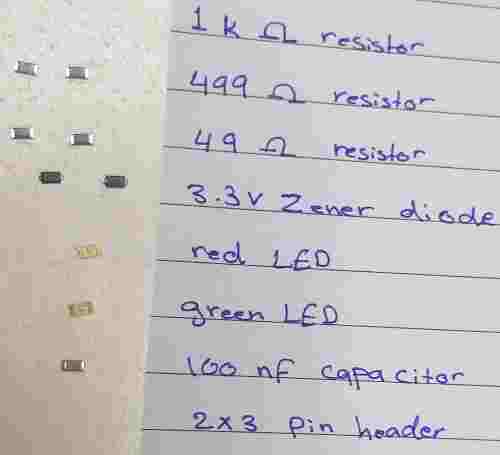
Components to obtain
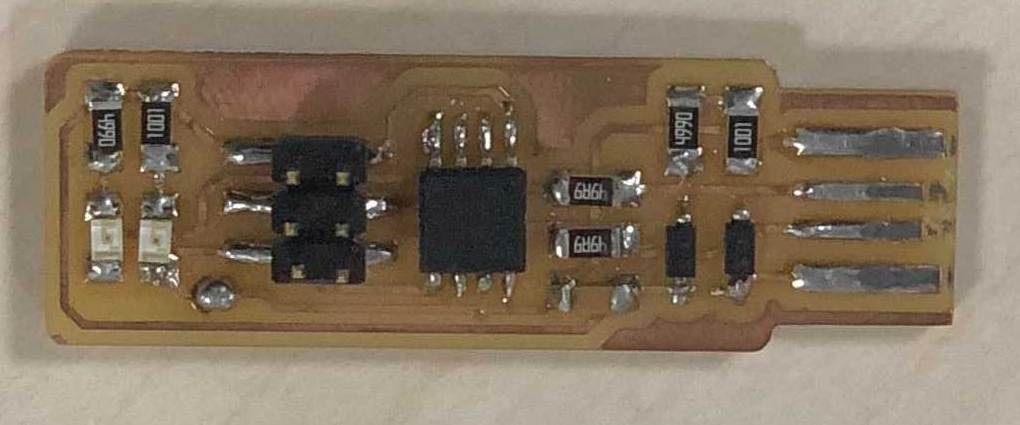
The PCB board after cutting it and soldering the resisters.
program ISP
After I finished making the PCB board, I programmed the board by using the software that I have installed. The steps I made for programming are below.
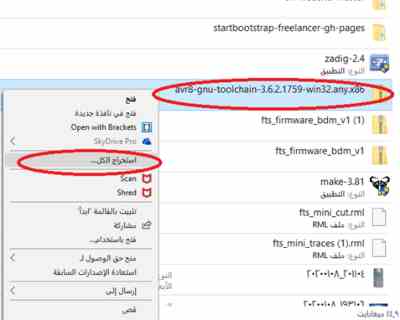
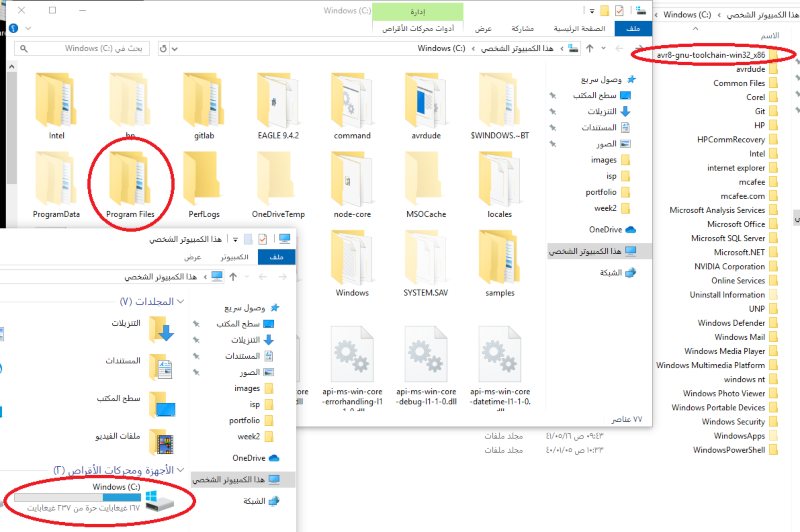
I installed Atmel AVR Toolchain for Windows on my computer and I extracted the ZIP file. I placed the folder inside the ‘’Program Files’’ on my hard disk.
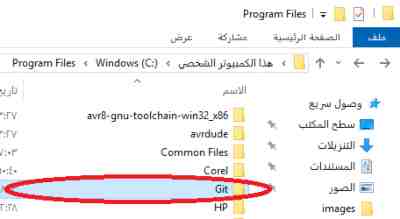
I already installed Git from before on my computer.
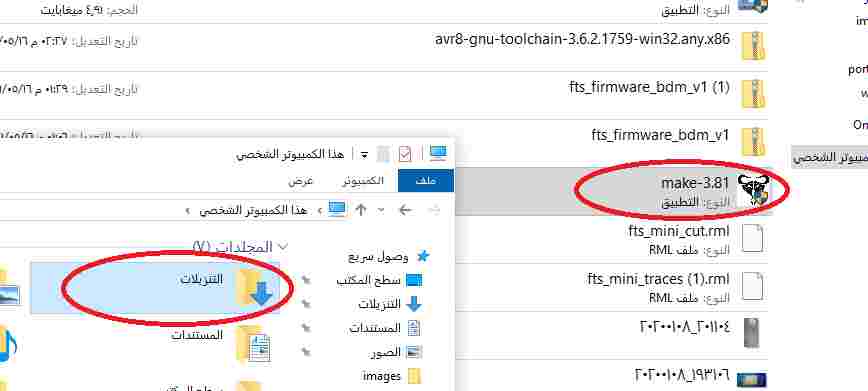
I installed GNU make on my computer and accepted the location for installation that is in Downloads.
I downloaded AVR dude and I unzip it on my hard disk inside the ‘’Program Files’’.
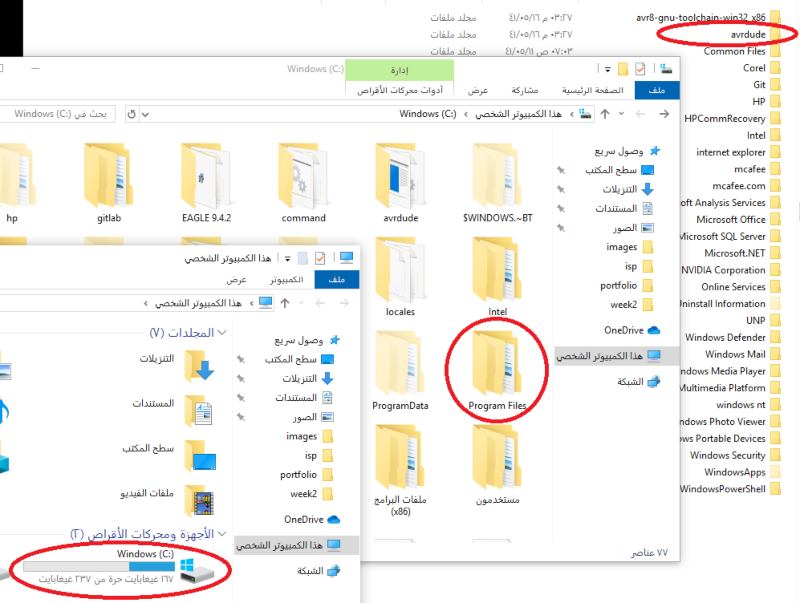
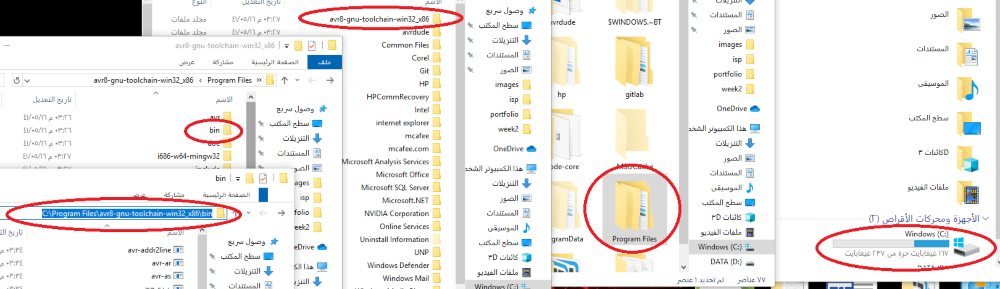
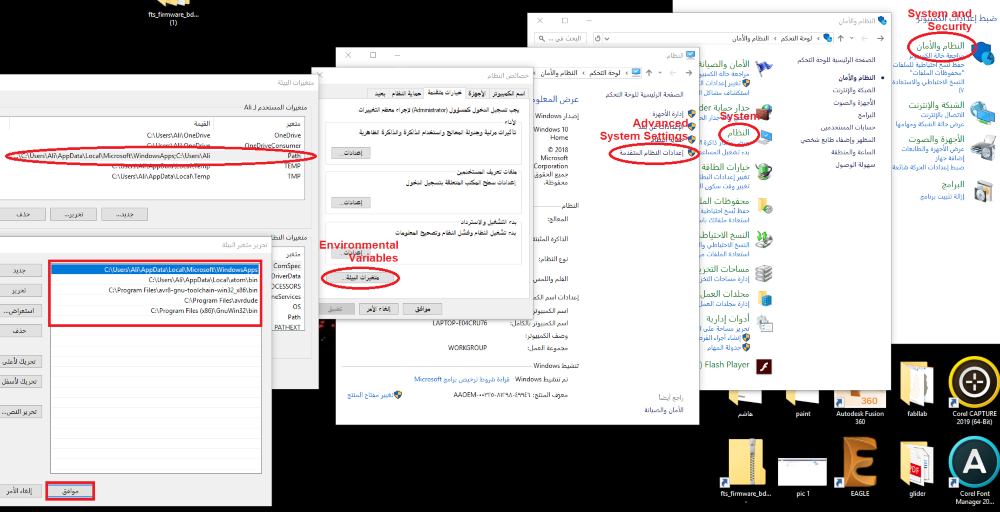
I opened the hard disk folder, then Program Files, then AVR Toolchain folder, then bin folder, and after it I copied the link of the folder to use it in the ‘’Environmental Variables’’ for programming.
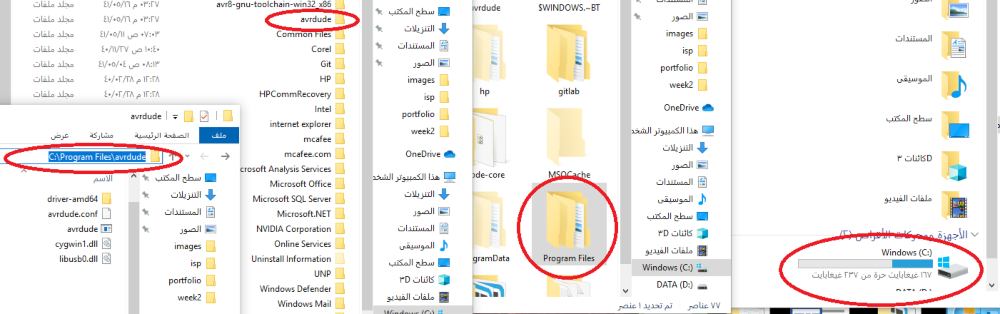
I opened the hard disk folder, then Program Files, the avrdude, and after it I copied the link of the folder to use it in the ‘’Environmental Variables’’ for programming.
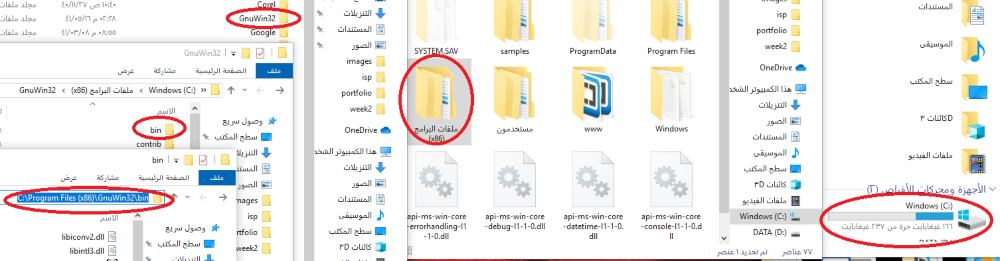
I opened the hard disk folder, Program Files x86 (in Arabic), GnuWin32 folder, bin folder, and after it I copied the link to use it in the ‘’Environmental Variables’’ for programming.
I opened the control panel, then System and Security, then System, then Advanced System Setting, then I clicked on Environmental Variables and chose Path and added the 3 links I copied from before that are shown in the previous photos into the window and accepted.
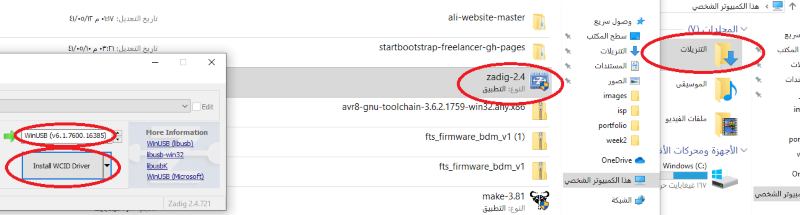
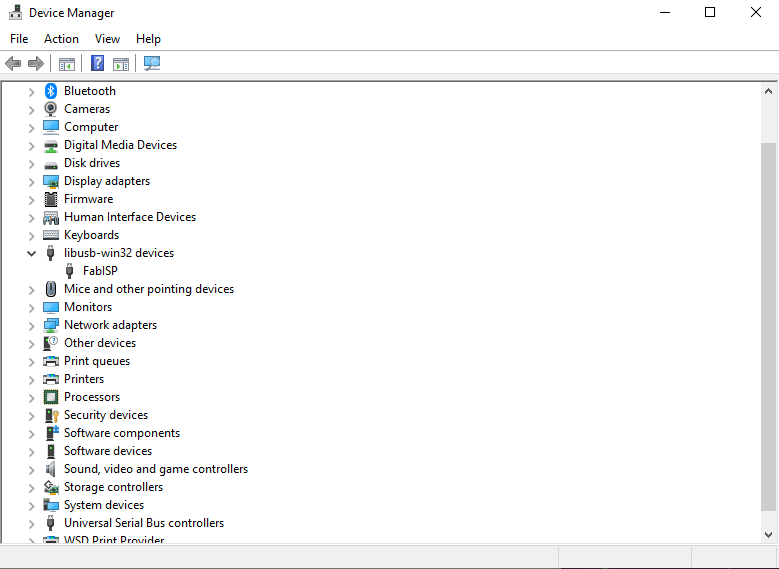
I downloaded Zadig located inside the Downloads file and launched it, then I chose the WinUSB and installed the driver onto it.
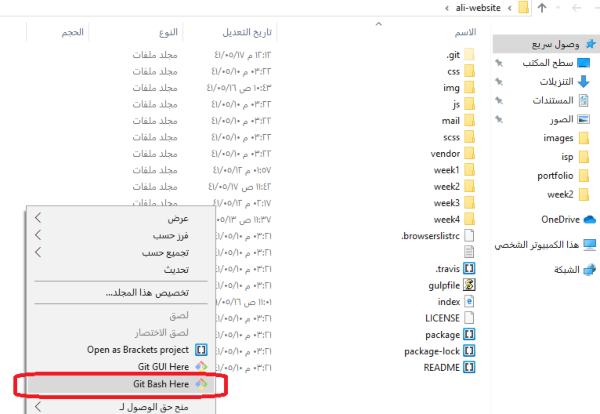
I opened my file ali-website and right clicked in the file to start using the Git Bash software.
I typed ‘’make –v’’ then pressed enter to find the result ‘’GNU Make 3.81’’ as shown in the picture.
I then typed ‘’avr-gcc –version’’ to find the result ‘’avr-gcc.exe (AVR_8_bit_GNU_Toolchain_3.6.2_1759) 5.4.0’’
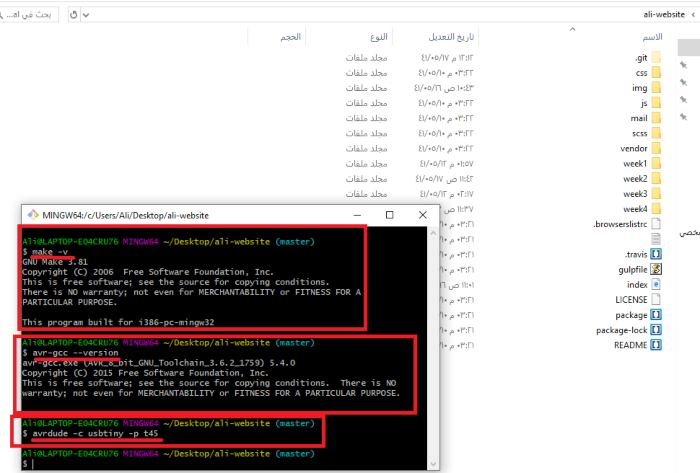
I also typed ‘’arvdude –c usbtiny –p t45’’ but I didn’t find a result on the code.
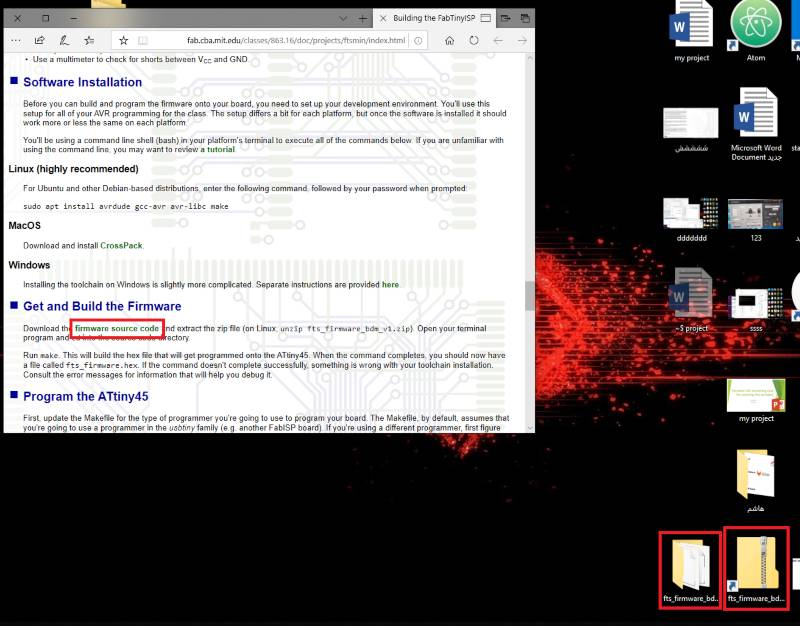
I downloaded ‘’firmware source code’’ from the link onto my computer and unzip the folder on my desktop.

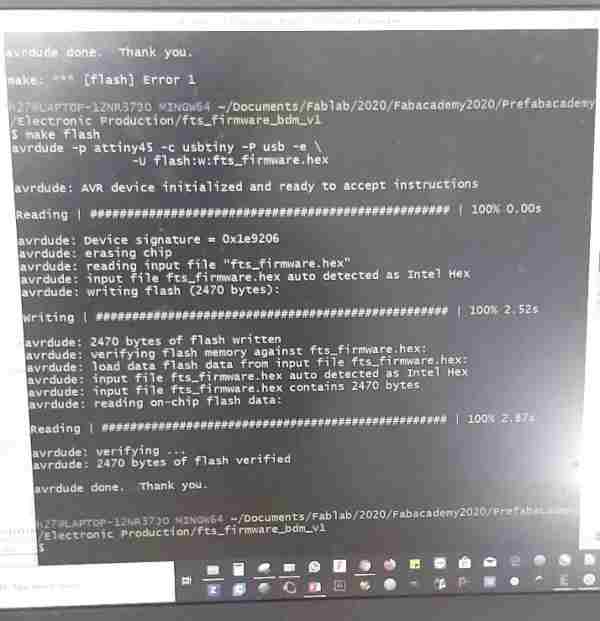
I opened Git Bash and typed ‘’make flash’’ and the result is shown in the picture.
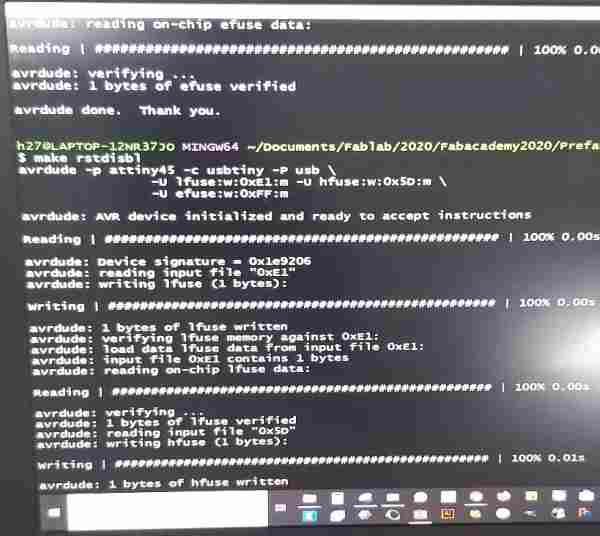
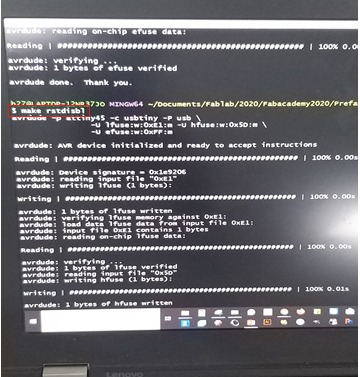
I used another laptop and tried the same process with the ‘’make fuses’’ code on the Git Bash and the result worked as shown above.
I opened Git Bash and typed ‘’make rstdisbl’’ and the result is shown above in the picture.
This video show my ISP to program the Attiny44 board.
My group assignments Climb Milling vs Conventional Milling

This work is licensed under a Creative Commons Attribution 4.0 International License.