Week 7
Goals of the week
Individual assignment:
Make (design+mill+assemble) something big.
Group assignment:
Test runout, alignment, speeds, feeds, and toolpaths for your machine.
The idea
Initially I had designed a bed computer table (also because I would need one), but it would have been too small for this week and making a bigger one (with a ground support) without an iron support would have been a failure because it wouldn't hold the weight of a pc. So I had to abandon the initial idea, to my bad luck. Fortunatelly it occurred to me to create a Montessori bed (here you can find an example). The Montessori method requires that the child learn to be as independent as possible from the very first years of life. The bed therefore rests on the floor without any support so that the child can get on and off independently. (In a kindergarten there are also stools so that the child can get to the sink by himself, for example, etc.)
Onshape
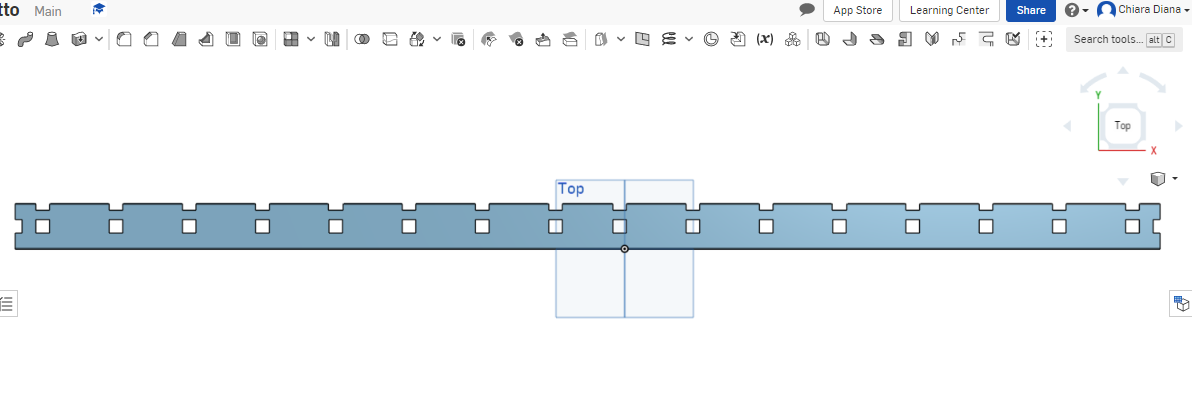
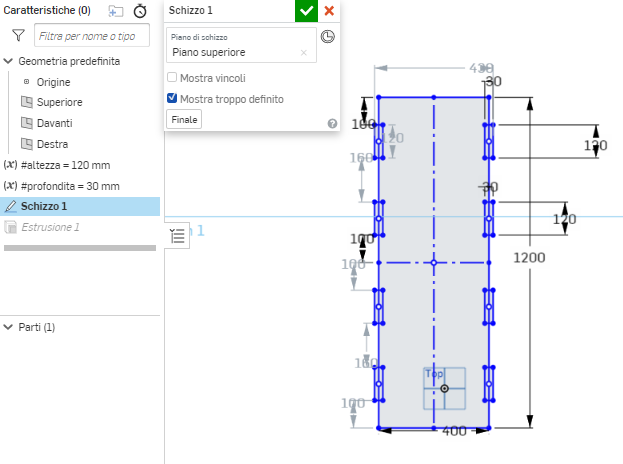
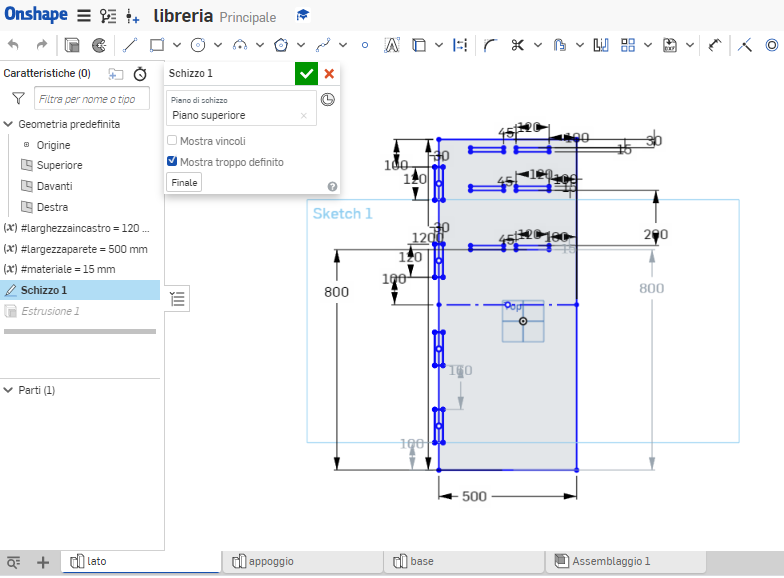
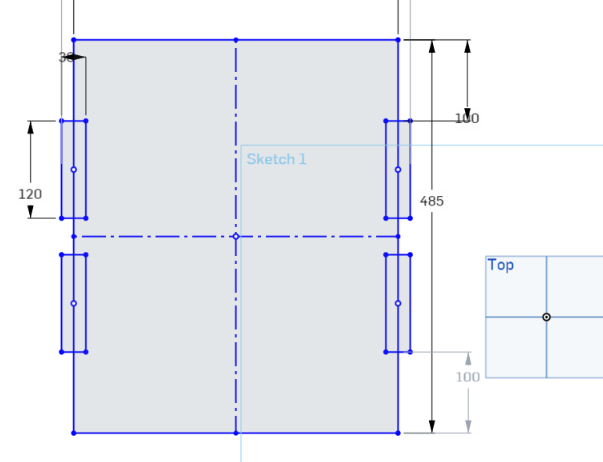
First I created a folder and for each piece I created a different part studio so that everything was in order. Next I created the various parts mainly using the "center point rectangle" tool. To facilitate the process I created some variables with the main measurements, in particular those of the joints (1.5 cm as the thickness of the material).
A few examples below
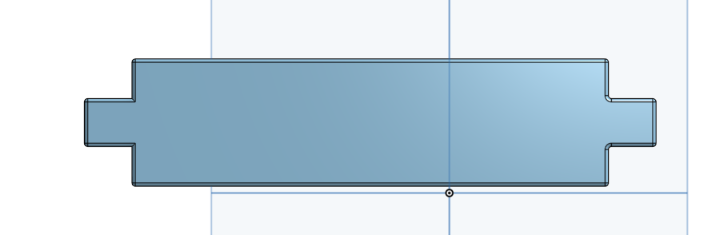
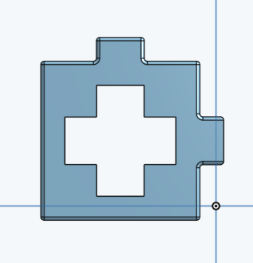
Finally, once the extrusions were done, our tutor advised us to insert fillets in order to facilitate the cutting.
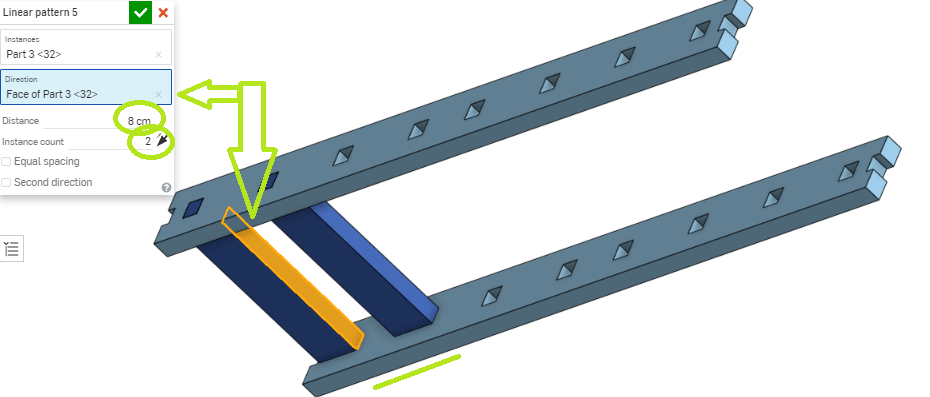
For this exercise I made a really interesting discovery among the tools of the assembly . In addition to the fastened mate tool, there is the assembly linear pattern that allows you to select an object, select the direction by clicking first on direction and then on the face of the object to multiply, decide the distance (in my case mainly 8 cm) and how many times to duplicate it. Needless to say that for the assembly of the staves with this method I have saved a lot of time

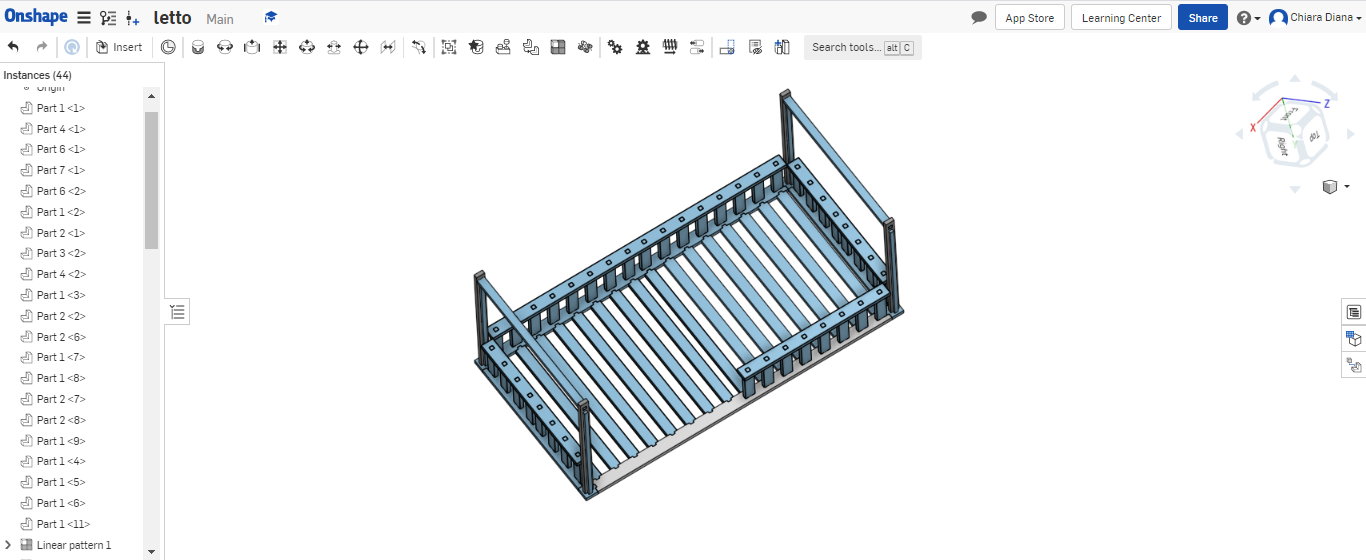
This is the result
Export
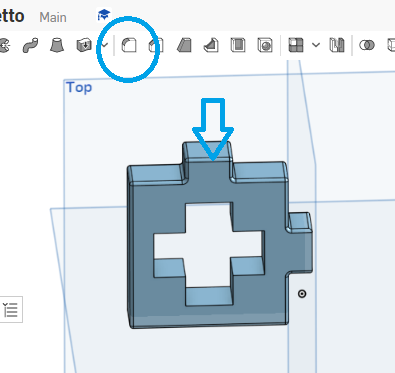
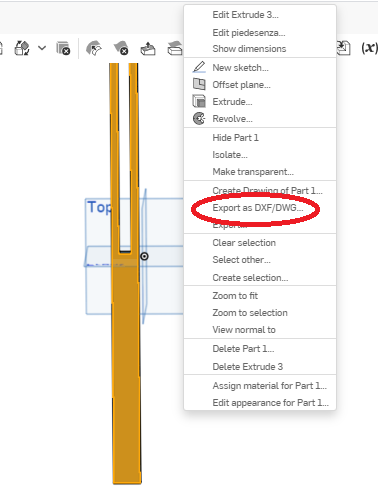
Once the extrusions were done and the fillets were placed, all that was left was to export the files in DXF format. To do this you must select a face of the object to export without opening either the sketch or the extrusion, press the right mouse button and then choose the option "export as dxf file".
Inkscape
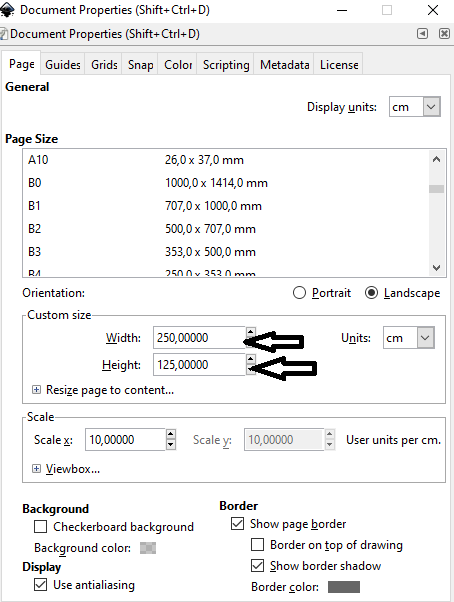
To make sure all the pieces fit into the board I will cut with the ShopBot, I created a canva on Inskape with the dimensions of the board and imported the .dxf files in real size. I then placed them in a possible arrangement for cutting and luckily the calculations I made at the beginning were correct!
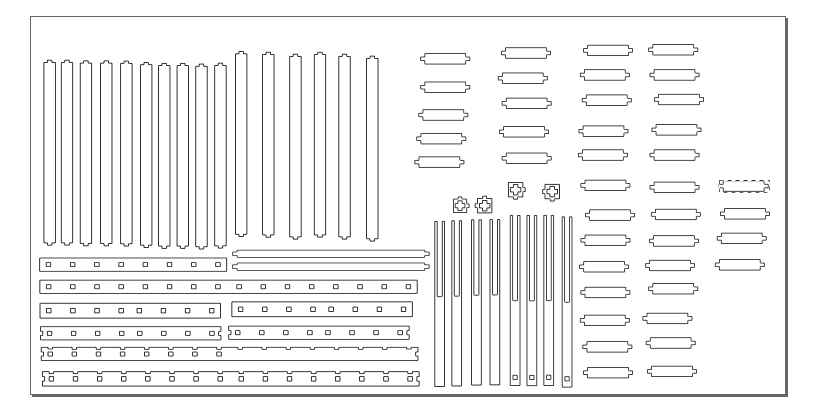
This is the result
Updates
Having designed the bed during the quarantine I had not taken into account the design rules of the Shopbot. My tutor pointed out to me that the joints were too weak: some because they were too small and others because they were vertical (i.e. maximum of the thickness of the material). Moreover we will use an Oriented Strand Board that is not a resistant wood...
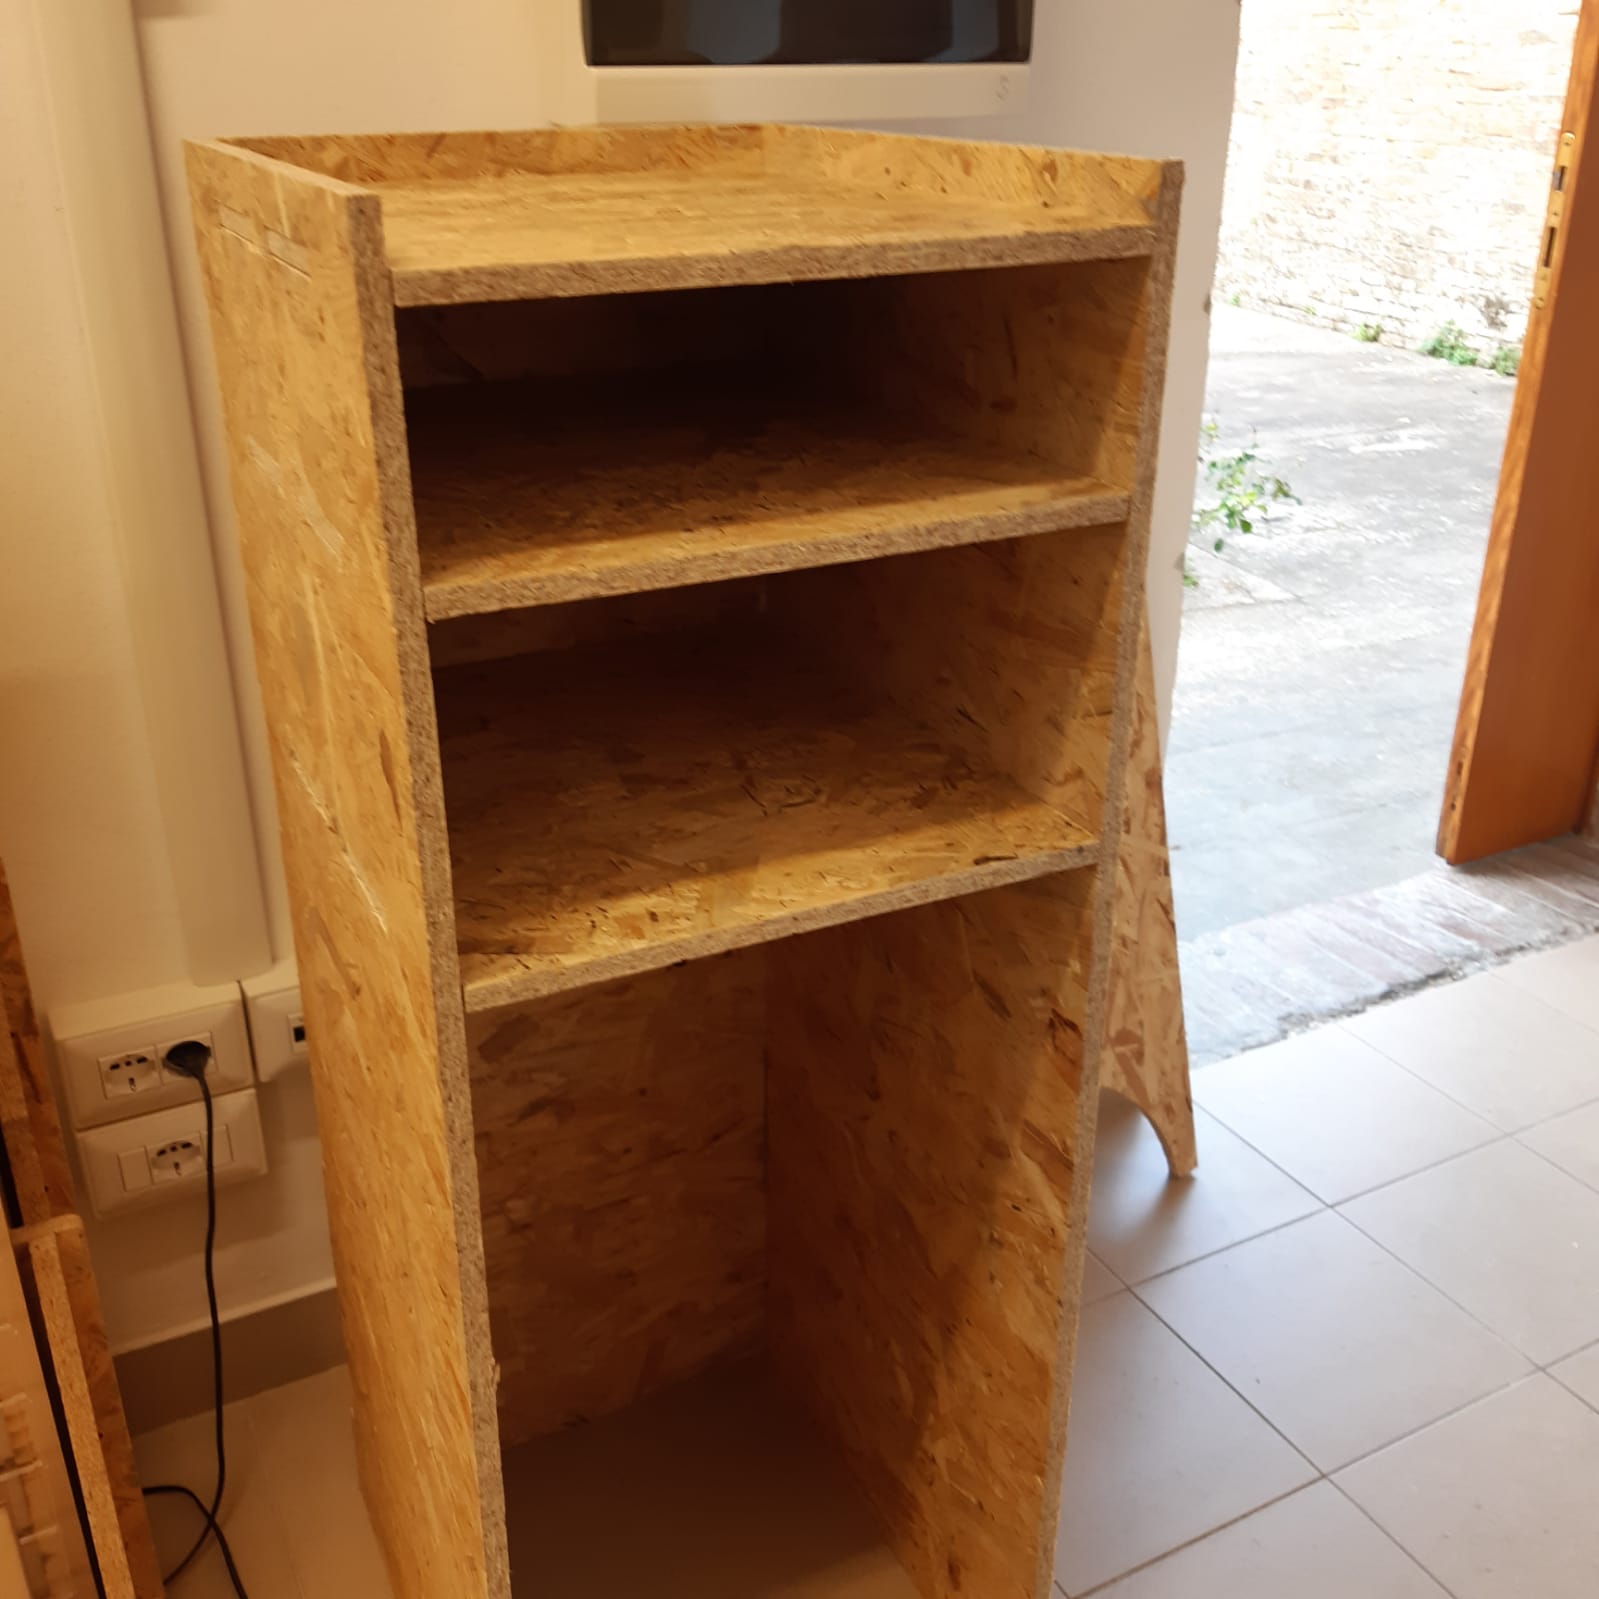
So, since I moved and I would need a bookcase, I decided to make this one! Definitely a simpler project, but safe and above all useful!
I designed first of all the wall that will be in contact with the wall and then the side doors into which I will fit the shelves.
Initially I had thought of a taller library, but the size of the table would not be enough, so I made some changes. (Fortunately during the third week I learned to use the variables for the parametric kit!)
This is the result
I know, it doesn't really look like a traditional bookstore.Actually, since I'm making it custom-made, I decided that in the first shelf I will put my two suitcases (that's why it's so big) and in the other two my personal bags. In a few words it will become a storage unit.
Some problems with T bones
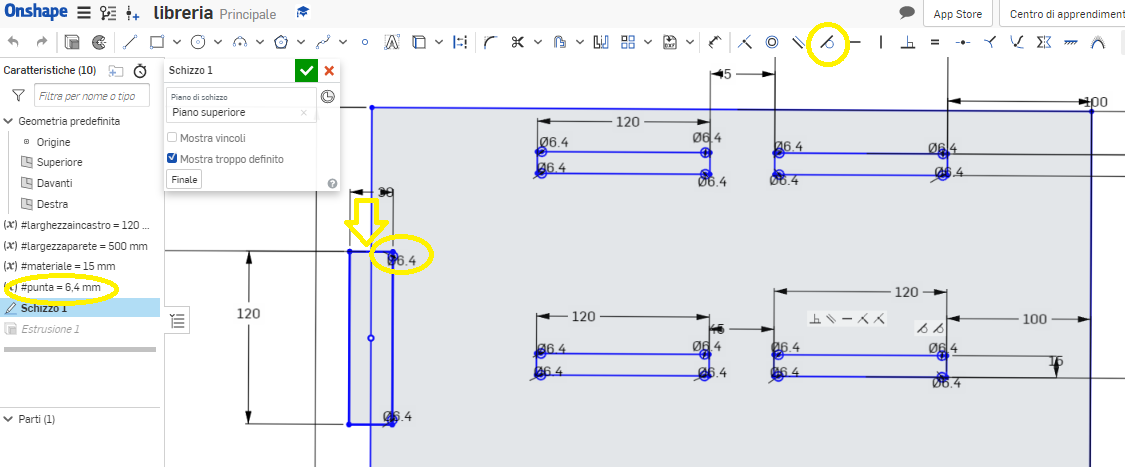
I was able to insert the t-bones in the piece of the shelf and in the one in front of the wall, but not in the two side doors. My tutor explained to me that another guy had the same problem . What on OnShape are perfect 90-degree angles are not recognised as accurate by VCarve. So I created the T bones on Onshape by creating circles with a diameter of 6.4 mm (the diameter of the ShopBot's tip) and used the tangency constrain on all the sides where I wanted the Tbones.
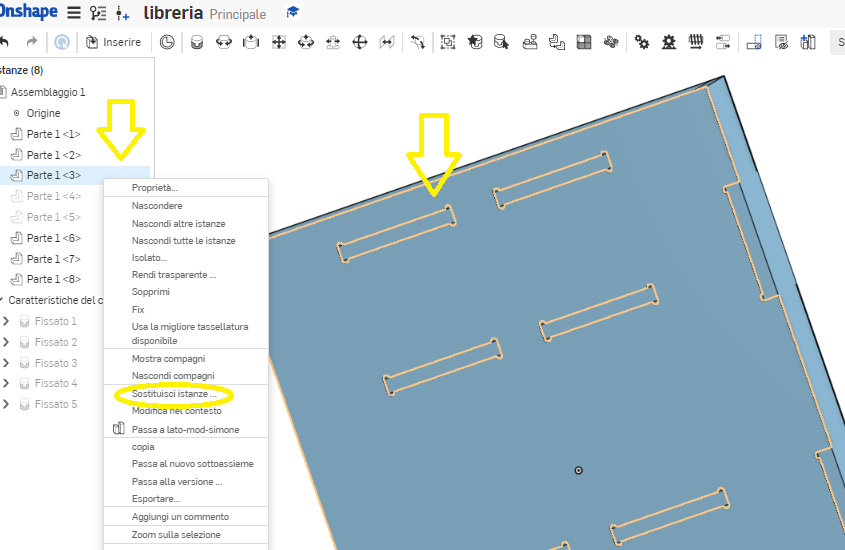
An interesting option I have learned not to do the assembly all over again is to replace a part by simply selecting it and right-clicking on the corresponding part and then choosing the "replace instances" option.
Vcarve
First I fixed the table on the sacrificial plane with six screws. Then I took the coordinates and reproduced the position of the screws in the vcarve file so that I could see where I could safely select the pieces of furniture.
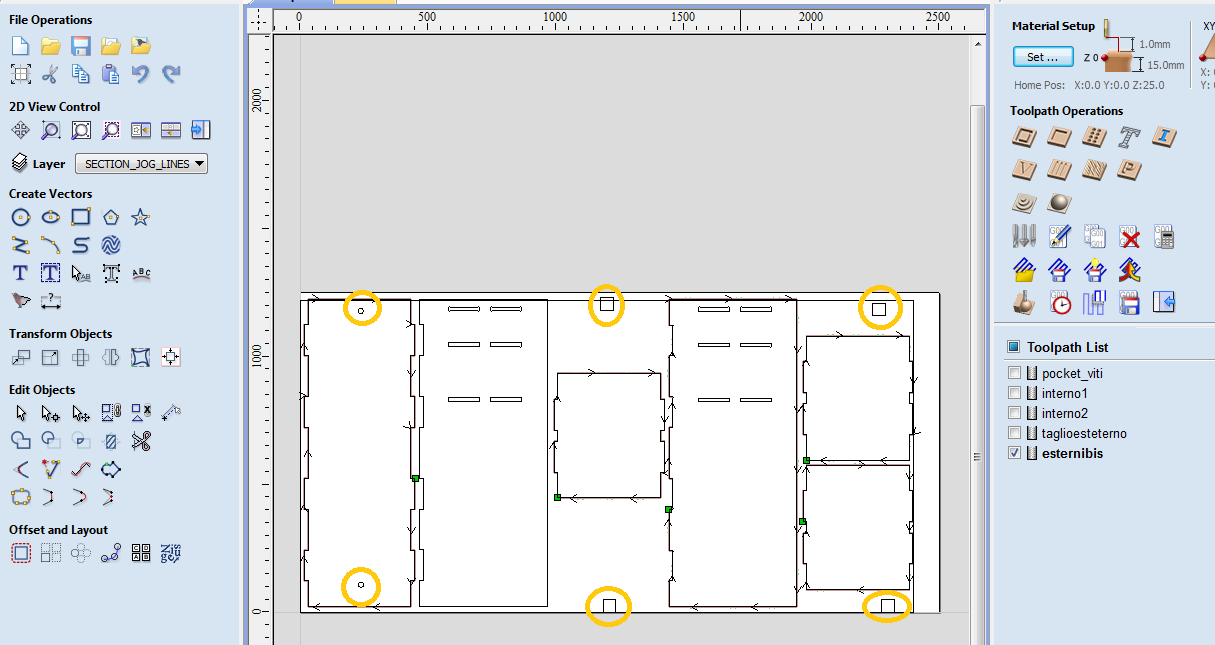
Following all the steps described in the group documentation , I prepared the cutting file by selecting the internal cuts first so as not to make the table unstable and then the external ones.

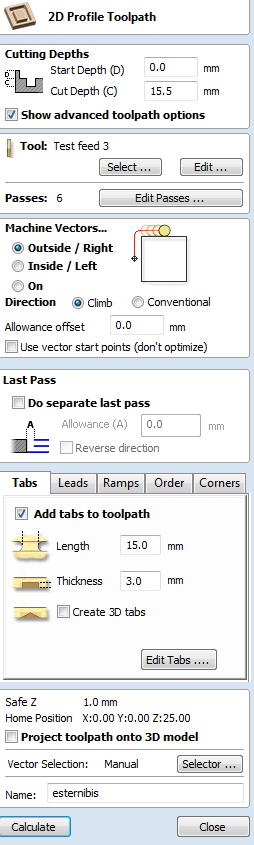
This is the result
You can find the downloadable files here
Bed
The Onshape fileBig base
Half of big base
Small base
Hut
"Fence" big part
"Fence" half of the big part
"Fence" small part
Long slat Short slat
Junction
Assembly
Bookcase
The Onshape file BaseSide
Shelve
Side with bones
Assembly