Week 12
Goals of the week
Group assignment:
review the safety data sheets for each of your molding and casting materials,
then make and compare test casts with each of them
Individual assignment:
design a mold around the stock and tooling that you'll be using,
mill it (rough cut + (at least) three-axis finish cut),
and use it to cast parts.
Onshape
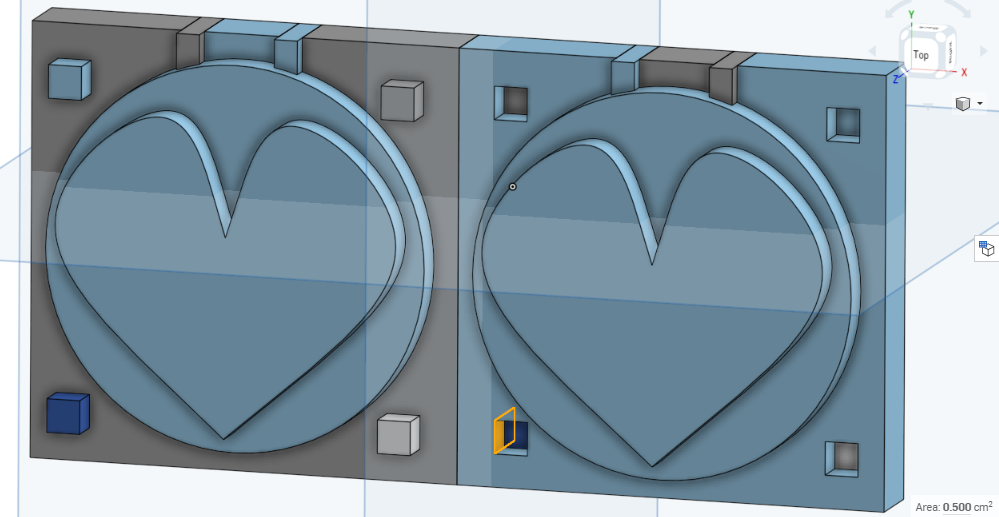
Design
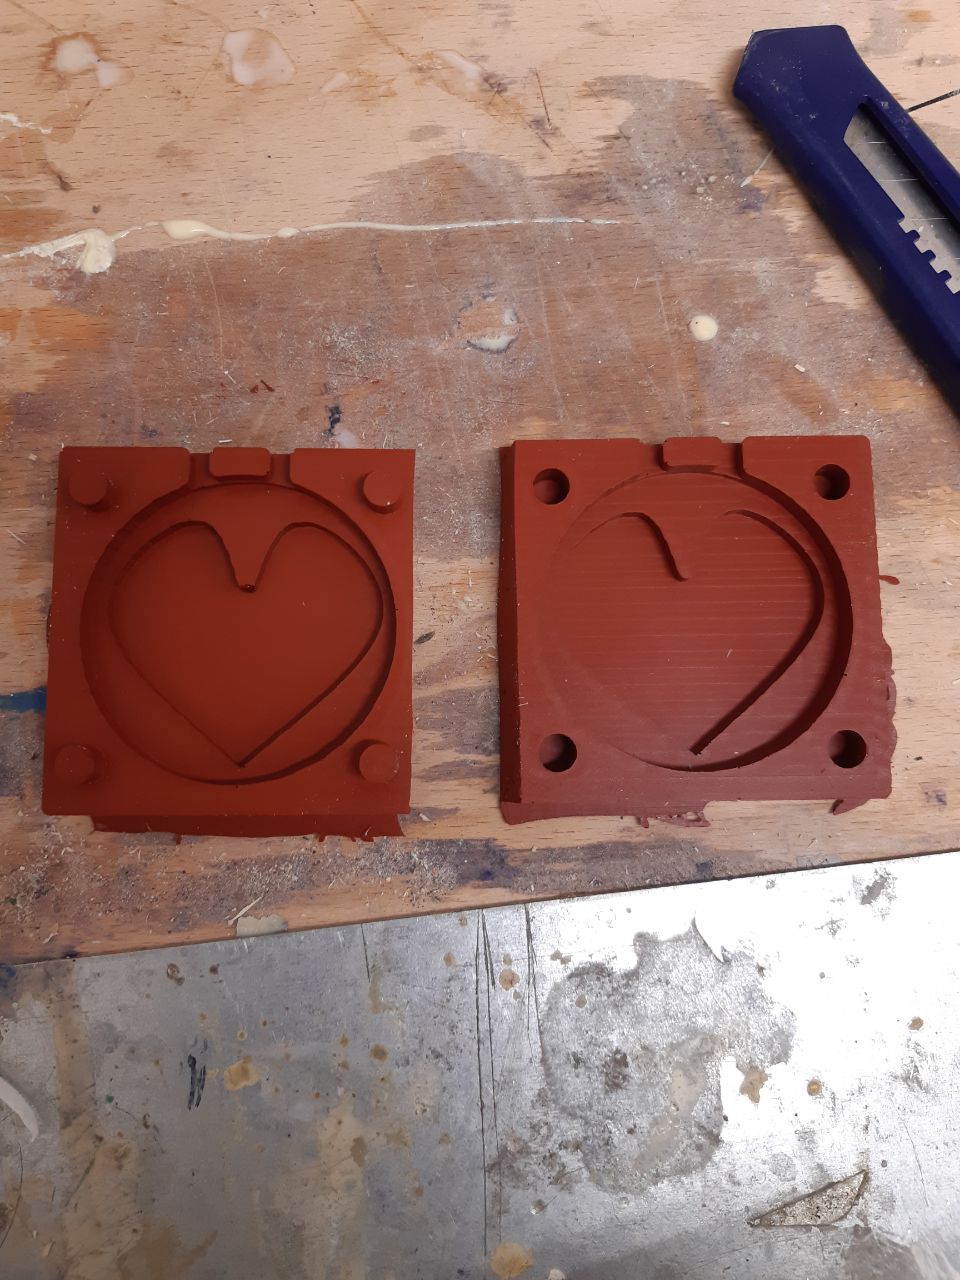
For this week I decided to make a mold of a heart tag. First I drew a square of 6.5 cm side. Then I created the medallion (a simple circle) and then a heart using the Spline tool. Afterwards I created 4 symmetrical squares of the same size that I will talk about later. Finally I created some rectangles that will create respectively the hole in which to insert the material and the one from which to take out the air and, using the mirror tool I duplicated the image.
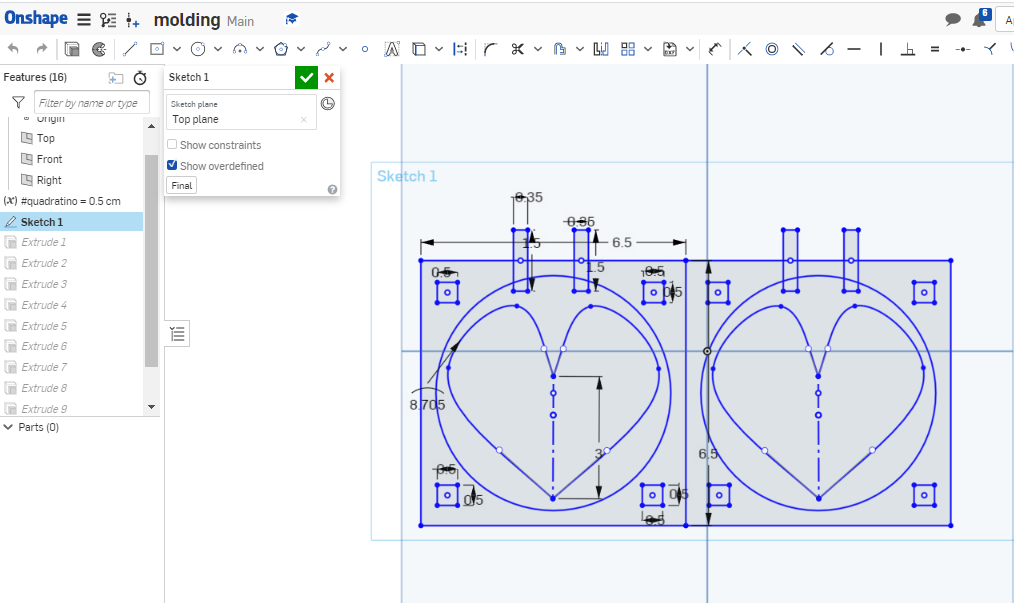
Extrusion
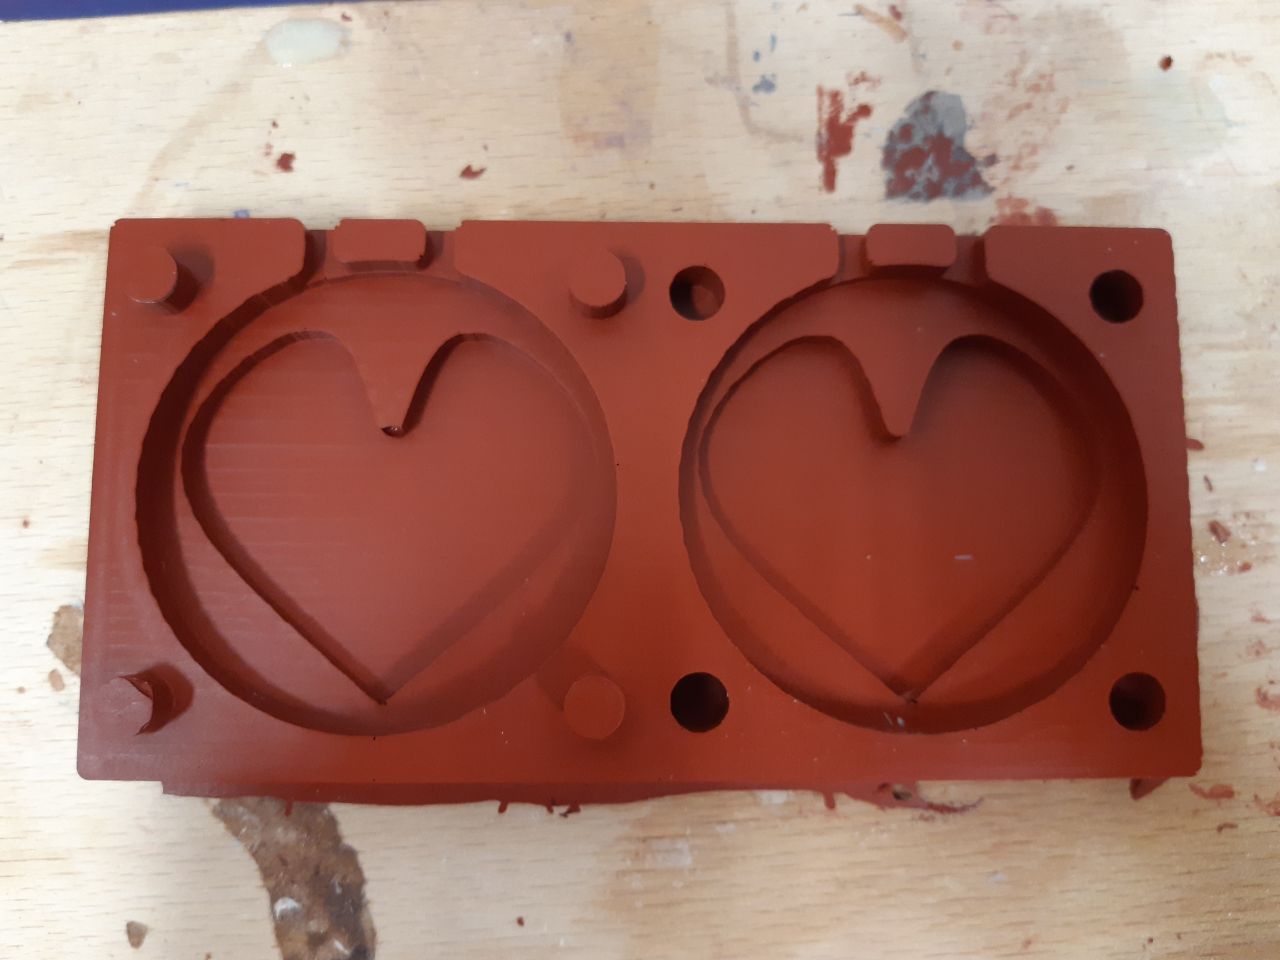
On the left is the positive and on the right is the negative of the same object. For this reason the squares of the positive part I extruded them 1.5 cm (0.5 cm more than the material), while those of the negative part I extruded them 0.5 cm deep. In this way when I insert the silicone for the mould the two will intersect perfectly (I hope). On the contrary, for the holes I will use to insert the material and let the air out, I have made positive extrusions so as to create a hole in the silicone.
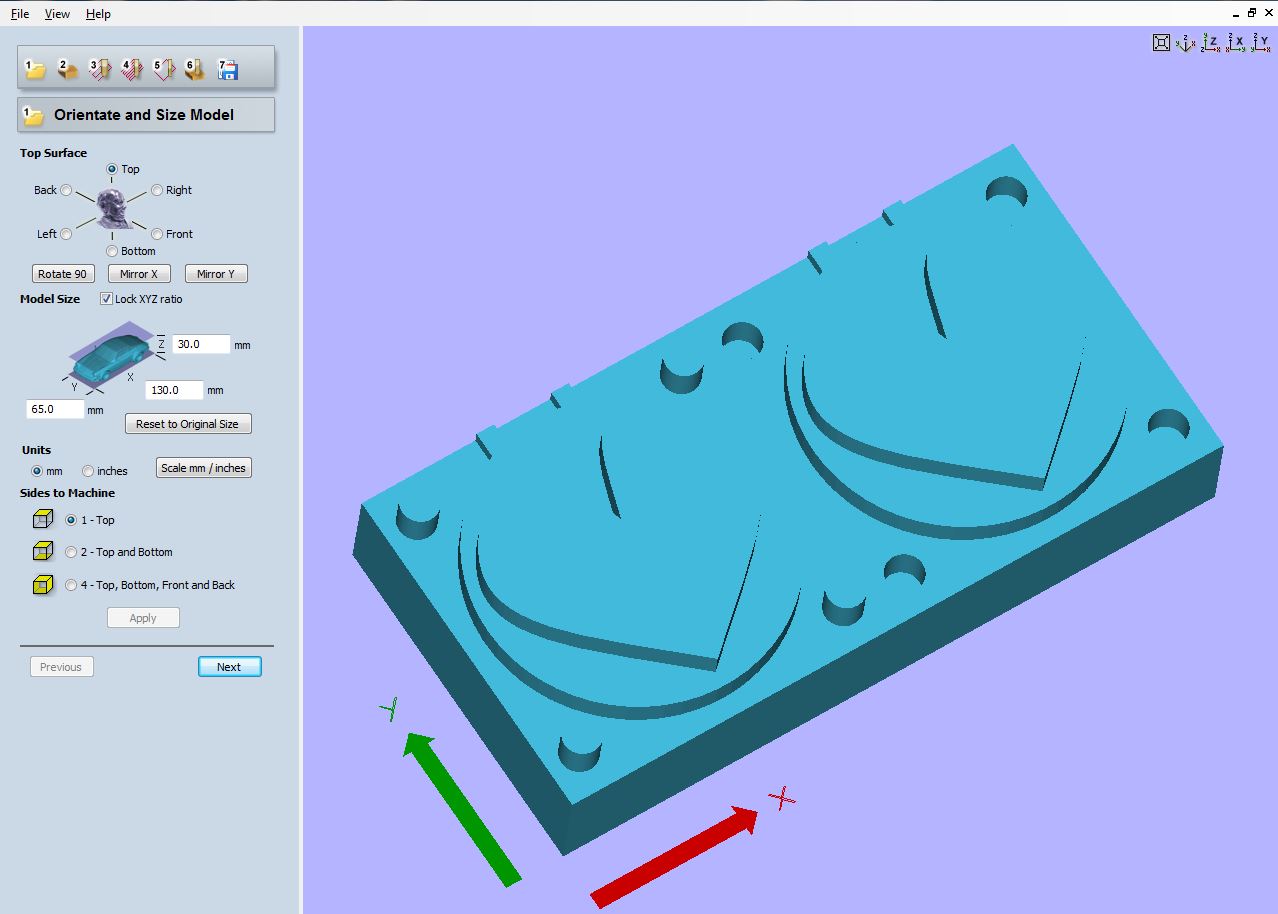
Cut 3D
Part 1
Once imported the file on Cut 3D I chose top as the surface, left the measurements unchanged and chose top as "sides to machine".
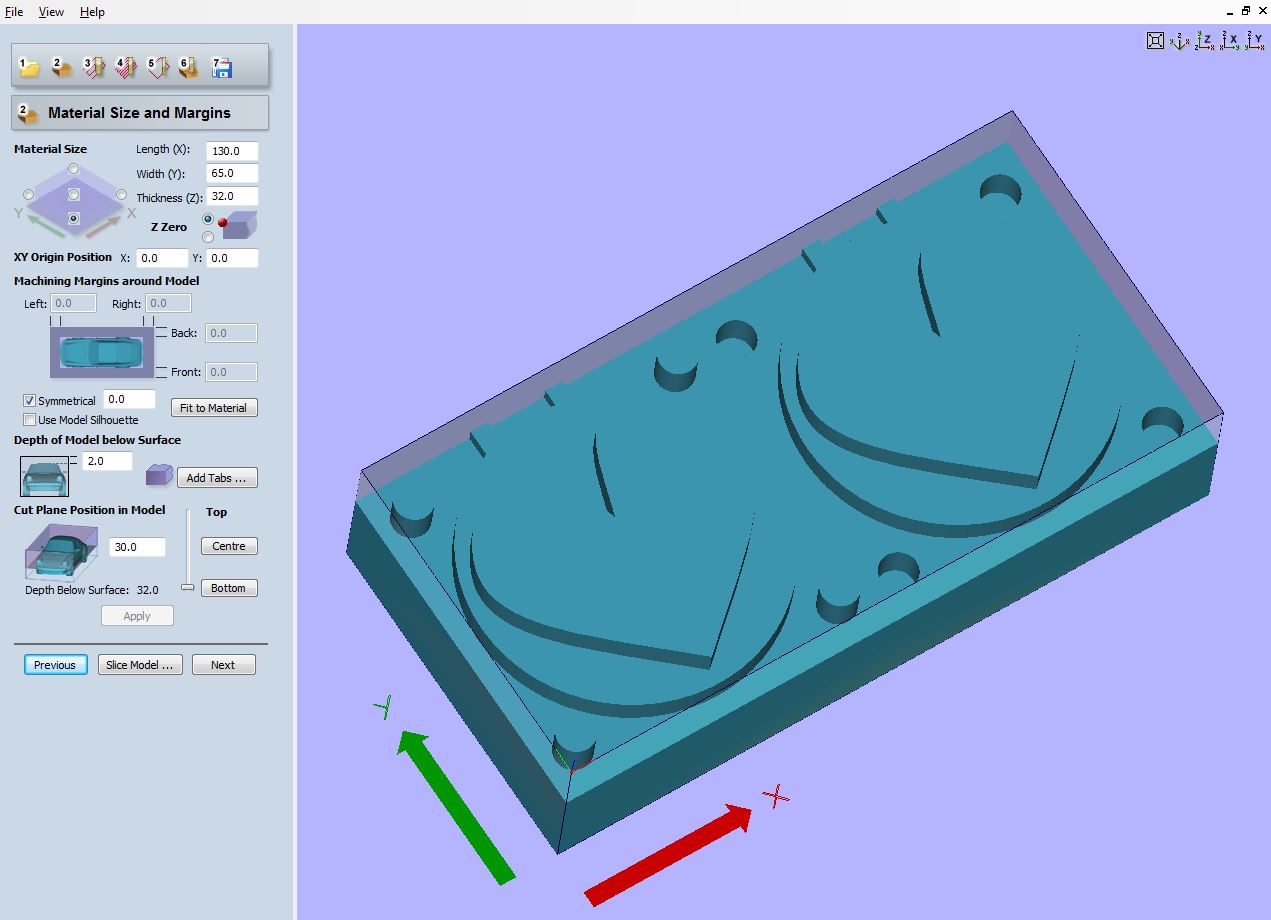
Part 2
Subsequently, once chosen the origin, I added 2 mm to the total thickness in order to have two mm depth of model below surface.
Part 3
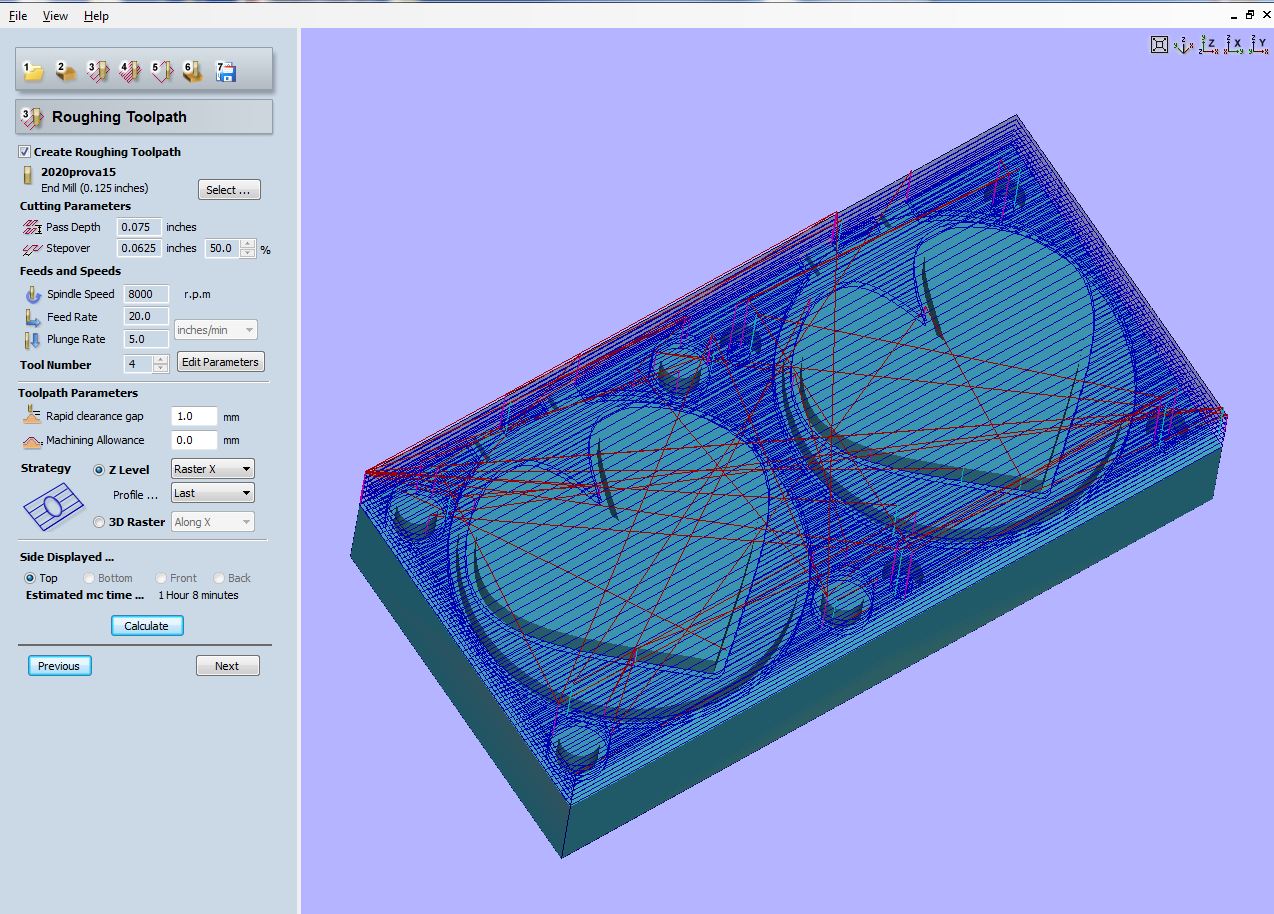
As far as roughing is concerned I have inserted the tip (0.125 inch end mill), the pass depth (0.075 inches) and the stepover (50%). I set the spindle speed to 8000 r.p.m., the feed rate to 20 and the plunge rate to 5. I decided not to leave the allowance, despite the program's warning, simply because it is not necessary for my work. As a strategy I chose Z level raster x simply because with the 3D raster option it would not have milled the holes.
Part 4
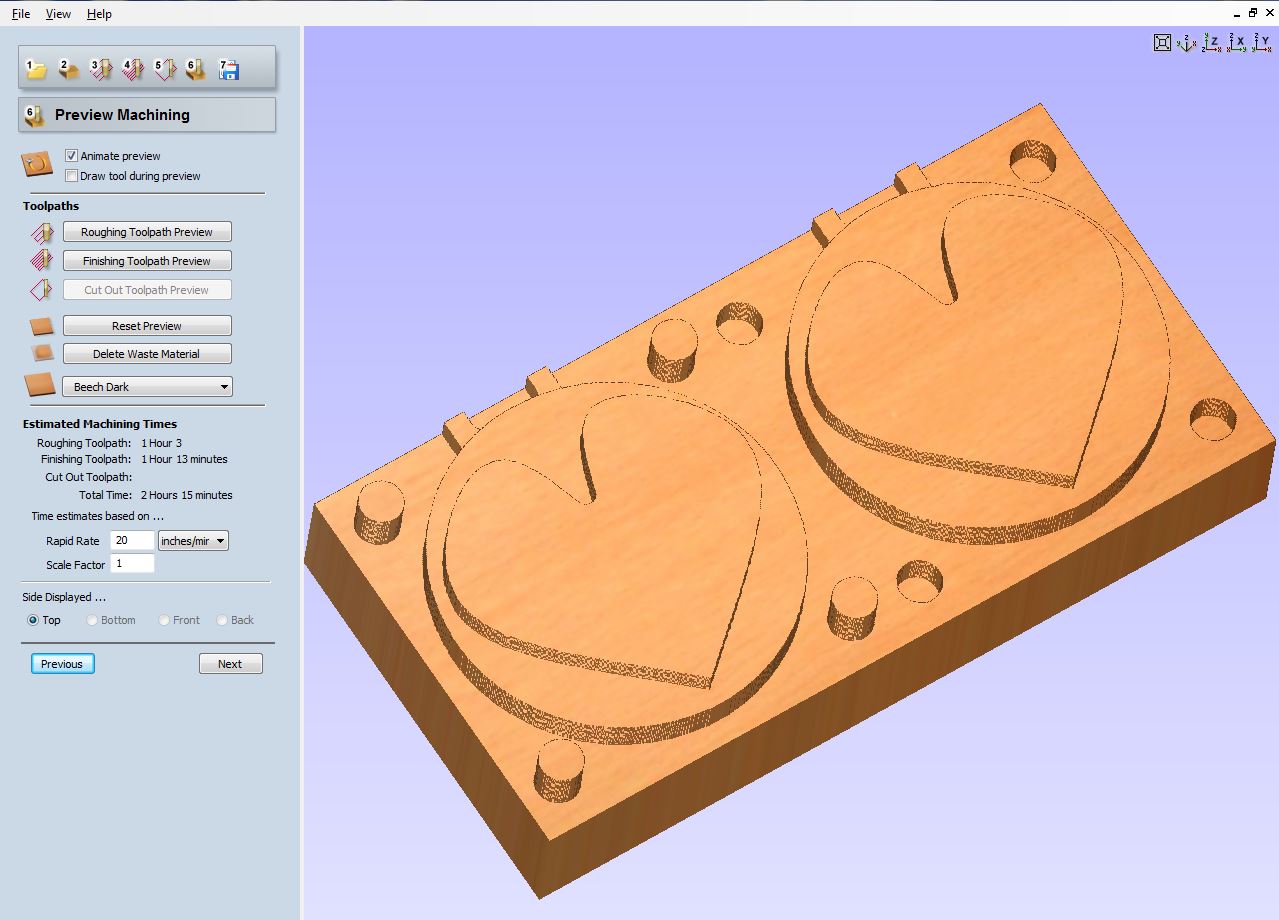
At this stage I could see the preview of the milling and set the rapid rate to 20 and the scale factor to 1. I was satisfied.
Part 5
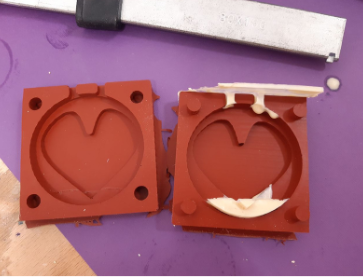
Finally, I saved the toolpaths and then, once I set the z and the x y origin and obviously inserted my cutter board in the Roland I could have my mold milled.

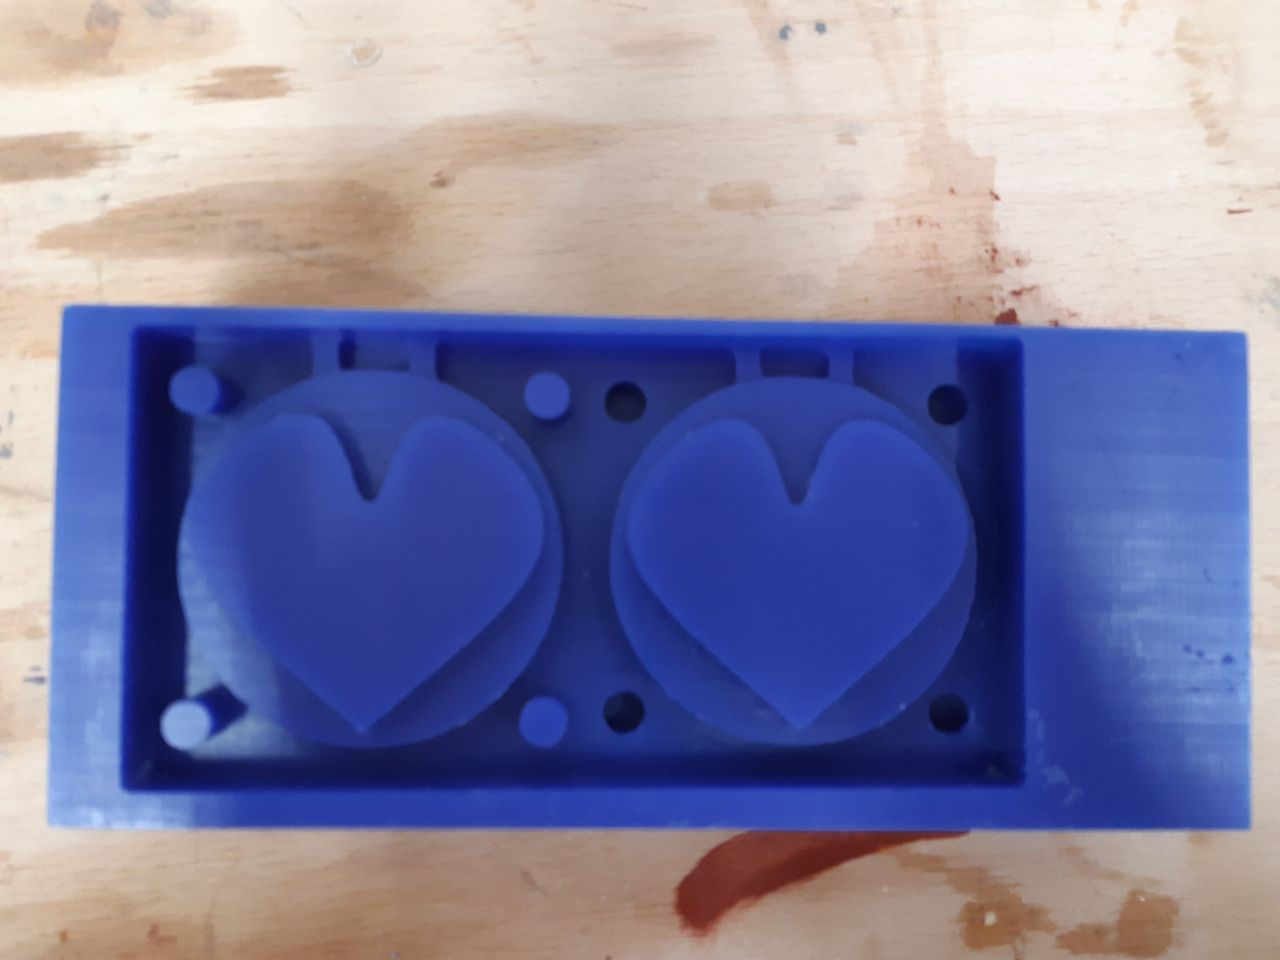
This is the result
Casting
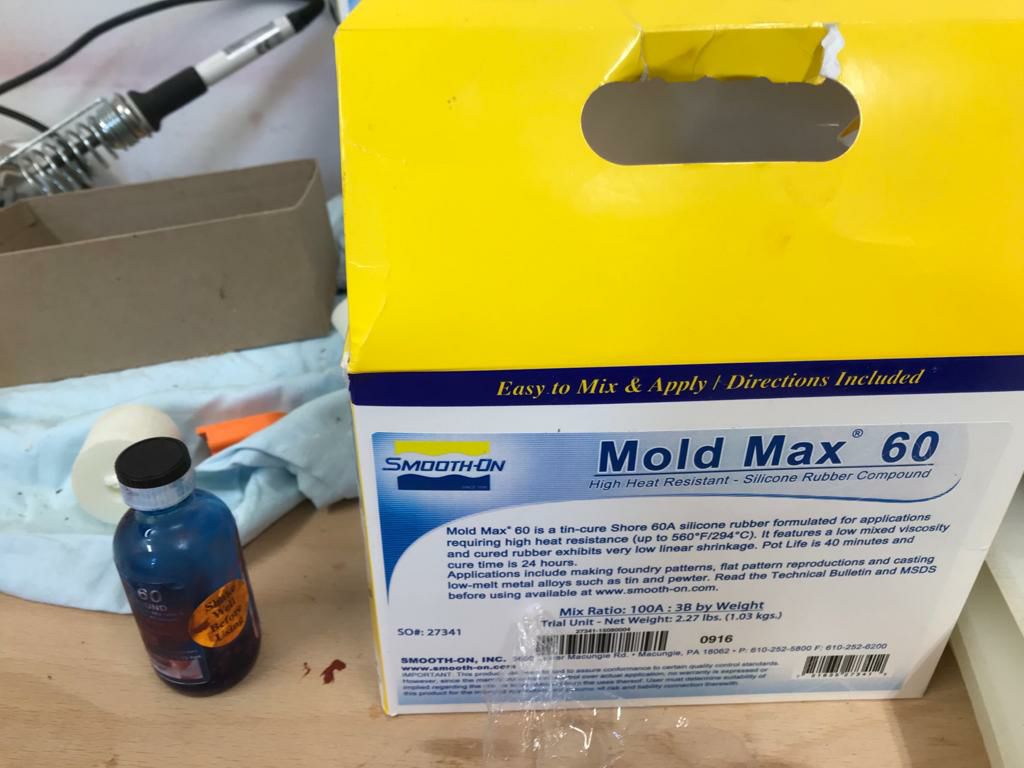
I initially used a Shore 60A tin catalyzed silicone mold rubber formulated for applications requiring high heat resistance (up to 560°F/294°C). Parts A and B are mixed 100A - 3B by weight. Pot life is 40 minutes and cure time is 24 hours.
I used exactly 100 grams of part A and 3 grams of part B.
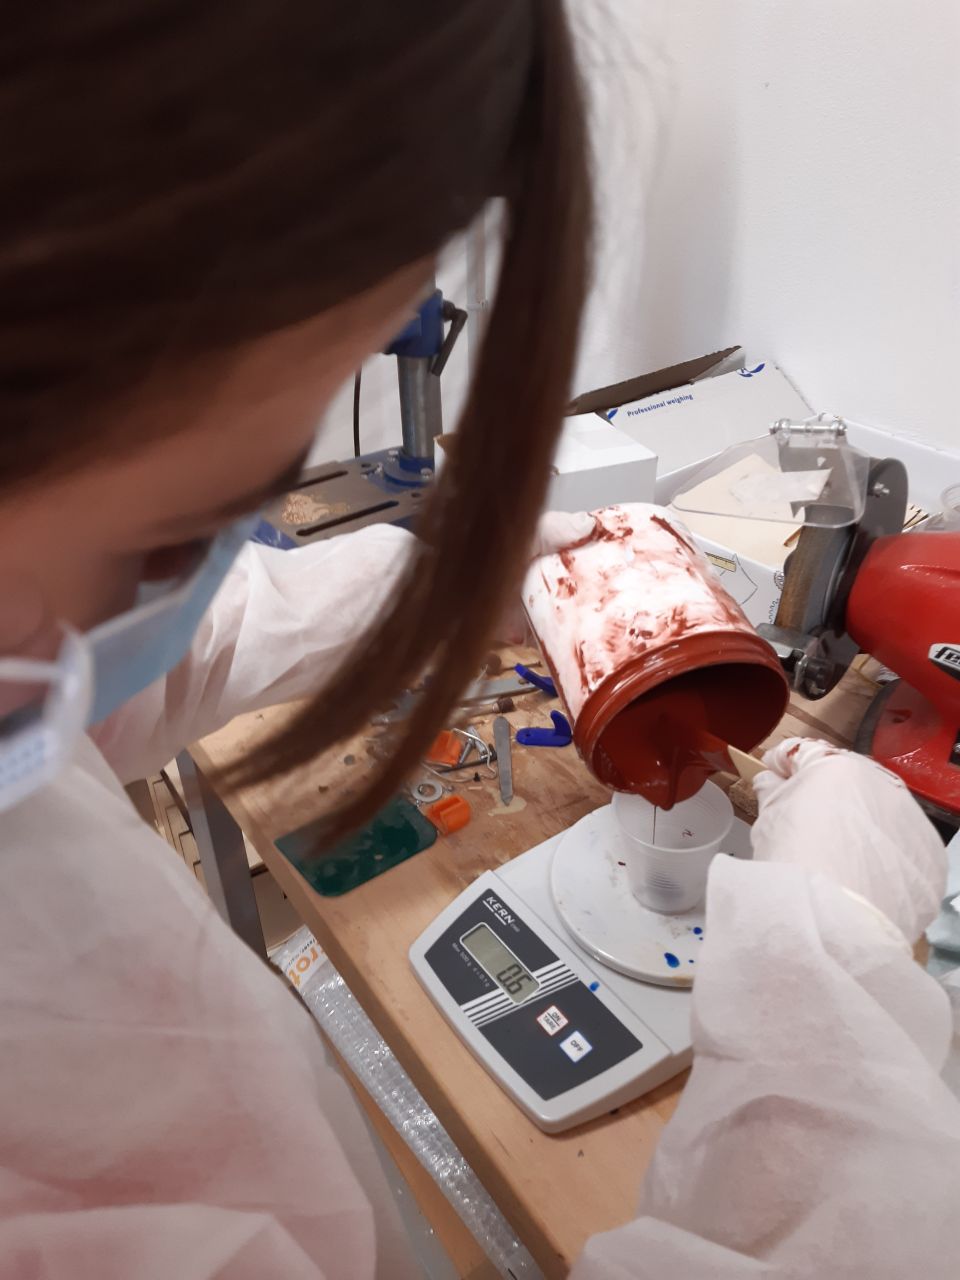
Afterwards I mixed the two parts taking care not to incorporate air.
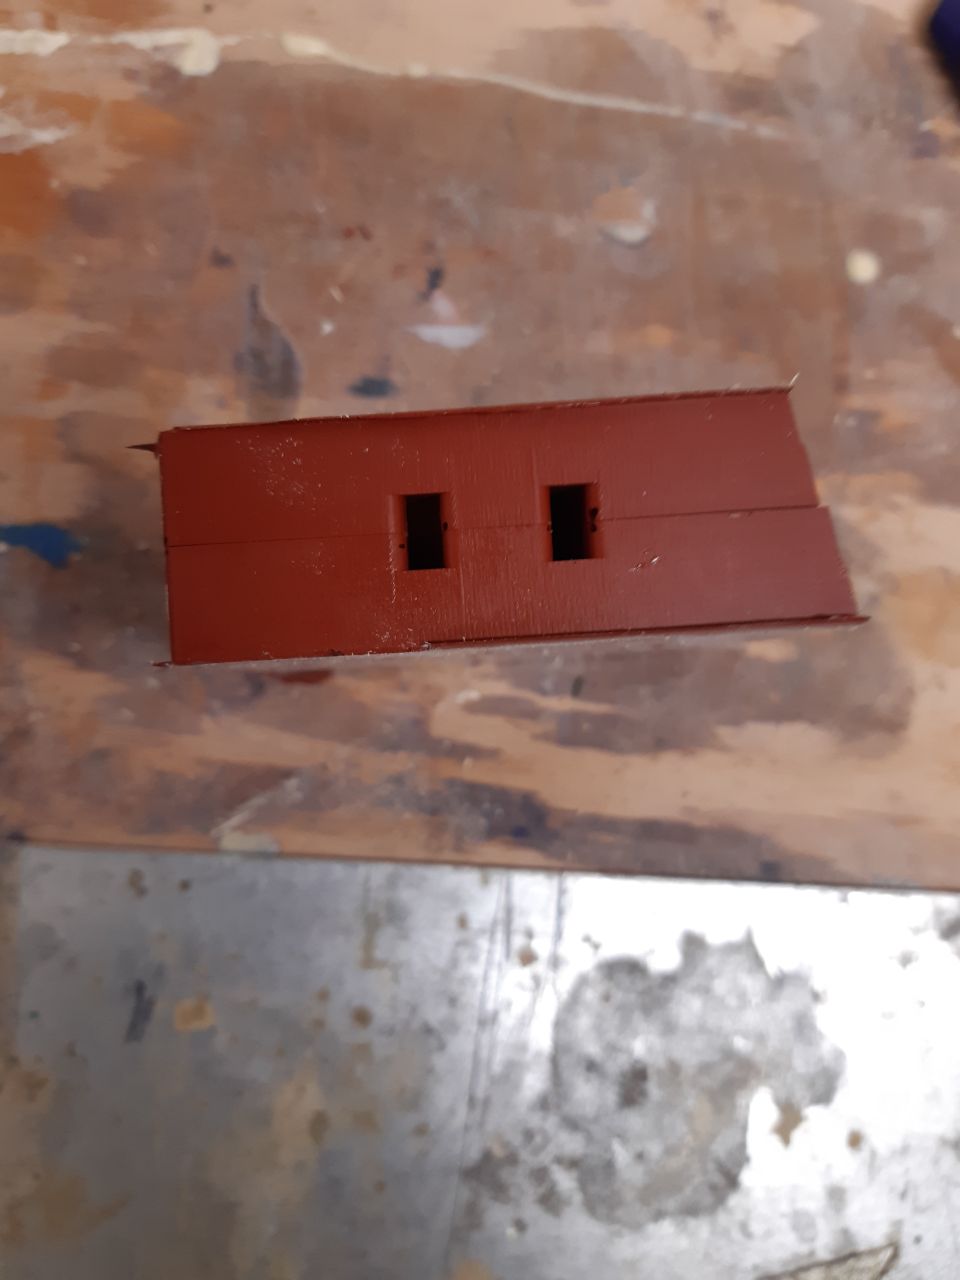
In order for the bubbles to rise to the surface, I slammed the wax mold on the table for a few minutes.
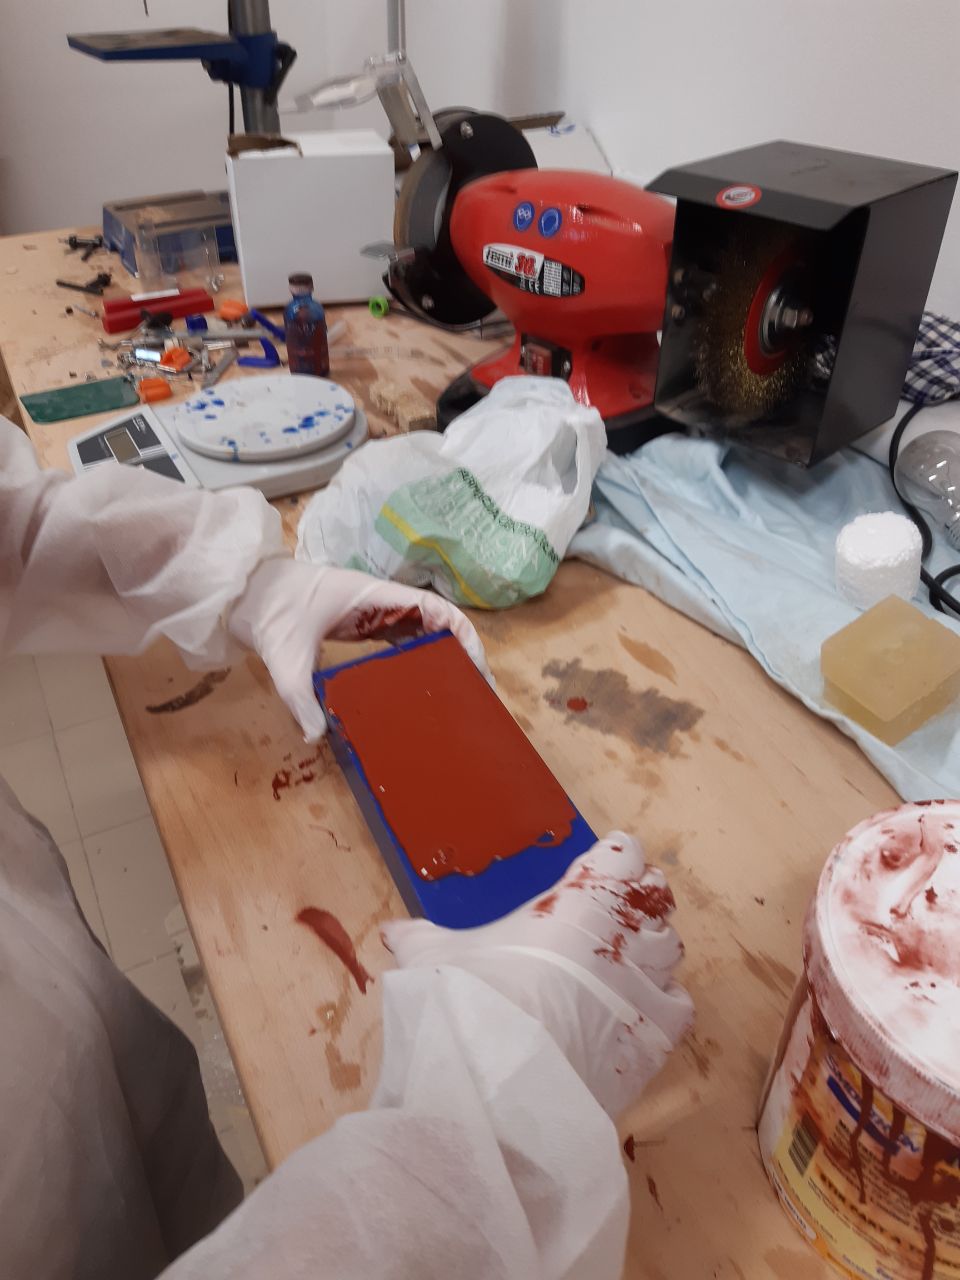
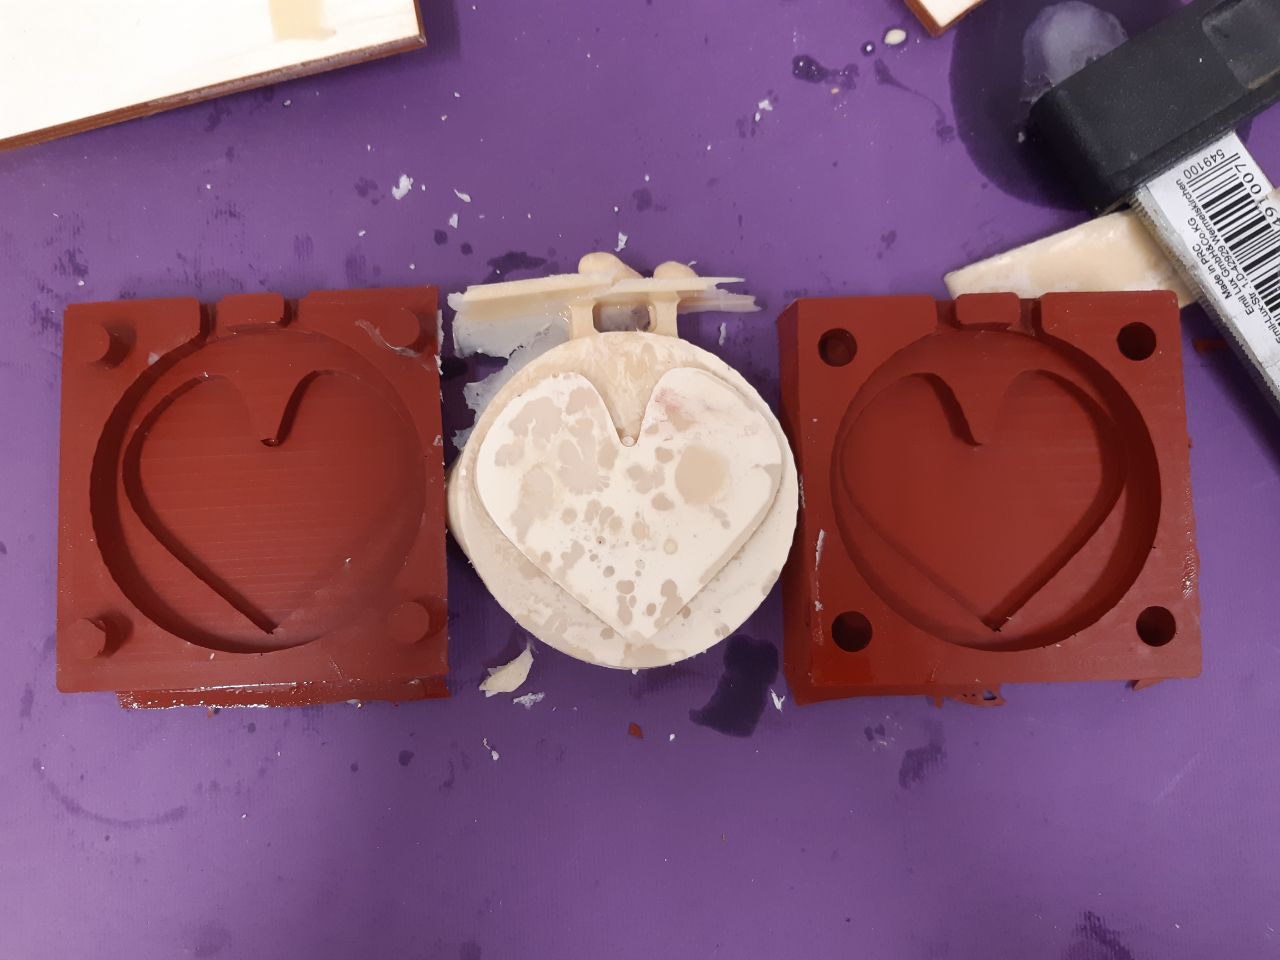
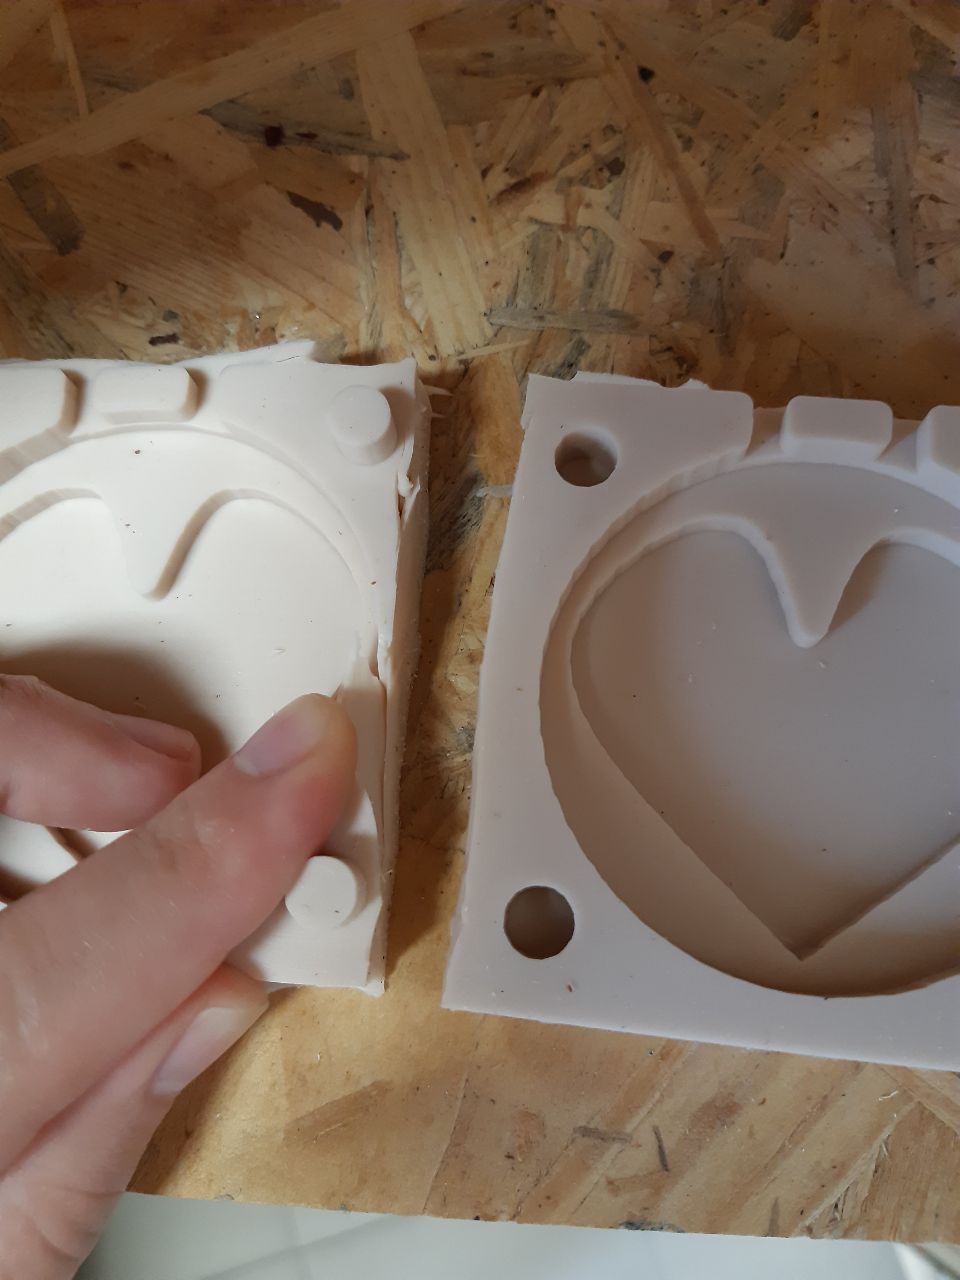
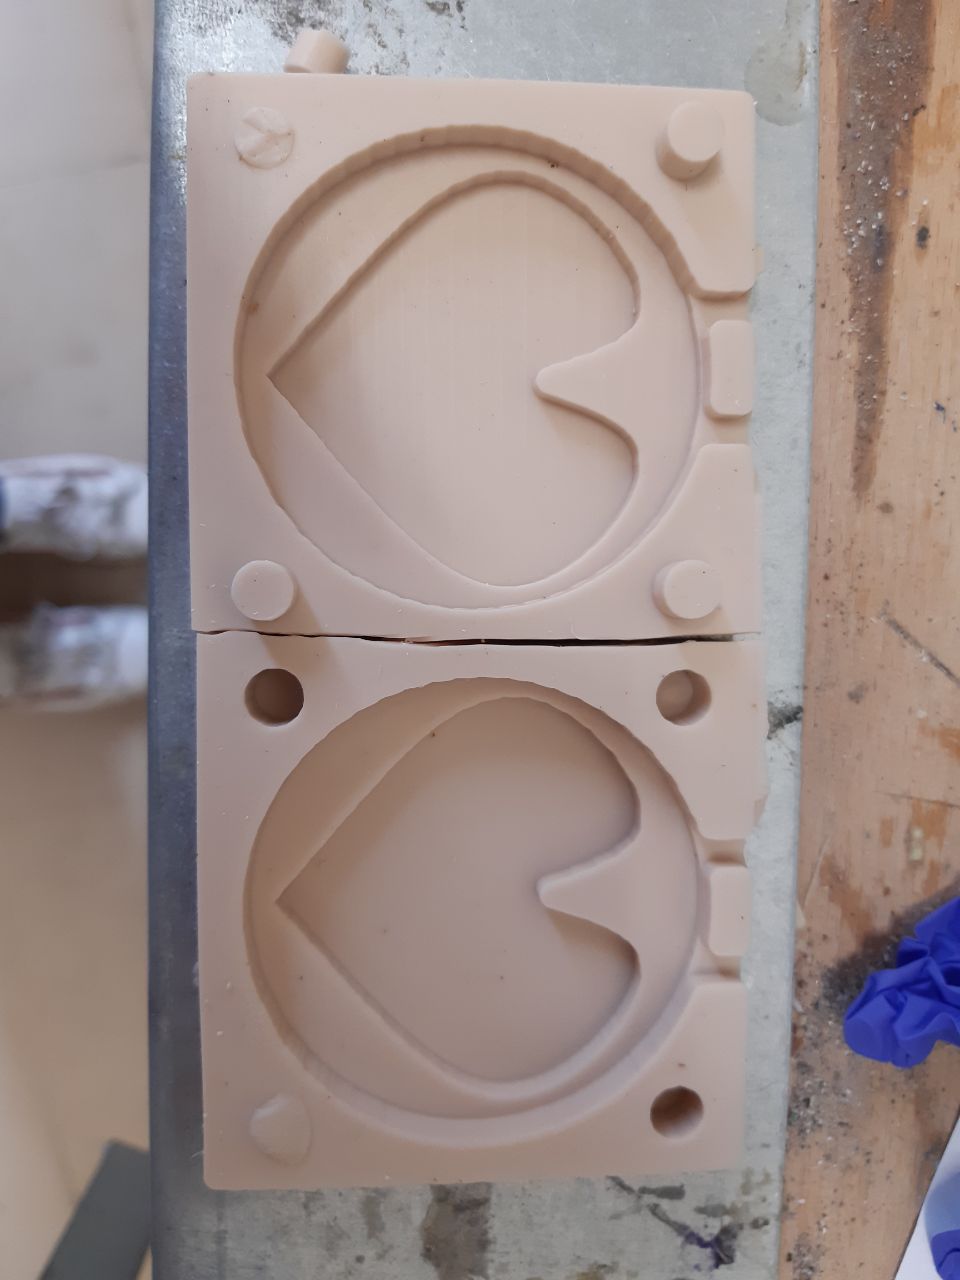
After 24 (48 actually) hours of Cure time, I removed the silicone mold from the wax base and split it in two with a knife.
First attempt
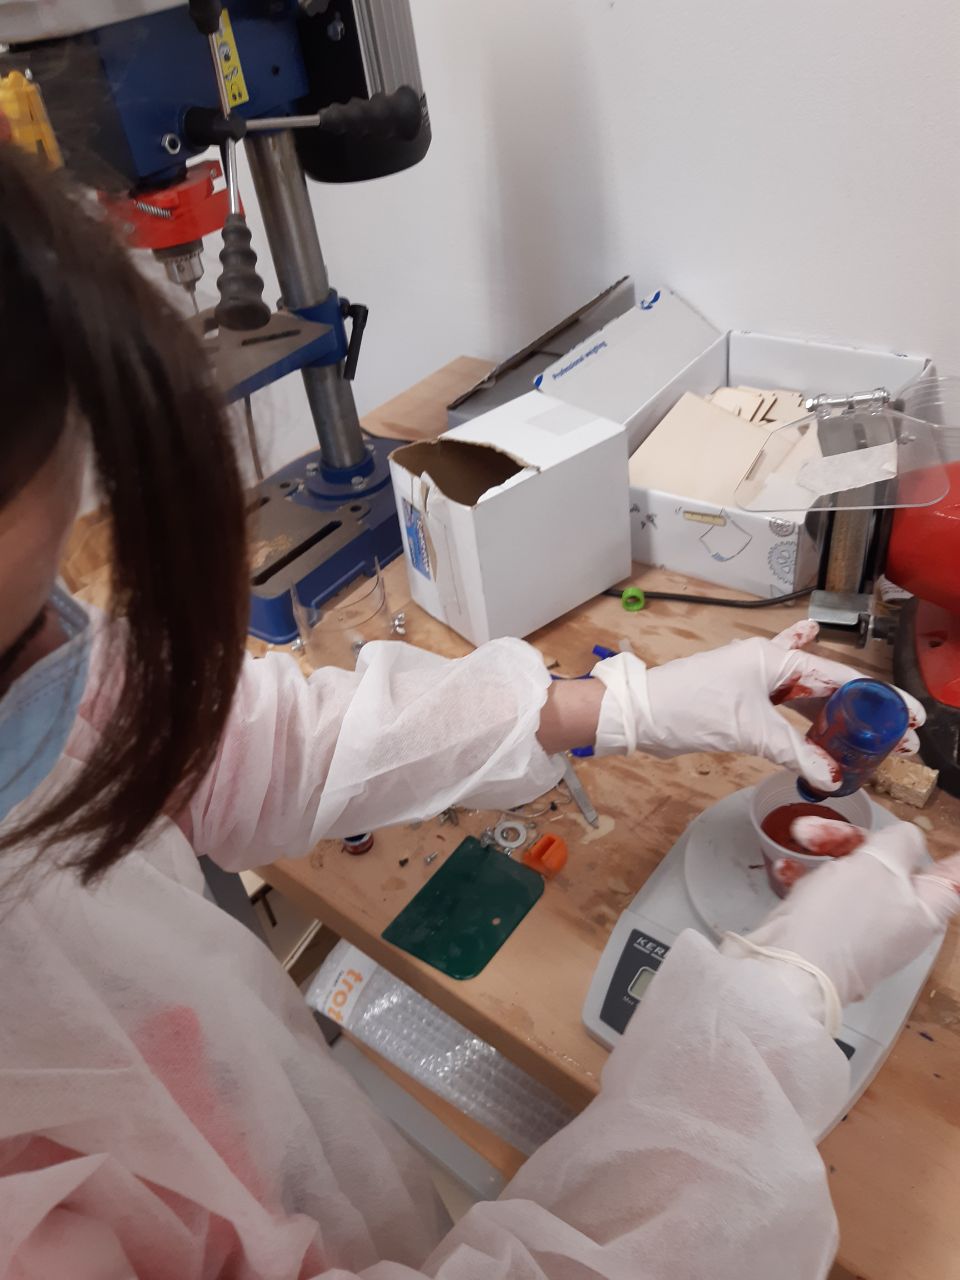
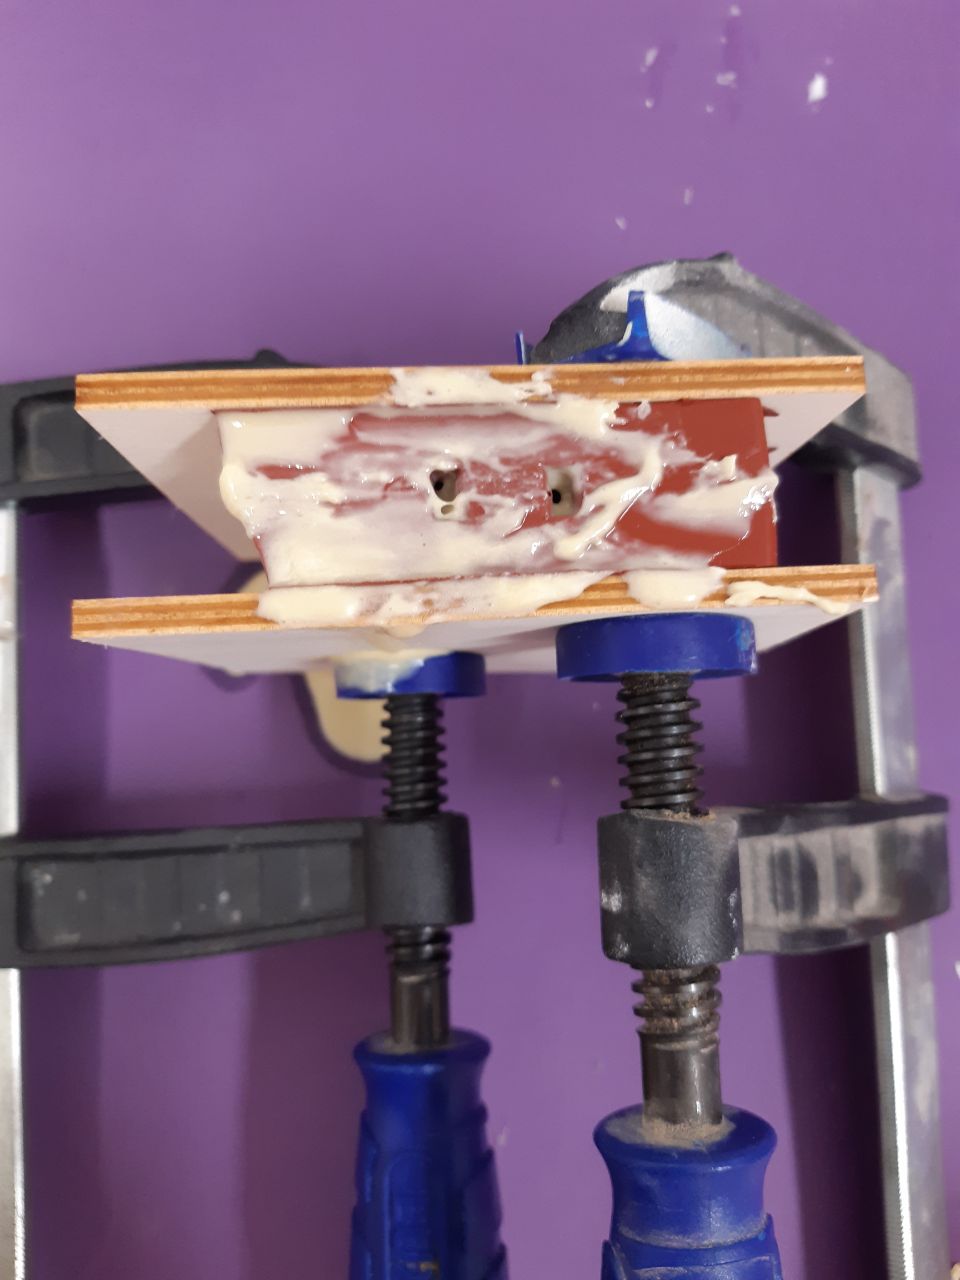
Then I prepared the resin with a 1:1 ratio between part A and part B. Also in this case we were given a first old resin to do the tests. In the first attempt I made two mistakes: the first is that I put too much material (80g in all) and the second is that I poured it too fast so I poured too much material for such a small hole and I also covered the second hole for the air leak. I waited 30 minutes and this is the result, obviously failed.
To hold the mould still I used two clamps and for safety I used two pieces of wood.
Second attempt
I wasted a lot of material the first time. So I used less material (25 grams in all), but this time it was too little. I took as a reference the quantities used by my colleague who, however, has a mould less thick than mine. At this stage, however, I must admit that I was able to pour the resin much more slowly and without dirtying too much, let alone clogging the hole for air leakage. So I could have considered myself satisfied with the result (maybe) if I had introduced the right amount of material.

Third attempt
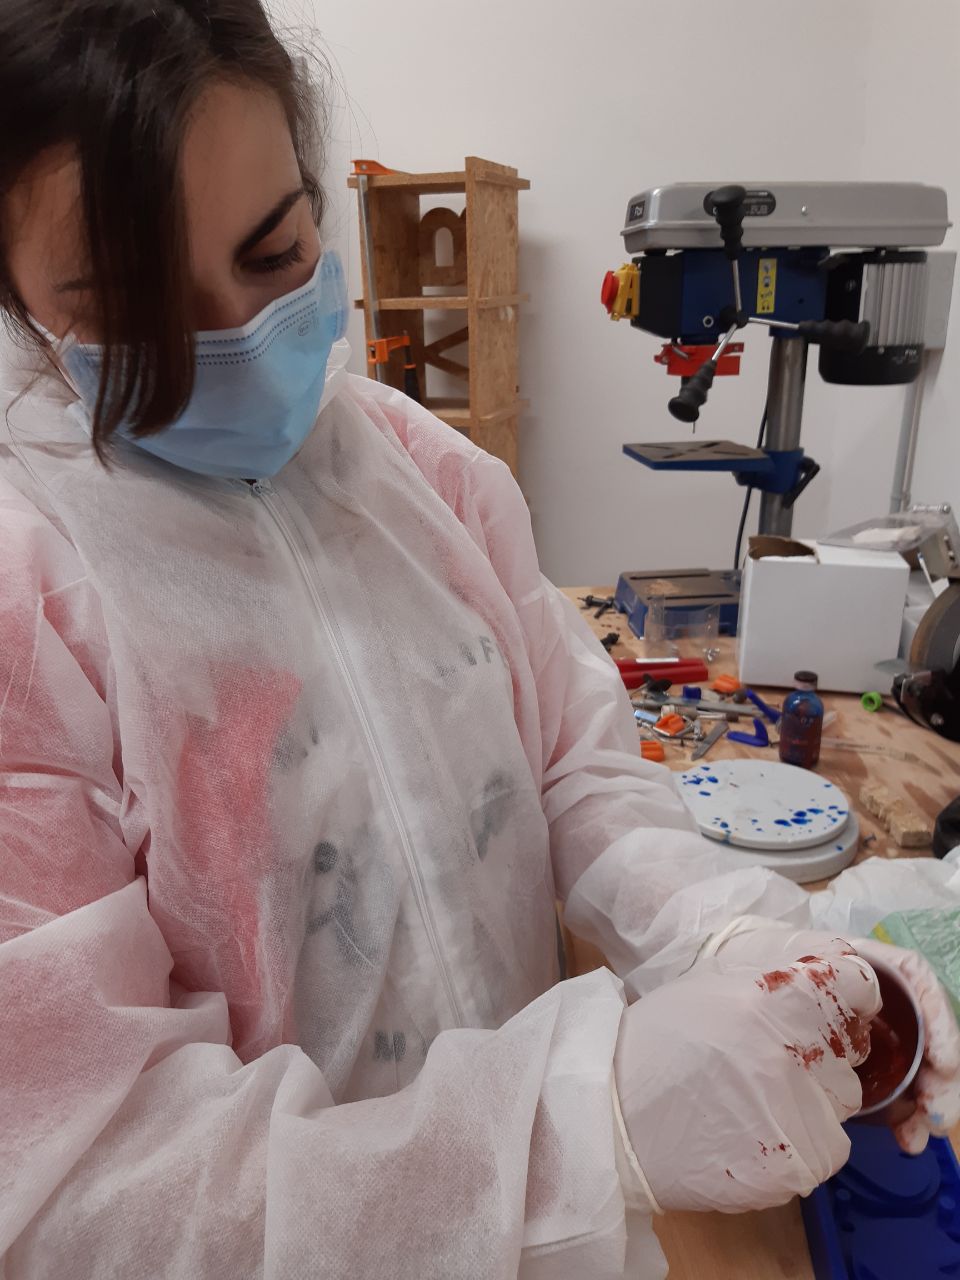
This time the measurements were correct (40 grams in all), but unfortunately I think I tightened the clap too much and thus created a point with less grip and a consequent accumulation of material.
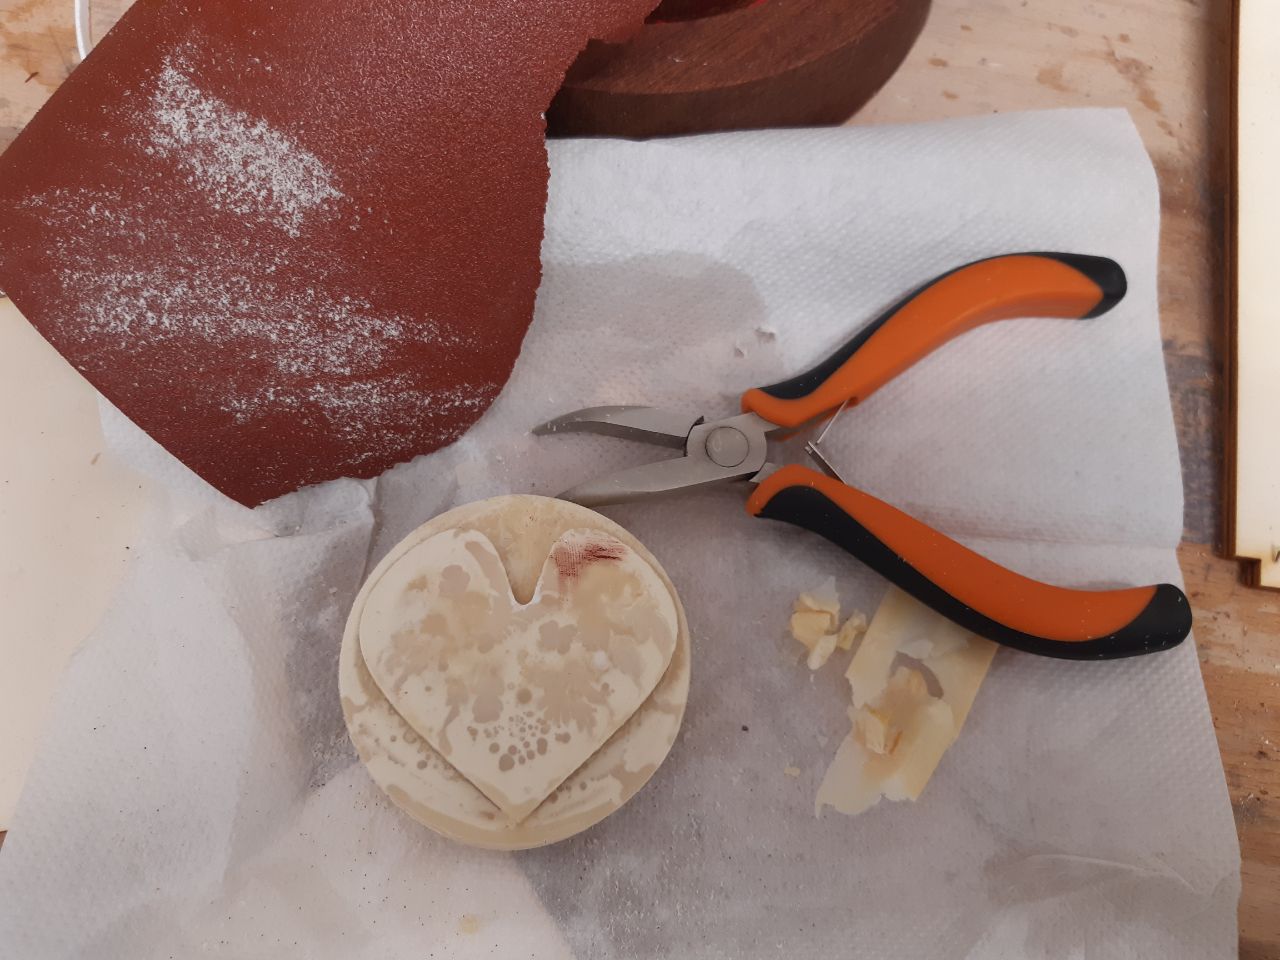
Actually, removing the excess material is not so bad but I decided to try again.
Fourth attempt
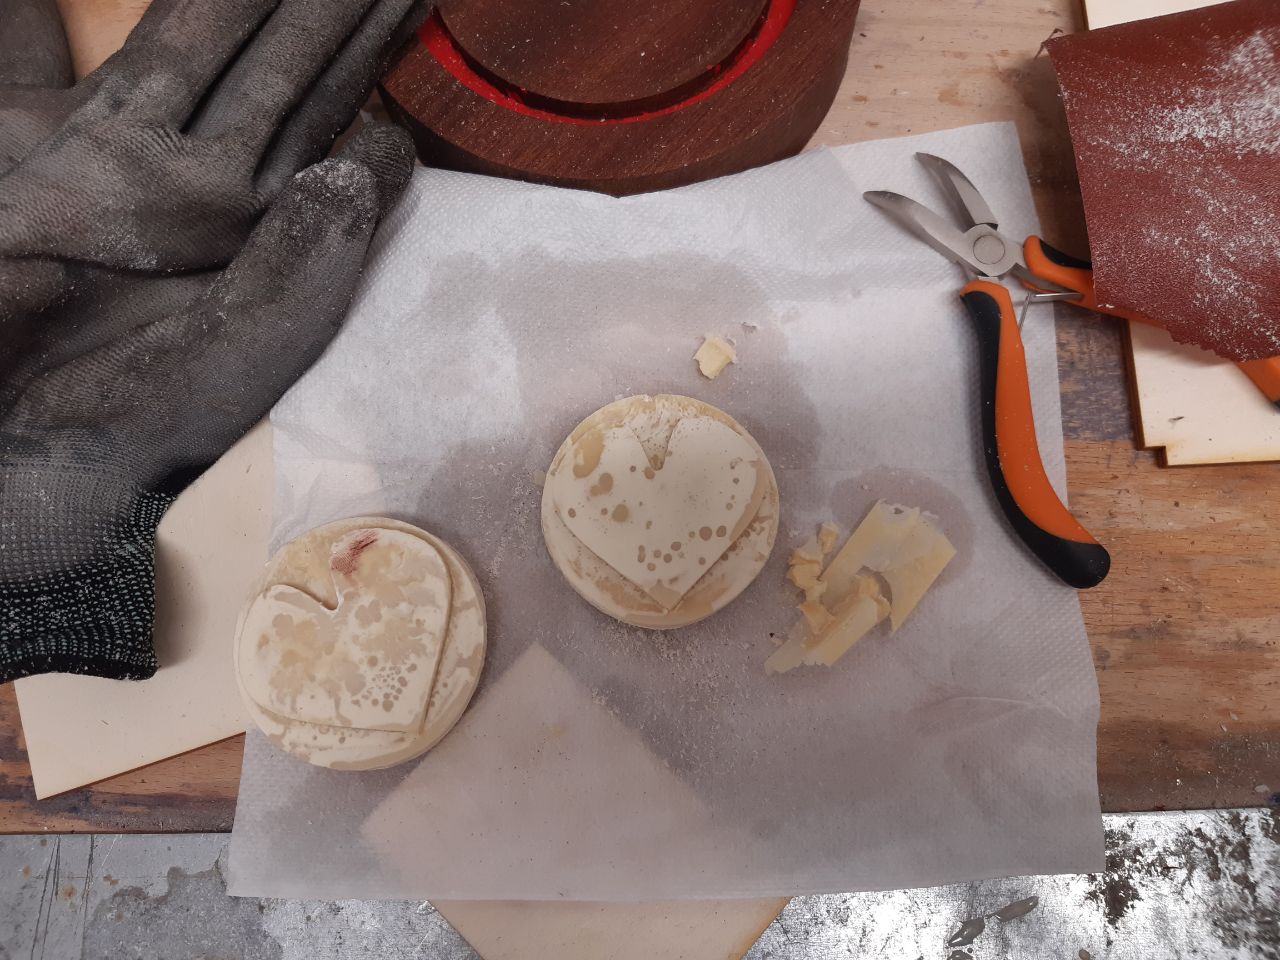
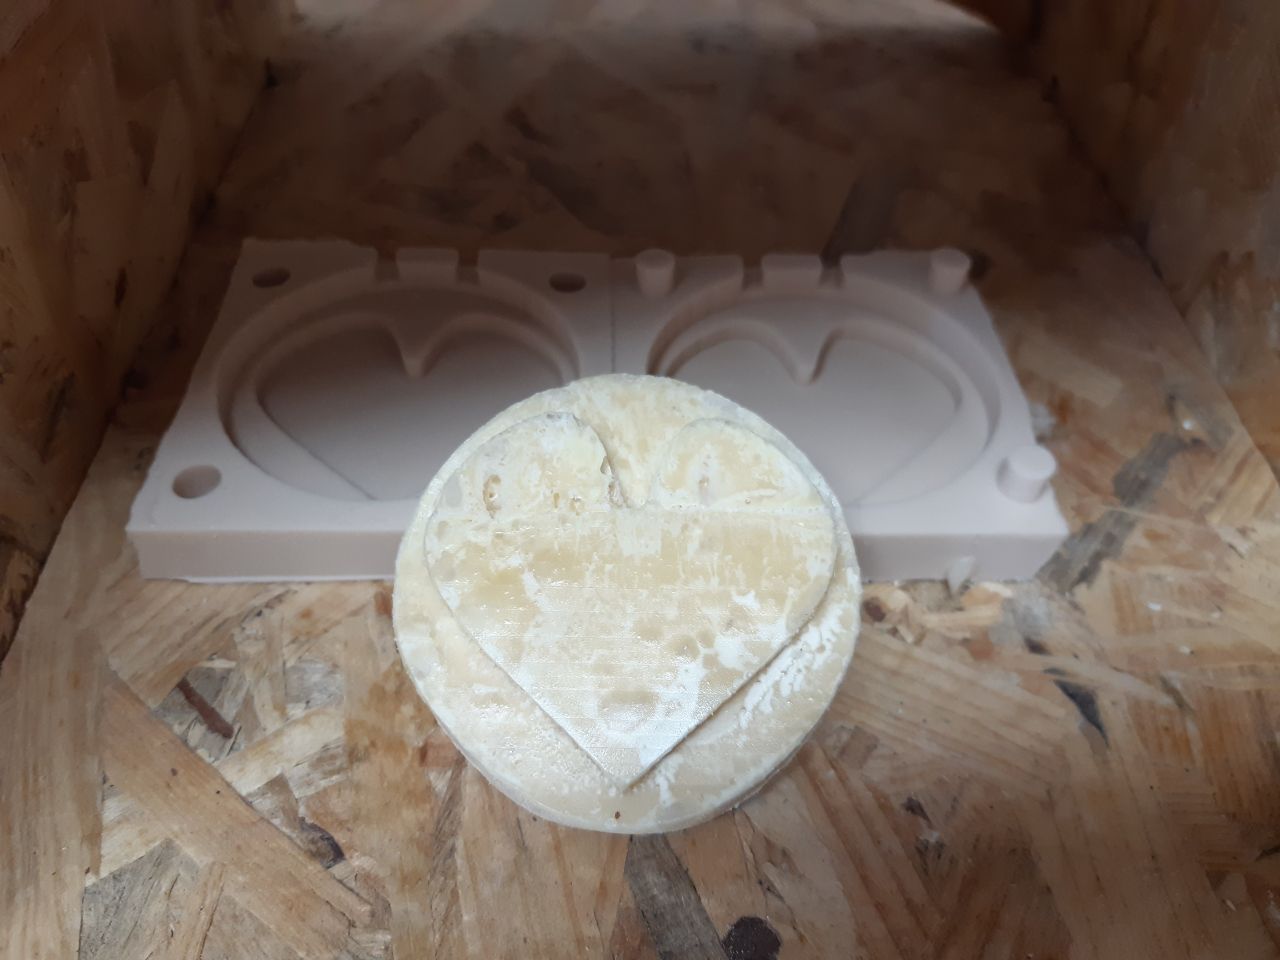
Finally this time, having taken into account past mistakes, I was able to obtain a satisfactory result. I poured the resin slowly, did not tighten the claps too much and used the right amount of material. I admit that I would have liked to have achieved this result on the first attempt, but I certainly won't forget what I have to be careful about next time!
My medallion doesn't have a uniform color, but it came like this all the time and also in my colleagues' attempts. My tutor thinks this is because the material we used is old. Tomorrow we'll use a new one.
This is the result using the new resin

We also used a different, much newer silicone. When I took out the first mould, however, I broke the wax wall so I used some clap and a piece of plywood. Unfortunately, however, I didn't leave enough space between positive and negative and cutting with the cutter (which is not easy since my mold is very high) I accidentally cut too much.
So I redid the process
To conclude, I used the new mould even though I used the old resin.
You can find the downloadable files here
Mold and countermold.stl
Mold and countermold.iges
Onshape document link