17. WILCARD WEEK
The statement raised in the FabAcademy 2020 schedule for the assignment to be achieved this week 17 (Wildcard Week) is this:
Individual Assignment
- Design and produce something with a digital fabrication process (incorporating computer-aided design and manufacturing) not covered in another assignment, documenting the requirements that your assignment meets, and including everything necessary to reproduce it.
This week there is no proposed group assignment.
I have continued recording my FabAcademy assignments in my private calendar as I have been doing every week since the beginning of this course.
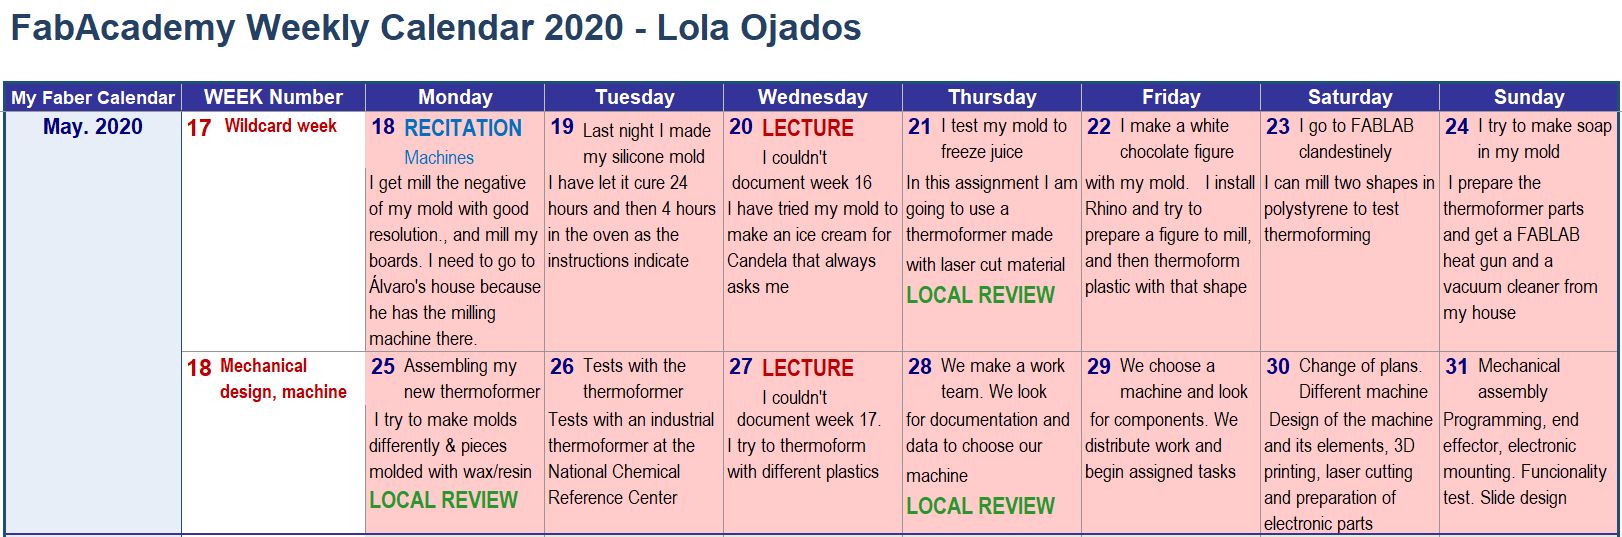
This week we are still homebound and without full access to the lab, so I’m going to use my imagination and try to do something that I can develop in the makeshift lab that I have set up at home.
VACUUM THERMOFORMING
For this wild card week, I have decided to use the vacuum thermoforming technique.
Vacuum thermoforming is a technique in which a plastic sheet is heated to a deformation temperature, stretched over a single-surface mold, and forced against the mold by vacuum, taking the shape of that mold. On cooling, the plastic will have acquired the desired shape.
In our Fablab we have acquired a machine to be able to work with this technique, but it has not yet been supplied to us due to the Covid-19 pandemic and the stock and distribution problems that are occurring.
As an alternative , we have users who belong to a public center (National Reference Center for Chemistry) that has one of these machines, similar to the one I have bought.
One of its workers, who uses our techniques from the SAIT of the UPCT a lot and whom I have helped a lot in carrying out analyzes, papers and publications for his doctoral thesis, has offered me to use this machine that is in his laboratories while we do not have the ours, the bad thing is that, at the moment it must be unofficial hours, since this center is also closed to the public for health security and only those in charge of some of its sections have access and in shifts so as not to coincide with each other.
So I depend a little on when he can go to use the thermoforming machine.
In this case, while waiting, I had to go from a first PLAN A to an alternative PLAN B , as in the previous week.
17.1. PLAN A
My goal with this task is, initially, to produce the transparent plastic packaging for the soaps that I want to do in the assignment of week 16, which I still have to do, because at the moment I am using my mold to make ice cream and chocolate bars with shapes. of baby motifs.
Later, waiting to be able to go to the CRNQ to use the thermoformer, I have gone to a plan B, which I also think will give a lot of play to show something manufactured in a different way in this assignment.
17.2. PLAN B
Already nervous, because I see that in this strange and difficult maelstrom, in which I am also having health problems, work is piling up on all fronts, and it is difficult for me to be able to keep up with the assignments of FABACADEMY, I begin to look for other alternatives to shape the work proposed this week.
On the website of the supplier of the products that I bought and used for the previous assignment (FEROCA), I have found something that I found very interesting for what I want to do now and I have decided to buy it since it is veeery affordable and try it, and yes It also works well, when I can go to the Fablab I will make a replica to a larger size to see how it works.
It’s about this:
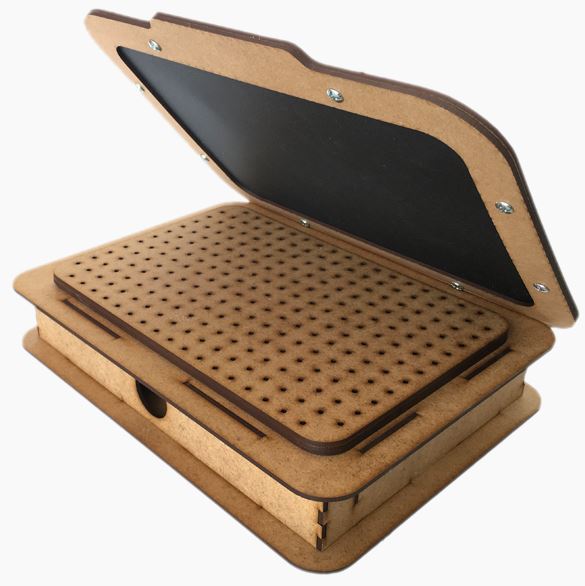
It is a domestic thermoformer available in two sizes, A5 and A4. Comfortable standard sizes to have in small spaces.
I have decided to purchase the A4 size.
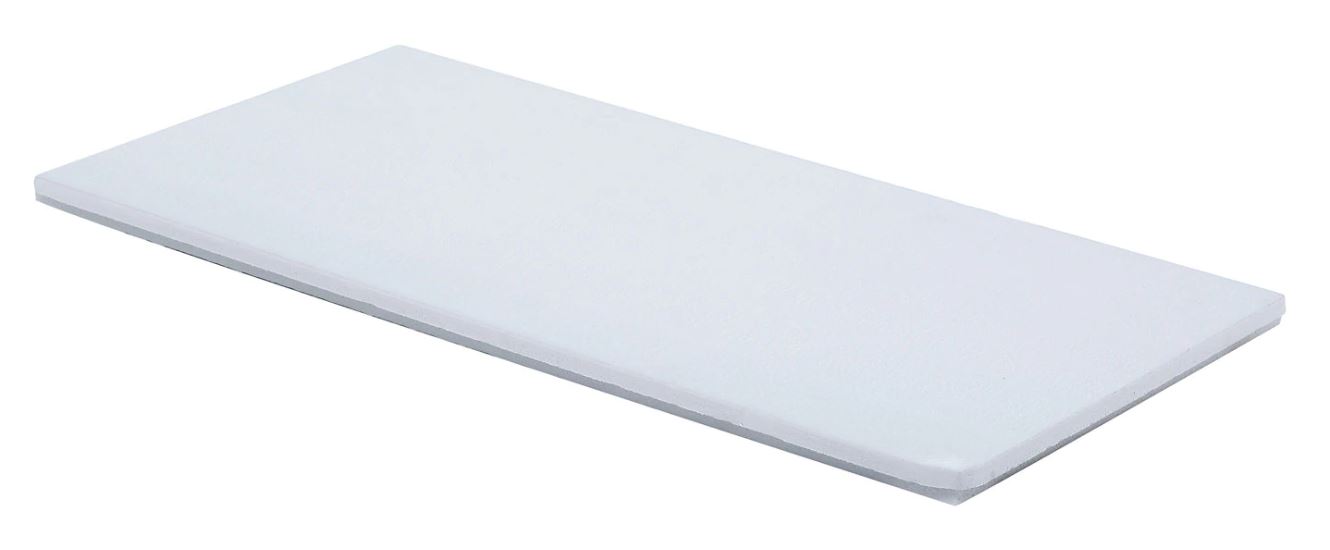
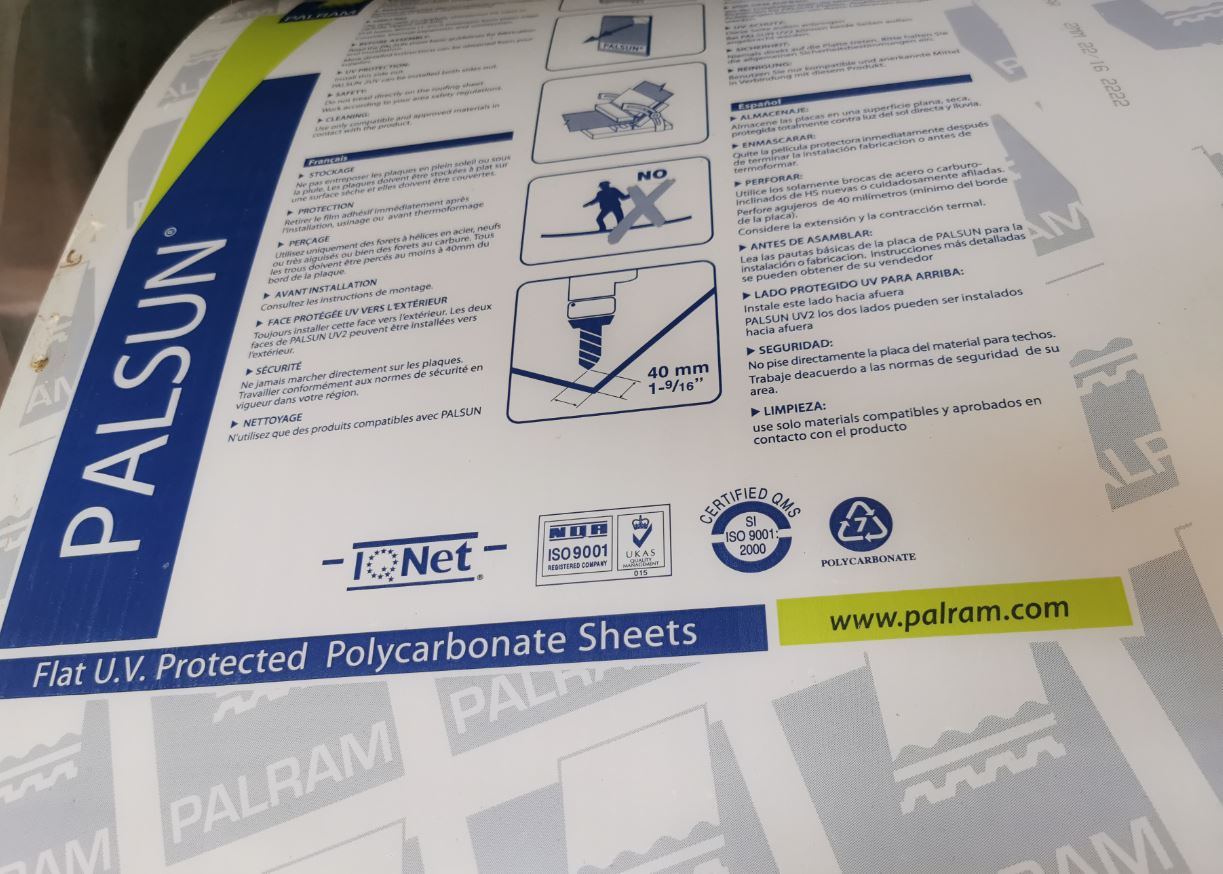
Its base of this DinA-4 size makes it perfect for making runs of small pieces in any type of plastic type Worbla which is available in different colors, normal, black, red and especially transparent, a more difficult worbla to work with with the stripper and that with this machine gives amazing results.
It also works with HIPS (High Impact Polystyrene) 1.5mm or less thick.
It is not suitable for use with PVC, Polypropylene or PET.
It is necessary to make it work the use of a standard vacuum cleaner .
In this video from the Feroca website you can see how it works:
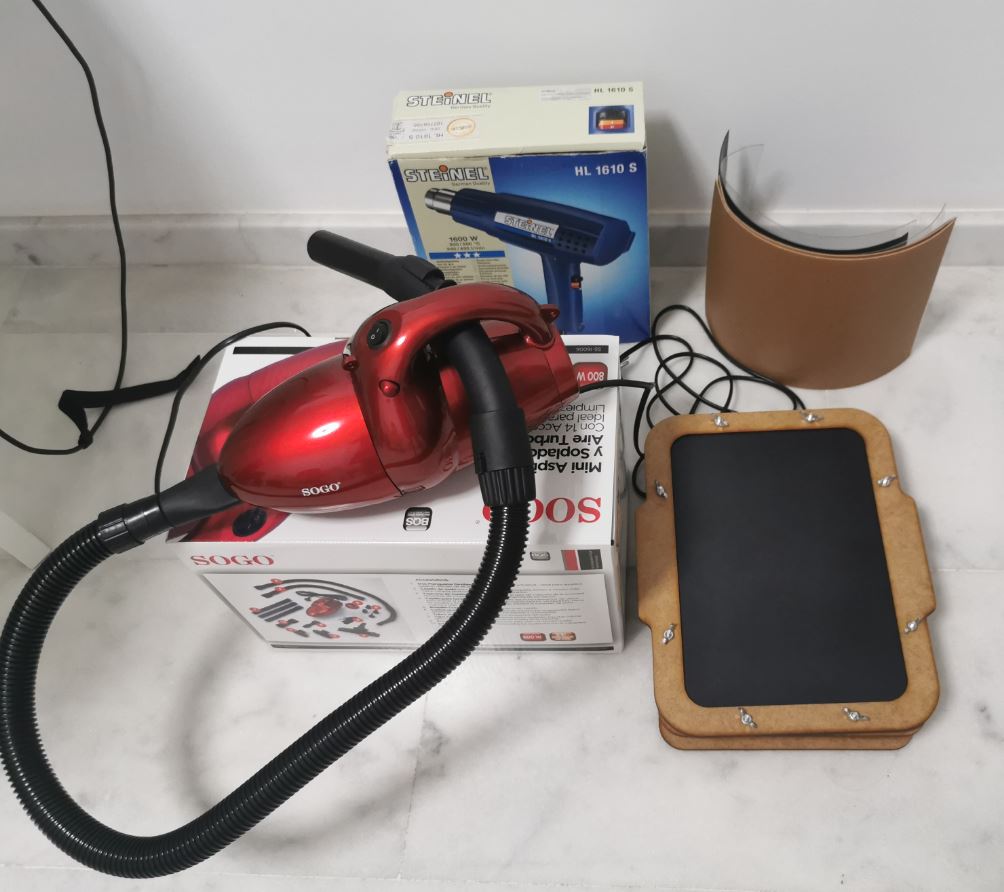
It is actually a very simple machine made up of parts from laser cutter manufacturing .
These are the parts that came in the kit that came to my house after purchasing online:
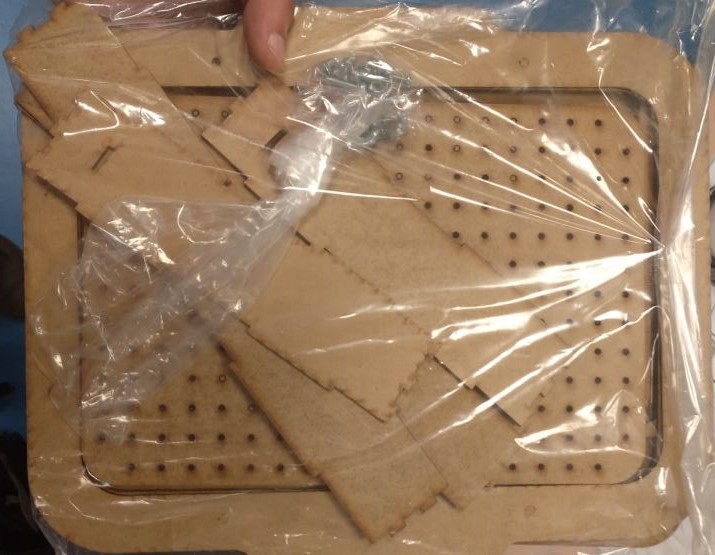
I have also bought worbla of different colors for testing.
17.2.1. Design to be thermoformed
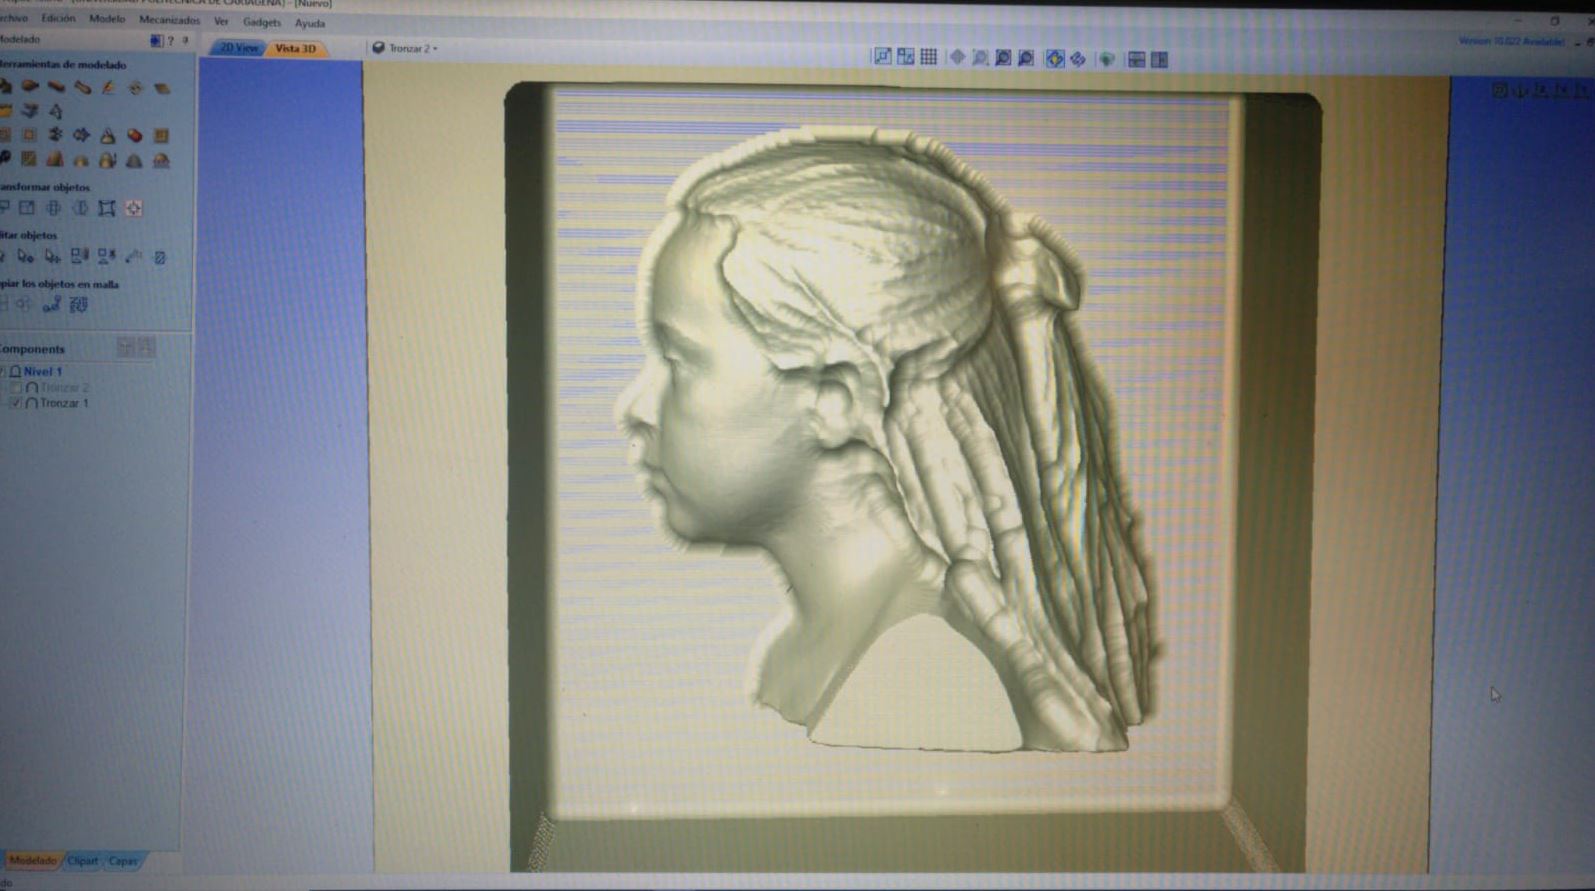
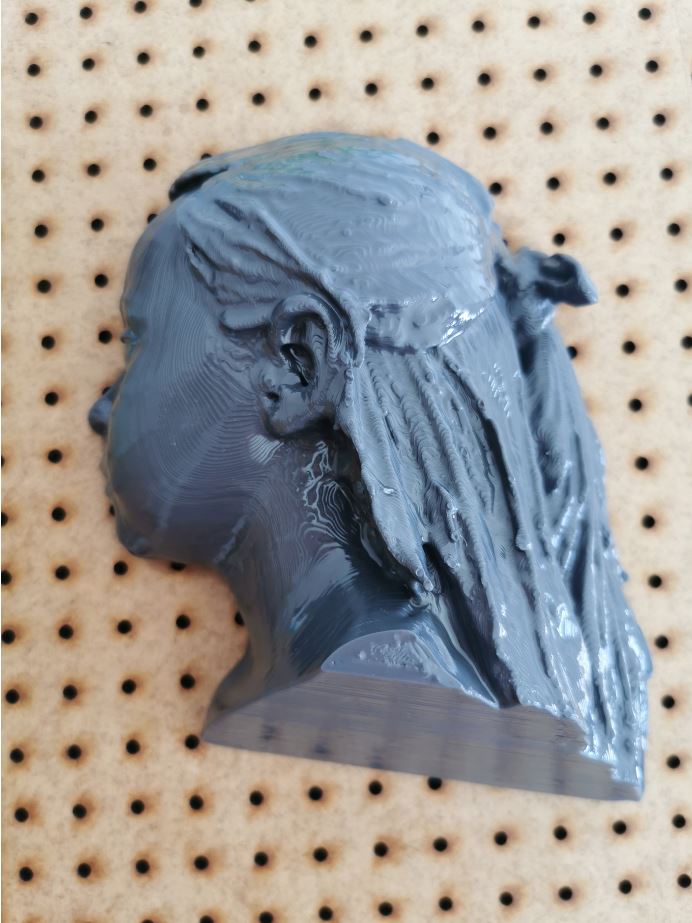
Regarding the form I want to obtain, I was keen to use Candela’s scan, in the previous task in assignment 16, so I will start from that idea again.
I start from the stl file obtained in the 3D scan of Candela and I try to divide it into two parts to use one of them and make the plastic shaping.
I am going to use the Rhinoceros software to do this.
I have not worked with this software for a long time, I used it a few years ago for naval design, it was very easy to get the frames and sections of the structure of a ship since this program works very well with surfaces and nurbs curves.
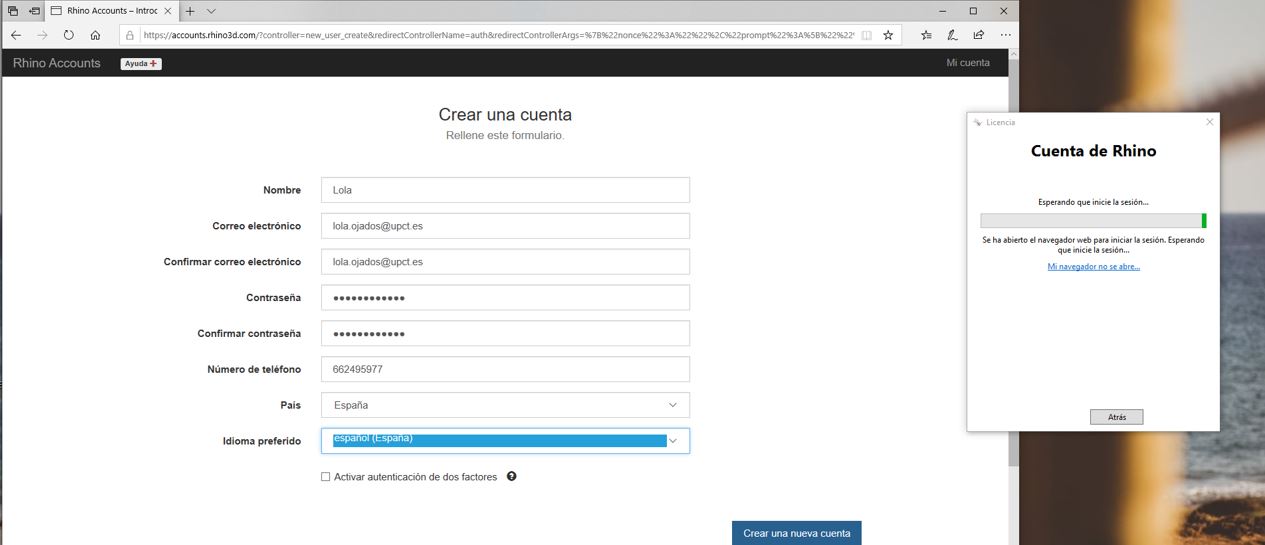
But I don’t remember how it works very well anymore and I don’t even have it installed on this computer I’m working with at home, so I have to start from scratch even with the installation.
I download Rhinoceros evaluation version 6 and I create a Rhinoceros account:
Once the license code for the downloaded version has been added and the installation done correctly, I am going to test with the stl designs from last week’s scan to see if I can create a cut in half and make a piece to use as a mold for the thermoforming process.
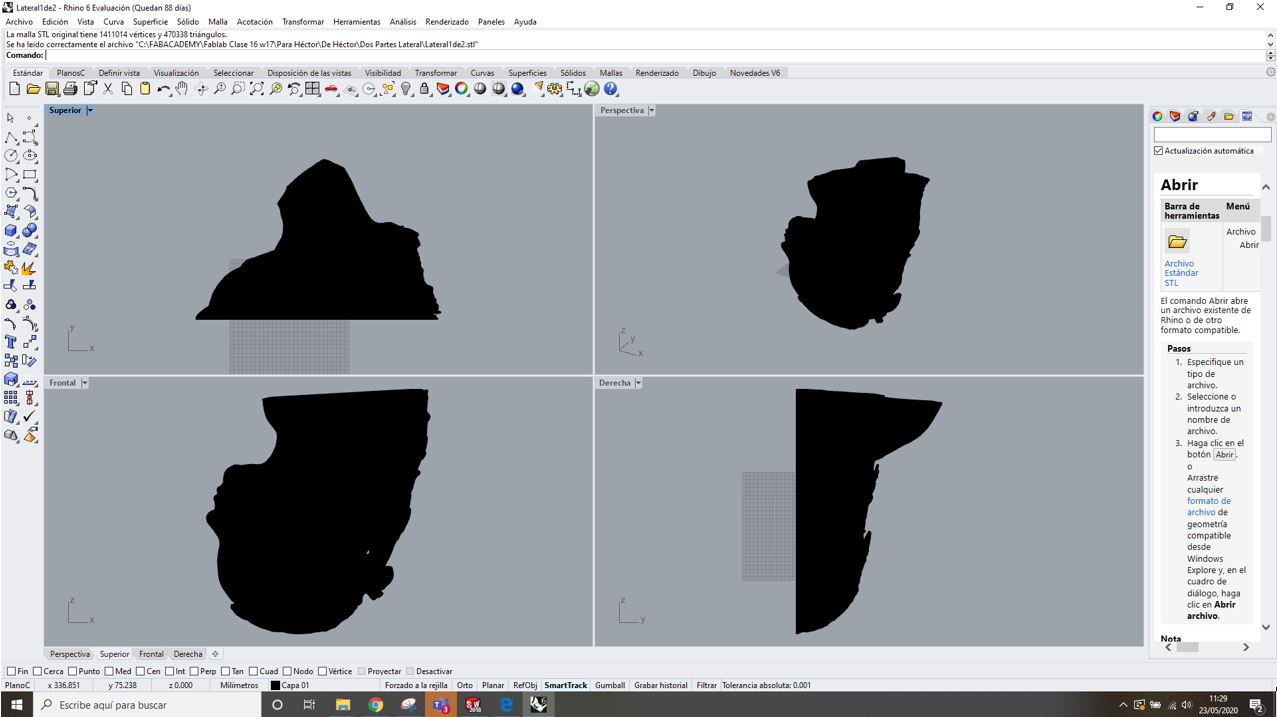
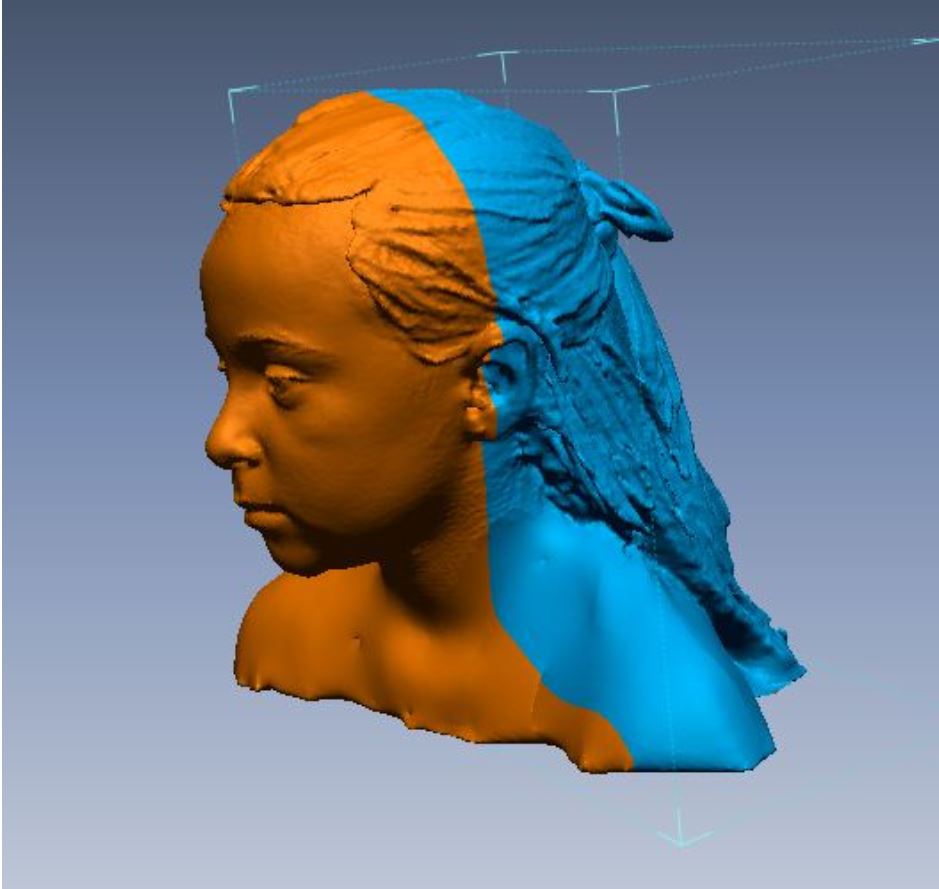
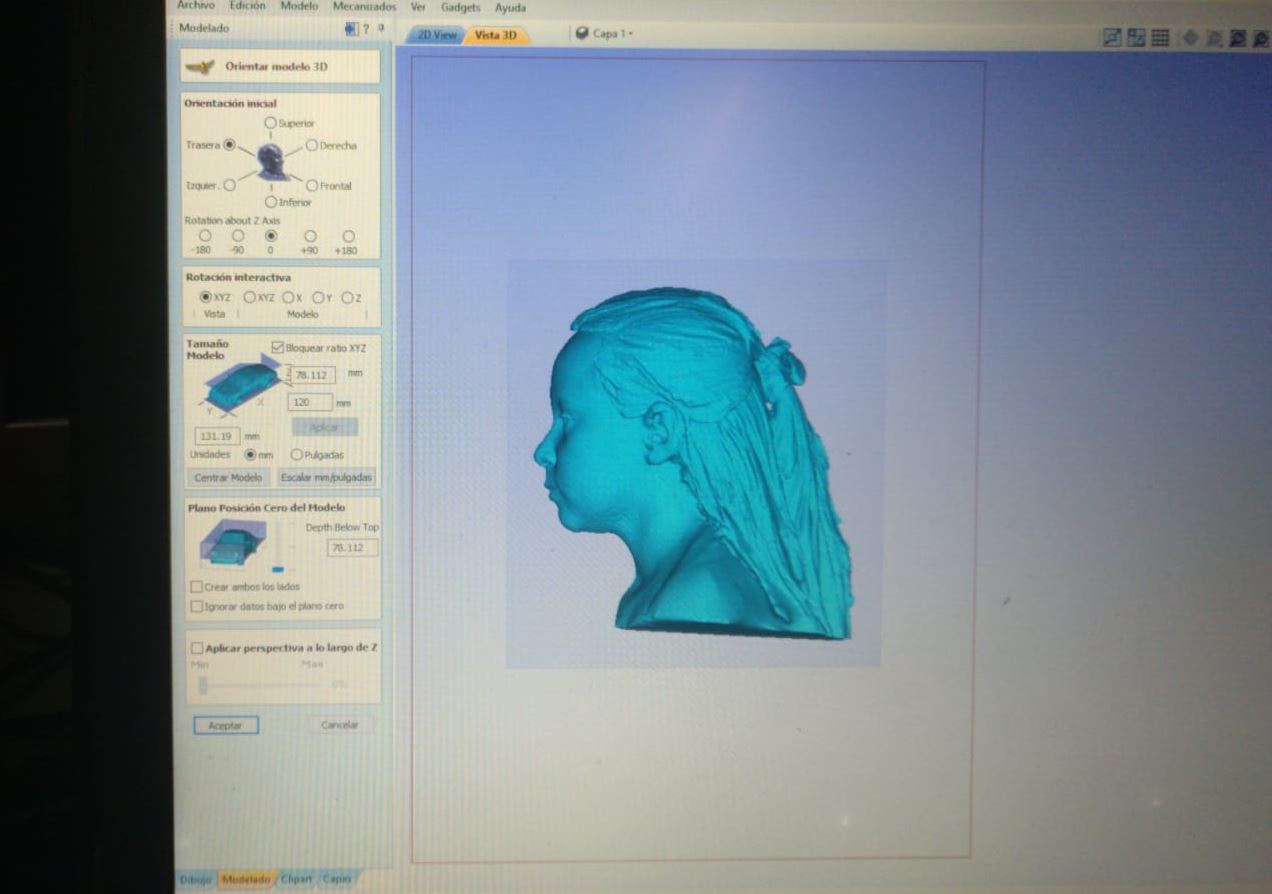
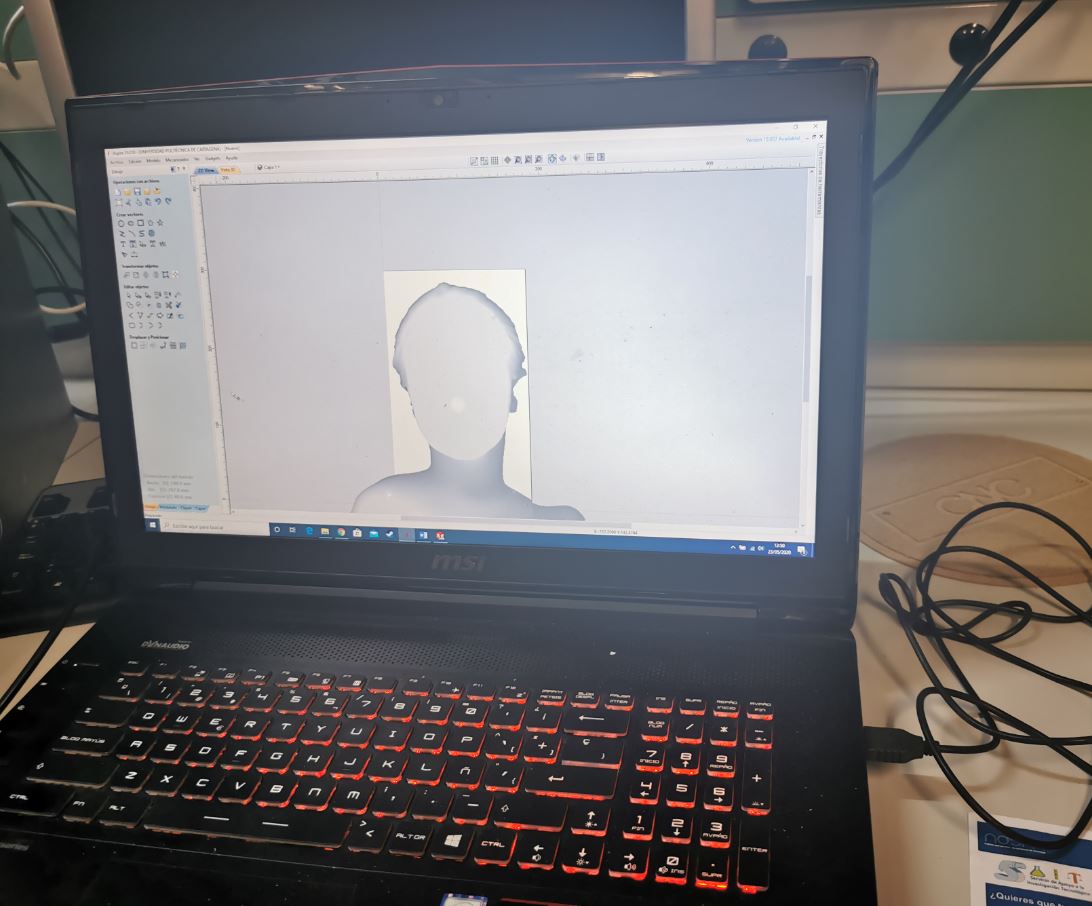
From Rhino, I import in stl of the Candela scan.
I have previously made a cut with the Geomagic software that is mesh treatment and with which I manage point clouds and scan meshes, with a plane that divides its head into two profiles.
I keep one of the parts that I want to make the milled mold from.
After importing this stl I want to see its dimensions, I go to mesh work mode and do all these operations:
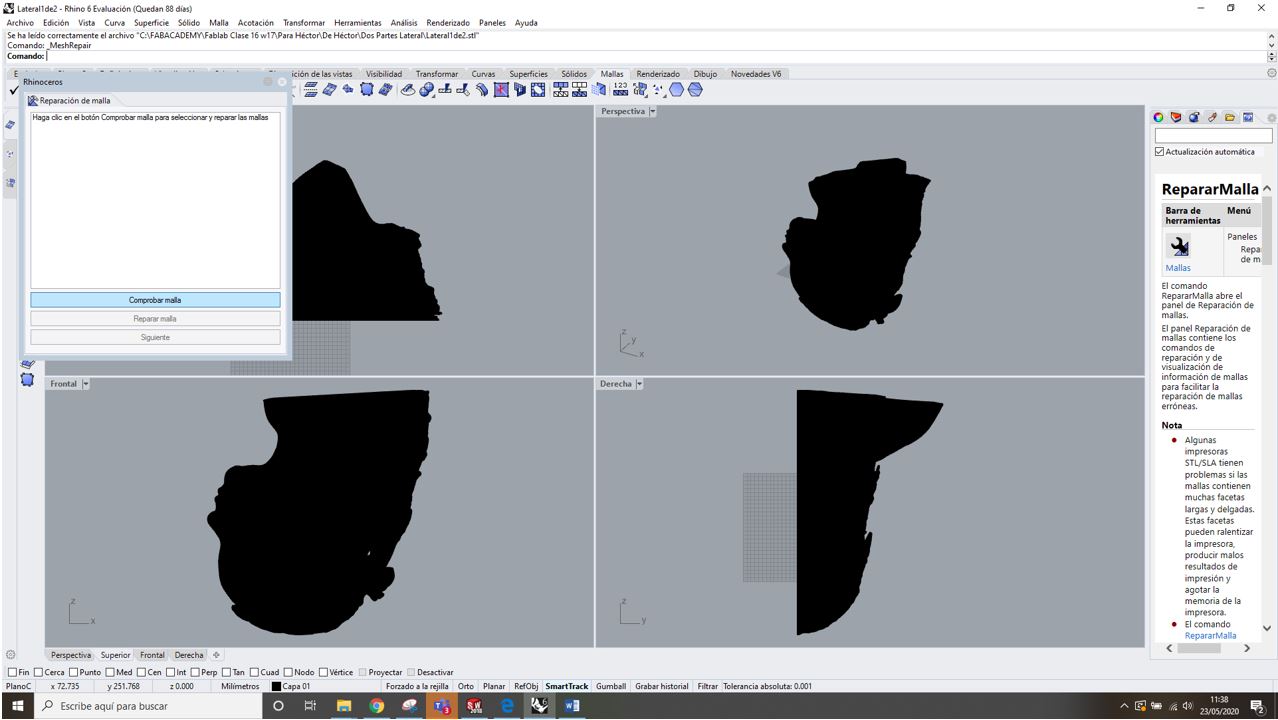
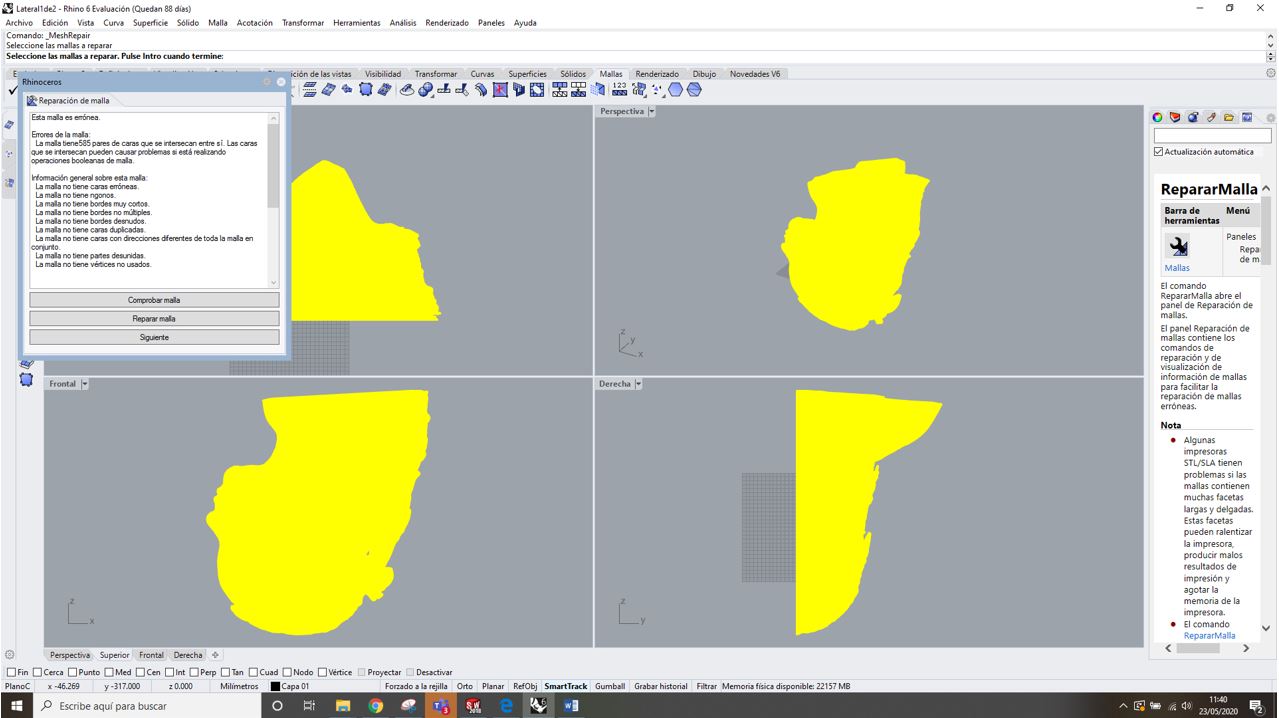
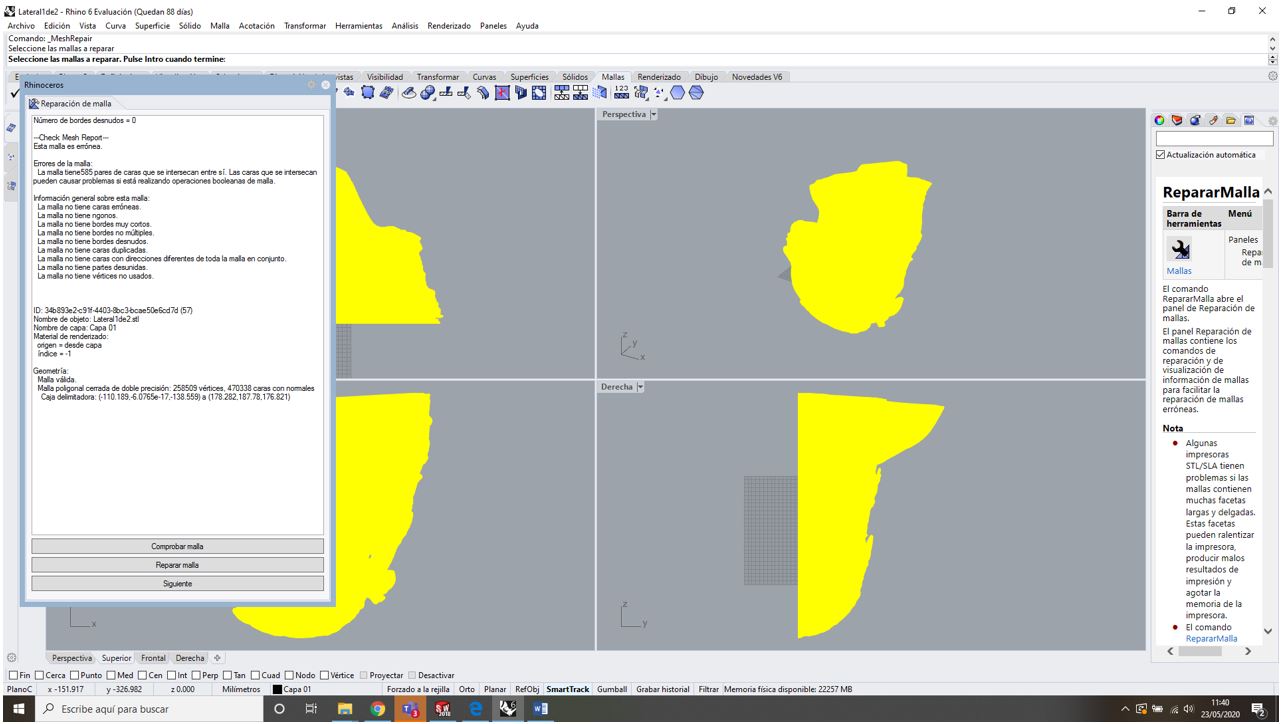

I select “Finish”.
I search and watch videos to cut mesh, solids, create cutting planes…
There is a lot of information online, here are some useful links:
Consulting what I need, I manage to cut the mesh.
Results:
These are the generated files,
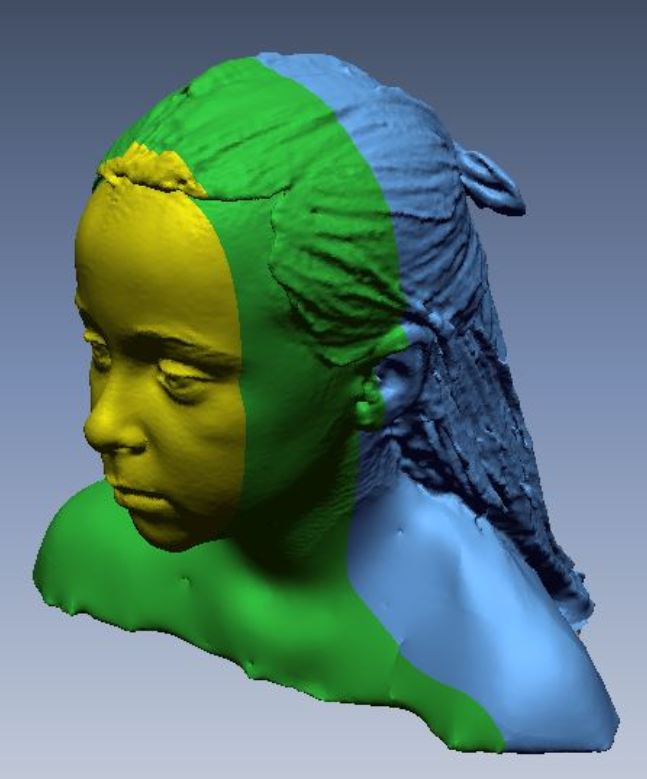
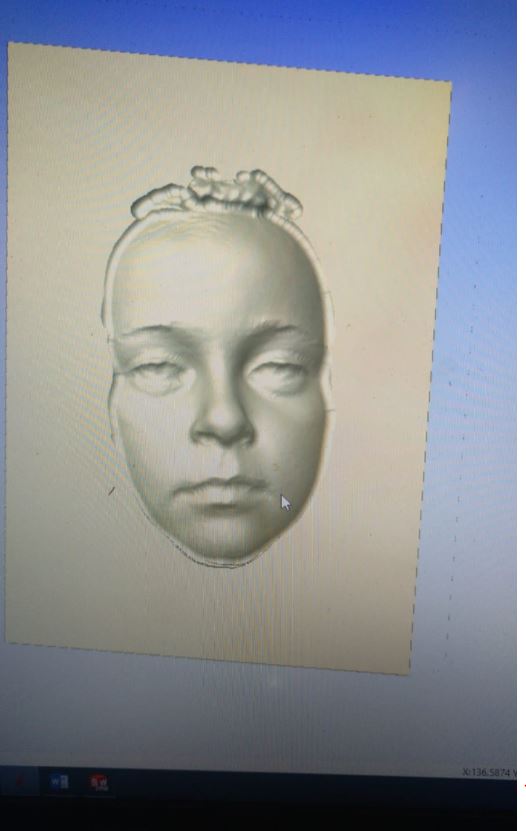
- Scanned head, ½ face cut, hair
- Scanned head, cut ½ two profiles. Right profile and left profile of the head.
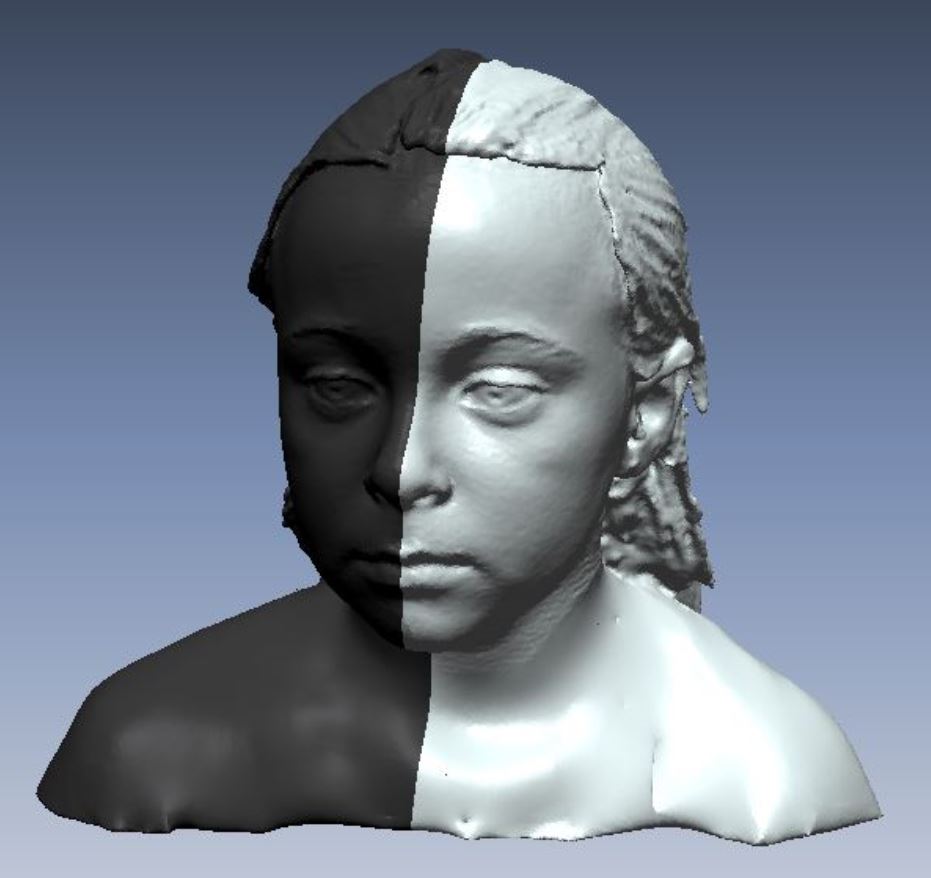
- Head scanned, cut into three parts, to stay ahead and try to make a mask.
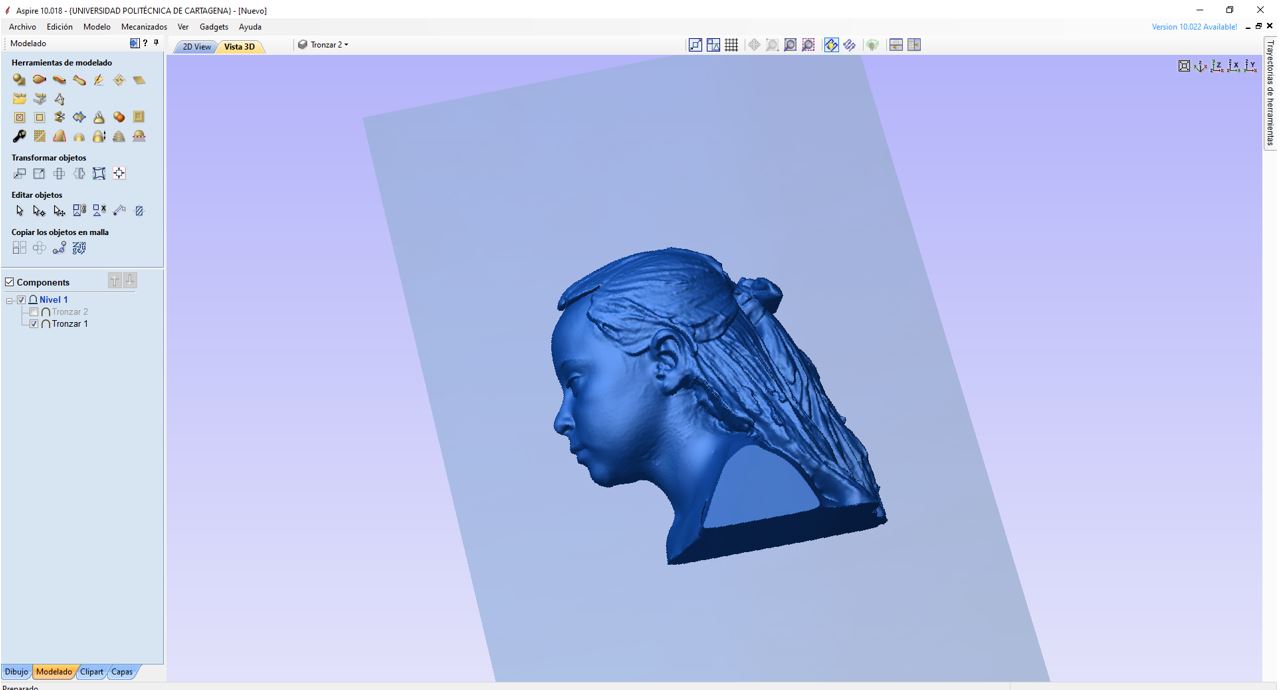
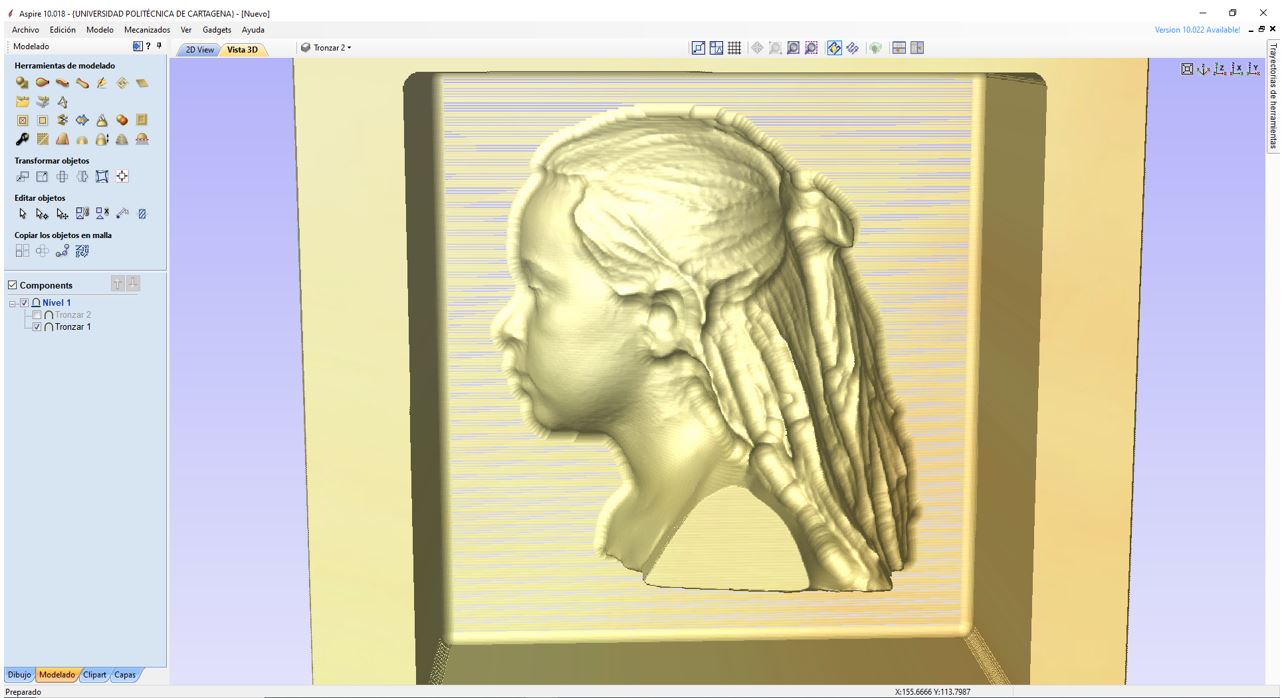
From here I use the profile section and I keep one of them, the left profile specifically, I am going to mill this in a size that fits in my domestic thermoformer.
17.2.2. Generating Gcode
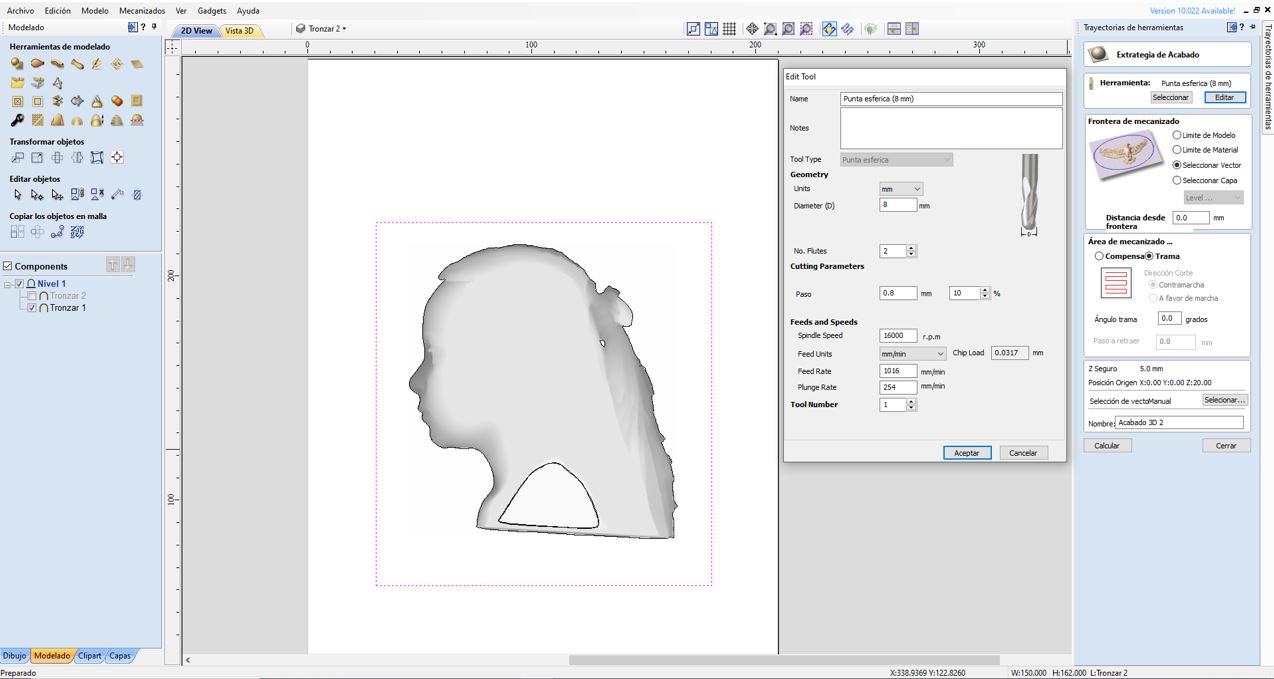
To do this, I am going to configure the milling in the Aspire software, as the shoulder height is greater than the length of the milling cutter that I have with a round tip, from this program I make a cut and set milling parameters.
I do the simulation of the milling and I check that everything is ok and no strange things happen.
Simulation of the roughing process.
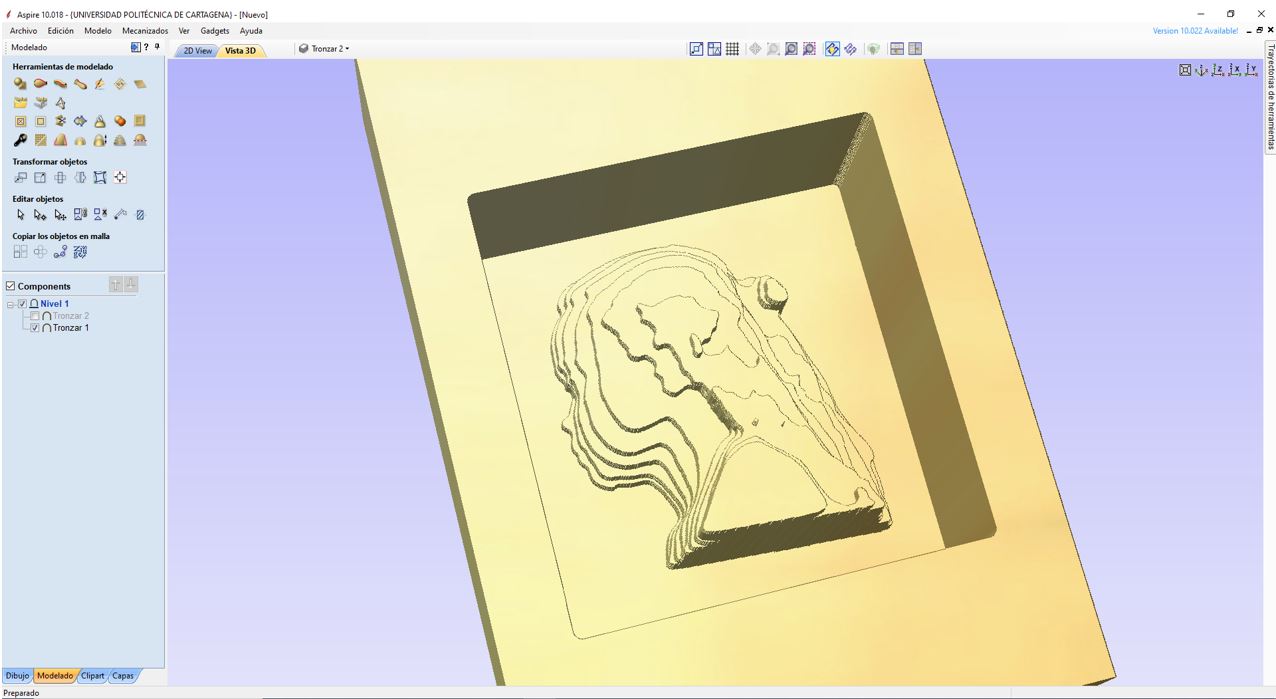
Simulation of the finishing process.
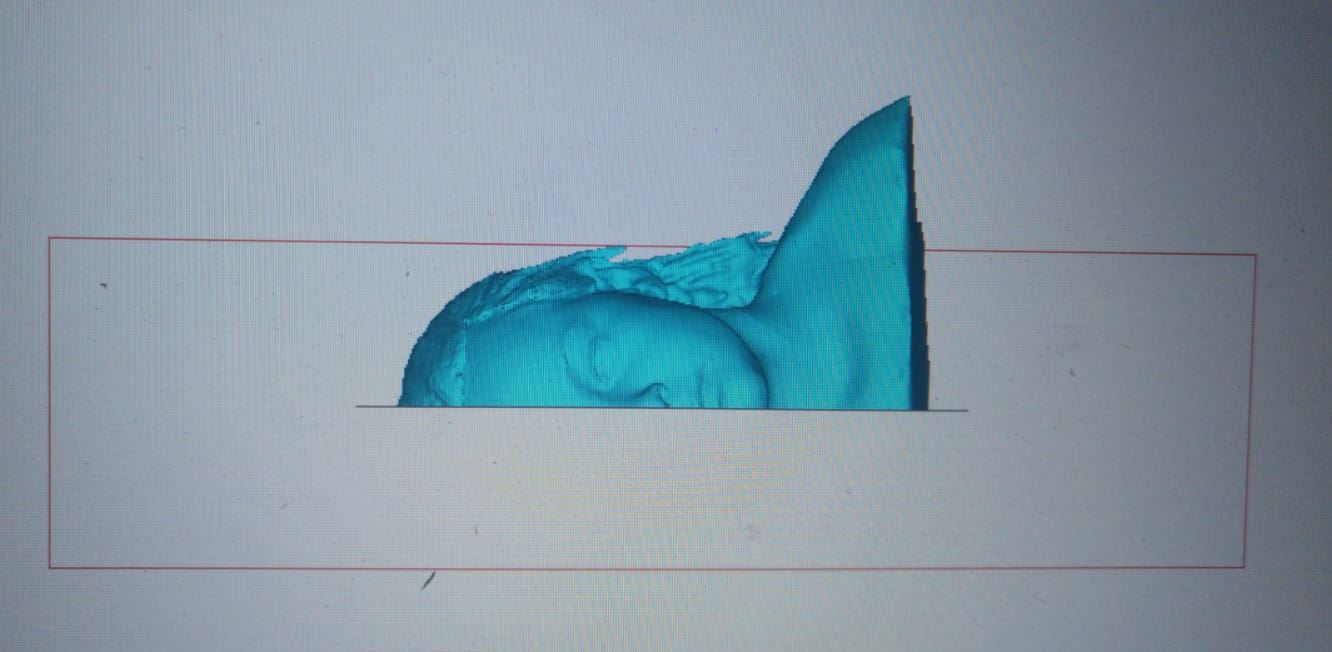
My mill tool has a maximum depth of 5cm. So I prepare my model so that it does not measure more than the depth of the milling tool..
I use Aspire software to generate the gcode. I have extruded polystyrene plates of 4 cm thick, so I glue 2 plates with glue to exceed 5 cm of the model. I get an 8 cm block.
Finally I am about to mill in a polystyrene of thickness = 8 cm
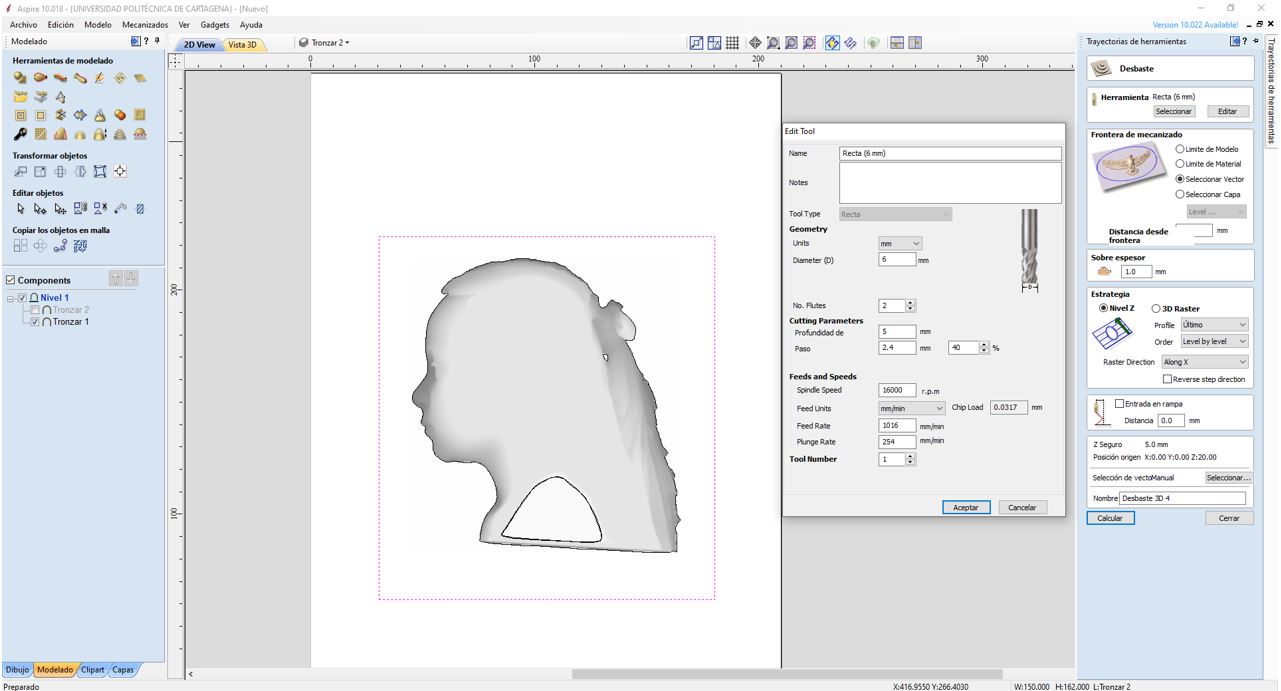
In the parameters imposed in Aspire, I select a milling tool 6mm in diameter, and choose 5mm depth of cut. I will select the feed rate later on the milling machine.
I also define the finishing operation. I select a 8mm diameter ball noise mill.
17.2.3. Milling my design
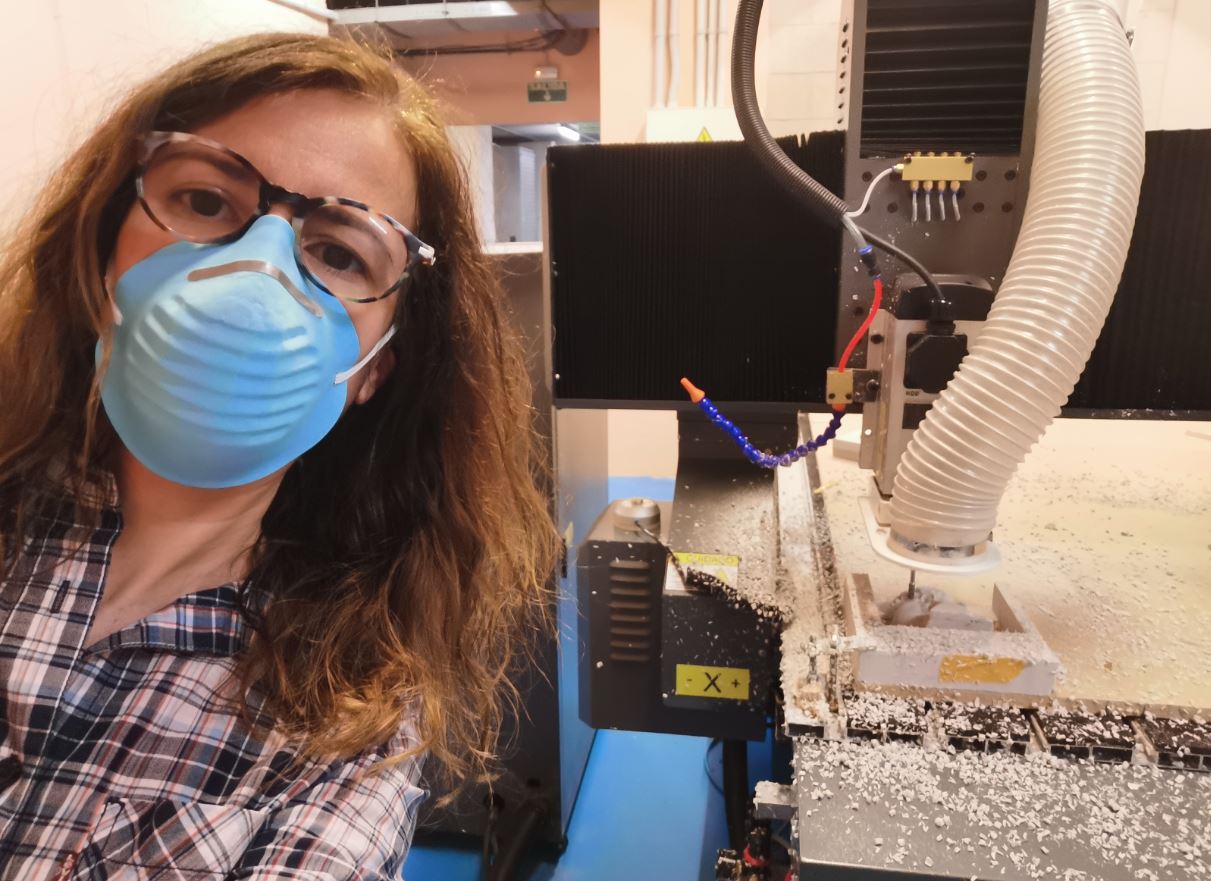
Álvaro and I ran away one afternoon and asked unofficial permission to use the CNC and we were able to access it to be able to do this assignment even though we were already out of time, but at least we have been able to do it.
Our milling machine is the SW1325 by CNC Barcenas.
I select 12,000 rpm and Feed Rate 10,000 mm/min.
I use double-sided tape to hold the plate.
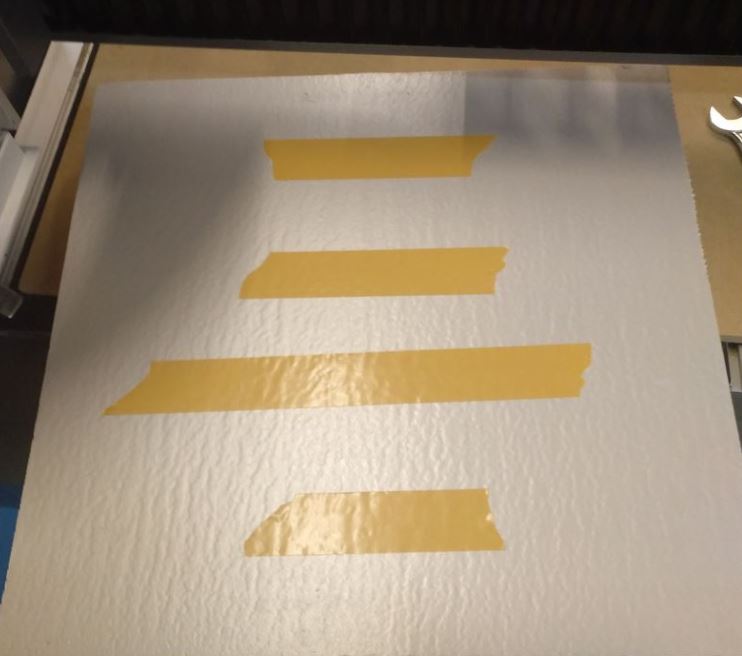
I match the 0.0 on the machine to the corner of the polystyrene block.I match the 0.0 on the machine to the corner of the polystyrene block.
My CNC mill is already milling.
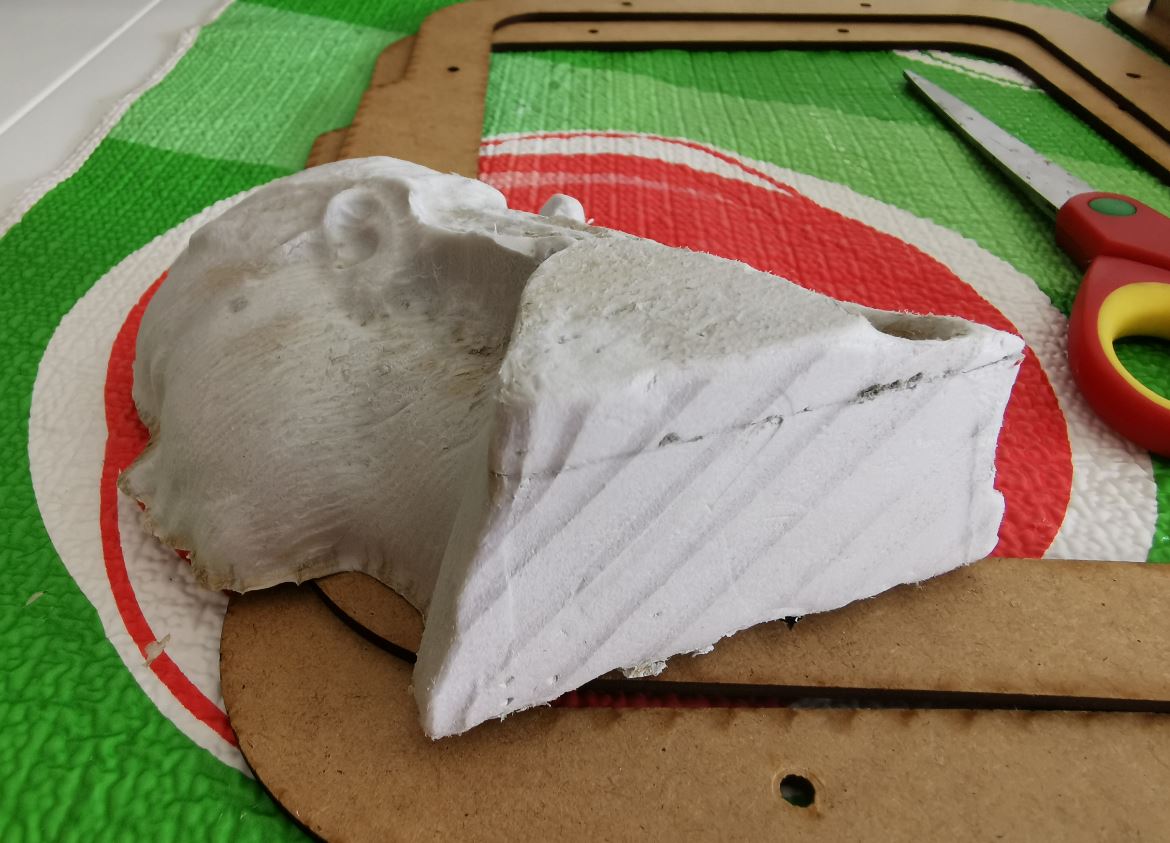
Already done.
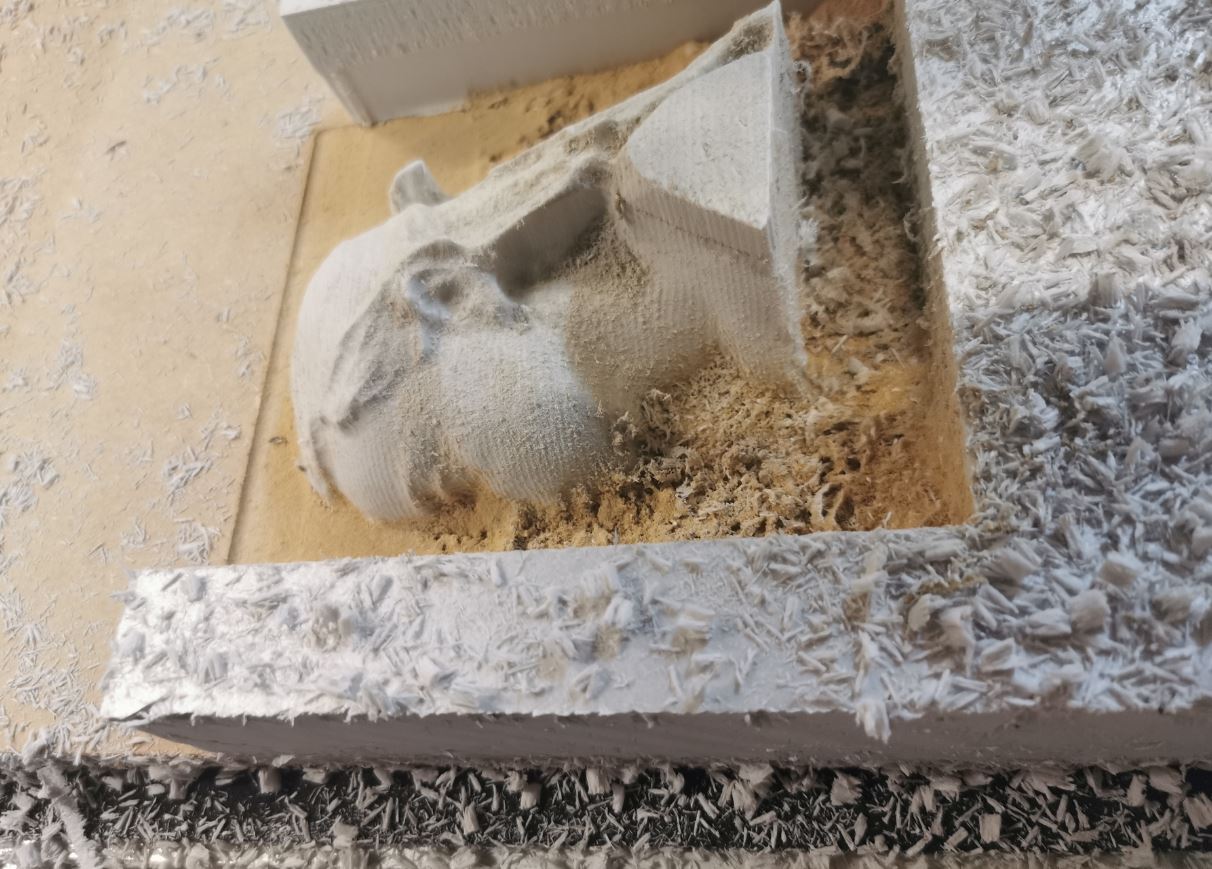
I remove chips with the vacuum cleaner.

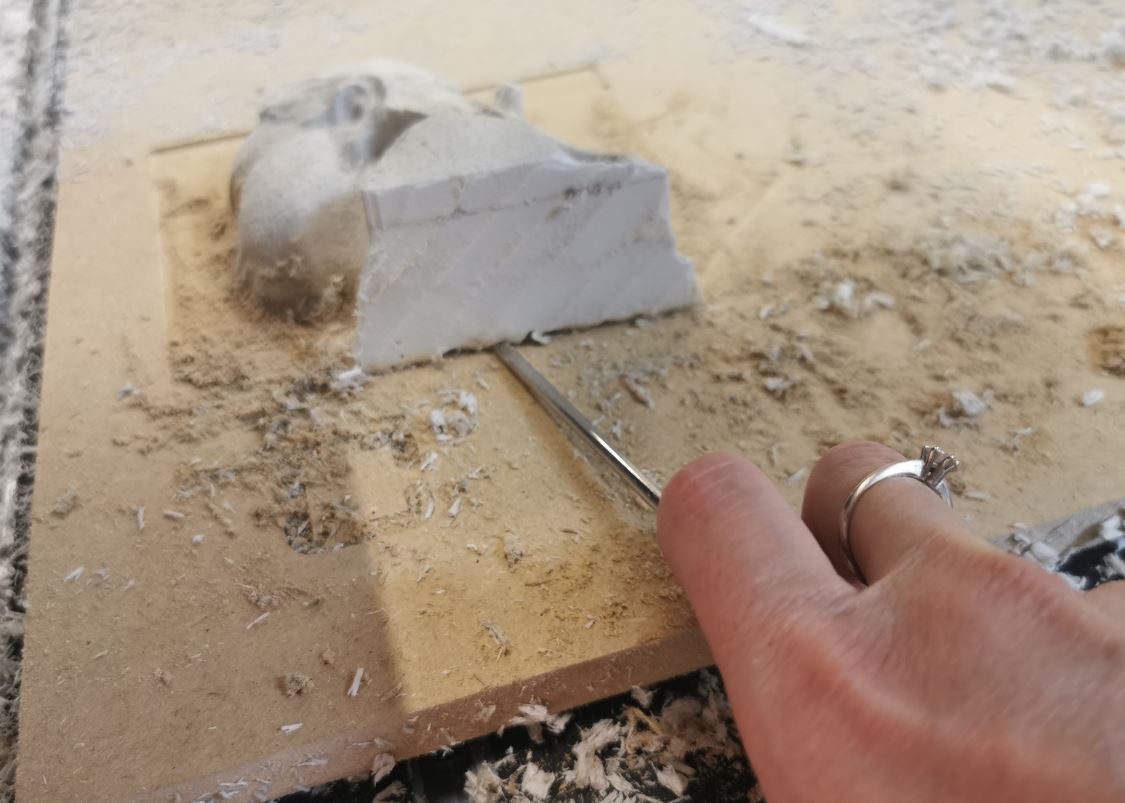
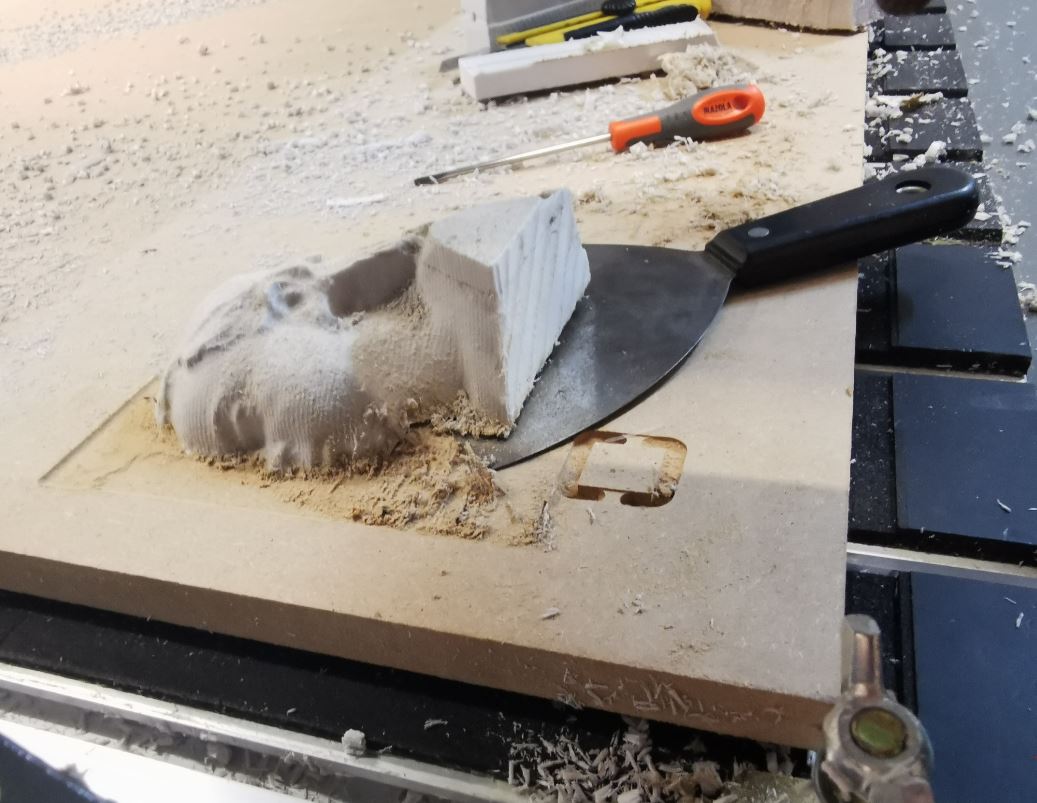
To remove it is difficult. I remove the mold using the tip of a screwdriver and a spatula, since it has been super well adhered to the bed of the CNC with the doubled adhesive tape that I used.
Since I have access to the lab and the CNC, I take the opportunity to configure and make another mold but from the front part of Candela’s face in case it might be good to try to form a kind of mask or mask with her anatomy.
So in Aspire I set parameters and create the corresponding GCode.
And I also mill this part of the face on a block of two plates joined with 4cm polystyrene glue, thus achieving 8cm of thickness.
I put the same values in the parameters of the milling machine and I start milling.

This is the result:
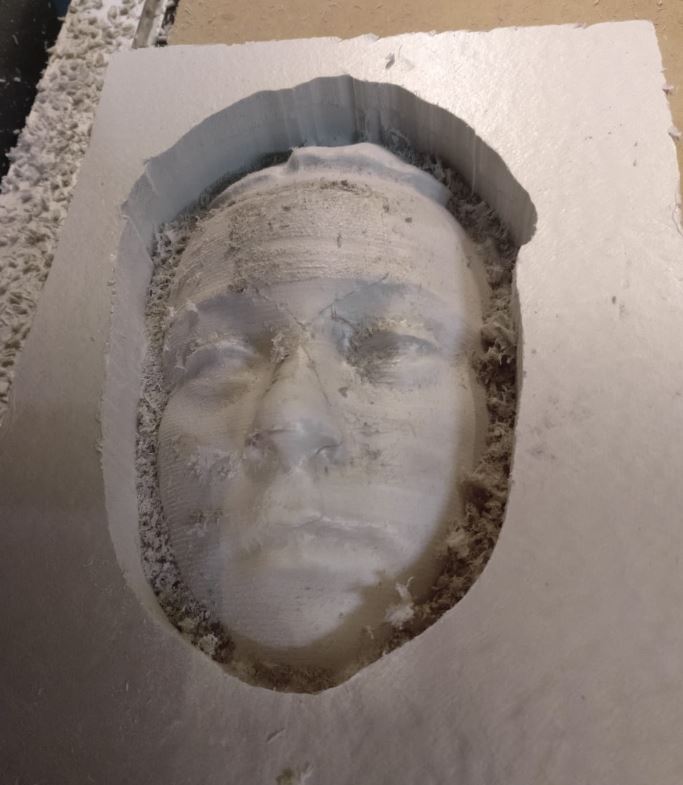
With this, I already have two possible polystyrene molds to form plastic sheets with them and obtain the desired shapes.
17.2.4. Thermoforming
I already have my thermoformer assembled and ready, the stripper to heat the plastic and the vacuum cleaner to make a vacuum.
I also have my molds created by me.
And, I made in 3D printing a positive of the mold of assignment 16, milled in wax to make chocolates and soaps that was shaped like a baby carriage.
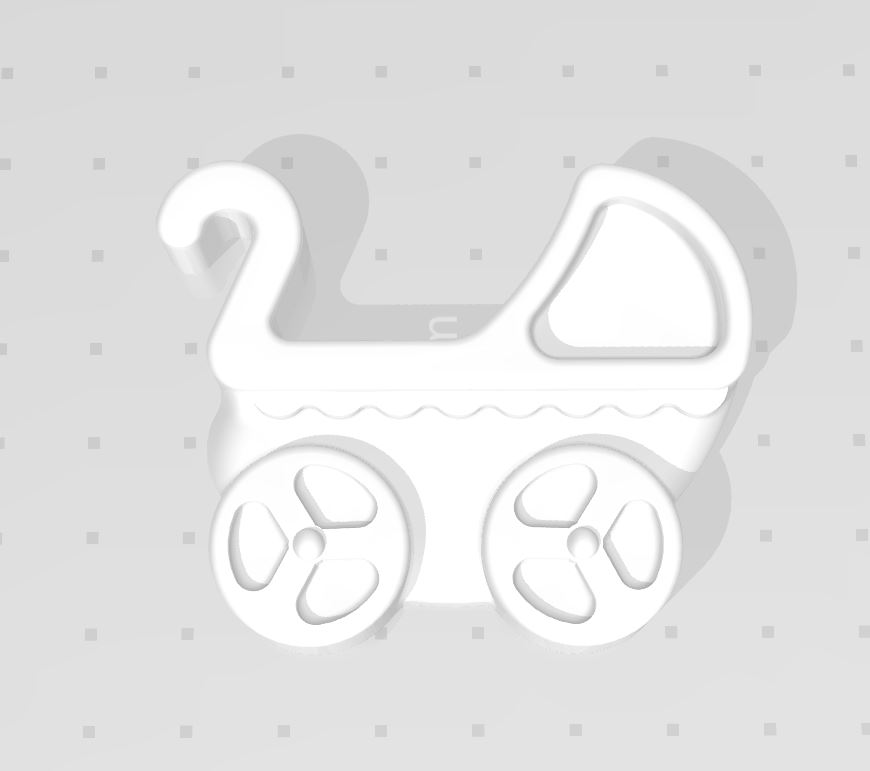
With it I’ll see if I can also thermoform something.
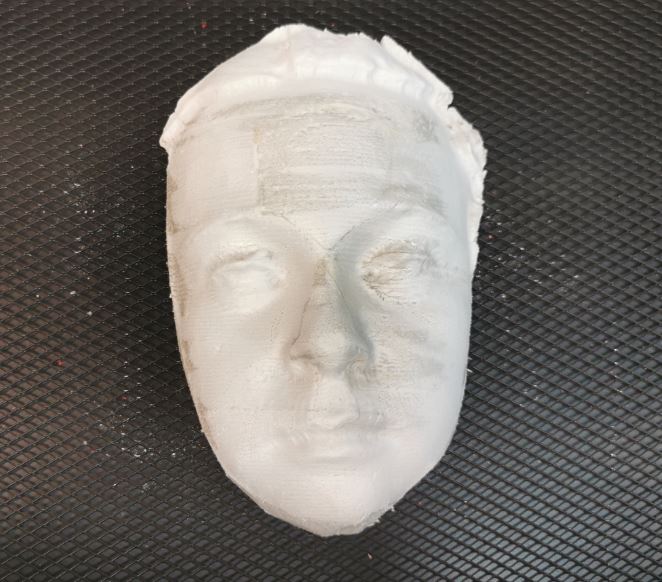
For now I’m going to use Candela’s profile.
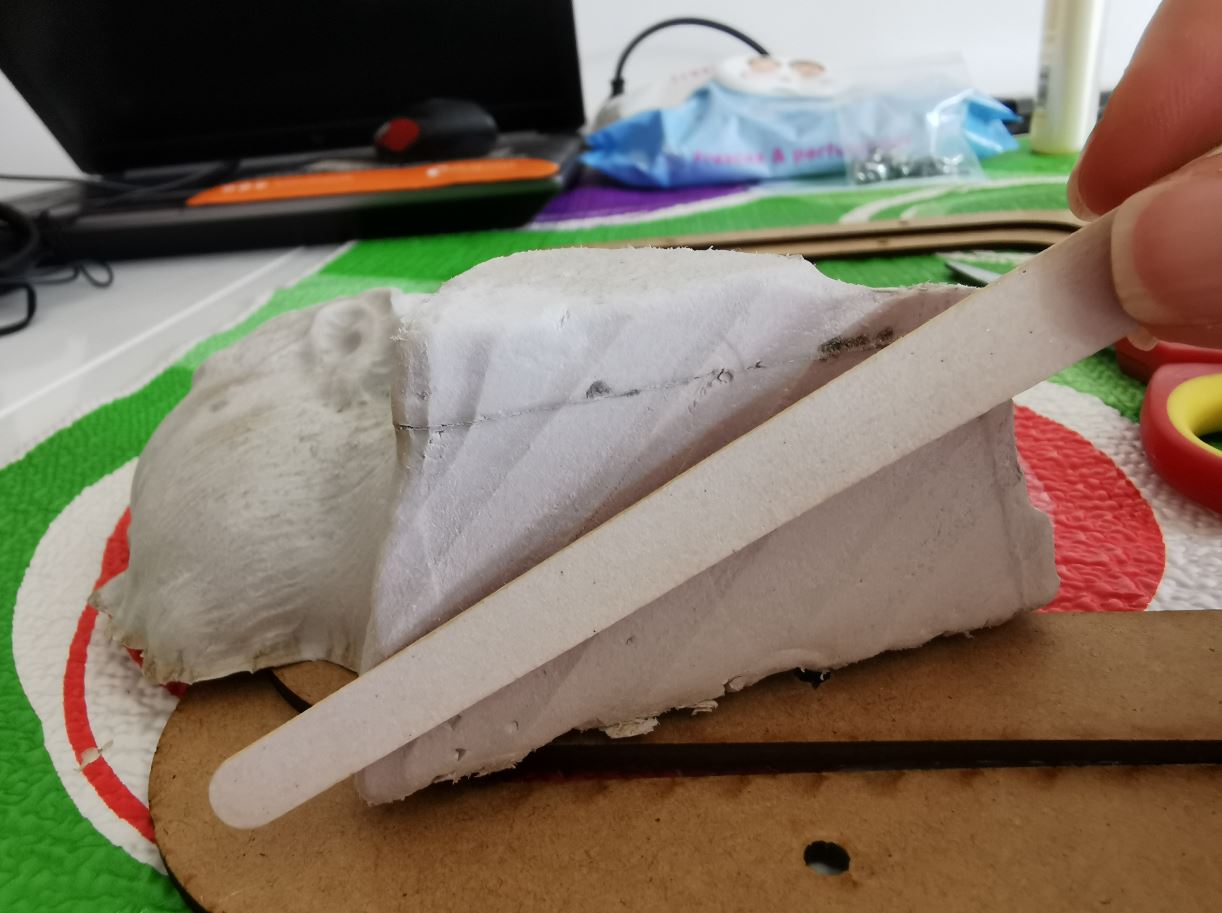
I slightly smooth the burrs and the bumps and unevenness that have been left by the cut of the polystyrene.
First test of thermoforming
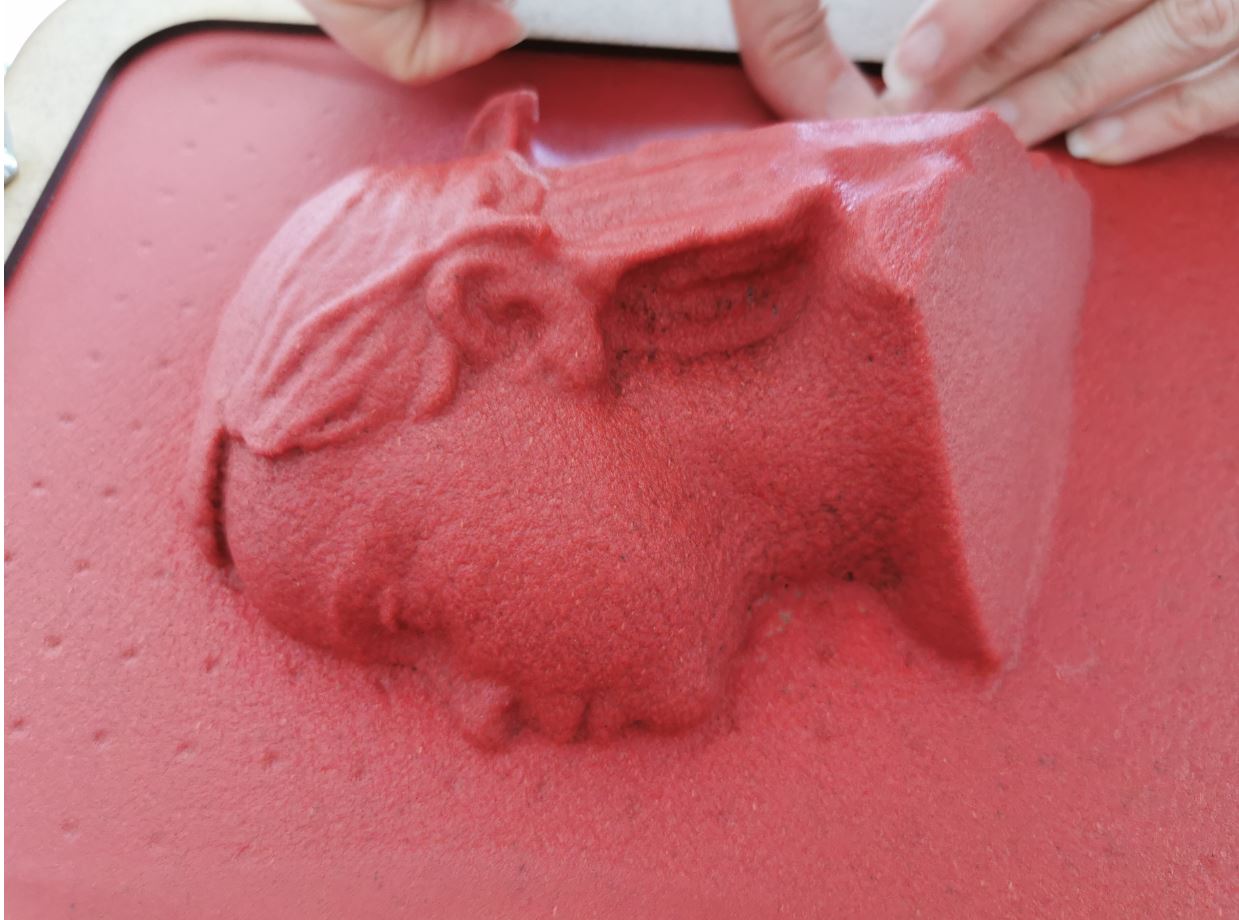
I have read in internet forums that for this type of work a film can be placed on the mold to prevent it from adhering to facilitate unmolding once my plastic is shaped, so I decide to try.
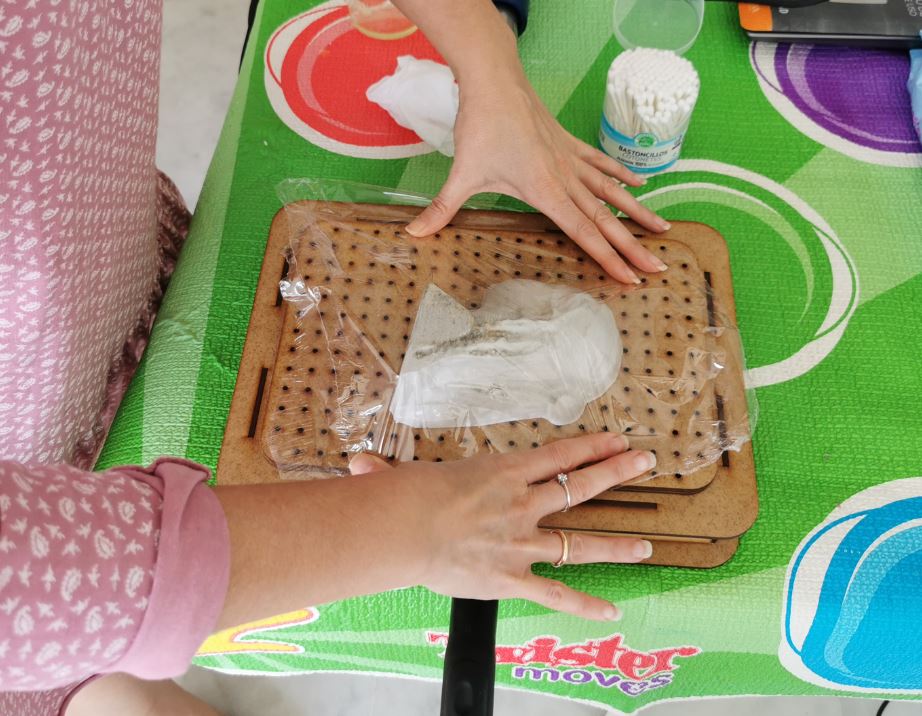
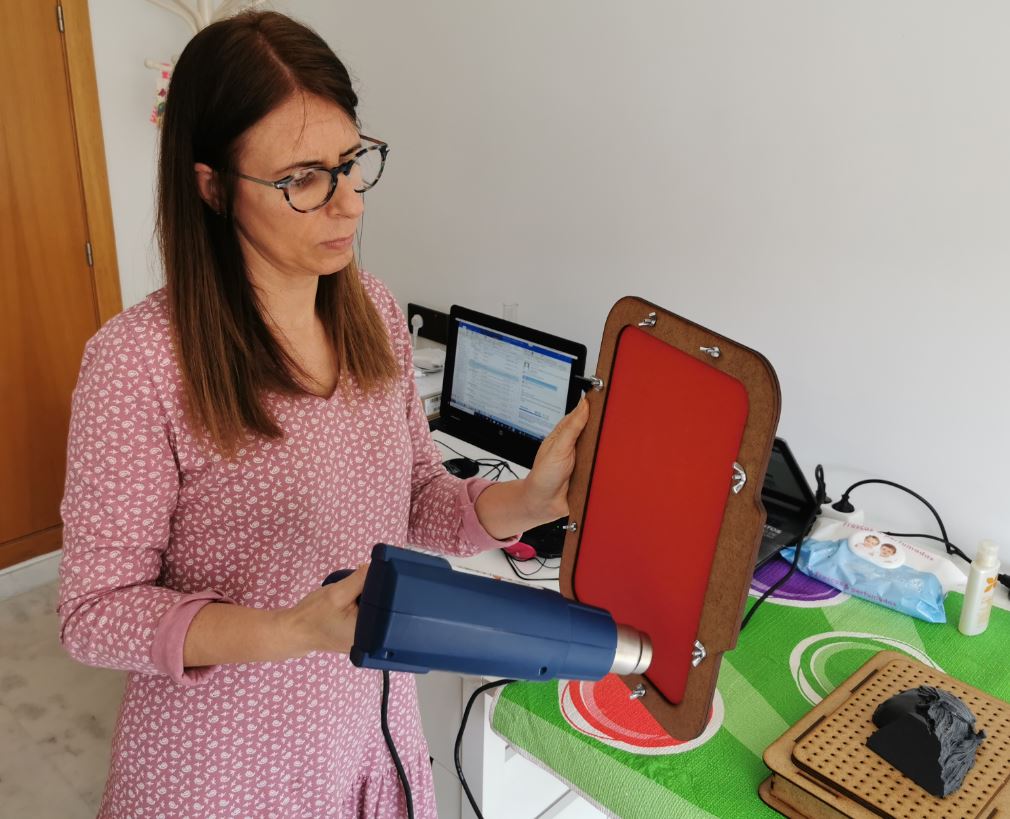
My first attempt to check the operation of my machine (or rather my accessory assembly that pretends to be a machine), has been to model with this technique, a plastic sheet worbla black color that I have cut to size A4 which is the limit of my domestic thermoformer.
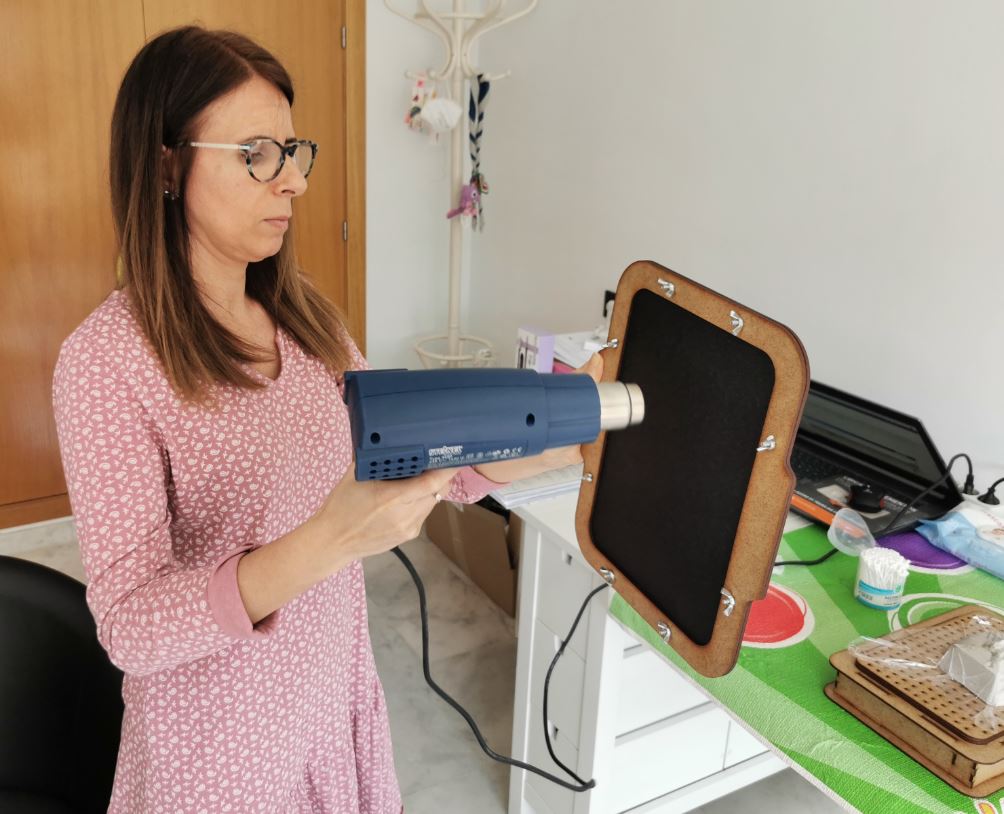
I have placed the worbla between the two pieces of wood in the form of a frame that hold the plastic by means of threaded pins, and I have heated this plastic with the stripper as indicated in the Feroca website operating video and various instructions that I have found.

The test did not go well, since when trying to vacuum with the vacuum cleaner, the film has wrinkled and I think I have heated the plastic a little or less than necessary, because it still remained very rigid when placed on the mold and like the film It was wrinkling a lot, I aborted the mission before it was all a mess. So after this failed test I went on to another attempt.
Second test of thermoforming
For this second test I’m going to use natural cardboard color worbla.
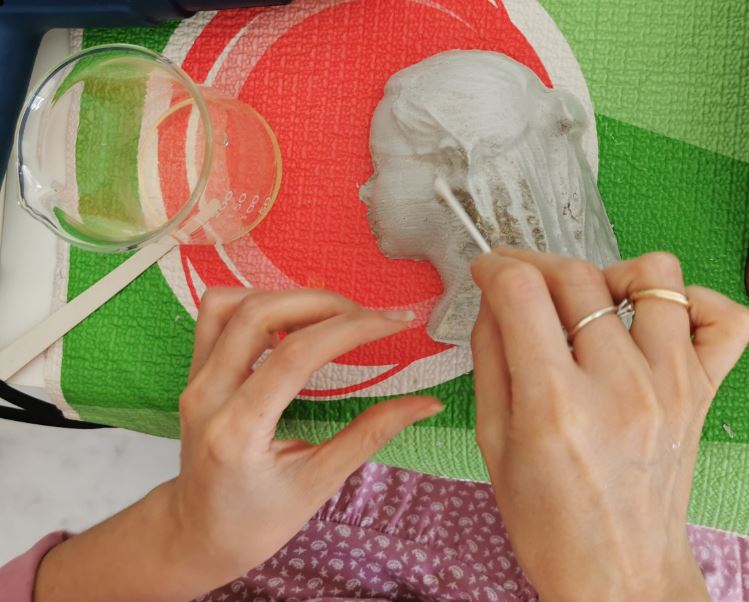
I am going to do without the film but I am going to use a cosmetic almond oil that I have at home and I am going to spread it over the surface of the mold as a lubricant (I have also found this on internet forums) to improve the removal process of the plastic from the mold.
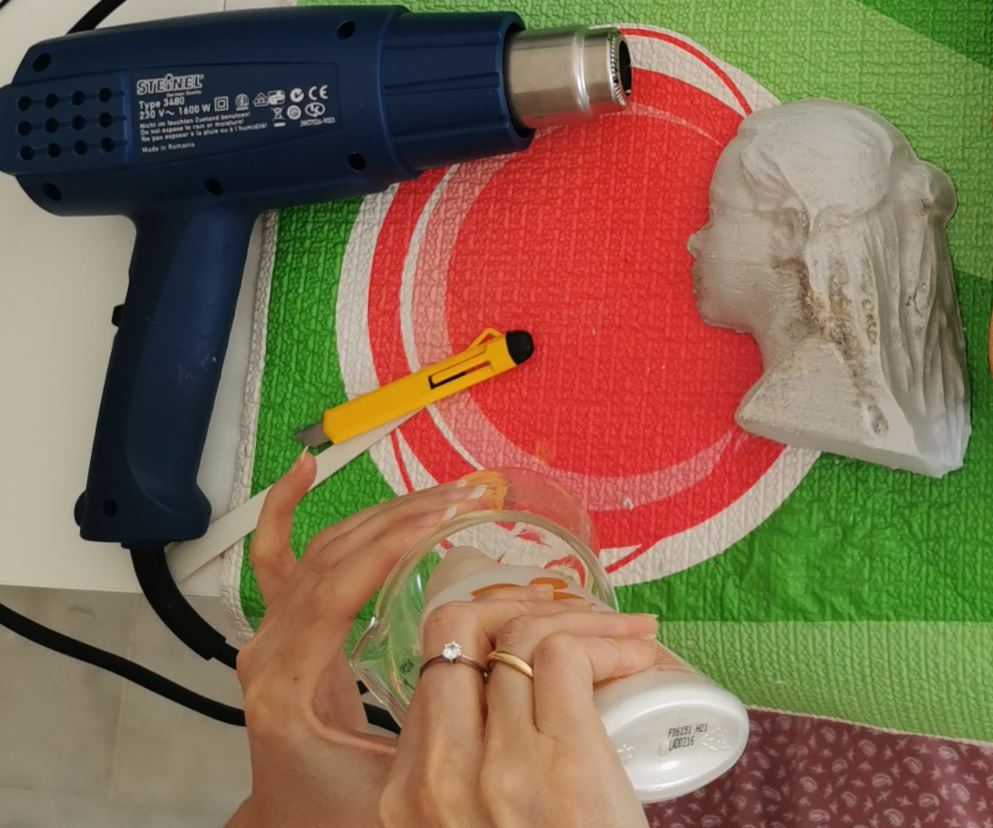
I spread it carefully and without excess with the help of a cotton swab.
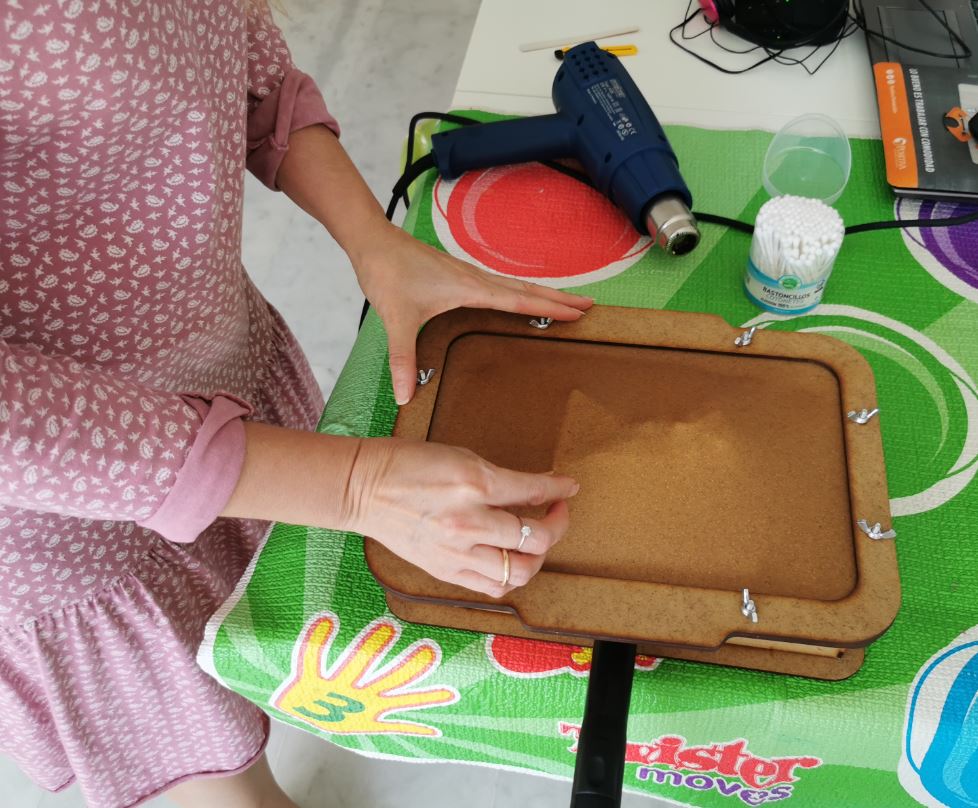
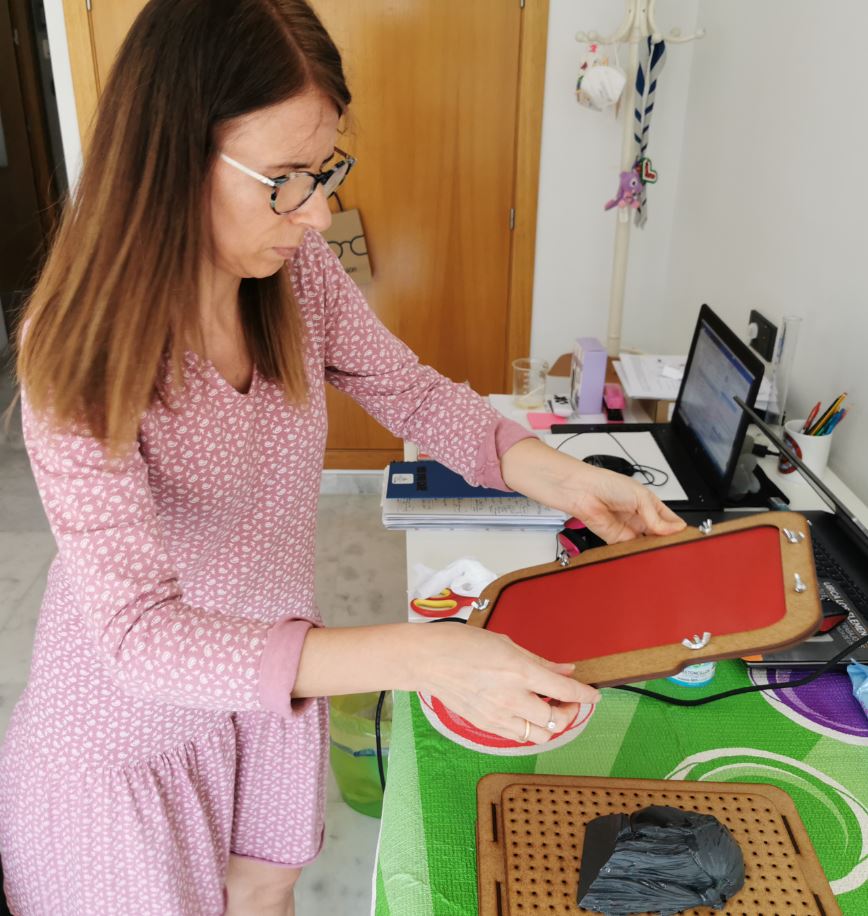
I place the lubricated mold on the base of the thermoformer that has holes to create a vacuum when the vacuum cleaner is connected.
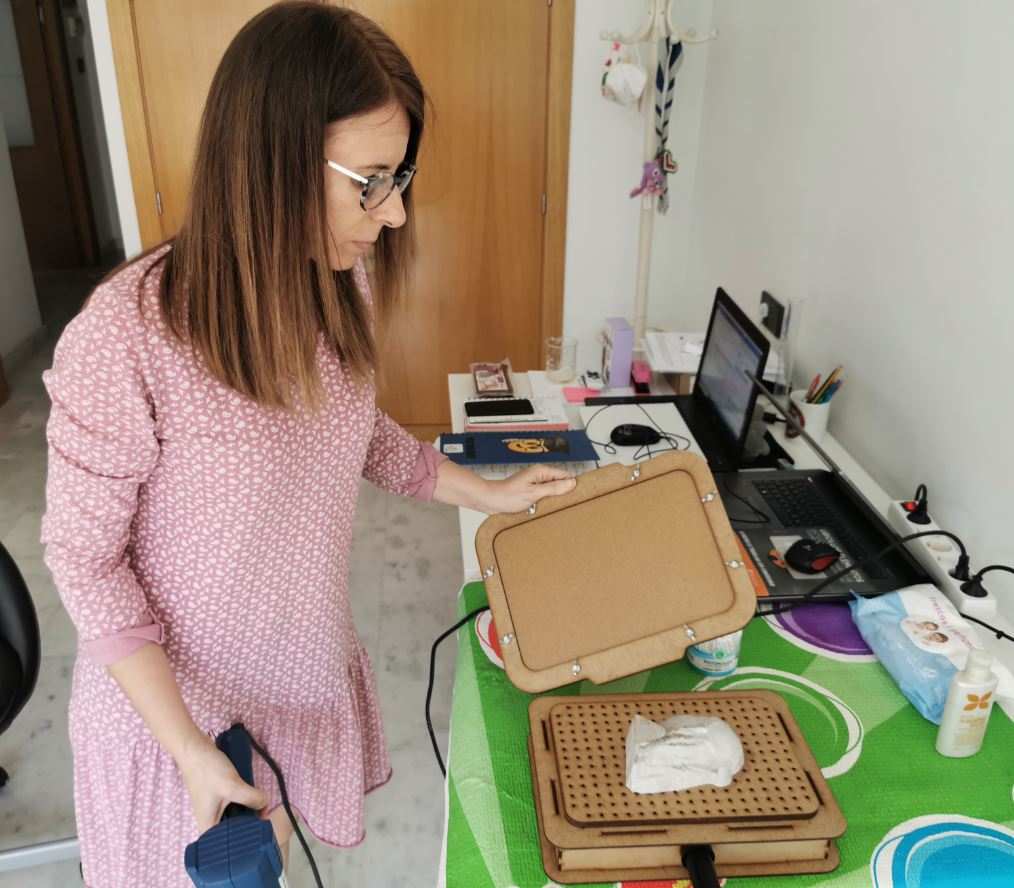
I heat up the worbla so that you start to see little bulging areas create that indicates that it is hot enough to warp into the shape I want.
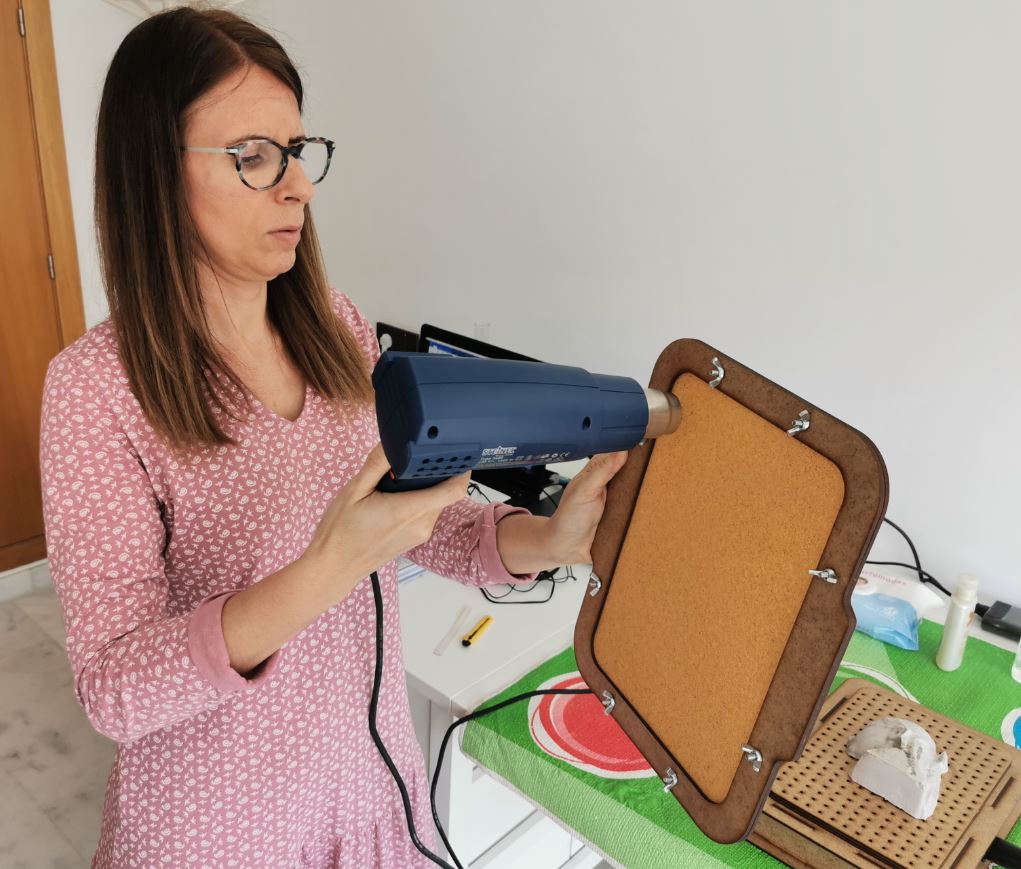
I place it on the mold adjusting the position of the frame where the plastic is attached to the bottom of the thermoformer, the two parts fit very well. And the vacuum cleaner is already in operation fulfilling its function of extracting air.
I help a little gently with my fingers so that the plastic adapts better to the surface of the mold and the shape is well defined.
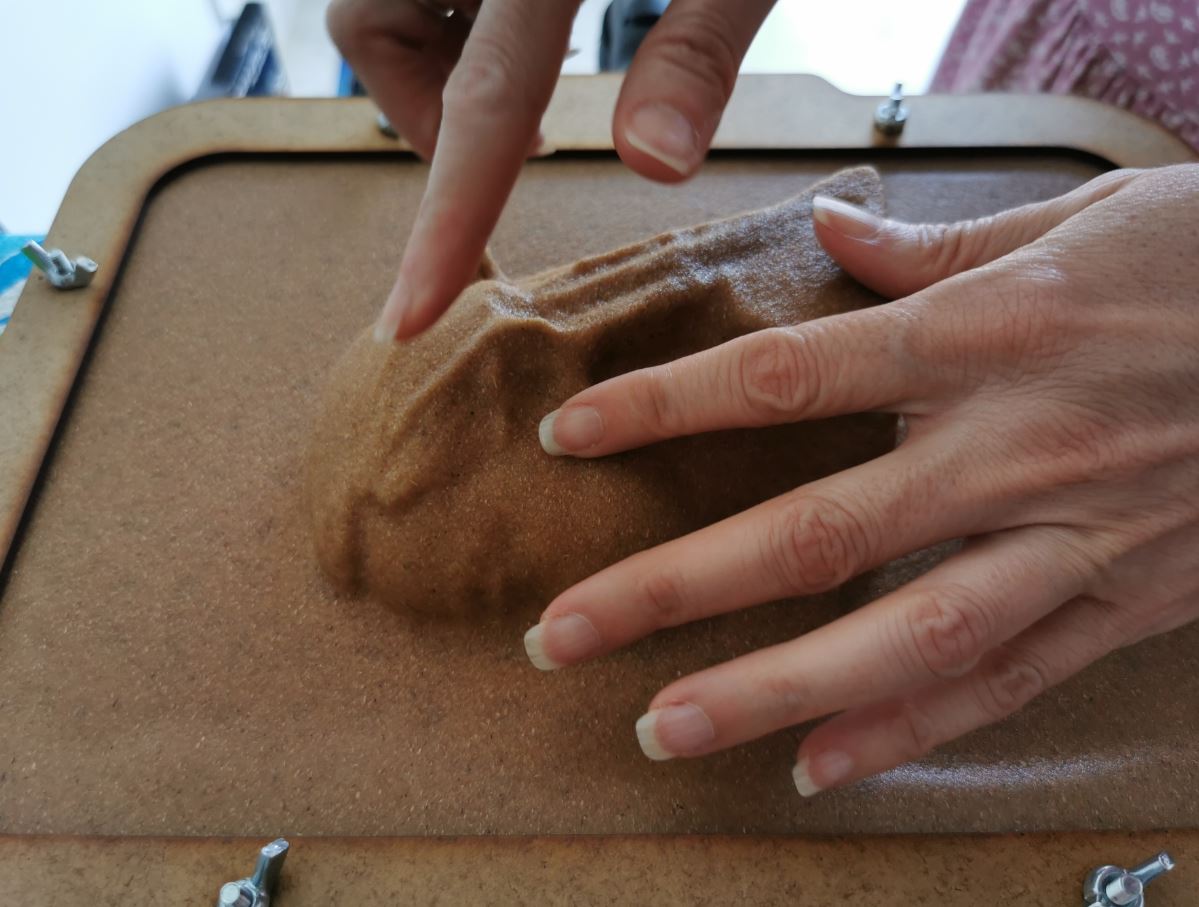
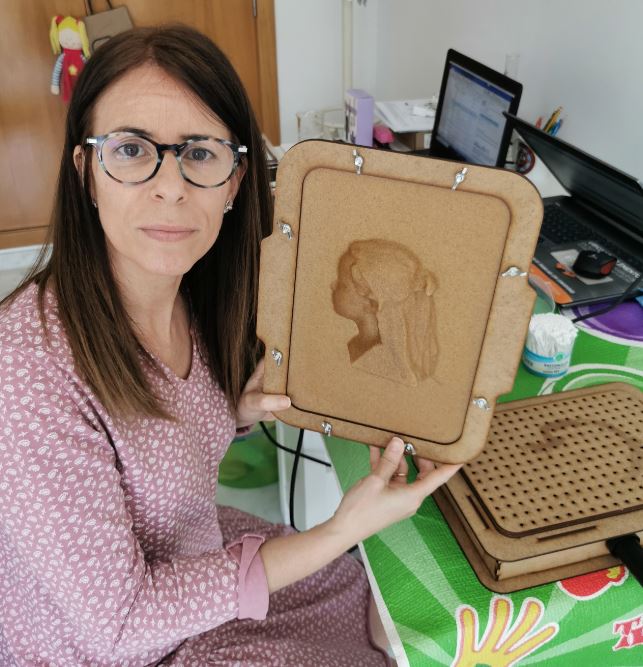
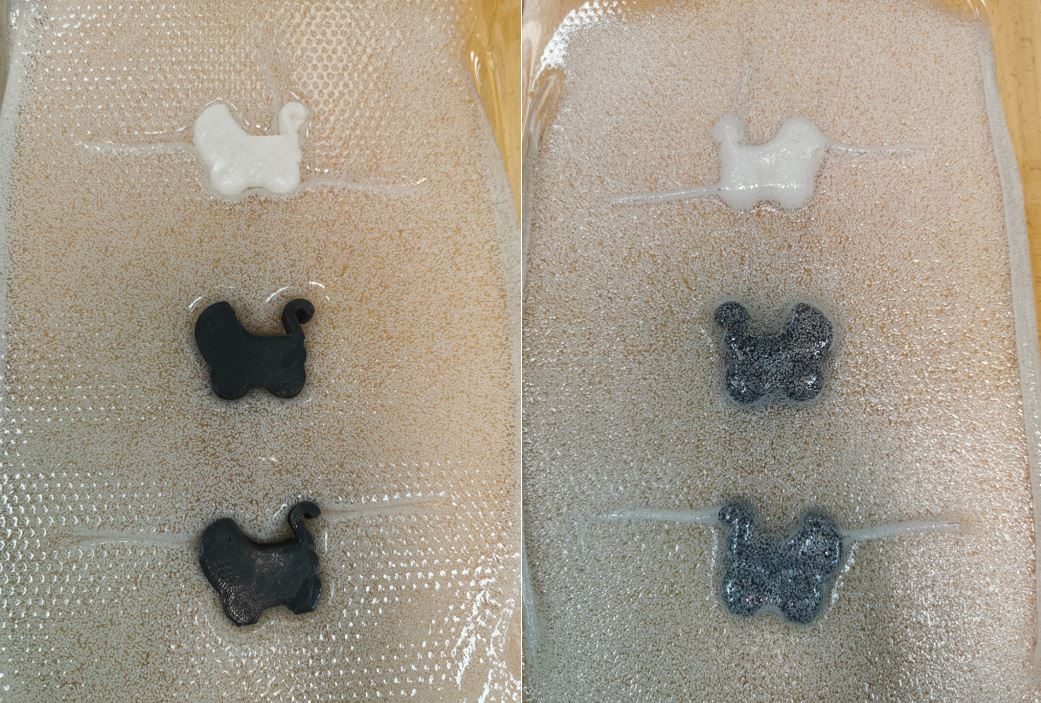
And this is the cool result that has been:
Third thermoforming test:
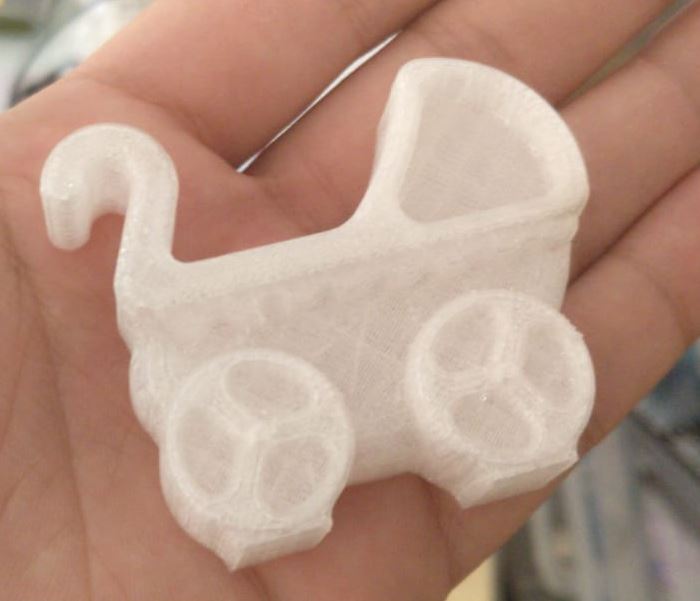
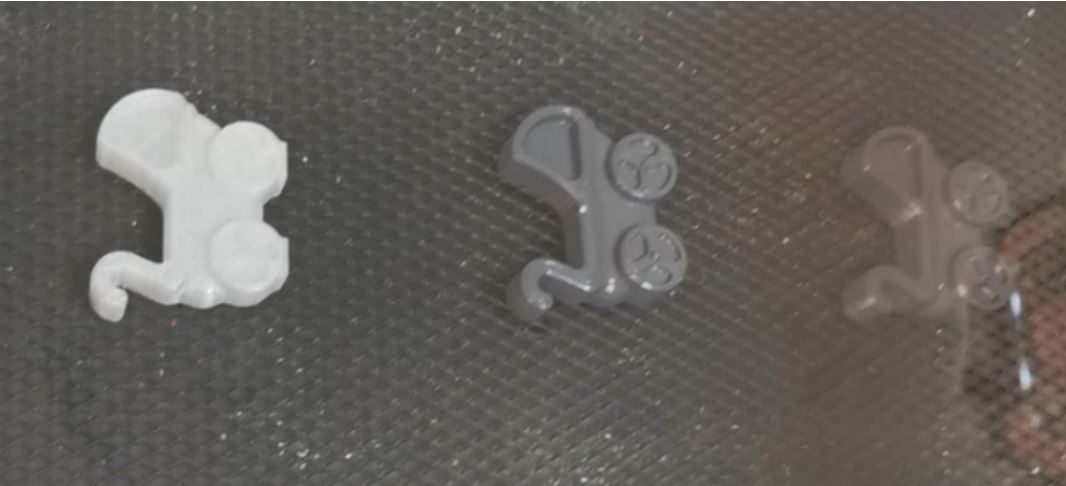
This time I am going to work with red worbla which is super nice (at least it seems to me), and I am going to use another mold that I have made with 3D printing to see what the result is in this case. From the same stl with which I got the Gcode for milling the polyurethane mold, I made some adjustments and scaled the size a little to make it a tad bigger, always making sure that it fit in the maximum A4 of the thermoformer.
This is the mold obtained by 3D printing in thermoplastic material (ABS recycled by me, see 6 week assignment) already lubricated and placed on the base of the homemade thermoformer.
The level of detail and resolution is better than that obtained with milling, in this case, since the size of the ABS deposition layer achieved with FDM technology is smaller than the diameter of the drill used for milling.
As in the two previous cases, I heat the worbla placed in the frame, with the stripper.
When it is hot and at the limit of deformation, I place it on the mold and connect the vacuum cleaner.
I help the plastic with my hands to take the shape of the mold as in the previous case.
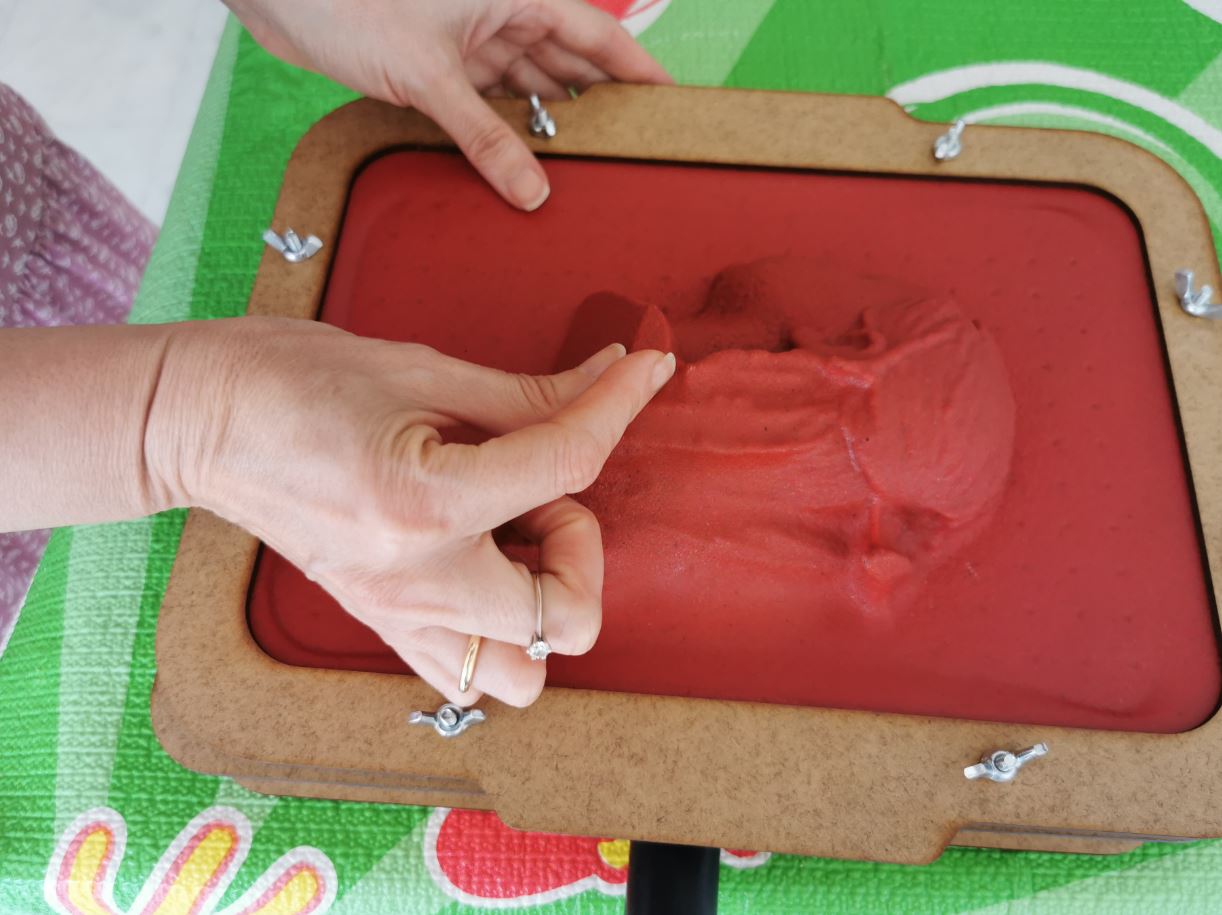
In this case, I think I went over the heat in the stripper process, since when vacuuming, in addition to acquiring the shape of the mold in the worbla, the vacuum holes in the base of the thermoformer have also been marked…
Anyway, experience will help me improve this technique little by little 😊
I could still do more tests with worbla of other characteristics, other molds and so on, but time is short and I am still hoping to test the thermoformer offered to me by the National Reference Center for Chemistry.
So as summary of this first contact with this technique and with this “homemade” solution to be able to make these forms at home, I show the result of these last two tests:
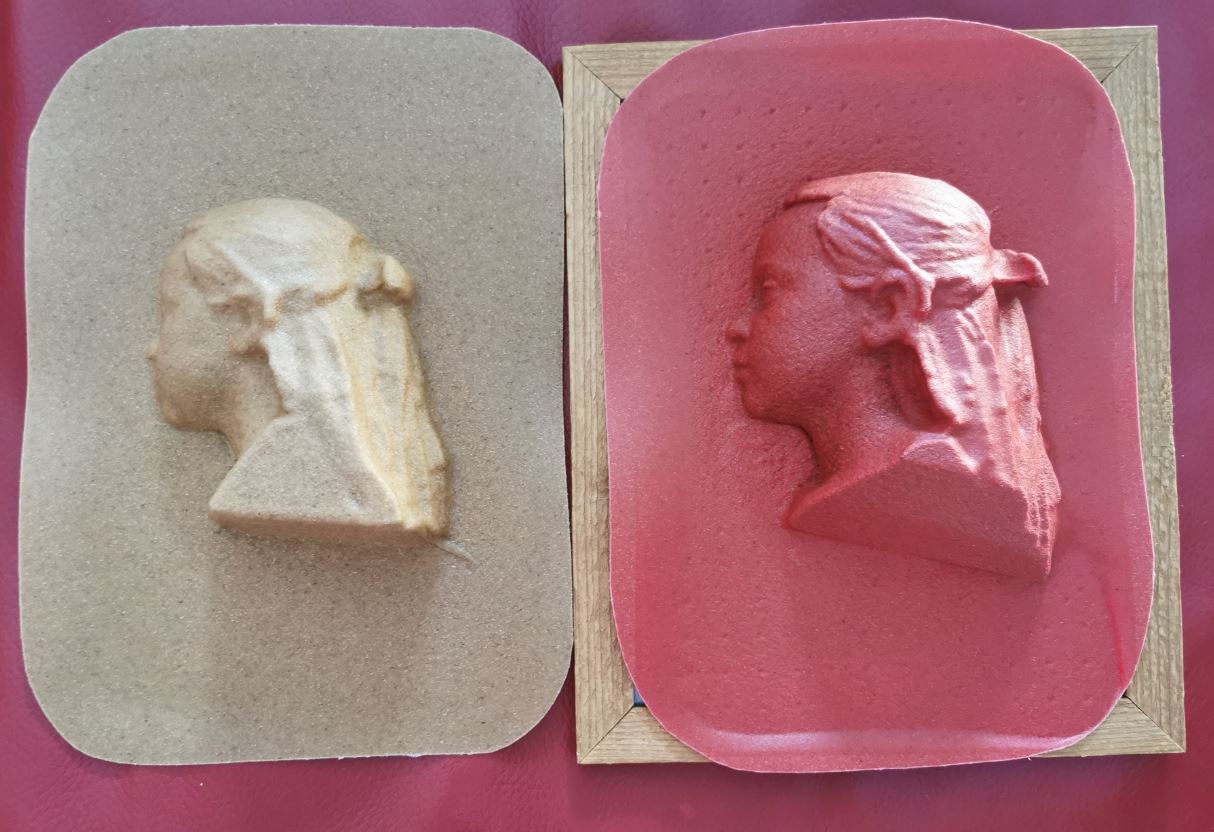
Note: I liked this solution and as soon as the Fablab is at full capacity and I have the opportunity, I will make my own frames for this machine in A5 and A3 sizes of my own manufacture.
17.3. VISIT TO THE NATIONAL CHEMISTRY REFERENCE CENTER (NCRC)
To finish documenting “my adventure” with this assignment, I have to tell about my experience in my visit to the Center where one of my users offered me to go to use his thermoformer.
Finally one night at 10 o’clock at night this user, already a friend, by dint of sharing so many hours of work, calls me and invites me to go that same night to the place where the machine is located since he has to go at that moment to review some machines and collect the results of some analyzes.
I was having dinner, although it was late, because I was working late on the FabAcademy homework, I left it halfway, put my little daughter to bed, whom I had given leave to stay awake a while longer while she accompanied me to my dinner and we chatted , and I told my older children, my father and my husband not to wait for me awake, (we are all at home still confined…).
It was like this, as “with nighttime and treachery” (it is a saying that in Spain is said to aggravate the events that occurred) I embarked on this visit.
My friend picked me up at the door of the house, he had a permit to travel with the car for work reasons, he was explaining to me that that was the only time he could go to the workplace taking turns with other colleagues, since In addition to all the restrictions, he has three children, the eldest three years old and the two little one-year-old twins, and teleworking at home with his wife was being crazy. This helped me to verify that not only I am going through a difficult situation, although it gives little comfort.
After the drive and all this story that I have told, we arrived at the building that is located in a place in the middle of the field and was closed to “cal y canto” (another typical Spanish expression, which means that it was closed with all possible means), it was completely dark…
My friend turned on lights, opened doors, and became more bearable.
This is the access to the building and the roll up that indicates a bit what is done here:
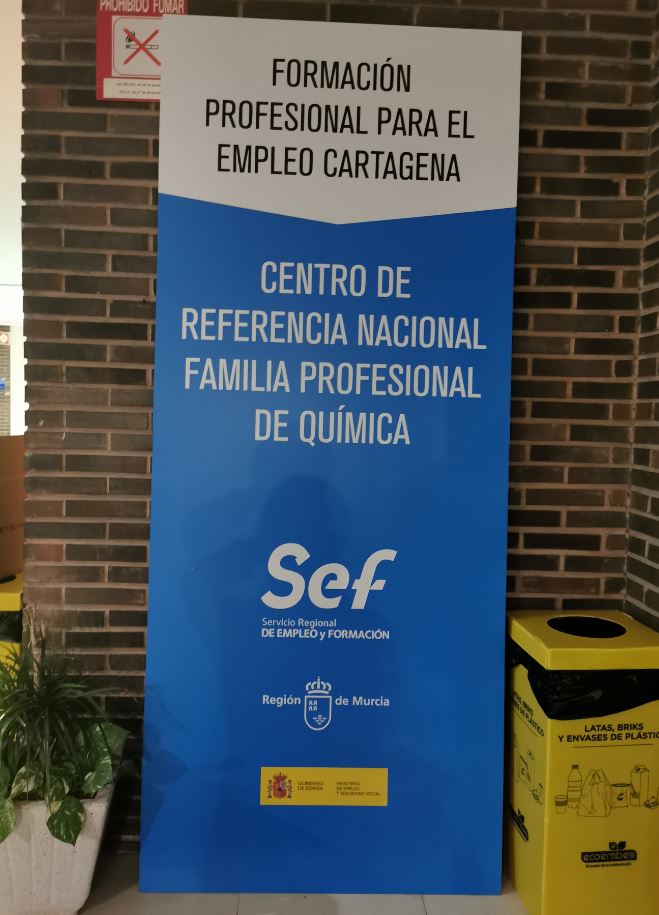
They have resources to train unemployed people and facilitate their access to decent employment.
After going through several corridors, we went to this laboratory “Transformation of thermoplastics or Plastics processing workshop”:
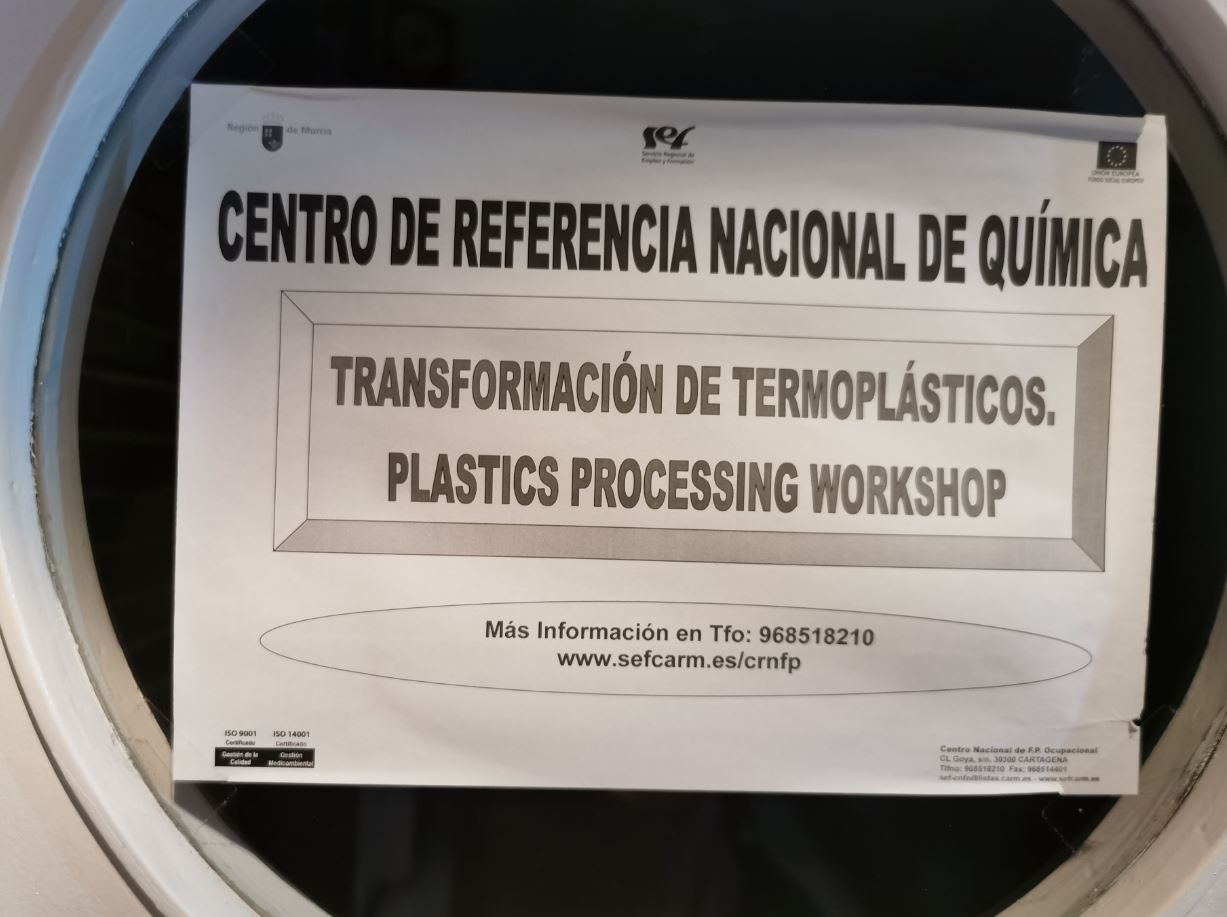
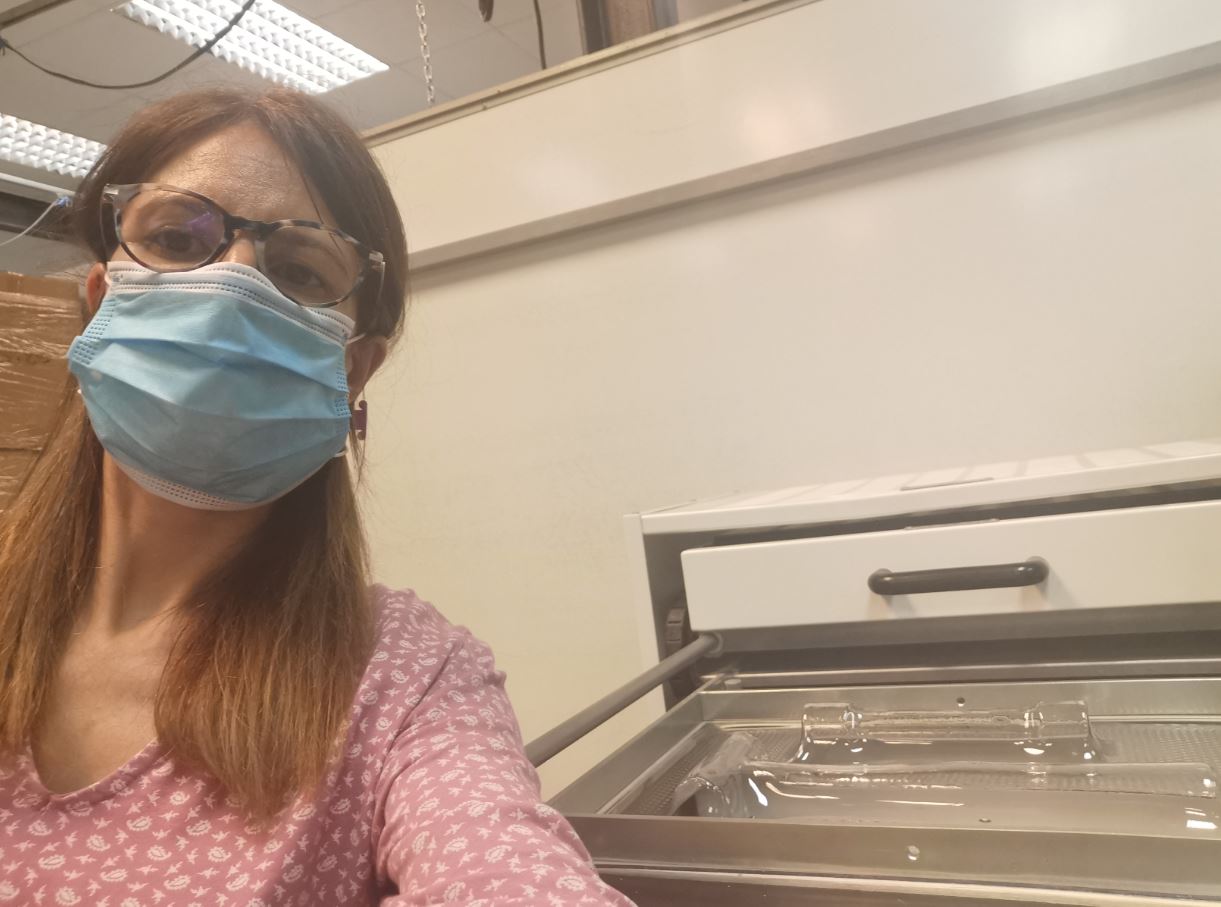
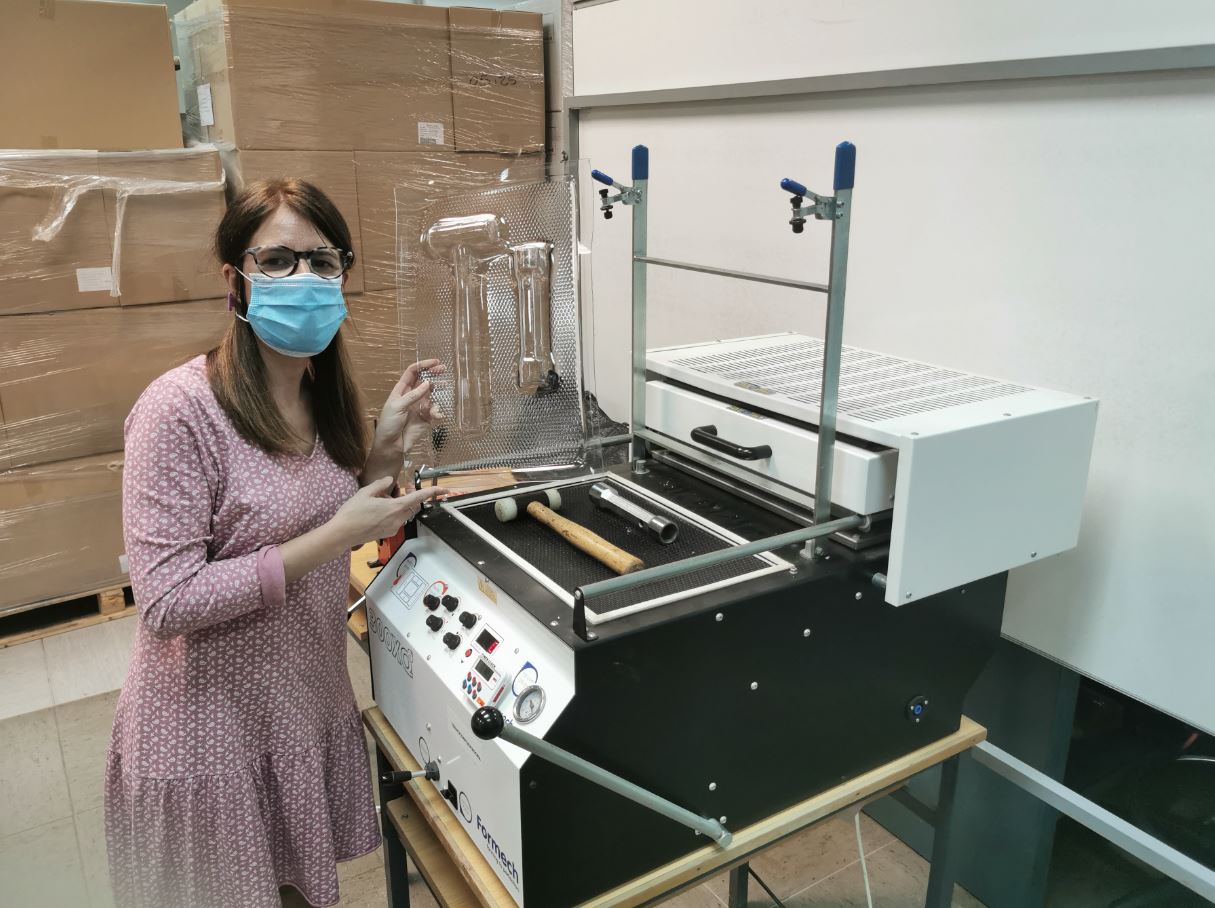
And, there was the promised machine:

These are its characteristics:
It can also be accessed from this link
And I have found this video that I wish I had seen before going to the laboratory and facing the use of the machine alone.
This is the type of plastic that they had in the laboratory to use the thermoformer, which according to my friend told me, they only used to show this technique to their students, but they did not really give it any other use.
I was sorry, since many of the machines that were there, I would get a lot out of them in my Fablab.
This was the first of the inconveniences that they started to, and they made this experience not really satisfactory for all the effort that I had to put in to be able to come here.
The plastic was too thick, not at all suitable for what I needed to do, indicated for tough jobs of shaping objects such as boxes or trays or drawers …, that had resistance to serve as containers for example.
In addition, I believed that being a training center, they would have optimized the machine and would know the working parameters, and unfortunately it was not like that.
In the time that I could be there I could not carry out a characterization of the machine so I set out to do what I could and that “be what God wants” (another expression that serves to entrust himself to fate).
17.3.1. First test at NCRC
Very confident, I tried to use the mold of Candela’s mask to form this hard and thick plastic, I set the temperature that my fatigue partner told me on this occasion and tried to get the machine to do something.
What happened was that the plastic began to crush and burn the polystyrene mold, which, being porous and having a texture like foam with this type of plastic that is so opposed to deformation, acts practically like a sponge.
the shaping of the plastic to have worked now, the temperature of the heater of the machine would have had to be raised much more and in the same way the polystyrene would have burned.
After the very negative result of this first test, I began to get very discouraged, it was very late, I was very tired, in an inhospitable place, without help because the person who accompanied me had enough with the work to do …, and I did I could see by now, everything very black.
17.3.2. Second test at NCRC
Still keeping some optimism, I tried three molds that I had created for a baby stroller.
I set the temperature the same as before, but the heating time of the plastic was not controlled. In the previous image you can see how the machine indicates the temperature it is reaching.
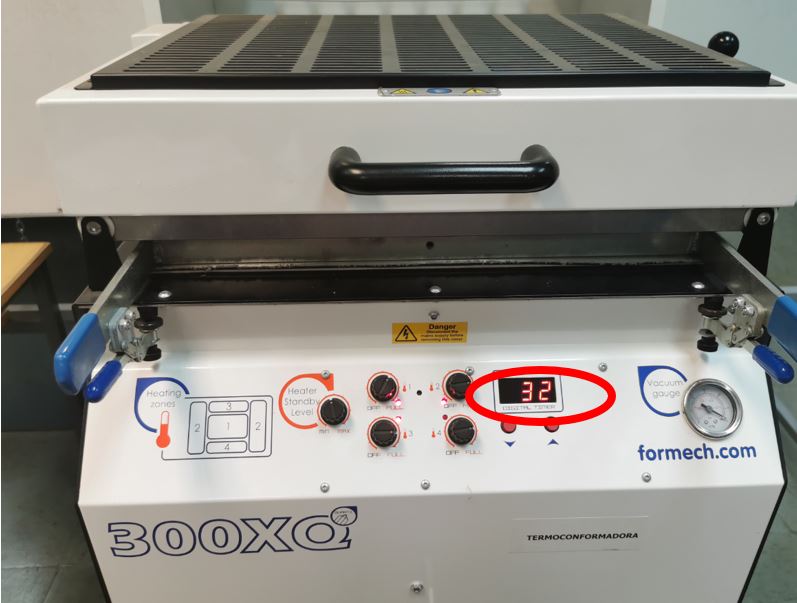
As I asked my partner questions about how to regulate the temperature, it got out of control. Paradoxical at least ☹
The plastic exceeded its melting temperature and began to create bubbles, also melted the outside of the thermoplastic strollers and another failed test. I see everything even blacker.
17.3.3. Third test at NCRC
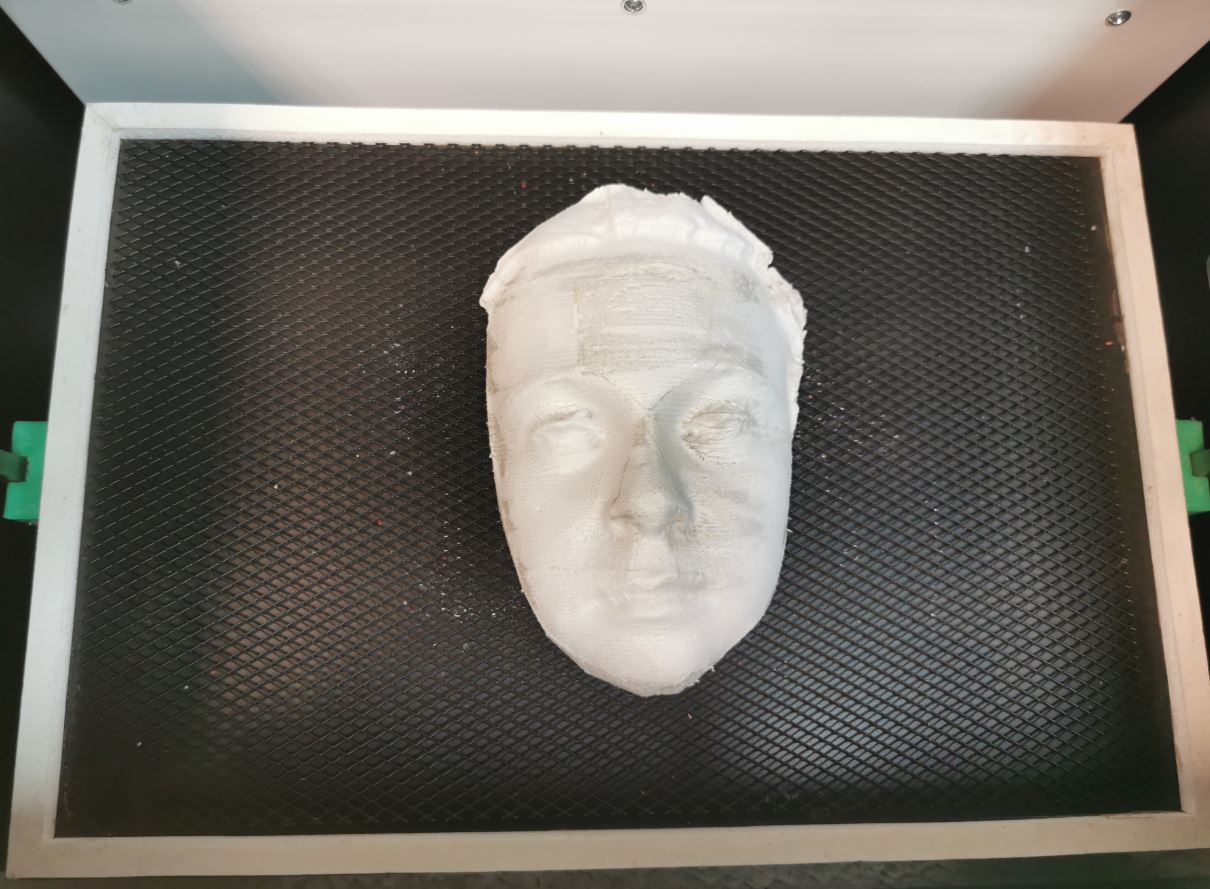
In this case, still without fainting, I tried a mold they had there for practical classes, it was a plaster star enameled red.
This time I did control the time:
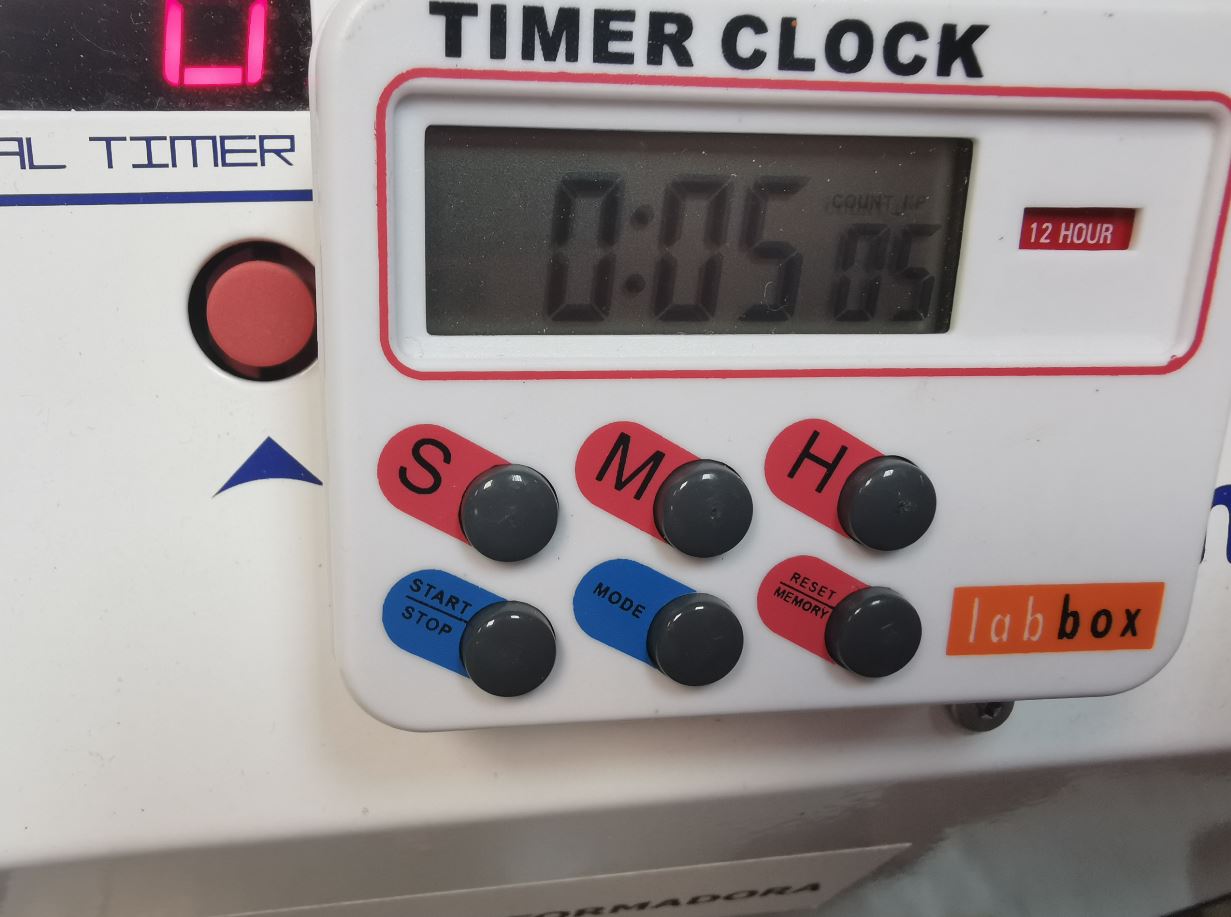
but even so, the temperature was not optimal for this material either.
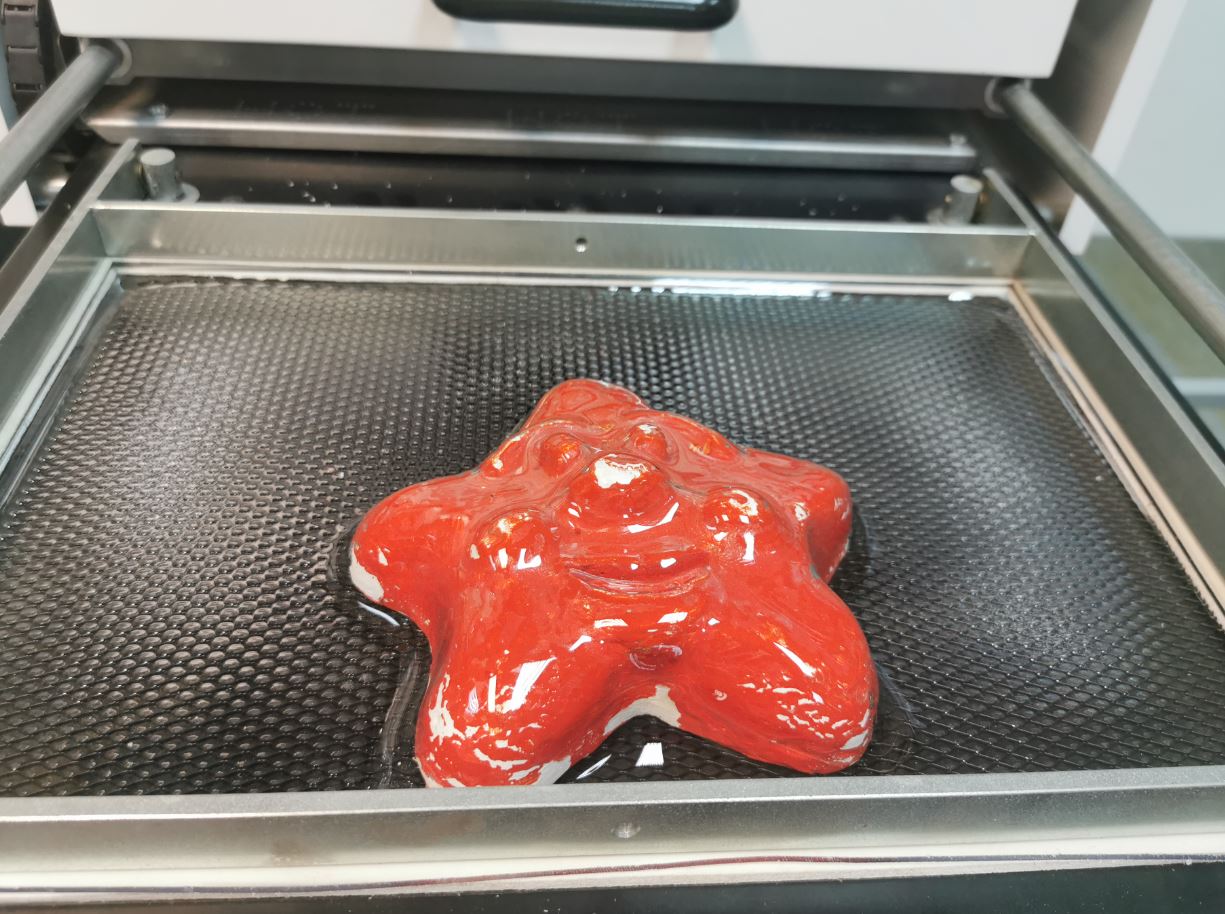
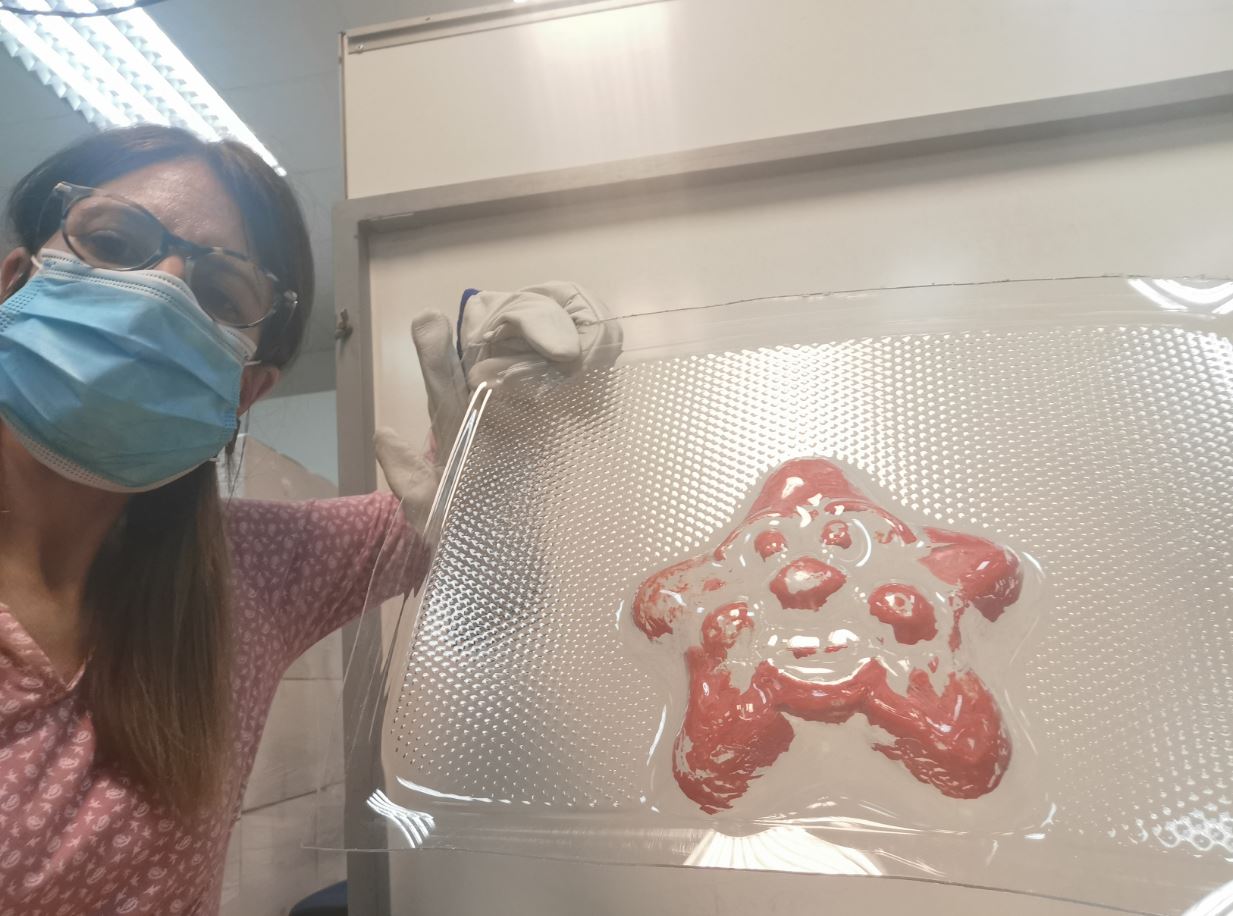
Since when unmolding, the enamel of the star remained adhered to the shaped plastic, which continues to be the main drawback in all these tests.
My selfie proves it:
17.3.4. Last test at NCRC
Considering what I have seen, I looked for something resistant to a plastic so rigid, thick and not very deformable that it requires such a high temperature and a vacuum time so high too, that it loads everything. (I have destroyed all the molds in the tests …)
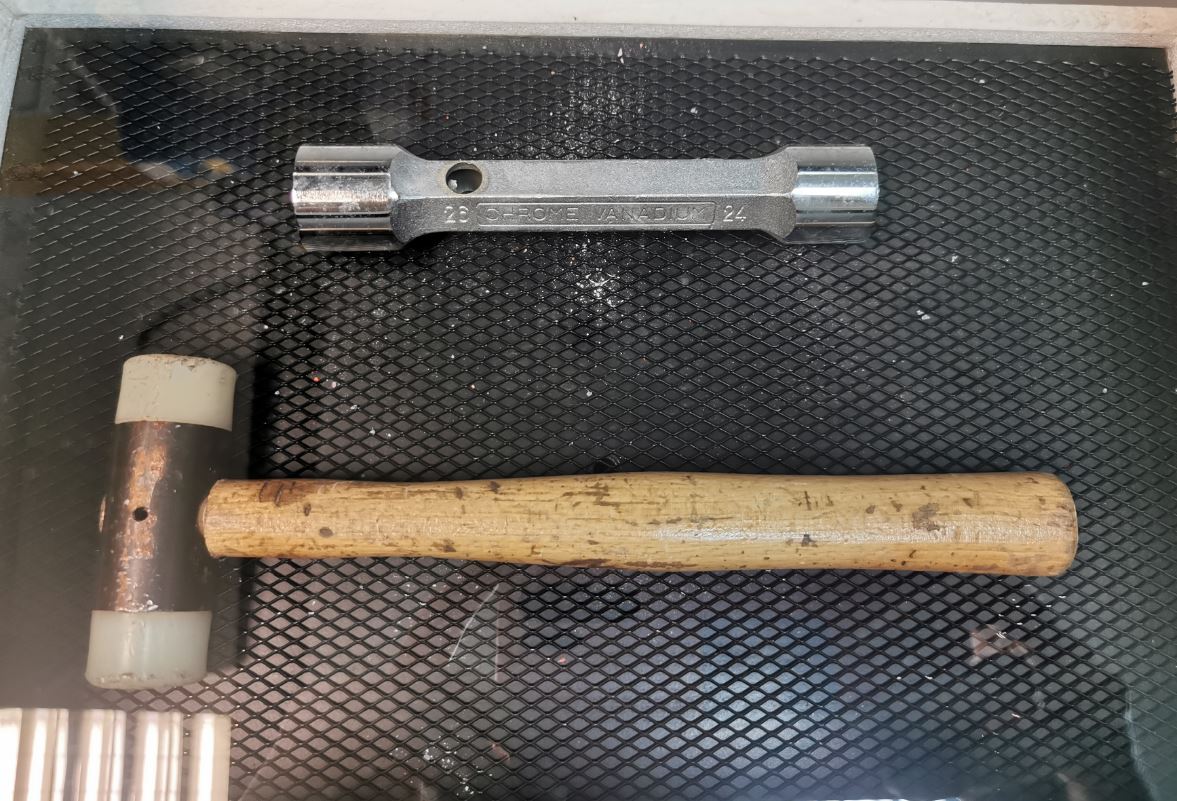
I had an idea when I opened one of the drawers, there were two poorly stored tools, they were made of metal and wood, and I thought of making a mold with the shape of them and the size of the bottom of the drawer so that they would be stored in a fixed position inside the drawer.
So I got to it. I put the two tools in the thermoformer.
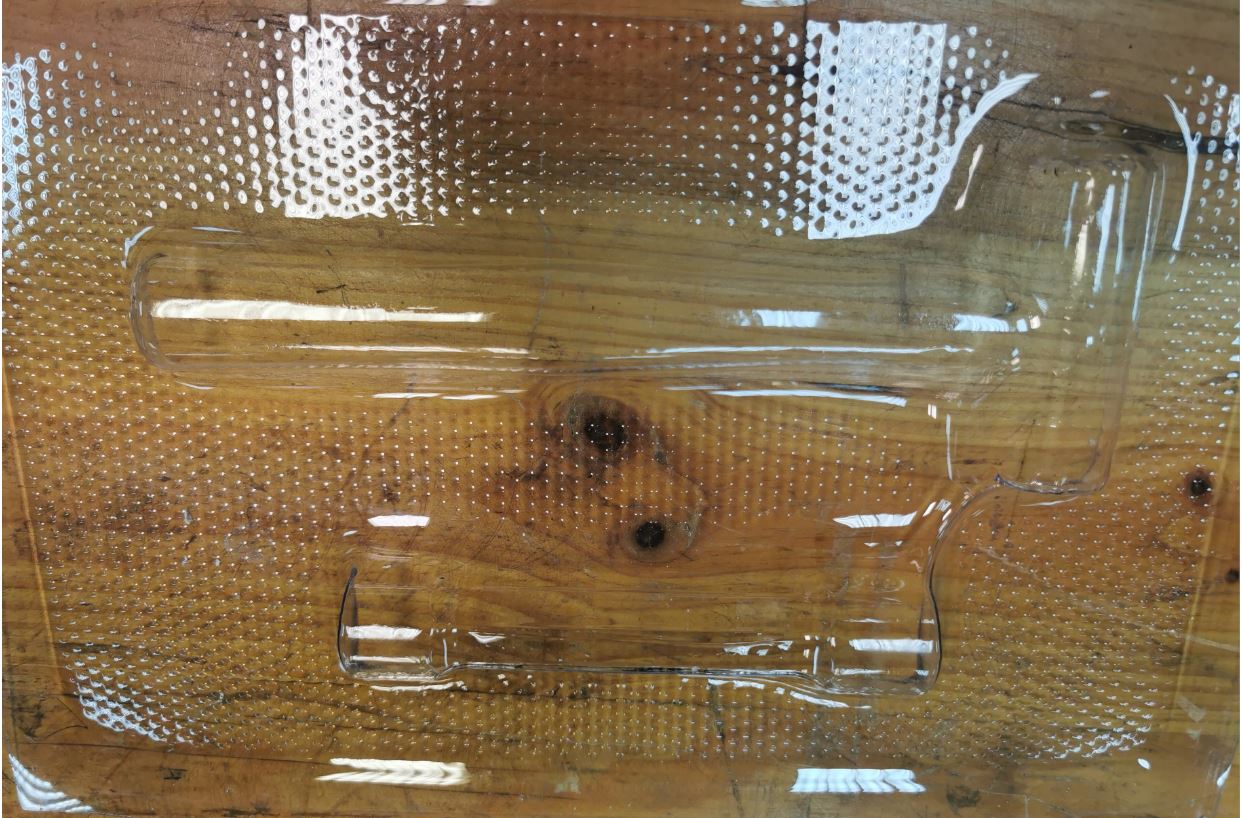
I set the optimal parameters to form this type of plastic Temperature = 55ºC and Vacuum time = 10 seconds.

This time I was successful!!!
I removed the tools and it was its shape, this time without breaking the mold heh heh.
I can already put the mold inside the drawer and when the tools have to be inside, then everything collected!
I got home at 3 in the morning.
It has been an intense night, almost endless and everything pointed to also being unsuccessful, but in the end, I have achieved something 😊
Let’s look at the bright side of things …
17.4. Links to Files
Link to the GDCODE of the finishing milling of the Candela profile
Link to the GDCODE of the finish milling of the Candela face
Link to the GDCODE of the rough milling of the Candela profile
Link to the GDCODE of the rough milling of the Candela face
17.5. Update
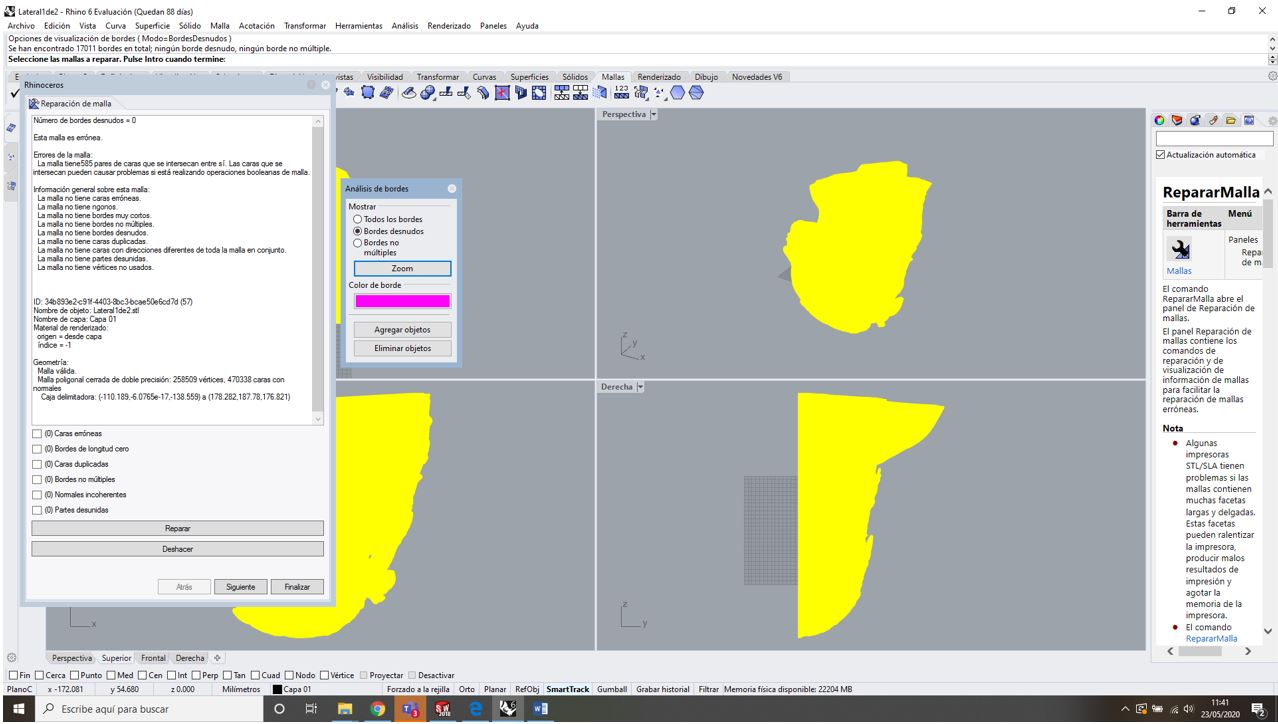
To do this assignmtent I have had a thousand problems, brackets have been closed with unexpected errors on two occasions, in one of them I made the mistake of trying to save the changes and in that action I deleted all the content of what was documented.
I had to start over, the next time I lost the changes made in a space of an hour and a half and I had to do it again, the screen stayed like this and the program completely hung:
A disaster that finally went down in history, after consulting instructors and colleagues and finding no solution…
Note: After everything I have told, this is the last assignment I have finished, I have finished documenting this almost two months after having done it, a lot of my homework these days!
I must also say that I never tire of thinking, that there is always something else that I think I could have done and better, that my ideas do not stop, I am very self-demanding and a perfectionist and those are great defects.
I had in mind to do something else for this assignment, I work with kevlar for military projects and we do ballistics tests. I have previously tested composites with resins and kevlar for field testing.
But I wanted to give shape to these composites, specifically a bulletproof vest, something similar to this, but also for women and children:

I have at home some of the materials to make it, kevlar, mannequin, special scissors, resins, vacuum bags, I have made patterns, I have documented:
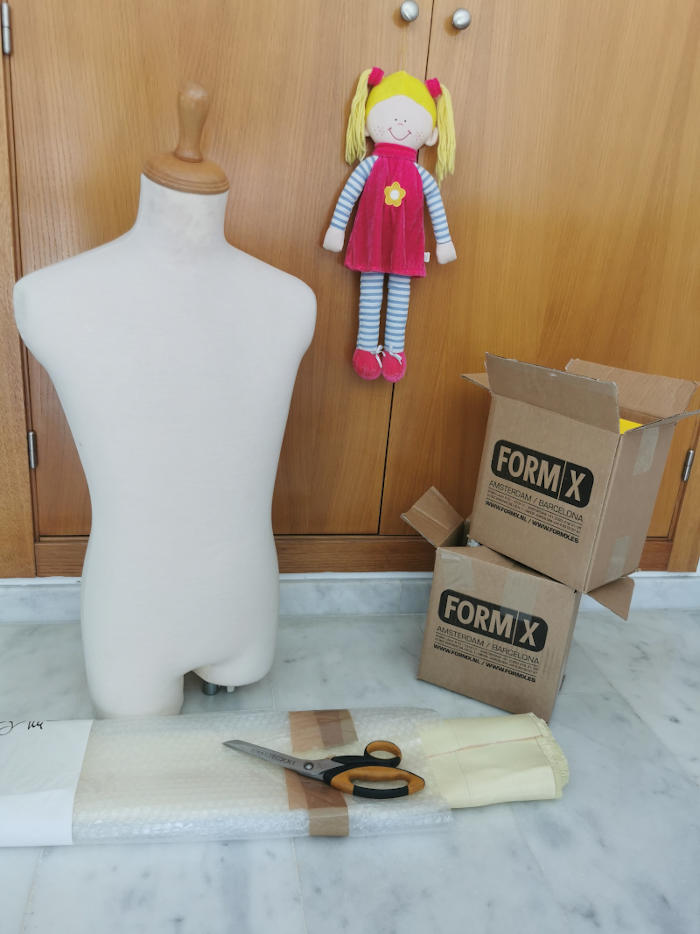
But on this occasion, it will not be possible, I have to set limits to myself!!
I am going to return the stolen space to my children that I have used to set up my own laboratory / office at home.
Perhaps, at FabAcademy 2021, I will give this idea and all the resources to my colleague Héctor who I hope can take this training and I will help him to carry out this assignment…
Who knows? 😊
I think that I have done is “GOOD”, it could always be “BETTER”.
But another expression of my land is:
“The BEST is the enemy of the GOOD”
And finally, another saying: