Final Project
To capture the beauty and wonder of a lightning storm in a fun and safe way, that is also easily reproducible and could be brought to market. The idea is to design a lamp or sculpture that looks like a tiny cloud. It will incorporate addressable LED’s that will simulate a lightning storm. I’d also like to include a sensory system so the cloud could be interactive. The idea would be to make it fun, so it would have multiple modes. One mode could simulate a thunderstorm that gets more intense the closer somebody gets to it. The other mode would be a peaceful mode that could act as a night light. This page will be dedicated to keeping a history of the project at it evolves and comes together.
Nimbus

Inspiration
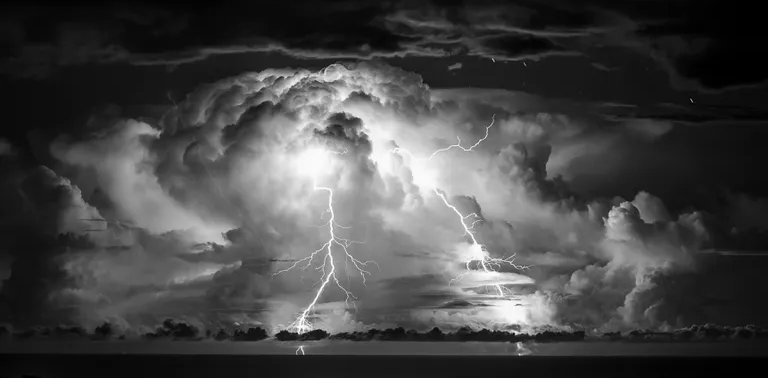
I’ve loved thunderstorms for as long as I can remember, especially lightning. Growing up on the shores of Lake Erie in northern Ohio, I got more than my share of storms, lightning, and waterspouts. Being curious in how the universe and natures systems function, witnessing the power of a storm has always been fascinating to me. As I got into school and starting learning about the physics of how they work, I was even more enamored by the actual raw energy that nature could generate.
As I got older still; getting married, buying a house, raising dogs, I began to respect the destructive power of these storms and the reality of what one could do to property and infrastructure. This starting me thinking as to how one could enjoy a lightning display safely.
If you’re unfamiliar with the weather of northern Ohio, specifically Cleveland, let me tell you that it is something else. There’s and old joke that goes “if you don’t like the weather, wait five minutes”. Nowhere is that more true than Cleveland. I’ve experienced three seasons in one week. I’ve woken up at 6am to temperatures in the mid-60’sF (18C), and by noon it was below freezing. I’ve witnessed thunderstorms in which the air temps were in the high 90’sF (35C) and dropped to 70F (21C) with a single wind gust. We get some wild weather year-round, so witnessing the power of nature is an everyday occurrence.
The Idea
I’ve casually played with Arudino’s in the past, and have read about addressable LED’s. I’ve also seen lamps that look like clouds, some of which even light up. I wondered, why not combine the two and make an animated lightning cloud? It could even be reactive to the environment, possibly motion sensing. This could be used by anybody that finds lightning to be both intriguing and relaxing. If I were able to include a nightlight mode, it could even be used for children as a gentle light.
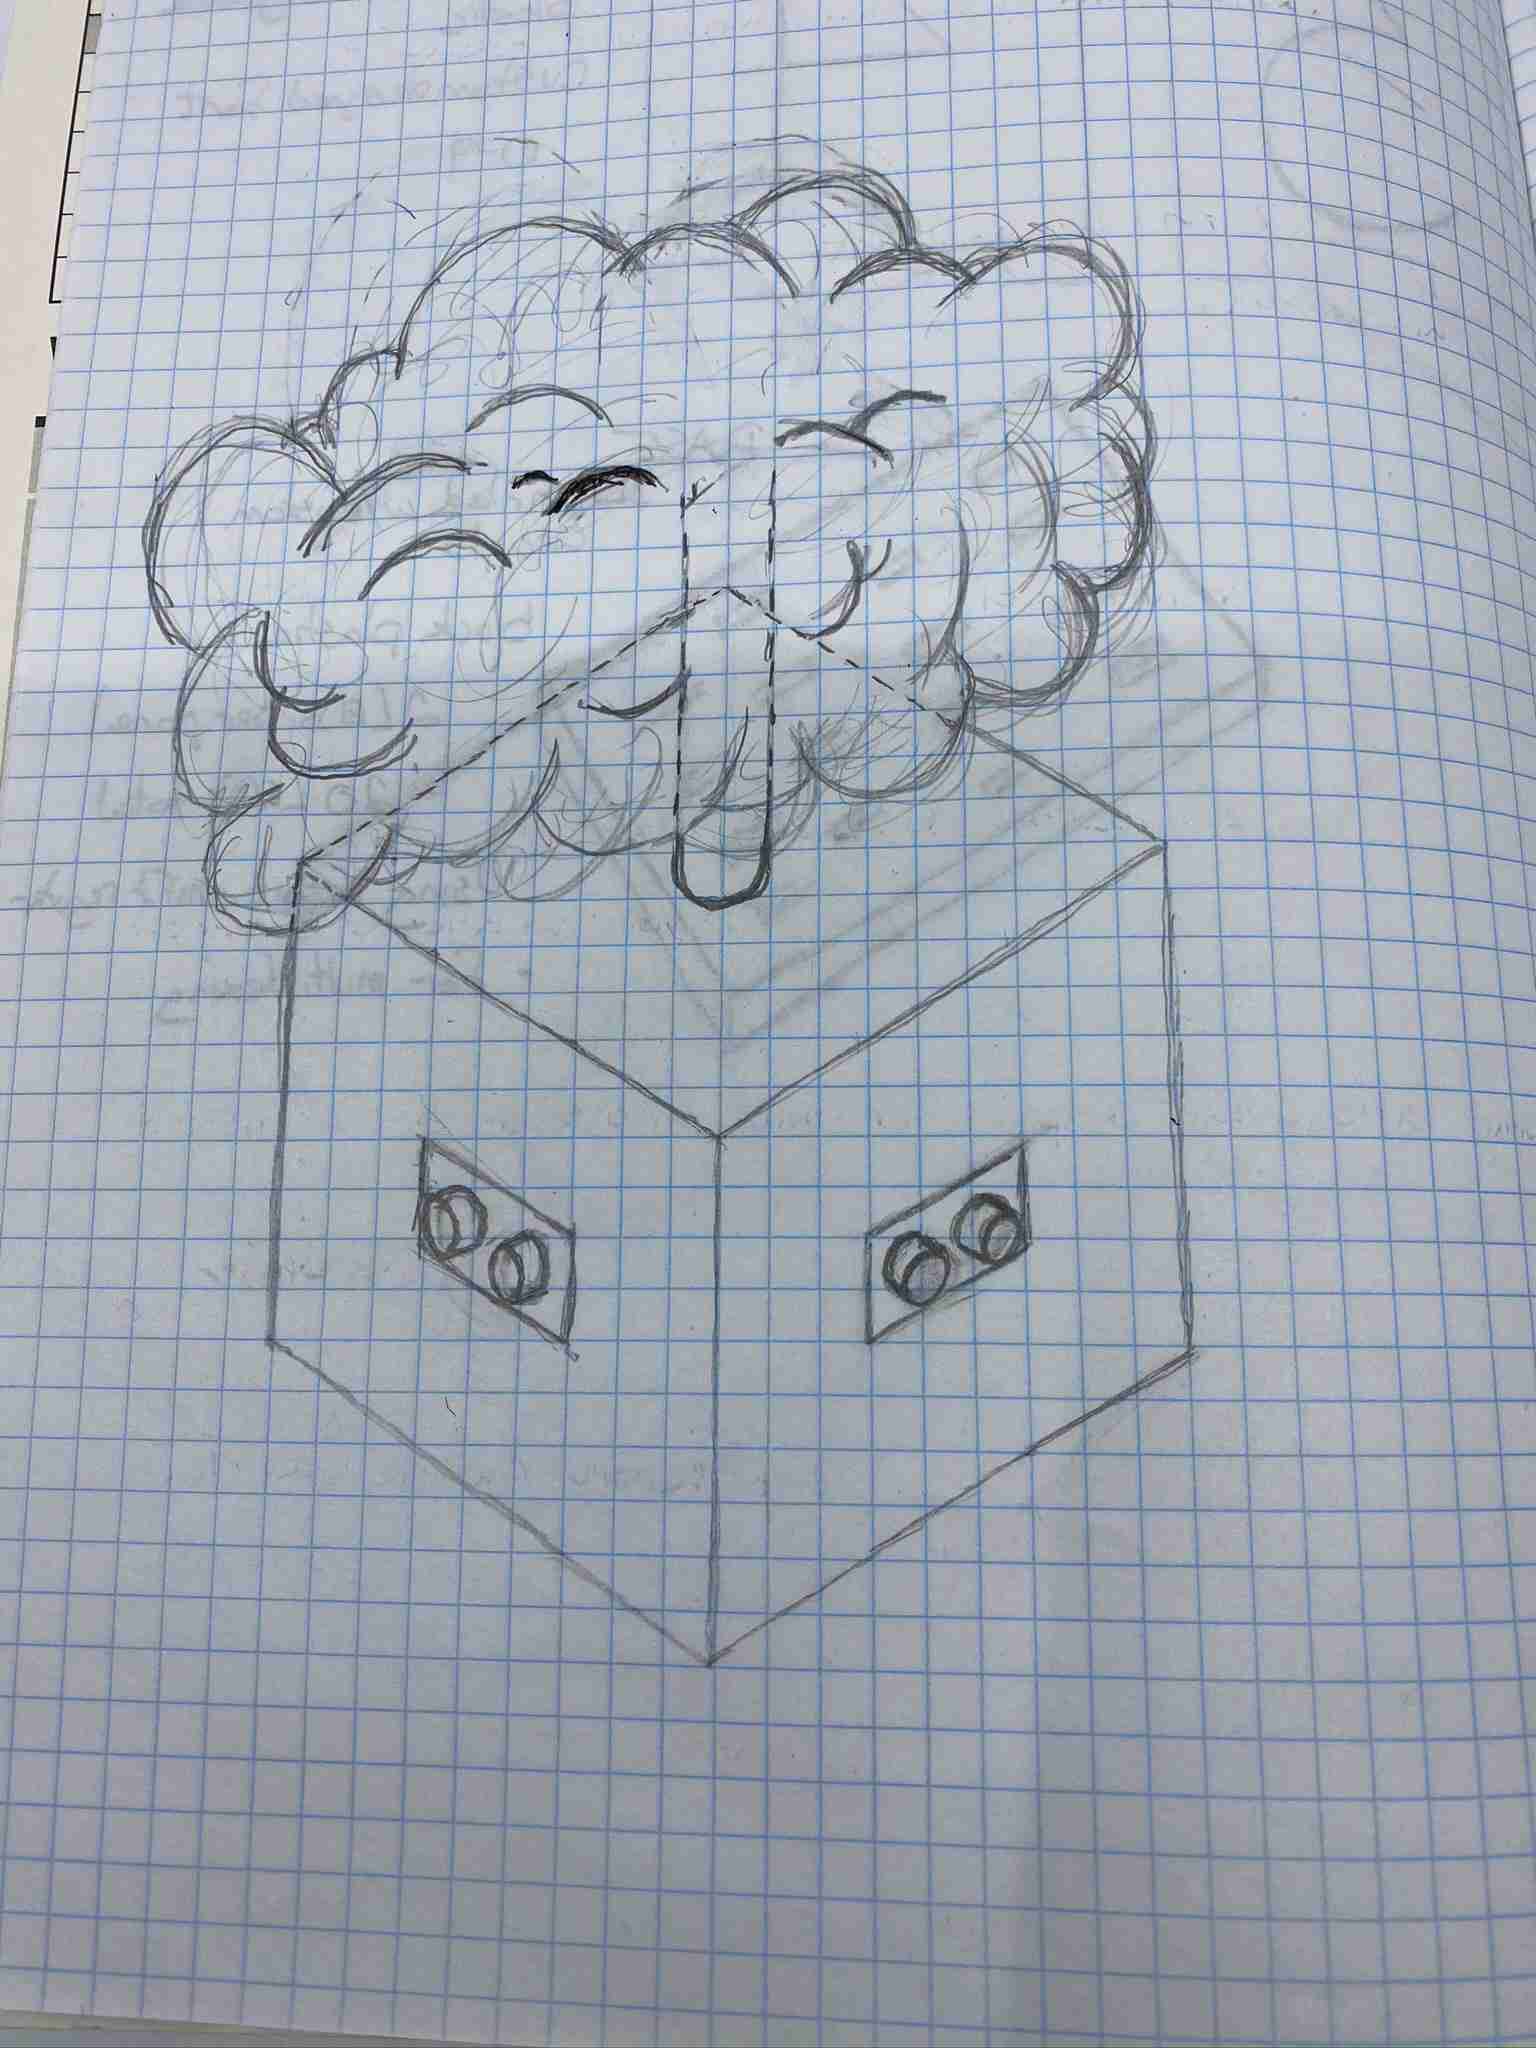
A quick pencil sketch
The Plan
The final plan is a little different than the initial pencil sketch. I originally planned on having a laser cut box as my base, which would house the electronics. However, I’m now using a machined solid block of 1.25” wood. The CNC router will machine the shape that will provide space for the electronic components.
 Solid wood base
 Machined underside of base
The electronic component will be made up of two ATtiny44 microcontrollers, an HC-SR04 ultrasonic sensor, 16 addressable LED’s (Neopixels), and a mini-USB port for power. I’m still working out the plan for switching modes, but I think I’ll be going with a rotary encoder. I’ll be using the FastLED library to run the addressable LED’s.
I chose this library over the Adafruit neopixel library for a few reasons. Mainly, it allows for CHSV color selection in addition to RGB. I wanted very specific colors for this project, CHSV control made that much easier. The FastLED library also has global brightness control, which allows me to regulate the maximum current draw and set a limit to how bright the brightest flashes are. This allowed for flexibility in the animation subroutines. I didn’t have to set maximum brightness for each subroutine, which also made experimenting with the animations much easier.
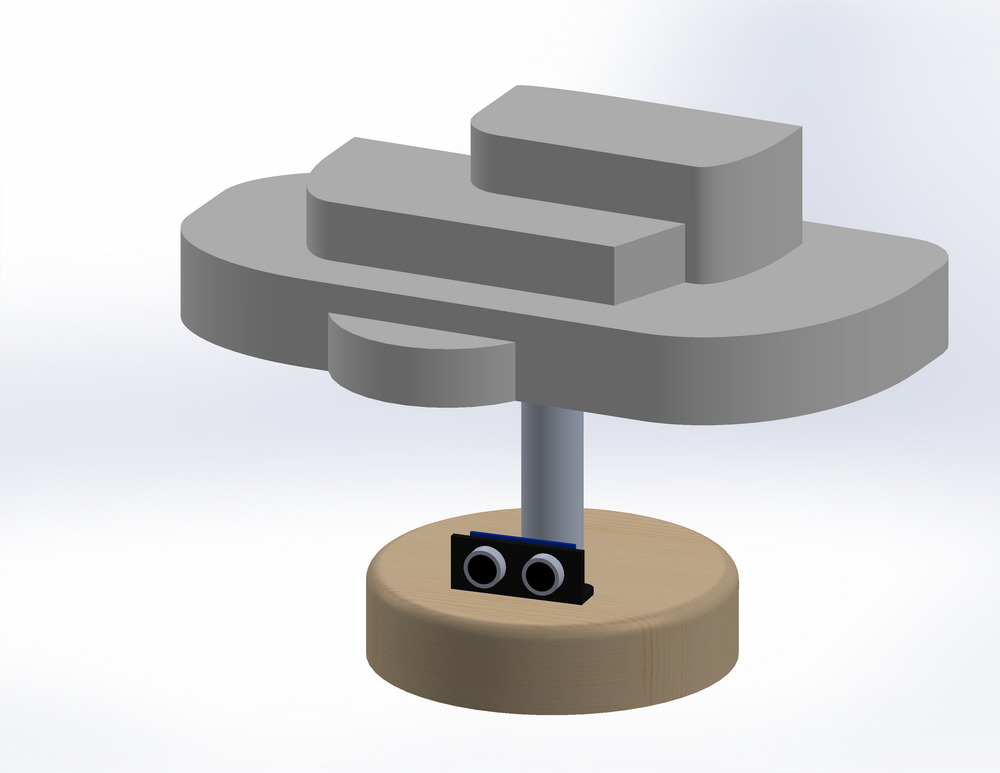
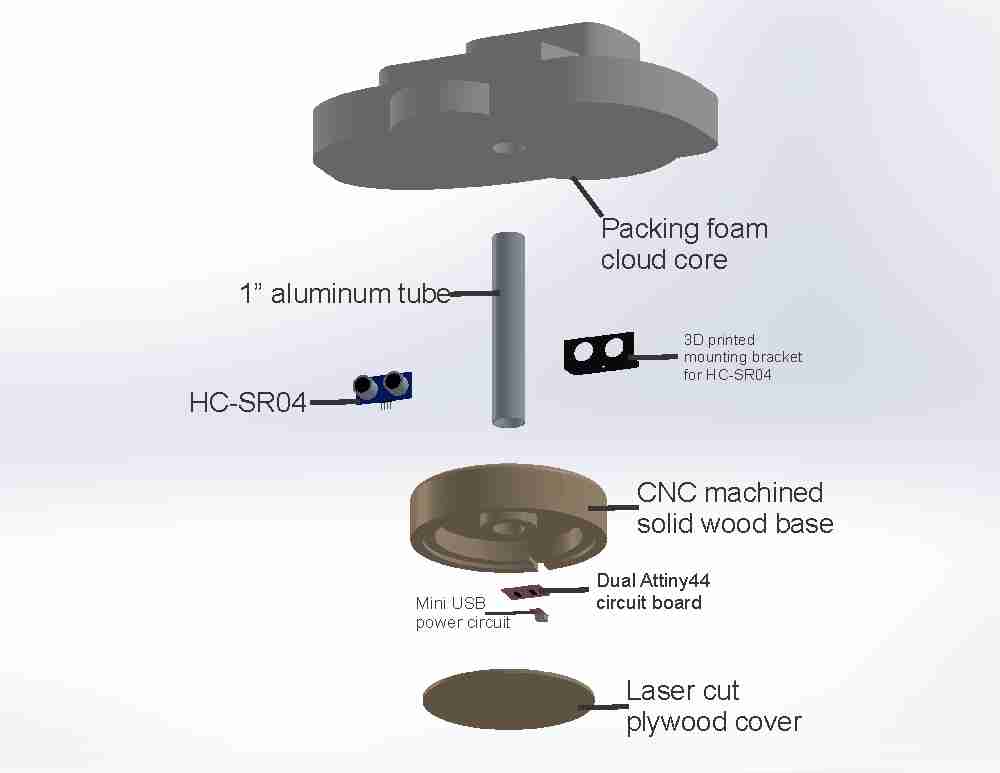
The cloud itself is made up of a core of packing foam block that will be glued together and machined to a basic cloud shape. The addressable LED’s will be mounted to the core, and then dry polyester fiber filling will be glued to the core using a spray adhesive. The fiber fill can be ‘fluffed’ to a desired effect, making for a convincing cloud. Wires will be routed through the core, into a 1” hollow aluminum tube and into the base to connect to the control board.
 Front side of foam cloud core
 Back side of foam cloud core
Range finding will be done with an HC-SR04 ultrasonic sensor. As the range decreases, the intensity of the storm animation subroutines will increase. Once a critical threshold is cross, the colors will switch from a natural pallet into a red pallet, as that’s typically the color associated with anger. The reason for using two Attiny44 is due to processing need for the FastLED library codes and reading the ultrasonic sensor. Running these simultaneously caused massive slowdowns and inaccurate range updating from the ultrasonic sensor. With two Attiny44’s, one chip can focus on the the ultrasonic sensor, while the other controlling the LED’s. These will be networked together using binary software communication. The plan is to use two output pins on the ultrasonic Attiny44 and two input pins on the LED Attiny44. I can read high/low states of the outputs of the ultrasonic processor with the input pins of the LED processor. This effectively gives me 4-bit communication. The ultrasonic processor will change pin states based on range. For example, when it detects somebody at midrange, it will set output pin 1 to LOW and output pin 2 to HIGH, basically giving me binary 01. Two pins let me have four states, or 4-bits. The LED processor looks for those states and varies its subroutines accordingly.
Making a storm
Many of the questions were answered in the Applications and Implications week.
The final project differed from my original plan in a few ways.
What will it do
The project will be a table-top sculpture of a cloud with embedded, addressable LED’s. It will have three modes, selectable with a rotary encoder or a push button. Those modes will consist of:
Peaceful Cloud (Passive): The LED’s will run an animation program that simulates a gentle lightning storm as seen from a safe distance.
Angry Cloud (Active): Using the same animation program, the intensity of the lightning effects will increase the closer a person gets to the cloud. The distance will be found with an ultrasonic sensor. Once a person gets too close, the color will switch from a natural palette to a red palette. Hence, angry.
Night-light: The entire cloud will be dimly lit, with no flashing.
What does it do
It no longer has selectable modes, so I didn’t use a rotary encoder. What is does now is simulate a gentle lightning storm with natural colors, but when it detects something that’s too close, the color shifts to red and the storm increases it’s intensity.
Who has done what beforehand
I found this a few years ago. It’s a neat idea, but it just fades in and out. There is no animation to make it look realistic. I want to take this a step further
There is also this design. It does have more functionality than what I plan on doing; it is sound reactive and can generate noise through onboard speakers. I don’t
think the speakers are necessary. Thunder is very viseral, and a tiny speaker will never be able to recreate that. There is also a very simple, limited animation. Just looking at it,
you can see that it’s just two LED strips that blink. I’ve personally never been a fan of sound reactive devices, they never seem to be accurate or all that engaging.
Also, it’s ludicrously expensive. I want to make this as inexpensive as possible.
What will you design and what parts and systems will be made
The two-piece core (top and bottom) of the cloud using recycled packaging foam. It will be a 3D CNC machined to produce the general shape of the cloud. This will provide a base to fix the addressable LED’s to and glue the polyester fiber fill onto.
A custom circuit board using an ATtiny 1614 to process information from two HC-SR04 ultrasonic sensors. That information will be then sent via I2C to an Arduino Nano that handles the LED animation code. The reasoning behind this is due to the way the LED animation functions, the Arduino doesn’t have the capacity to handle two ultrasonic sensors and run the animation code simultaneously.
This changed a lot from the initial design idea. The addressable LED library doesn’t work with the ATtiny1614 yet. I ended up going with an ATtiny84 because the library will run on it, and it has more memory than the ATtiny44. I switched from two ultrasonic sensors to just one. Experimenting with the HC-SR04 showed me that a single unit could cover the area I needed for the lamp.
A CNC cut wood base for the lamp.
This ended up being made from machinable foam, specifically, RenShape 5020. Sourcing the wood I needed during the lock-down proved difficult, but we were lucky to have a supply of RenShape scrap. Added bonus is it was free.
A 3D printed housing all of the electronics and provide stability to rest on a table. Also to add some decorative flair. This can possibly be molded and cast, but I haven’t decided yet.
Only part needed to be 3D printed was the housing for the HC-SR04 sensor.
Both the codes for the lightning animation and to process two ultrasonic sensors as well as interface the two with I2C.
Laser cut a decorative panel for the switch and rotary encoder.
Wasn’t needed at all. I did laser cut a wood cover for the base, however.
A 3D printed hollow tube for the wiring to run from the base to the cloud.
I ended up going with a 0.75” aluminum tube I had laying around. All I had to do was cut it down and clean it with a wire brush. It was lightweight, aesthetically pleasing, and free.
A vinyl decal with my logo
Vinyl didn’t stick to the RenShape, so I ended up not doing this.
What did I design
-
ATtiny84 modular boards using KiCad.
-
The base and bottom cover were designed in Vectric Aspire.
-
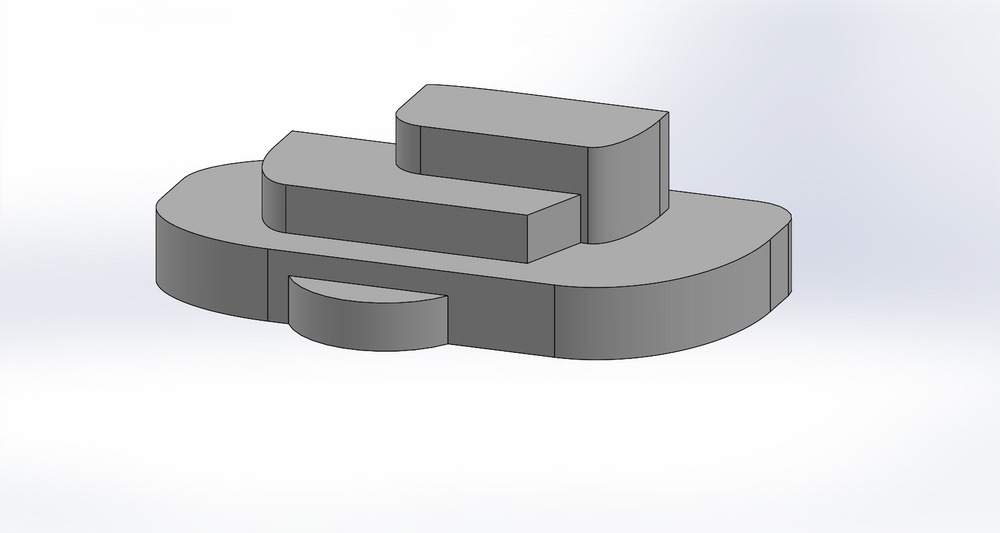
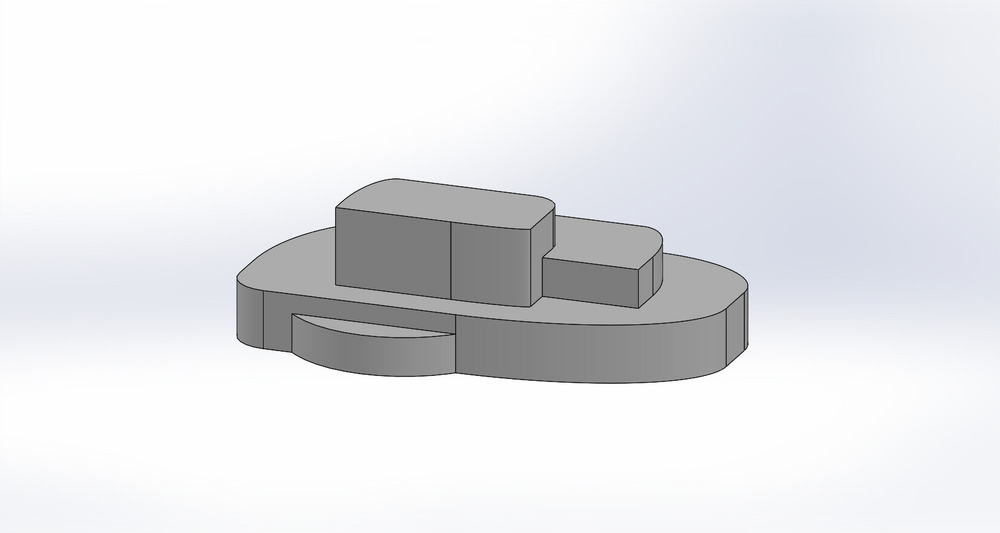
Housing for the HC-SR04 sensor was modeled in SolidWorks.
-
Code for the animations and HC-SR04 sensor in the Arduino IDE
Bill of materials
I linked my orginal bill of materials here as a spreadsheet:
Because of the changes, here’s what I ended up using
| qty | Location | Cost $ | Total $ | |
|---|---|---|---|---|
| ATtiny84 | 2 | digi-key | 0.82 | 1.64 |
| 6-pin header | 2 | Fab Inventory | 0.86 | 1.72 |
| 4-pin header | 2 | Fab Inventory | 0.67 | 1.34 |
| HC-SR04 | 1 | digi-key | 1.92 | 1.92 |
| FTDI pins | 2 | Fab Inventory | 0.67 | 1.34 |
| 1uF capacitor | 2 | Fab Inventory | 0.40 | 0.80 |
| 10K resistor | 2 | Fab Inventory | 0.10 | 0.20 |
| Spray adhesive | 1 | Home Depot | 9.97 | 9.97 |
| LED strip | 1 | Adafuit | 16.95 | 16.95 |
| PLA filament | 1 | Amazon | 24.95 | 24.95 |
| 5 volt power supply | 1 | Amazon | 4.95 | 4.95 |
| Power connector | 1 | digi-key | 0.89 | 0.89 |
| 2”x3” copper board | 2 | Amazon | 1.00 | 2.00 |
| Poly fiber fill | 1 | Michael’s | 9.95 | 9.95 |
| 0.25” wood | Recycled | 0 | ||
| RenShape | Recycled | 0 | ||
| Foam packaging | Recycled | 0 | ||
| 0.75” Aluminum tube | Recycled | 0 | ||
| Total | $78.62 |
What process will be used
CNC machining - foam core of cloud, wood base
Electronic design, production, and embedded programming - HC-SR04 processing unit
3D printing and/or Molding and Casting - Housing for electronic components; hollow support tube
Laser cutting - support interface for cloud core; decorative switch label for rotary encoder/switch
What I ended up using
-
Base of lamp - CNC machining
-
Bottom cover of lamp - Laser cutting
-
Ultrasonic sensor mount - 3D printing
-
Electronics components - Electronics design, production, input devices, output devices, embedded programming, and networking
-
Animation and Ultrasonic code
-
The cloud core ended up not needing to be machined. It was just simple blocks glued together
What questions need to be answered
There are a number of things I’ll need to figure out for this project. First, I’ll have to learn how to model a 3D ‘organic looking’ cloud shape for the foam core that can be milled. Second, learning how an addressable LED library works and how to animate the LEDs to my liking. From the input week, I learned how an HC-SR04 ultrasonic sensor functions, what I’ll have to learn is how to get two functioning at the same time. I’ll also have to learn how the I2C protocol works and how to transmit data from the ultrasonic control unit to the Arduino Nano.
I have answered those questions and more along the way.
How was it evaluated
-
Does the passive lightning animation function? YES
-
Does the active animation function as planned as somebody approaches the cloud? YES
-
Does the active animation color palette change when the proximity threshold is met? Does the color palette return to normal as the person retreats? YES
Nimbus performed all of the functions I wanted it to. The three criteria I outlined were the goals I set to achieve and did so. When somebody gets to close, the color changes to red and the storm gets more intense. During my presentation, it did exactly that. Dr. Gershenfeld complimented the realism of the storm animation as well as saying it didn’t look like a fab project, but a finished project.
Implications
Going through the process of completing my final project gave me insight into how things could be done differently. I’d rethink the order in which I design the components. I would design the circuits first and then map out my packaging plan. After that was complete, then I’d design the base. It would be better to design the base around an electronics package. Trying to fit the package into a base that was already complete limited some of the design aspects of the circuits. I’d also look into other range finding components. The HC-SR04 performed its task, but it would be interesting to see what other options I could use and how I could change the design aesthetics around it.
I’d also re-think the design of my circuits. I would include two on-board LEDS, one for power, and another as an output for easier testing and debugging. Being able to see if the board is powered at a glance would be ideal.
Electronics
The first part of electronics was writing the code to handle the animations. Using an Arduino for testing and debugging, I setup the test circuit.
I then had to decide how the code should work. Luckily, we’ve had a few thunderstorms come through northern Ohio recently, so I watched them intently. I found four different types of lightning make up a typical storm; the rumble, the multiple burst, the large burst, and the bolt. I also saw at least four distinct colors that I hoped to replicate.
The rumble is lightning that rolls through a cloud. Typically not very intense, not very bright, lights up throughout the entire cloud, and usually lasts longer.
The multiple burst, or burst, is a few bright flashes in different areas of the cloud. While similar to the rumble, it’s much brighter, more concentrated, larger, and has a shorter duration.
The large burst is just that, a single bright flash that lights the entire cloud.
Lastly, is the bolt. The bolt is what we typically associate as lightning. It the arcing streak of light that leaves the cloud and usually hits the ground.
In addition, there are the four colors I’d like to replicate; bright white, pale yellow, pale blue, and pale purple.
I started with the base code for the FastLED, library. In additions to the examples provided by the library itself, I found two excellent resources for animations
The code starts by including the library, as well as defining the number of led’s (pixels), the data pin. As mentioned earlier, the FastLED library also allows for a global maximum brightness setting. This is especially useful for power consumption, as well as adjusting all the different subroutines with one variable. This is also where the structure for the numbers of leds is setup
#include "FastLED.h"

//Setup of hardware
#define PIXEL_COUNT 20
#define PIXEL_PIN 6
#define MAX_BRIGHTNESS 124

struct CRGB leds[PIXEL_COUNT];
After a lot of research and experimenting, I found the use of random calls makes for a more realistic animation.
void rumble()
{
  for (int i = 0; i < PIXEL_COUNT; i++)
  {
    if (random(0, 100) > 90)
      leds[i] = CHSV(0, 0, 255);
    else
      leds[i] = CHSV(0, 0, 0);
  }
  FastLED.show();
  delay(random(2, 10));
  reset();
}
Notice the CHSV object reference. FastLED includes both RGB and HSV color support. Using HSV allows me to pick specific colors, adjust the saturation, and set the brightness. I included a link to the pixel reference in the FastLED git that defines the values for the colors. The first value represents the color, or hue. This value is irrelevant here because I set the second value to zero. This second value is for the saturation of the color. Zero means no saturation, so the hue value doesn’t matter. The last value is the brightness. The maximum brightness global variable limits this, but setting it to 255 (max value) gives me flexibility to vary the overall brightness using the brightness global variable.
I should mention the ‘reset()’ subroutine. At the end of the animation, I needed the led’s to go back to black, or reset. It was easier to put this into its own subroutine instead of inline with the rest of the code.
void reset()
{
  for (int i = 0; i < PIXEL_COUNT; i++)
  {
    leds[i] = CHSV(0, 0, 0);
    FastLED.show();
  }
}
The next animation is the multiple burst, or just burst for brevity. This code is much more complex than rumble, it has a lot more random calls in it, as well as numerous variables to achieve the desired effect.
void burst()
{
  int x1 = random8(0, PIXEL_COUNT/4);
  int y1 = random8(5, 15);
  int x2 = random8(x1 + y1, PIXEL_COUNT);
  int y2 = random8(5, 16);

  for (int r = 0; r < random16(3, 6); r++)
  {
    for (int i = 0; i < y1; i++)
    {
      leds[i + x1] = CHSV(0, 0, 255);
    }
    if (x2 + y2 < PIXEL_COUNT)
    {
      for (int i = 0; i < y2; i++)
      {
        leds[i + x2] = CHSV(0, 0, 255);
      }
    }
  }
  FastLED.show();
  FastLED.delay(random8(10, 50));

  reset();
  FastLED.delay(random(10, 50));
}
Random8 is a function built into FastLED. It’s much faster than Arduino’s random, but has a trade of of not being as random. I intentionally use both random and random8 because these differences add more realism.
FastLED.delay is another function built into the library. This allows for specific brightness settings to be retained. The standard delay function forces only integer values, which can be destructive to scaled brightness values that are not integers. An excellent description can be found here:
One thing to notice about the math of the variables; the value of ledsi + n never exceeds the actual number of pixels. The second if statement allows for a second grouping of leds to be lit independently of the first grouping.
The large burst is just a modified version of the multiple burst, the difference being that it lights only one large group of leds.
void largeBurst()
{
  for (int r = 0; r < random(3, 6); r++)
  {
    for (int i = 0; i < PIXEL_COUNT; i++)
    {
      leds[i] = CHSV(color_Array[0, 0, 255);
    }
  }
  FastLED.show();
  delay(random(10, 50));

  reset();
  FastLED.delay(random(10, 50));
}
The last animation is the bolt of lightning. This is the code that became the impetus of this entire idea. I found a code from Dan Wilson from 2014.
A link to his git.
From this code spawned my own slight variation
#define MIN_FLASH_DELAY 5
#define MAX_FLASH_DELAY 20

void bolt()
{
  uint8_t boltStartPOS = random8(PIXEL_COUNT);
  uint8_t boltLength = random8(3, PIXEL_COUNT - boltStartPOS);

  unsigned int dimmer;
  int flashes;

  for (int flashCount = 0; flashCount < random8(3, FLASHES); flashCount++)
  {
    if (flashCount == 0)
    {
      dimmer = 4;
    }

    else {
      dimmer = random(1, 3);
    }
    fill_solid(leds + boltStartPOS, boltLength, CHSV(0, 0, 255 / dimmer));
    FastLED.show();
    FastLED.delay(random8(MIN_FLASH_DELAY, MAX_FLASH_DELAY));

    reset();

    if (flashCount == 0)
    {
      FastLED.delay(25);
      FastLED.delay(25 + random8(100));
    }
    FastLED.delay(25 + random8(100));
  }
  FastLED.delay(random8(300);
}
Adding the global variables to change the minimum and maximum delay values between ‘strikes’ as well as the minimum length of the bolt improved the look of the animation.
I liked the look of Dan’s animation as well, so I ended up using it as well. I renamed it ‘fullRumble’ and modified the code to fit my syntax and include FastLED.delay.
Now that all of the animations are complete, the next step is combining them into one code that randomly calls the various subroutines. I did this by using a switch case statement. This was made easier by the fact that all of the animations were separate subroutines.
void fullStorm()
{
  switch (random(8))
  {
    case 1:
      bolt();
      FastLED.delay(250);
      bolt();
      Serial.println("1");
      FastLED.delay(200);
      break;

    case 2:
      burst();
      FastLED.delay(200);
      Serial.println("2");
      break;

    case 3:
      rumble();
      Serial.println("3");
      break;

    case 4:
      for (int q = 0; q < 4; q++)
      {
        largeBurst();
      }
      Serial.println("4");
      break;

    case 5:
      bolt();
      FastLED.delay(200);
      bolt();
      Serial.println("5");
      break;

    case 6:
      fullRumble();
      Serial.println("6");
      break;

    default:
      reset();
      Serial.println("reset");
      break;
  }
  FastLED.delay(1);
}
Randomizing switch values allowed for the different subroutines to be selected and ran without it looking like a pattern.
The animation is complete. Now I want to add the four colors. Right now, I was just using white, so basically just setting the saturation value to zero. To add color, I’ll need to not only change the hue and saturation values, I’ll have to randomize them between specific values.
I did this by starting with an array
int color_Array[5][2] =
{
  {64, 0}, //White
  {64, 160}, //Pale Yellow
  {160, 100},  //Pale Blue
  {195, 74},  //Pale Purple
  {10, 255} //Red
};
The first column is the hue value and the second is the saturation. Next is to set a variable to place those values into.
int randColor1;
int randColor2;
To randomize between the color, I set the randColor variable to randomize between 0-4 in the main loop. This why, it always refreshes the value before inserting into the animation.
randColor1 = random8(4);
randColor2 = random8(4);
For this to work in the animation subroutines, I had to replace the hue and saturation values with the randomized values from the array.
leds[i] = CHSV(color_Array[0, 0, 255);
was changed to
leds[i] = CHSV(color_Array[randColor1][0], color_Array[randColor1][1], 255);
This way, the hue value is set the row position value from the first column of the array, while the saturation value is the corresponding row value from the second column.
Replacing the CHSV references in all of the subroutines allows them to be set to one of the available colors.
Project links
Most of my weekly assignments were directly related to my final project, either in the end result, or the processes used. Here are a few that I directly worked on the final project.
Files
Second possible project
Illuminated, interactive cornhole gameboards

This work is licensed under a Creative Commons Attribution-NonCommercial-ShareAlike 4.0 International License.