19. Project Development
Objectives
This week the only objective is to complete the final project while keep tracking of my progress and answer the following questions. 1. What tasks have been completed, and what tasks remain? 2. What has worked? what hasn’t? 3. What questions need to be resolved? 4. What will happen when? 5. What have you learned?
Files, Tools and Planning
Files
Find the files here
This contains:
- Acrylic Bottom Test Laser Cut
- 3D design Servo Base
- 3D design Comb Pipe Coupler
- PCB Schematics
- Logo Laser cut
- Arduino Programming code
- 3D design Box
Tools
- Autodesk Fusion 360
- Inkscape
- Eagle
- Cura
- Prusa Slicer
- Trotec 100 Laser Cutter
- ShopBot
- Hand drill
- Band saw
- Scroll Saw
- Prusa i3
- Ultimaker 2+
- Soldering iron
- Arduino idea
- Roland Modela MDX 20
Original Plan
Initially, when I started academy my plan for the final project was to create a fabric segregator that sorts clothes based on colour. This is described in Assignment 1. However after the 3 month lockdown when we were finally ready to get back to the lab I knew I needed another project and decided to make an automated Cat Litter Box that uses Wooden pellet as litter. At the beginning of the second cycle, I made a plan so I can spiral my way into the final project.But none of it went the way I thought it would. This was my plan.
What tasks have been completed, and what tasks remain? What has worked? What hasn’t?
Here is a recap of all the work that I have completed with respect to my project(both directly linked and thematically) so far.
Week 4. Computer Controlled Cutting
Although, when I made this, my idea of the final project was different, this fits perfectly with my larger plan of catifying the house.
In this week as part of first assignment I had to create a parametric design using laser cutting.
I was inspired by Buckminster Fuller and created three kinds of domes that works as cat houses.
Did it work: Not exactly as a cat house but as display pieces.
In the second part of the assignment I had to cut a vinyl sticker
I was inspired by Andy Warhol and I decided to do Screen printing using vinyl.
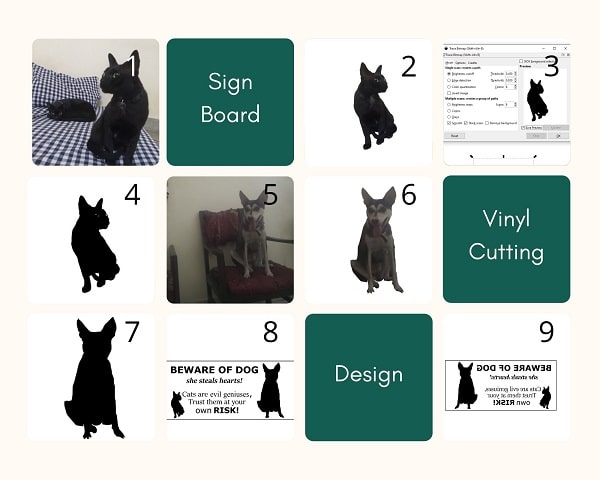
I made a “Beware of Dogs and Cats” board for my house.
Did it Work: Yes
Week 6. 3D Scanning and printing
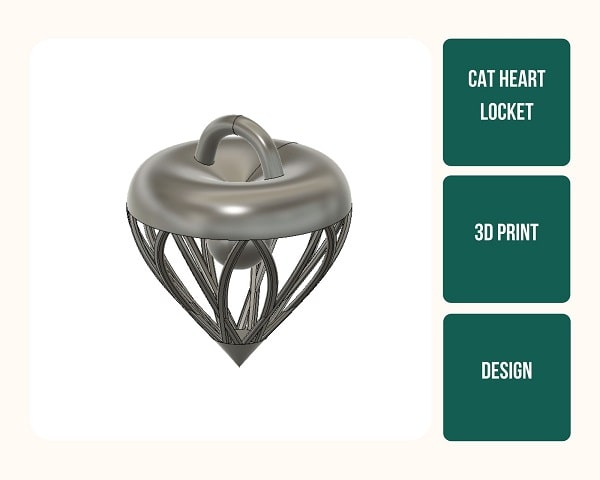
I 3D printed a heart pendant for my cats.
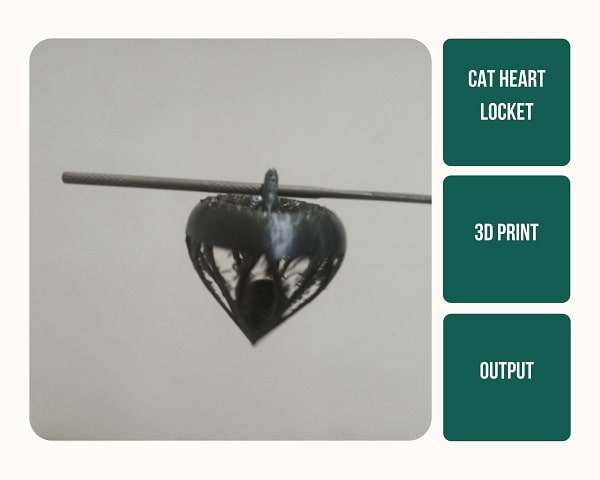
Did it work: Yes
Week 10. Input devices
I made a PIR sensor board that detects the presence of a living being. One problem I found is that the sensor doesn’t detect if the cat is inside the box, it senses if there is living being(from its Infra Red rays) in it’s vicinity. PIR sensor is good as a switch to on the lights of a room but not to switch on the cleaning cycle of the litter box, as it might end up cleaning the box whwnever there is a living being in the vicinity.
Did it work: No
Alternate solution:Ultrasonic Sensor
Week 12. Output devices
I made a DC motor board that can be used to run the rake from one end to another end of the box.
Did it work: Yes
Alternate solution:Stepper Motor might be a better option.
Week 13. Molding and Casting
In this assignment I made a cat paw mold and cast it using multiple materials so I can give it as a take away gift when the cats I foster go to their forever homes.
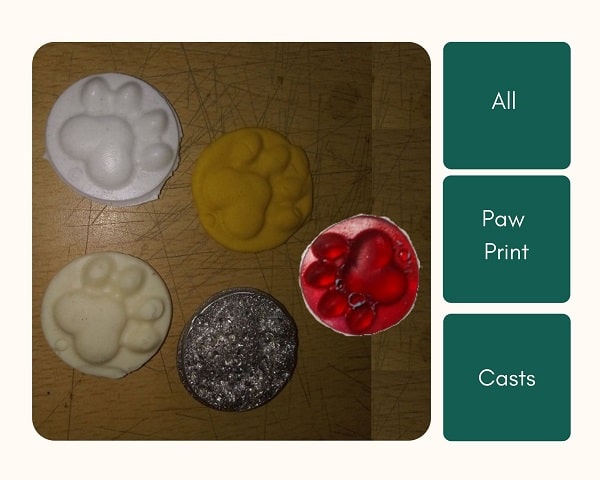
Did it work: Yes
Week 14. Embedded Networking and Communication
The plan for this assignment was to set up a network between my input board and output so the DC motor, which moves the Rake, would work when a cat leaves the box. But this didn’t go as planned and I ended up creating a network between my input board and my hello blinky board.
Did it work: No
Alternate solution:Ultrasonic sensor to be used
Week 15. Interface and Application Programming
In this assignment I would be creating an interface between my board and I would be creating an application that would give a message every time the cat leaves the box. However I haven’t been able to complete this week so far and it is pending. Made after project completion and presentation:
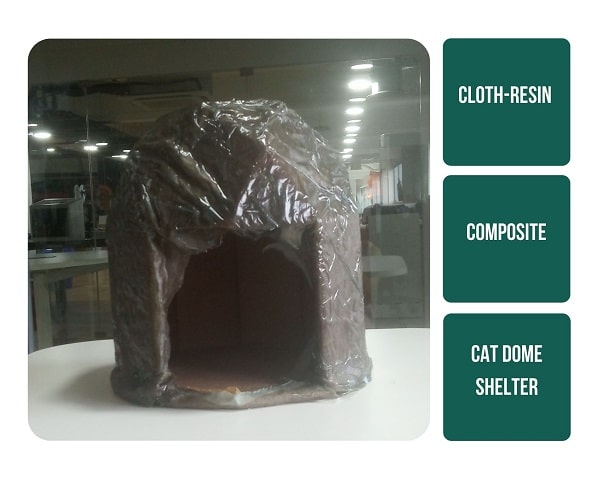
Week 17.Wildcard week
In this assignment I was planning to make a composite layer for my box, so the urine won’t destroy the bottom of the box. However, I have used a perforated metal sheet for the bottom of the box, so I think I will make either an all weather cat shelter. Made after project completion and presentation:
What questions need to be resolved?
- Rake movement - I planned to use DC motor initially but after doing it for Output week, I’m less convinced of it’s use. Besides after working with Stepper-Servo combination for the machine week, Vidya, I’m leaning towards it. So I would try using a Stepper motor for the Rake to move from one end to the other of the box and combining with Servo it should work well.
- Speed - Speed vs Accuracy is always a question, and in this case I have to ensure that the rake can remove the feces while moving in a pretty fast pace. Also it has to start working a certain time after the cat leaves.
- Servo movement -
- Bottom of the box - One of the things I wasn’t quite sure was what to use for the bottom of the box. Laser cutting acrylic sheet was an option but what to do if it doesn’t work.
What will happen when?
Having tried and tested the DC motor gave me a pretty good understanding of the working, also it helped to have been around when Anooj and Tom were working on their projects. It helped me finalise the project requirements and the design.
I listed out all the work pending and made an order to finish all of this. Due to the Onam festival and the increasing number of COVID patients my lab time might get cut even further. I have already endured many weeks of triple lockdown as my place was in containment zone. Besides I didn’t know which day the market was open and when our lab will be closed.
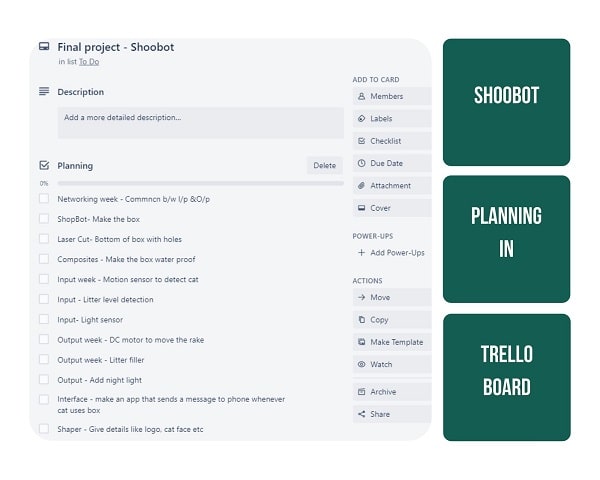
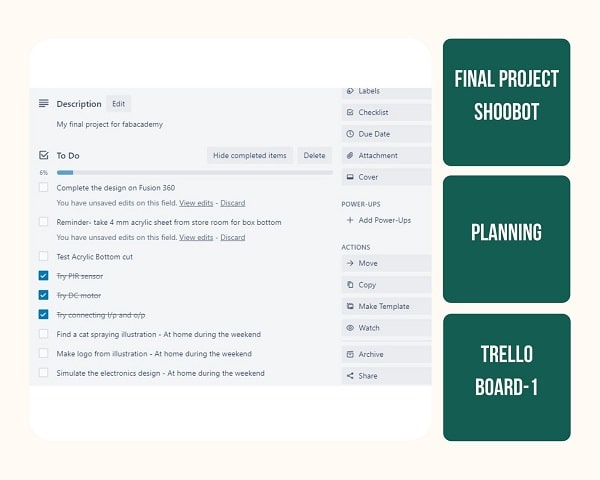
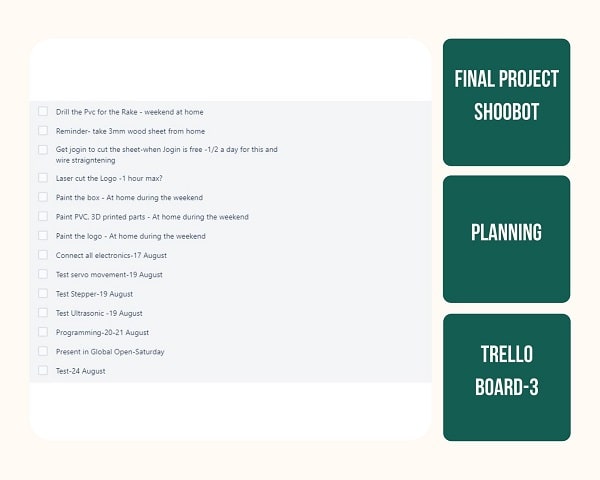
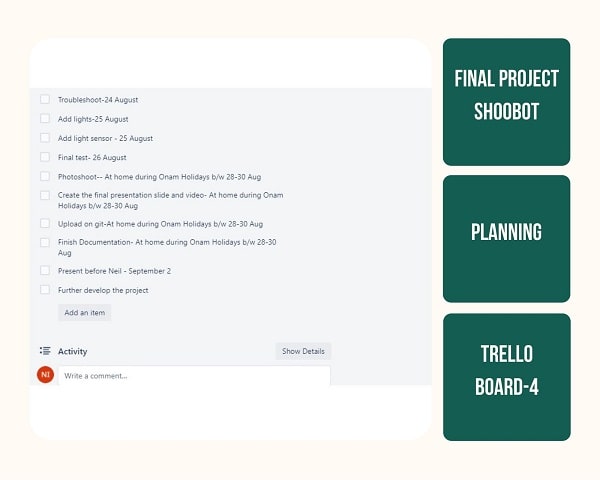
My habit of project management using Trello came in handy as this involves a lot of processes that needs to be completed at a small amount of time. I had to judiciously use the remaining time as some my work was totally depended on the COVID regulations at place. There was a good chance that I may not have been able to complete this on time, however my plan was to finish as much possible from my list on any day I’m allowed to go to the lab. Another idea was to deputize Anooj and Abraham to buy the things required from the market but I doubted whether they know exactly what I wanted.
I knew I had to complete the design and then Cut the box in ShopBot
In parallel I can 3D print
Next I have to design the PCB and once this is done I can mill it, then solder it and start working on the electronics and assembly
The painting and finishing can be done during weekends/lockdown so I don’t have to spend my precious lab time on it.
Purchasing from market can also be done on Saturday evening if market is open.
Laser cutting can also be done parallely

Project Development Week
Designing
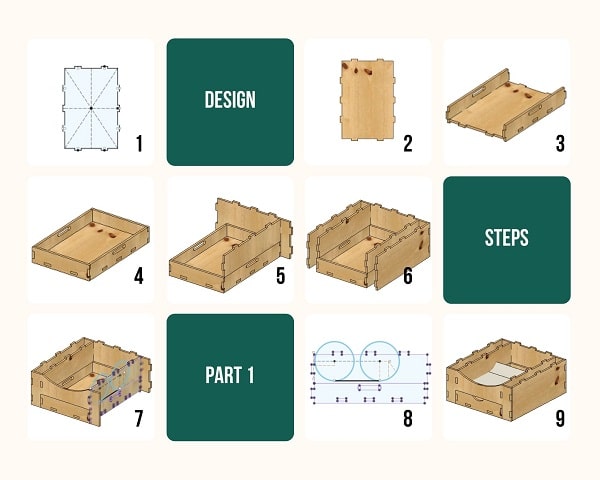
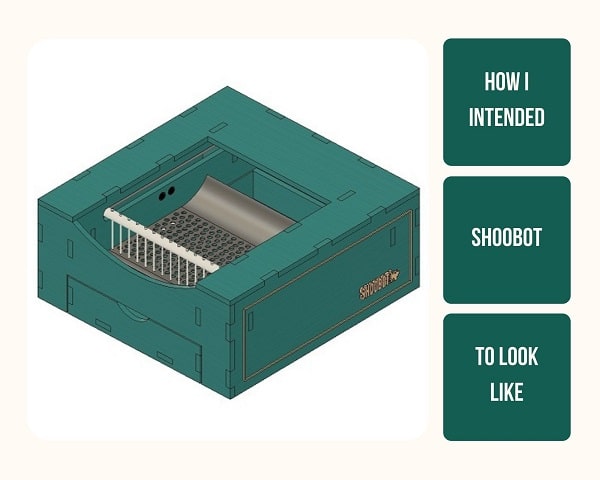
Next I completed the design. Once I decided to use the combination of Stepper+Servo movement, the design came easily. All the time I have previosuly spent on the design seems like a joke now. As I wasn’t sure what will go into the bottom of the box I decided to simply give it a 3mm bended pocket and would somehow insert whatever bottom part I end up making into it so that will work. I was confident because we have a Shaper machine at our lab. I was initially planning to do the Cat shape on the front of the box with the shaper. But since I was short of time, I decided to mill that as well using the ShopBot.
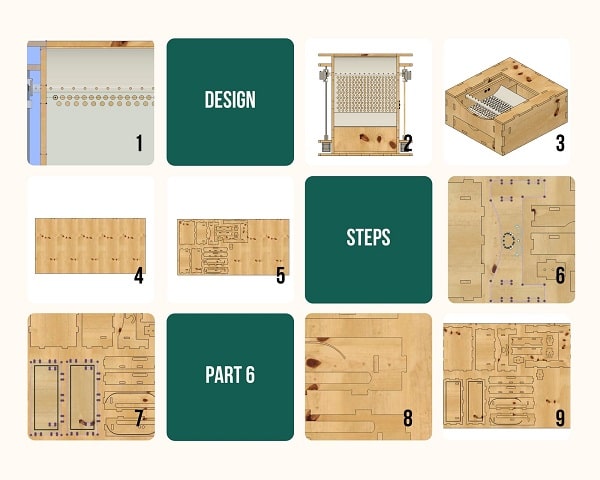
Materials
Bottom of the box-acrylic testing
Eldho used acrylic sheet for the structure of his project which has a curved triangular shape. He made it by bending the acrylic sheet using a hot blower through the midline of the sheet several times when the surface was hot. Then he applied pressure on it and repeated this process until he got bend in the necessary angle.
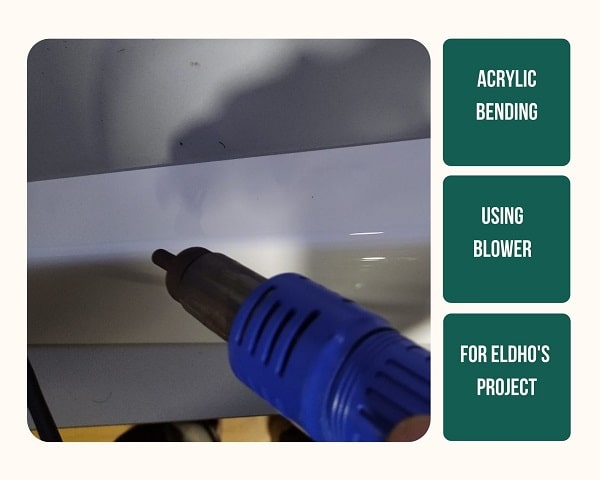
I was inspired by his technique and wanted to try this out for the bottom part the Top area of ShooBot, were the cat sits on.
I wanted to bend it on both ends so the cat can comfortably sit in the middle. The angle of the bend was very important as the smooth servo movement is totally depended on it.
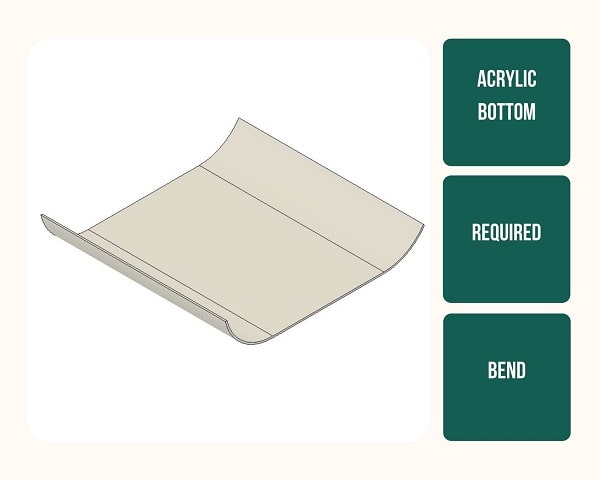
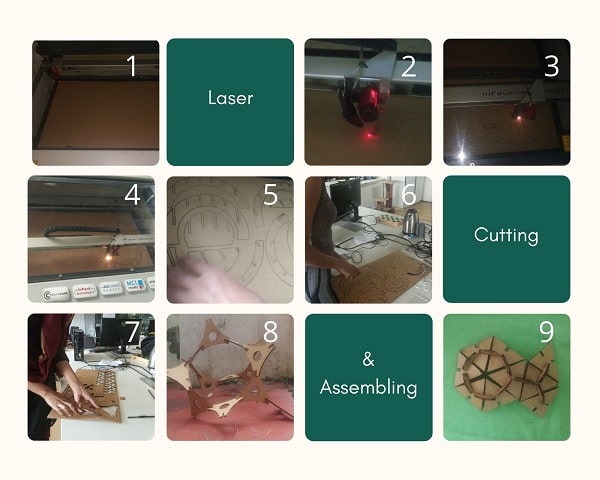
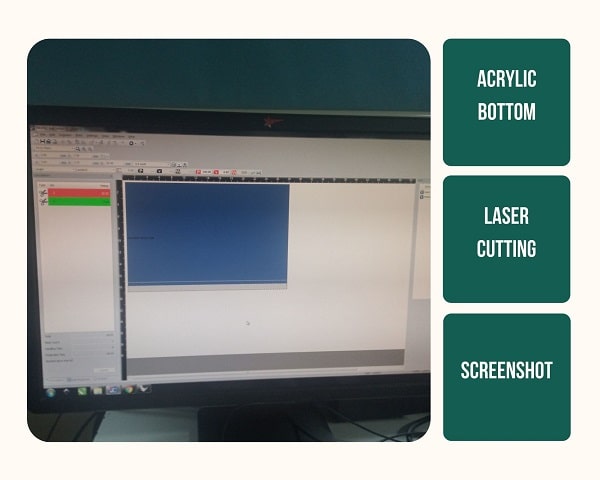
I designed a piece with tiny holes of 4mm dia so I can test it.

When I gave the design for cutting, it took a lot of time, even the test took 13 minutes to cut. I had to give two passes.
When it started cutting, it was evident that I made the mistake of not scaling the design, the cuts were very big.
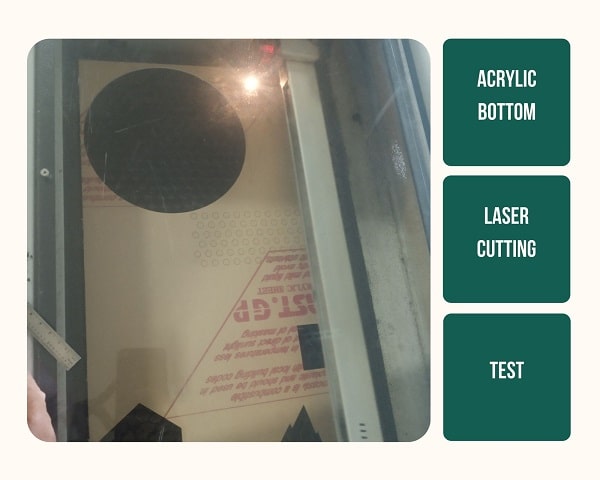
It took me a long time pushing and cutting the edges by hand to remove the pieces from the acrylic to reveal the holes.
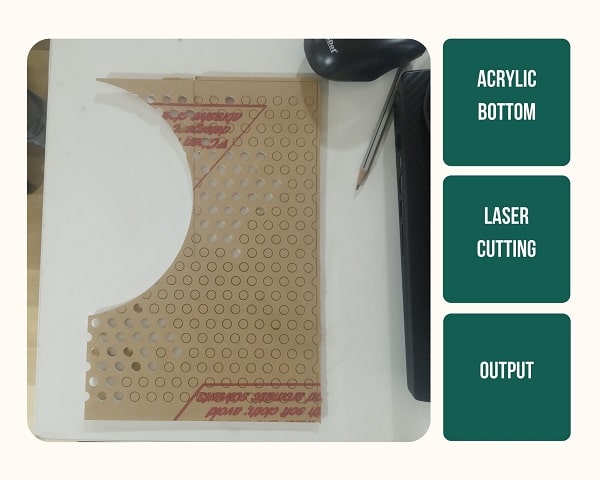
Even though the holes were very big it was clear that this wouldn’t work. Had the holes been smaller the acrylic might have caught fire during laser cutting. Also it was clear that the laser would break off if I had tried to manipulate it to bend by applying heat. So finding an alternative option for the bottom part was absolutely necessary.
Alternate material for bottom of the box
I bought 2 mtrs of stainless steel wire mesh from a hardware store that was open on the way to the lab.
Jogin suggested to buy a perforated sheet instead but they only had Brass sheet used in making Pooja rooms and it was very expensive. (Rs 3500/- per mtr). So I decided to try the wire mesh.
I stapled it on to a thin wooden sheet using wood stapler gun. My idea was to insert the wooden sheet into the box.
This was not a good method as after applying pressure it was evident that the wire mesh would move apart when the cat sits on it.
This would serve as my backup if I’m not able to find the perforated sheet before I have to assemble the box.
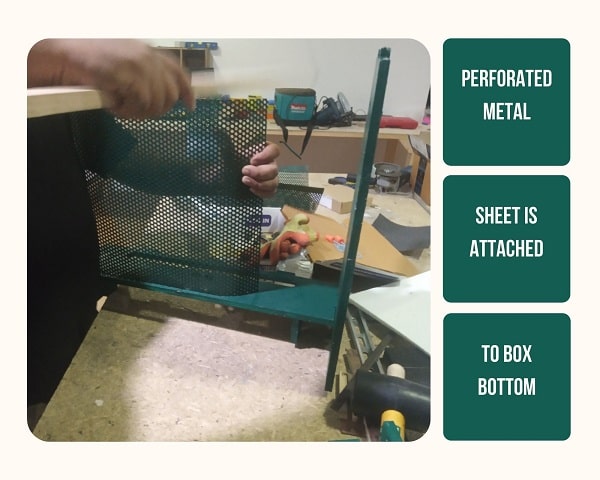
Luckily the market opened up and I was able to find the perforated sheet from a shop there. I got some extra pieces as well just in case.
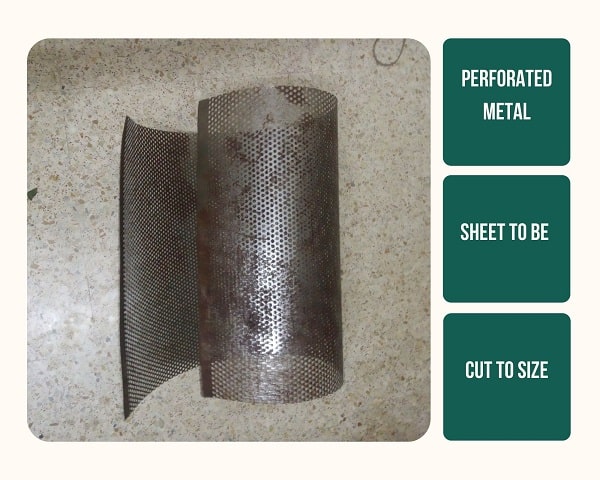
Jogin wouldn’t let me cut the metal on the angle grinder and I had to beg him to let me do it.
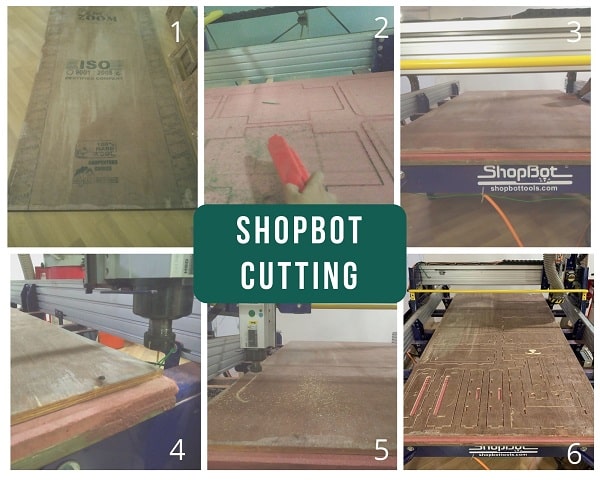
CNC Machining
I have detailed how I made the box using CNC cutting machine, ShopBot in the assignment Week 8. Computer controlled Machining.
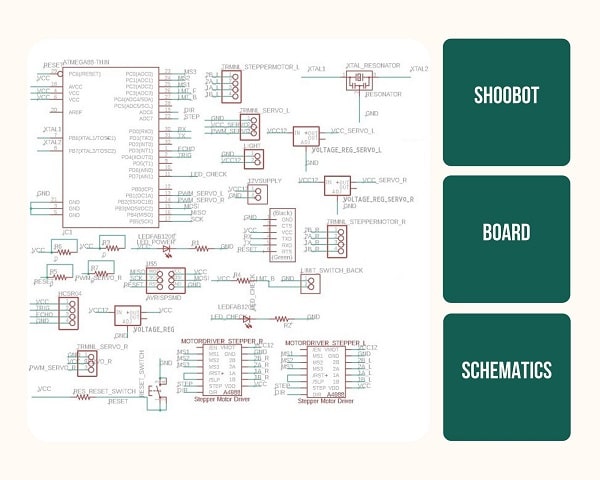
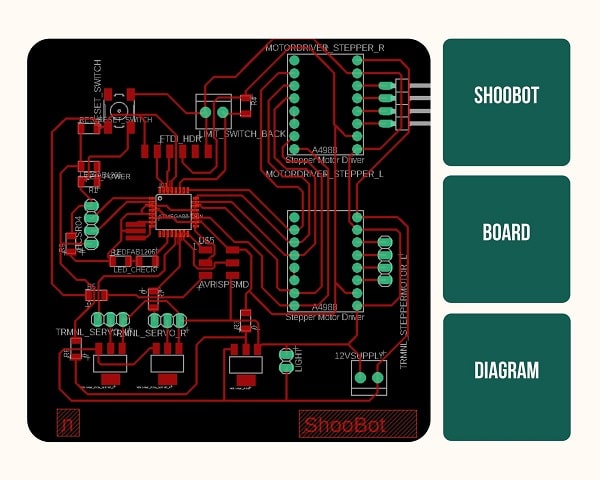
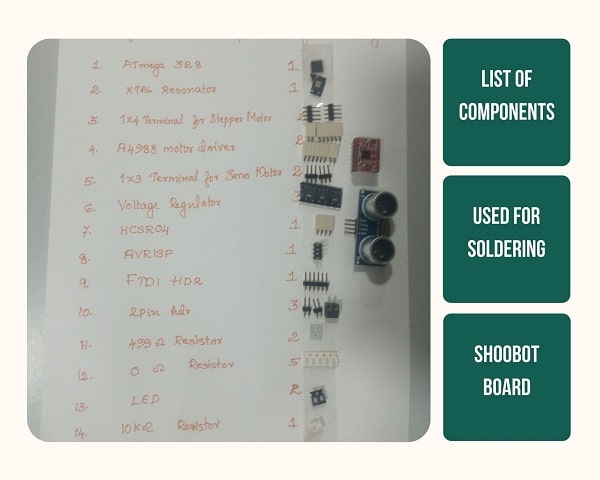
Electronics Design
After doing the weekly assignments on electronics I was sure that I needed a combination of Stepper Motor-Servo Motor combination to move the rake through the box and an ultrasonic sensor to detect the presence of cat in the box. While I did my input devices assignment using PIR sensor and output devices assignment using DC motor, Anooj did his input devices assignment using Ultrasonic sensor and he did his output devices assignment using Stepper Motor. This gave me a reference point to start with.
- HCSR04 Ultrasonic Sensor
- Nema 17 Stepper Motor I needed 2 of these for both sides for bot sides of the box to move the rake from one end to other.
- Pololu A4988 stepper driver From the datasheet I realised that it needs two power input, a logic supply voltage (3 – 5.5 V) to be connected across the VDD and GND pins and a motor supply voltage (8 – 35 V) to be connected across VMOT and GND.
- Servo Motor
- Limit switch So the rake won’t end up hitting the back of the box
- LED for check
- LED for Power
- Microcontroller
Next I had to consider which microcontroller I should use, as I wanted a microcontroller with multiple pins. Both Jogin and Joel suggested to use Atmega328P as it is available in our inventory . I read the datasheet of Atmega328P and realised that it has 23 programmable pins. - Crystal Oscillator
To generate the clock frequency - Light
I wanted to add an LED light strip, so the cat can see the box at night
I also had to include the usual suspects, the terminal heads
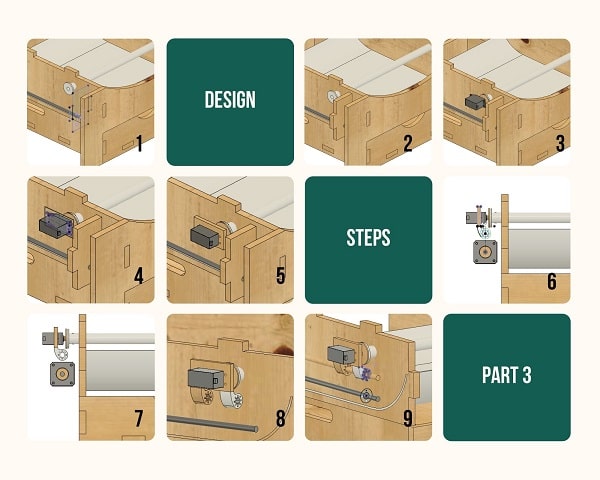
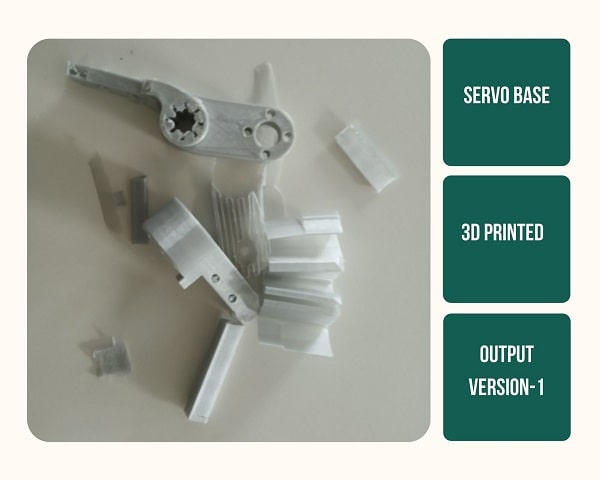
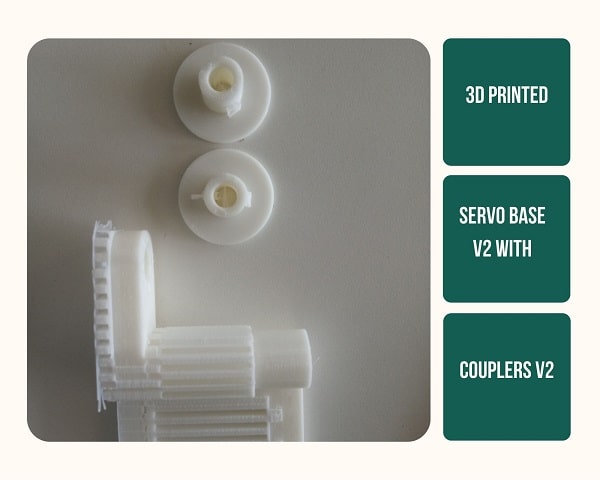
3D printing
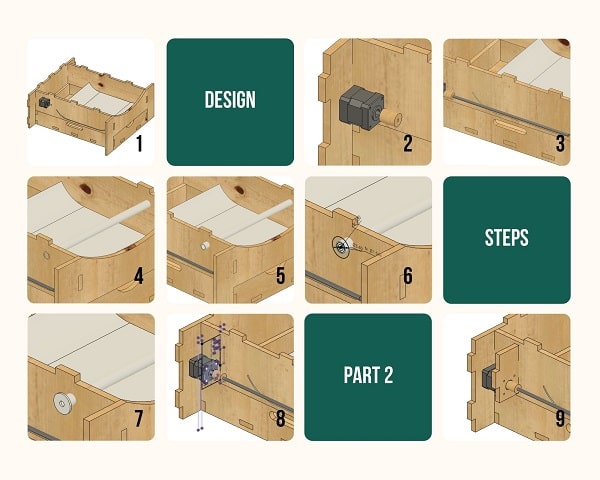
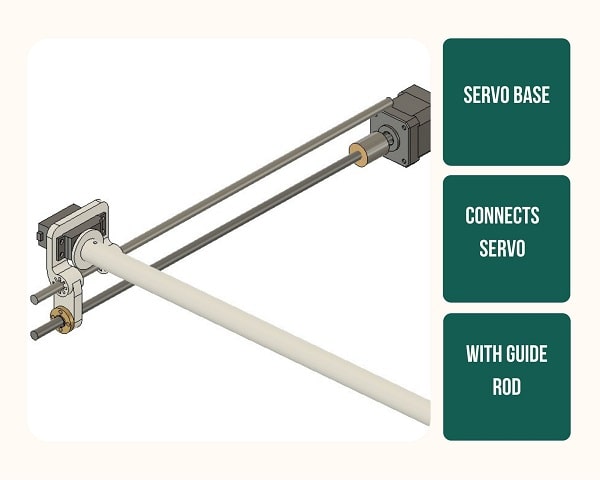
In the ShooBot design two components were to be 3D printed. A Servo Base and a Combpipe-Coupler.
The ServoBase is where the Servo Motor sits on, and it will be held on by four 3mm screws at all corners. The bottom part of the Servo Base runs through the connector rod and the Guide Rod. This part is very critical as this essentially let the entire Raking system to move from one end to the other.
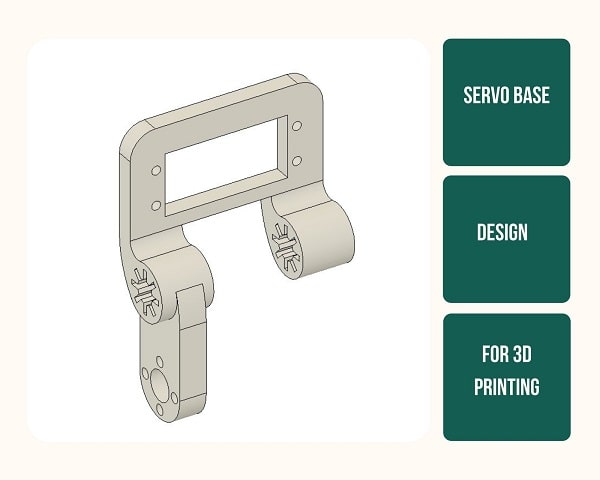
It is evident from this figure, how important the structural integrity of this part is.
I decided to print it on Ultimaker 2+, so I cut it on Cura Slicer and send then print to Ultimaker 2+.
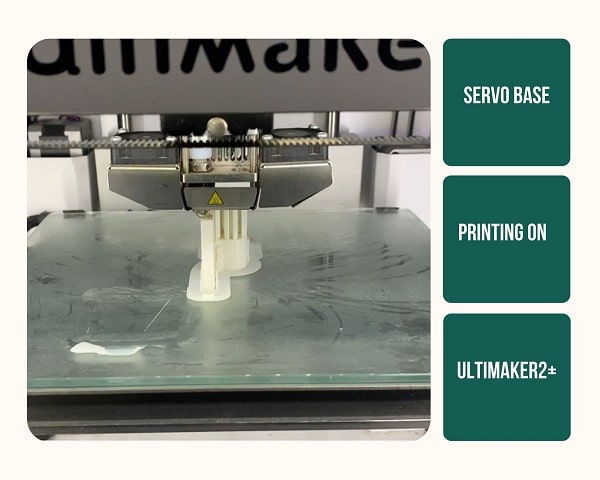
But half way through the printing it stopped as it ran out of PLA. I didn’t notice this and it kept on printing on the air.
I refilled the PLA and was about to restart the printing when Rahul told me to edit the G-Code and get the machine to continue reprinting from where it stopped.
First I measured the correct height to which it had printed. Rahul helped me edit the Gcode and we gave it to continue were it started, but a tiny mistake in calculation ended up in destroying the structure. The machine actually does a sweep initially from one corner to another but we forgot to consider this while editing the code.
So I gave it for reprinting.
After all the problems and corrections, it turned out the output was very poor. It broke apart while I trying to remove the support.
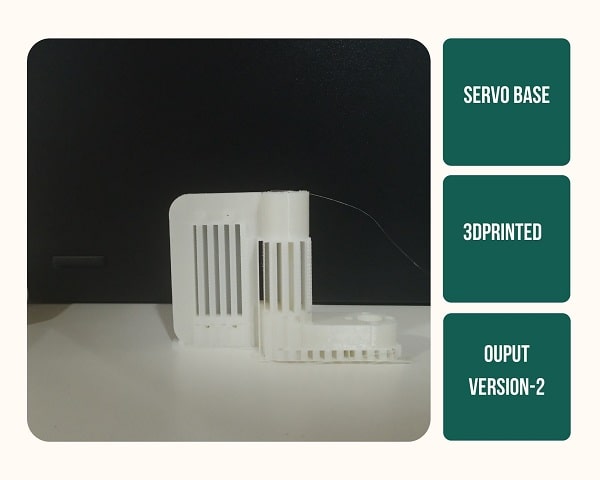
So I decided to try out printing the same design on Prusa i3. I first sliced it on the Prusa Slicer and then gave it for printing on Prusa i3.
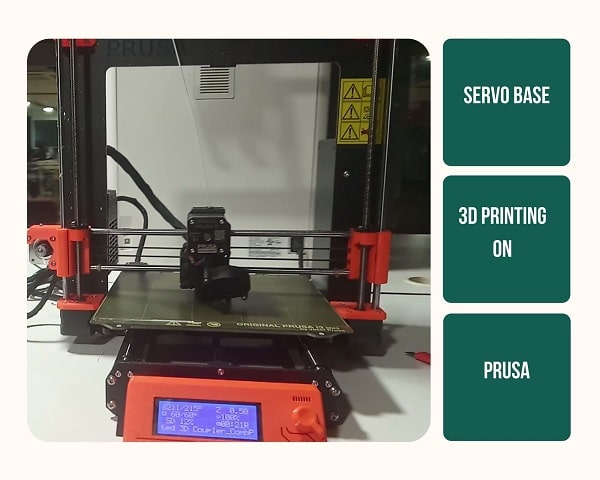
The output turned out to be perfect and it looked like it could definitely hold the Servo.
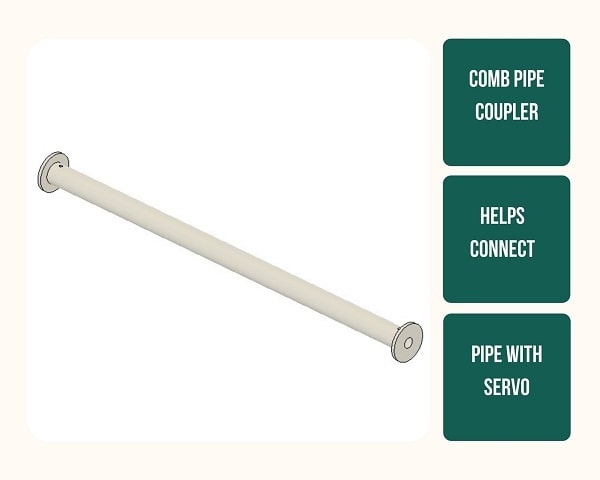
The coupler that acts as a Base for the Comb Pipe that moves from one end to another of the box.
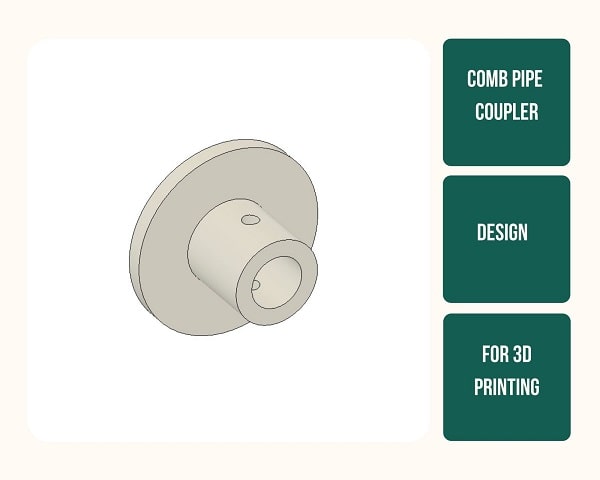
Basically this coupler connects the comb pipe, which at this point I was hoping to make by drlling holes on a 1/2 inch PVC pipe I have already bought from a hardware shop on my way to the lab.
But the first print turned out to have a smaller diameter in the centre structure, the coupler was not tightly fitting as was required. So I redesigned it by increasing the center diameter and printed the new version.
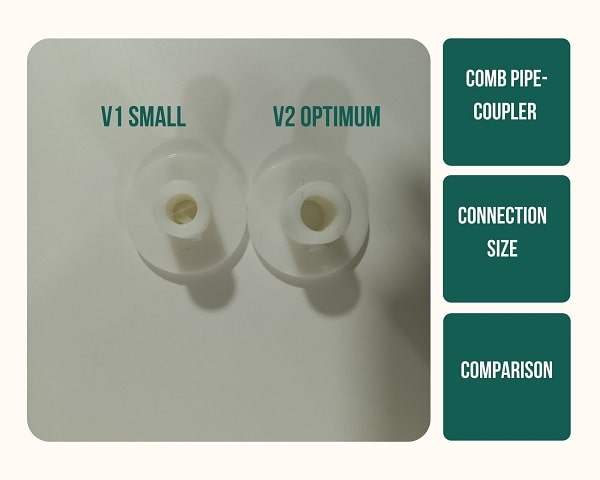
The second version seemed to be ideal so I printed one more for the other side of the Comb Pipe along with another Servo Base.
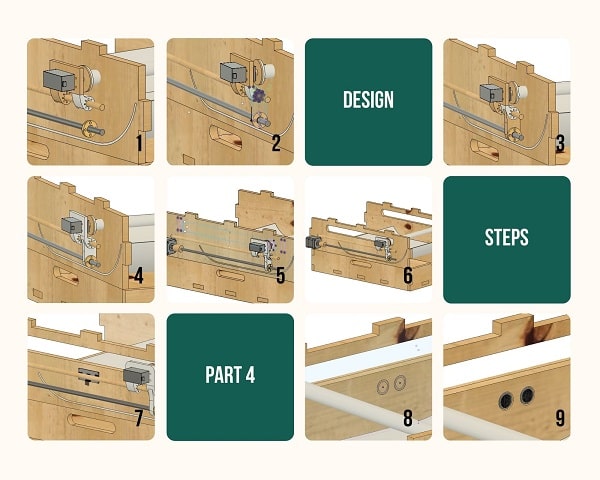
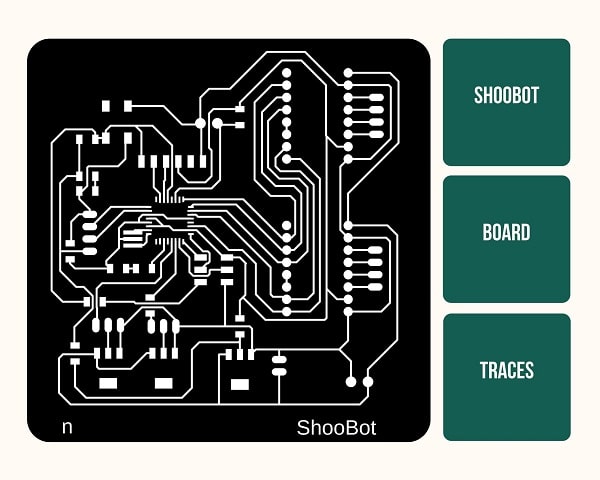
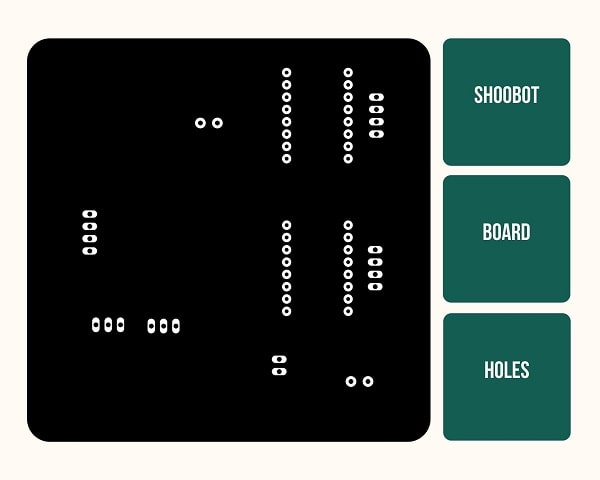
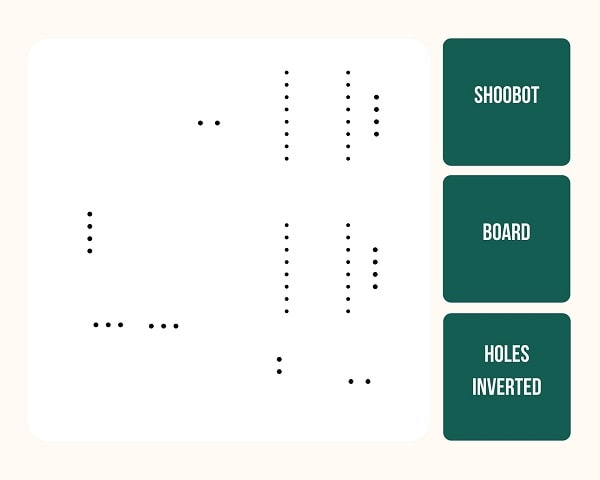
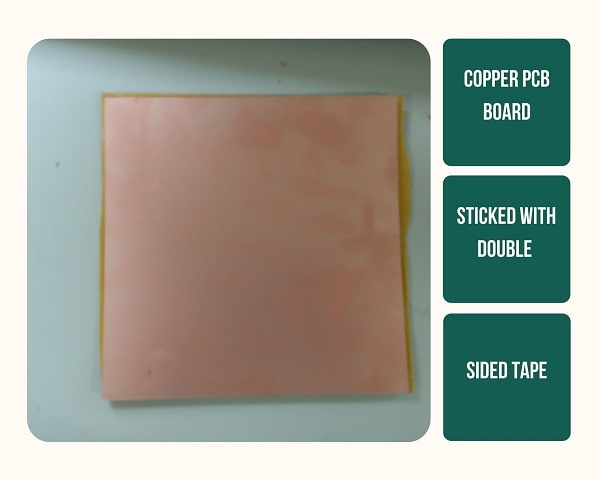
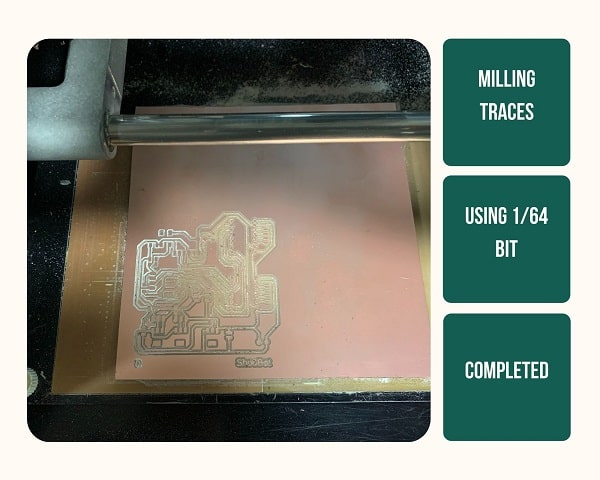
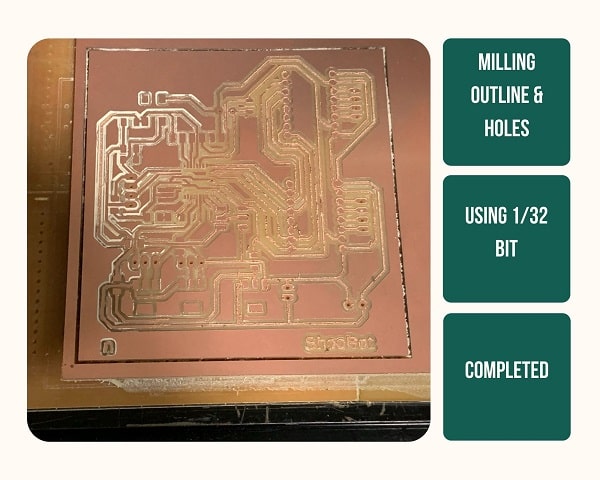
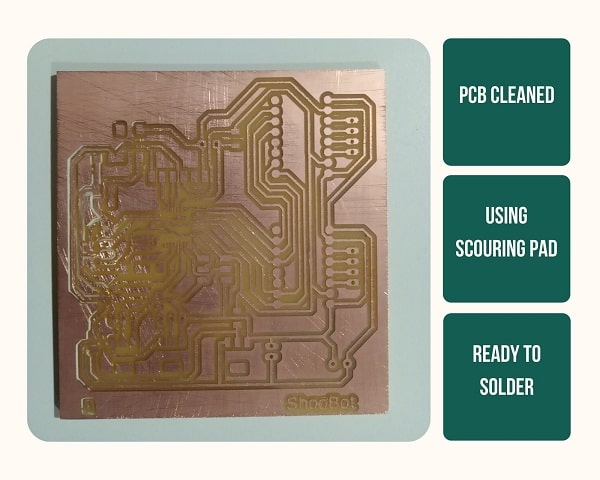
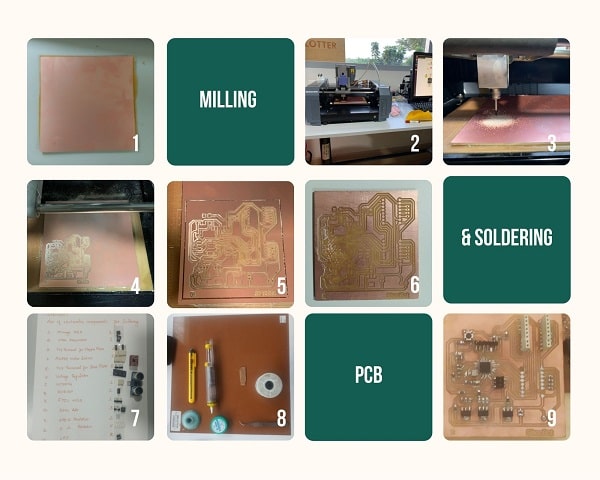
Milling

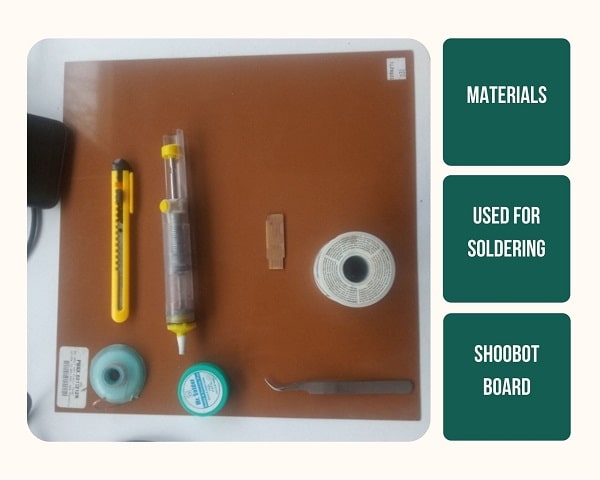
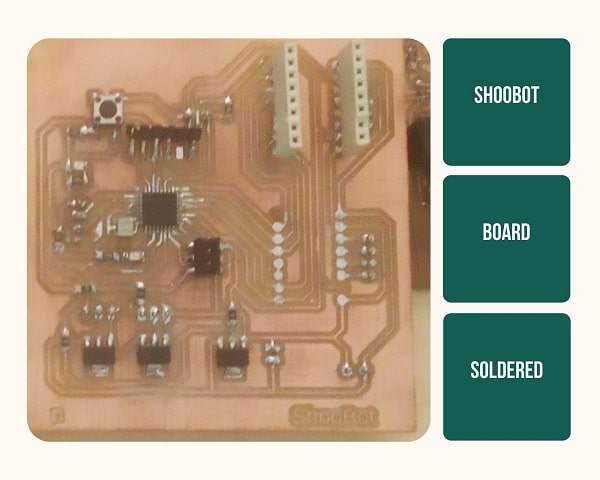
Soldering
When I went to the soldering area to start I never expected the soldering iron to be hot because it was early morning on a public holiday. I moved the hot iron using both my hands and burned it, it didn’t feel bad at the time. But Joel was quick to react and literally dragged me to the refridgerator. But someone had switched off the fidge and there was no ice. So he made me keep my hands in the water for a long time. It was only 10 minutes after that it started to pain, turned out it was numb until then. I somehow finished soldering. It wasn’t very good, so Jogin helped in resoldering the headers.
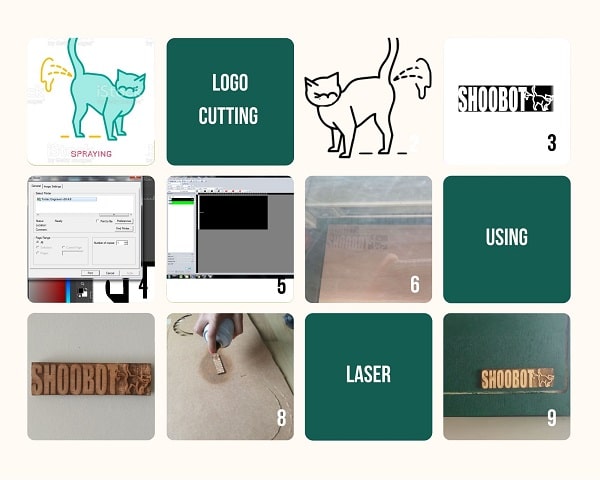
Laser cutting
I laser cut the logo for the litter box.
I wanted a logo for “ShooBot” that conveys the essence of my thoughts behind it. Cats mark everything that they like or think that they own. So I thought of using this behaviour of marking on the logo as well. What I had in mind was a very 3D style Typographical logo of ShooBot with the a cat spraying its pee on it from one end. First I tried to take the phot of my cat and make it but it became very complicated. So I downloaded the illustration of a cat and used “Trace Bitmap” in inkscape to make it into a vector. Then I used it on a Typographical logo and I think it looked okay.
I decided to laser cut the logo on a 2mm wooden sheet that I have. I have been working with this company, NissiWood, run by my friend, Elias Paarell. They specialise in making wooden veneers, they have foldable paper like veneers and thin wooden sheets. Punnoose Uncle, Elias’s late uncle, started the venture. I wanted to use the 2mm balsa wood sheets and cut the logo so it will look embossed when I stick it on the box.
Although I just wanted to stick the logo part on to the box, Joel, on seeing my design, suggested that it might be too hard to align it while I stick it, so I decided to cut the logo part to a depth and then keep a part of the wood like a platform.
I had to use multiple passes, but it came out well.
The light wooden colour was good, but to make sure it popped I gave it a coat of golden acrylic spray paint.
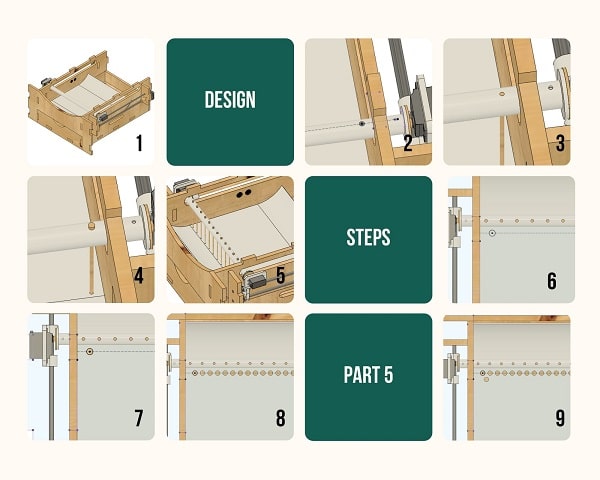
Finishing & assembling
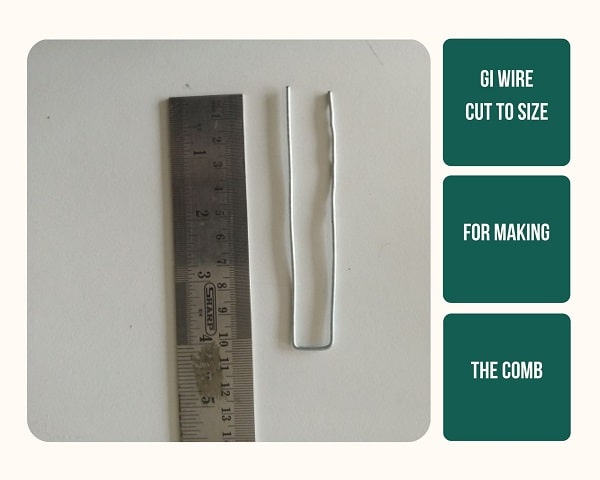
The 1/2 inch diameter PVC pipe needed to make the comb pipe needed to be cut to size. This was done using a scroll saw.
The PVC pipe edges were sharp and frayed after cutting. This needed to be smoothened and I used band saw for this.
I bought 2 mtrs of GI wire from the hardware shop to make the combs and also 3mm Brass wire for inlaying.

Jogin came up with a method to straighten my wire
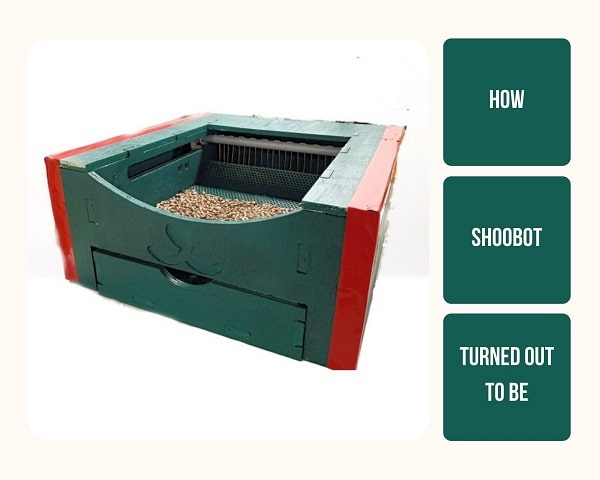
Next I assembled everything
Fevicol super glue was used to fix the wooden pieces together just to ensure that everything holds.

I kept it this way overnight and came back int he morning to do the programming.
Programming
#include <SoftwareSerial.h>
#include <Servo.h>

#define TO_MM(X) X*50

//Ultrasonic
#define ECHO 3
#define TRIGGER 4

//servo
#define SERVO_L 9
#define SERVO_R 10

#define UP 1
#define DOWN 0

//Stepper
#define STEPPER_STEP 5
#define STEPPER_DIR 7

#define MS1 A2
#define MS2 A1
#define MS3 A0

#define FORWARD 1
#define BACKWARD 0

SoftwareSerial mySerial(1, 0);
Servo servol;
Servo servor;


int now = 90;

void setup()
{
  mySerial.begin(9600);
  mySerial.println("Start");


  //Ultrasonic
  pinMode(TRIGGER, OUTPUT);
  pinMode(ECHO, INPUT);

  //Servo
  pinMode(SERVO_L, OUTPUT);
  pinMode(SERVO_R, OUTPUT);

  servol.attach(SERVO_L);
  servor.attach(SERVO_R);

  //Stepper

  pinMode(STEPPER_STEP, OUTPUT);
  pinMode(STEPPER_DIR, OUTPUT);

  set_micro_stepping(0, 0, 1); // (MS1, MS2, MS3)

  servo_mov(90);
  delay(3000);

}

void loop()
{
  mySerial.print("distance = ");
  mySerial.println(read_ultrasonic());

  if (read_ultrasonic() < 15) {
    mySerial.println("Triggered");
    int tme = 0;
    while (read_ultrasonic() < 15) {
      delay(1000);
      mySerial.println("Wait");
      tme++;
    }
    if (tme > 5) {
      delay(5000);
      mySerial.println("Move");
      moves();
    }
  }
  else {
    delay(3000);
  }

}

int read_ultrasonic() {
  long duration;
  int distance;

  digitalWrite(TRIGGER, LOW);
  delayMicroseconds(2);

  // Sets the trigPin on HIGH state for 10 micro seconds
  digitalWrite(TRIGGER, HIGH);
  delayMicroseconds(10);
  digitalWrite(TRIGGER, LOW);

  // Reads the echoPin, returns the sound wave travel time in microseconds
  duration = pulseIn(ECHO, HIGH);

  // Calculating the distance
  distance = duration * 0.034 / 2;

  return distance;
}

void moves() {
  servo_move(150);
  stepper_move(FORWARD , TO_MM(105));
  servo_move(90);
  servo_move(10);
  stepper_move(FORWARD , TO_MM(200));

  servo_move(90);
  stepper_move(BACKWARD , TO_MM(190));
  servo_move(180);
  delay(3000);
  stepper_move(BACKWARD , TO_MM(115));
  servo_move(90);
}

void servo_mov(int angle_l) {
  int angle_r = 180 - angle_l;
  servol.write(angle_l);
  servor.write(angle_r);
  delay(1200);
}

void servo_move(int angle) {
  int to_move = now - angle; //90 ->0 =90
  if (to_move > 0) {
    for (int i = now ; i >= angle ; i--) {
      servol.write(i);
      servor.write(180 - i);
      delay(8);
    }
  }
  if (to_move < 0) { //0 ->180 ->-180
    for (int i = now ; i <= angle ; i++) {
      servol.write(i);
      servor.write(180 - i);
      delay(8);
    }
  }
  now = angle;
}

void stepper_move(bool dir , int steps) {
  digitalWrite(STEPPER_DIR, dir);
  for (int i = 0; i < steps; i++) {
    digitalWrite(STEPPER_STEP, HIGH);
    delayMicroseconds(800);
    digitalWrite(STEPPER_STEP, LOW);
    delayMicroseconds(800);
  }
}

void set_micro_stepping(bool in0, bool in1, bool in2) {
  pinMode(MS1, OUTPUT);
  pinMode(MS2, OUTPUT);
  pinMode(MS3, OUTPUT);

  digitalWrite(MS1, in0);
  digitalWrite(MS2, in1);
  digitalWrite(MS3, in2);
}
Output
What have you learned?
- Time management I learned to use the time judiciously and let go of some not so important “to-do” items because COVID has given me only few days to work on each of the assignment.
- Documentation on the go I have a notebook which I carry around all the time, I jot down the values, mistakes occured etc on it as and when it happens. This is a habit I picked up as a kid and having worked as a journalist I’m used to taking the important notes at a fast pace. But one of the mistakes I did early on during the academy was not not use screenshots. Now I made it a habit to use print screen.
- Project planning Trello helped me a lot especially in remembering small but critical areas that need focus which I might have otherwise forgotten. Also it helped in organising my work in a way that I can complete some work simultaneosly and some work in subsequent manner.
- Designing It was only by designing the ShooBot project that I actually learned to design a whole piece completely. By now I was confident about electronics design and 2D but project helped me in understanding it further.
- Prototyping methodologies I got to use a lot of machineries and it was absolutely thrilling but using these wisely by parallely working was something critical that I learned during this time.