16. Mechanical Design, Machine Design
Objectives
Group assignment:
Design a machine that includes mechanism + actuation + automation
Build the mechanical parts and operate it manually.
Document the group project
Individual assignment:
Document my individual contribution.
Files and Tools
Files
Header design
Tools
Fusion 360
Photoshop
Openshot
Group Assignment
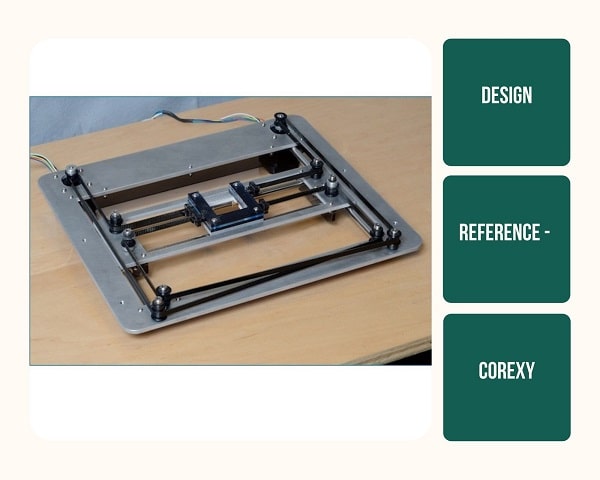
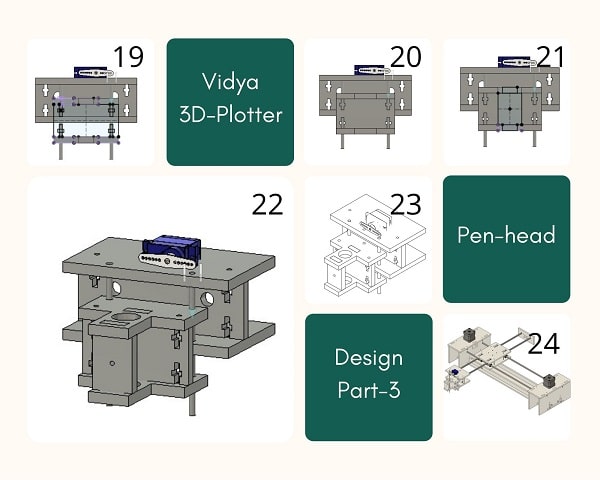
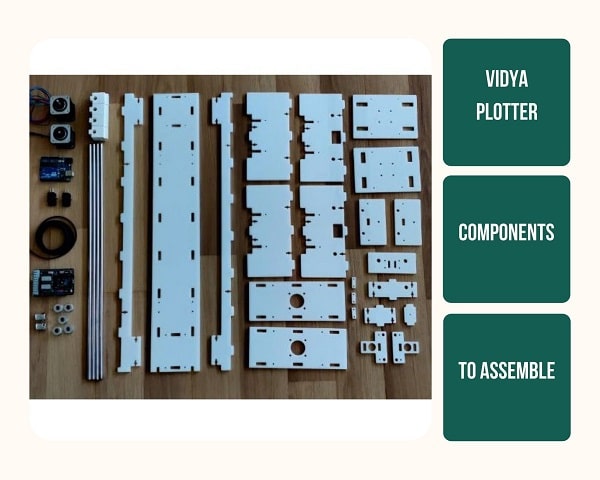
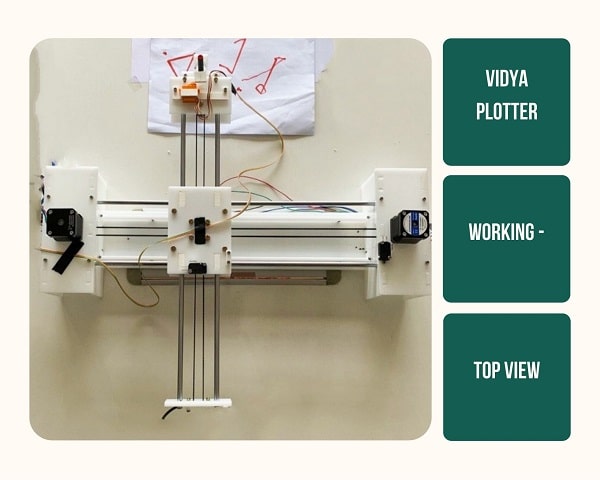
This week’s aim was to build a machine as a group with the available resources in our lab. We decided to build a CNC Plotter that can attach a pen and would write anything that is given as input. We decided to name it “Vidya”- the malayalam word for education and learning. The complete documentation is written in our group page.
Research
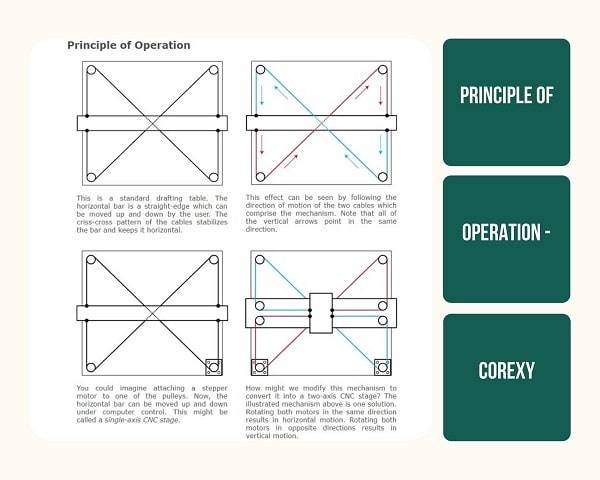
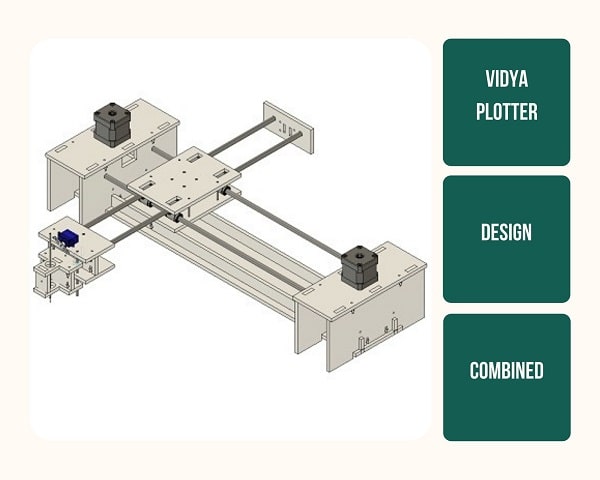
We took reference from the CoreXY design and decided to make our simple design.
Individual Assignment
We divided the work between 5 of us and my part was to design the Y-axis of the 2D plotter.
CNC Plotter - What it does?
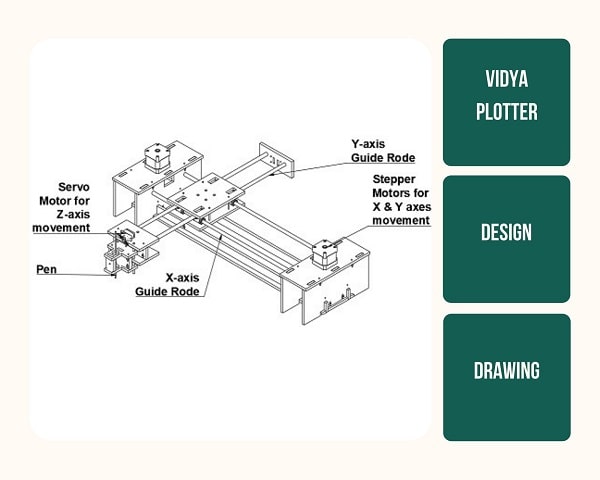
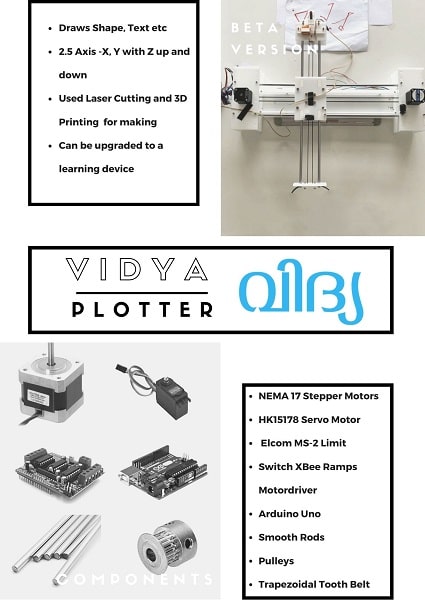
As the name suggests, the plotter machine obviously draws or plots a drawing as per given instruction. It can draw most of the basic shapes, texts and even cartoons. It’s operation is similar to the way a human hand writes. It is basically a 2.5 axis CNC machine, it has two stepper motors on both X & Y axis and a servo motor at Z axis.
The pen is connected on the arm that makes the Y-axis, the servo motor that moves the pen up and down makes the z-axis.
How does it work?
Connect a pen to the axis
What I did Step-By-Step:
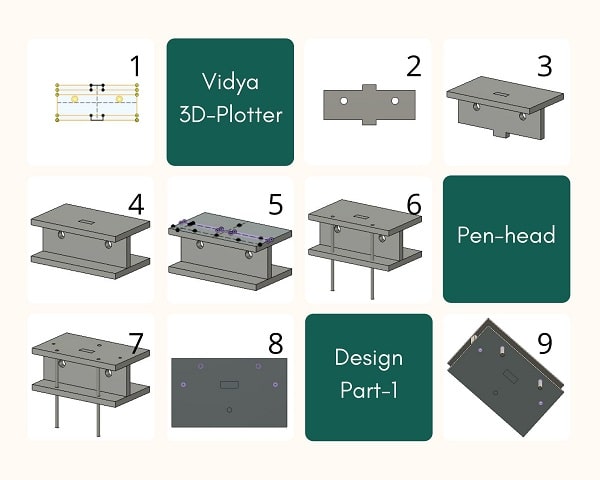
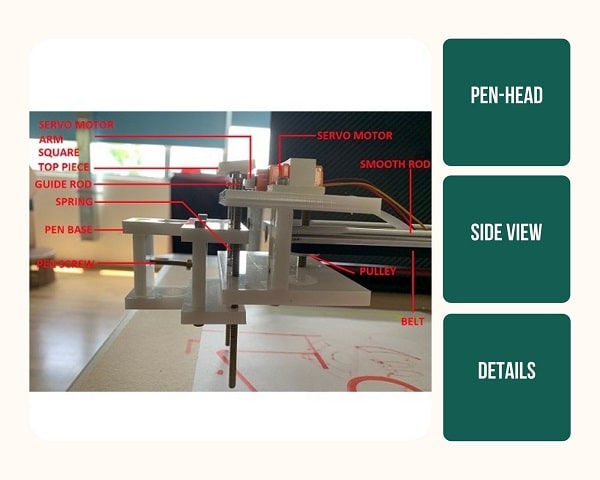
I did the design of the header on which the pen is kept. This header is attached to the metal rod arm and the belt. This arm moves left and right creating the movement along the Y axis.
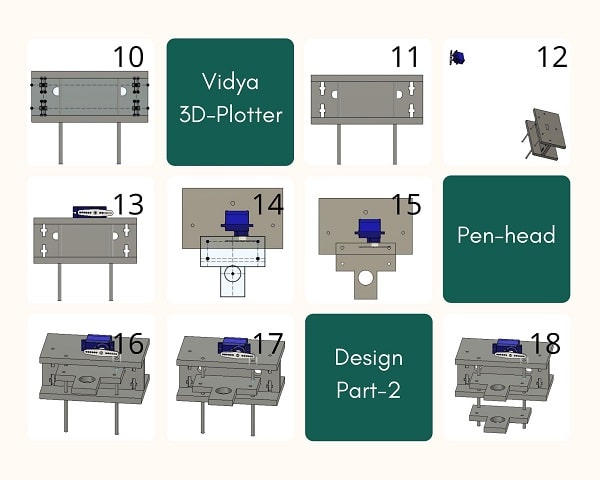
On that header I attached the servo motor (Z axis) and the pen base. Two guide rods on either side and a tension spring on a guide rod in the middle connects the pen base to the header. One part of the spring is grounded to the header and the other part is connected to a ‘Square top piece’ kept right above the servo motor.
Servo motor Movement(z-axis):
Position 1-When the servo motor raises its arm, the ‘Square top piece’ moves up, creating tension in the spring and extending it. This makes the entire pen base with the pen to move up causing the Z-axis movement.
Position 2-When the servo motor lowers its arm, the header moves down with it causing the spring to bring back the pen base and the header together again.
I also made the poster and part of the video as I’m way more faster in these softwares. Tom helped me with poster and video by giving elements required for adding to it.
I also wrote the documentation.
Design
Anooj, Tom and I together designed the entire structure. We had already taken stock of the inventory in our lab inventory and found out that we have 8mm thick smooth rod and 6mm thick acrylic sheets, so all of us kept these values as the parameters and started designing on Fusion 360. We would later combine our design.
Assembly
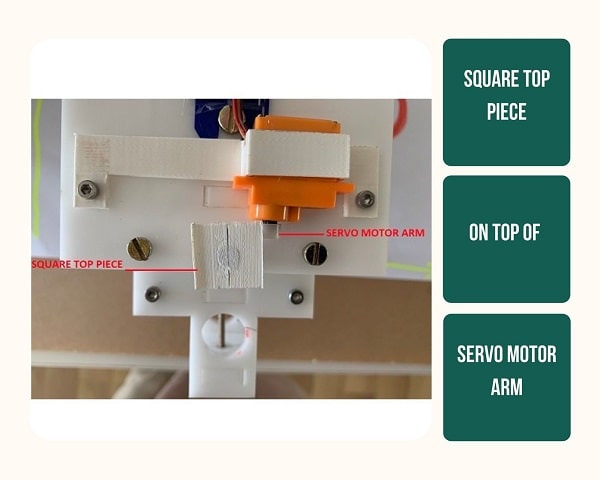
‘Square Top Piece’ that rests on top of the servo motor arm.
Pen is kept in the hole and screwed in. This mechanism allows any size pen to be kept in the hole.
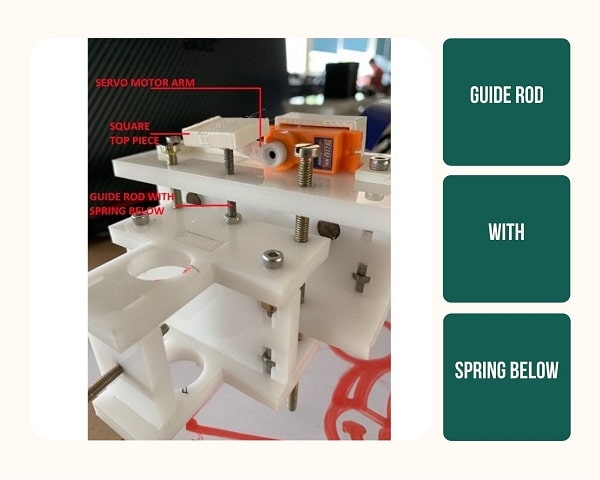
Guide rods that keep the pen base on to the header. The entire weight of the pen base is holded down to the screw on the guide rod. The pen base can freely move up and down on the guide rod.
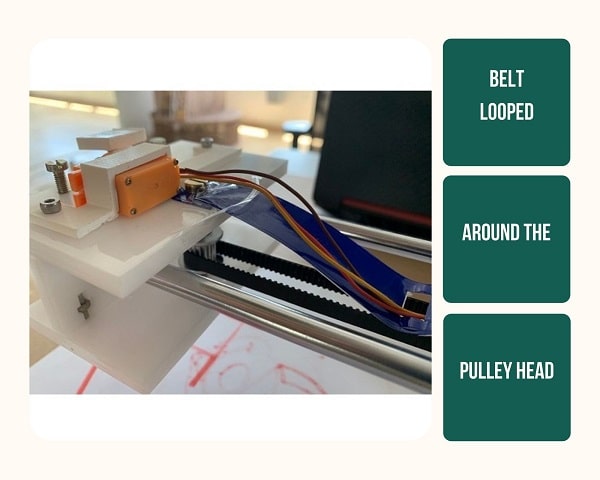
The belt is looped around the pulley kept on the backward facing side of the pen header between the two metal arm rods. When the pen has to move along the y axis, the stepper motors moves the belt causing the rods to jet out in the back which causes the pen header to move with it.
The two stepper motors move in two speeds causing the belt, that is looped along them and along the two arms, to move. It is the speed difference in these two stepper motors that creates the motion along the x-axis and y-axis.
Preparing summary slide and video
Mistakes and Learnings
In the initial design, there was no spring. The servo arm raises the pen; when the arm goes down, gravity lowers the pen. It was since then that we created the better, more precise pen holder that uses the spring action to raise the pen base. This avoids the pen base from getting stuck.
What made me proud
I was extremely happy to see “Vidya” working. It is the first machine that we have developed and it was quite an achievement to finish it in such a short time.
Also, we were ecstatic when Neil said he liked our machine and asked us to further develop it for the kids of the of state Kerala. He mentioned that he really liked the simplicity of our design.