13. Molding and Casting
Objectives
For this week’s group assignment we have to review the safety data sheets for all the molding and casting materials we are using. We also have to make and compare test casts with each of them.
As individual assignment I have to design a 3D mould around the stock and tooling that I’ll be using, mill it (rough cut + (at least) three-axis finish cut), and use it to cast parts.
Files
Paw print design
Logo mold design
Acrylic sheet laser design
Find my files here
Tools
Fusion 360
Inkscape
ShopBot
Trotec Speedy 100
Link with final Project
I decided to make two molds
1. The logo of my bag brand, soul sanchi.
2. A paw print so I can cast it and use it as a keychain, or make chocolate gifts for guests to my house or to those who love cats and dogs. A terracota version could be a nice christmas ornament.
The paw print is thematically connected with my final project, the automated cat litter system. My hope is that all my weekly assignments and the project combined together would make a complete indoor cat system.
Research
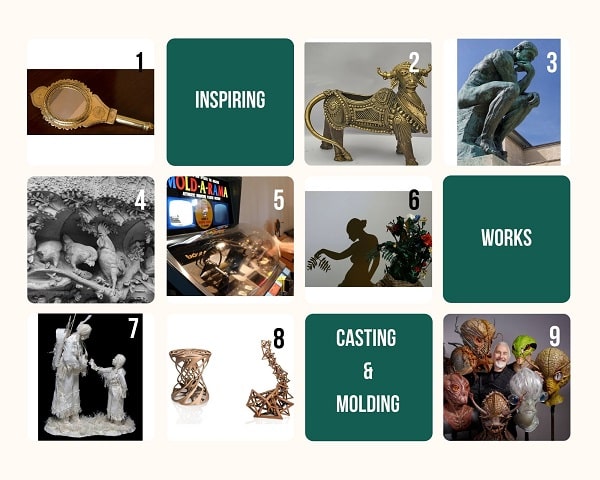
- Aranmulakannadi- A mirror casted from Bronze
- Dhokra Art- Stunning metal figurines fashioned from bronze and copper based alloys using a ‘lost wax casting’technique
- Auguste Rodin - The thinker and other works by Auguste Rodin, who is considered as the father of modern sculpture
- Antoni Gaudi’s Sagrada Familia- It is said that Gaudi created those Animal figurines by molding living ones.
- Mold-A-Rama - A vending machine made in the 70’s in chicago to make plastic souvenirs in a minute or two.
- Tedosio Sectio Aurea- Tedosio casts inconspicous metal sculptures whose shadows reveal a whole new form.
- Patty and Allen Eckman- Paper sculptures by them are
- Rick Baker
Group Assignment
Find it here in our group page.
Individual Assignment
Design
Logo mold
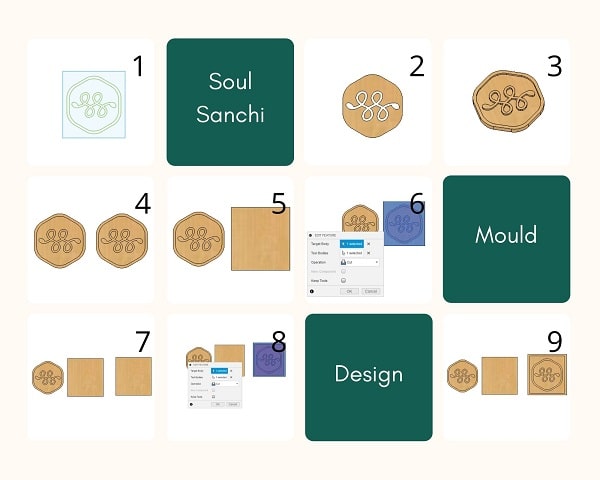
Step 1: I made sketch1, a square of 75mm side using create sketch and inserted the vector image of my logo inside it.
Step 2: First I extruded all the parts that will act as the base of my logo seal to a height of 3mm
Step 3: Next all other portions that will act as the protruded portion of the seal were extruded to a height of 5mm
Step 4: I made a copy of the body and placed it alongside the first. The second body is the design of the actual seal that we want at the end of casting.
Step 5: Next I extruded everything in the sketch1, including the square around the logo, to a height of 8mm and this encompasses the first body. The first and second bodies are aligned to be on the same axis.
Step 6: Now I used “combine” to cut the first body from the second body without keeping the tools.
Step 7: Then I made a copy of this body and placed this third body alongside the other two. Next I created a sketch and made a square of side 80mm on the top portion of the third body. A square body was created around the third body encompassing it, by extruding everything inside the new square area to the bottom for 10mm.
Step 8: Next I used “combine” to cut the third body from the square by making the square as the target body and the third body as the tool body, without keeping the tools after combine.
Step 9: All the bodies were aligned to be in the same axis
Paw print mold
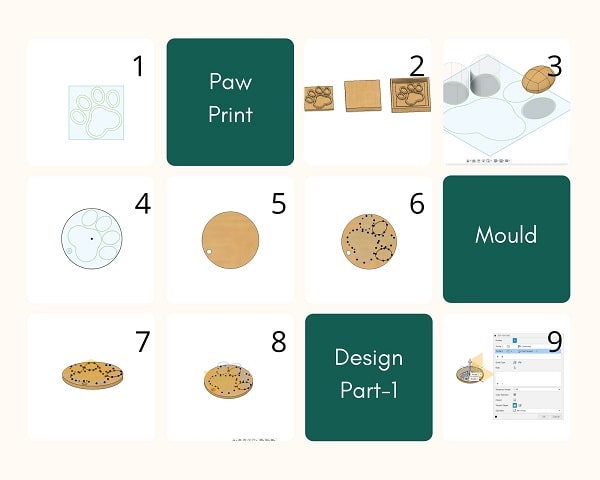
Step 1: I used Bitmap image trace in inkscape to get the illustration of a paw print. I exported this drawing to fusion
Step 2: Extrude the paws and made the mold all to realise that the resulting mould is a 2.5D mould not a 3D mould.
Step 3: Then I tried to make a 3D mold using the same image. First I tried making each digit shape using “Create Form” from the menu. But my 3d form making skills were not enough to create the shape fast.
Step 4: In the 3rd method, which worked, I first made a circle of diameter 35mm.
Step 5: Then I extruded it. This was to be the base plate of the paw.
Step 6: Then I inserted the illustration in .svg format into that plane.
Step 7: Next I created a plane 4 mm offset to the base plate.
Step 8: I drew one point above each of the shapes, on this plane which I thought would be the highest point of each digit.
Step 9: Next I used “create– loft” to make the center digit shape, here I used the “point tangent” instead of “sharp” profiles to make the shape look more realistic.
Step 9 through 12: I repeated for each of the digits. Next I combined all of it to one body.
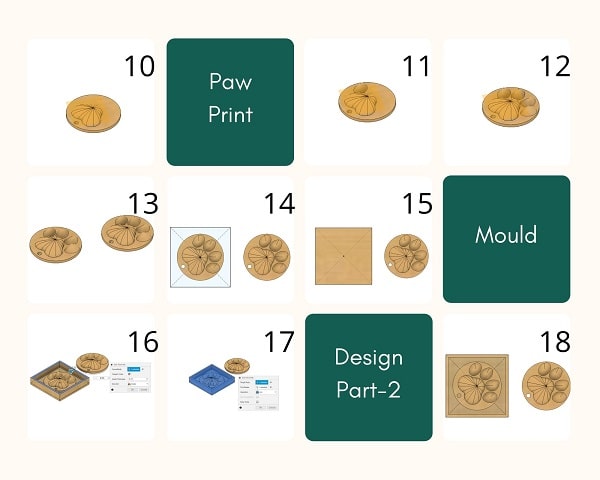
Step 13: I made a copy of the body and placed it alongside the first.
Step 14: I used “create sketch” and drew a square of side 45 mm around the bottom portion of the first body.
Step 15: I extruded the square to both sides(7mm to the lofted side and 2mm to the bottom) thus making the first body inside the square
Step 16: Next I used “Shell” feature to create a whole on the top portion of the body leaving a thickness of 2mm outside
Step 17: After this the outside square and the inside paw body were combined to make the design of the wax mold.
Step 18: The copied body is the final seal required.
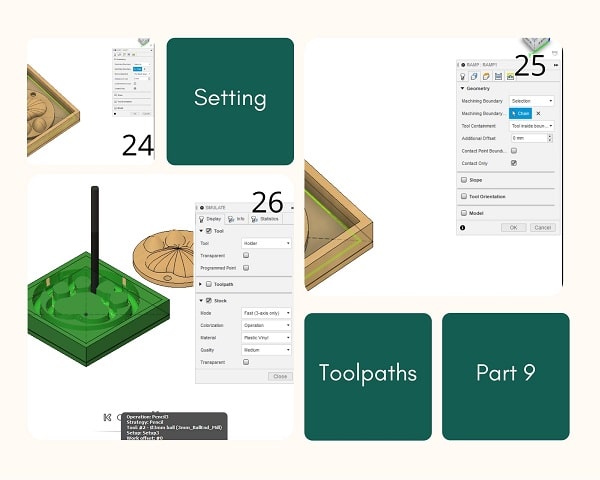
Setting the toolpaths
Just like a carpenter would carve out a design by hand, the machine would also cut out at varying z-depths depending on the width of the shape in which the cutter is moving. For this the regions to cut has to be specified, the tool details has to be given and the toolpaths need to be calculated.
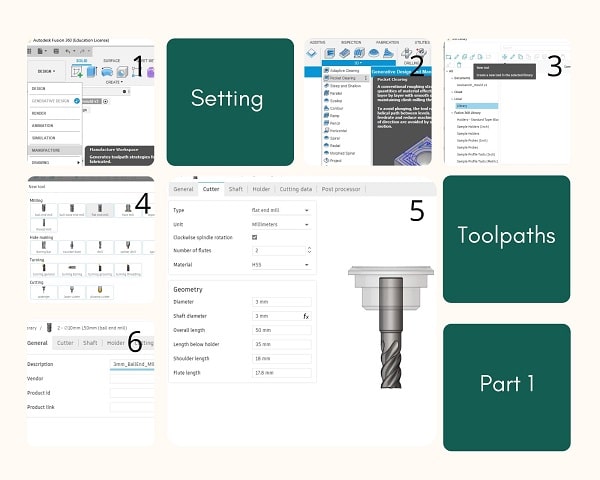
Step 1: I wanted to create toolpaths for the designs I created. For this I opened the “manufacture” underneath the “Design” in the main dropdown menu.
Create a Setup :
Step 2: To mill the mold I require two kinds of clearing processes, a rough clearing to give a raw shape of the mold and a fine clearing to give the details.
In the main menu I pressed the dropdown underneath 3D and selected “Pocket Clearing”. (I read all the available ones and found it to be better suited).
In the pop up I pressed “select…” next to “tool”, now a new popup opened.
Step 3: On the left menu, I pressed “library” under “local”. Now I pressed the “+” symbol in the top middle and a popup opened up giving a selection of milling tools.
As in our lab, we have two types of milling bits, 3mm flat end mill and a 3mm ball end mill, the 3mm flat end mill gives the rough clearing and 3mm ball end mill gives the fine clearing.
Step 4:First I clicked on Flat end mill
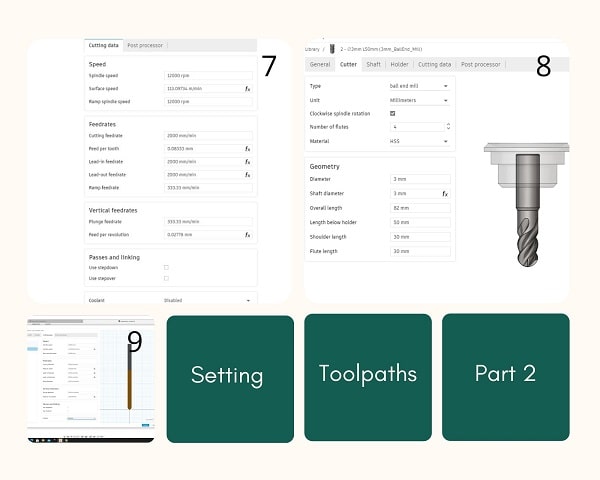
Step 5 to 9: I proceeded to enter these data in the tool library.
I have now two tool profiles: 3mm_FlatEnd_Mill and 3mm_BallEnd_Mill.
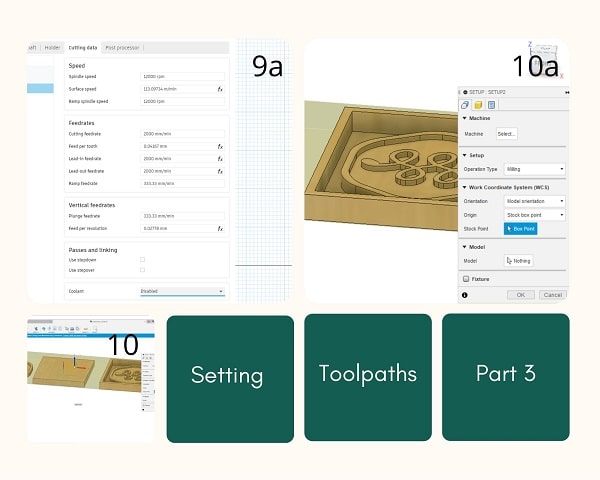
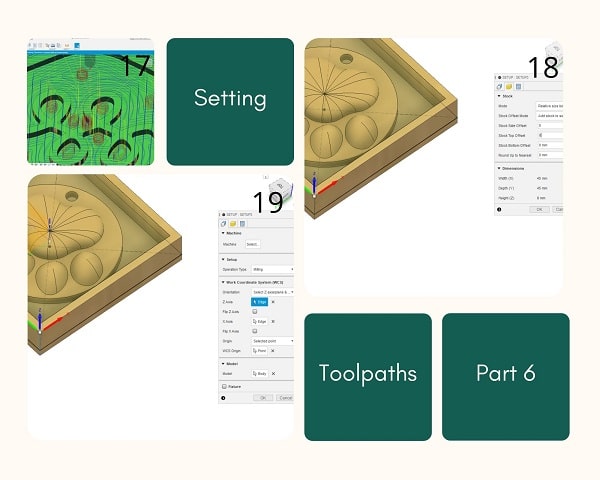
Step 10 : Next I pressed the “new setup” in the dropdown menu underneath “setups” in the top menu. Now a “setup” popout opened up.
I clicked “Stock Point” then selected the upper right stock point to move the axis triad in my design. This has to be moved according to the orientation of the cutting machine.
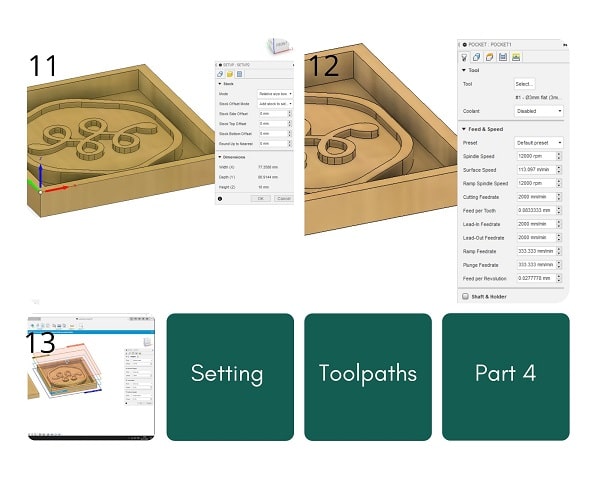
Step 11 : I moved it to the left corner of my wax mold design. Clicking on those arrow heads will flip their direction if needed. Click the Stock tab to define the stock size.
Click OK to finish the setup.
Create a Clearing operation:
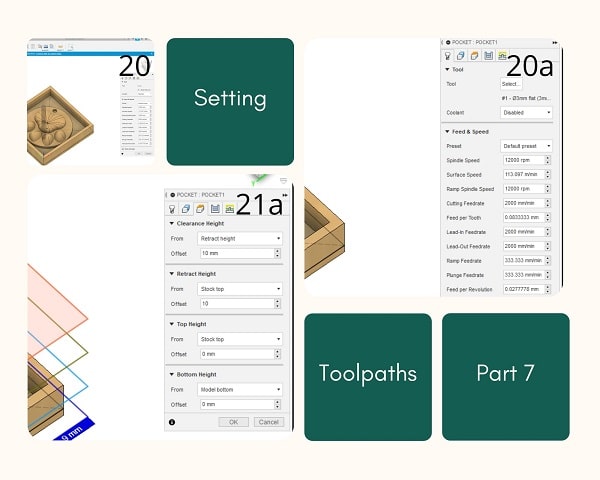
Step 12 : I again took the “Pocket Clearing” and set the “tool” to “3mm_FlatEnd_Mill”, “disabled” the coolant the feed and speed is automatically updated based on the profile.
Step 13 : Next I opened the “Linking” tab and changed the “Tolerance” to 0.1mm
Step 14 and 15 : In the “Heights” tab, the “Clearance Height” and “Retract Height” were given as 10mm from “Stock Top”. Press Okay.
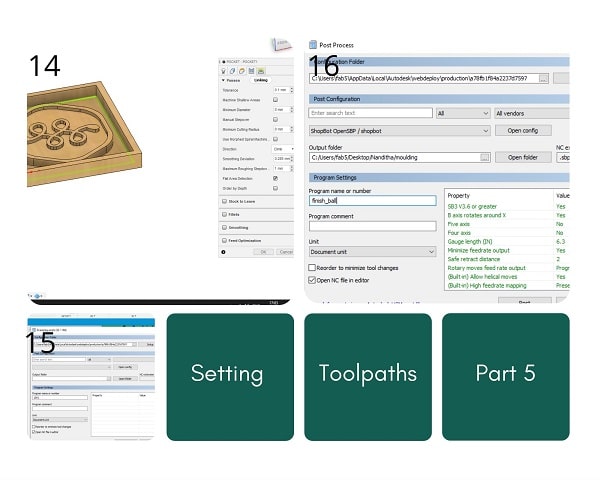
Step 16 : In the data panel right click “Setups” and click “post process”. In the popup that opened I changed the open config to ShopBot, as we use ShopBot for milling operations in our lab. gave the output folder and changed the program name to finish_ball and pressed post
Step 17 : Now I can right click setups and simulate to check the movement of the mill and see the toolpaths and how it removes the pieces.
In the same way I created one more clearing operation using “3mm_BallEnd_Mill”, a “Morphed Spiral Clearing operation”. This will give the fine details needed to make my mould more realistic.
Step 18 through 22 : I repeated all the above steps for Paw Print Design as well to make clearing operations and simulate toolpaths. I used Pocket and Morphed Spiral Clearing operations.
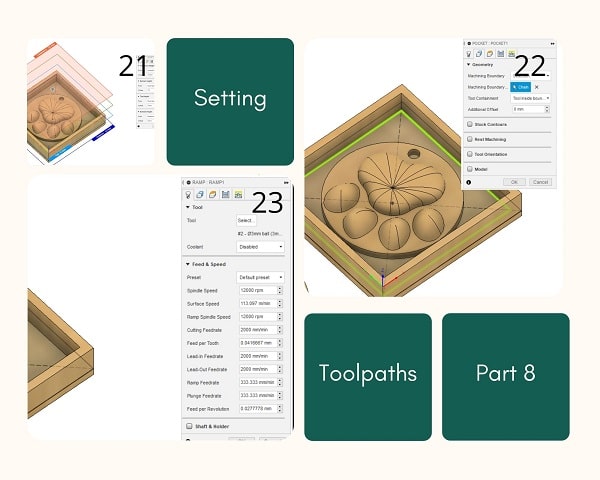
Step 22 : I made a Ramp clearing operation.
Simulate Toolpaths:
Step 24 : But later after the first milling operation I realised that this was inadequate for the paw print 3D design and chose “Pencil Clearing Operation” and created another program and simulated the toolpaths. This worked fine.
Milling the wax mold
Size of the wax block I used is 172mm x 77 mm
First I fixed the block on the ShopBot table using strong double sided tape so that it wouldn’t move during the milling operation.
The milling tool I used first is 3mm flat mill to get a rough cut.
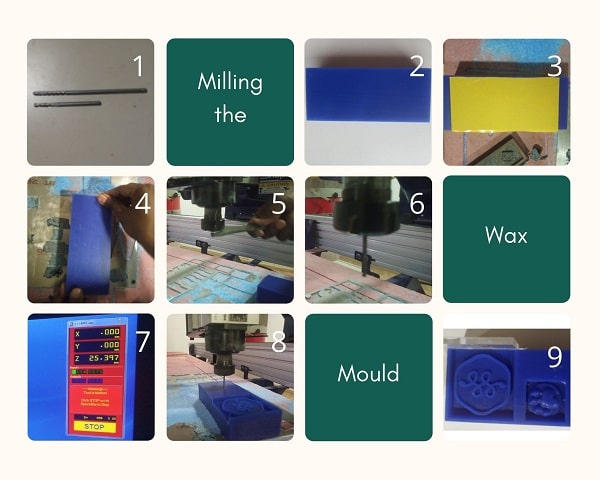
I set the origin and ensured that the z-axis of the mill is just touching the edge of my block.
Once the first mold was milled using 3mm flat mill, I changed the tool and used 3mm round end mill to get a finsh.
The toolpath for this was set.
The same origin was set and z-axis was also set.
This was repeated for the next mold as well.
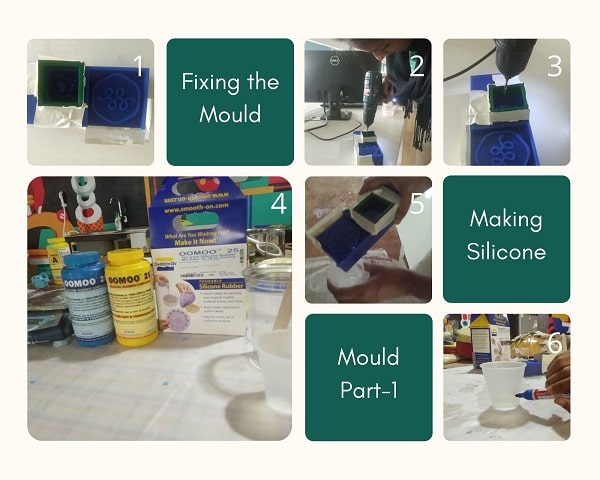
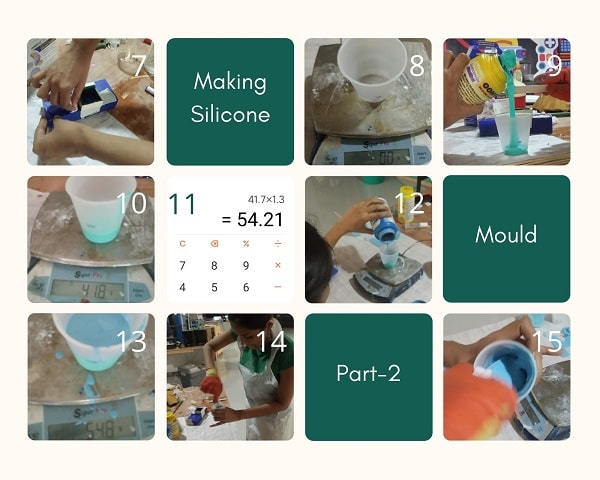
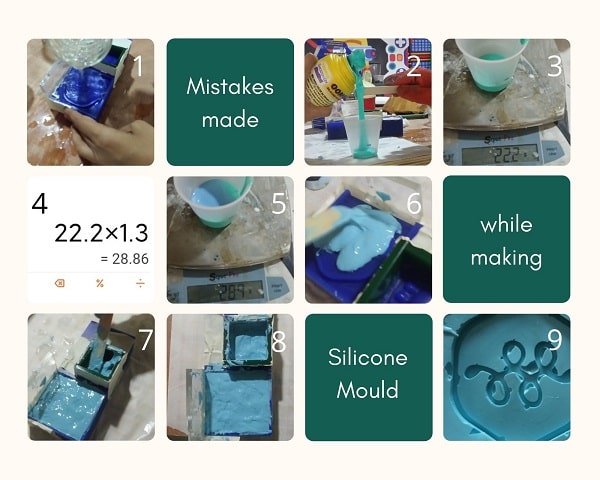
Making Silicone Mold
The hole that was needed on the wax mold wasn’t properly milled. So I tried to fix it by making a hole using 3mm drill bit.
Once all sides were taped off and height was increased(See mistakes) I took my wax to a well ventilated area in our lab were we do the molding. There is a pipe and a sink in this area which was very convenient.
For silicone molding I’m using Smooth-On OOMOO 25 silicone rubber composite. It consist of 2 parts-Part A and Part B.

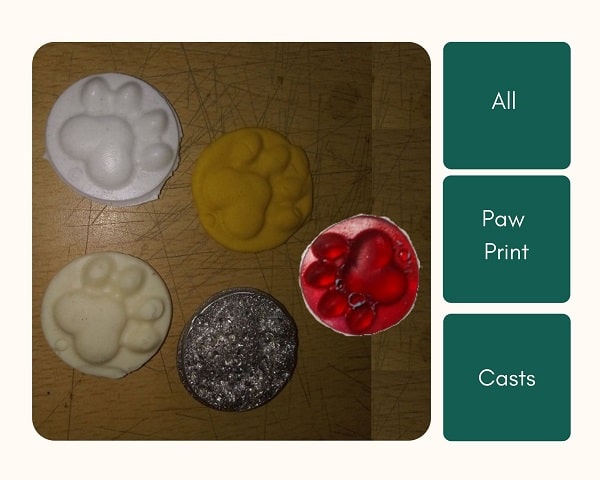
Casting in the mold
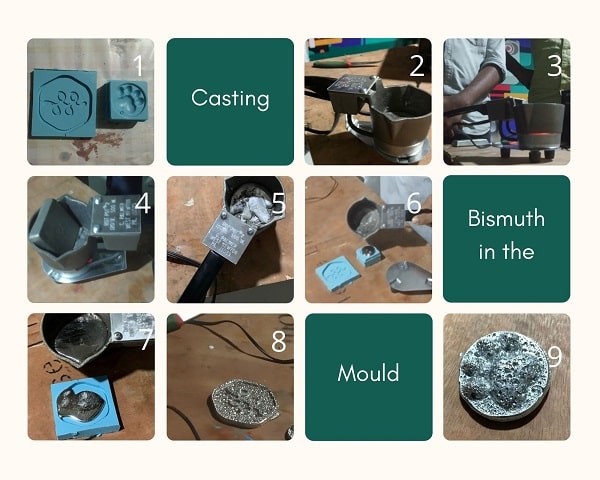
Casting Cerrotru
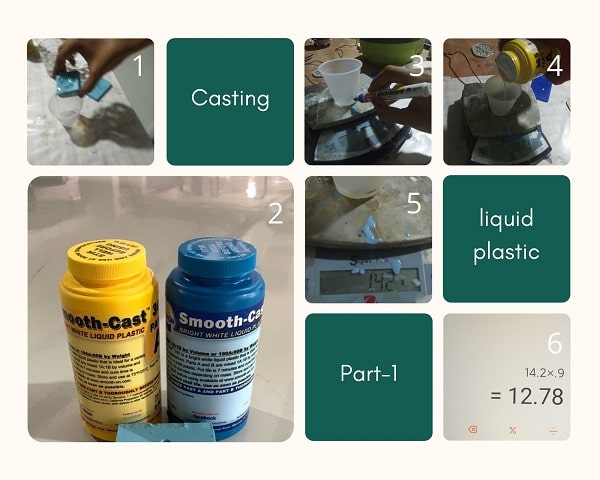
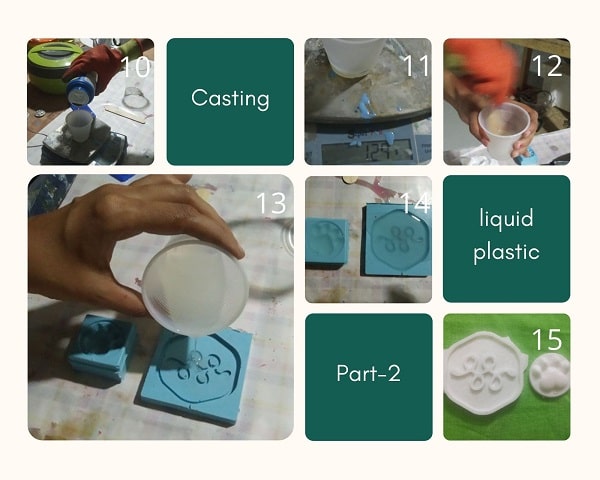
Casting liquid plastic:
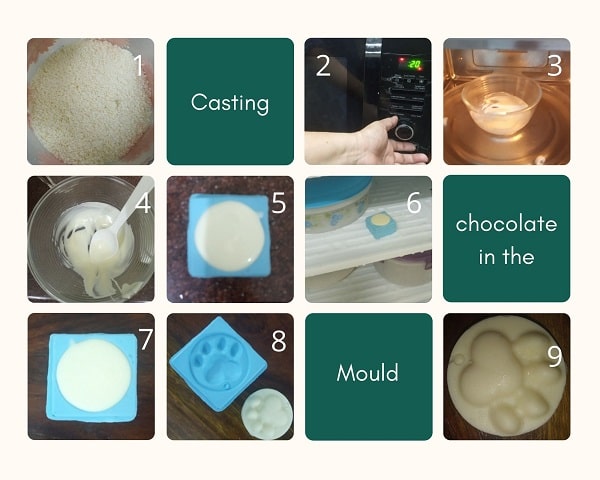
Casting chocolate:
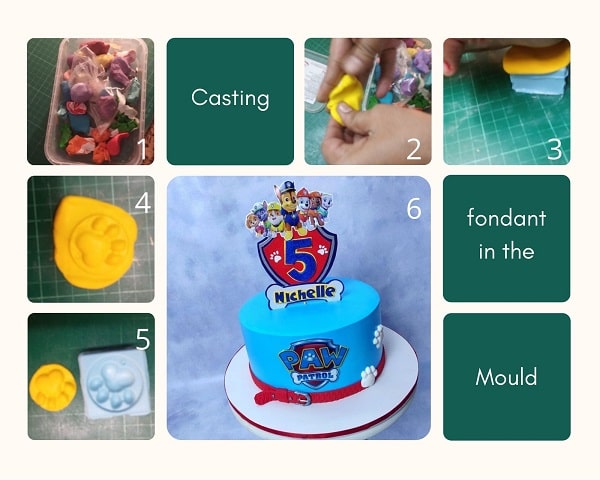
Casting Fondant:
Mistakes and Learnings
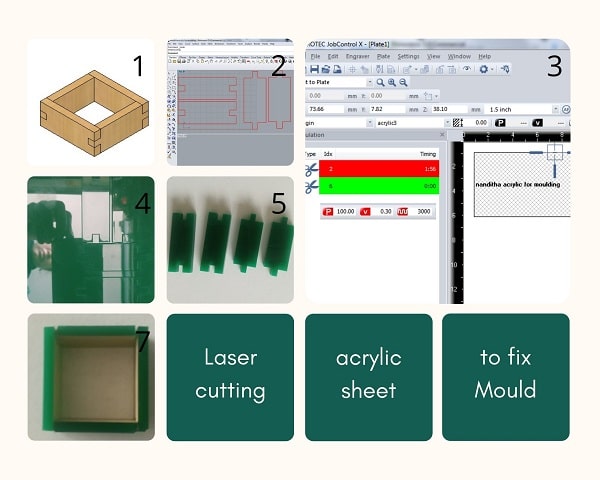
Cutting Acrylic sheet
The wax mold had some problems:
1. One edge of the logo mold was milled off, this had to be closed to pour silicone into it
2. The paw mold didn’t have enough height to make a proper mold. This has to be fixed by increasing the height of the mold with some other material.
Silicone mold problems:
The first time I made the mold it wasn’t taped off properly and I lost water through the sides and this resulted in me taking lower amount of silicone than required.
Also when filling the silicone try to remove as much air bubbles as possible by sticking the wooden spoon into the liquid and let air out.
Casting problems:
Any metal has to be casted at its lowest possible molten temperature or it creates hole in the cast. As I let the molten metal be in the heat longer, it craeted air bubbles all over and hence the cast surface was full of pockets.
What made me happy?
For years, molding has been an issue for me. Not many people makes moulds and those who do make are very expensive and hard to get appointment.
I finally could do it on my own and I was really happy when Ruby ma’am made the Paw Patrol cake using my mold.
I’m planning to make terracotta paw prints and gift it to my friends.