Wildcard Week
The assignment for this week is to design and produce something with a digital fabrication process (incorporating CAD and manufacturing)
not covered in another assignment, documenting the requirements that our assignment meets, and including everything necessary to reproduce it.
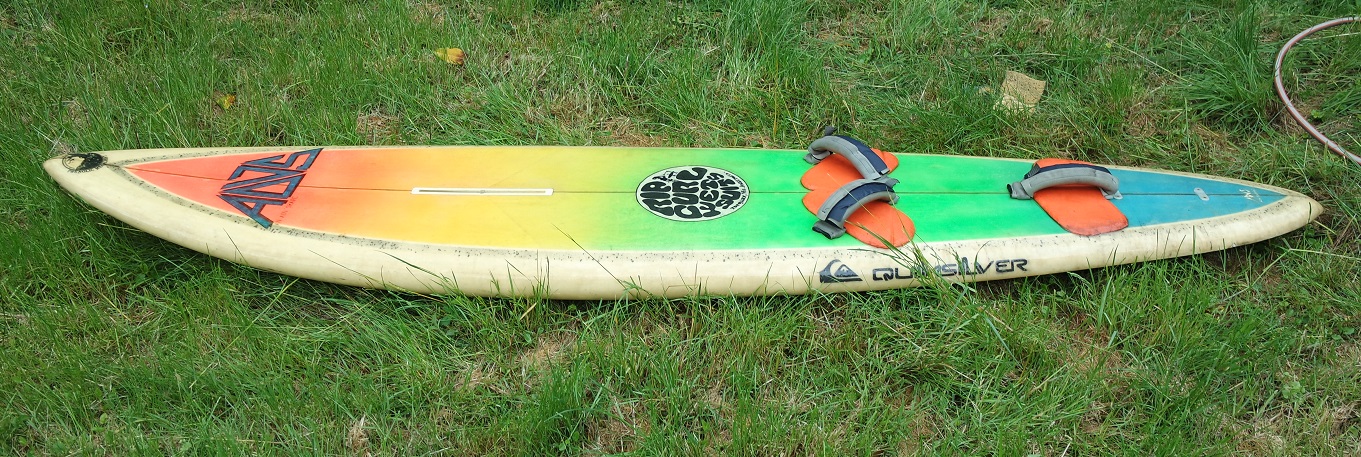
At that time I was a windsurf addict and decided to make my own windsurf boards.
I liked this activity so much that I wanted to become a windsurf and surf shaper. But it didn't happen...
I will show a few photos of what I made at that time at the end of this page.
It has to be strong (must be able to support at least 100kg) but still flexible.
It also needs to have a shape (it's not just a flat deck). Adding concave on the top is a must have.
I've seen several people on the web trying to make one with just a laser cutter or even trying to mill it directly which most of the time ended up as failures.
So it really needs to be made out of wood laminates.
So here I'd like to introduce the way we're making longboard decks with a friend of mine, by using layers of wood, fiberglass (or carbon fiber) and epoxy resin that are put in final shape by compression molding in a home made press.
It all started because we were several friends that wanted to make our own longboard. That's why we decided to make a press that could be reused.
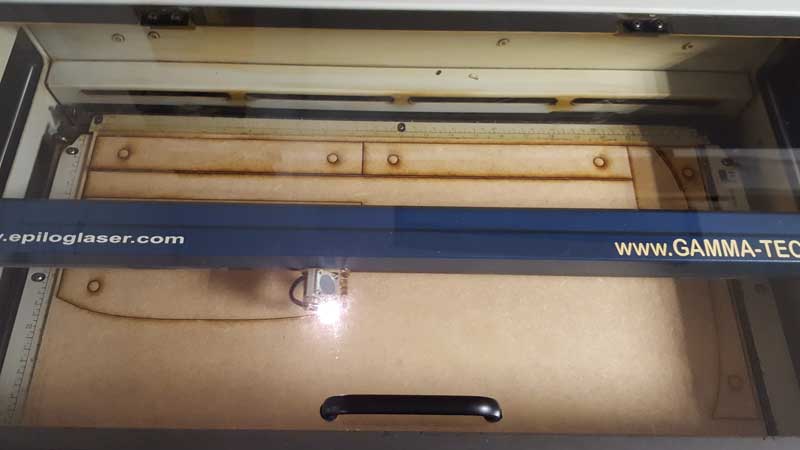
As whe had no access to a CNC milling machine for making the mold, I proposed to make it by aligning lasercutted profiles, and it worked suprisingly well!

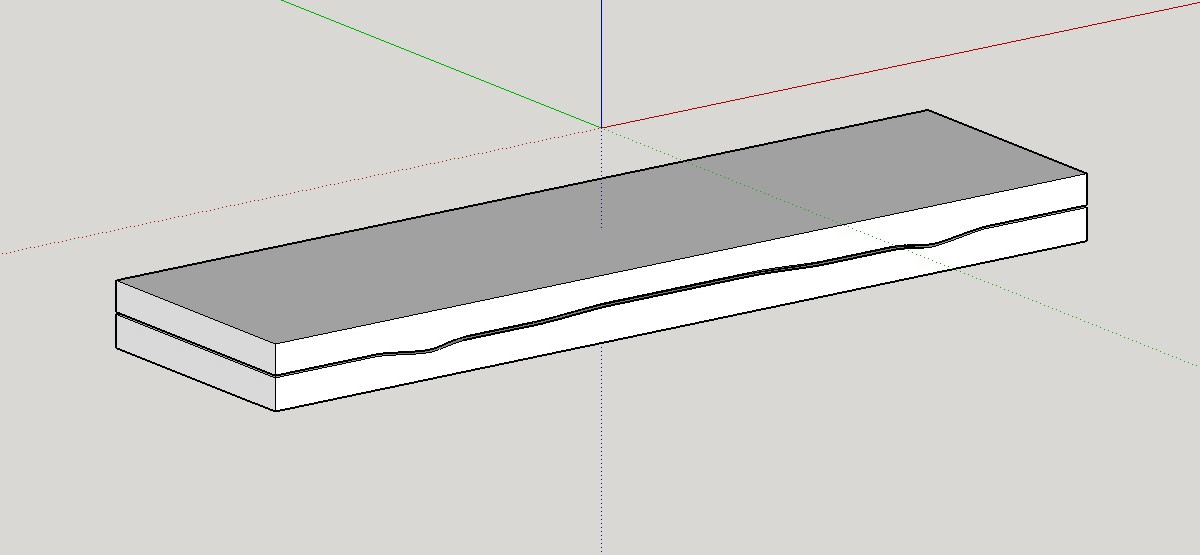
At this stage we realised that we will need more flex in the center to compensate for the rider's weight:


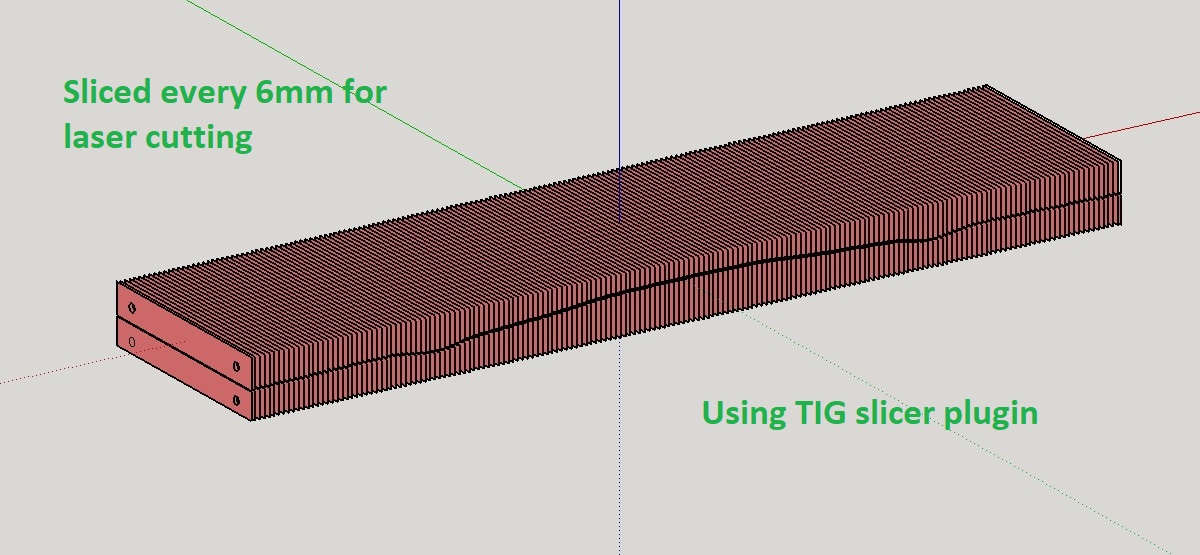
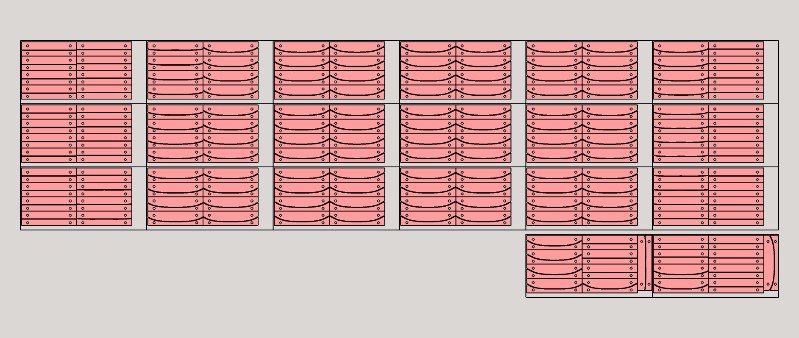
The mold is then sliced every 6mm for laser cutting:
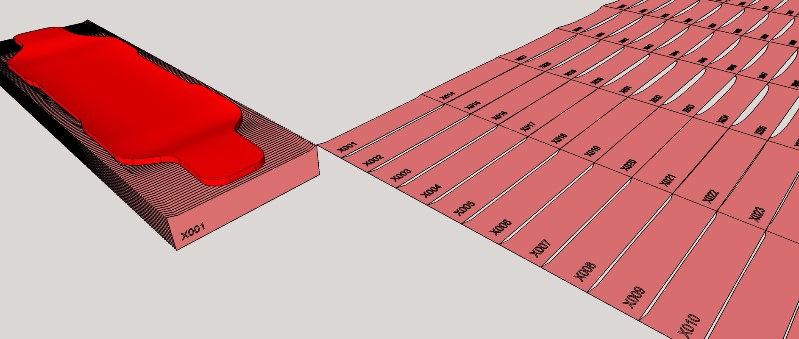
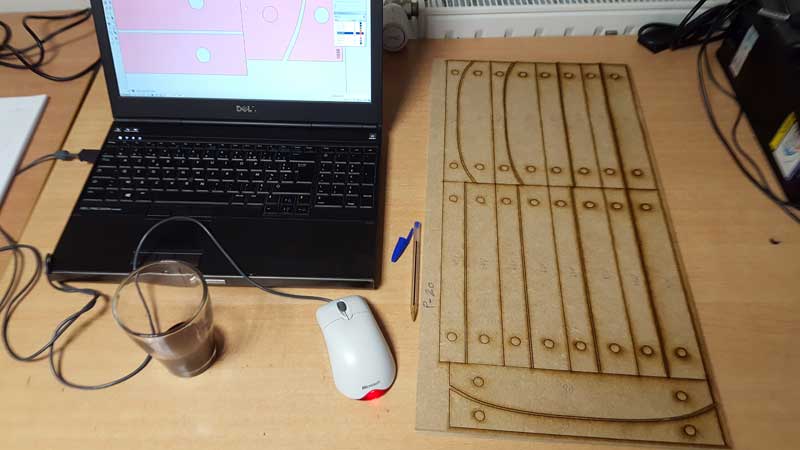
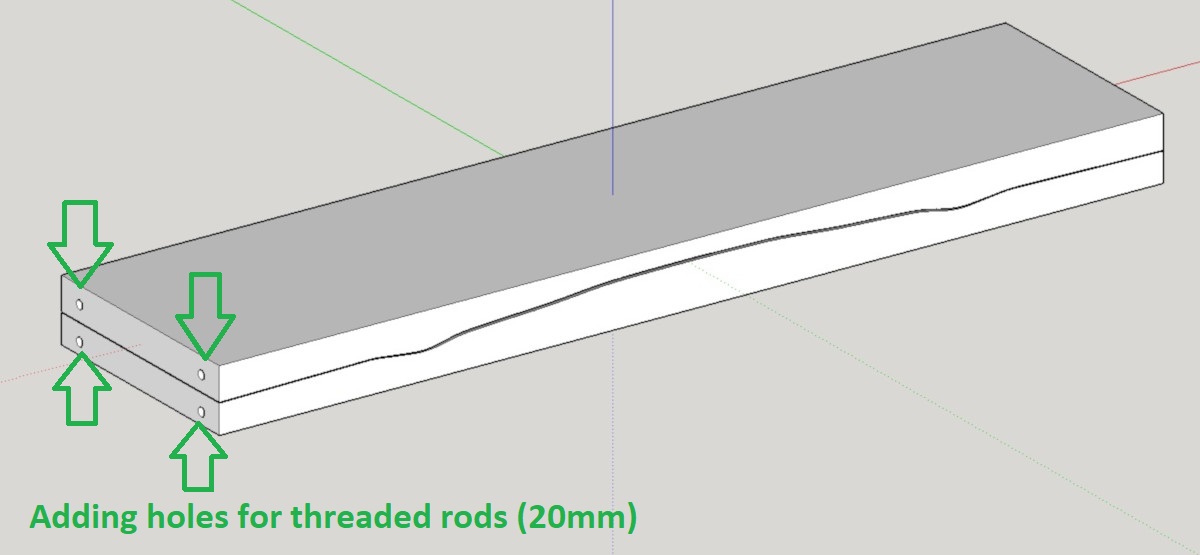
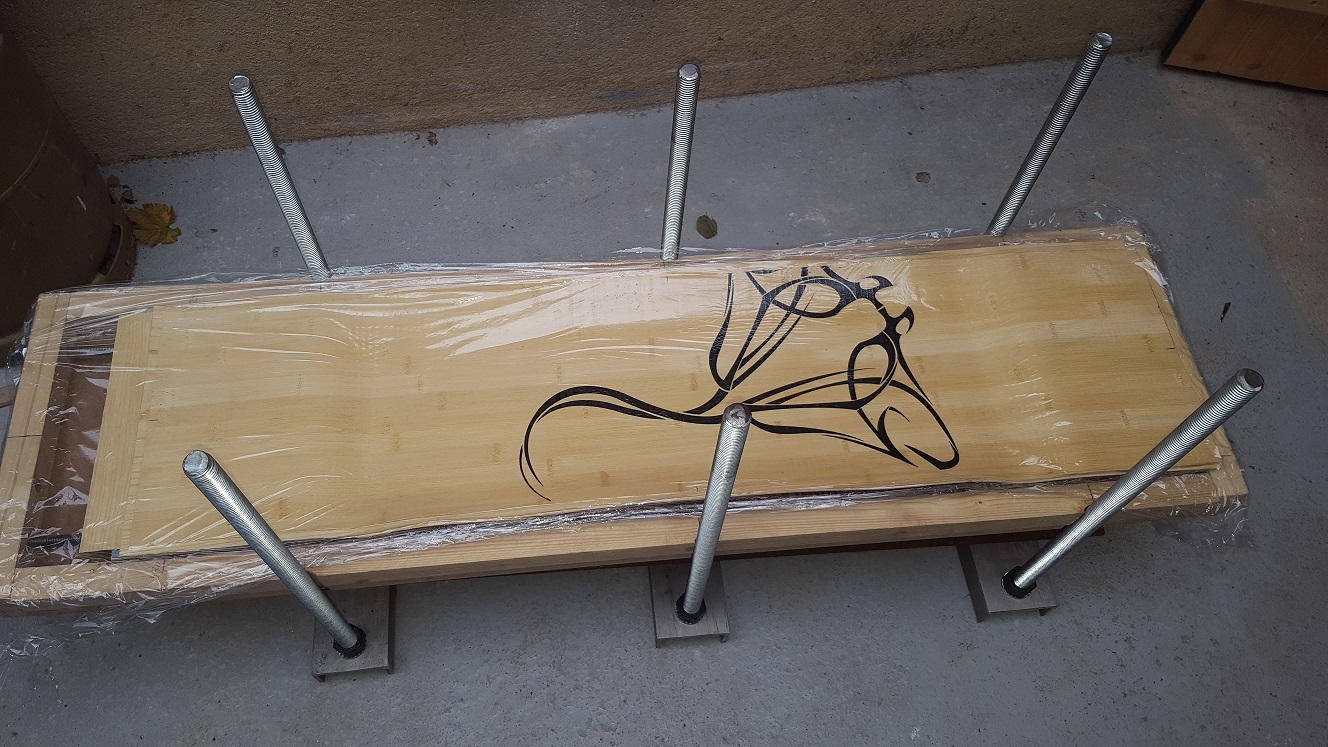
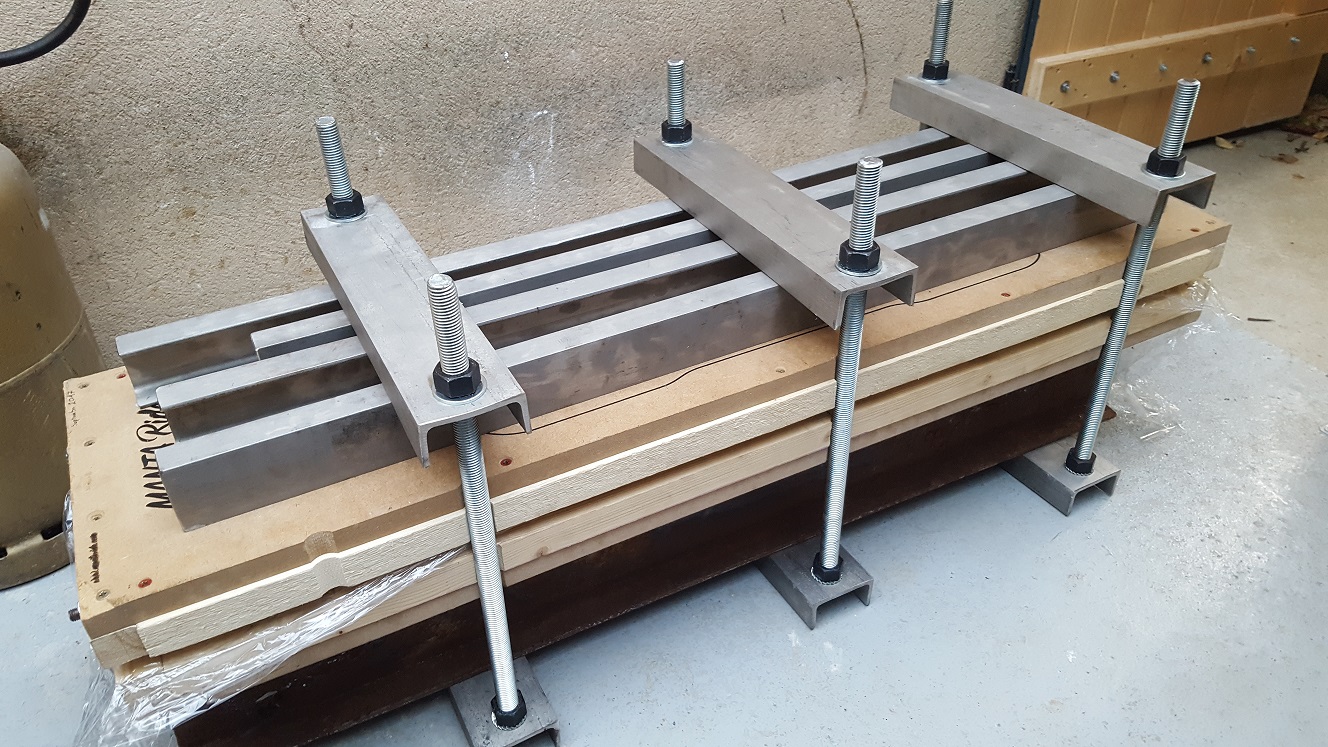
Once all the pieces are made, they are assembled back following the numerotation, and are aligned thanks to 2 long 20mm diameter threaded rods.
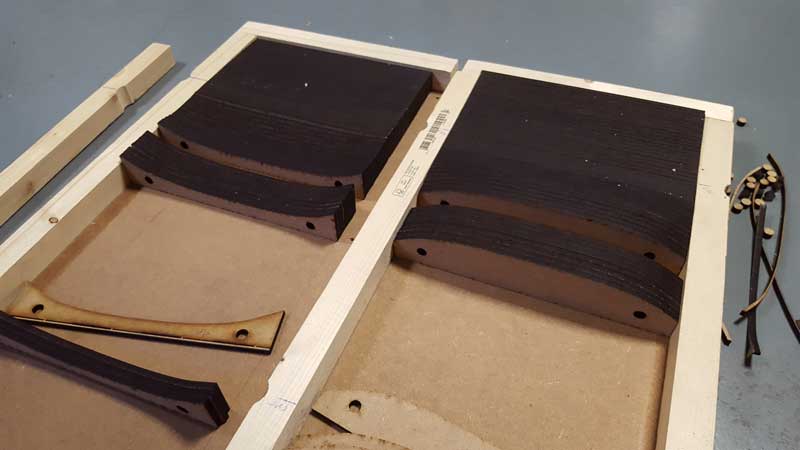
Once assembled, each mold part is sanded to minimize the stairs in between the lasercutted individual pieces and get something smoother.
They will also be covered with a layer of wood for perfect smoothness when pressing the 1st deck. This is only done once (see later).
The 2 parts of our mold are now ready to be used in a press to produce the 1st deck.
The compression force that is applied can be very high with such a system.
This is the place where we buy our wood from: www.roarockit.eu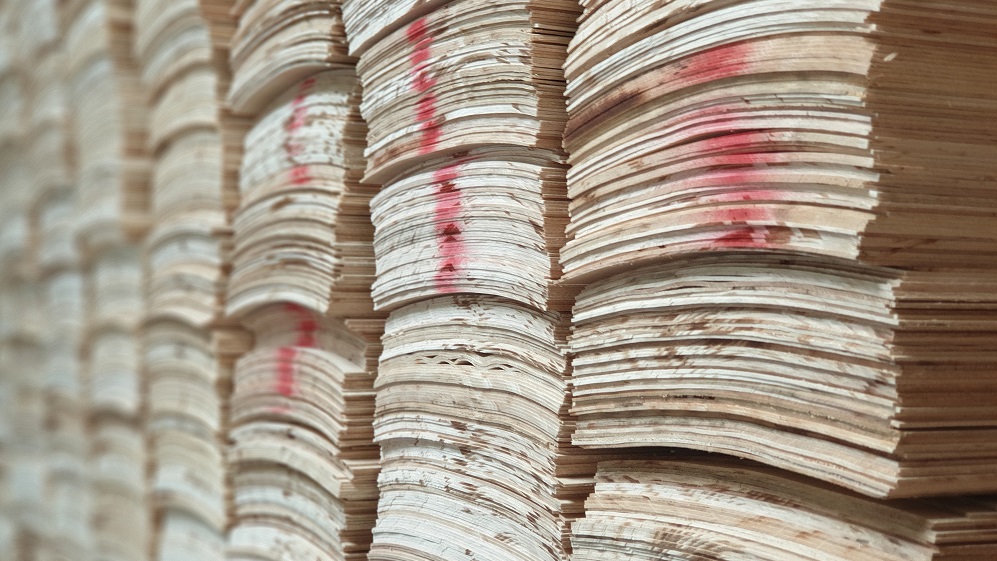
The wood we use is maple, except for the most outside layers (top and bottom) that are usually bamboo. Unless for decks that will be covered with carbon fiber.
Most of the layers have their wood fiber direction along the long side, except for the 2 layers right on top and bottom of the center that have their fiber direction turned 90°.
This will give the deck more strenght while preserving flexibility. On the next picture these 2 inverted fiber direction wood layers are the colored ones:
For each layer, wood glue is applied on both sides making sure to put some everywhere.
On the bottom and top sides of the future deck, a film of plastic wrap is applied to avoid it sticking to the mold and ease unmolding.

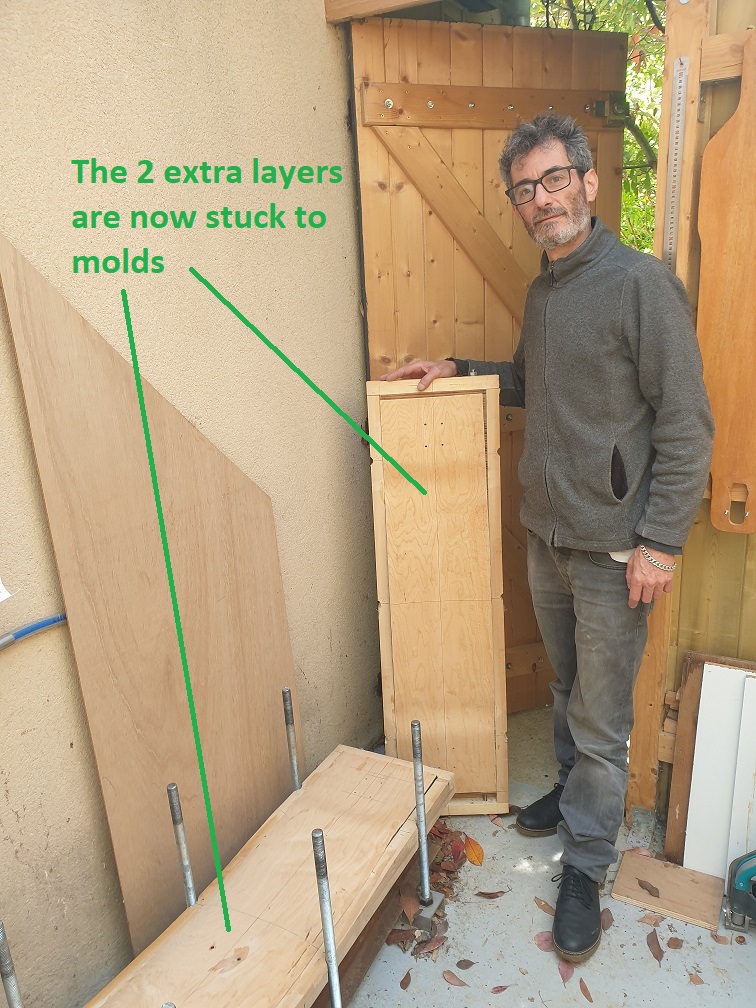
For the very 1st time using the mold (1st deck making) another extra layer of wood is applied with glue on top of each half mold.
These 2 extra layers will stick to the mold (making it perfectly smooth) but won't stick to the skateboard deck due to the plastic film.
This is done only once (1st deck) and makes a perfect mold surface finish.
This is how the mold now looks like with these 2 extra layers of wood after unmolding the 1st deck:
Once the future deck is placed in the mold, maximum pressure is applied by compressing the top 1/2 mold down onto the bottom one, and left to dry during at least 8 hours.
Then the mold can be open and the deck will keep its given shape. But it must be left for complete drying without touching it for at least 5 days.
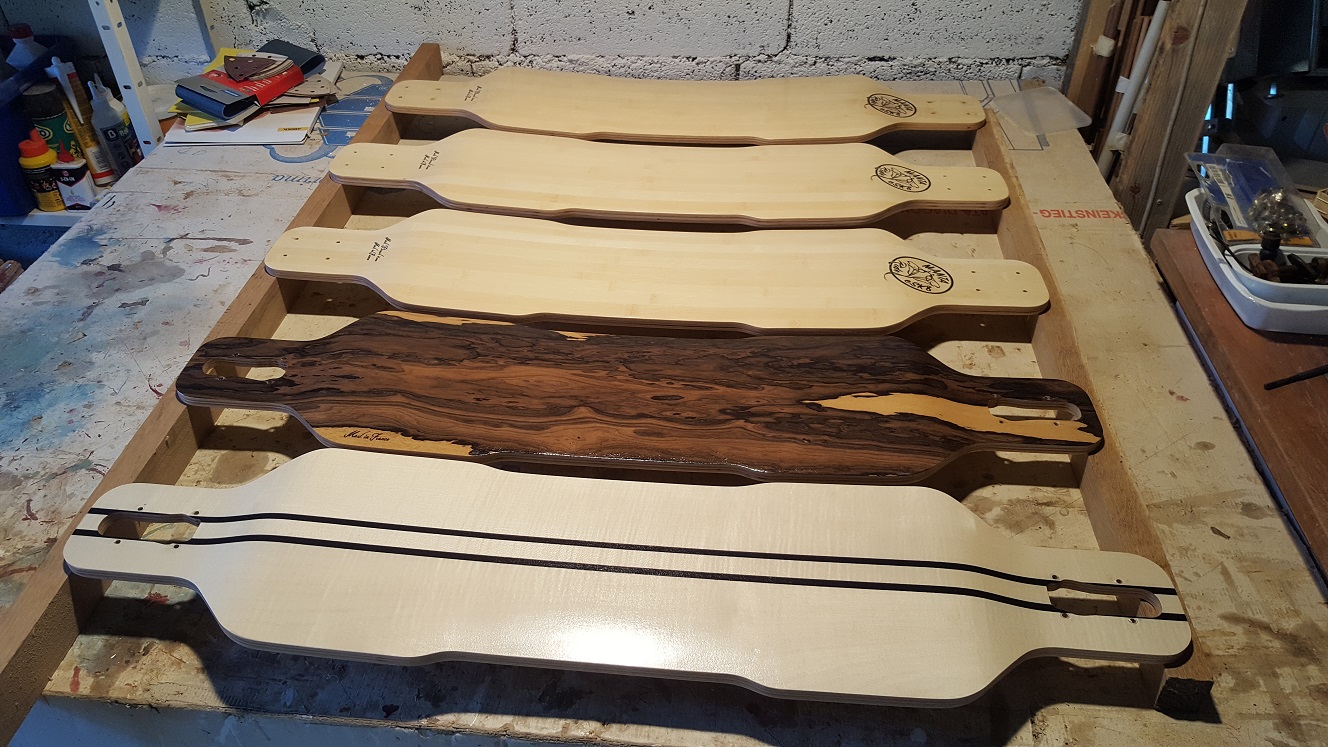
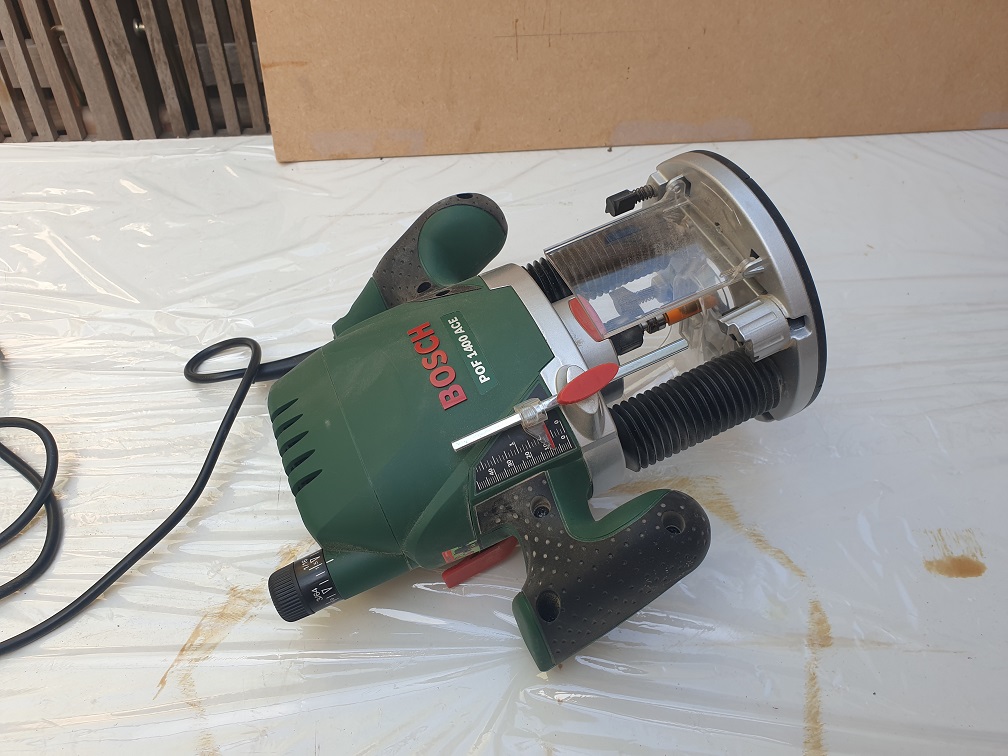
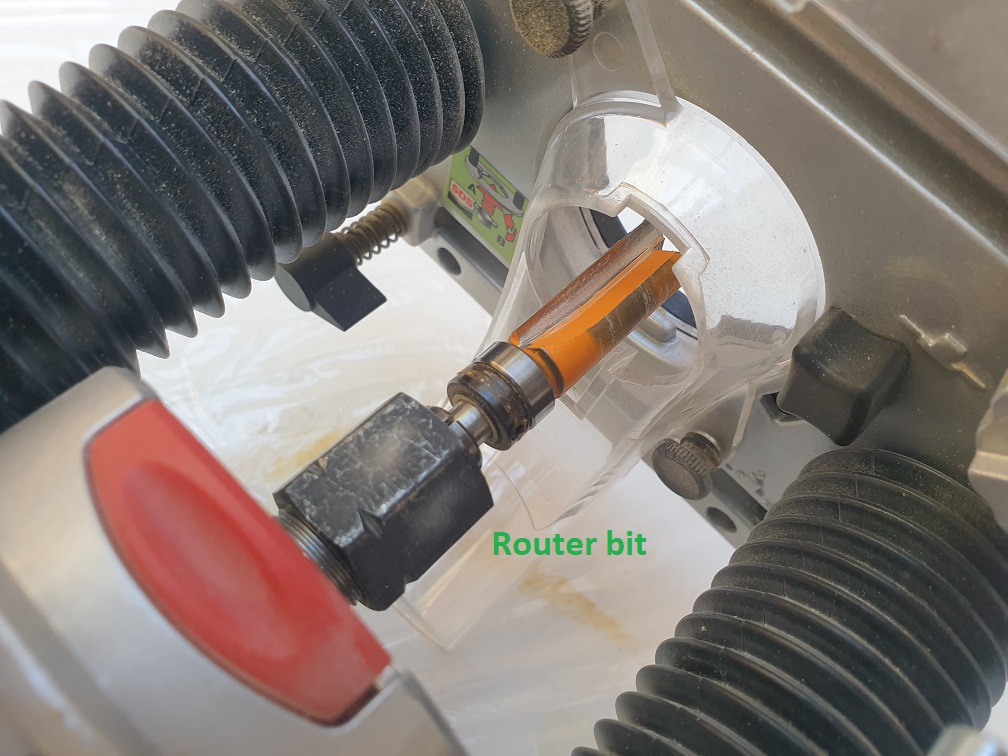
Only after that, the top profile is cut to the desired shape by using a wood template, a jigsaw for rough cut, and a router for the finish cut.

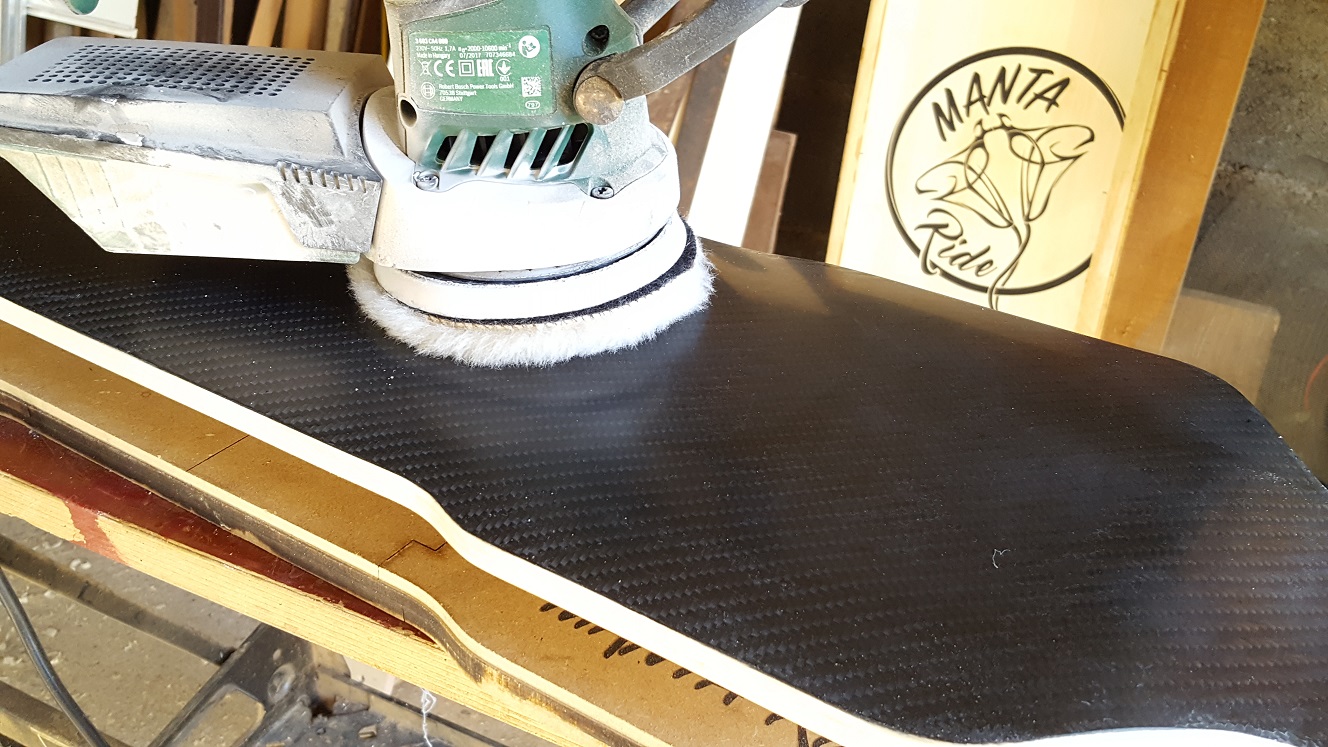
The deck is then sanded for a smooth finish.
Most of the time we don't add any glass or carbon fiber layers and drill the holes for the trucks at this stage.
And simply protect it with some clear or colored varnish, or a thin coat of epoxy:
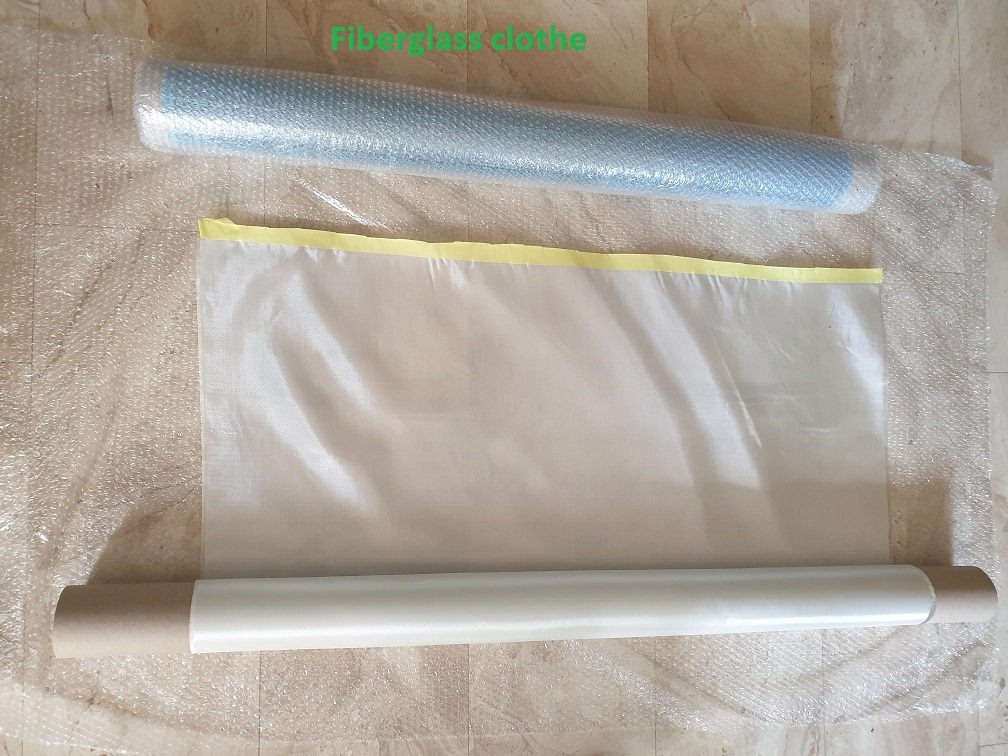
But I also made some decks with an extra layer of carbon or glass fiber.

In this case it needs to be sanded before applying a last coat of epoxy resin (glass finish).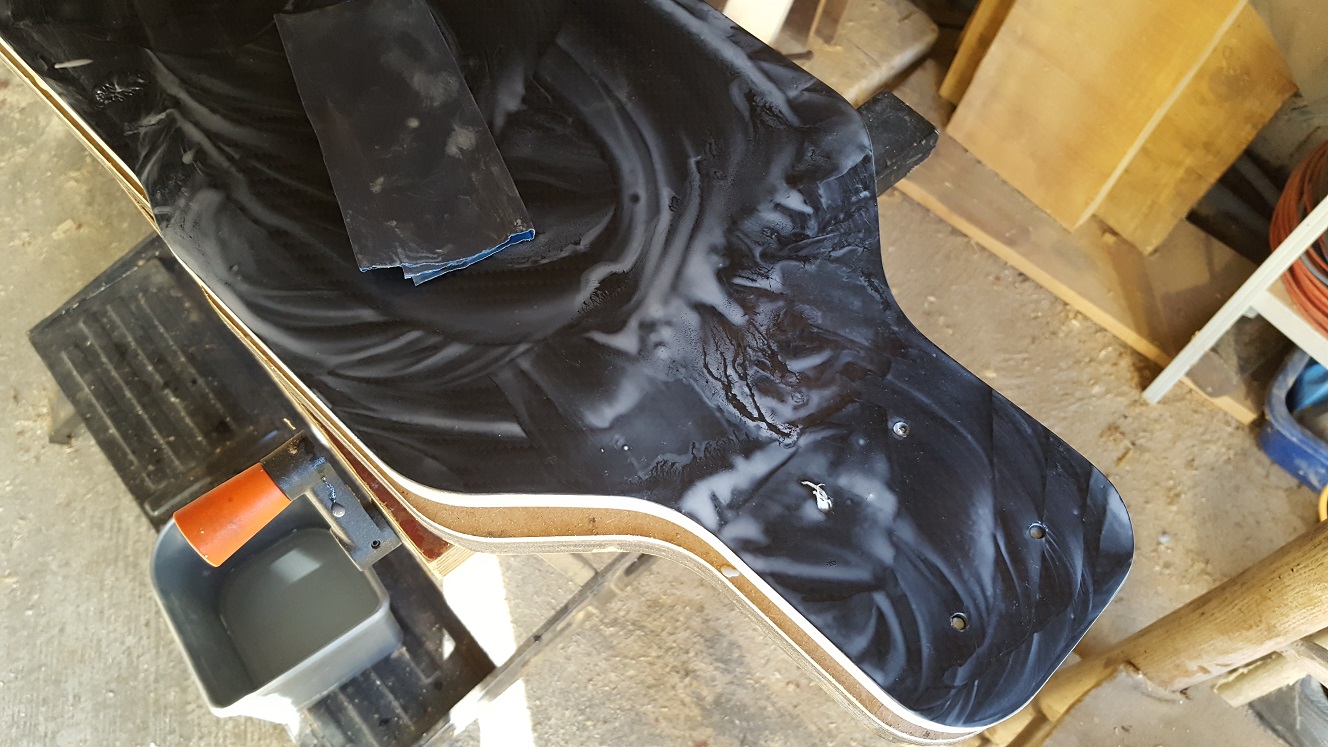
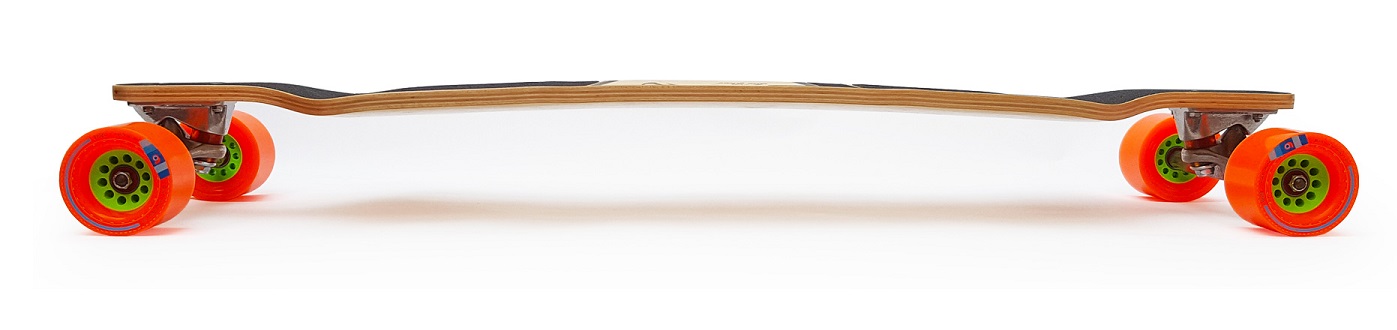
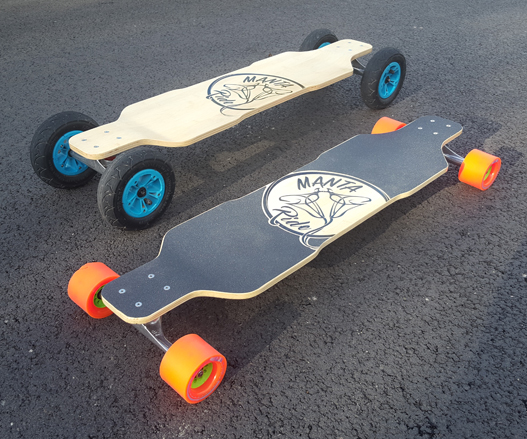
The deck can now receive its grip, trucks and wheels and is ready for riding.
We made several longboard this way with my friend and we are very happy with our press. It works really well!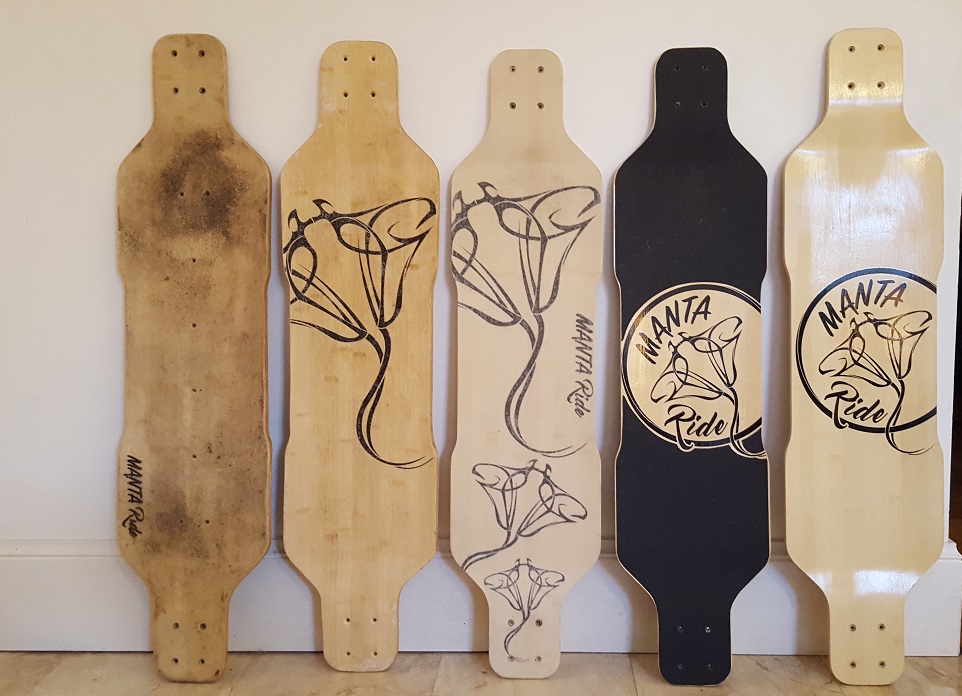
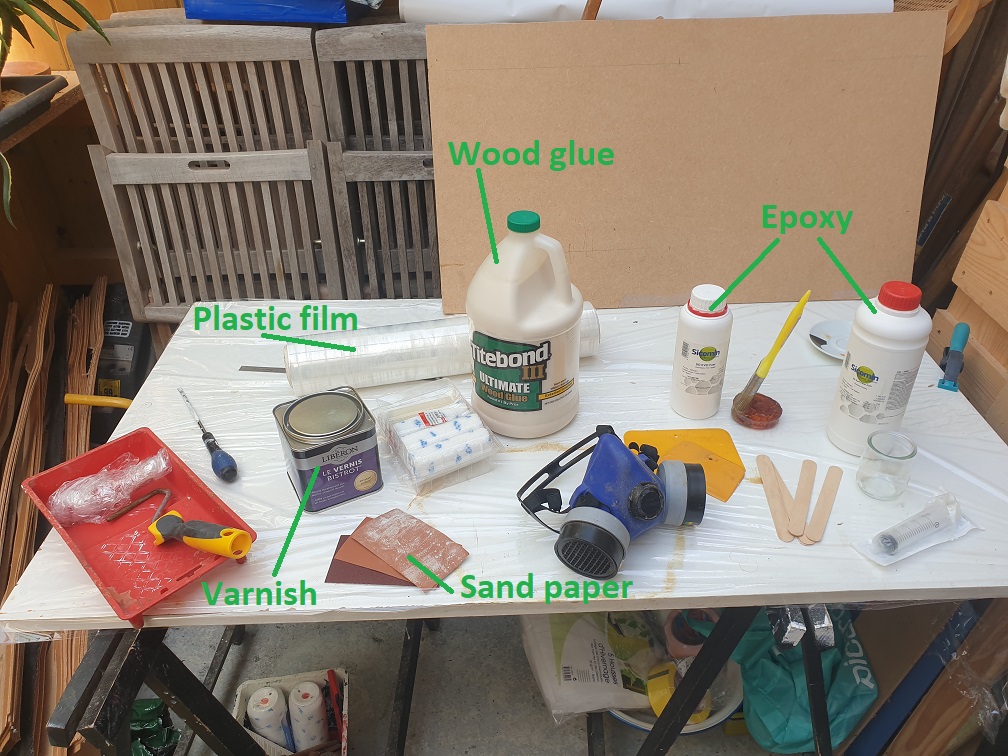
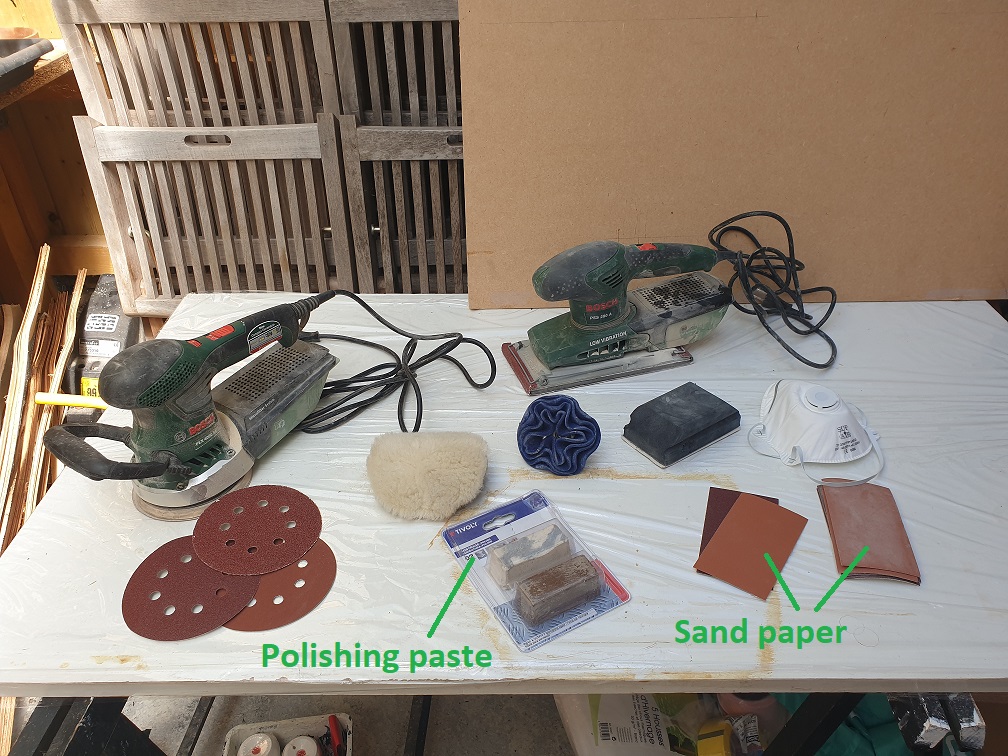
Here are the tools and products we use the most.
The epoxy resin I used at that time was SP-115 and seems to be still available.
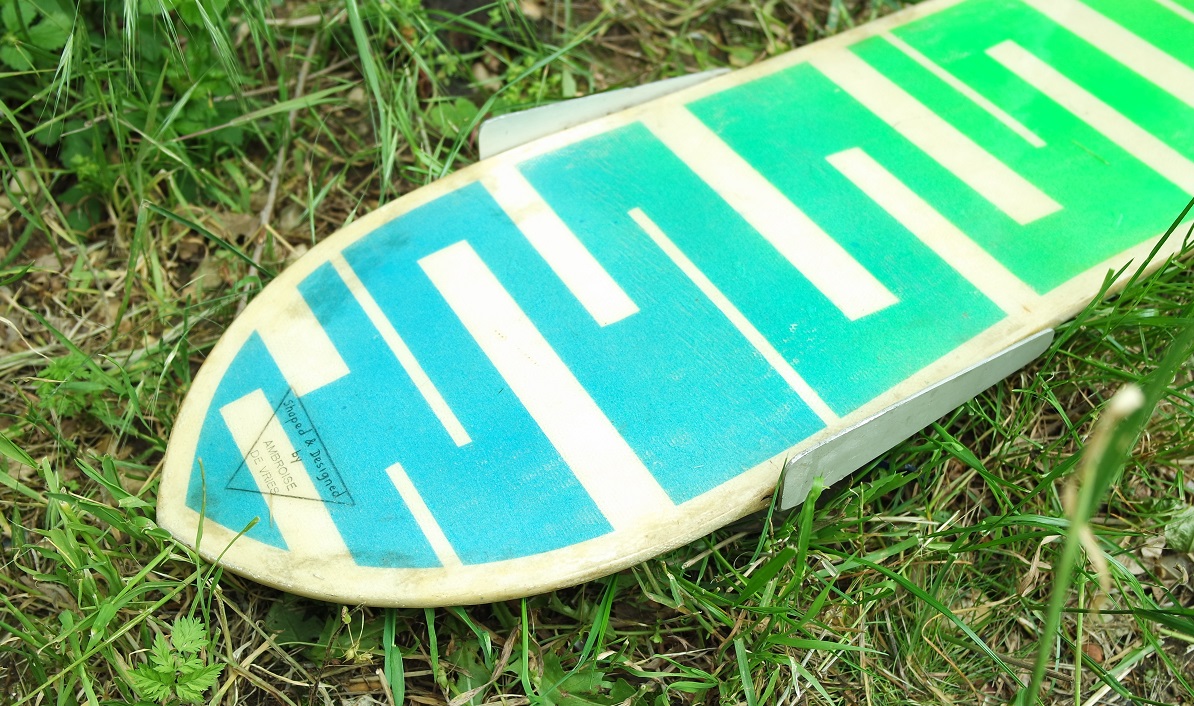
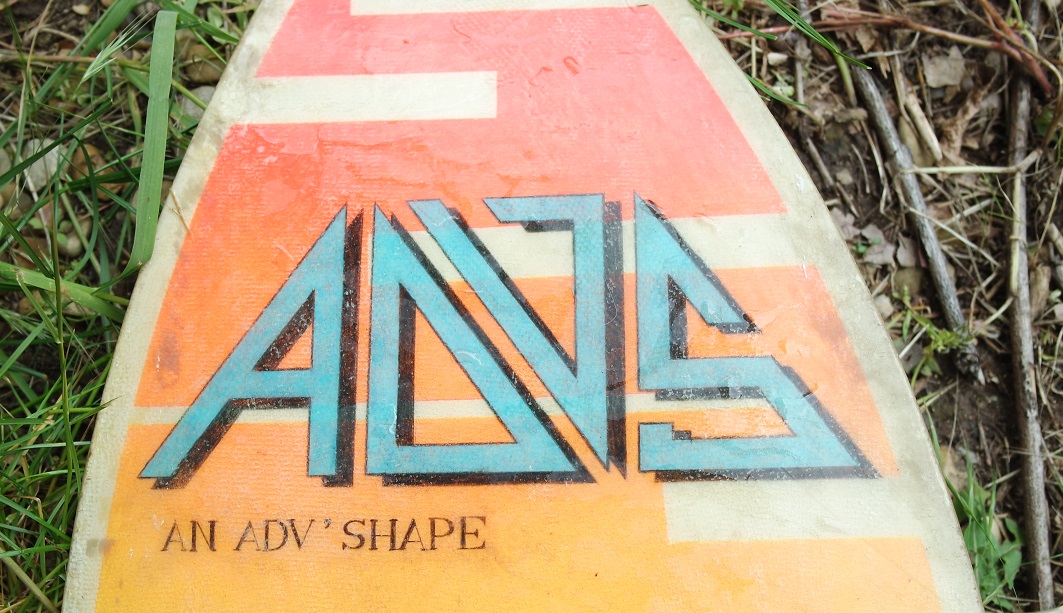
Here is the very first board I shaped 35 years ago and that I still have in my garage:

I made several other boards for friends and even worked a bit for Dill Sailboards when I went to Hood River (Oregon). It seems that Bob Dill left funboard since and is now shaping guitars.
I also made what is probably the very first snowboard seen in France (1986). It's made out of wood, fiberglass and epoxy.
I had never seen a snowboard for real at that time and had to invent a system for the footstraps.
They are made of thick transparent plastic (PVC I think) like the one used in cold chambers.
That way I was sure it could stand low temperature without becoming hard or breakable.
Looking back at what I made when I was 18 without knowing anything about resins, composites and laminates, I think I could have become a decent shaper.
Nostalgia...

So he asked me to demonstrate my work by uploading a video instead. The video has been cut into 6 parts to be able to upload it:
Composites knowledge background
I started working with composites in 1985 when I was 18 years old.At that time I was a windsurf addict and decided to make my own windsurf boards.
I liked this activity so much that I wanted to become a windsurf and surf shaper. But it didn't happen...
I will show a few photos of what I made at that time at the end of this page.
Making a longboard (skateboard deck)
Making a skateboard deck is more complicated than it seems.It has to be strong (must be able to support at least 100kg) but still flexible.
It also needs to have a shape (it's not just a flat deck). Adding concave on the top is a must have.
I've seen several people on the web trying to make one with just a laser cutter or even trying to mill it directly which most of the time ended up as failures.
So it really needs to be made out of wood laminates.
So here I'd like to introduce the way we're making longboard decks with a friend of mine, by using layers of wood, fiberglass (or carbon fiber) and epoxy resin that are put in final shape by compression molding in a home made press.
It all started because we were several friends that wanted to make our own longboard. That's why we decided to make a press that could be reused.
As whe had no access to a CNC milling machine for making the mold, I proposed to make it by aligning lasercutted profiles, and it worked suprisingly well!
Board CAD design
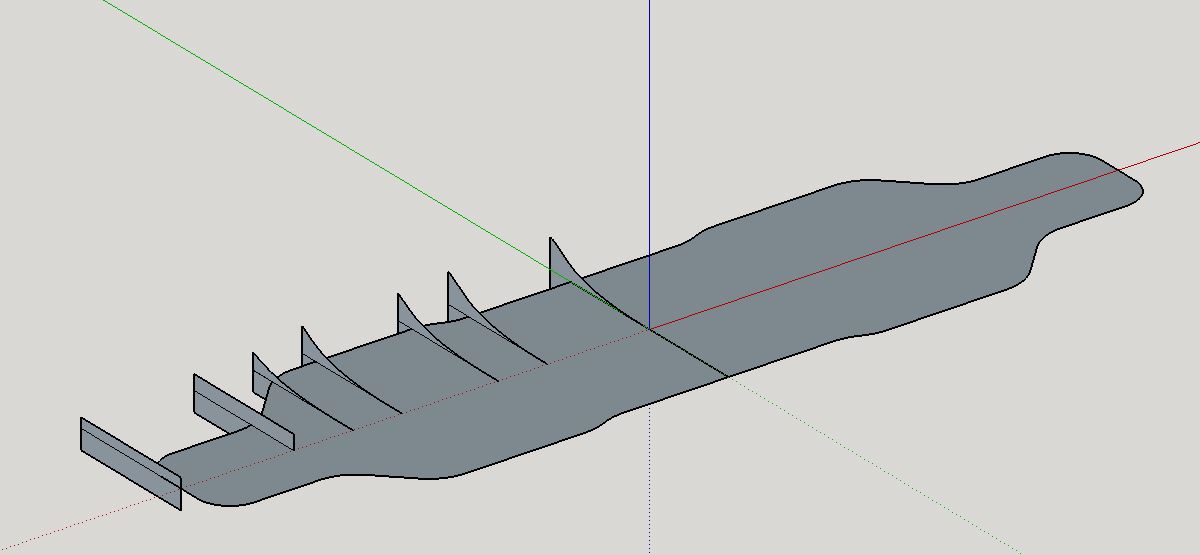
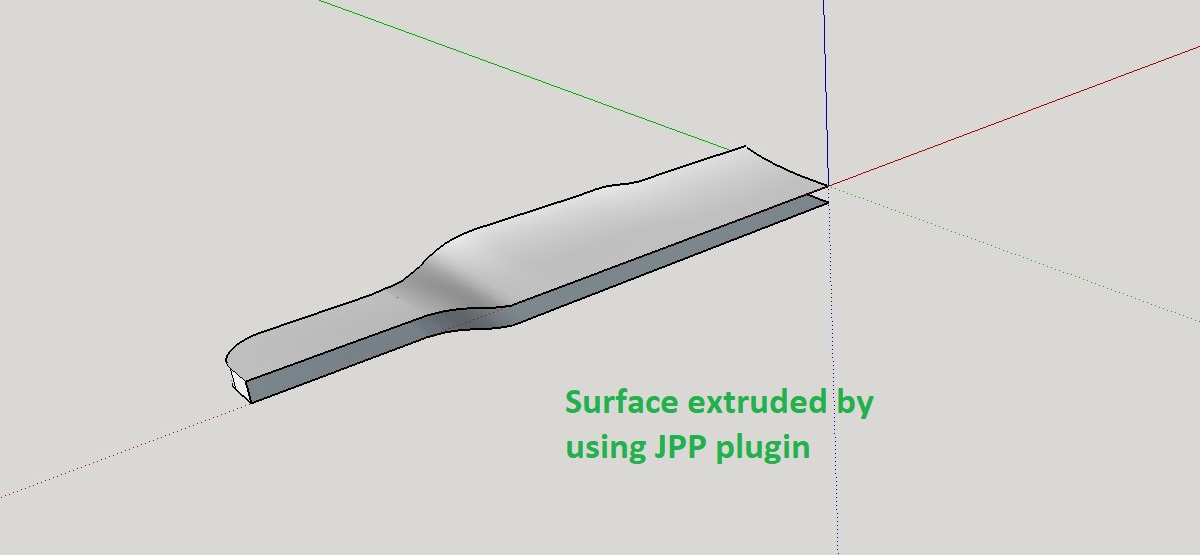
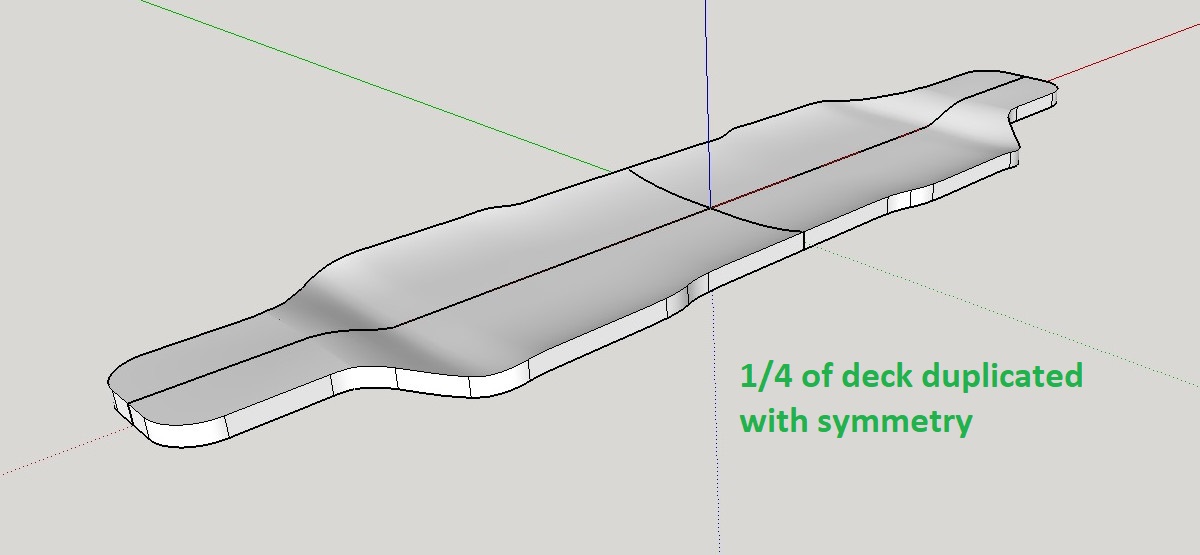
The first thing to do is to design the shape of the final board. All the CAD was done in SketchUp:Compression mold CAD design
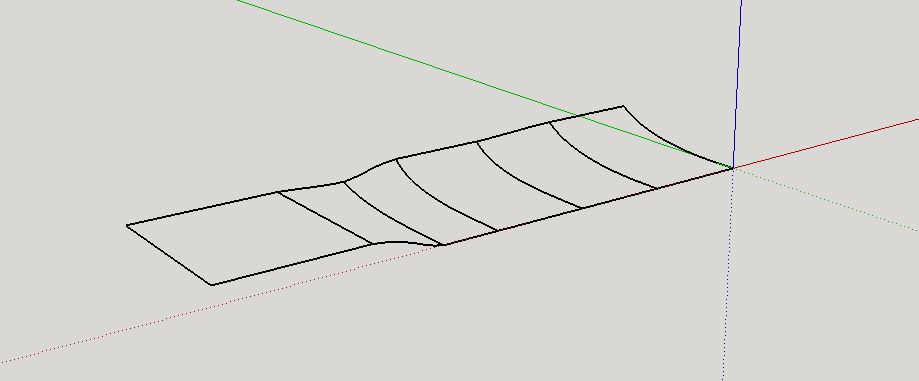
From the board CAD I designed a 2 parts mold:At this stage we realised that we will need more flex in the center to compensate for the rider's weight:
The mold is then sliced every 6mm for laser cutting:
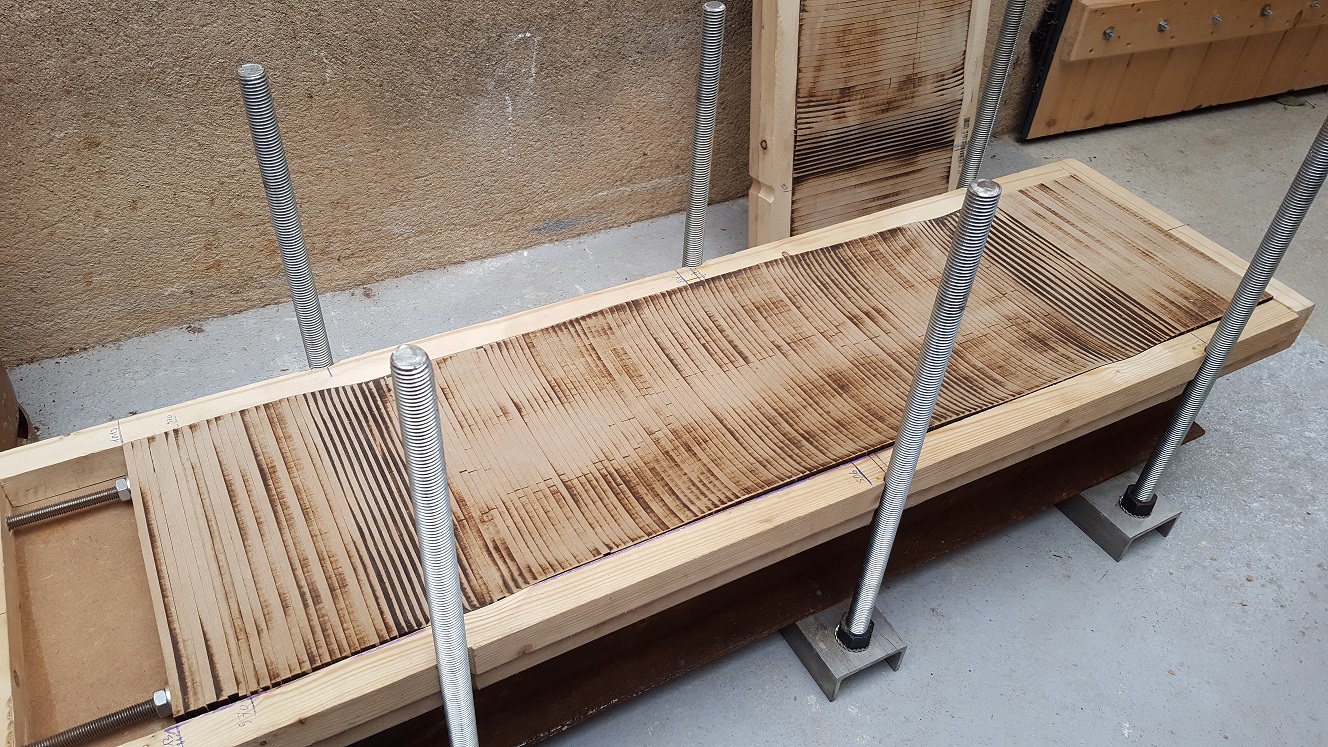
Compression mold manufacturing
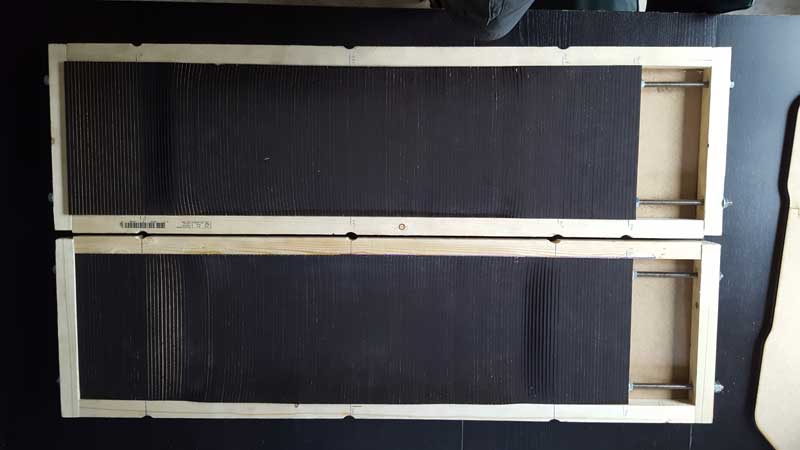
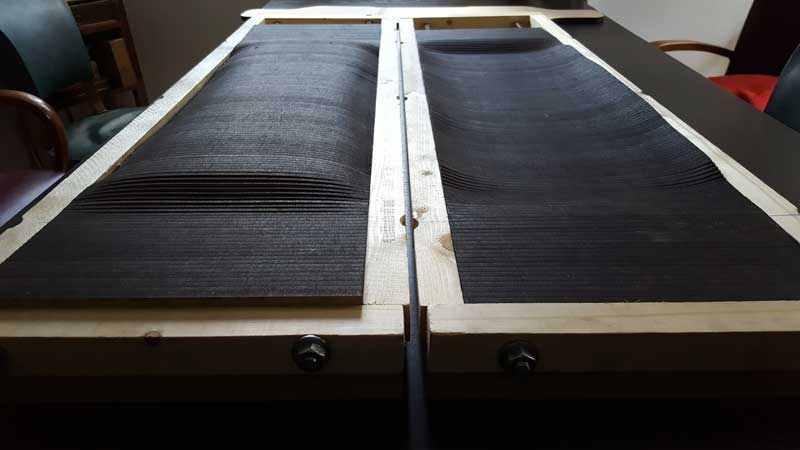
The different pieces forming the mold are lasercutted and each piece is numeroted to avoid mistakes during later assembly.Once all the pieces are made, they are assembled back following the numerotation, and are aligned thanks to 2 long 20mm diameter threaded rods.
Once assembled, each mold part is sanded to minimize the stairs in between the lasercutted individual pieces and get something smoother.
They will also be covered with a layer of wood for perfect smoothness when pressing the 1st deck. This is only done once (see later).
The 2 parts of our mold are now ready to be used in a press to produce the 1st deck.
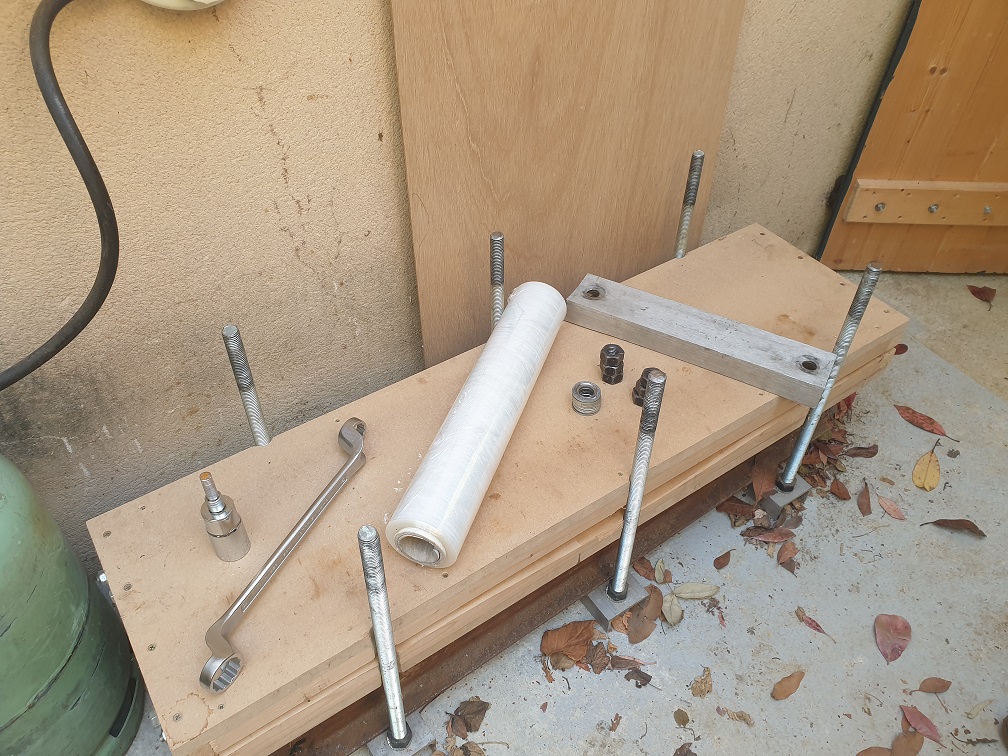
Press manufacturing
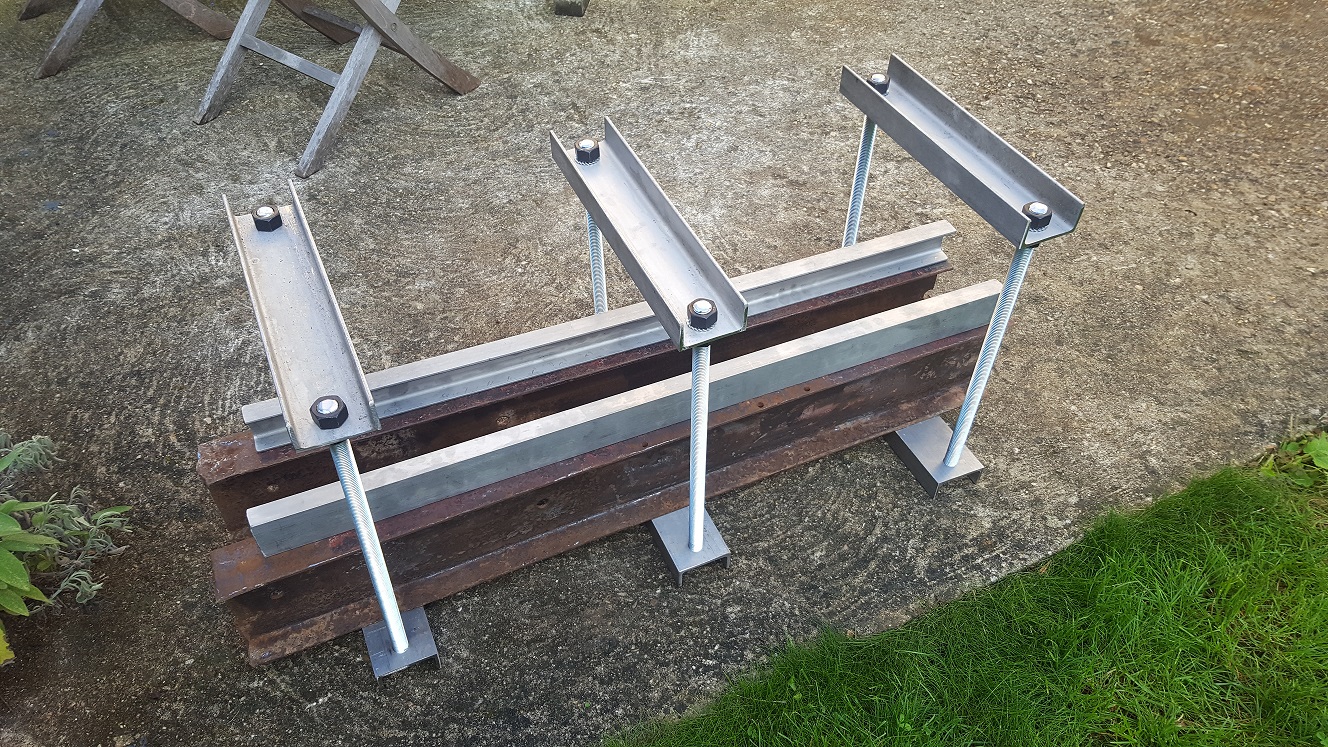
The press itself is made of heavy and strong U shaped steel bars that are connected with 20mm diameter threaded rods and nuts.The compression force that is applied can be very high with such a system.
Longboard deck manufacturing
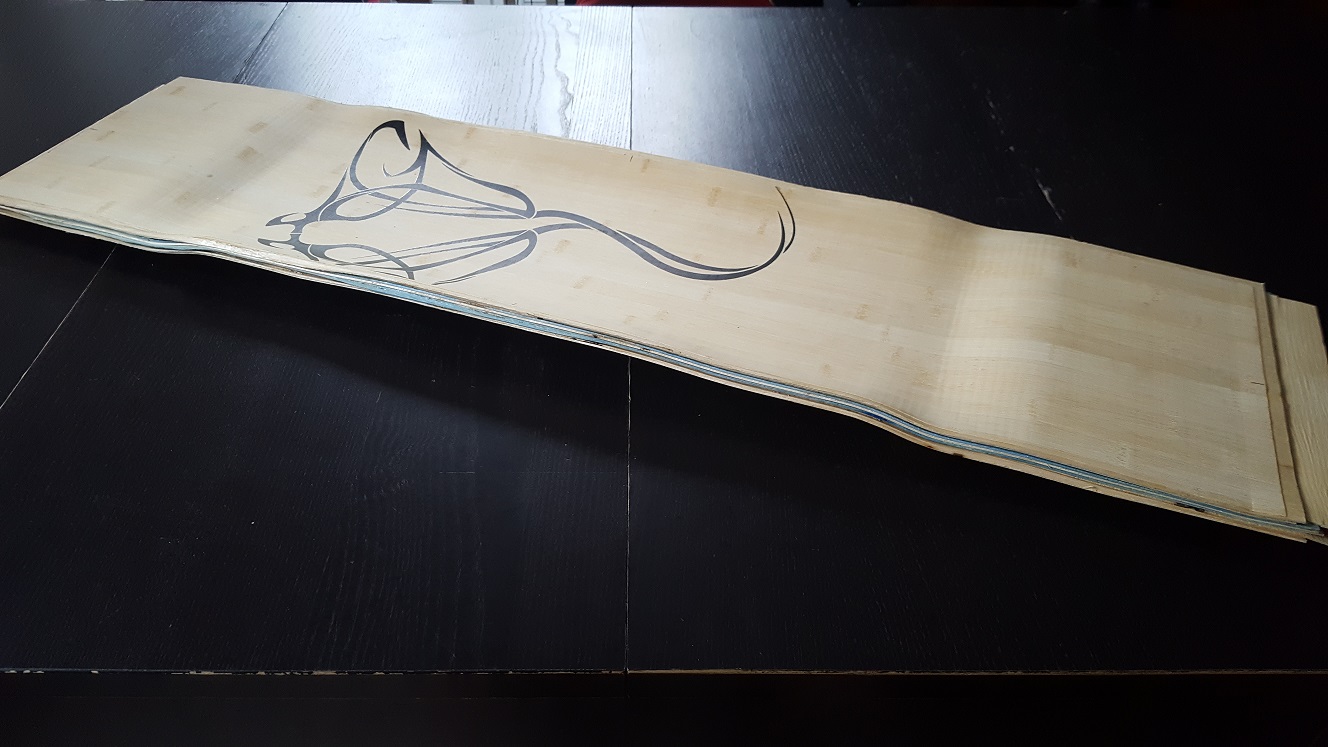
The deck is made out of 7 to 9 layers of 1.58mm thick maple wood (105 x 29 cm). The number of layers depends on the rider's weigth and flexibility preferences.This is the place where we buy our wood from: www.roarockit.eu
The wood we use is maple, except for the most outside layers (top and bottom) that are usually bamboo. Unless for decks that will be covered with carbon fiber.
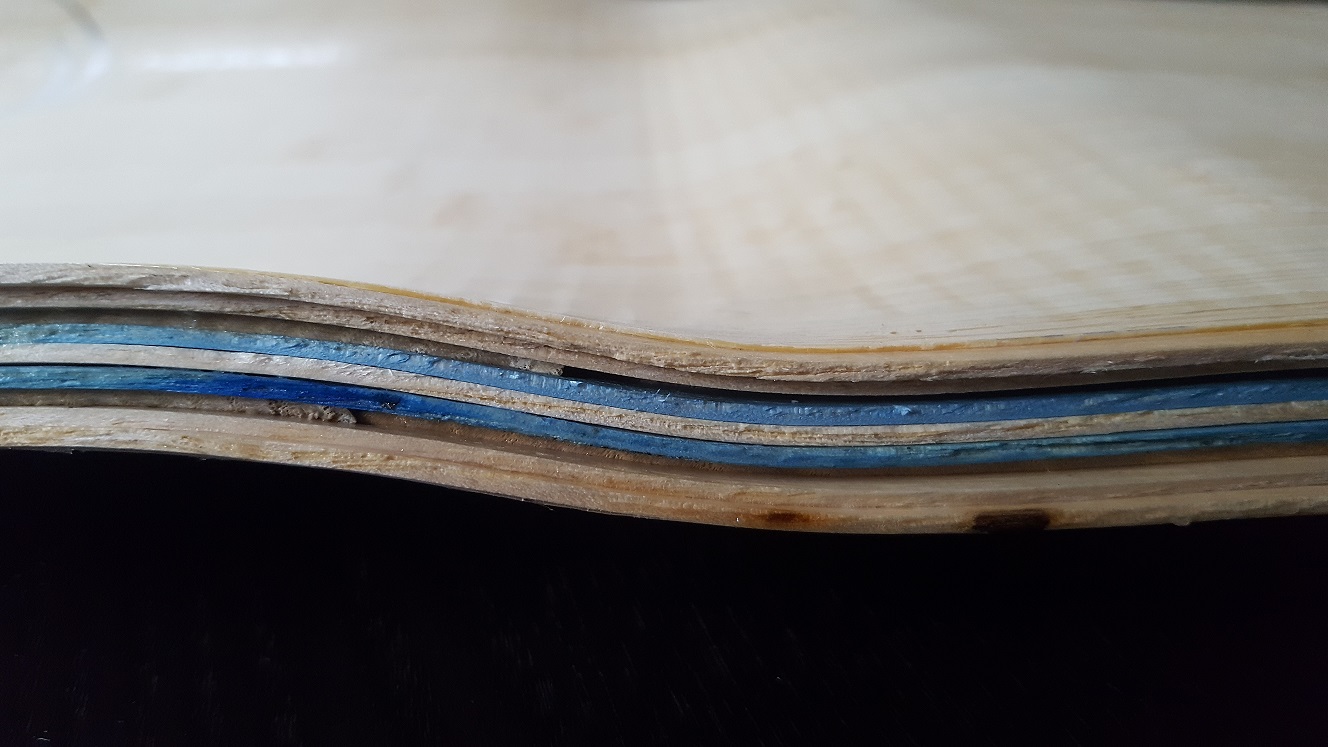
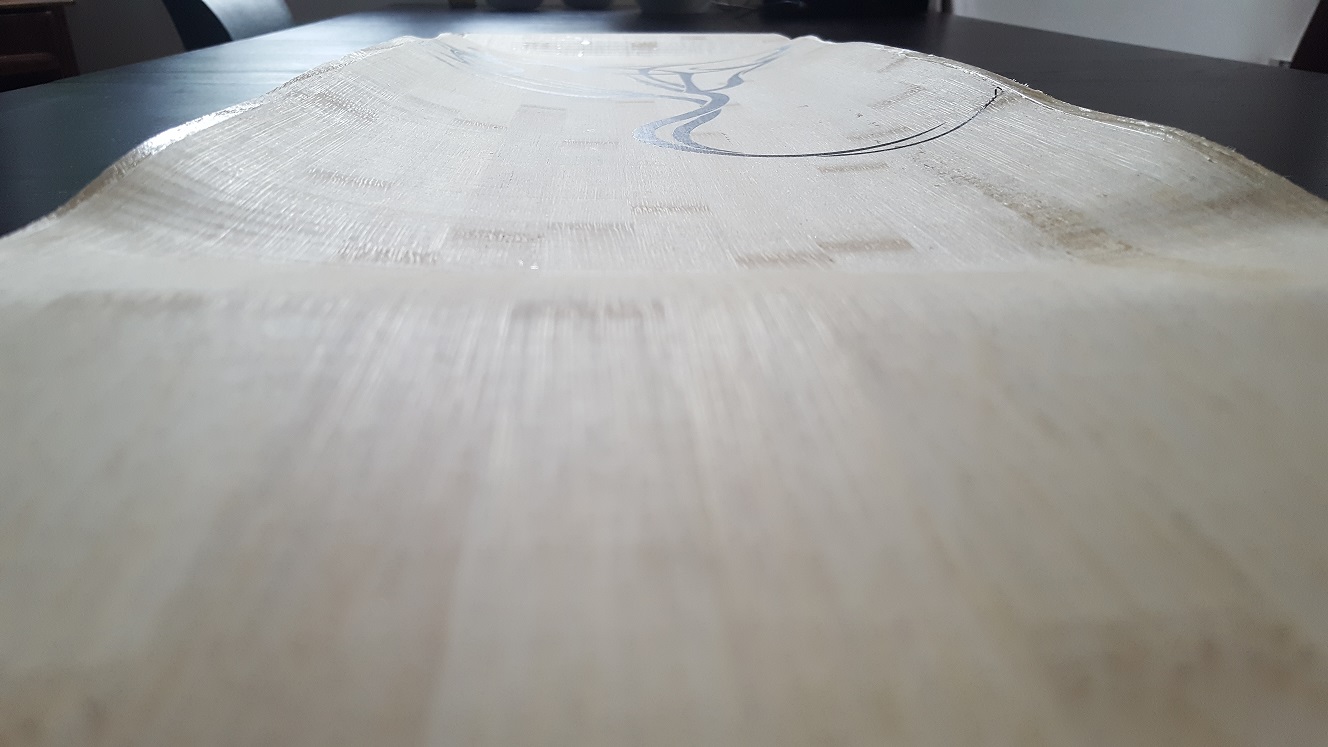
Most of the layers have their wood fiber direction along the long side, except for the 2 layers right on top and bottom of the center that have their fiber direction turned 90°.
This will give the deck more strenght while preserving flexibility. On the next picture these 2 inverted fiber direction wood layers are the colored ones:
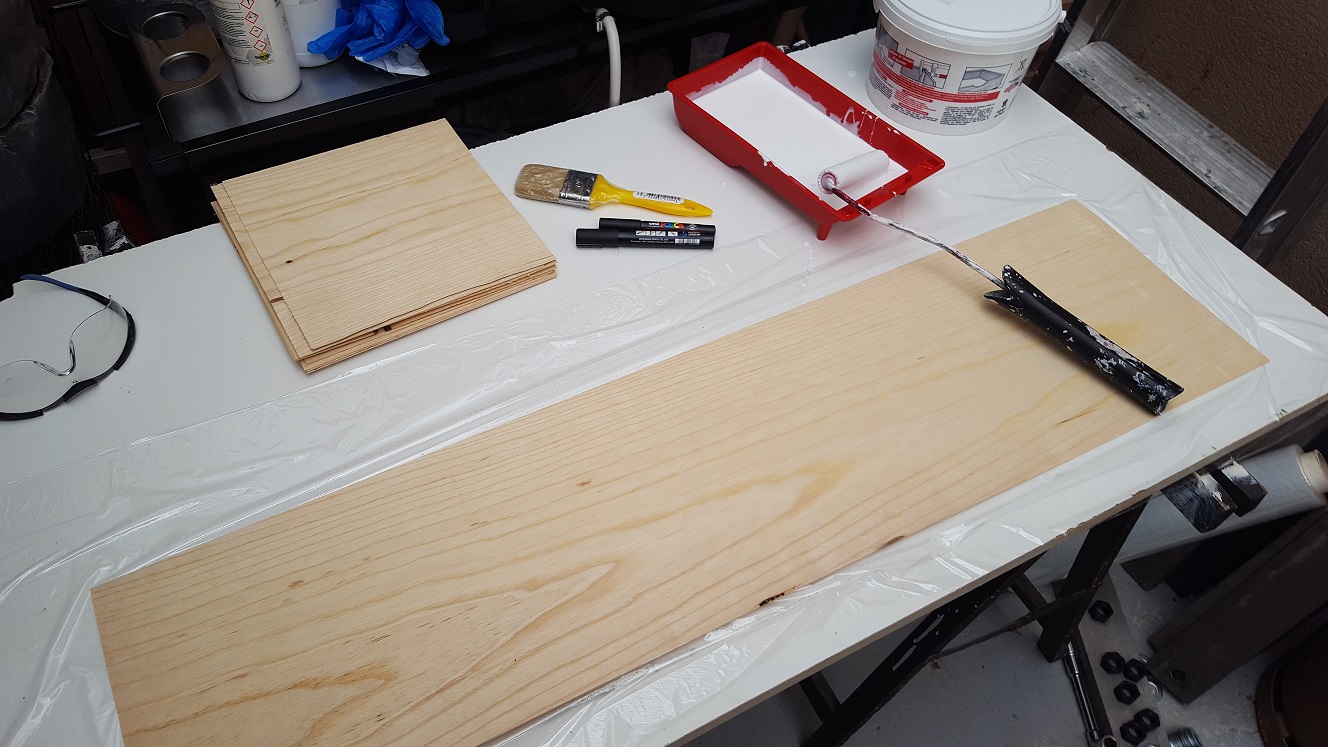
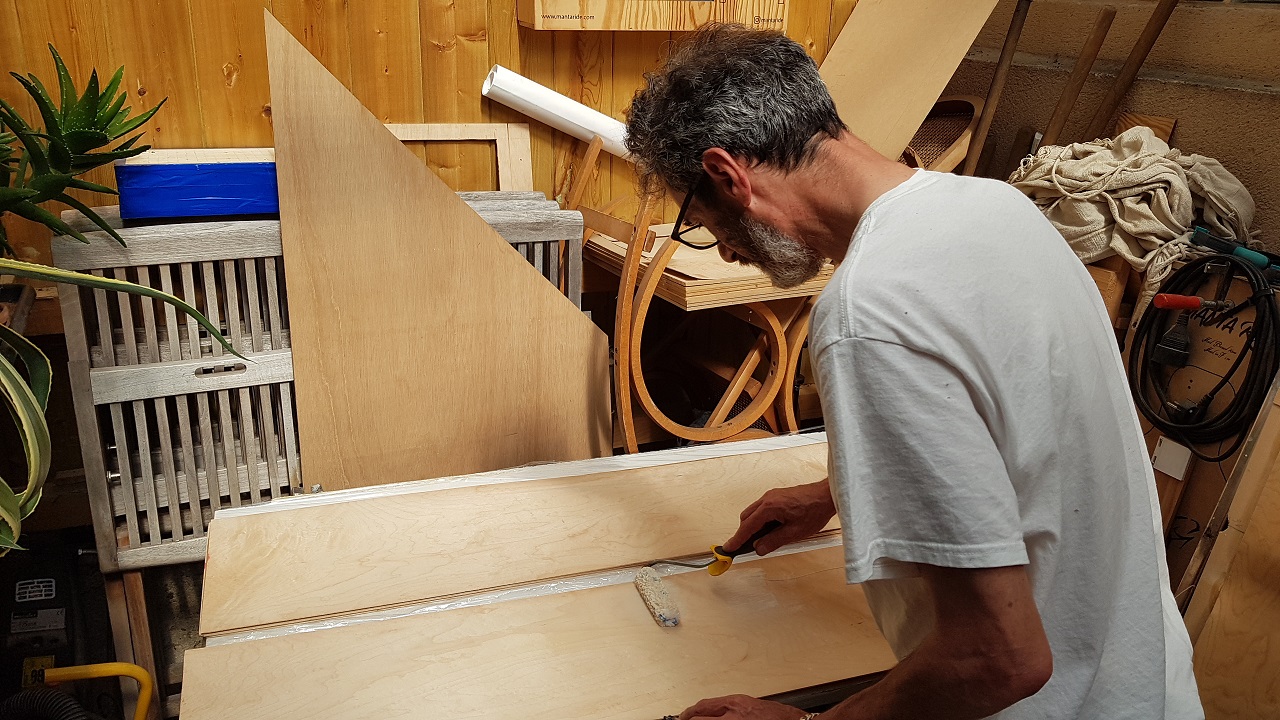
For each layer, wood glue is applied on both sides making sure to put some everywhere.
On the bottom and top sides of the future deck, a film of plastic wrap is applied to avoid it sticking to the mold and ease unmolding.
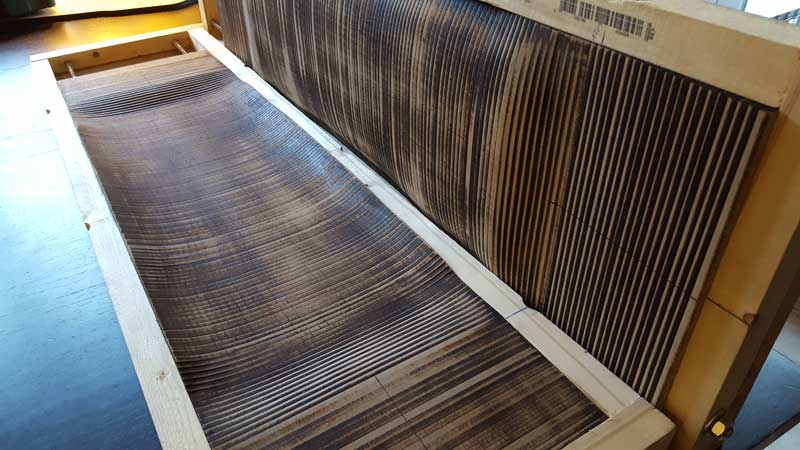
For the very 1st time using the mold (1st deck making) another extra layer of wood is applied with glue on top of each half mold.
These 2 extra layers will stick to the mold (making it perfectly smooth) but won't stick to the skateboard deck due to the plastic film.
This is done only once (1st deck) and makes a perfect mold surface finish.
This is how the mold now looks like with these 2 extra layers of wood after unmolding the 1st deck:
Once the future deck is placed in the mold, maximum pressure is applied by compressing the top 1/2 mold down onto the bottom one, and left to dry during at least 8 hours.
Then the mold can be open and the deck will keep its given shape. But it must be left for complete drying without touching it for at least 5 days.
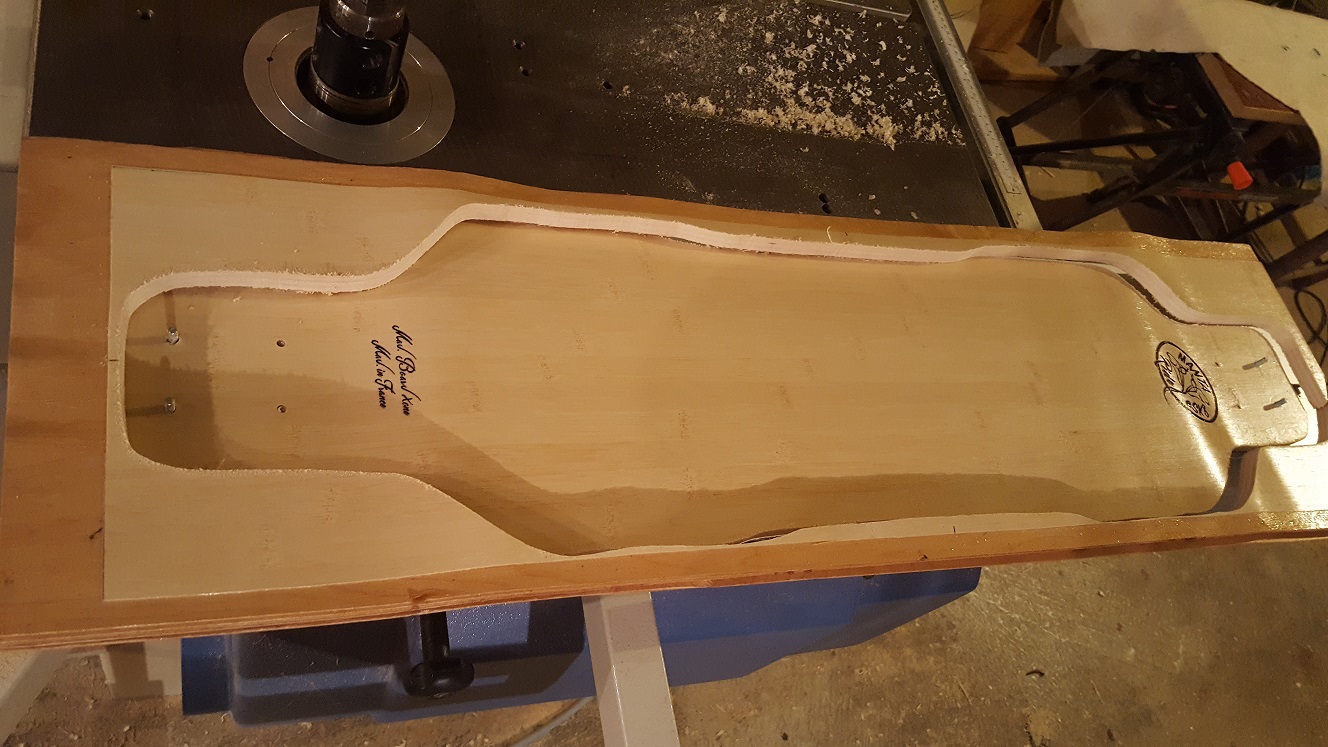
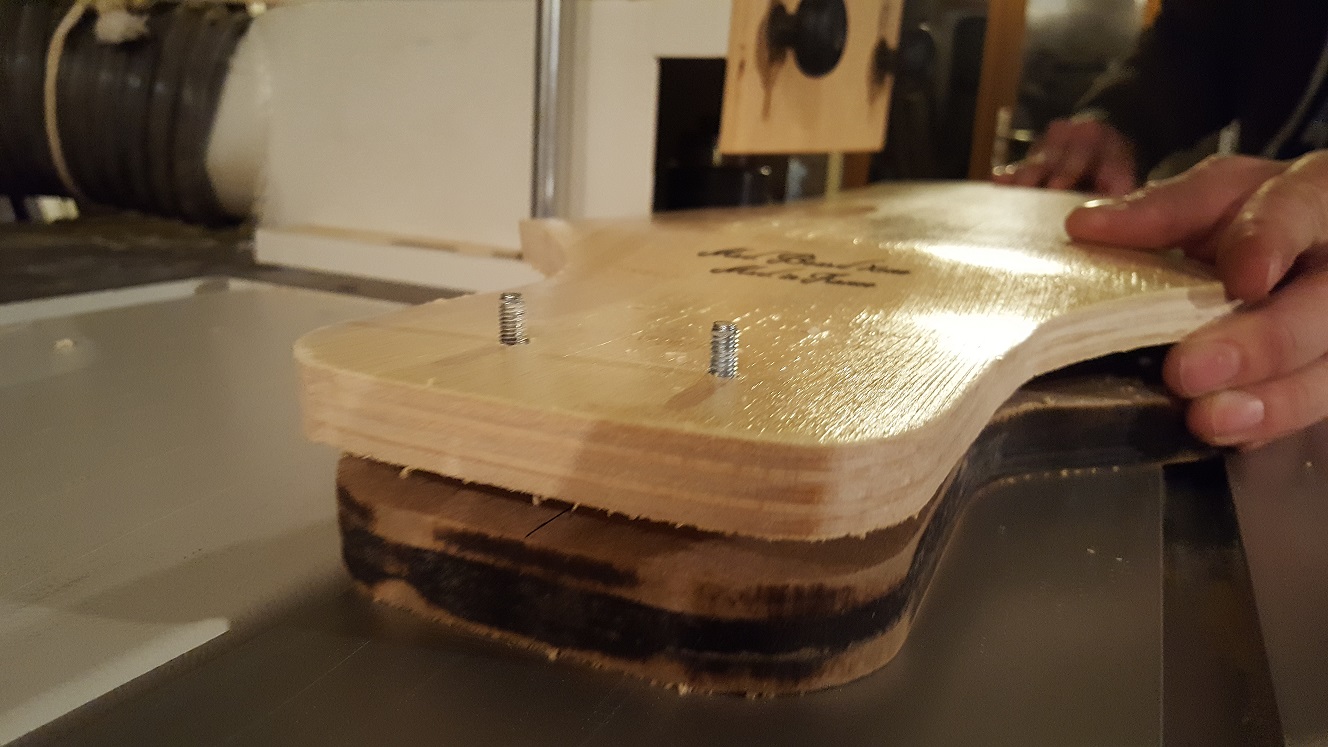
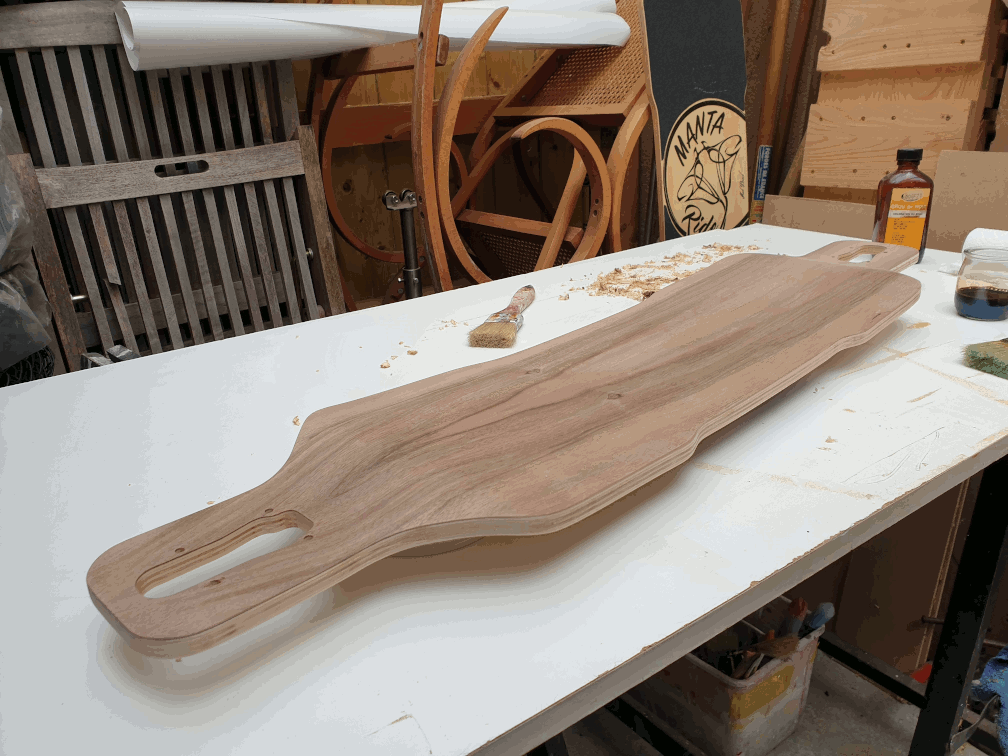
Only after that, the top profile is cut to the desired shape by using a wood template, a jigsaw for rough cut, and a router for the finish cut.
The deck is then sanded for a smooth finish.
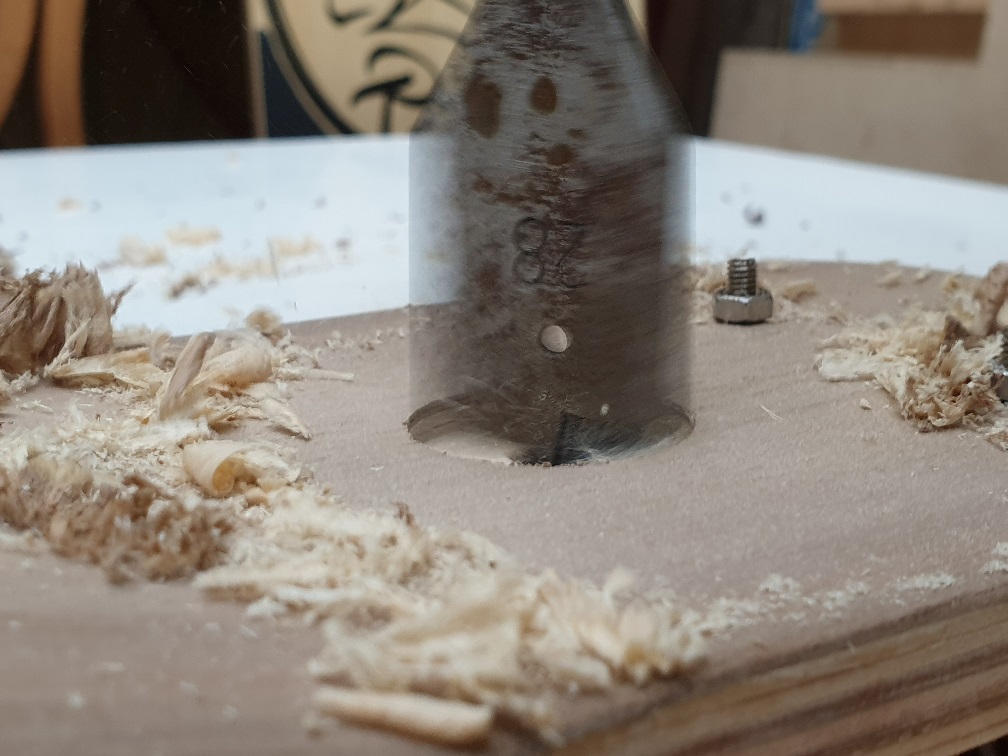
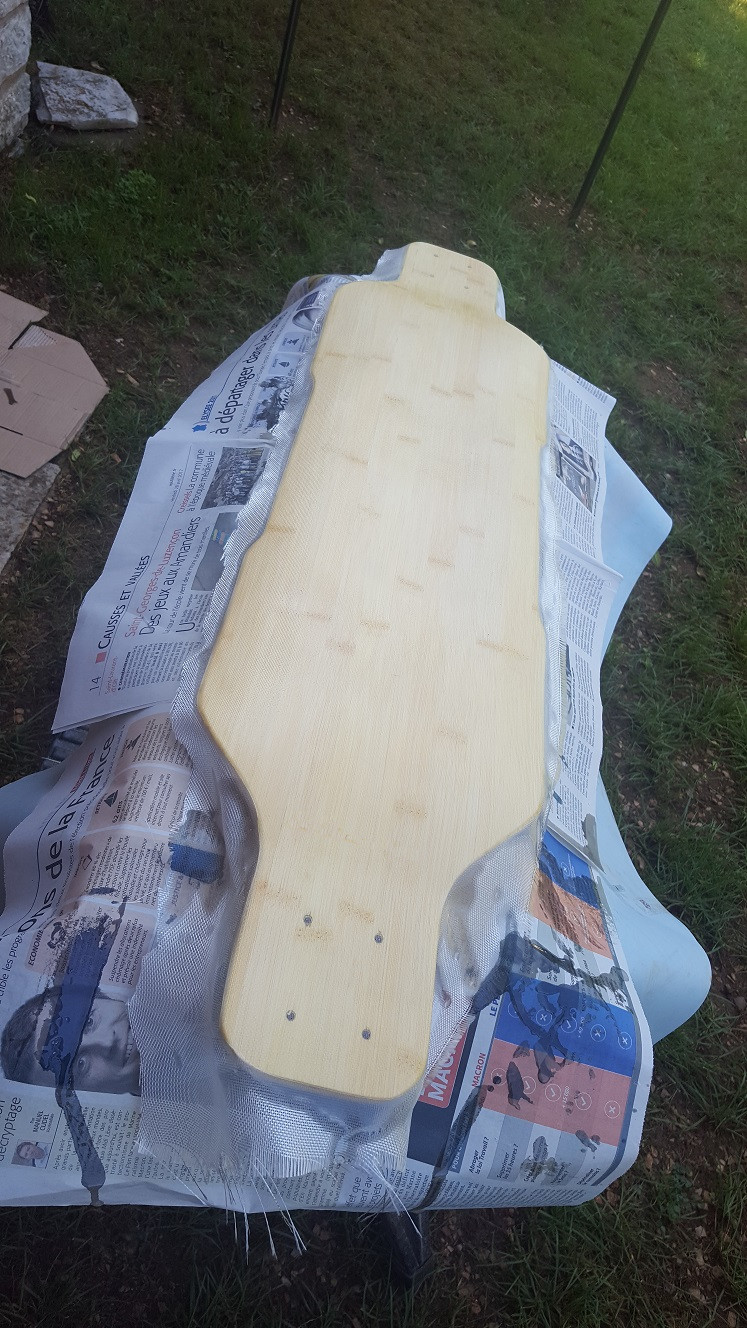
Most of the time we don't add any glass or carbon fiber layers and drill the holes for the trucks at this stage.
And simply protect it with some clear or colored varnish, or a thin coat of epoxy:
But I also made some decks with an extra layer of carbon or glass fiber.
In this case it needs to be sanded before applying a last coat of epoxy resin (glass finish).
The deck can now receive its grip, trucks and wheels and is ready for riding.
We made several longboard this way with my friend and we are very happy with our press. It works really well!
Here are the tools and products we use the most.
Nostalgia from 1985 - Windsurf shaping
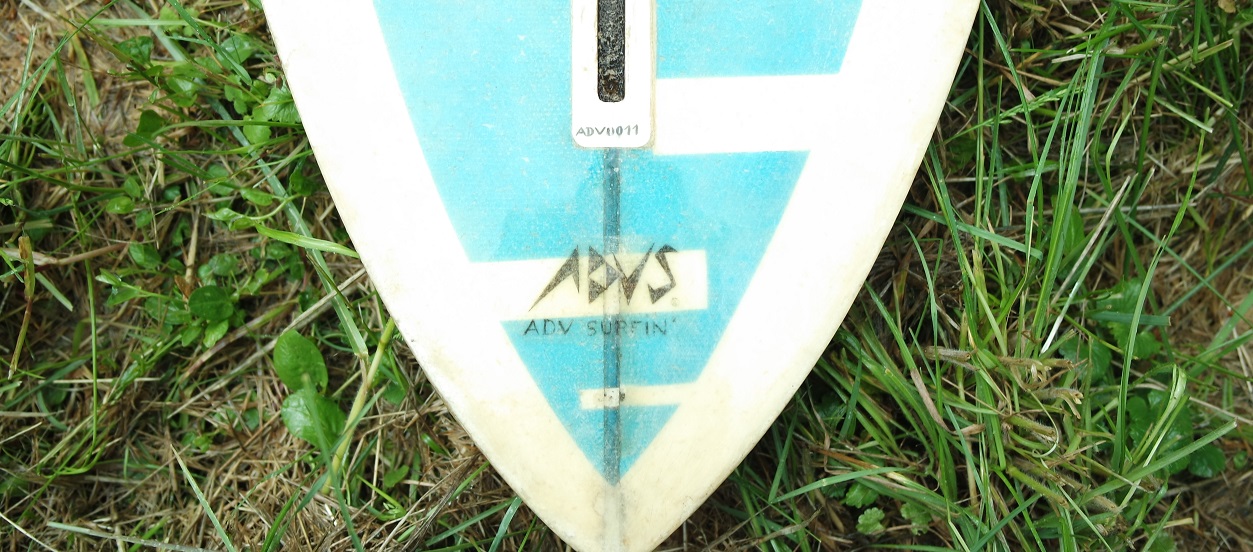
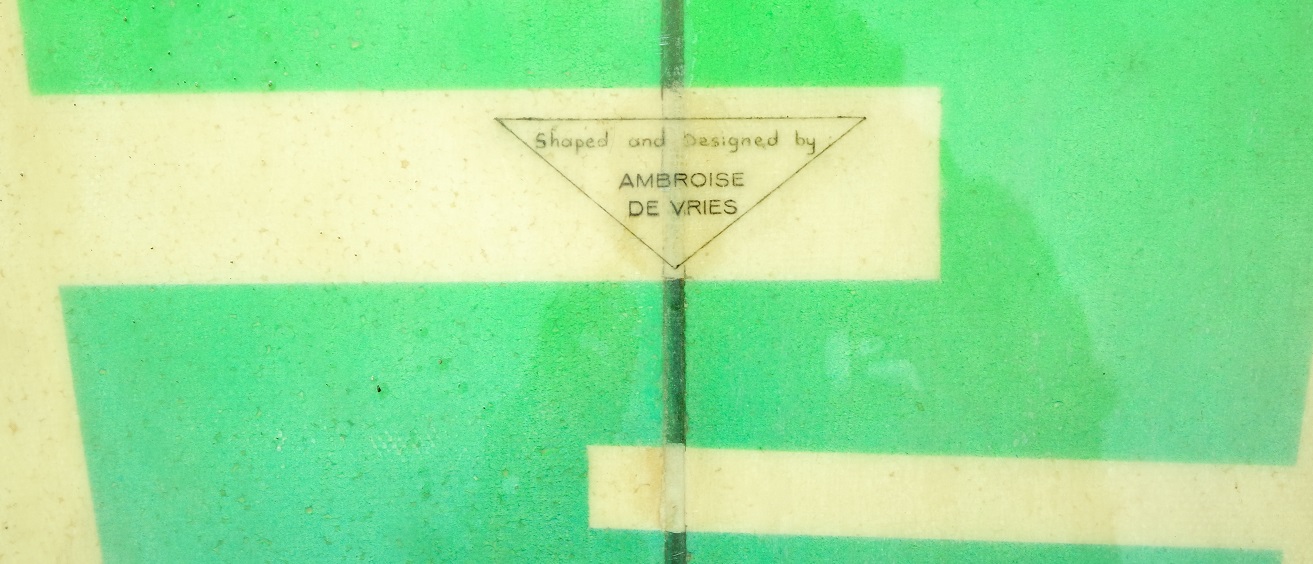
As I said at the beginning of that page, my background with composites started when I was 18 and decided to make my own windsurf boards.The epoxy resin I used at that time was SP-115 and seems to be still available.
Here is the very first board I shaped 35 years ago and that I still have in my garage:
I made several other boards for friends and even worked a bit for Dill Sailboards when I went to Hood River (Oregon). It seems that Bob Dill left funboard since and is now shaping guitars.
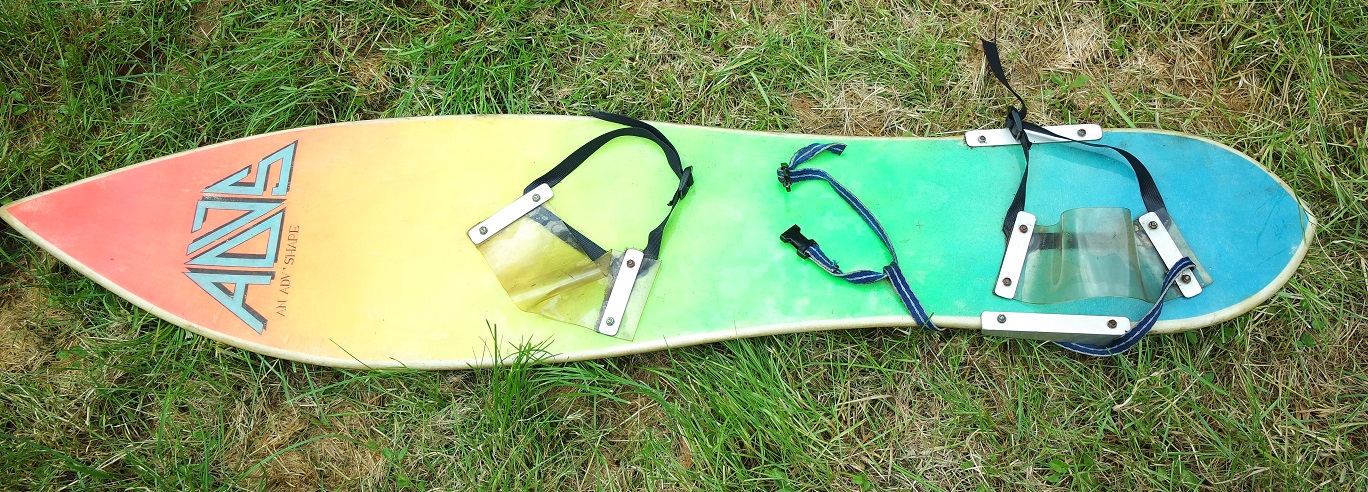
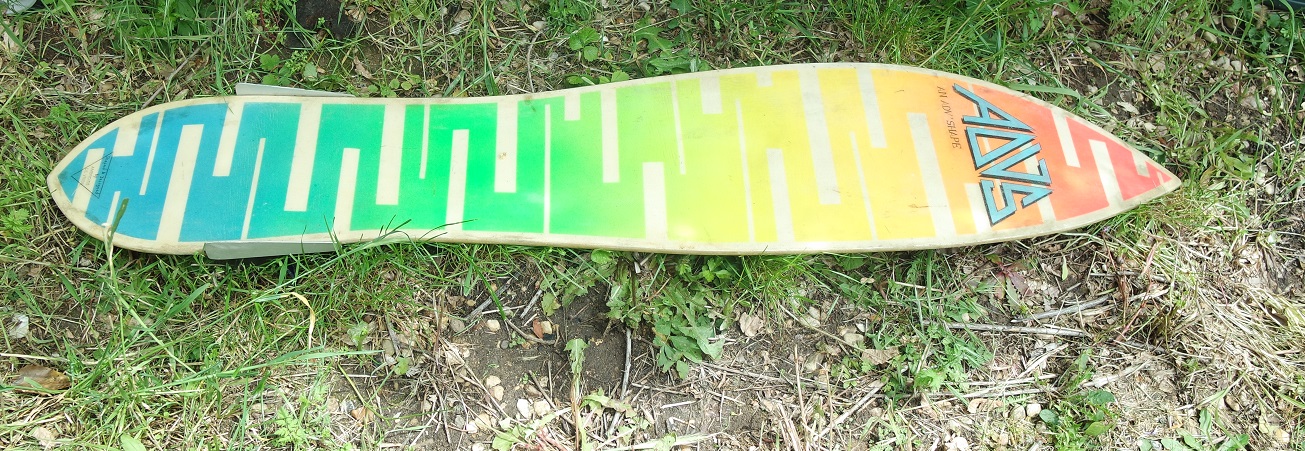
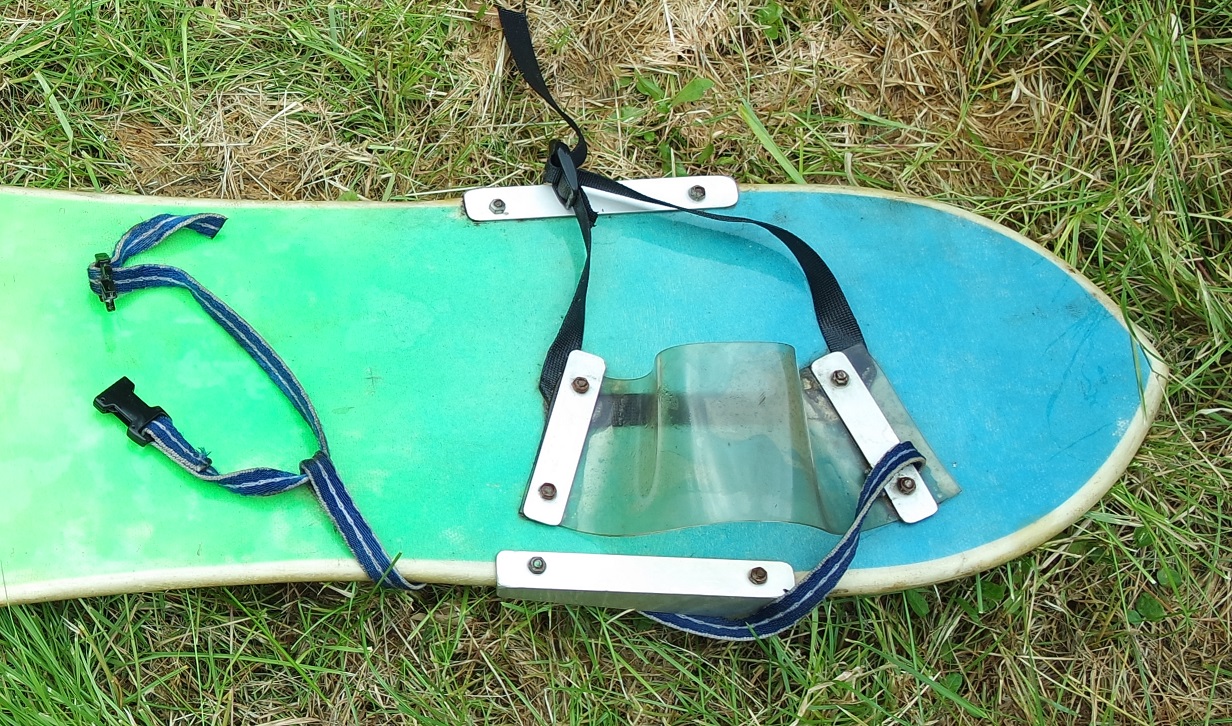
I also made what is probably the very first snowboard seen in France (1986). It's made out of wood, fiberglass and epoxy.
I had never seen a snowboard for real at that time and had to invent a system for the footstraps.
They are made of thick transparent plastic (PVC I think) like the one used in cold chambers.
That way I was sure it could stand low temperature without becoming hard or breakable.
Looking back at what I made when I was 18 without knowing anything about resins, composites and laminates, I think I could have become a decent shaper.
Nostalgia...
I want to dedicate this page to my beloved 19 years old nephew who passed away during this week.

						He was a very good skater and a nice and friendly young man!

						RIP Hugues!

						Missing "U"...
Files for this week
I explained to my global evaluator that I couldn't upload my CAD work for this week because I'm now running a small skateboard decks business and don't want my boards to be copied.So he asked me to demonstrate my work by uploading a video instead. The video has been cut into 6 parts to be able to upload it: