Mechanical and machine design
The group assignement for this week is to
We found everything we need in the lab: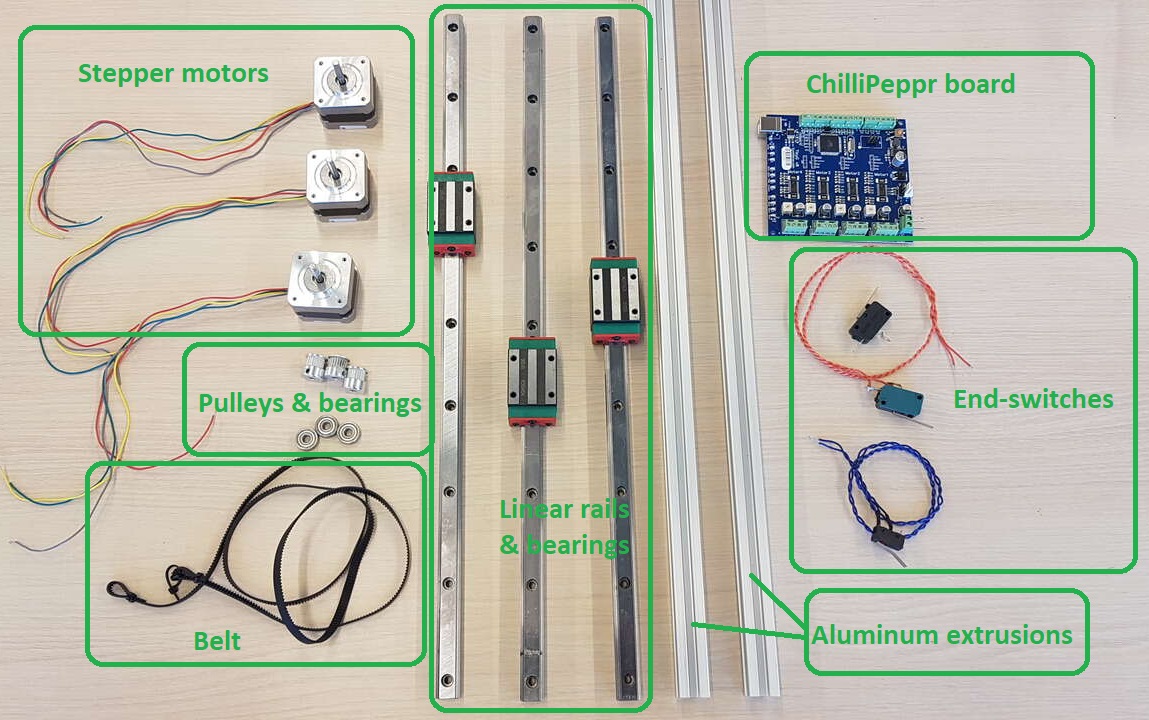
The collaborative part of our work, along with our results, is described on a dedicated page here.
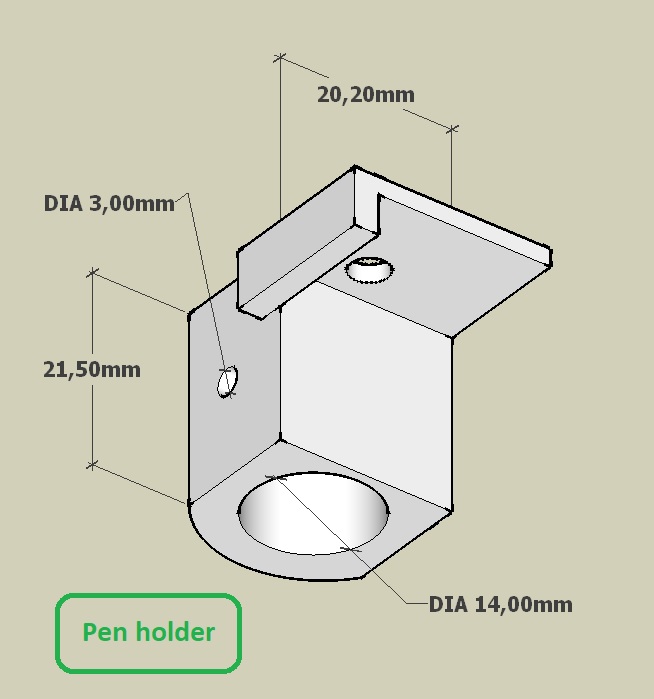
I also designed a simple pen holder and the Y switch holder.
The parts were printed on a Ultimaker 5 using PLA.

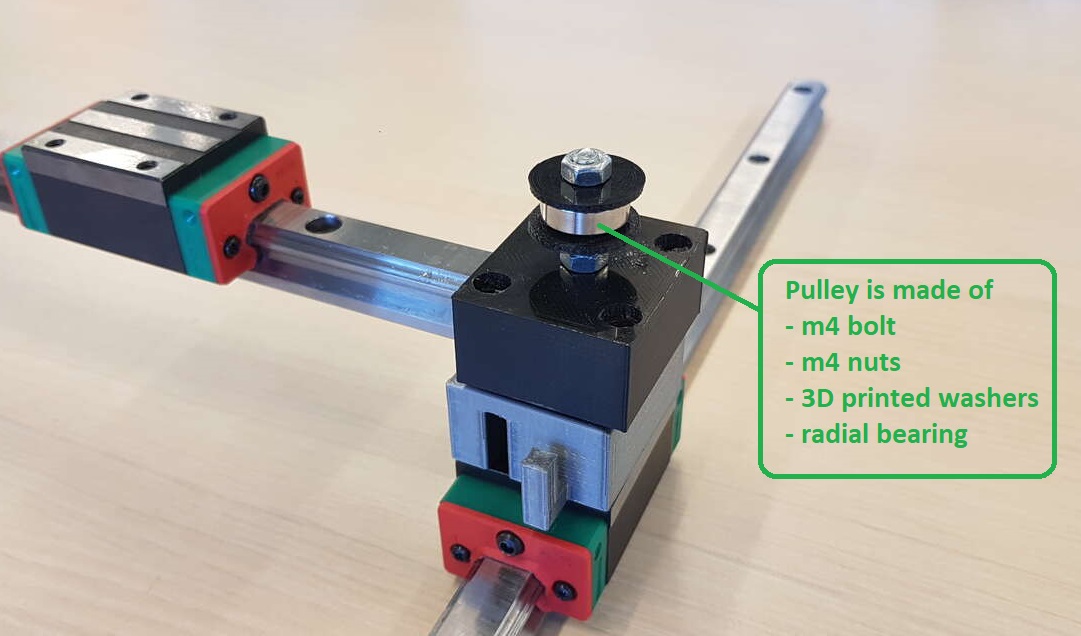
The pulley is made of a M4 bolt with several nuts and a bearing placed in between 2 large washers:
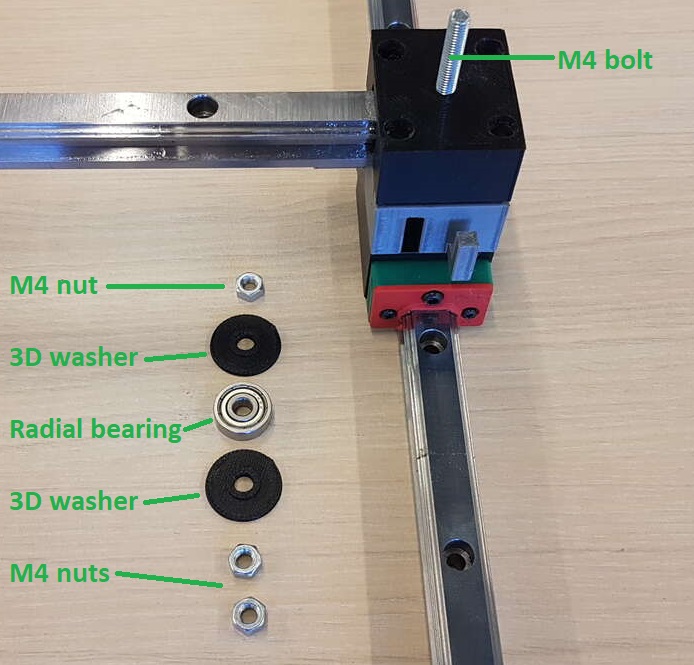
As we didn't have large washers (larger than the bearing) I designed this small part that combines a big washer and a small one and printed in PLA:

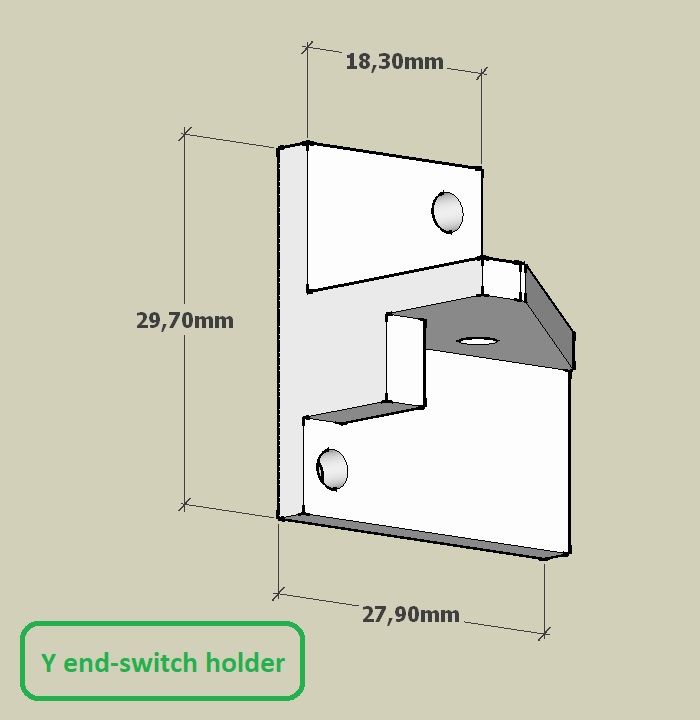
I also designed the Y end-switch holder:
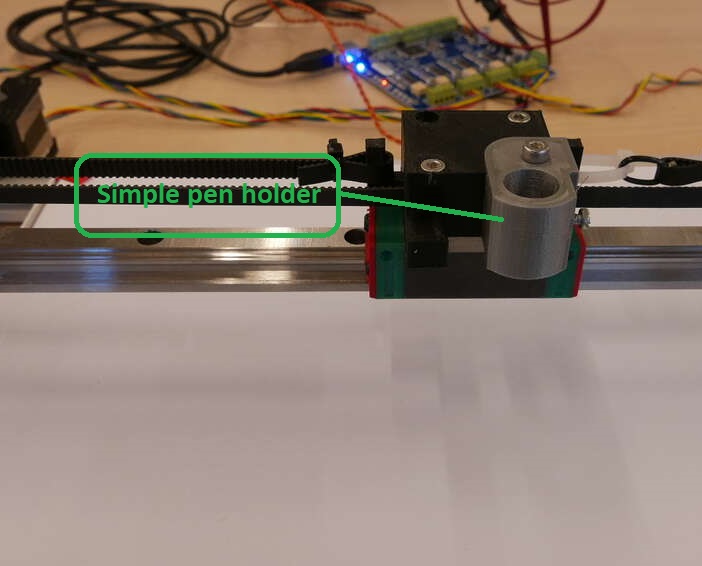
And a simple pen holder for our very first tests:
Later on it was replaced by Quentin's design of a better pen holder with up and down automation.
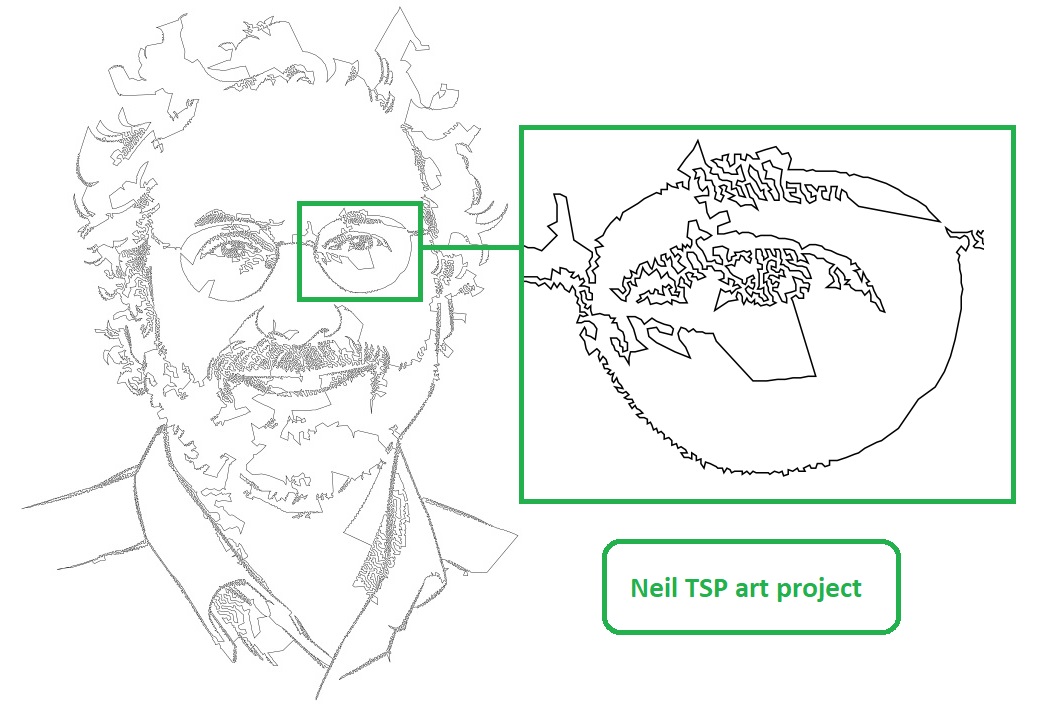
Before Quentin's new pen holder's design, we had no up and down automation for the pen, so I prepared a drawing that doesn't need any pen lifting system.
The drawing is made out of a single closed path that never crosses itself.
This technique is called TSP art.
So I prepared Neil's portrait as a TSP drawing:
w09_chariot.stl
w09_chariotX.stl
w09_elevateurY.stl
w09_elevateurY_butee.stl
w09_head_base.stl
w09_linear_coupler.stl
w09_moteurX.stl
w09_retour_X.stl
w09_rondelle.stl
- design a machine (mechanism + actuation + automation)
- build the mechanical parts
- operate it manually
- actuate and automate the machine
Machine design choice
After a discussion with Selena and Quentin, it was decided to build a 2 axis machine that could serve several purpose like a pick&place machine, a 2D plotter, etc.We found everything we need in the lab:
- linear bearings and rails
- radial bearings
- nema17 stepper motors
- end-switches
- belt
- belt pulleys
- nuts & bolts
- T-slot aluminum extrusions
- Chillipeppr board
Collaborative work
Several parts needed to be 3D designed and printed and we devided the work between us.The collaborative part of our work, along with our results, is described on a dedicated page here.
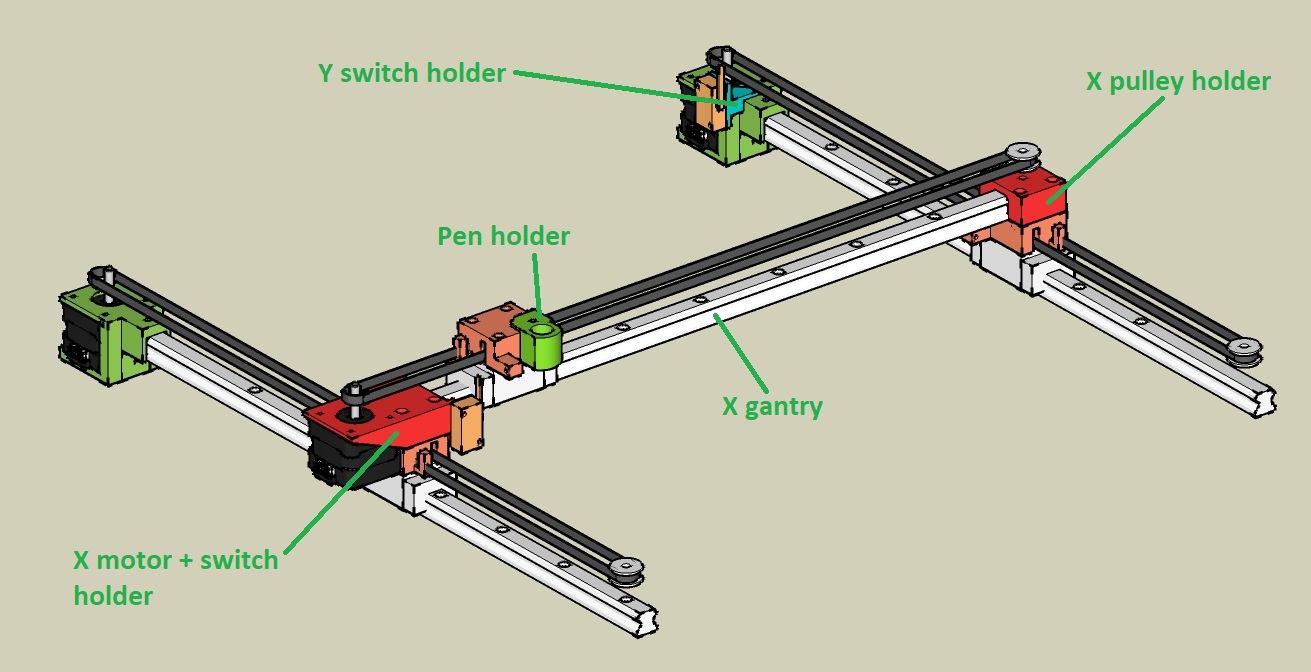
Individual design work
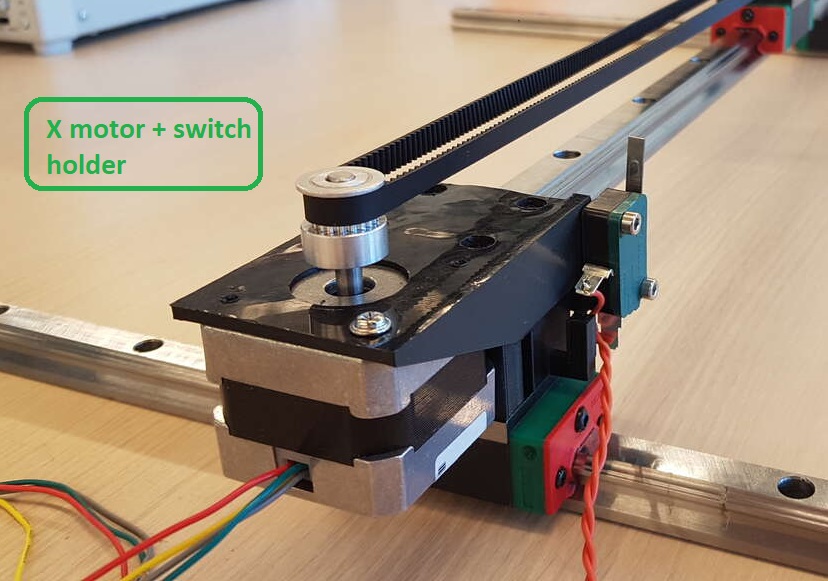
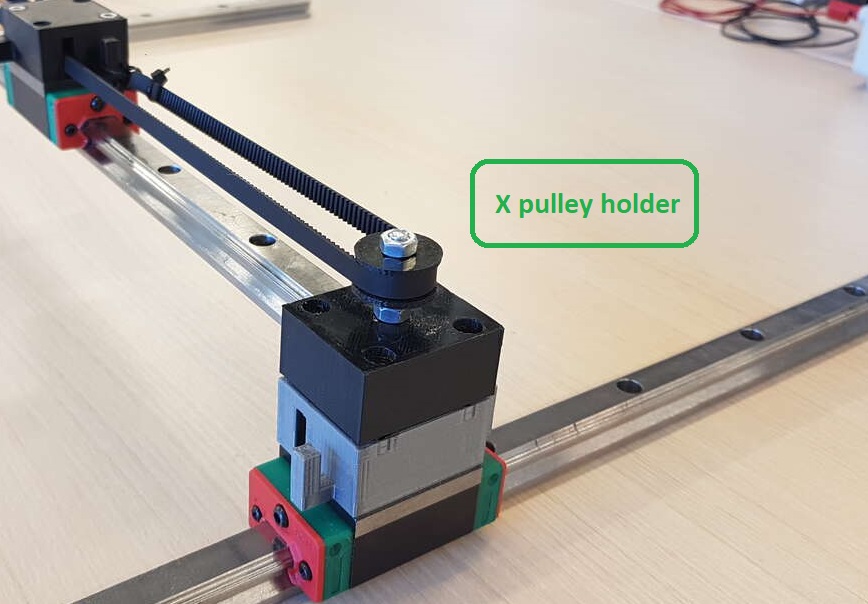
I was in charge for the design of the parts needed to build the X gantry : the X motor + end switch holder and the part that will serve as the belt pulley.I also designed a simple pen holder and the Y switch holder.
The parts were printed on a Ultimaker 5 using PLA.
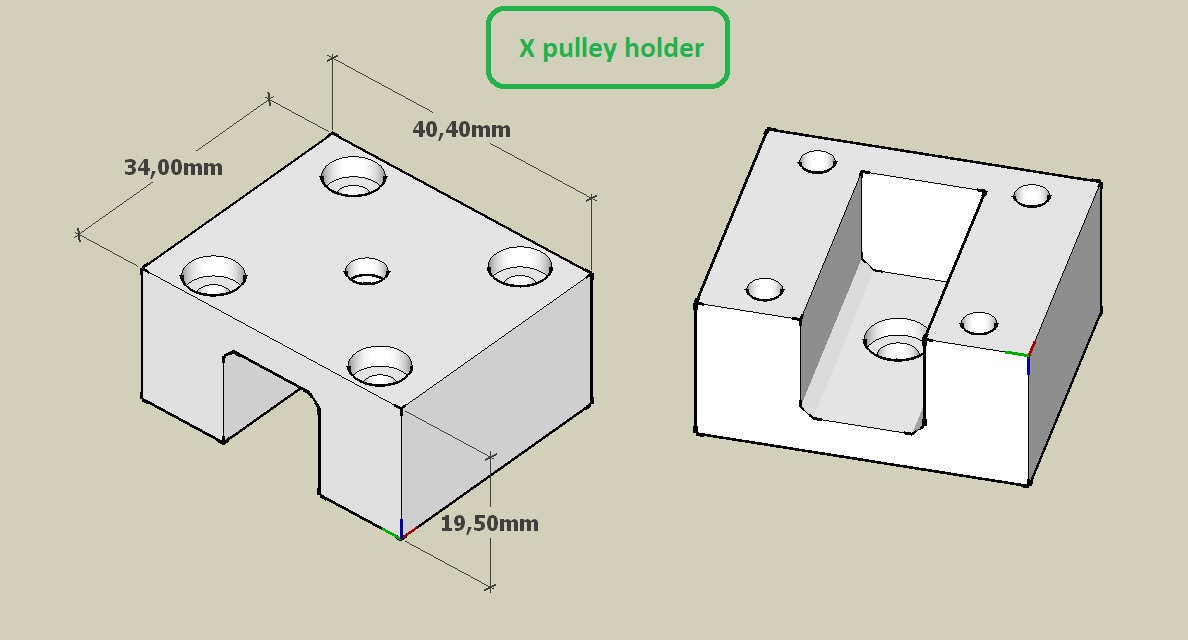
The pulley is made of a M4 bolt with several nuts and a bearing placed in between 2 large washers:
As we didn't have large washers (larger than the bearing) I designed this small part that combines a big washer and a small one and printed in PLA:
I also designed the Y end-switch holder:
And a simple pen holder for our very first tests:
Later on it was replaced by Quentin's design of a better pen holder with up and down automation.
Something to draw
For our early tests we simply tried to draw very simple figures like squares, circles or stars.Before Quentin's new pen holder's design, we had no up and down automation for the pen, so I prepared a drawing that doesn't need any pen lifting system.
The drawing is made out of a single closed path that never crosses itself.
This technique is called TSP art.
So I prepared Neil's portrait as a TSP drawing:
Files for this week
w09_cable_guide.stlw09_chariot.stl
w09_chariotX.stl
w09_elevateurY.stl
w09_elevateurY_butee.stl
w09_head_base.stl
w09_linear_coupler.stl
w09_moteurX.stl
w09_retour_X.stl
w09_rondelle.stl