Molding and Casting
The individual assignment for this week is to design a mold around the stock and tooling we have, mill it (rough cut + finish cut), and use it to cast parts.
And the group assignment is to review the safety data sheets for each of our molding and casting materials, and make and compare test casts with each of them.
After carefully reading the safety data sheets that come with each of our products, we concluded that these materials are not very "friendly" to use and dispose, and that we have to use them with some precautions: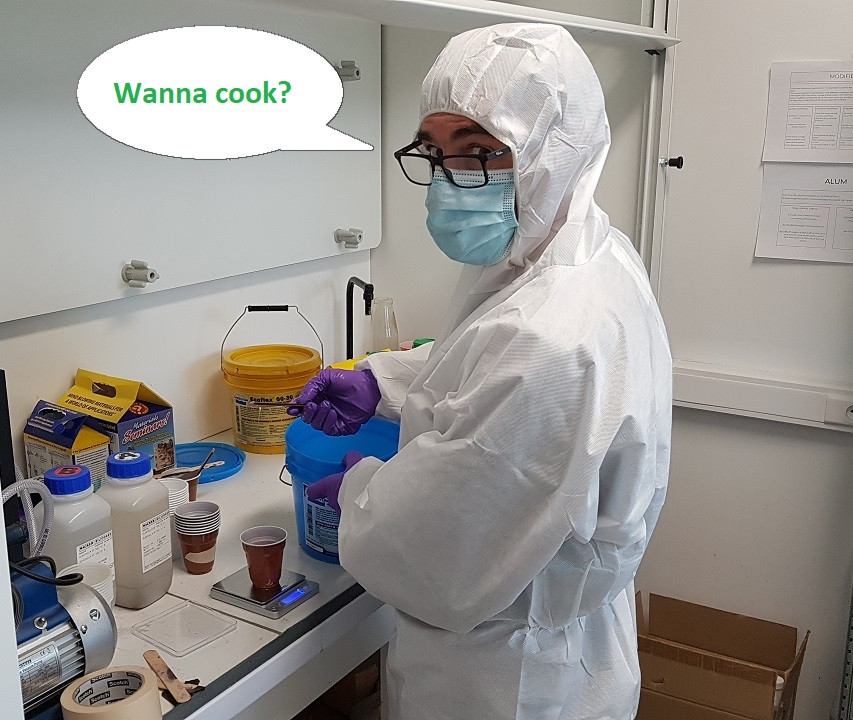
We also paid attention to the "how-to use" notice for each product before to perform our tests and especially the:
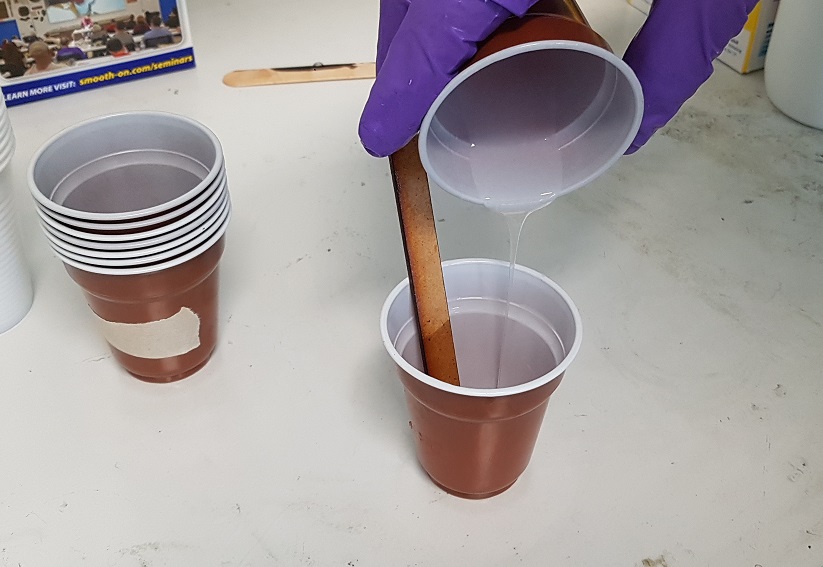
We used small coffee machine plastic cups and a gram precision balance to mix our 2 parts product:

We noted on each test cup the name of the tested product. Each of our tests are done for a 20g final preparation (10g of each parts for most products except for "Mold Max 29NV"):
We paid a lot of attention at not introducing bubbles while stirring or pouring one part into another and stirring again:
Some materials are more or less prone to bubbles and that was a very instructive training if we plan to use them later for our individual assignment.
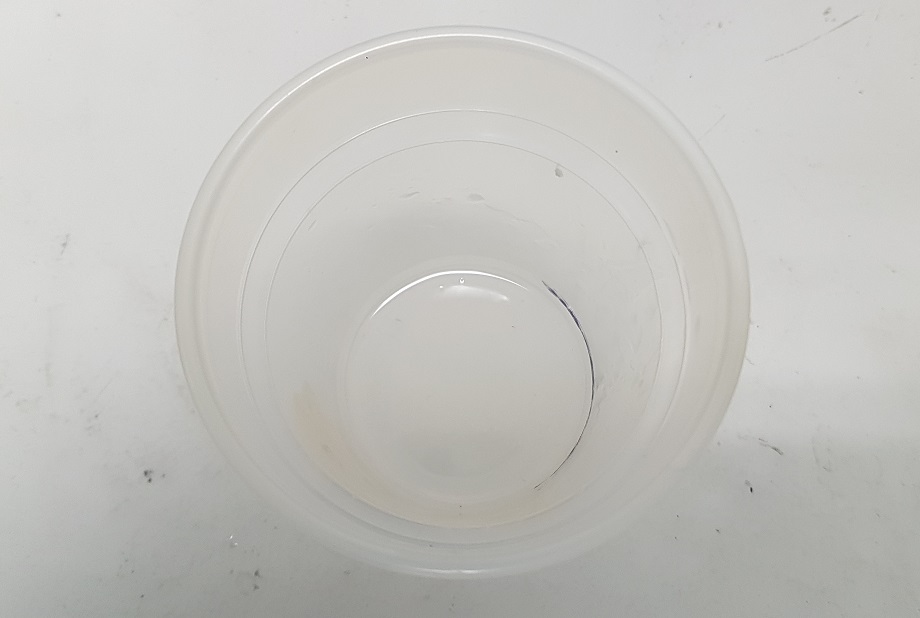
We left our tests to cure and we will only be able to see the results when we get back to the lab on monday:
During this curing time I worked on my individual assignment.
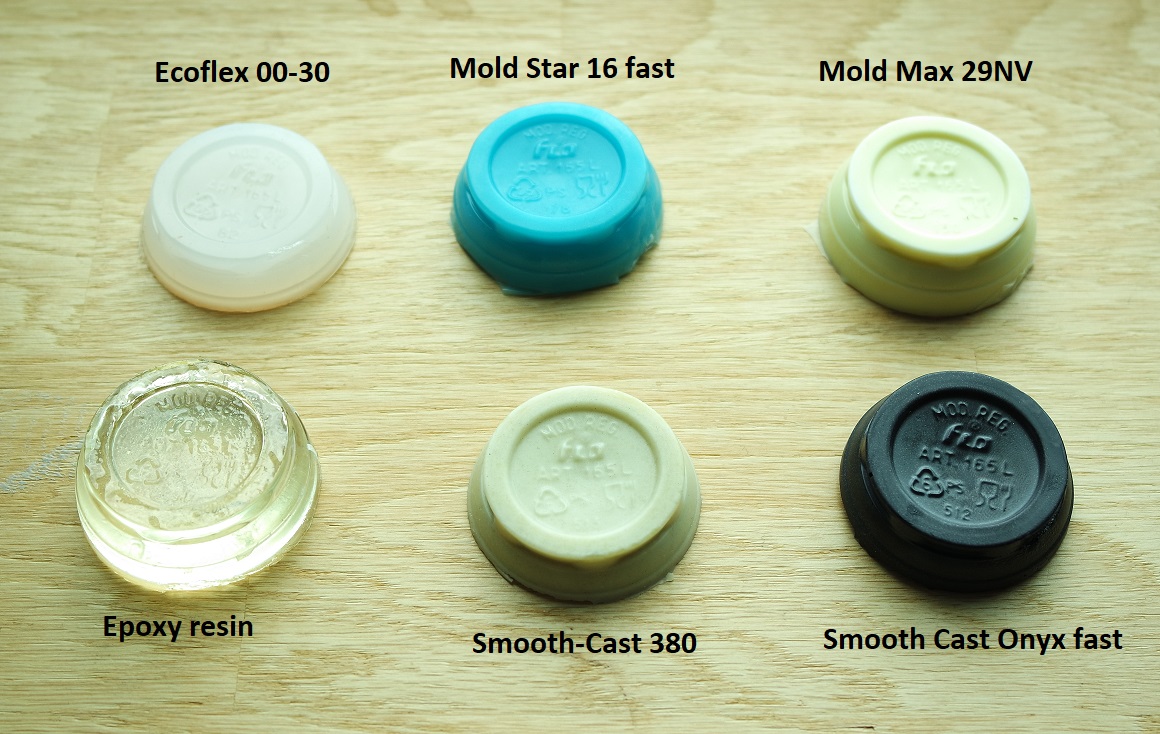
When we came back to the lab on monday we could see the results of our tests:
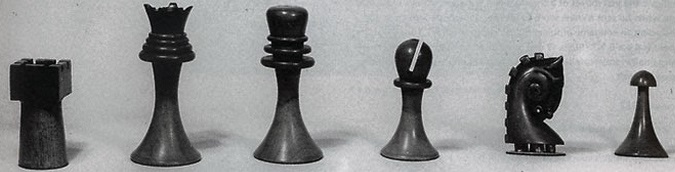
And he designed a chess set that unfortunately got lost. The only thing left is an old black and white photograph:
From this photograph some makers already modeled the pieces back in 3D but were not able to share them because of some "copyright infringement".
What a shame!
Let's revive Marcel Duchamp's chess set and memory!
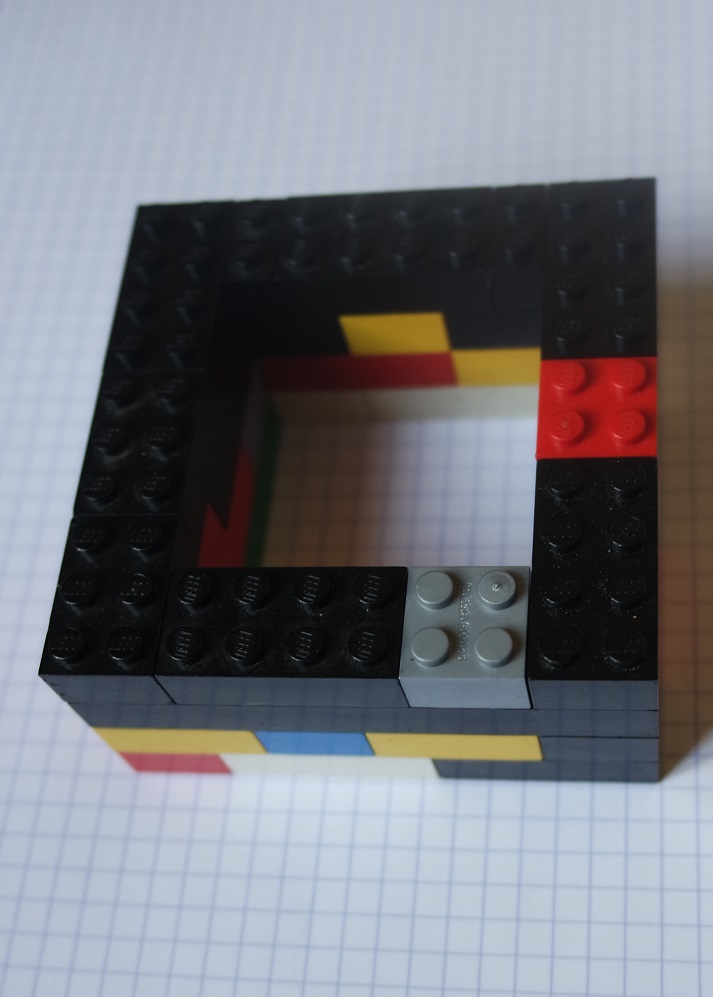
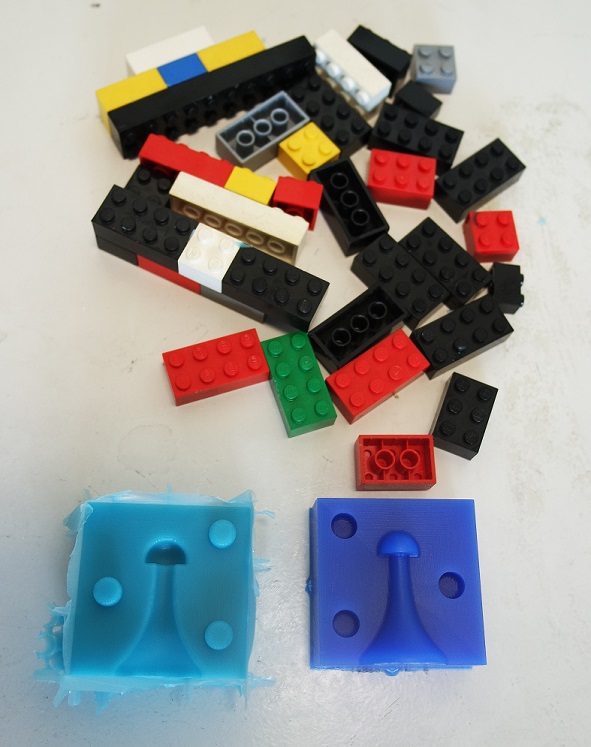
They will be made with Lego bricks. That means I have to make sure the bounding box X and Y dimensions of my wax are in "Lego units".
One "Lego unit" is 8mm X 8mm. This is the "Lego resolution" I must work with. It means that I can make a room of 48mm X 48mm (6 X 6 Lego unit) for example:
So making a mold for it really makes sense.
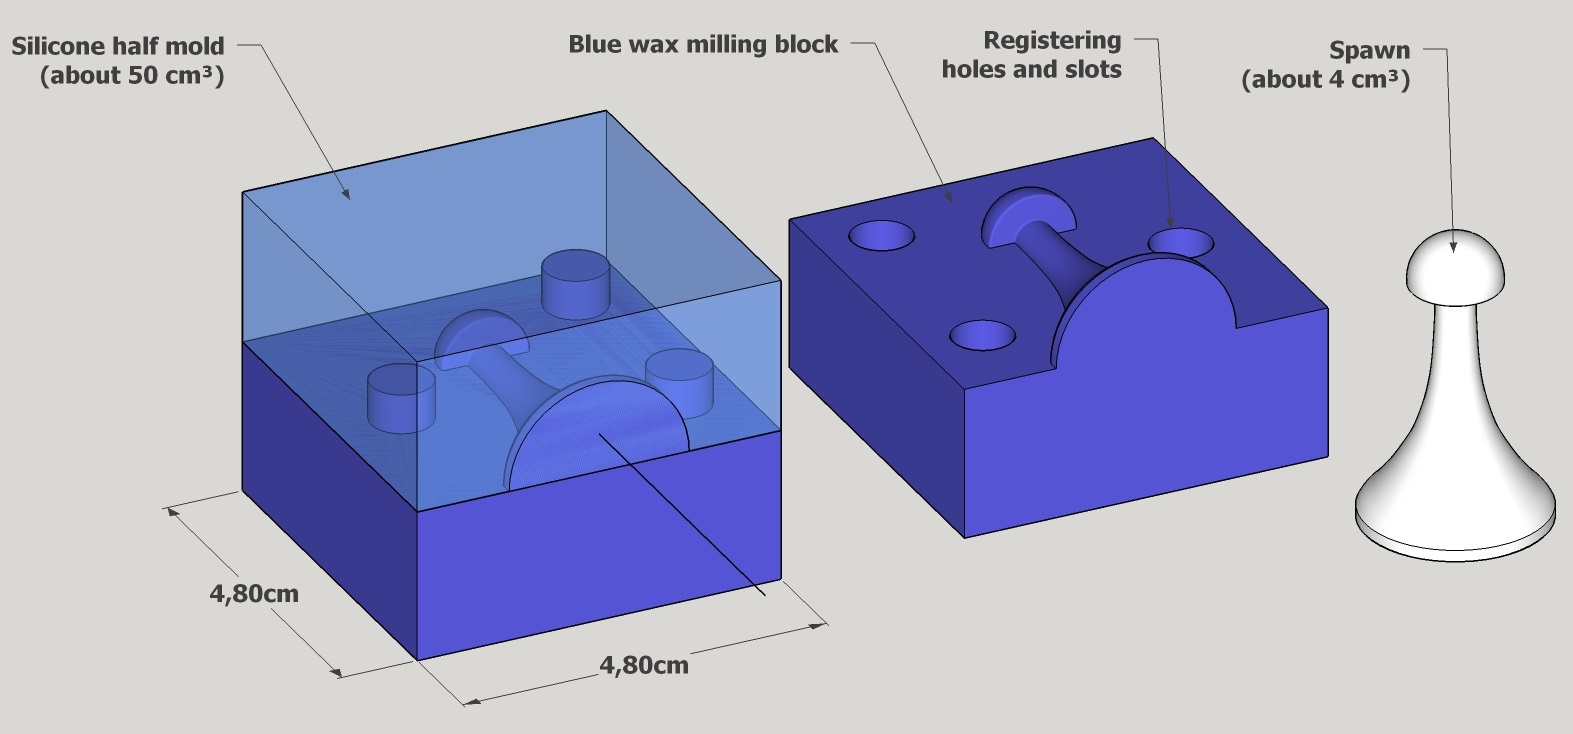
A Lego room of 48mm X 48mm is a good size for the spawn future silicone mold:
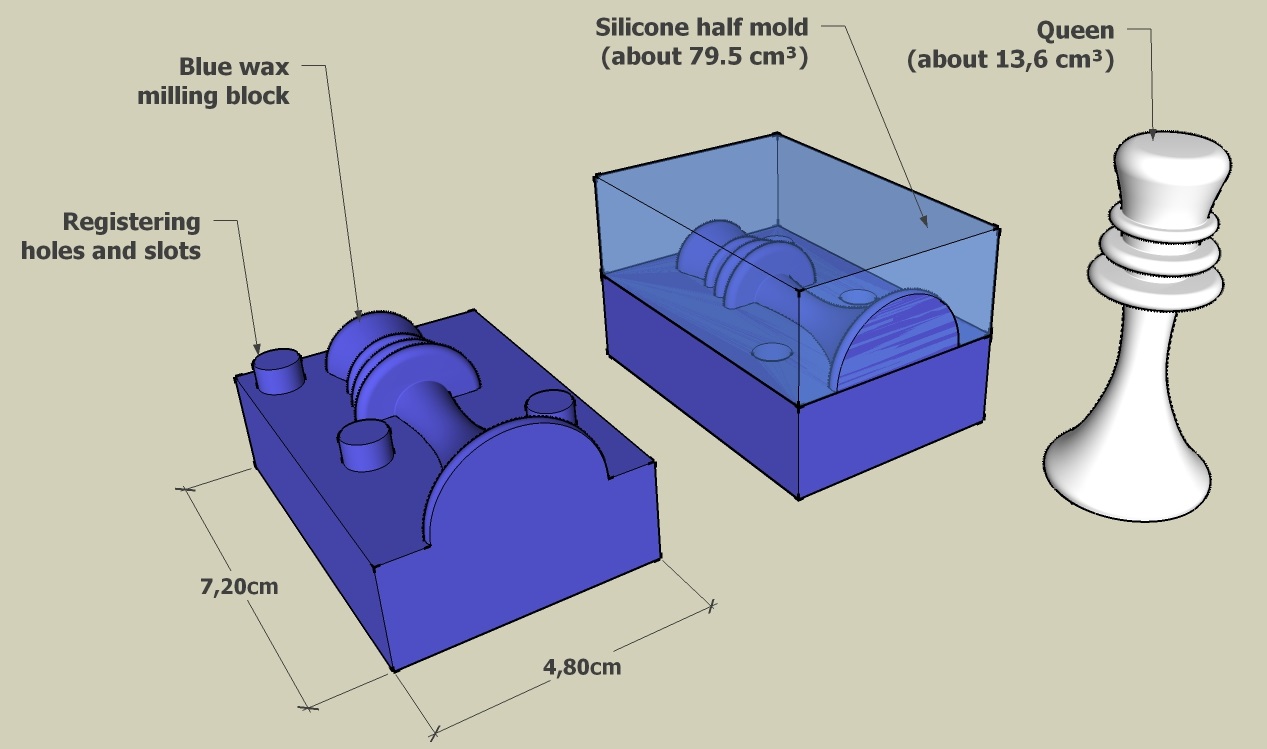
While a Lego room of 72mm X 48mm is used for the queen future silicone mold:
For each half-mold wax I have to perform:
And here after the finish pass:
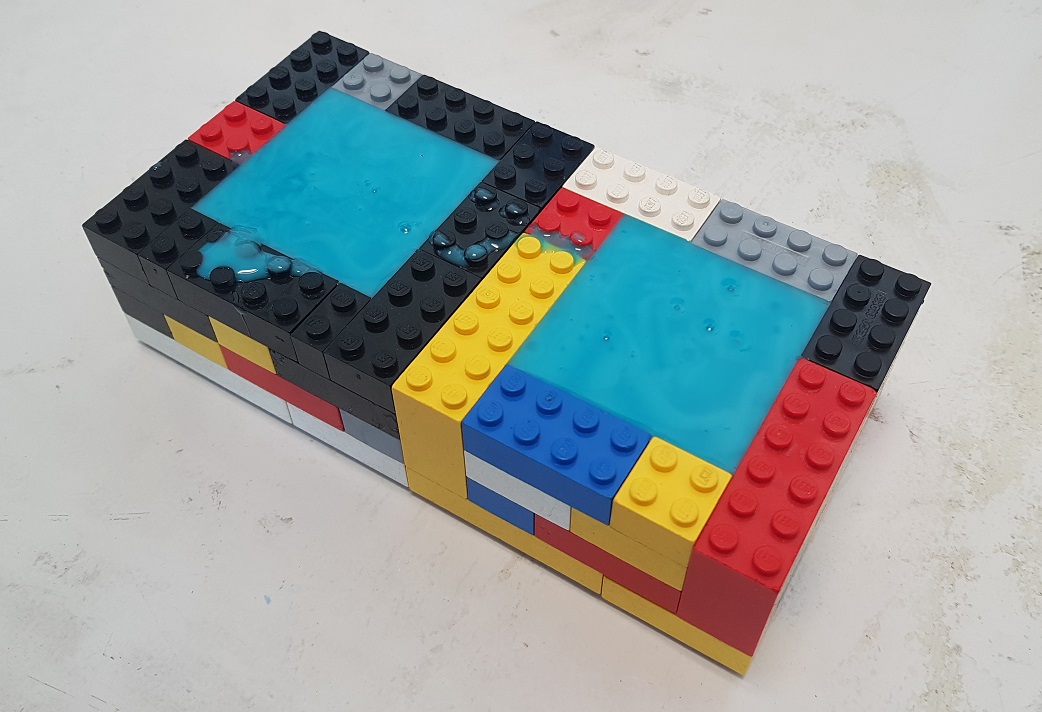
Here it is surrounded by Lego walls, ready to receive its silicone counterpart.
This will be the next step when I can have access to the lab on monday...
Mold Star is a light blue, soft, "bubble friendly" and low viscosity silicone.
We tested it during our group assignment:

How much do I need to prepare?
Mold Star is 1.18g/cc.
Each "Lego mold" is about 50cc so 100cc for both.
So it will take 118g of Mold Star mix (100 x 1.18g). I will prepare a bit more just to make sure...
Mold Star mix ratio by weight is 1:1.
If I want 120g I need to mix 60g of each part.
I prepared 60g of each part and after stirring each of them carefully, mixed them together:
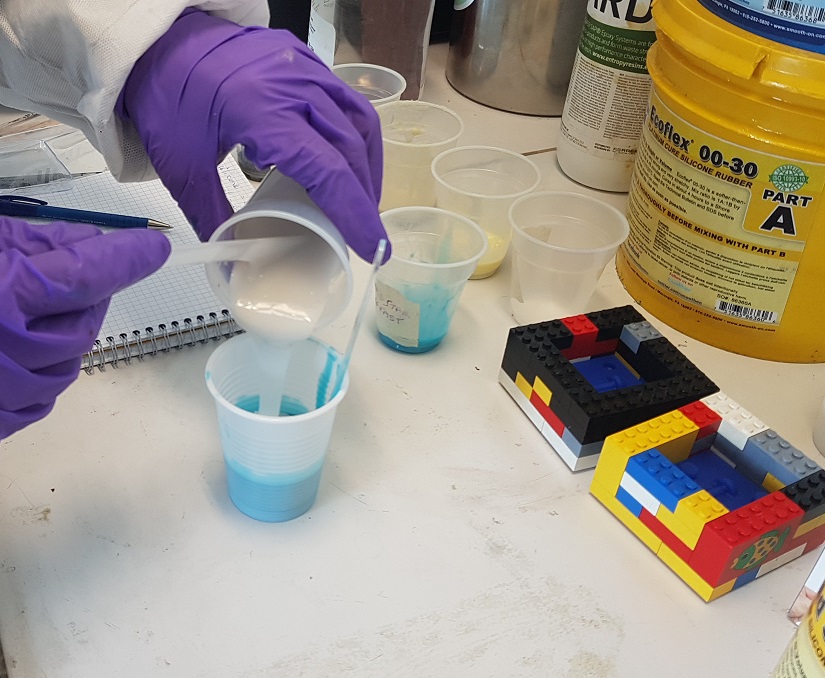
Again I did a 2mn stirring while paying attention to not introduce air bubbles:
And then carefully poured the final mix into my two "Lego molds".
The quantity I calculated earlier was just perfect.
Curing time for this silicone being 30mn, I let it cure and will come back later on for the unmolding step.
Unmolding the "Lego molds" was easy and the silicone molds are very nice and "bubbles free".
I also made another silicone mold but this time I used Ecoflex 00-30 instead:

Onyx is a black, low viscosity material that has a very short pot life.
We tested it during our group assignment:
How much do I need to prepare?
Onyx is 1.09g/cc.
The spawn is about 4 cc.
So it will take about 4.4g of Onyx mix (4 x 1.1g). I will prepare a bit more just to make sure...
Onyx mix ratio by weight is 120A:100B.
If I use 3g of partB, I must mix it with 3.6g of partA.
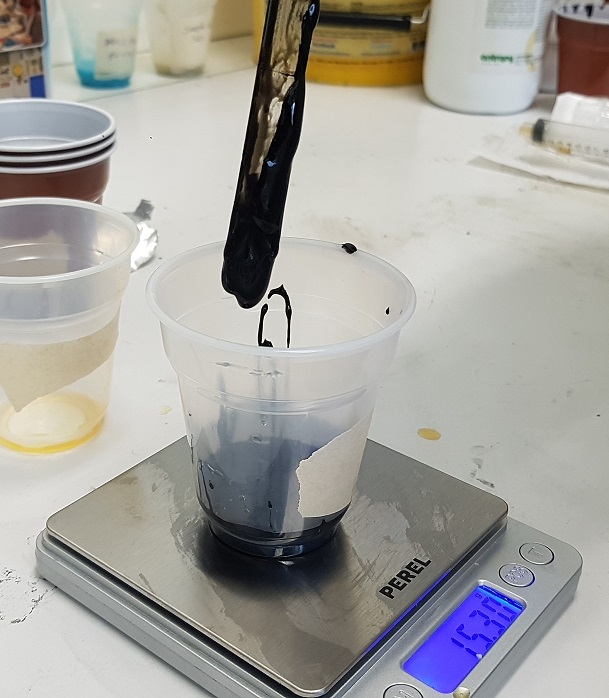
The final mix will then be 6.6g.
After carefully stirring the two parts mix of Onyx I slowly pourred it into the silicone mold to avoid bubbles.
Onyx curing time is fast and the spawn is left for curing during 3 minutes.
After curing the silicone mold can be opened to reveal the molded spawn.
Onyx expands when it cures so the bottom of the spawn wasn't perfectly flat and I had to sand them back flat:
I made 8 black spawns this way (with Onyx) and a white one in transparent epoxy resin just to test it.
Out of the 8 black spawns, only one didn't came out well because of a big trapped bubble in the most critical place:
All the others came out without major defect:
The "white" epoxy spawn has a few bubbles:

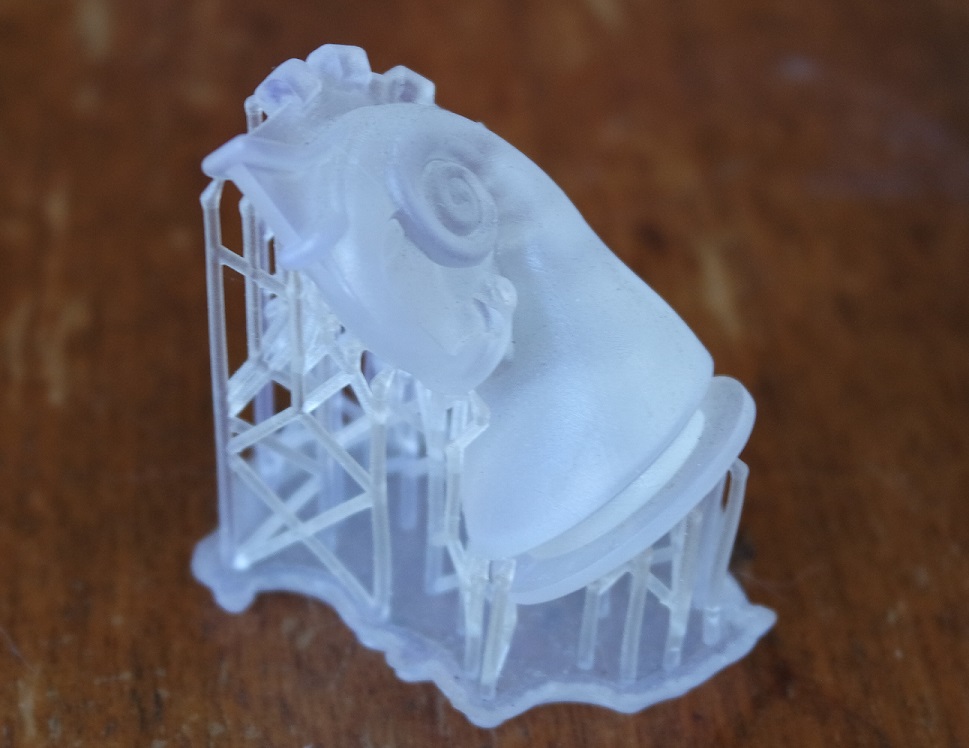
Here is the molded spawn next to an SLA 3D printed knight:

I had tried in the past (2017) to create a mold for the spawn with an "everyday" silicone for bathroom joints.
Over the years it shrinked but it's still soft:
Now I can see how "special molding" silicone really makes a difference!
And it gave me back the willing to survive Marcel Duchamp's lost chess set.
w11_pion.skp
And the group assignment is to review the safety data sheets for each of our molding and casting materials, and make and compare test casts with each of them.
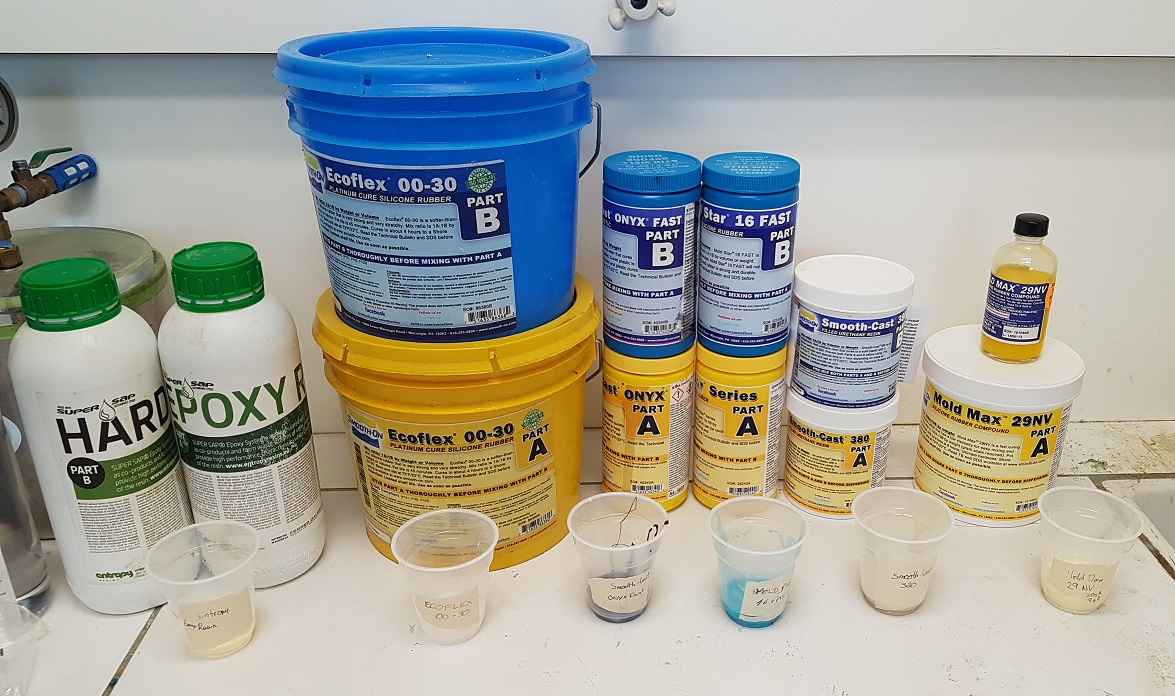
Group assignment
We have several molding and casting materials we can play with in the lab:- Urethane resin (Onyx fast)
- Urethane elastomer (Simpact)
- Casting resin (Smooth-Cast)
- Epoxy resin (Super Sap)
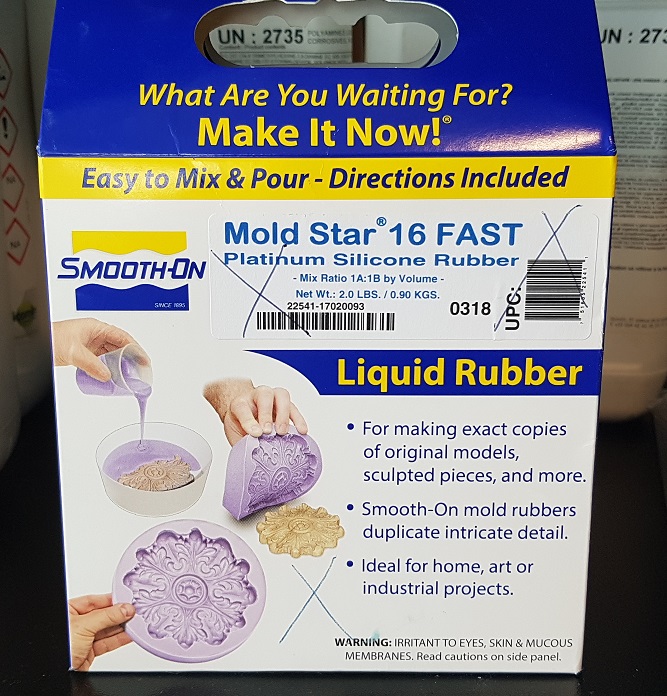
- Fast curing silicone (Mold Star)
- Low viscosity silicone (Mold Max)
- Rubber silicone (Ecoflex)
After carefully reading the safety data sheets that come with each of our products, we concluded that these materials are not very "friendly" to use and dispose, and that we have to use them with some precautions:
- wearing a protection blouse
- wearing protection glasses
- use gloves
- use a mask
- do it in a ventilated area
We also paid attention to the "how-to use" notice for each product before to perform our tests and especially the:
- mix ratio
- stirring time
- pot life
- curing time
We used small coffee machine plastic cups and a gram precision balance to mix our 2 parts product:
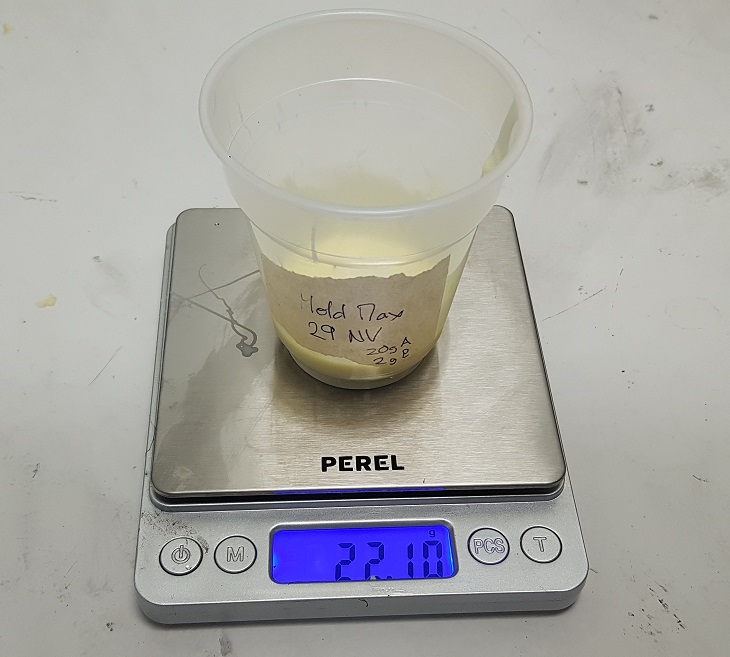
We noted on each test cup the name of the tested product. Each of our tests are done for a 20g final preparation (10g of each parts for most products except for "Mold Max 29NV"):
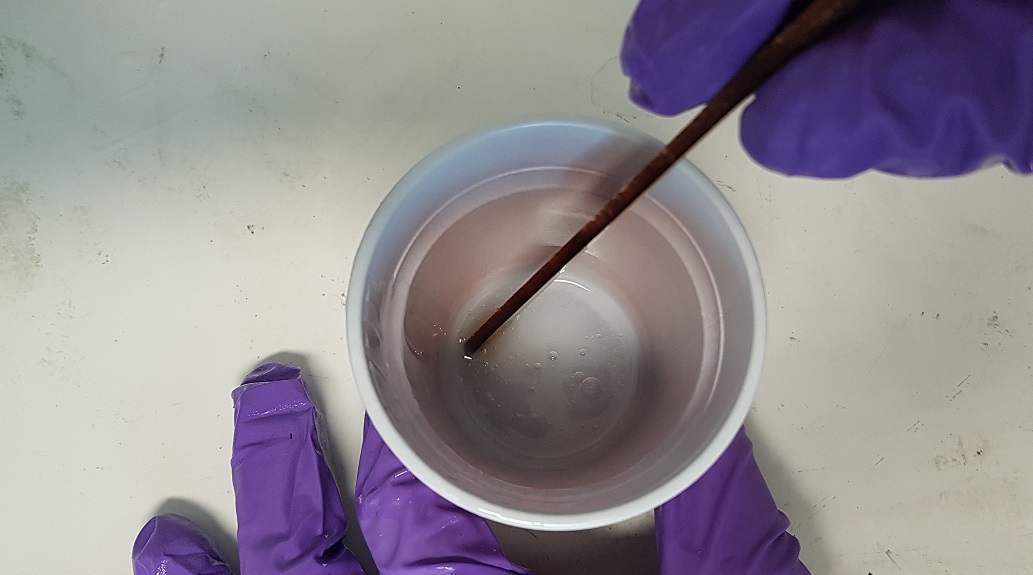
We paid a lot of attention at not introducing bubbles while stirring or pouring one part into another and stirring again:
Some materials are more or less prone to bubbles and that was a very instructive training if we plan to use them later for our individual assignment.
We left our tests to cure and we will only be able to see the results when we get back to the lab on monday:
During this curing time I worked on my individual assignment.
When we came back to the lab on monday we could see the results of our tests:
Individual assignment
Marcel Duchamp's lost chess set
Marcel Duchamp was not only a great (and controversial) artist, he also was an international chess master and player.And he designed a chess set that unfortunately got lost. The only thing left is an old black and white photograph:
From this photograph some makers already modeled the pieces back in 3D but were not able to share them because of some "copyright infringement".
What a shame!
Let's revive Marcel Duchamp's chess set and memory!
Molding strategy
All of my parts (chess pieces) will be a 2 parts mold (2 halves). For each half I plan to:- mill a wax stock (75mm x 175mm x 38mm)
- build walls around it
- fill the empty space (room) with silicone
- put the 2 silicone half-mold together
- fill them with black plastic resin
Planning ahead 3D modeling
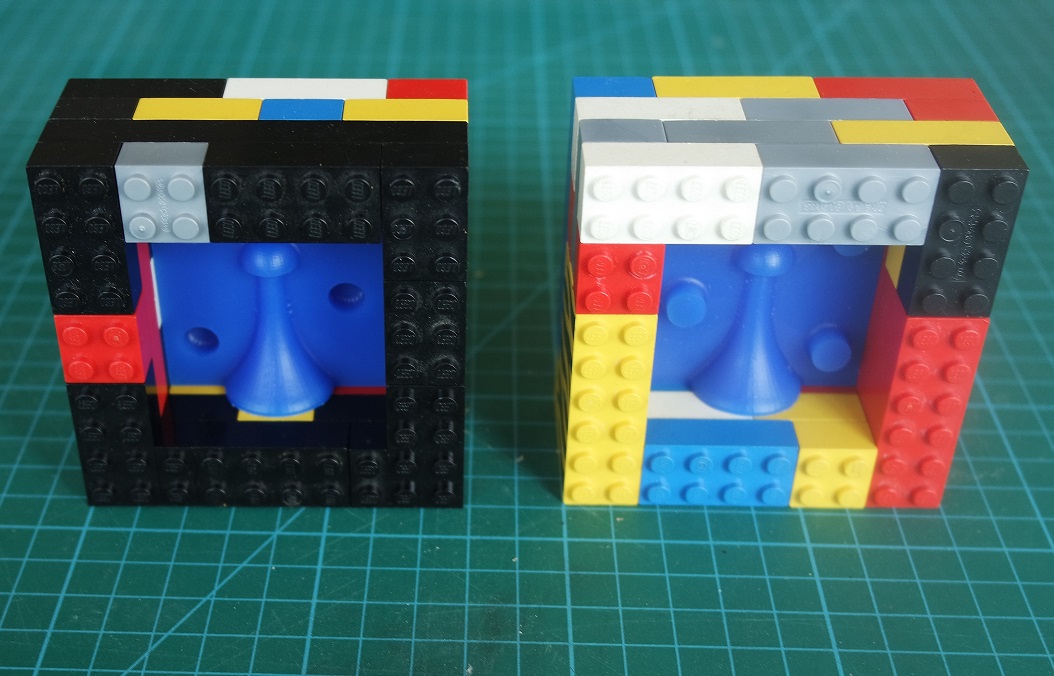
As exposed previously, I plan to build walls around my wax after milling it.They will be made with Lego bricks. That means I have to make sure the bounding box X and Y dimensions of my wax are in "Lego units".
One "Lego unit" is 8mm X 8mm. This is the "Lego resolution" I must work with. It means that I can make a room of 48mm X 48mm (6 X 6 Lego unit) for example:
3D modeling
I started with the spawn because it's the piece that is the most present on a chessboard (at least at the beginning of the game...)So making a mold for it really makes sense.
A Lego room of 48mm X 48mm is a good size for the spawn future silicone mold:
While a Lego room of 72mm X 48mm is used for the queen future silicone mold:
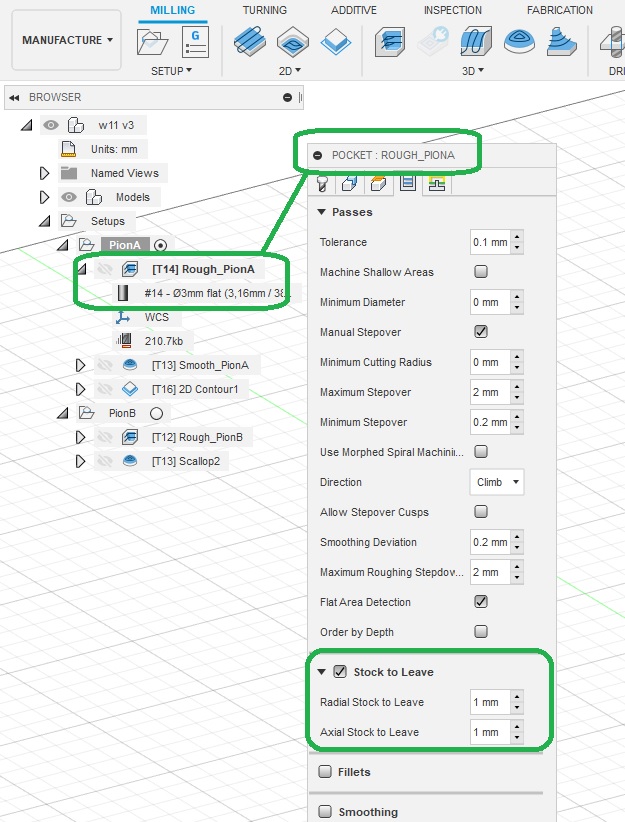
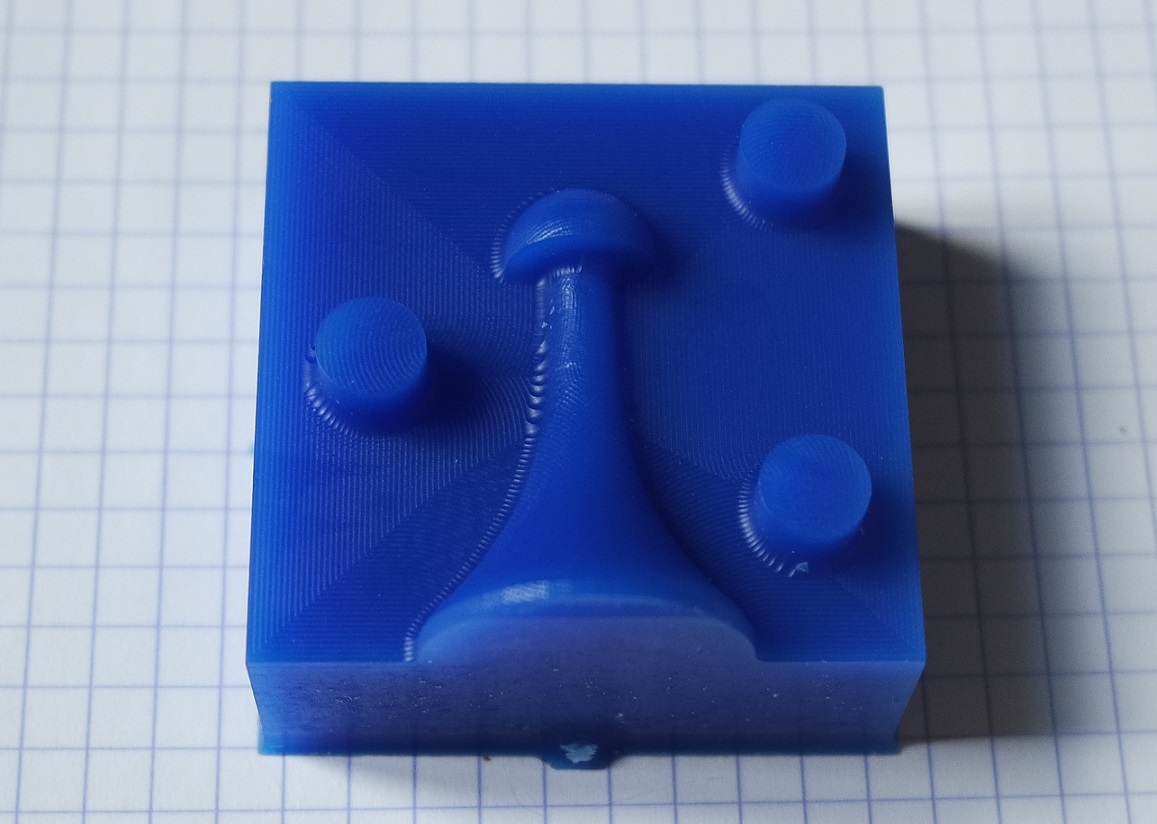
Step 1: Wax milling
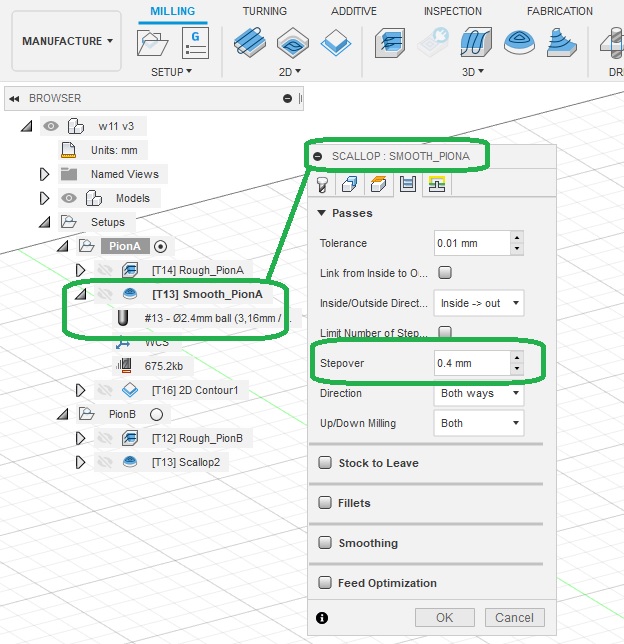
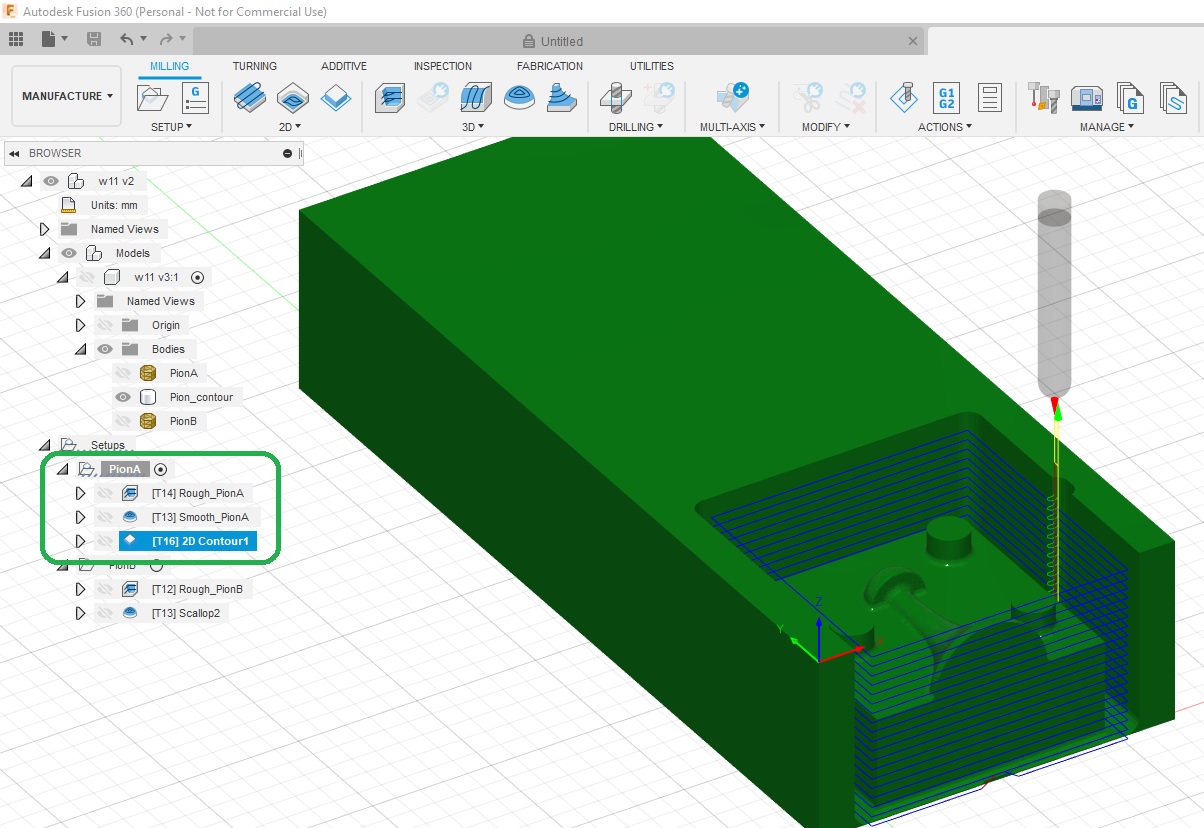
The milling strategy is done in Fusion 360.For each half-mold wax I have to perform:
- a roughing pass (3mm flat drillbit end)
- a 3-axis finish pass (2.4mm ball drillbit end)
- a 2D contour (long, 6mm drillbit end)
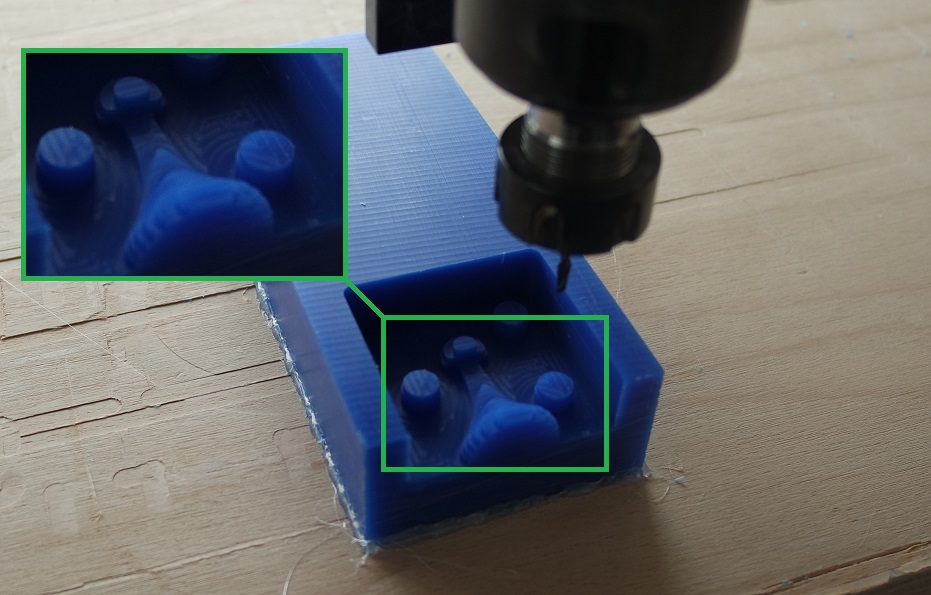
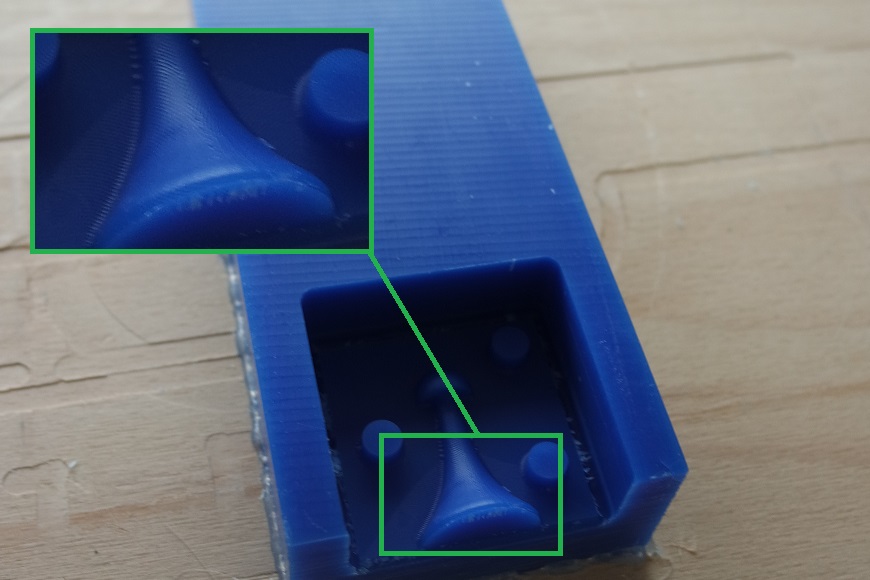
Milling result
Here is a photo of the wax after the roughing pass:And here after the finish pass:
						Wax is the master.

						From it you can make multiple silicone molds.

						And from these molds... multiple copies.

						But wax is very fragile. So it's important to protect it from any kind of damage due to heat, scratches, etc.
Here it is surrounded by Lego walls, ready to receive its silicone counterpart.
This will be the next step when I can have access to the lab on monday...
Step 2: Silicone mold making
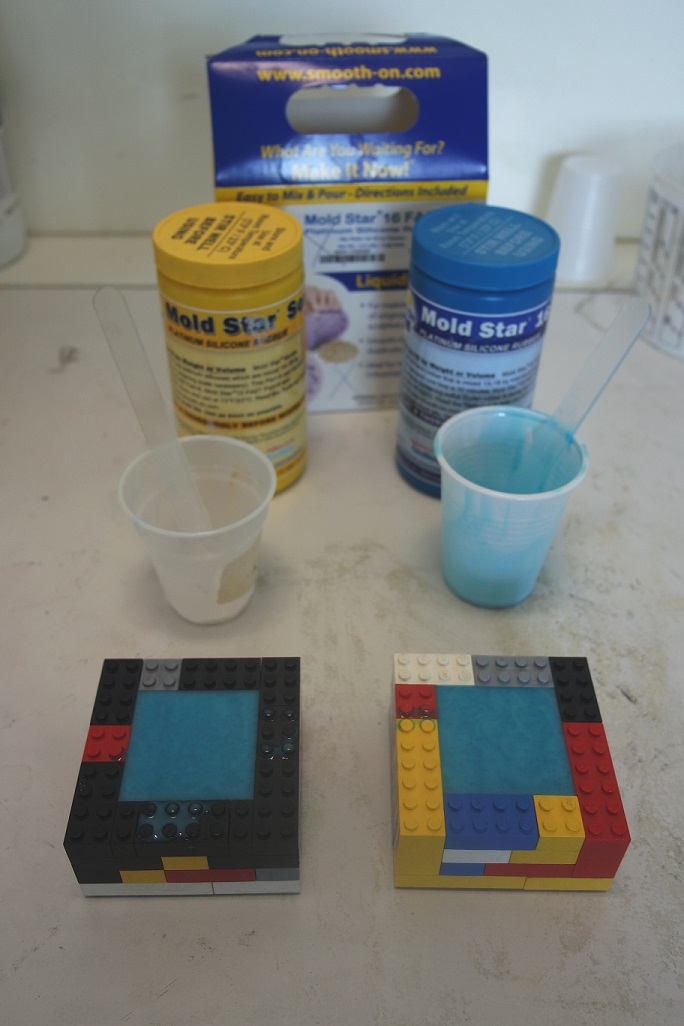
I will use Mold Star silicone to make my 2-parts mold from my 2 "Lego molds".Mold Star is a light blue, soft, "bubble friendly" and low viscosity silicone.
We tested it during our group assignment:
How much do I need to prepare?
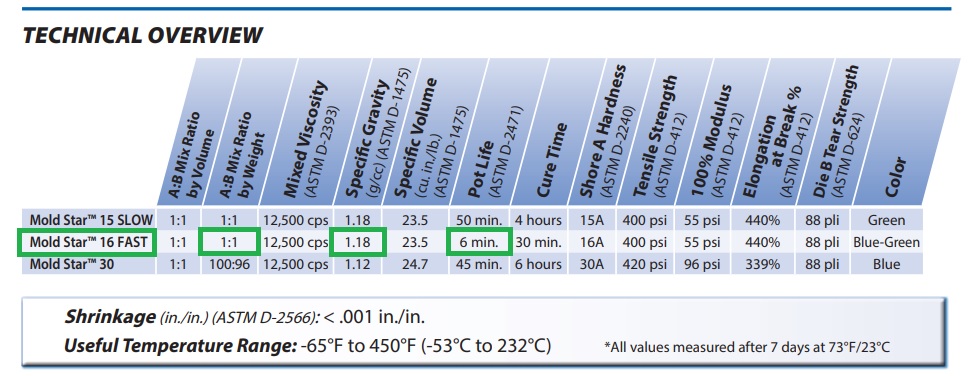
Mold Star is 1.18g/cc.
Each "Lego mold" is about 50cc so 100cc for both.
So it will take 118g of Mold Star mix (100 x 1.18g). I will prepare a bit more just to make sure...
Mold Star mix ratio by weight is 1:1.
If I want 120g I need to mix 60g of each part.
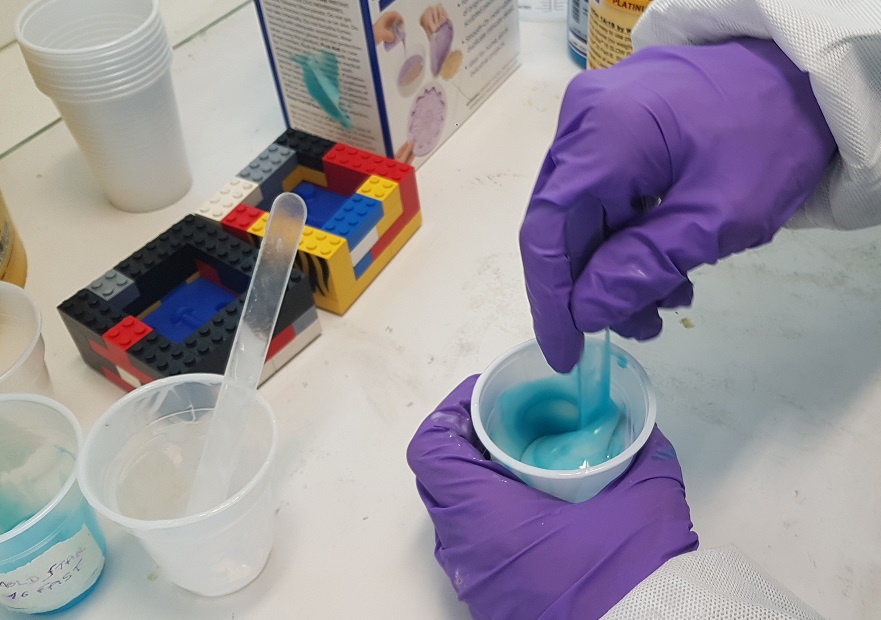
I prepared 60g of each part and after stirring each of them carefully, mixed them together:
Again I did a 2mn stirring while paying attention to not introduce air bubbles:
And then carefully poured the final mix into my two "Lego molds".
The quantity I calculated earlier was just perfect.
Curing time for this silicone being 30mn, I let it cure and will come back later on for the unmolding step.
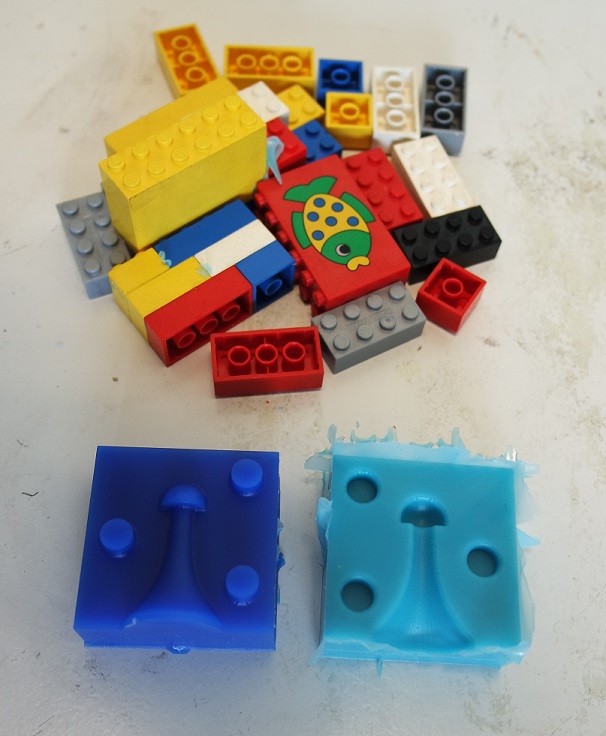
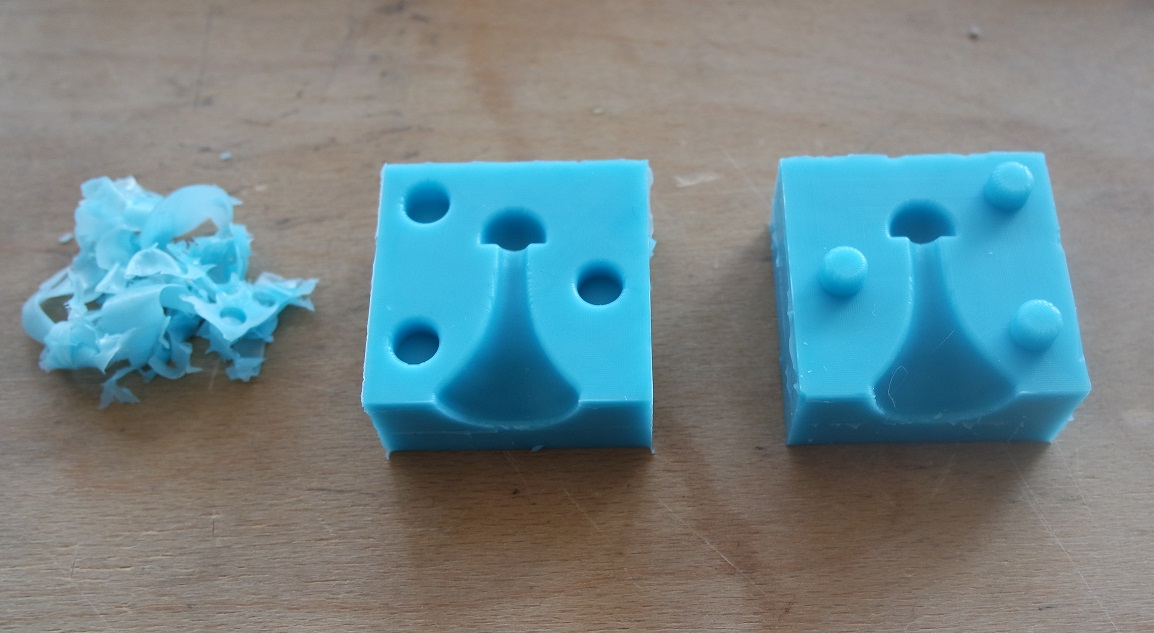
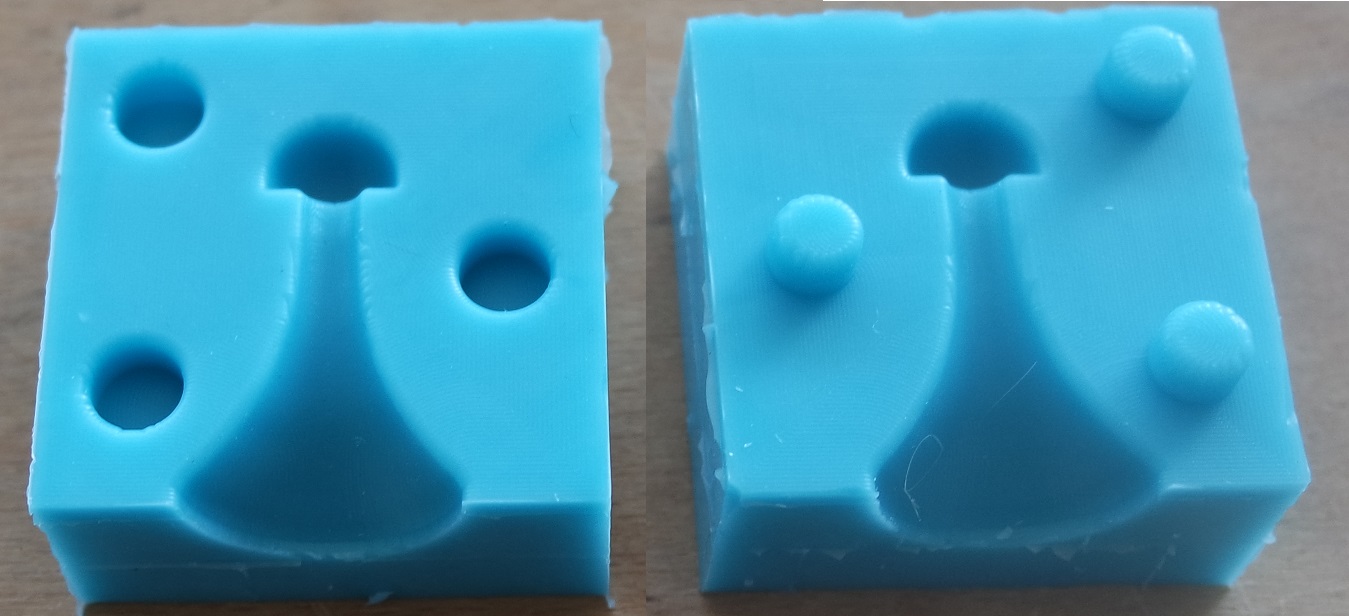
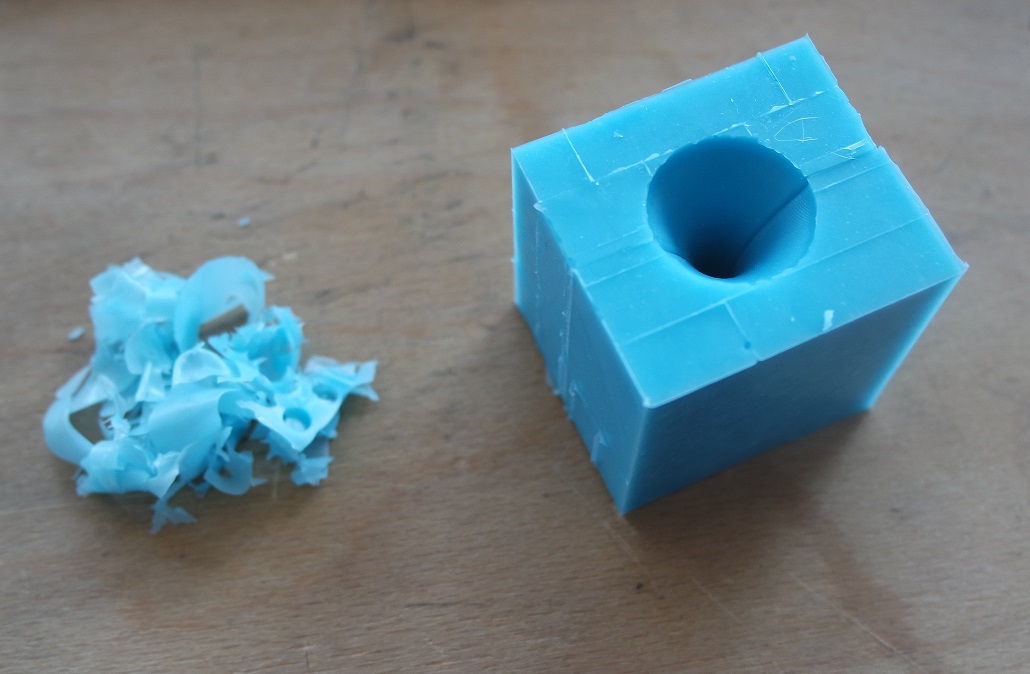
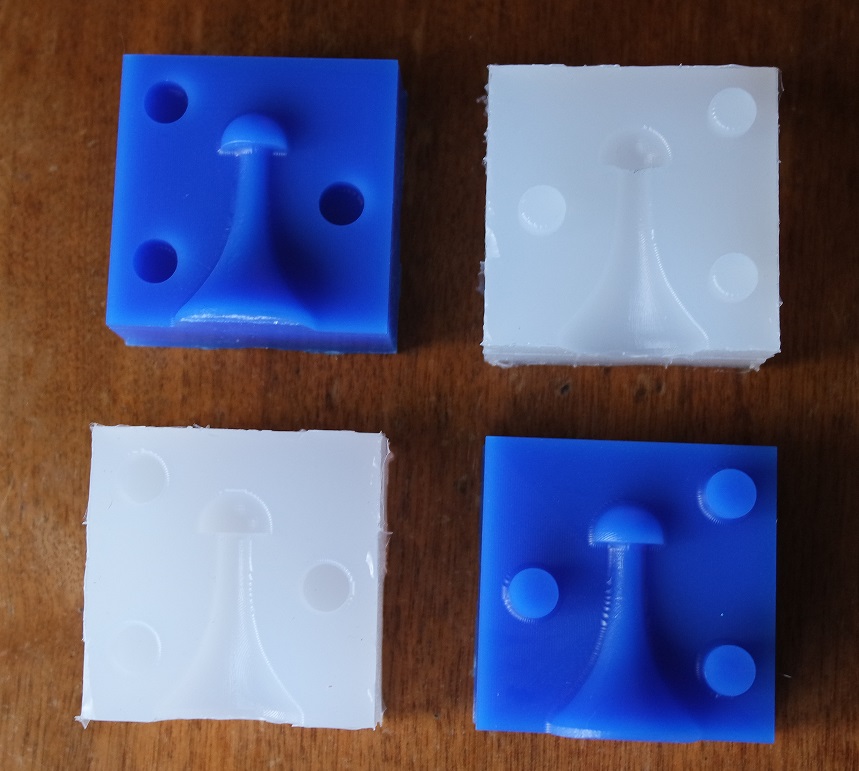
Unmolding the "Lego molds" was easy and the silicone molds are very nice and "bubbles free".
I also made another silicone mold but this time I used Ecoflex 00-30 instead:
Step 3: Final casting
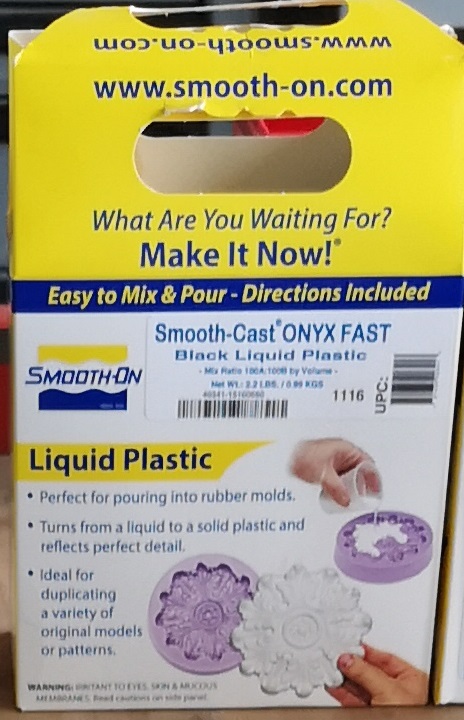
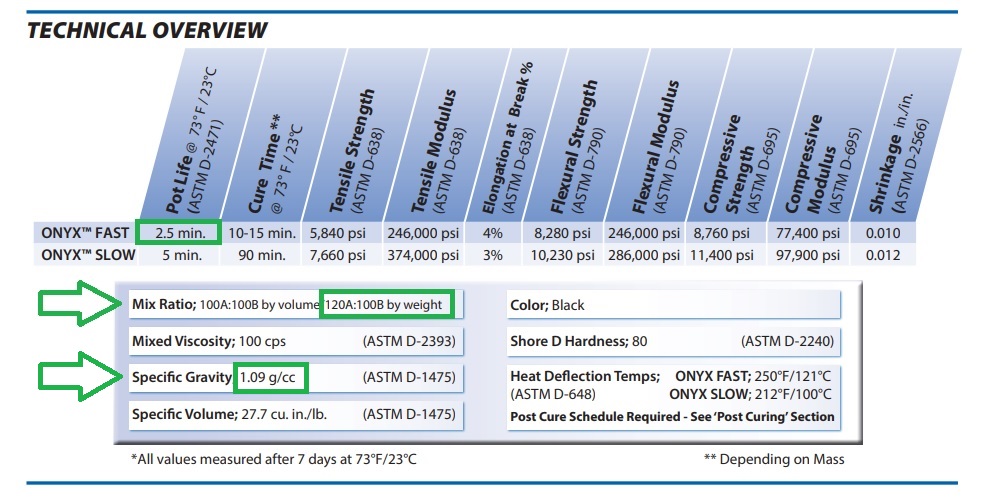
The final spawn is made by casting Onyx fast liquid plastic in the silicone mold.Onyx is a black, low viscosity material that has a very short pot life.
We tested it during our group assignment:
How much do I need to prepare?
Onyx is 1.09g/cc.
The spawn is about 4 cc.
So it will take about 4.4g of Onyx mix (4 x 1.1g). I will prepare a bit more just to make sure...
Onyx mix ratio by weight is 120A:100B.
If I use 3g of partB, I must mix it with 3.6g of partA.
The final mix will then be 6.6g.
After carefully stirring the two parts mix of Onyx I slowly pourred it into the silicone mold to avoid bubbles.
Onyx curing time is fast and the spawn is left for curing during 3 minutes.
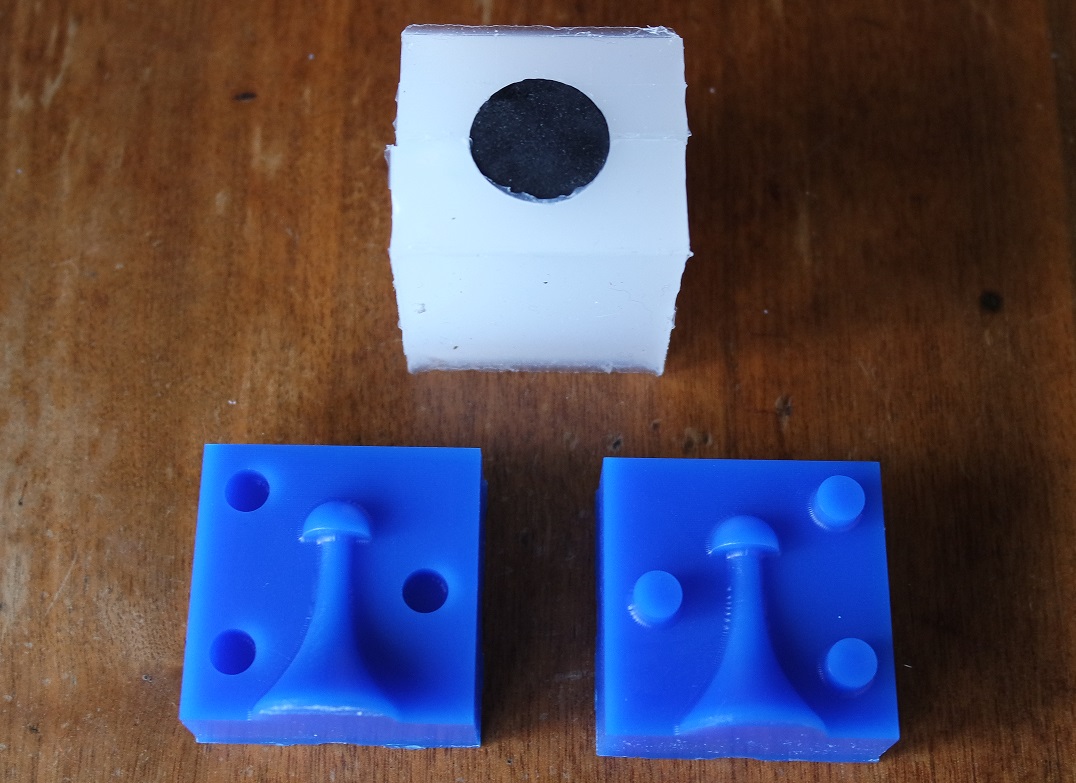
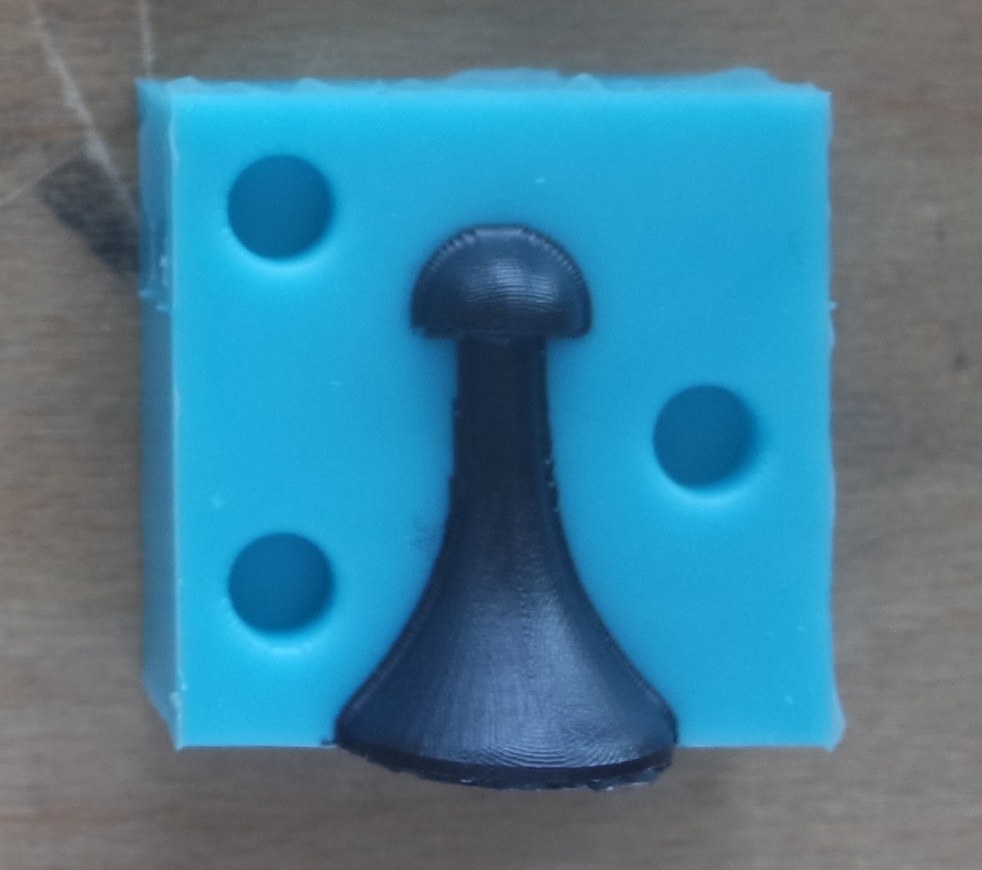
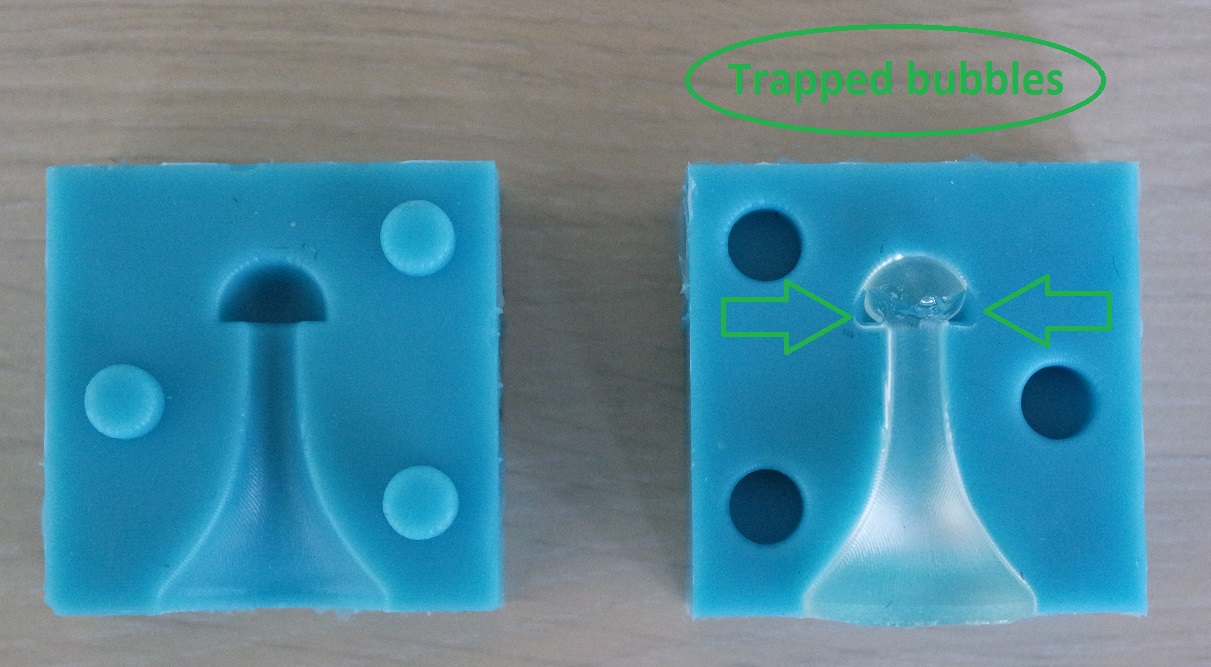
After curing the silicone mold can be opened to reveal the molded spawn.
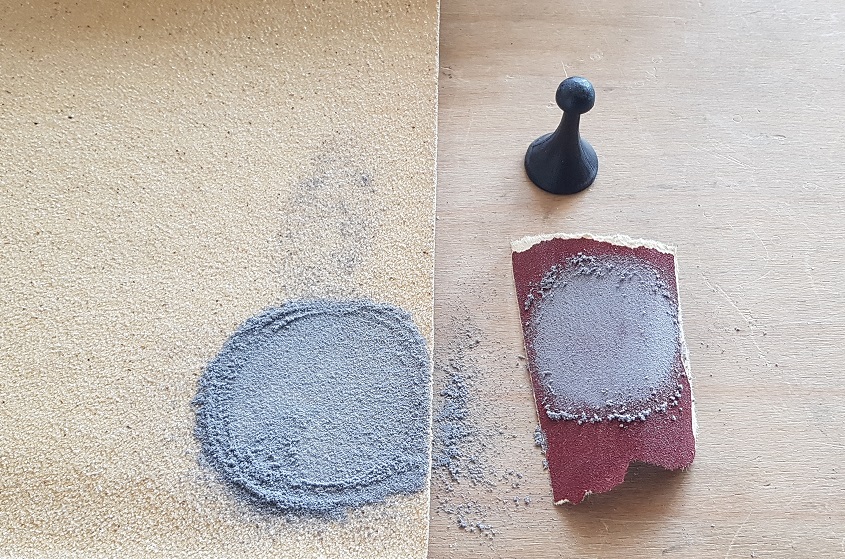
Onyx expands when it cures so the bottom of the spawn wasn't perfectly flat and I had to sand them back flat:
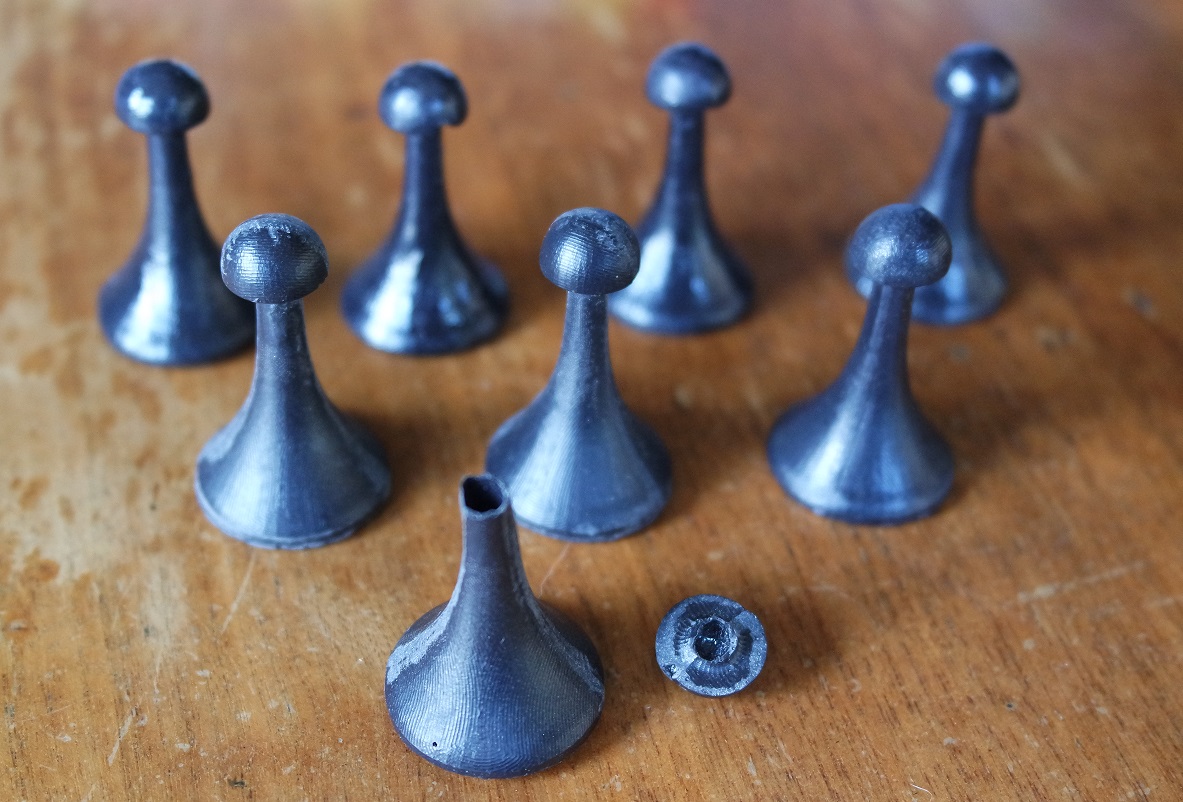
I made 8 black spawns this way (with Onyx) and a white one in transparent epoxy resin just to test it.
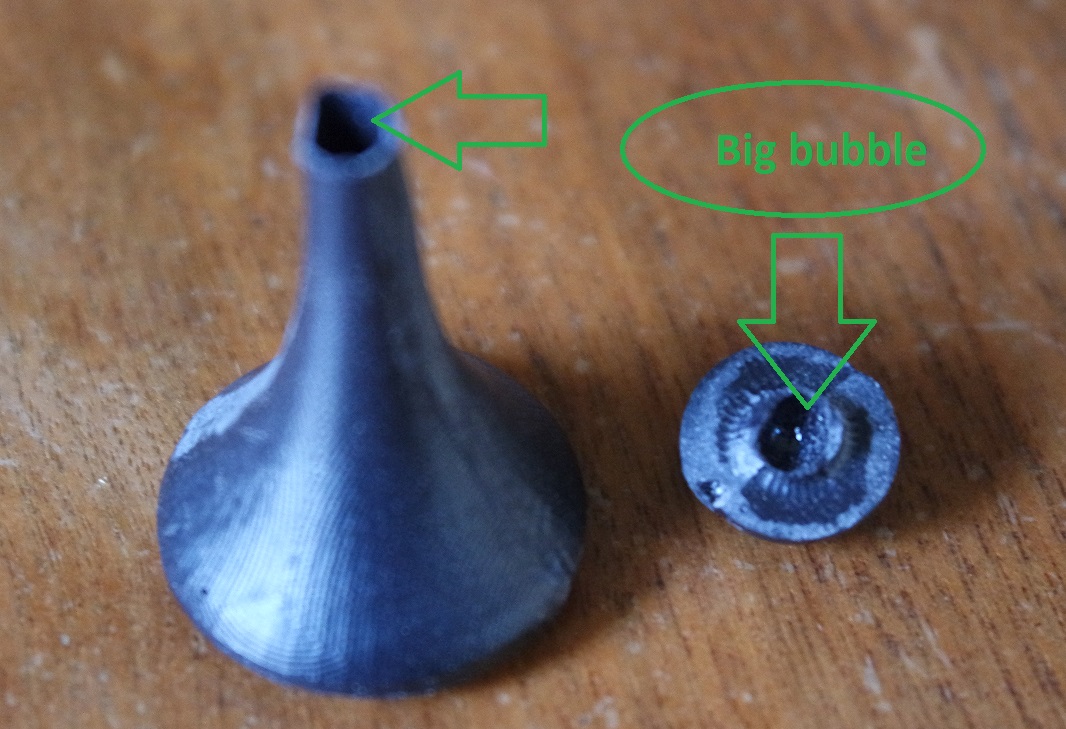
Out of the 8 black spawns, only one didn't came out well because of a big trapped bubble in the most critical place:
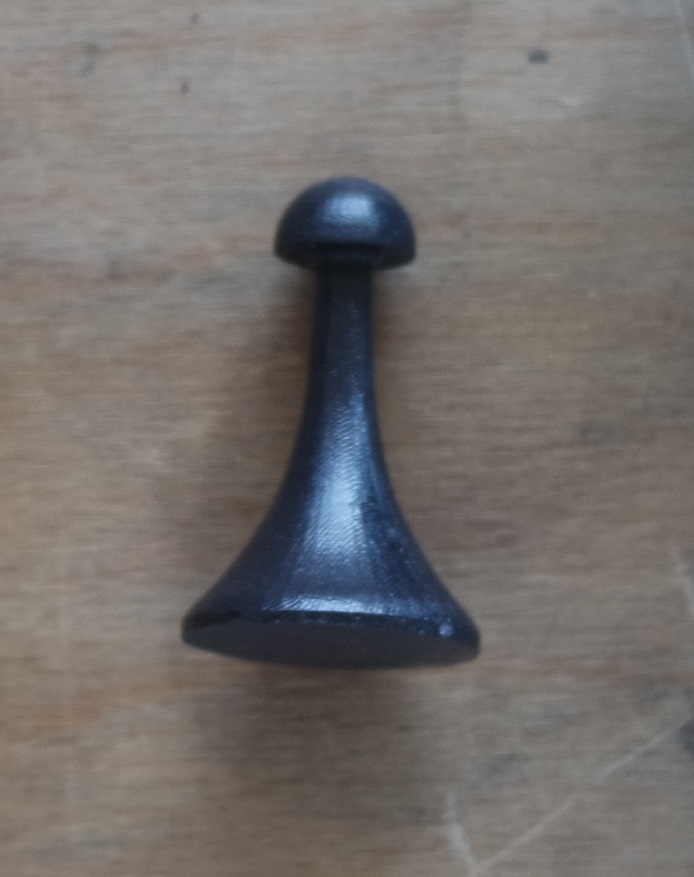
All the others came out without major defect:
The "white" epoxy spawn has a few bubbles:
Here is the molded spawn next to an SLA 3D printed knight:
Week conclusion
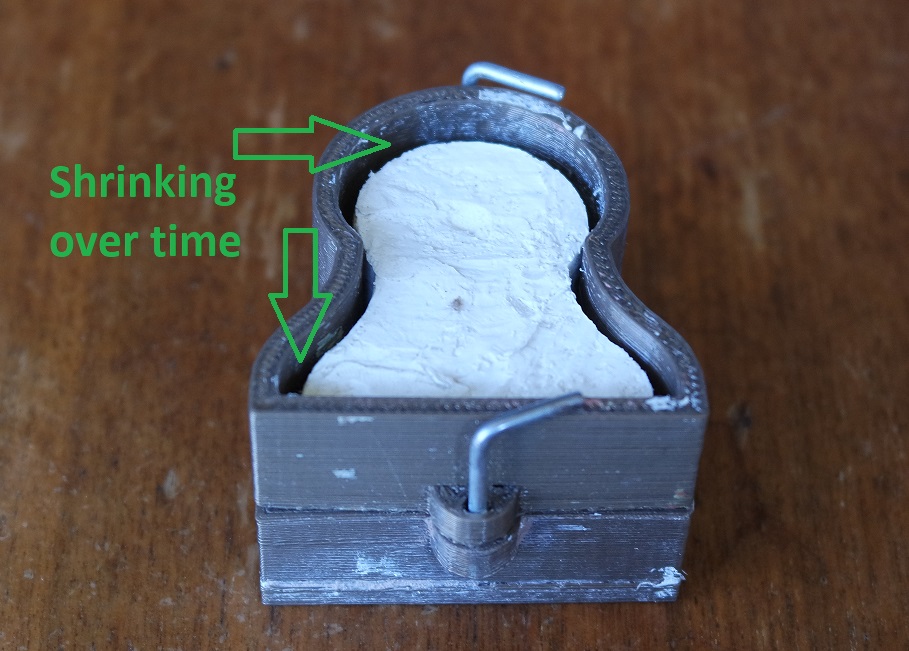
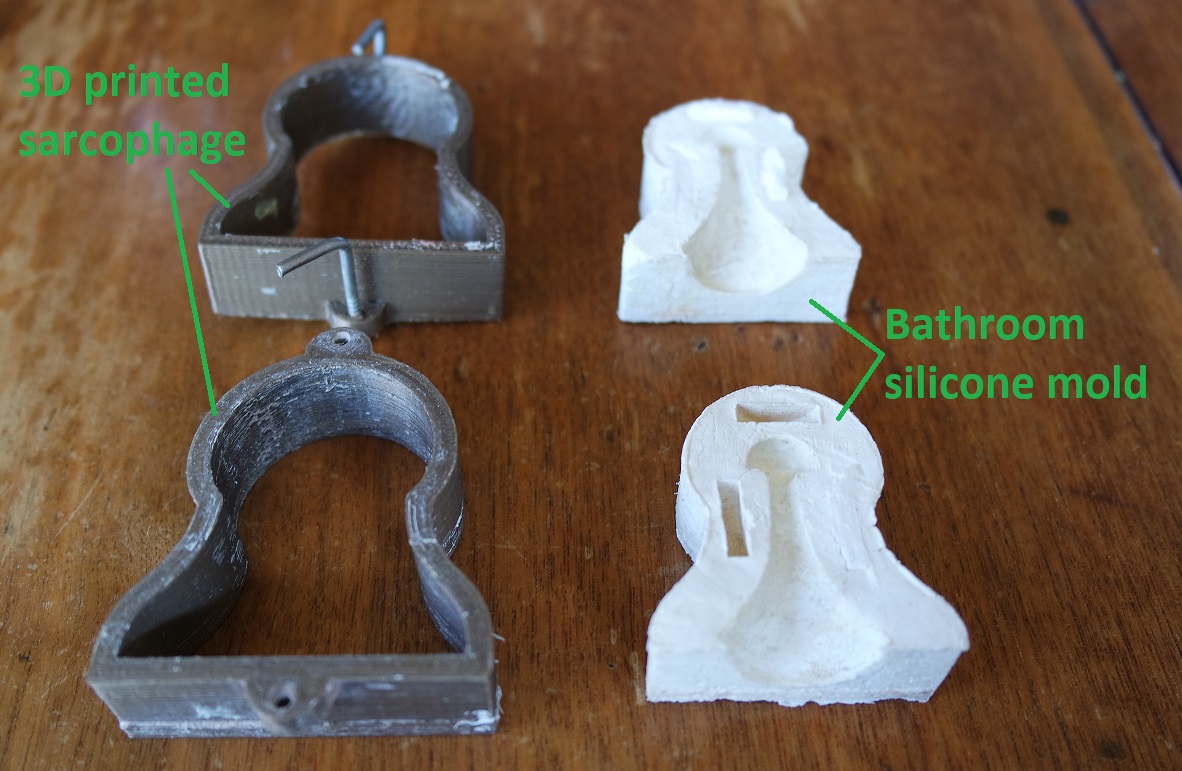
This week was creative and recreative and I really enjoyed it.I had tried in the past (2017) to create a mold for the spawn with an "everyday" silicone for bathroom joints.
Over the years it shrinked but it's still soft:
Now I can see how "special molding" silicone really makes a difference!
And it gave me back the willing to survive Marcel Duchamp's lost chess set.
Files for this week
w11_spawn.f3dw11_pion.skp