18. Mechanical design
group assignment
   - design a machine that includes mechanism+actuation+automation
   - build the mechanical parts and operate it manually
   - document the group project and your individual contribution
   - actuate and automate your machine
   - document the group project and your individual contribution
Individual Contribution
Dispenser Mechanism
For the group project, Harri Seto and I worked collaboratively on the dispenser mekanism and how we are going to squeeze the handle of the cupcake batter dispenser. However, before I started working on the mekanism, Harri ran into a few problems getting a smaller stepper motor to push the cupcake dispenser handle backwards. It seemed there was too much resistance from the handle of the cupcake dispenser for the stepper motor to handle. Thus, instead we used a HS-475HB servo.
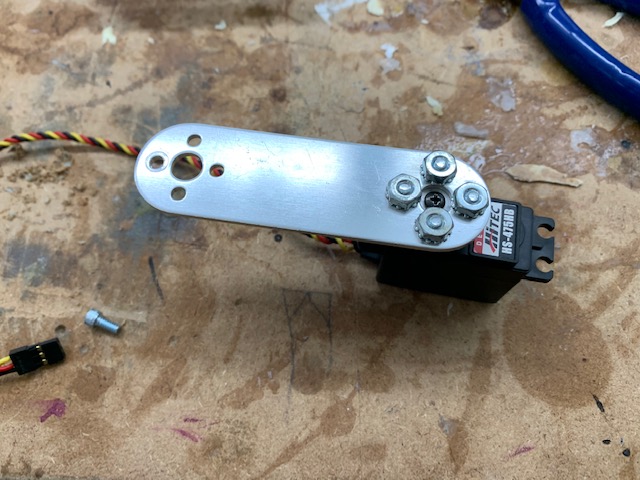
With tetrix frames, I created a temporary arm to test whether even this servo had enough torque to be able to push the cupcake batter dispenser. However, even this servo lacked in power and was unable to even inch the handle backwards.
Without any servo or stepper motors powerful enough to push back the cupcake dispenser, an alternative solution was developed where the handle of the dispenser would be ziptied open and a servo with an arm would block the bottom of the dispenser. To use this design, it was also mandatory that we create a mount dedicated for the servo. Thus, Harri and I created a CAD of a servo mount that would build off the already existing screws of the dispenser mount that Vincent Zhou created.
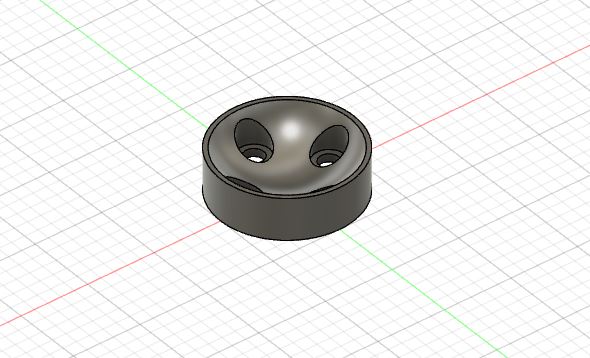
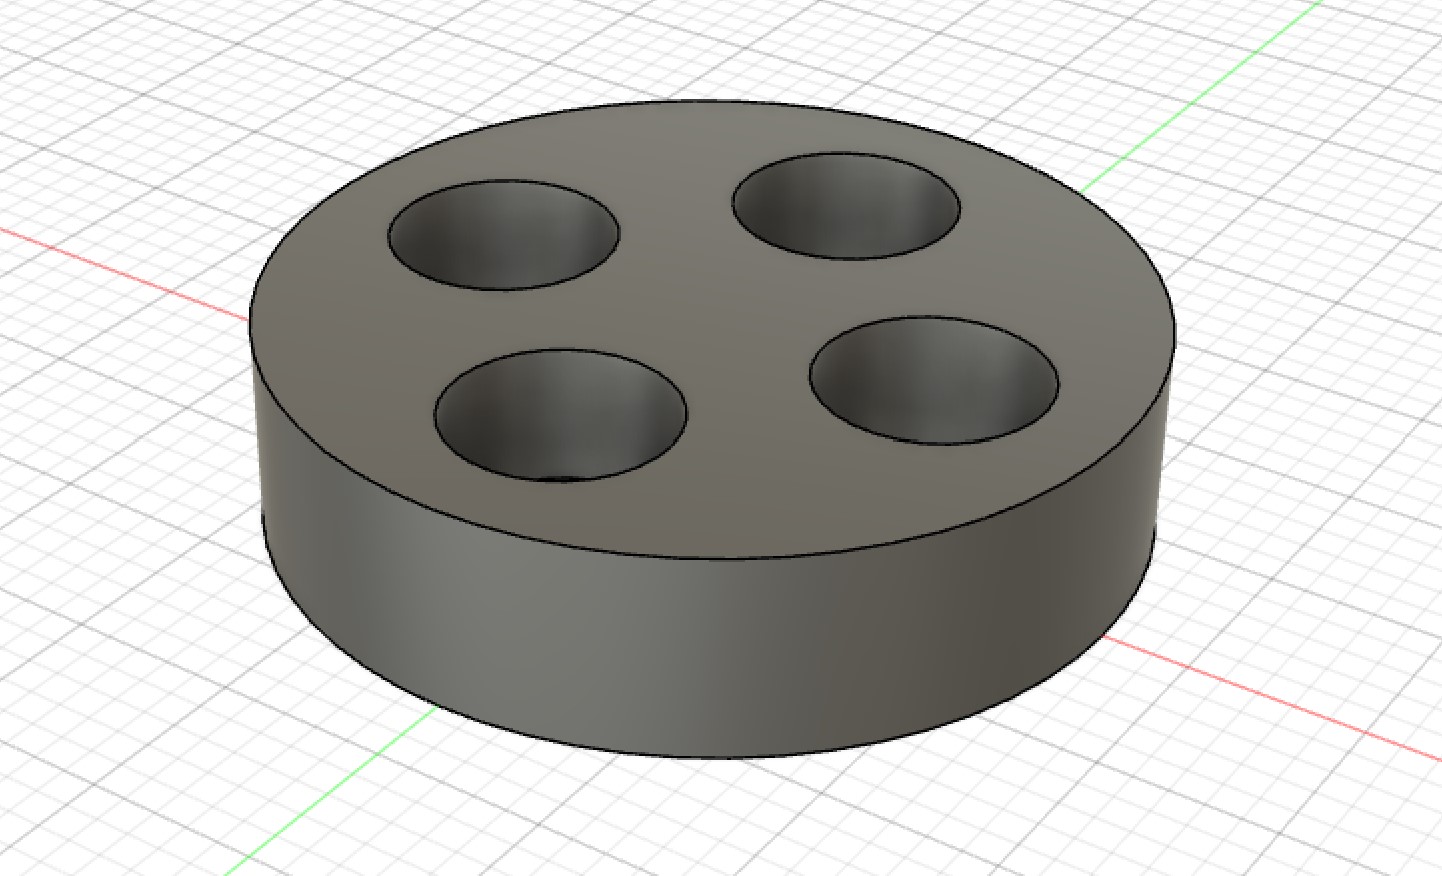
In addition to the servo mount, here is the piece that I will attach on the servo arm to block the nozzle of the cupcake dispenser:
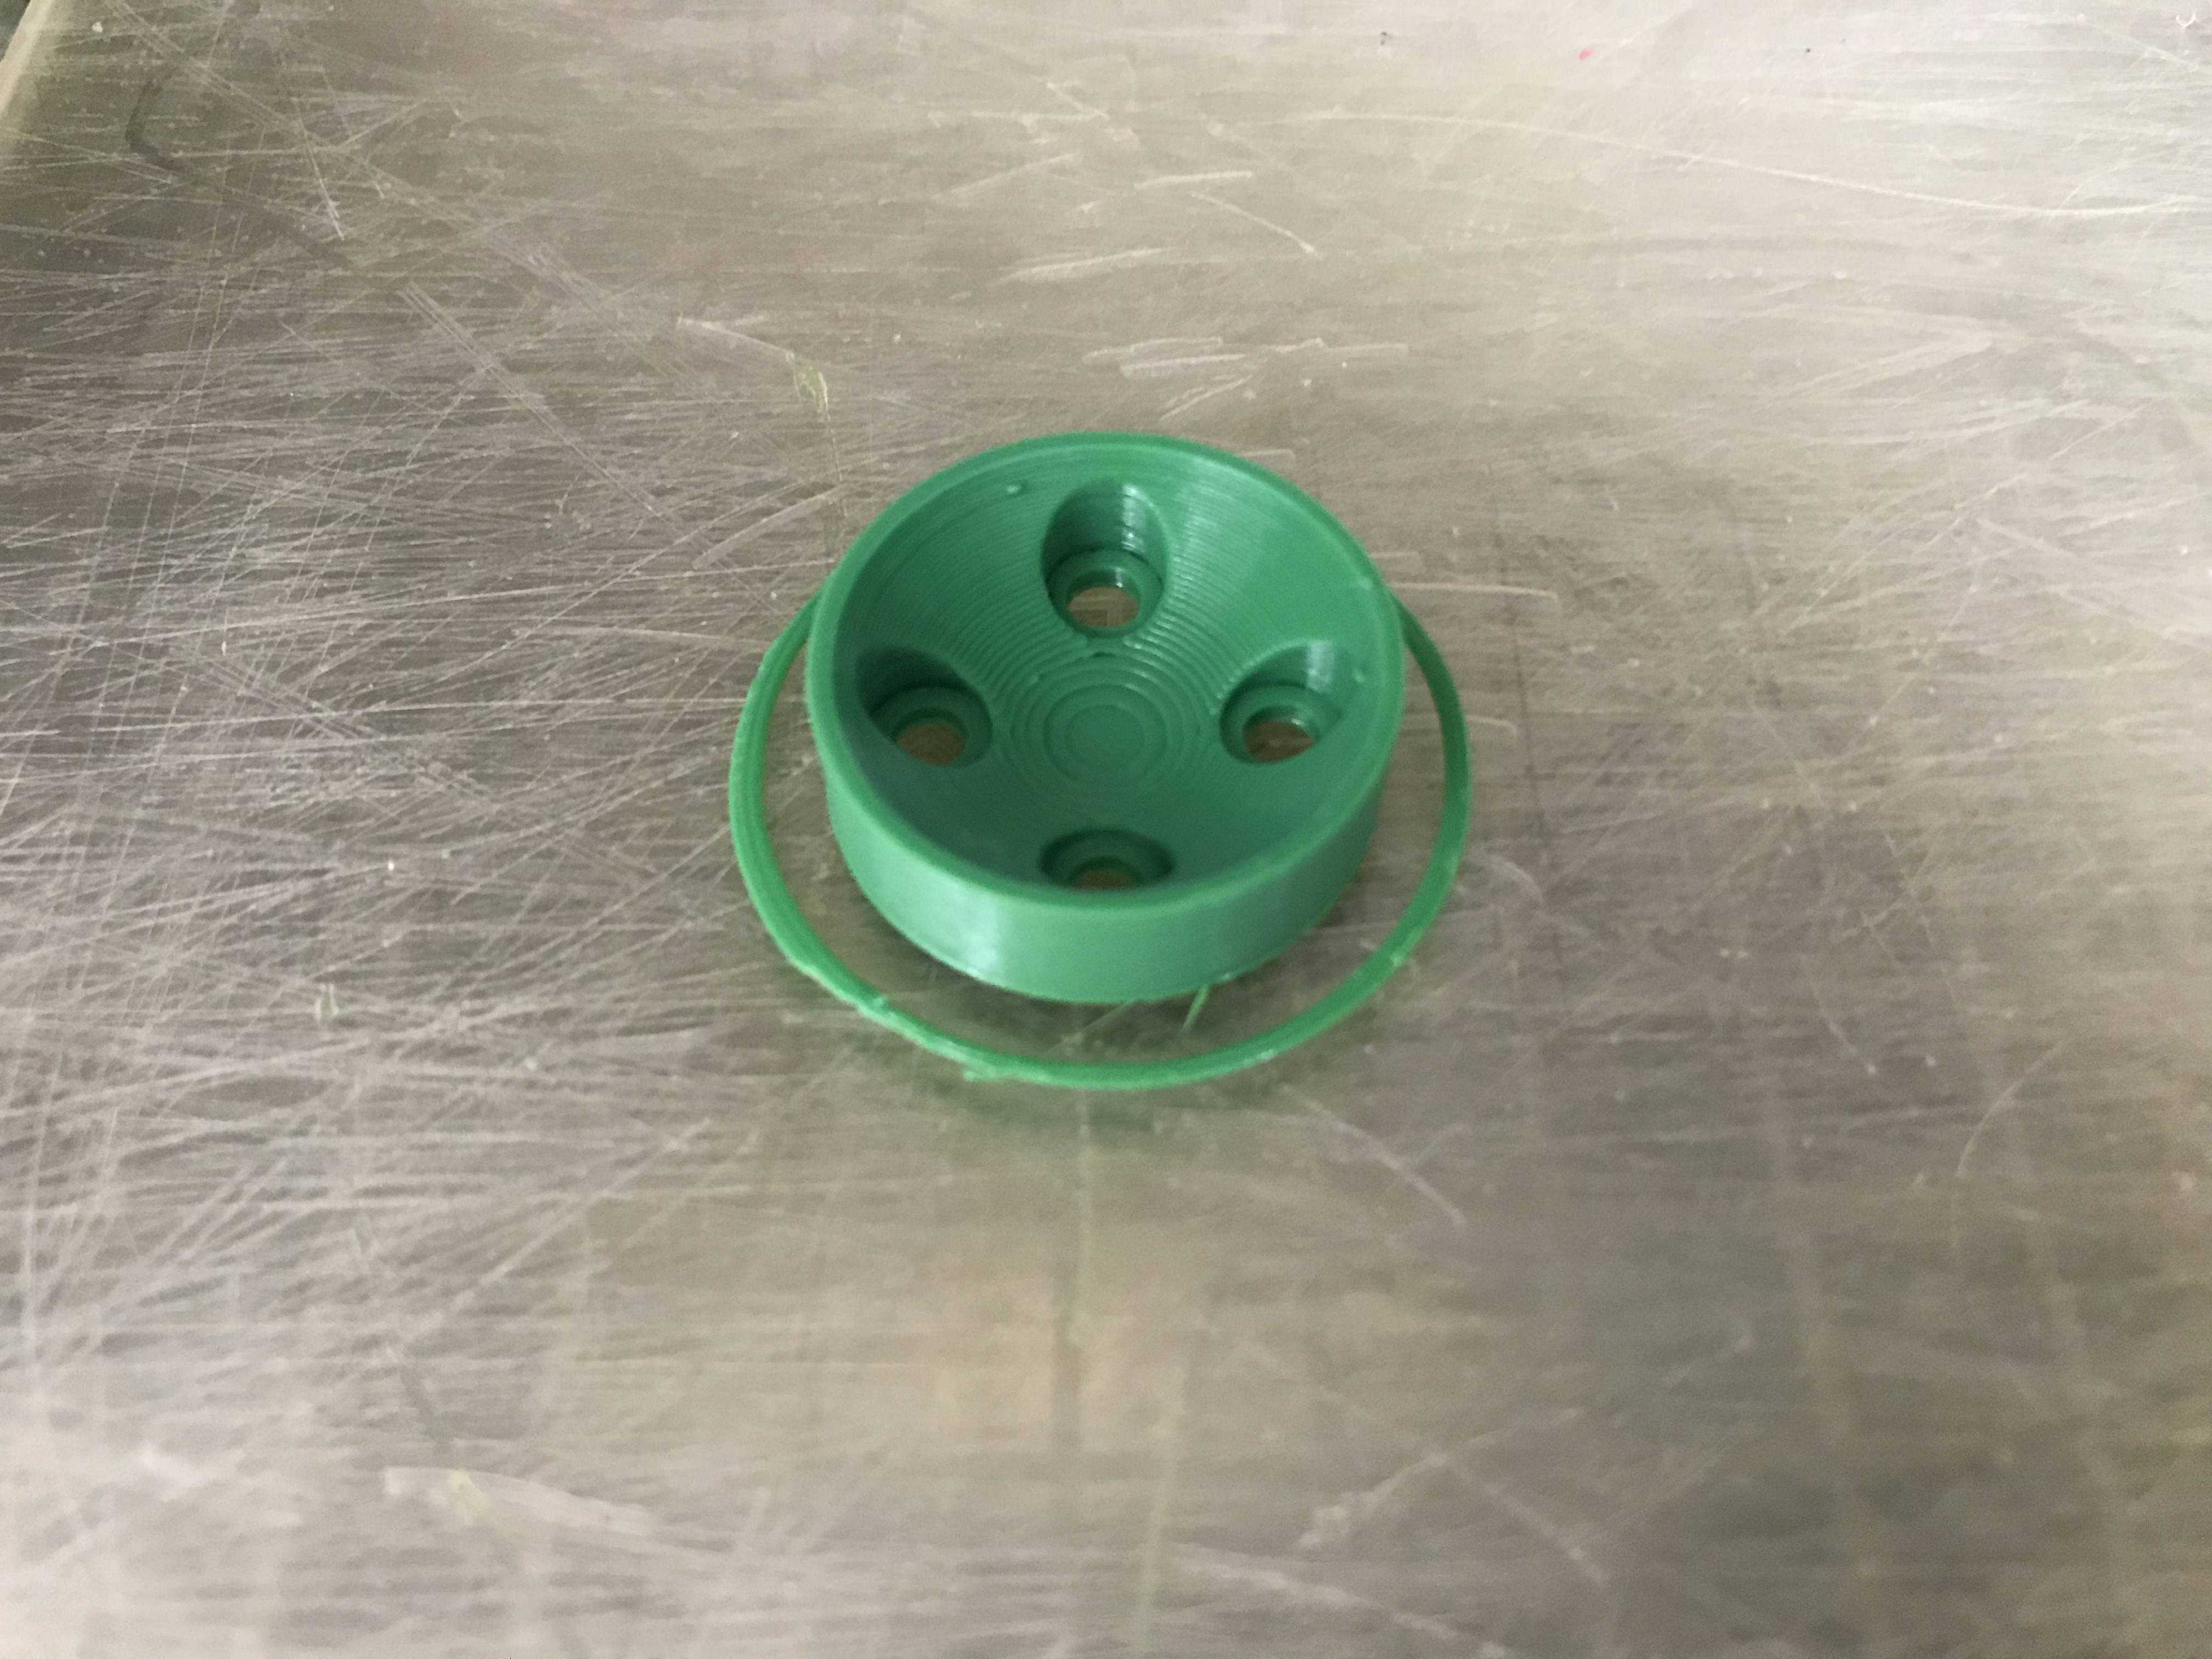
Here it is 3D printed. While PLA is not food safe, during actual use it will be covered in food safe plastic wrap to ensure there is no contamination in the batter.
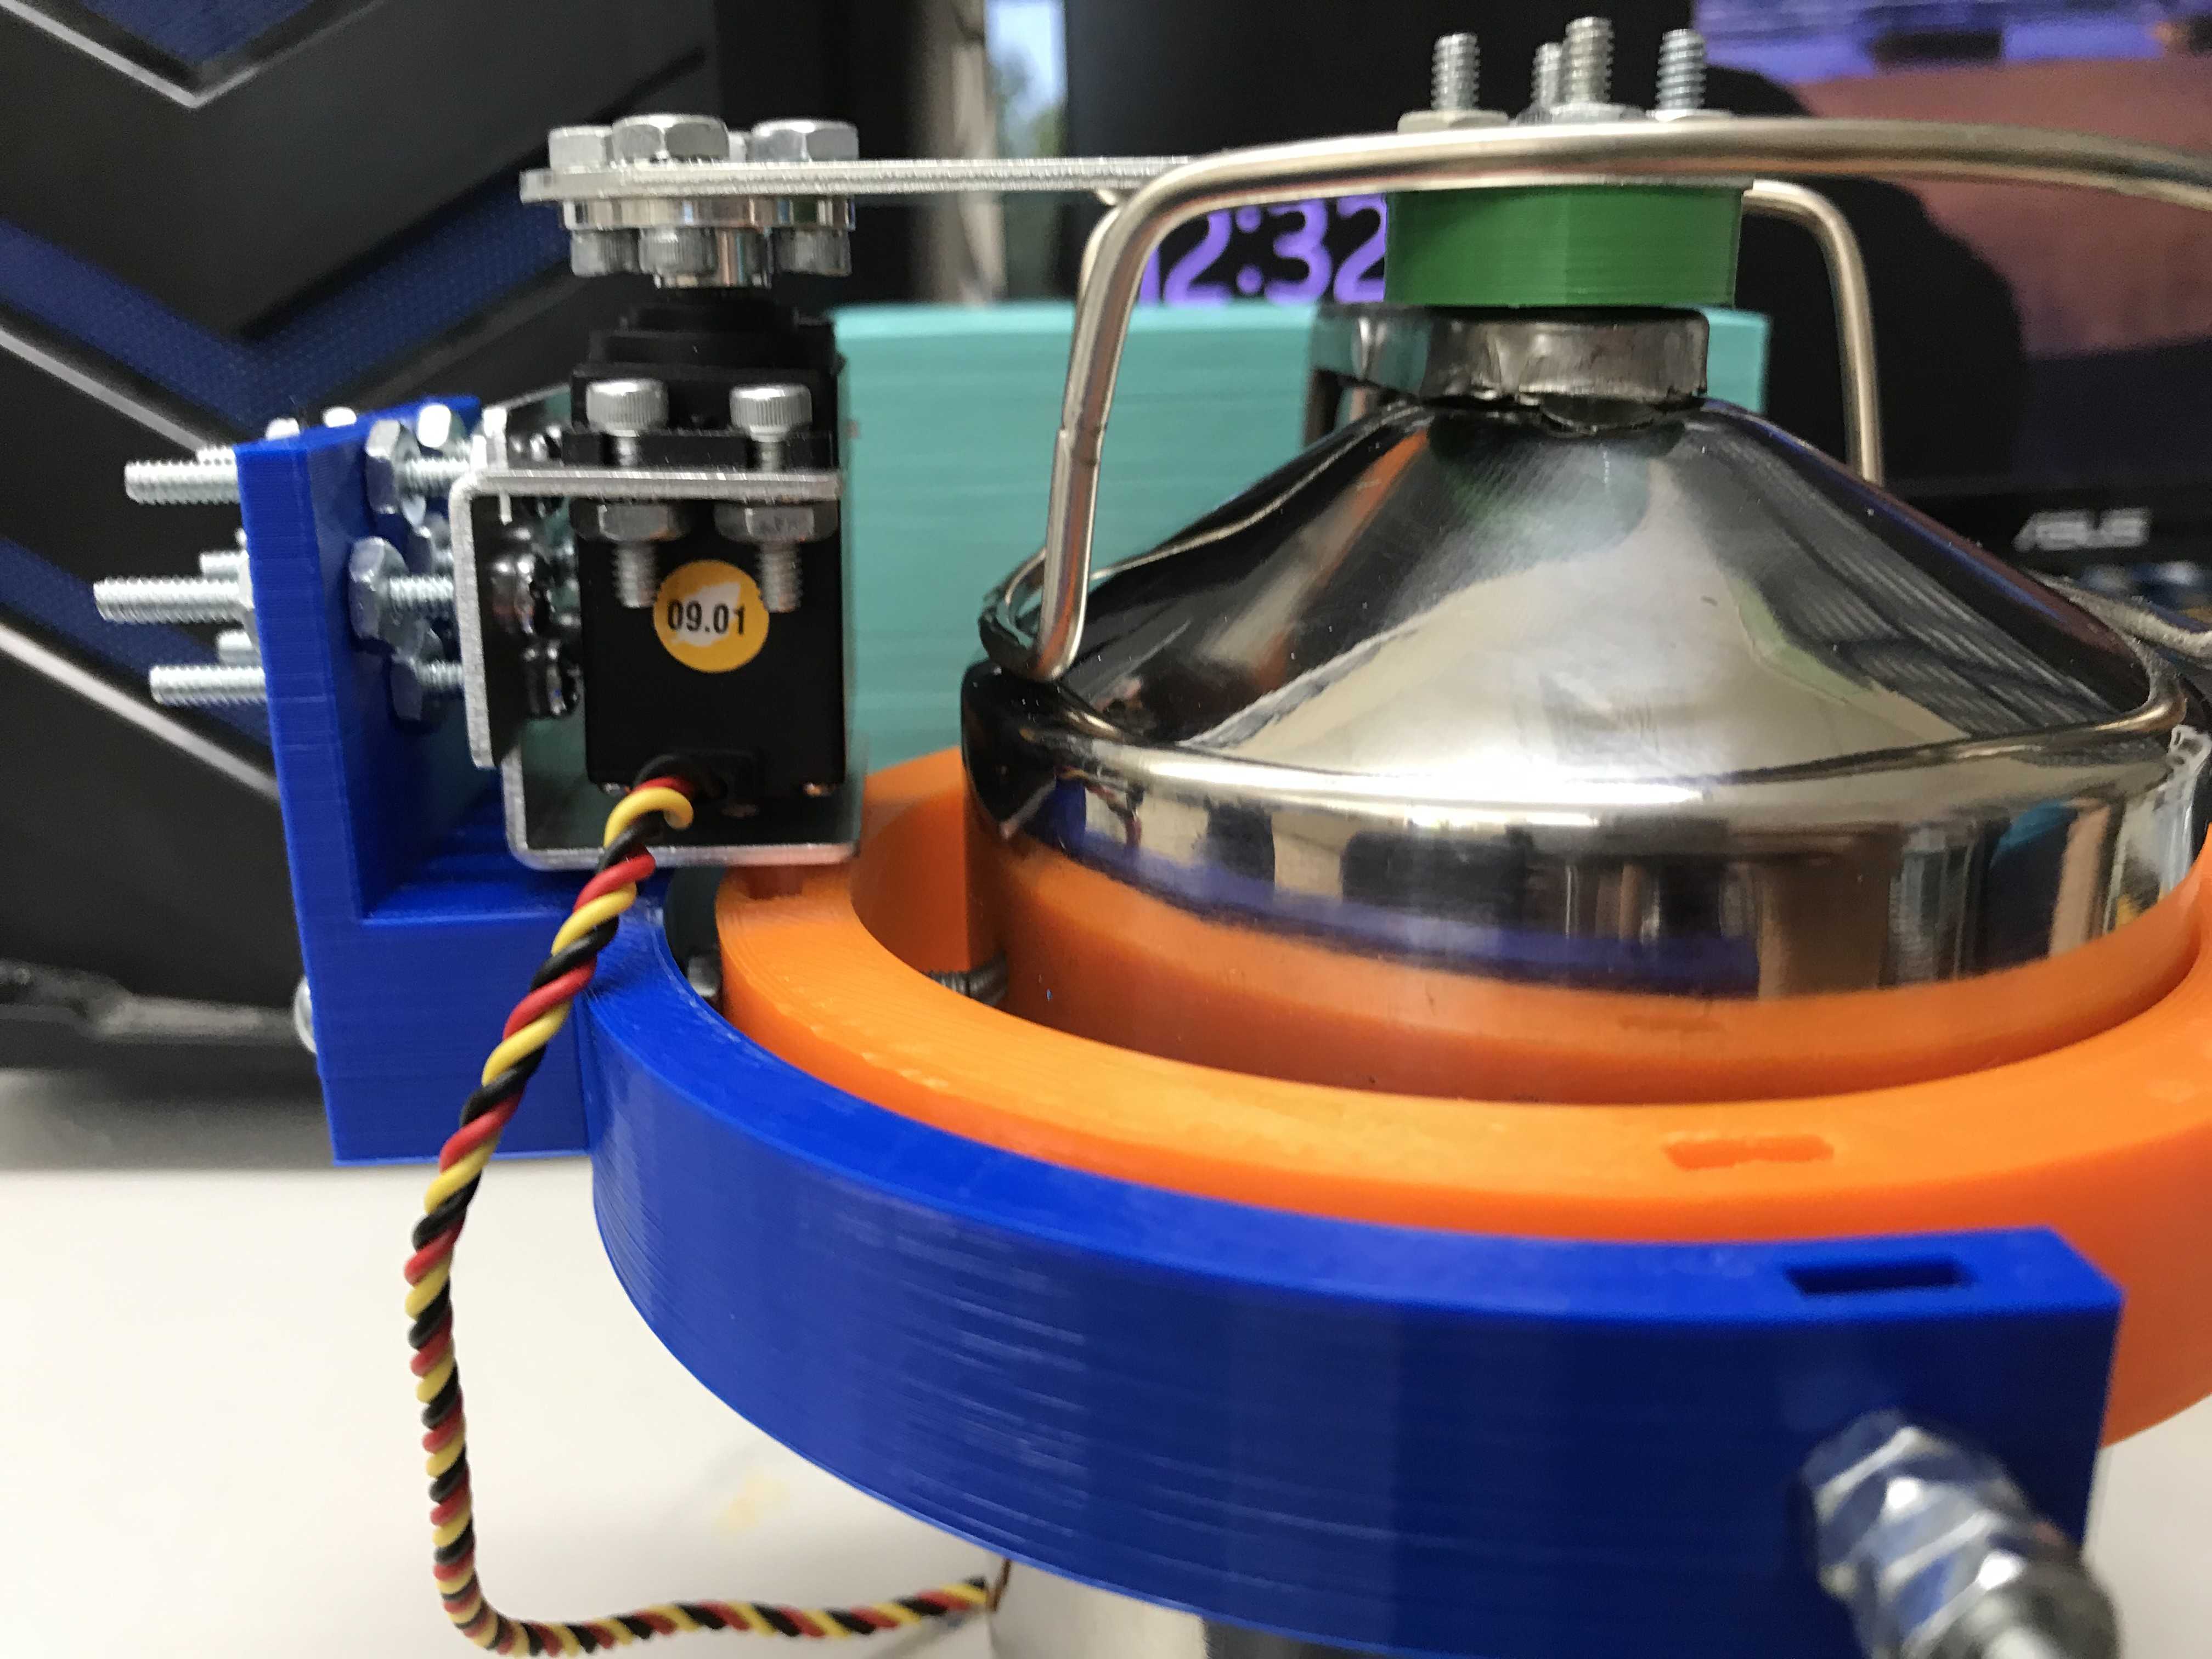
Once we assembled the entire contraption, the entire thing fit very well.
However, while the piece that blocked the nozzle sort of worked, lots of batter overflowed on the sides of the piece:
Thus instead, Vincent suggested that the piece instead simply be flat on the top plane as there was no need for slopes. Here is the CAD:
This is the finished product with the replaced pieces and the cupcake batter dispenser almost no spillage now:
CNC Shield
One of the reasons that Harri had tried to use the stepper motor previously, was due to the CNC shield not having support for a servo motor. However, with the dispenser mechanism using a stepper motor now, something with the CNC shield had to be done now. Using a guide on how control a servo motor with a GRBL CNC shield, I was able to get the servo integrated into the shield. This method will utilize a modified GRBL firmware called MIGRBL to control a stepper motor in replacement of a spindle on a CNC machine.
You need to download the following two items:
MIGRBL is the exact same as GRBL, so unzip this folder and import this library as you would with regular GRBL.
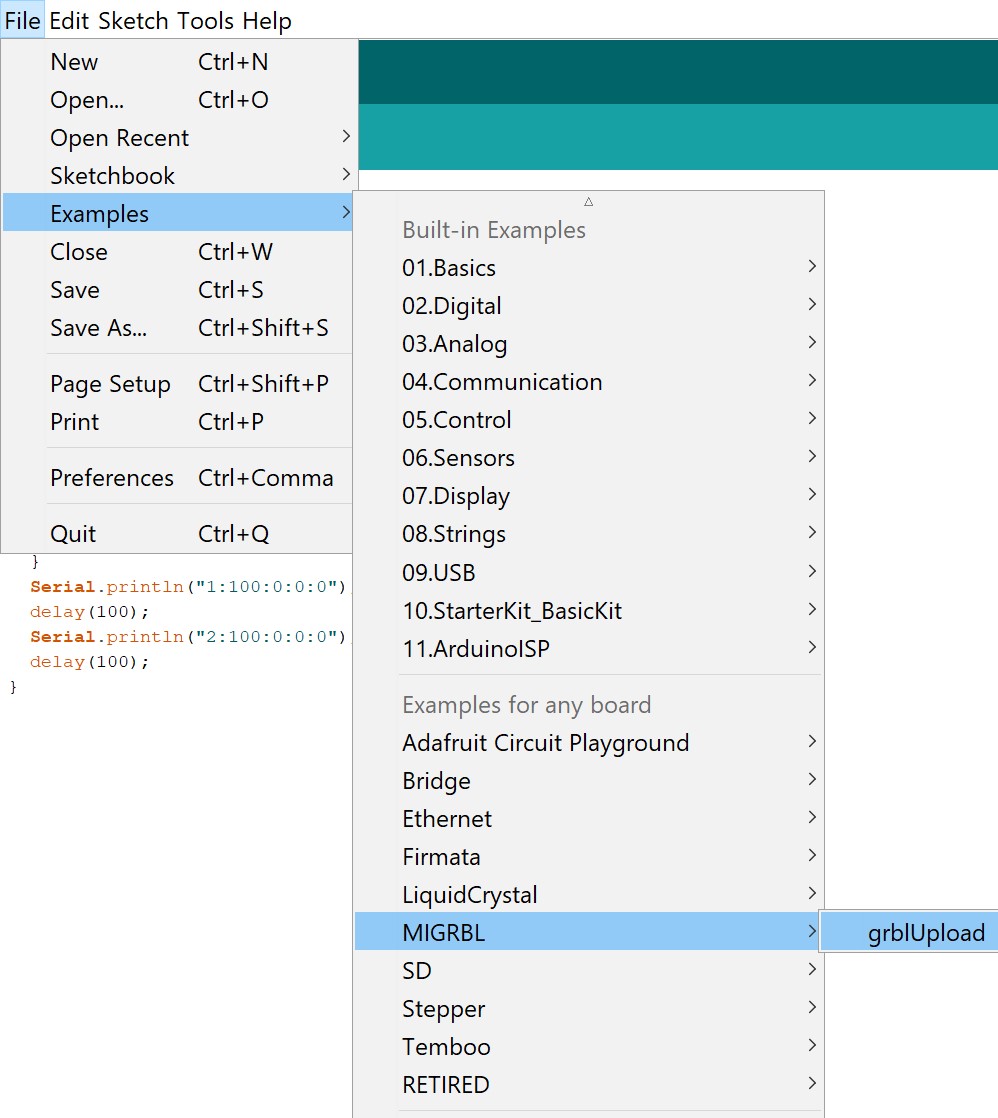
Now in the Arduino IDE under examples>MIGRBL click the only example they have “grblUpload” and upload this code to your Arduino Uno. Remember that when uploading code to the Arduino Uno, it can not be connected to the CNC shield or you will get a programmer error.
Now, the connections for the servo motor is a little different. Here is a little diagram that shows you how to connect a servo to the GRBL CNC shield.
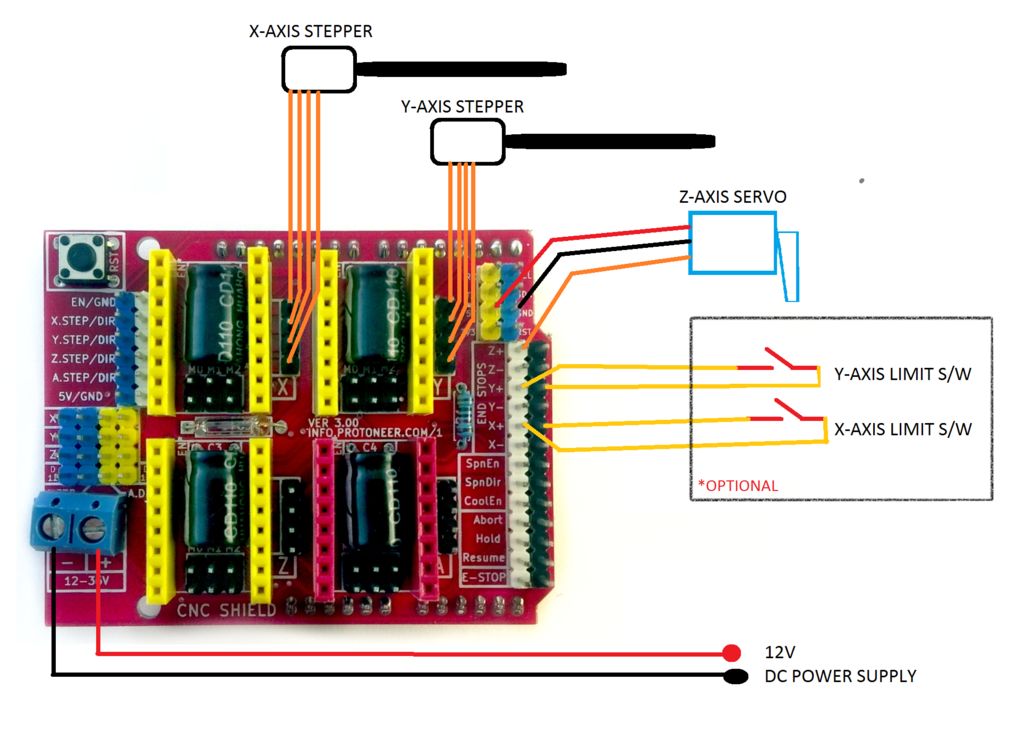
Connect 5V and Ground to the corresponding pins on the GRBL CNC sheidl and then connect signal to the D11 pin or the Z+ End Stop Pin.
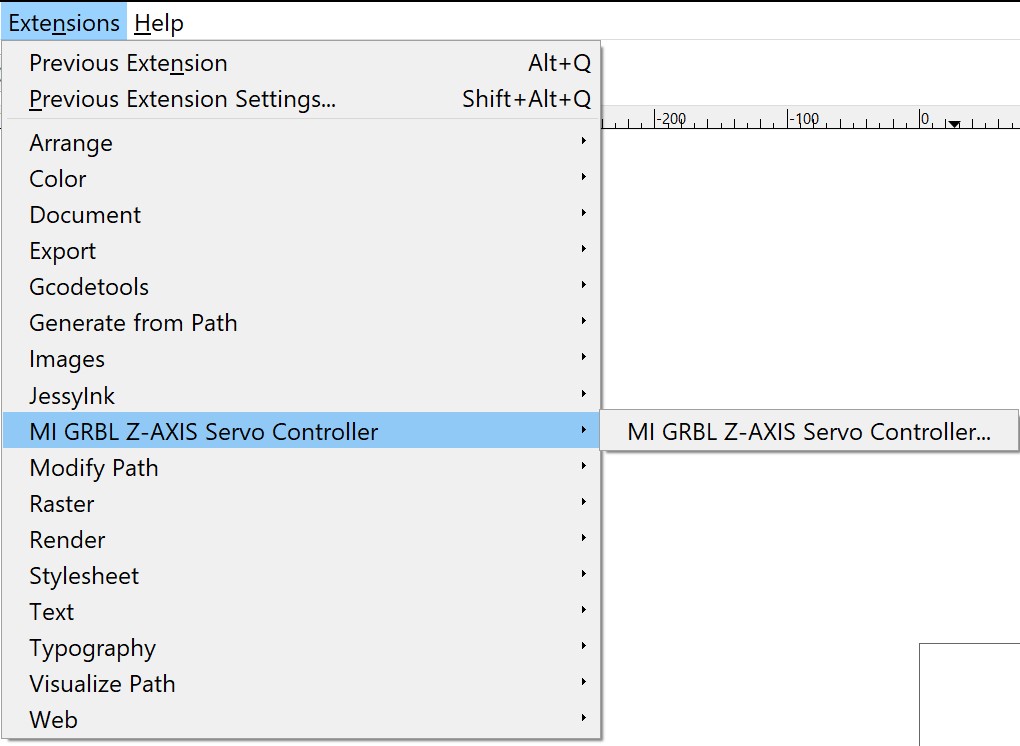
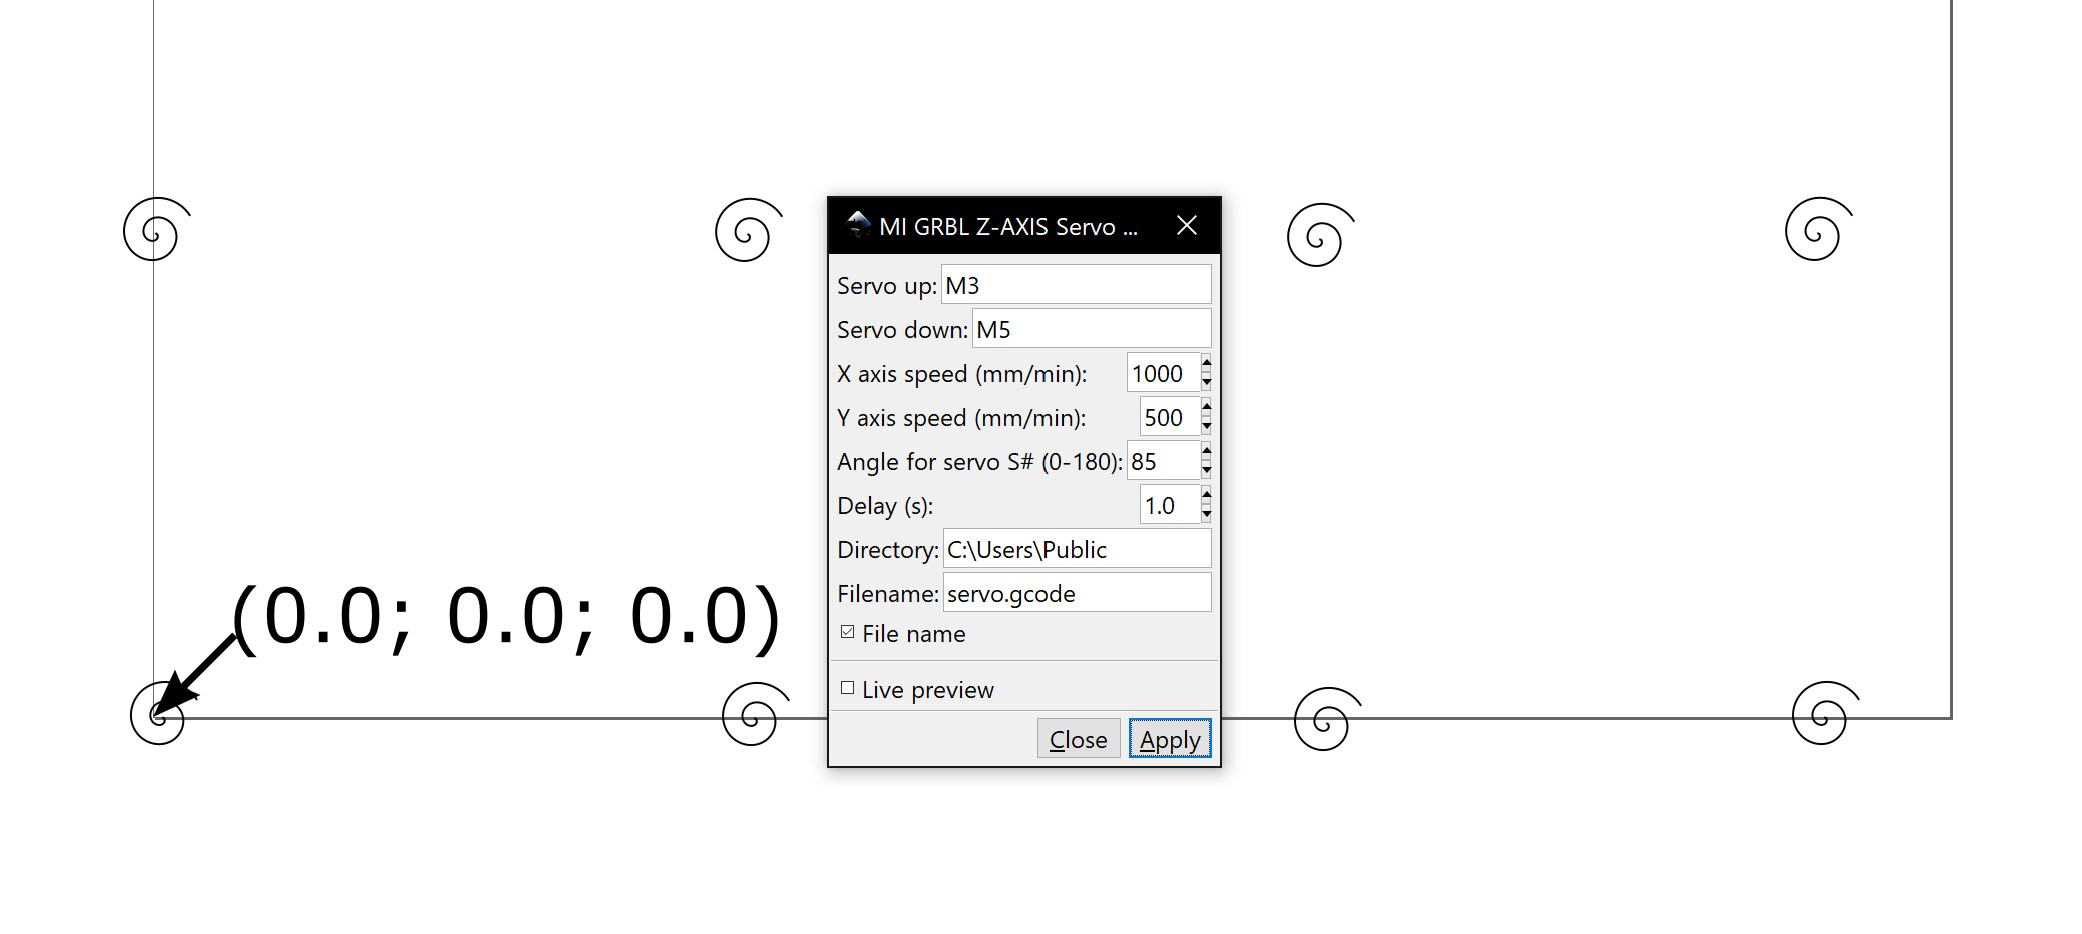
To use MIGRBL, you will need the MIGRBL extension made for Inkscape. Extract the previously downloaded folder and copy all the files inside into your extensions folder for Inkscape. Now when you restart Inkscape, a new extension should pop up called MI GRBL Z-AXIS Servo Controller.
From the guide, here are the steps for generating G-code:
- Open the Inkscape software
- Go to the file>Document properties
- Set the units to mm
- Set width and height of your plotting area and close the tab
- Now draw the design or drag and drop the image of your choice (If you have drawn something itself in inkscape skip to step 12)
- Now select the image and go to the path>trace bitmap
- Click ok and close the tab
- Now hold click on the image and drag the mouse
- A black and white image will separate from the original image
- Now delete the original image
- Drag the black and white image in center of the frame
- Again goto path>object to path
- Now go to Extensions tab and select MI GRBL Z-Axis servo controller
- Change the values if needed
- Click on apply to generate the G-code
- Default location where you canfind the generated G code is C:/Users/Public
While I was trying to get this extension to generate G-code, I would continously get this error:
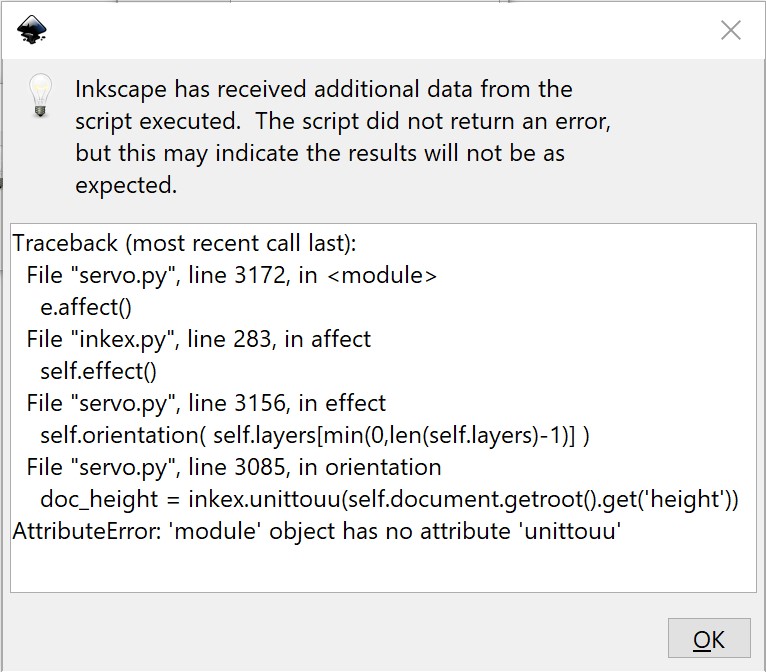
Searching this problem up, a blog traced the problem back to one line in the code that was outdated and broke due to an Inkscape change. The error in the code is on line 3080 of servo.py and you need to change
doc_height = inkex.unittouu(self.document.getroot().get('height'))
into
doc_height = self.unittouu(self.document.getroot().xpath('@height', namespaces=inkex.NSS)[0])
Back in Inkscape, I created spirals in the places that I wanted the dispenser to dispense the cupcake batter. If I wanted to make the servo open the hatch for longer, I could simply extend the spirals and decrease the feed rate.
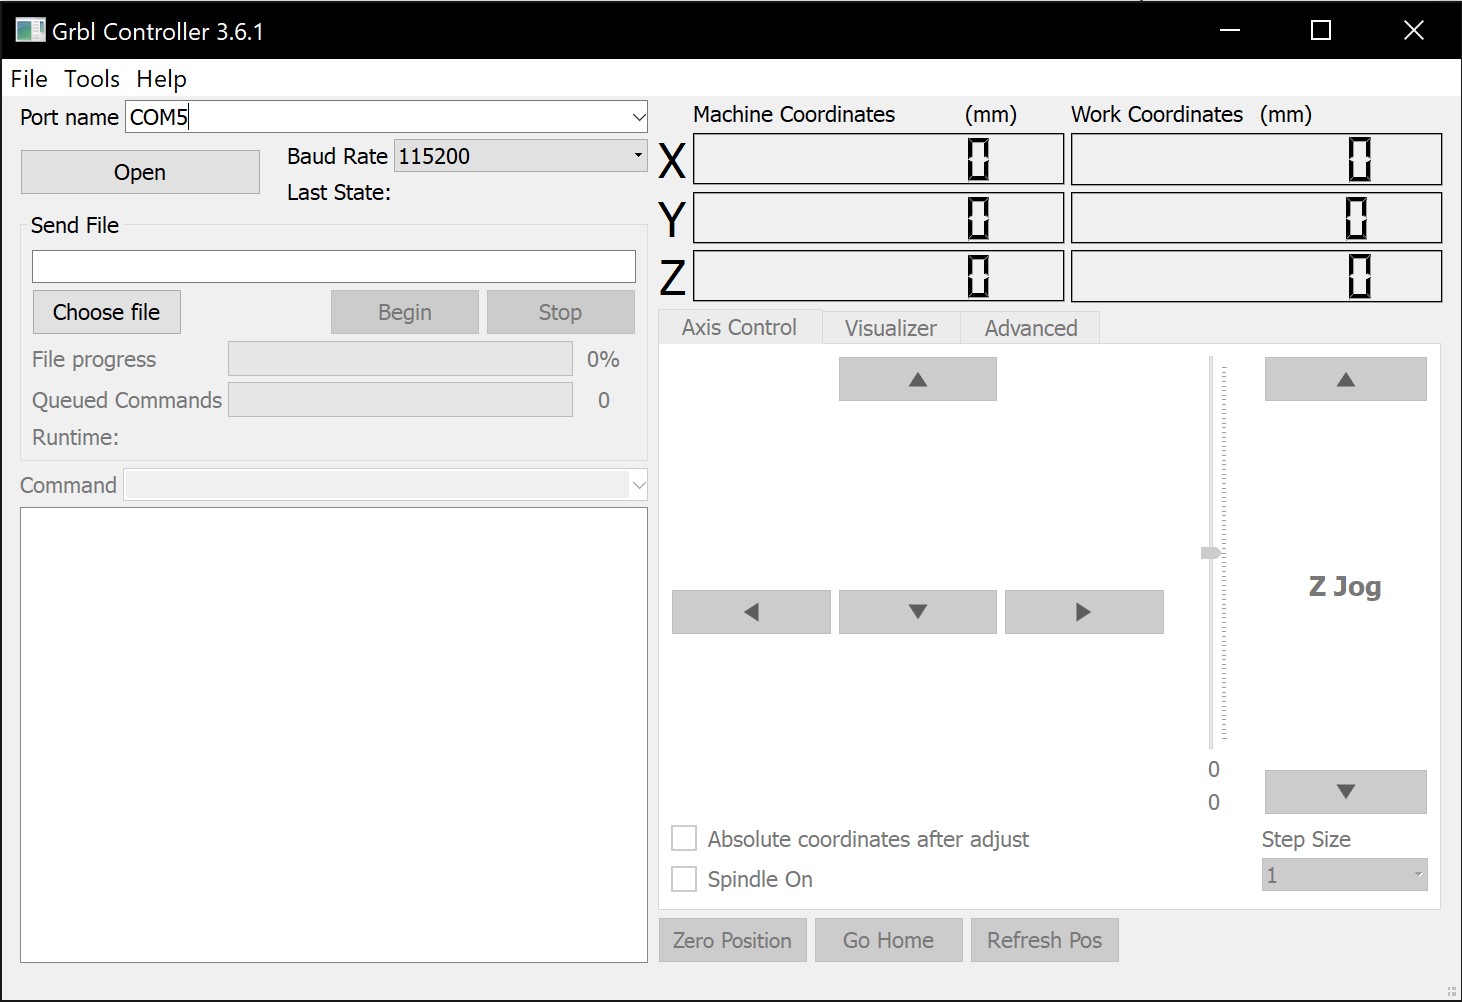
Now once this .gcode file is ready, I used a simple grbl controller to read the .gcode file and send commands over serial. This program was very simple to use and we were easily able to get it to work. Simply connect to the correct COM port in the top left corner, and then load up a .gcode file just below that. Be aware that pressing the Stop button doesn’t instantly stop the machine as there could still be some gcode being executed by your CNC shield before you stopped the grbl controller.
I uploaded the .gcode file created by the Inkscape extension to the grbl controller and here it is running!
Once we were confident that the position of the dispenser was correct, we loaded up some mock batter into our dispenser and let the machine do the work:
Group Project
The group assignment can be found here.