17. Wildcard week
Design and produce something with a digital fabrication process (incorporating computer-aided design and manufacturing)
not covered in another assignment,
documenting the requirements that your assignment meets, and including everything necessary
to reproduce it.
Inkscape
To guide myself through this process, one of my FabAcademy peers, Sydney Gee, created a workflow to help everyone use the embroidery machine. It provides steps regarding creating the file and operating the machine, and is a very useful document to have for using the embroidery machine.
I will be using the Ink/Stitch addon for Inkscape to create my design to be embroidered on the machine. To add this extension to Inkscape, the steps for installation will need to be followed on their website.
I used the .svg file I created back in the Computer Controlled Cutting week for the vinyl cutter to sow. However, in the process of trying to map out the stiches for my .svg file, I kept running into this error:

After quite a while, I settled for a different software called SewArt that many of my FabAcademy peers were using as well.
SewArt
The program for SewArt can be found on their website here. While it is paid, I used their trial to create my embroidery file for this week. I found a very helpful video taking me through the steps of using a .svg file and auto mapping out the stitches for that file:
Here are the steps to digitzing your .svg file.
First, open up your .svg file into SewArt.
If your image is too large or too small for your embroidery machine, simply use the resize image tool in the toolbar to change the dimensions of your image.

Next, you will use the Stitch Image tool to convert your image to stitches.
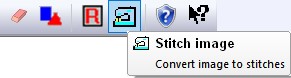
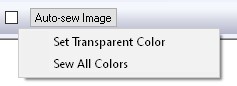
In this tool, you will need to click the Auto-Sew Image tool and then set transparent color so that SewArt knows what your background will be when sowing. In this case, my white background will be transparent, so I click the dropper over a white area in the embroidery area. Once this is done, the auto sew will finish and you are ready to export your file to the embroidery machine.
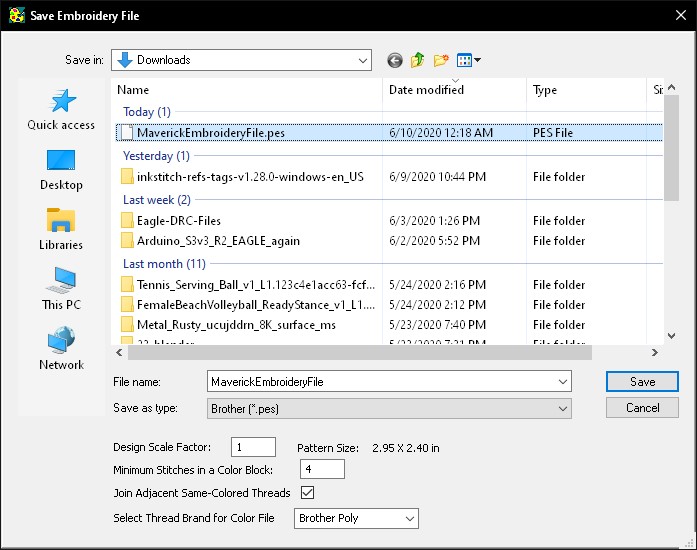
To save this as an embroidery file, you will need to go to File > Save As and you will see a popup that says Save Image File. Press Cancel and a new popup will arrive that says Save Embroidery File which is the screen you want. I saved it as a .pes as that was the file that Brother uses in their embroidery machines.
Embroidery Machine
The embroidery machine I will be using for this week is the Entrepreneur PR650e, Six-Needle Embroidery Machine made by Brother.
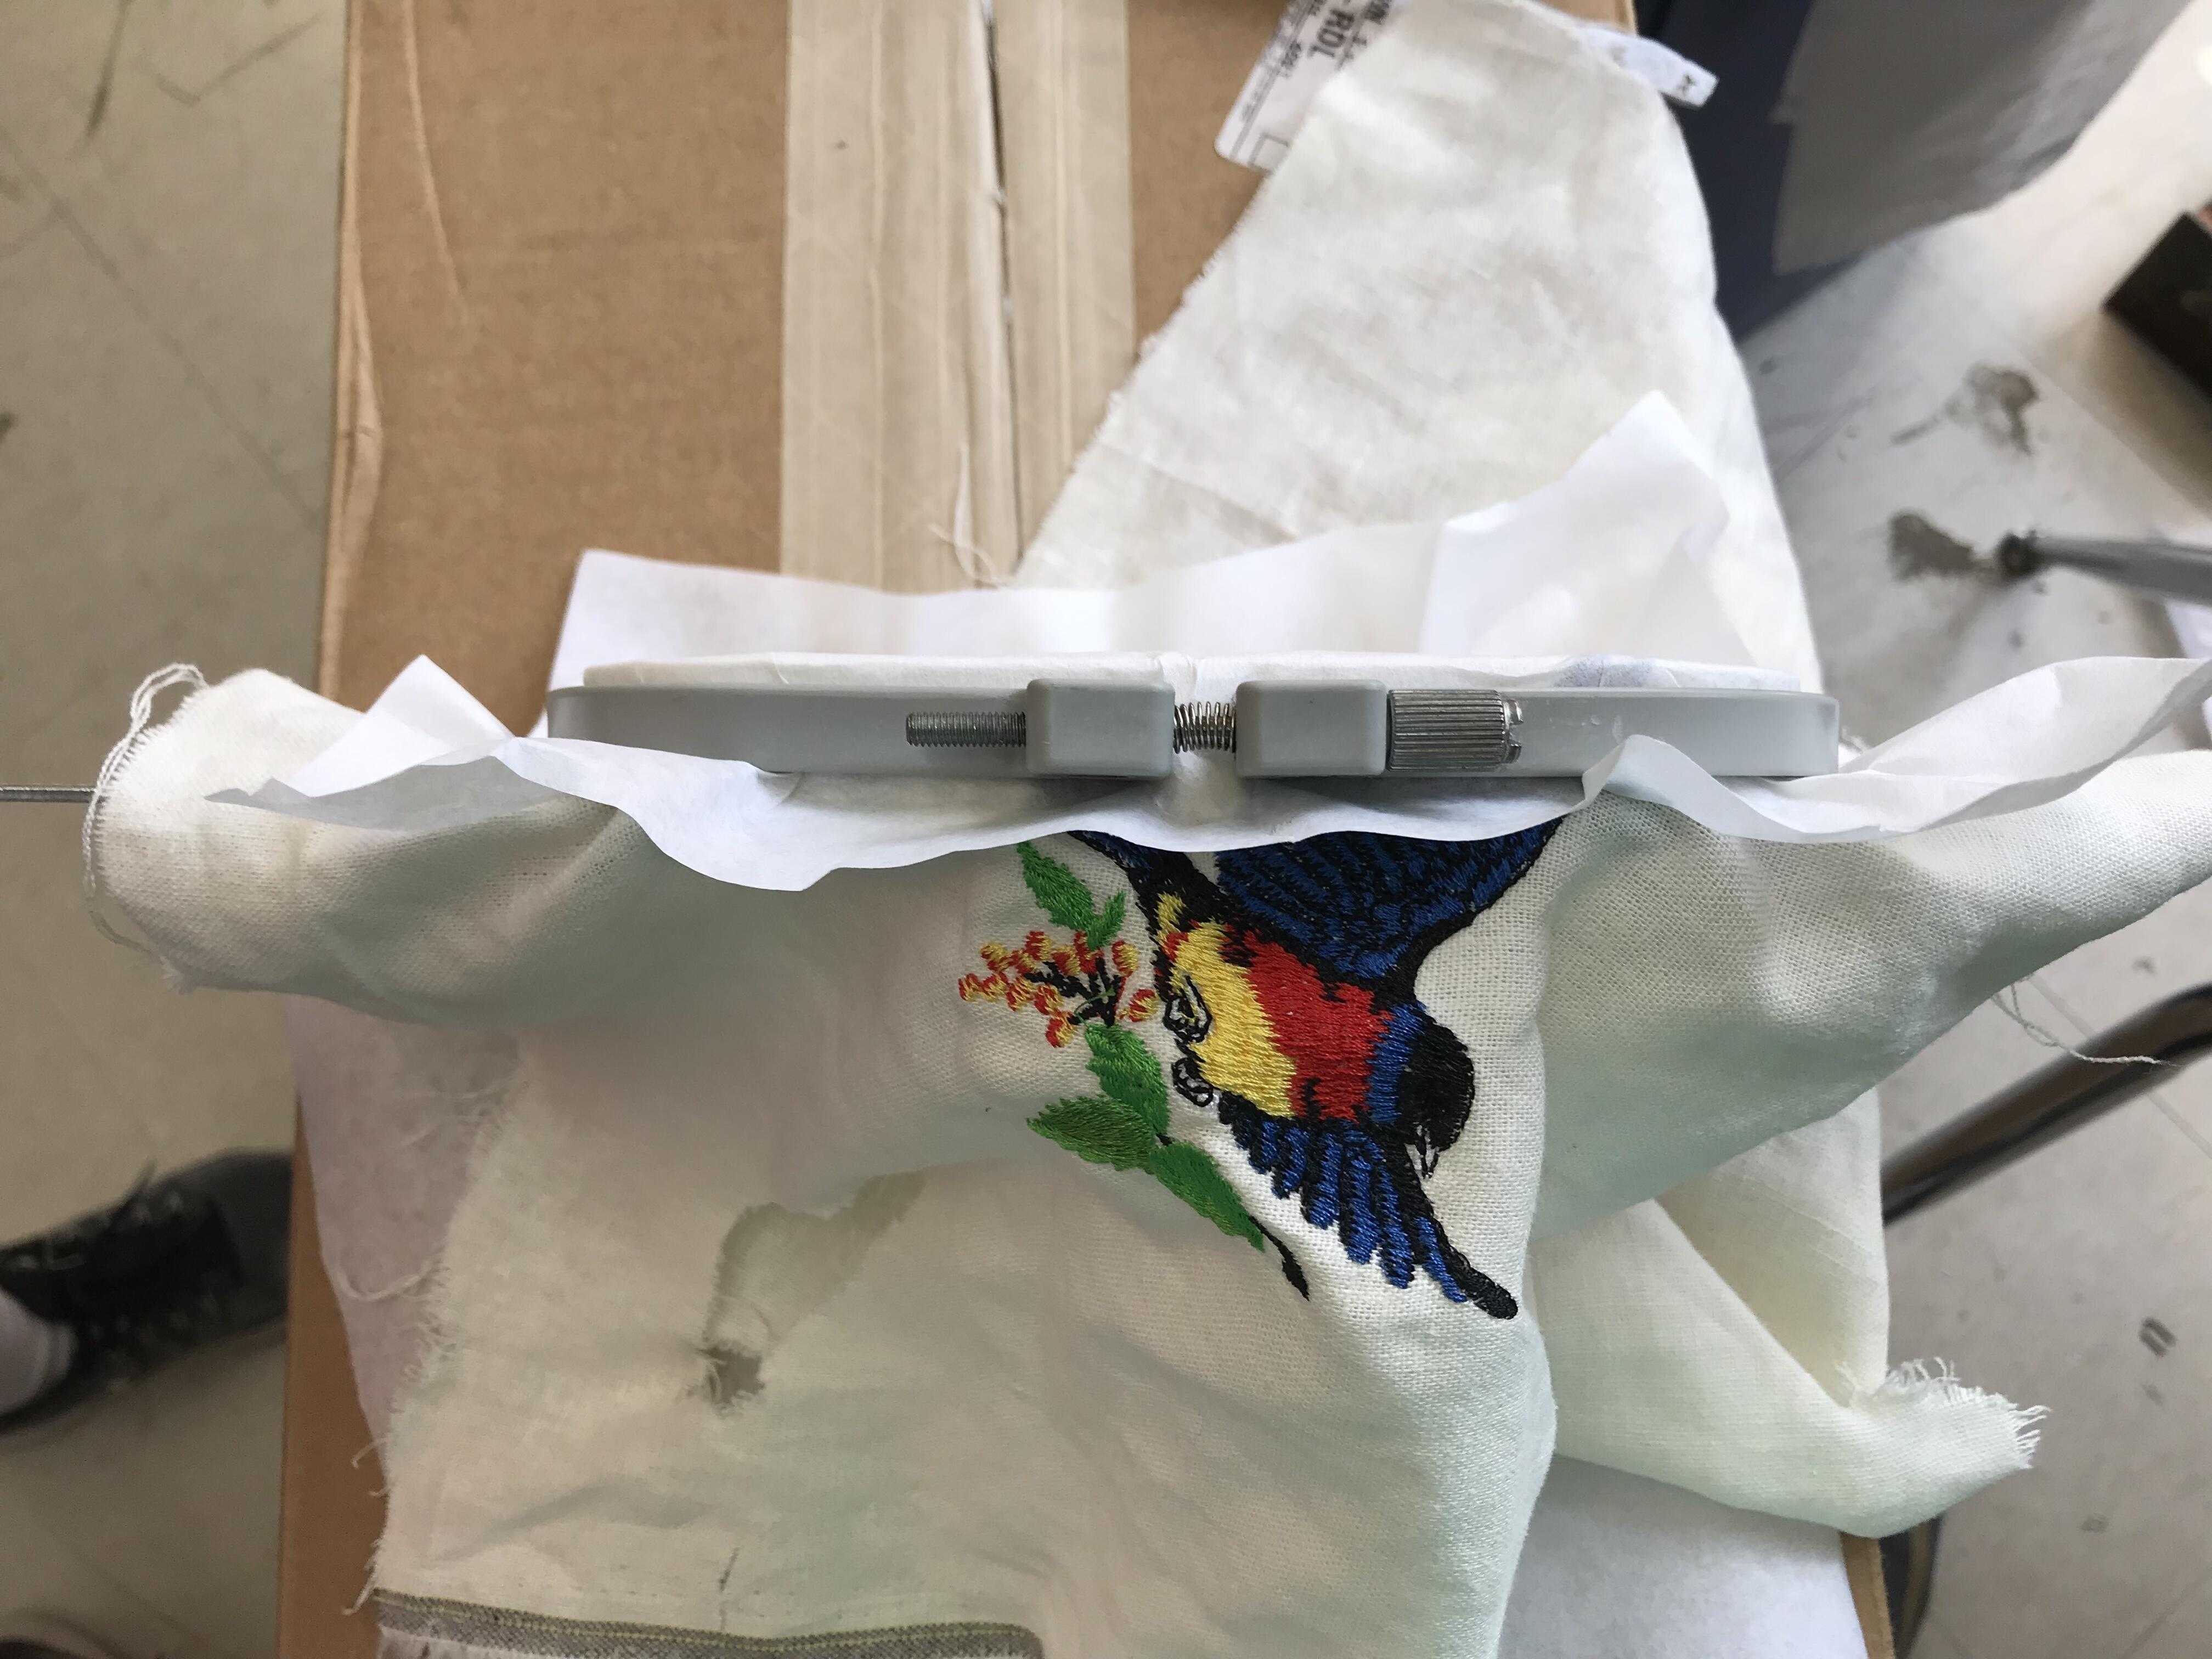
First, to set up your cloth for being stiched on, you need a frame, a hoop, trace paper, and the material you want to stich on. There are several different sizes of frames and I picked one of the smaller ones as my design was relatively small. Now, with the frame facing upwards and the metal sides touching the table, cloth and then your trace paper will need to be placed on the frame following that order. Lastly the hoop will be placed over the frame, tightening the cloth and trace paper. It will look something like this when done properly:
To upload your files to the machine, there are a variety of options to do so. However, I simply uploaded my .pes file through USB as this was the easiest and most accessible option. Now, before using this machine, it is good practice to look at the manual and workflows to get a good idea of what you are doing. The Brother manual can be found here and provides an in depth guide on how to do almost everything needed for this machine to operate correctly.
When your file is uploaded to the machine, click Edit End in the bottom right corner and you will be taken to this screen.
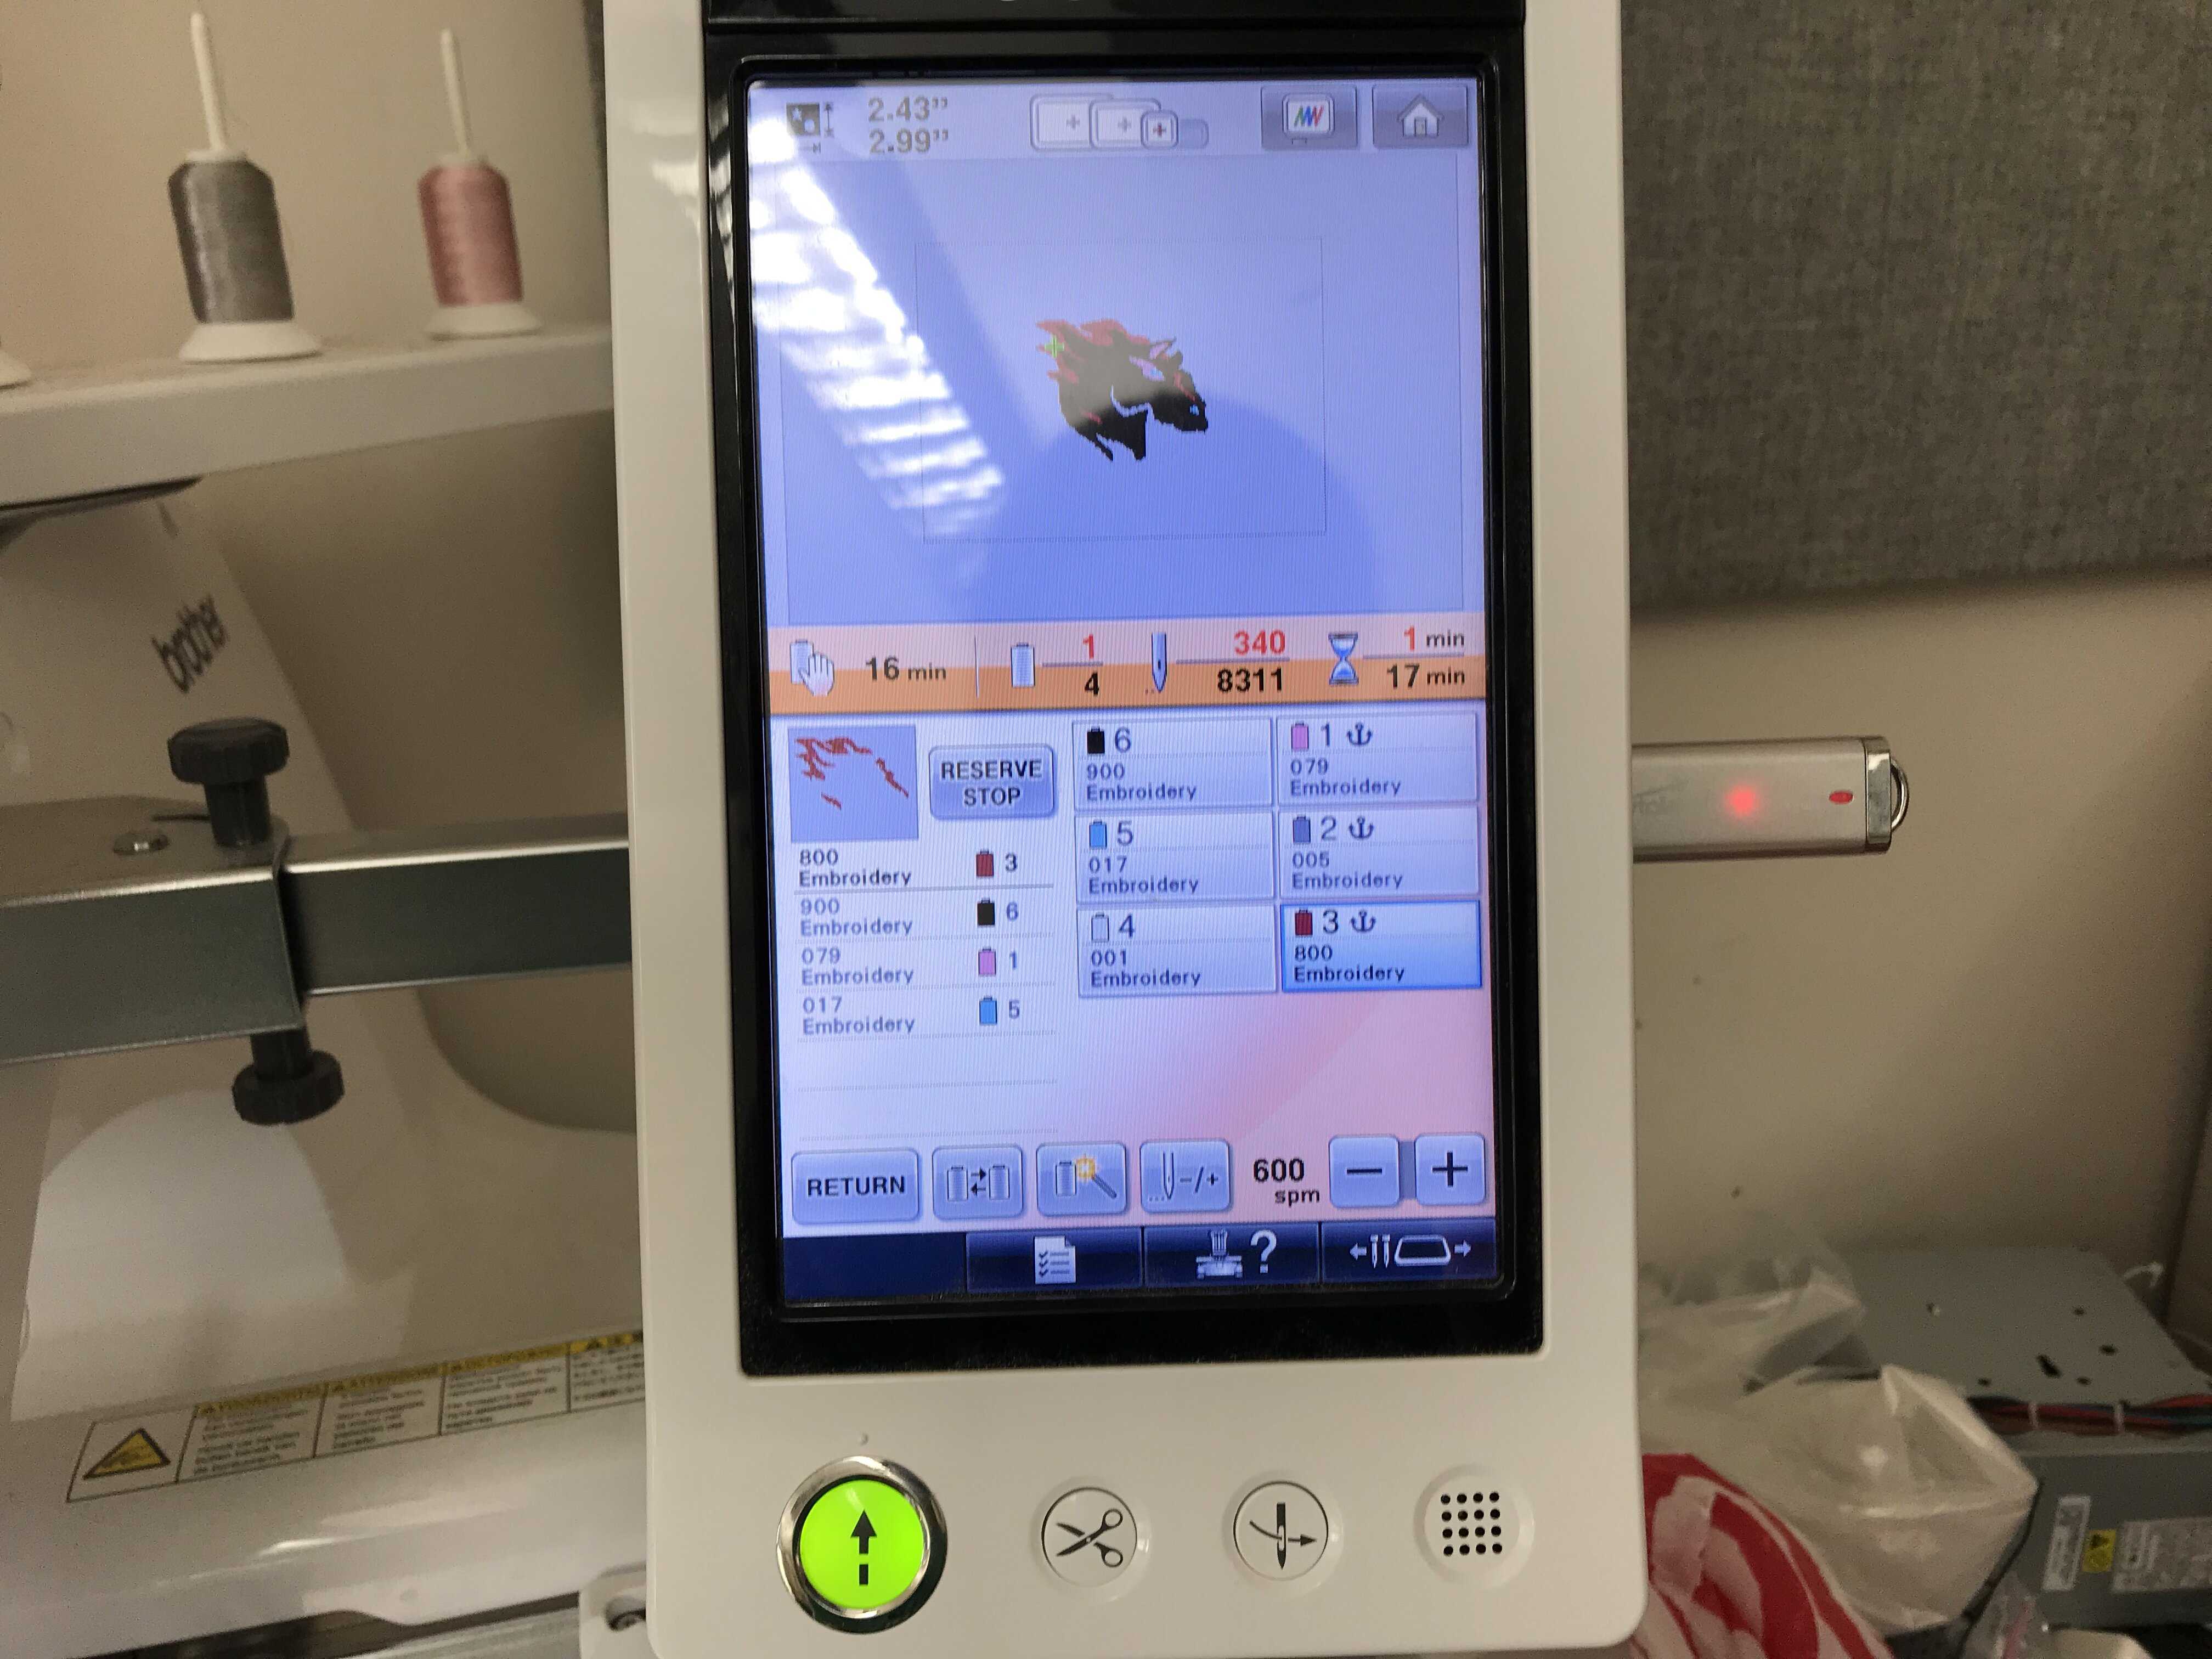
In here, it will display the number of stiches it will perform, the estimated time it will take, and the colors it will use to stich with. If you do not have a color that is currently threaded on the machine, you can switch the color used on your stitch to one already on the machine or manually switch out the thread.
When all the preparation are finished, in the bottom left hand corner, there will be a red button that says LOCK which you will need to press. Once this is pressed, a button below the screen will light up green and once you press that, the embroider will start stiching your design.
Here is a video of it stiching:
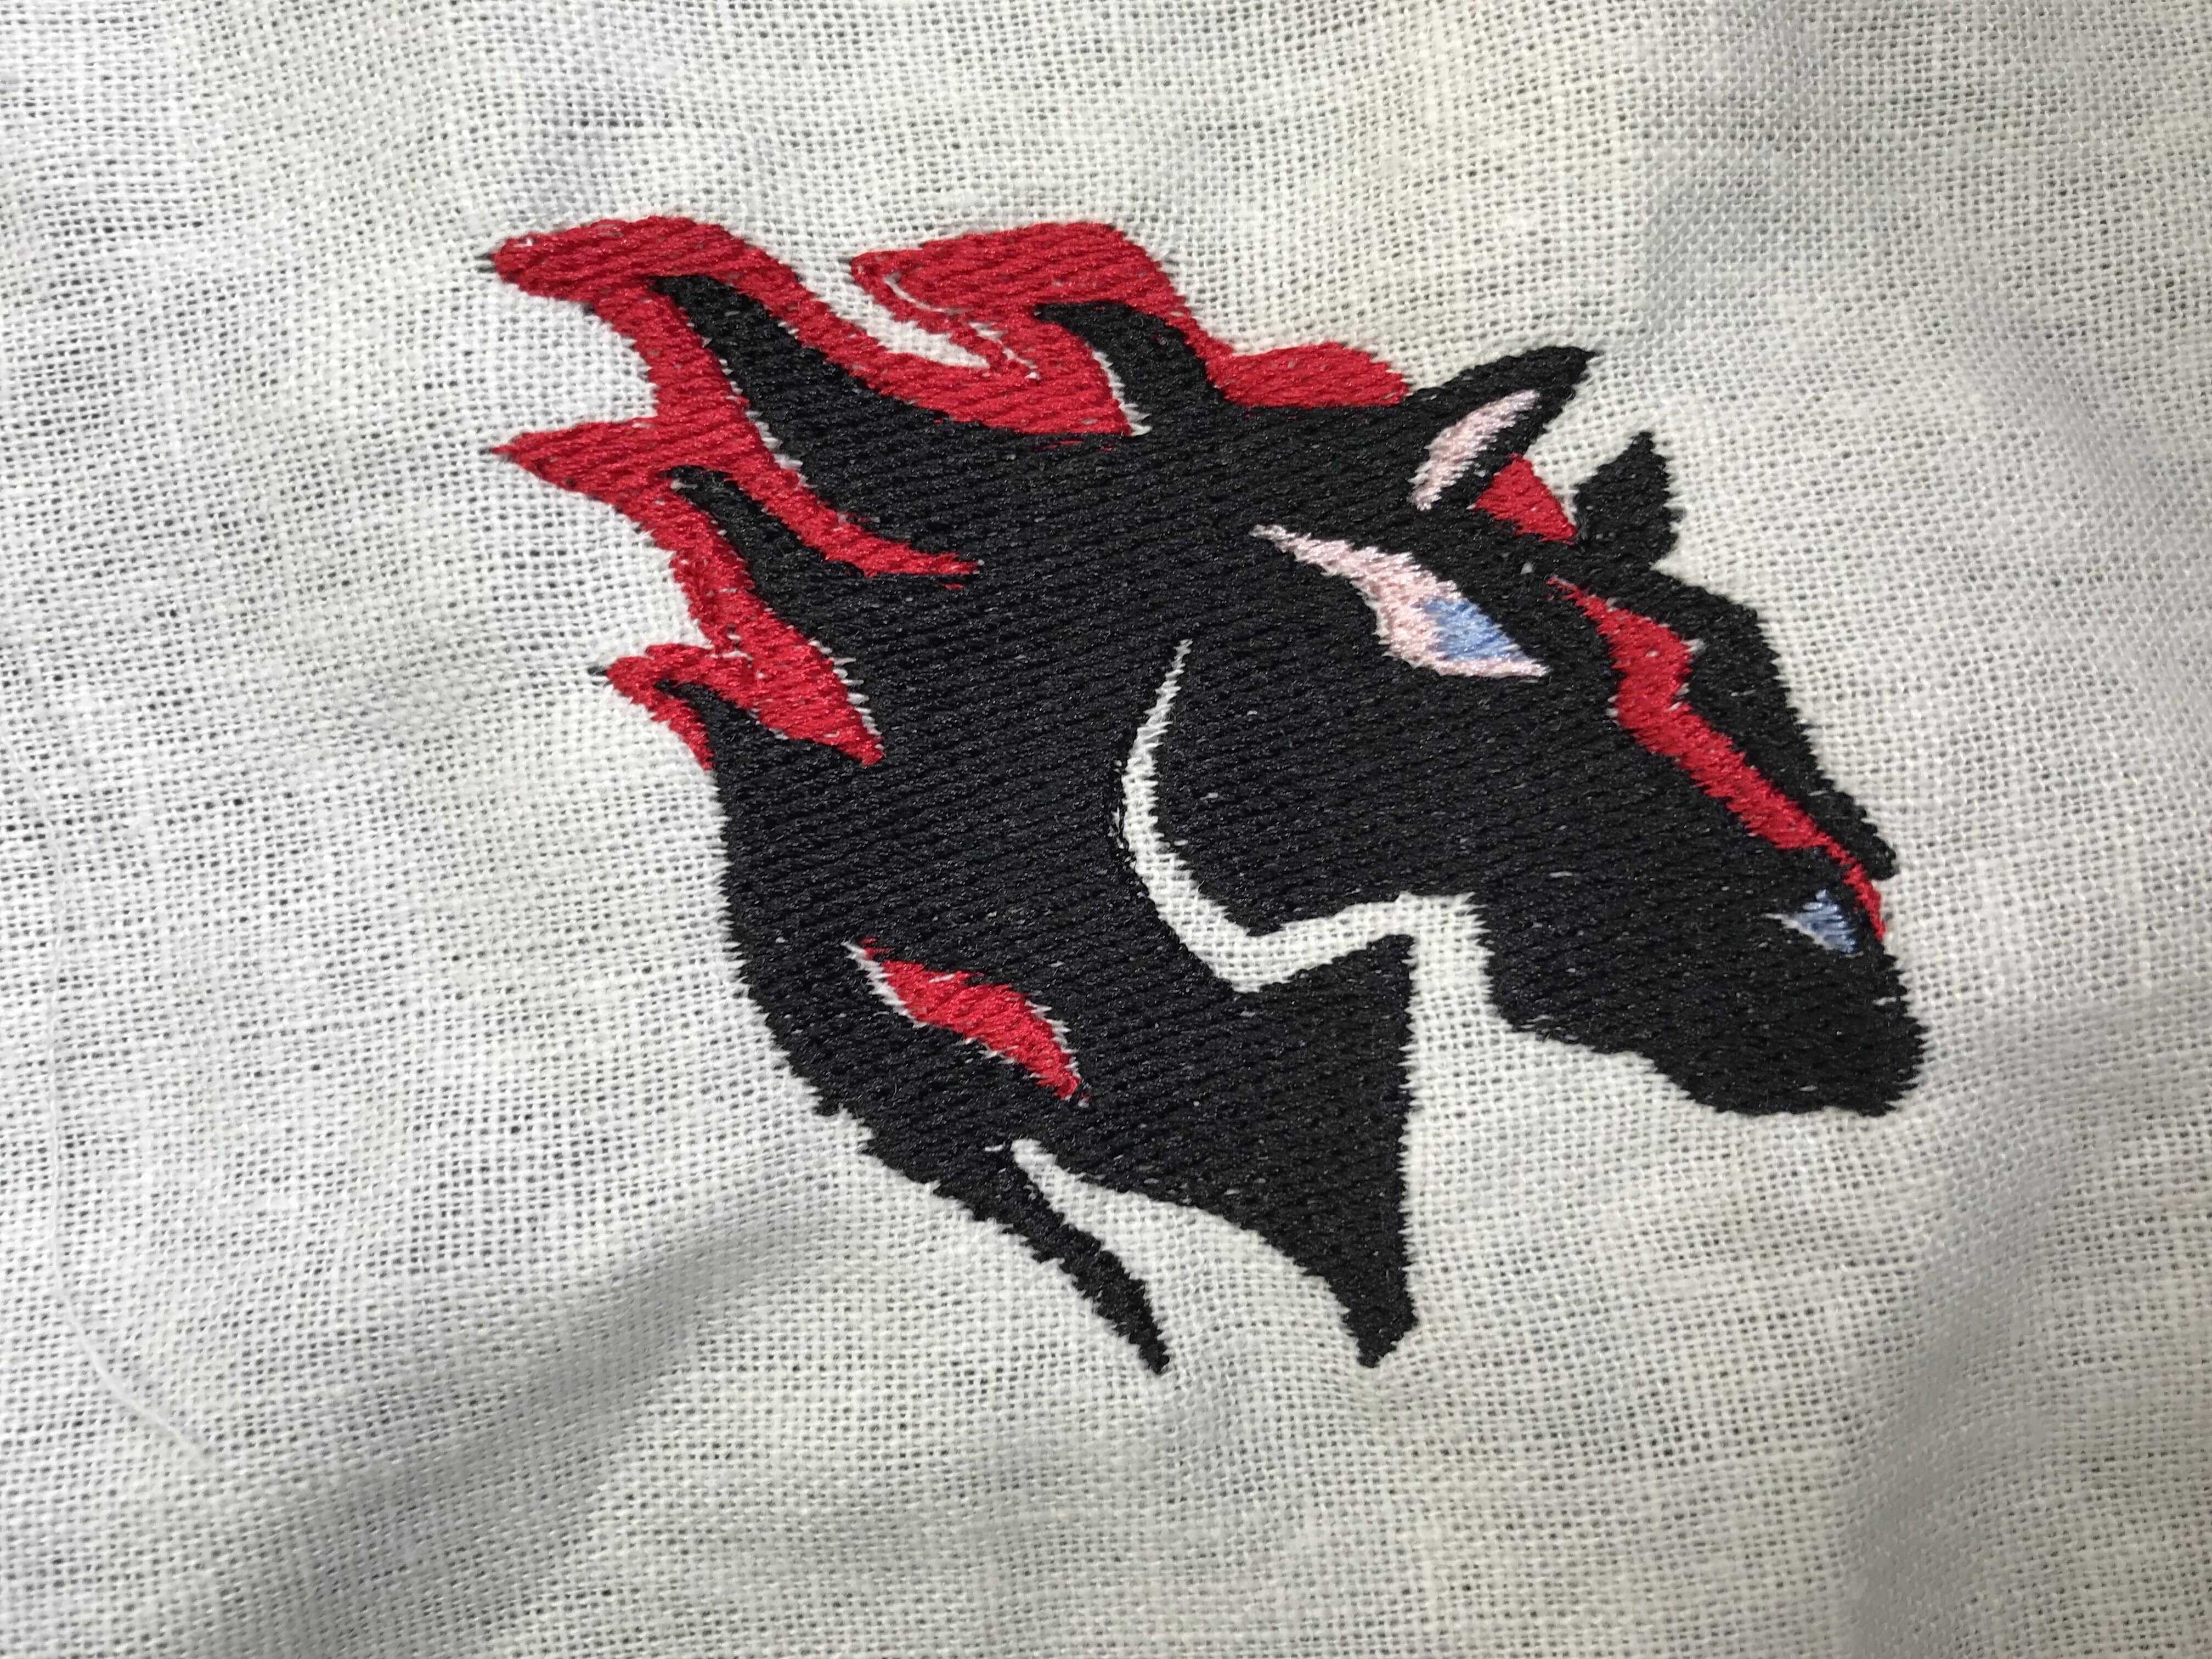
Here is the final product:
Here are the files for this week: download