18. Wildcard week
This week we were required to design and produce something with a digital fabrication process (incorporating computer-aided design and manufacturing) not covered in another assignment, documenting the requirements that the assignment meets, and including everything necessary to reproduce it.
Inspiration
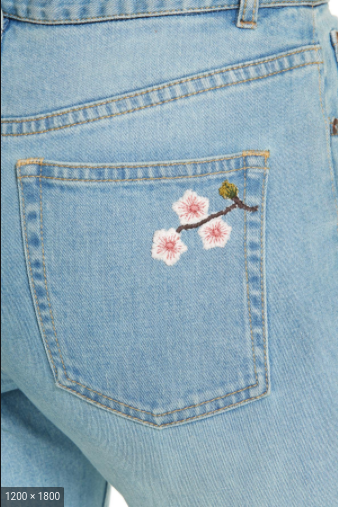
I really like to sew - on a machine and cross-stitching, and am currently learning how to knit. Last year,our lab got a new embroidery machine which I got the chance to use occasionally. However, I only ever made two designs on my own and not from the templates provided. I had an idea to make a cherry blossom design on a pair of jeans but never came around to it.
For this week, I thought it would be the perfect opportunity to complete this idea. I don’t know if the jean material will be too thick, so I will most likely put the print on a tshirt.
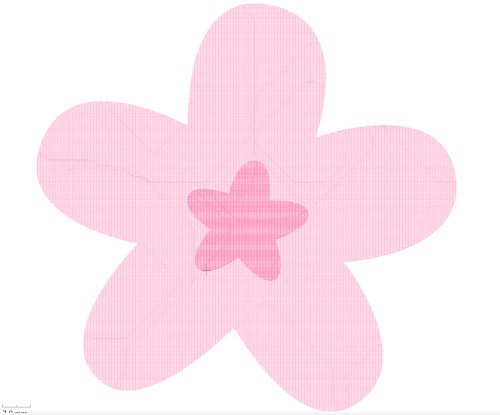
My inspiration:

~
Designing
Ink Stitch provides a series of tutorials on how to use the software to create your own design.
I applied techniques from this video about inkstitch and this video about a simple way to make flowers in inkscape.
Originally, I wanted the flowers to have a stem going through the middle, but I actually liked the idea of having one singular semi-large cherry blossom on a back jean pocket or in the corner of a tshirt more.
Inkscape
Taking inspiration from this picture:

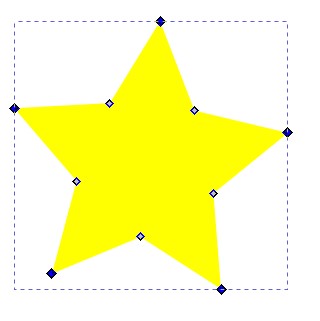
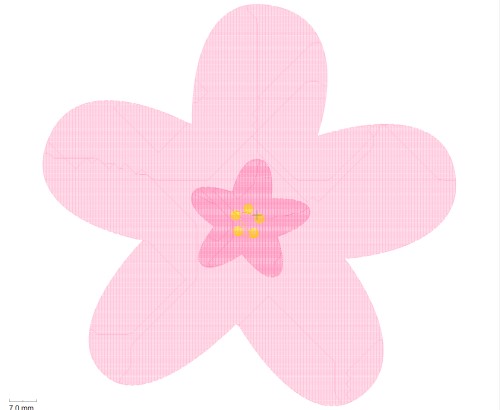
I went into Inkscape and created a 5 point star because there are 5 petals on the flower.

From there, I selected the path tool  and, while holding down shift, selected all of the five corners of the star.
After that, I clicked the ‘make nodes symmetric’ tool  and they turned into “petals”!
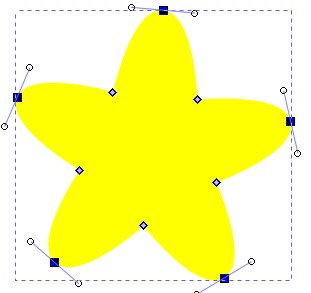
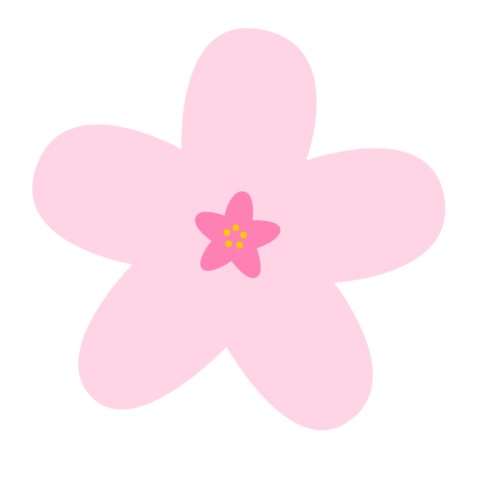
I repeated the same process again with a smaller star in the middle to create the inside of the flower. After that, I added yellow dots in the middle to represent the inner yellow pieces inside the cherry blossom.
InkStitch
Opening up the params menu Extensions > Ink/Stitch > Params I noticed an immediate problem - my yellow dots were not showing up.
I tried this twice until I realized that I never made the dots a path. After changing them from an object to a path, they appeared. I didn’t change any of the settings because I liked how the stitches appeared in the preview.
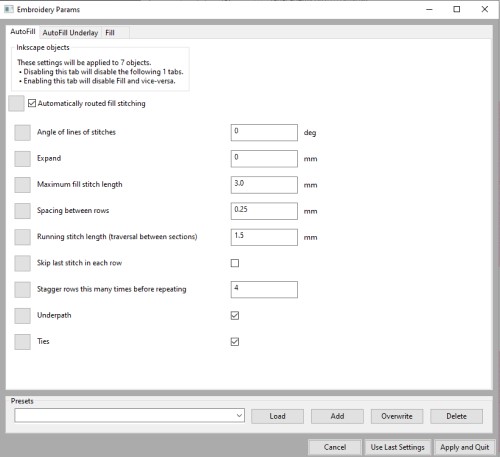
To save it to embroider, I went Extensions > Ink/Stitch > Embroider and saved it as a .dst file. When I get to the lab, I am going to save it on a USB, so that I can embroider it.
Embroidery Machine
My classmate and I made a workflow for the embroidery machine last year, so I followed that to refresh my memory on how to use it.
With the help of my Fab classmate and friend, Elaine, we figured out how to change the colors and their orders on the machine. Previously, I had only ever worked with the colors provided or simply embroidered the examples with the default colors. This time, however, I was able to customize which colors I wanted and their orders.
How to change colors
-
Load your design (USB icon)
-
Thread in the colors that you want manually on the machine
-
Click the icon with the array of colors on the main page and assign your desired colors to each section of your design
-
Click the icon at the bottom of the screen that looks like a piece of paper with a list on it
-
Go to the third page and set the colors to the number that you want (make sure they are in the order that you want) - Click reset, select the color, and then set to anchor a new color
-
Go back to the main page and click “Edit End”
-
Then, click sewing and check color order there.
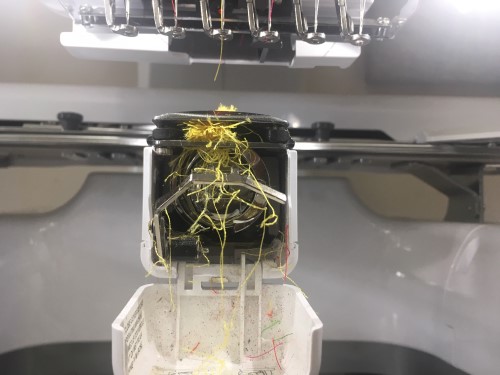
I followed these steps, clicked “Lock” and then the sew button. It went smoothily until the very end.
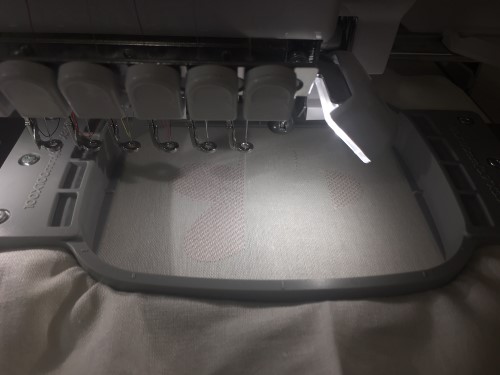
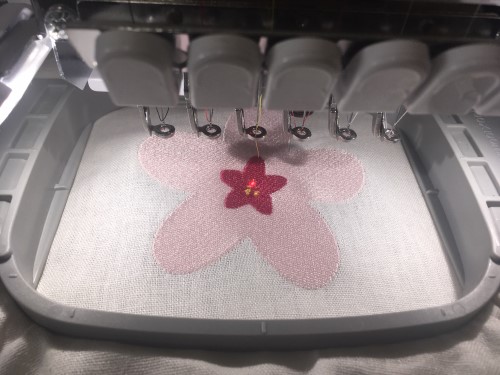
The bobbin jammed and caused a knot at the bottom of my embroidery. I ended up just cutting it and removed the excess thread in the bobbin compartment.
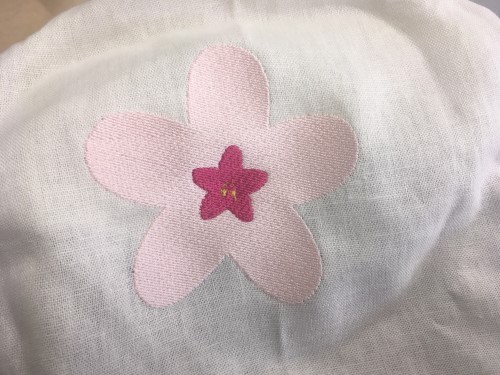
Here is the finished product!
Group Assignment
Here is our group assignment for this week!
My files:
Takeaways
I loved this week. In the lab, the embroidery machine is my favorite because I love sewing and working with textiles in general. I have been working with this machine in particular since last year, so manuvering my way through it did not pose as an issue. I gained experience in changing thread colors and creating my own designs.