Week10 - Moulding and Casting
1-Design
My first design was basically a logo of our game dev team, that we are hoping to go official with soon! I had to actually trace the logo from a picture, using spline tool and line, and then i extruded. 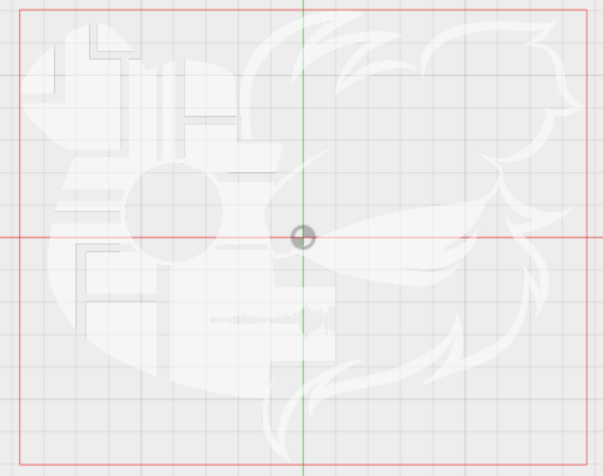
So i extruded and after resizing it, and calculating everything, i had to make the wall of the mould. So that's what i got! 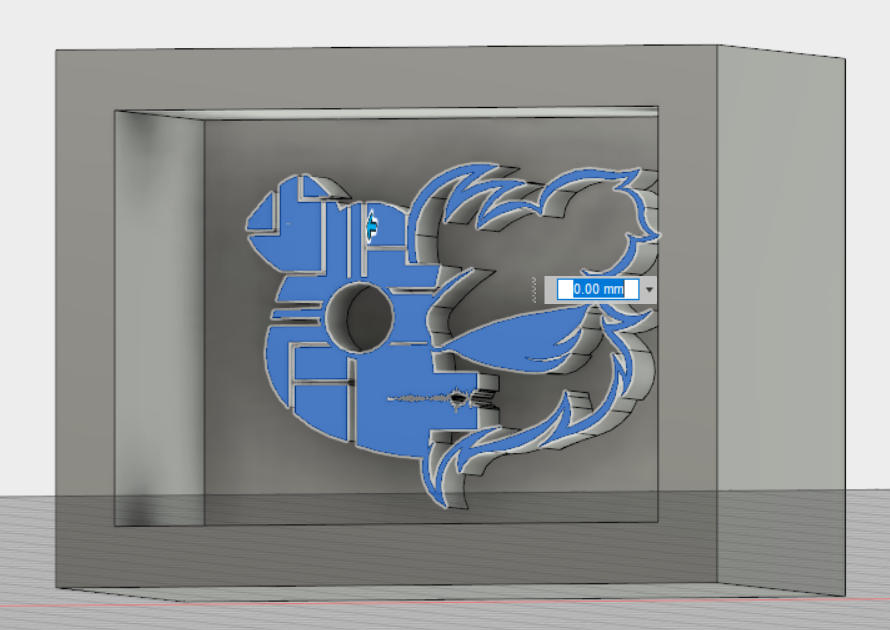
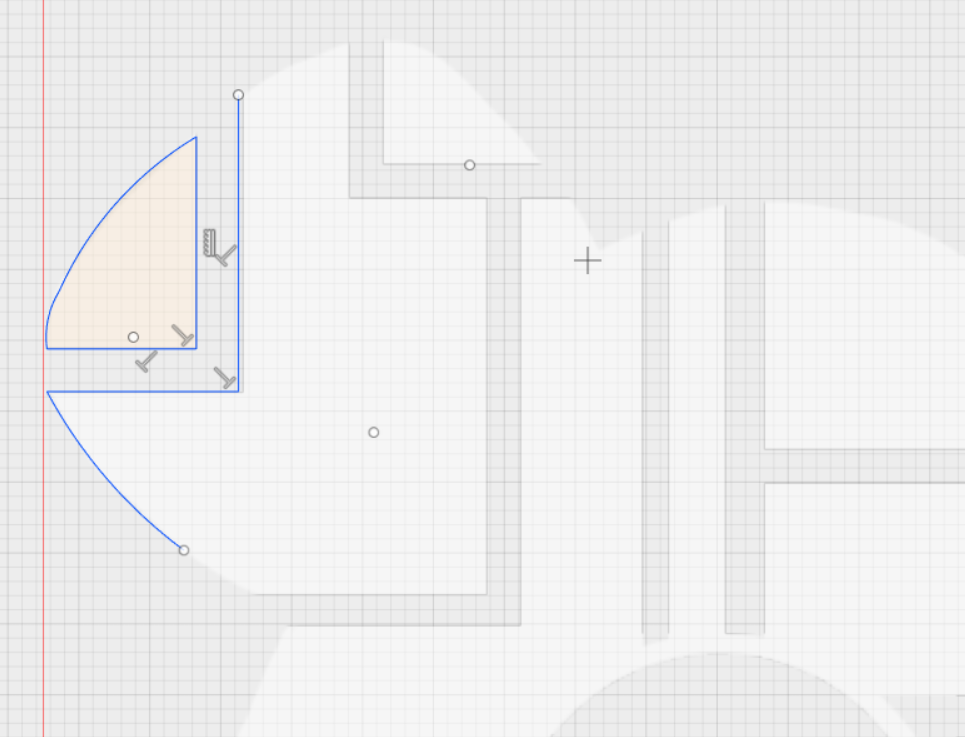
However, that didn't turn out well, at the SRP, when i chose all the correct settings and previewed, it was just too thin at the edges, even though i tried and previewed the 1/64th mill bit. So i had to change the design, the new design was basically me playing with the spline tool, and i ended up with fire. 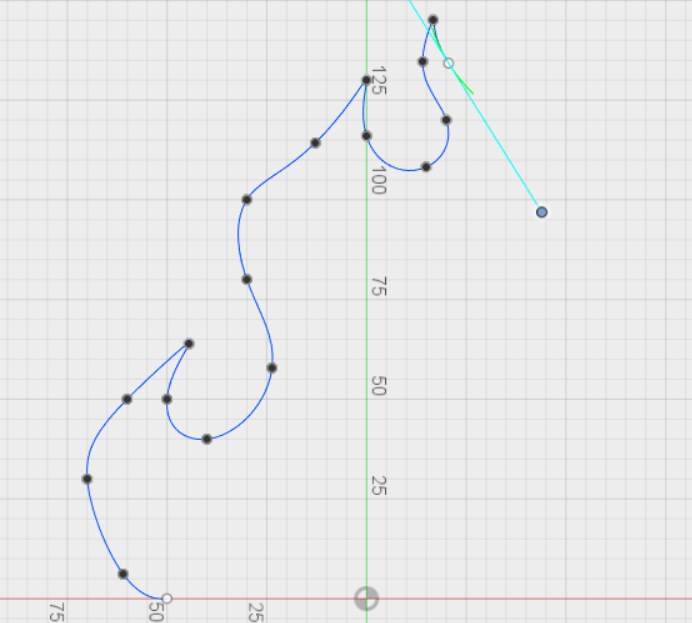
The edges were too thin here too, so i modified this. 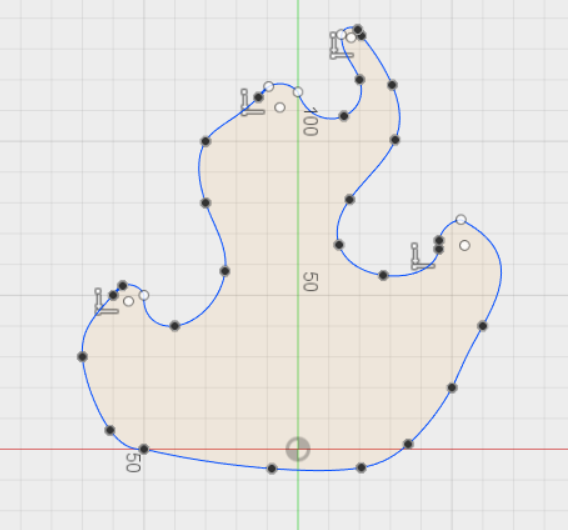
I thought i wanted something extra, and i extruded and put it in a box. 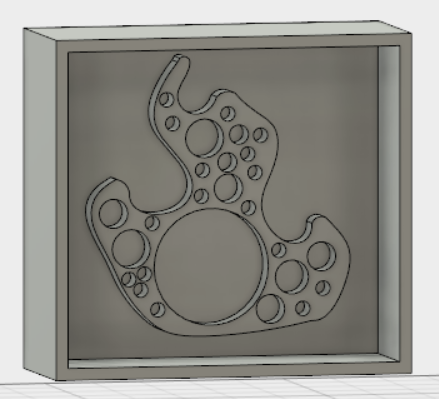
although i completed this design, it was too flat, so i made a new one, but here is how it looks like at the end, and the process is the same as below. 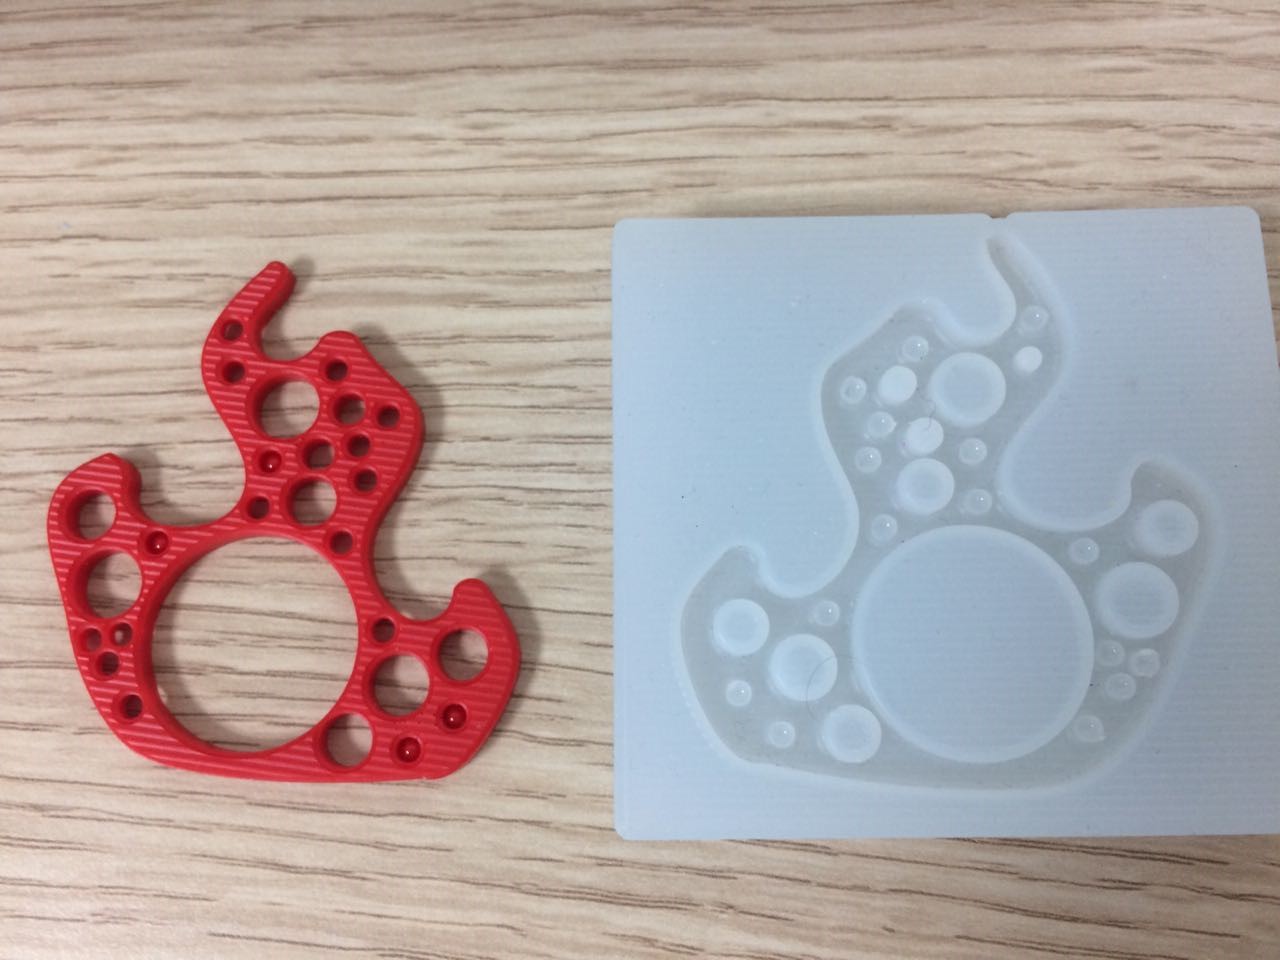
Download fusion f3d file here. -New DesignI had to make a new design because the older one looks too flat, so i needed to show some more skills with something more advanced than this. I did the design on Fusion360, I created these shapes below using the line tool, polygon tool. 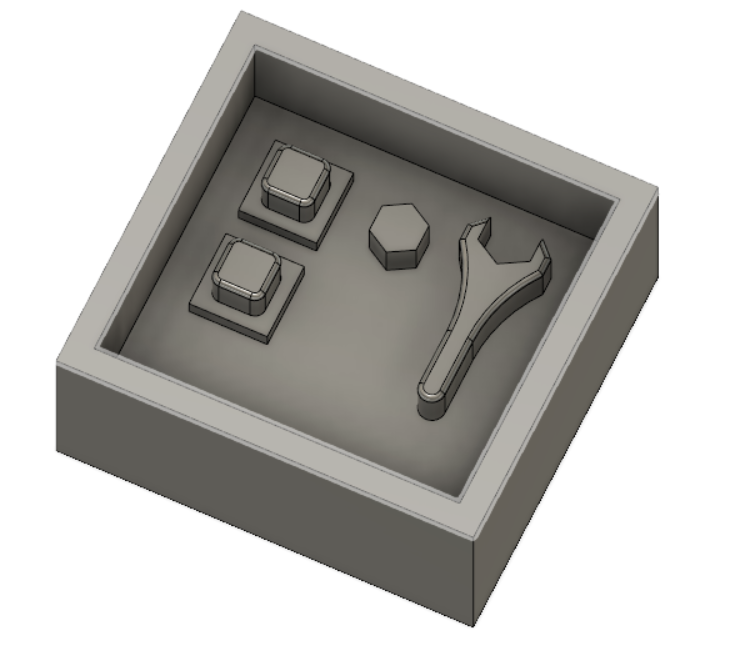
I designed buttons so i can use it later on my finalproject, i really wanted buttons for turning it on and off, The design was simple, create 2 rectangles with the right sizes. 
then later I used fillet to make the edges go away on top, i wanted it to be roundish. 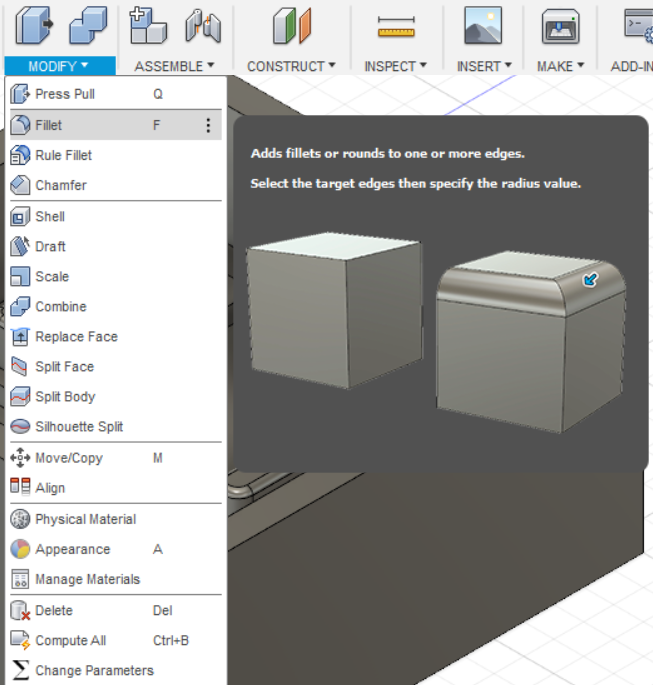
The other designs were easy, just a polygon and then extrude it, the spanner actually took me time to design, i wanted it to be practical with the nut, so i made sure it wasn't gonna be tight on the nut, looser is better, i made it 1mm wider than the nut. SRP SoftwareAfter exporting the fusion design to STL, i opened it with SRP software. SRP has only 5 steps to finish the designing, I really liked how they organized things. 
Above is the first step, in this step you just confirm the size of your model and orientation, mine was correct with this settings and i didnt want to scale it down. 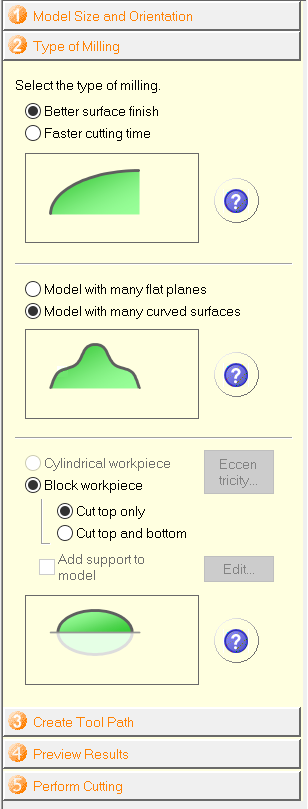
In the type of milling, there are options to reduce the time of your cuts, like "Faster cutting time" however i used a better surface finish because i wanted it to look and feel nice, my design actually didnt need that, i just chose it anyway, i didnt care about the time. It is the same withthe 2nd option, but i chose "Model with many curved surfaces" although i have it mostly flat. So the first 2 options really control how fast your cut is gonna be and the quality of the final cut. The third option is really important, i was using a block of wax so i chose a "Blockworkpiece" and my milling machine SRM-20, doesnt cut from bottom so "Cut top only". 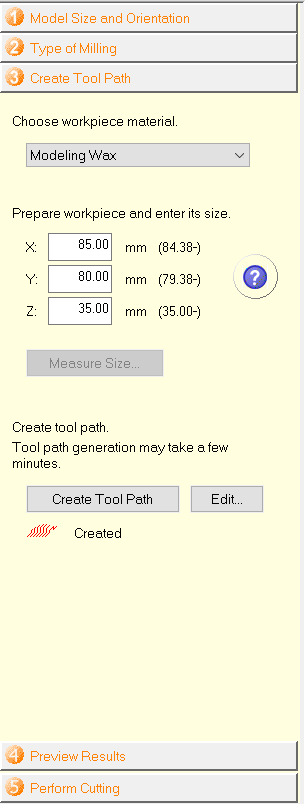
This is the most important step, you need to choose material for the first option, modeling Wax for me. The second step you actually have to do something here, you need to set increased values for x and y axis, meaning you cant use less than what is given in the brackets, or even equal for that matter, only the z axis gets to have the same setting. This new larger size you enter will not affect your cutting in anyway, it is just like a precaution for you while cutting, do you have that much extra space just incase? that was okay for me because i already had precautions from the fusion design, i already created the design and made sure it is smaller than the work piece itself, i did that by designing the wall of the piece slightly smaller than the Wax block i had, which i measured with a caliber. 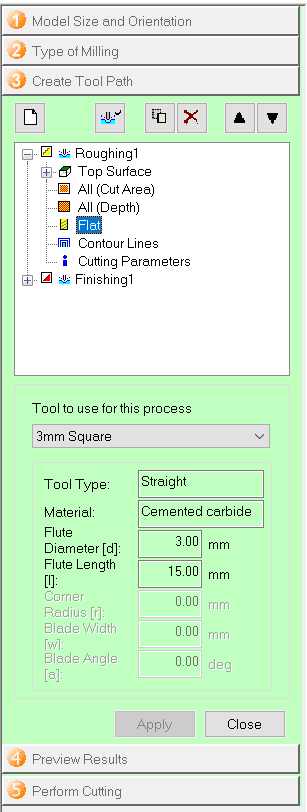
If you click edit in the creating tool paths section, you will get this green window, now this is the most important window because you have to set up your bit type and size here. There are 2 steps here, roughing and finishing, for roughing, you only need to change the bit to the bit you are going to use, if you click on the selected icon and choose the tool used for the process from the list, mine was "3mm Square" milling bit, hit apply and go to the finishing. 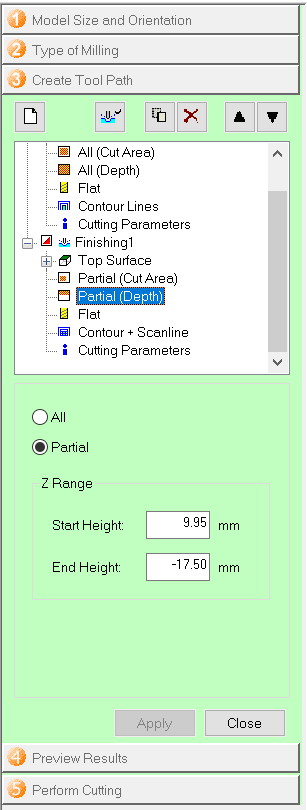
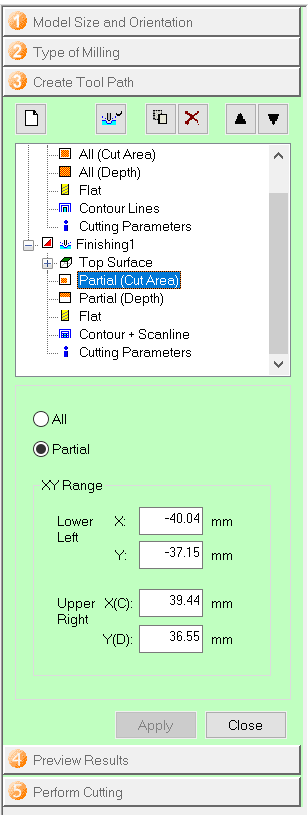
The cut area and cut depth dont really affect your cut if not touched, however it will help to reduce time if you set them partially. Keep in mind that finishing is after the roughing, so by this time, you dont need to cut the depth all over again, i eye balled it (check below pic) and thought this much was all empty for my wax model, this reduced the time of the cut by 30 minuts on its own. This was for the Depth, the Cut area is the same but with the sides, if you had empty spaces on one side, it is better to partially cut it too for faster cut. 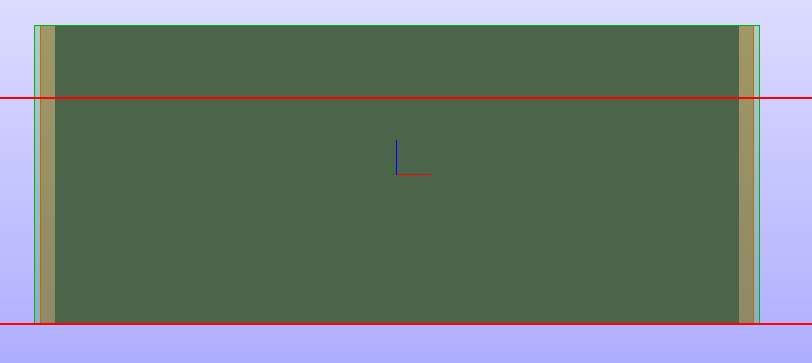
After every step there is an apply button, you have to click that for the setting to save, later you have to close and click "Create Tool Path" button, only then you can go to the next step. 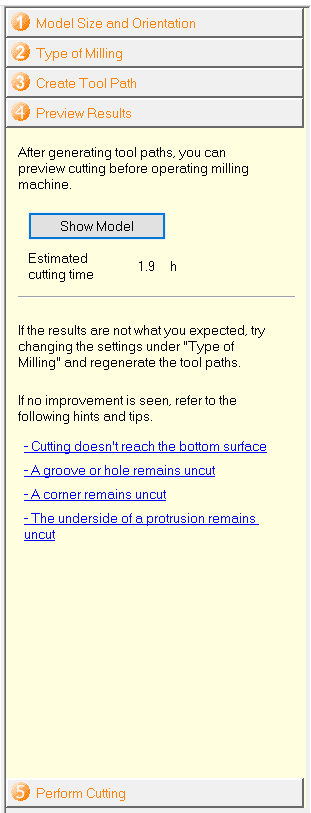
Here you get the estimated cutting time, 1.9 hours is what i got, I prefer clicking the Show Model button, it really lets you know when you have something wrong, it is indeed a good preview. 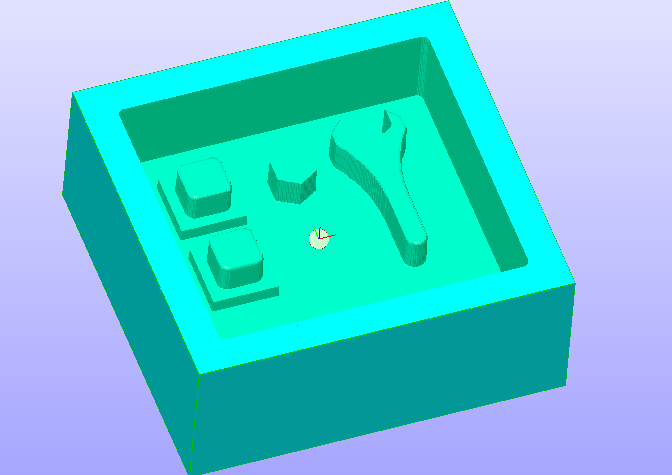
My preview looked great. 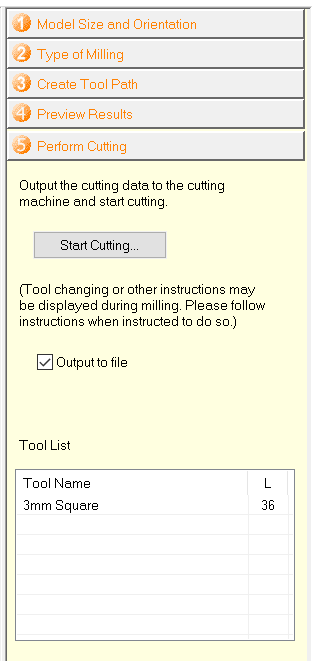
The last step is how you prefer cutting it, from the SRP software itself, or do you want to export the cut files? I chose output to files just because i am familiar with VPanel already. more about VPanel in Week05. SRM-20First Stick the WaxBlock with a doubletape and change the bit to 3mm. 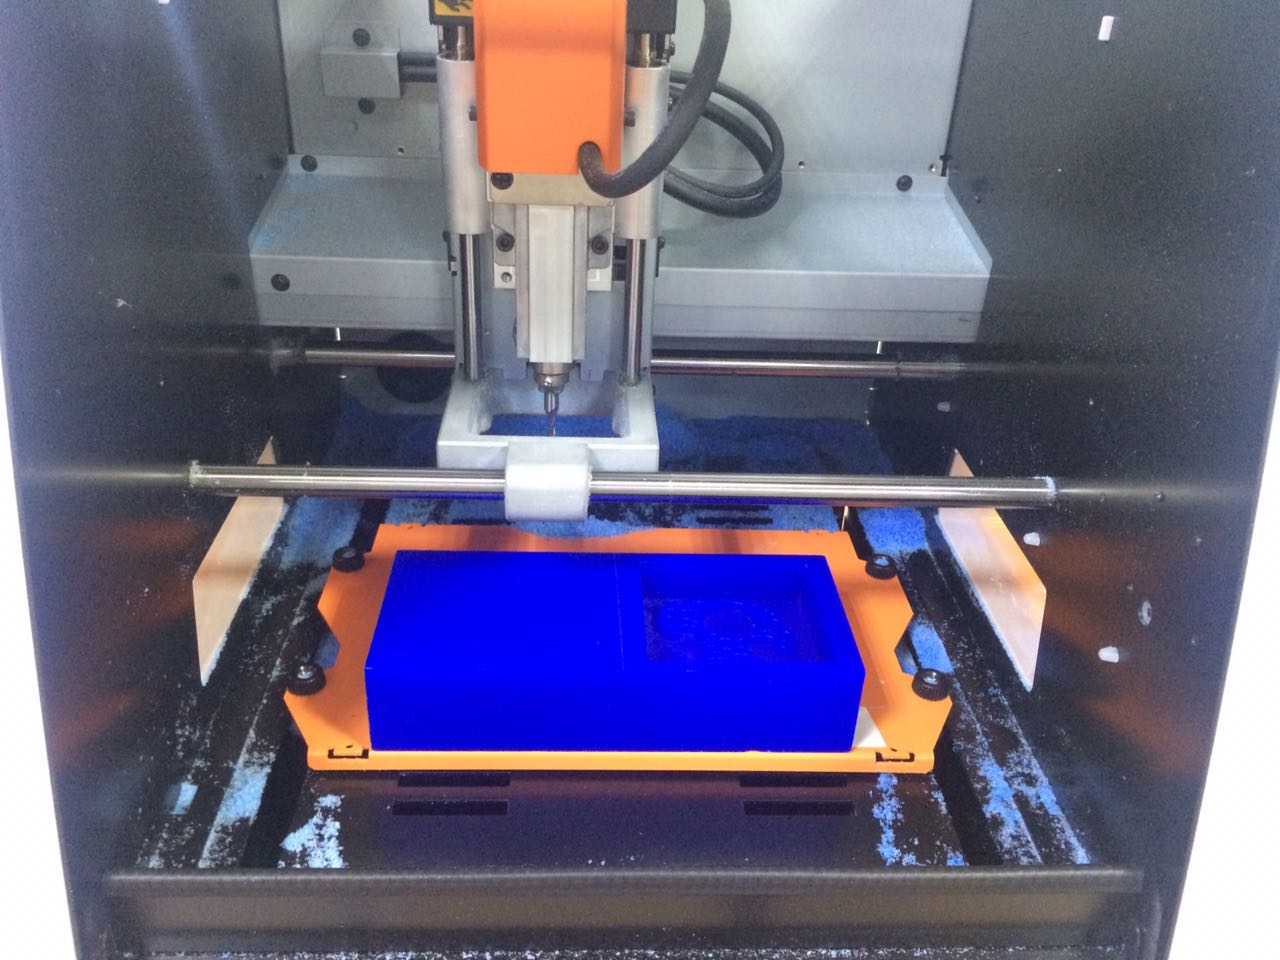
The Exported files from the SRP Software were .prn files, they are compatable with the Vpanel software, You just need to set the XY axis in the middle of the wax area instead on the bottom left like doing the traces. 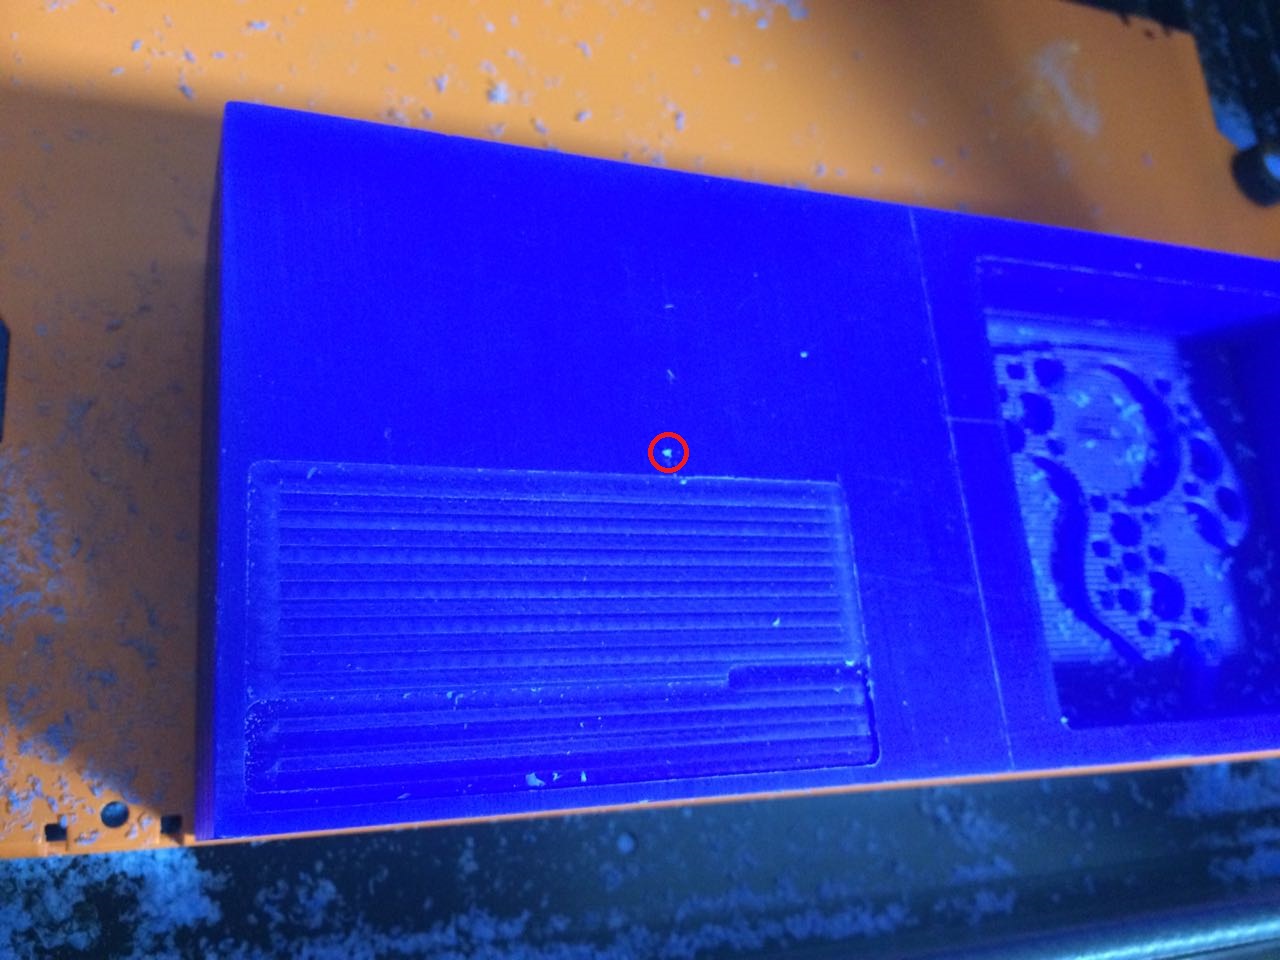
Above I actually origined the xy axis on bottom left corner, once i noticed that i stopped the cut and started over with the orgin in the pointed middle point. 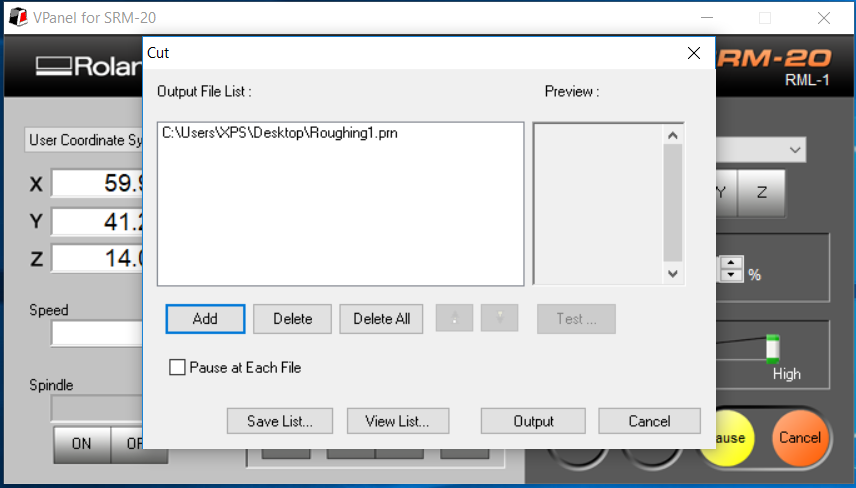
So yeah, you just origin all axises and the output the cut file like above. The outcome of the roughing is always like this, sorry for the bad picture but if you look closely, there are rough lines on the surface of all shapes, teeth like marks. 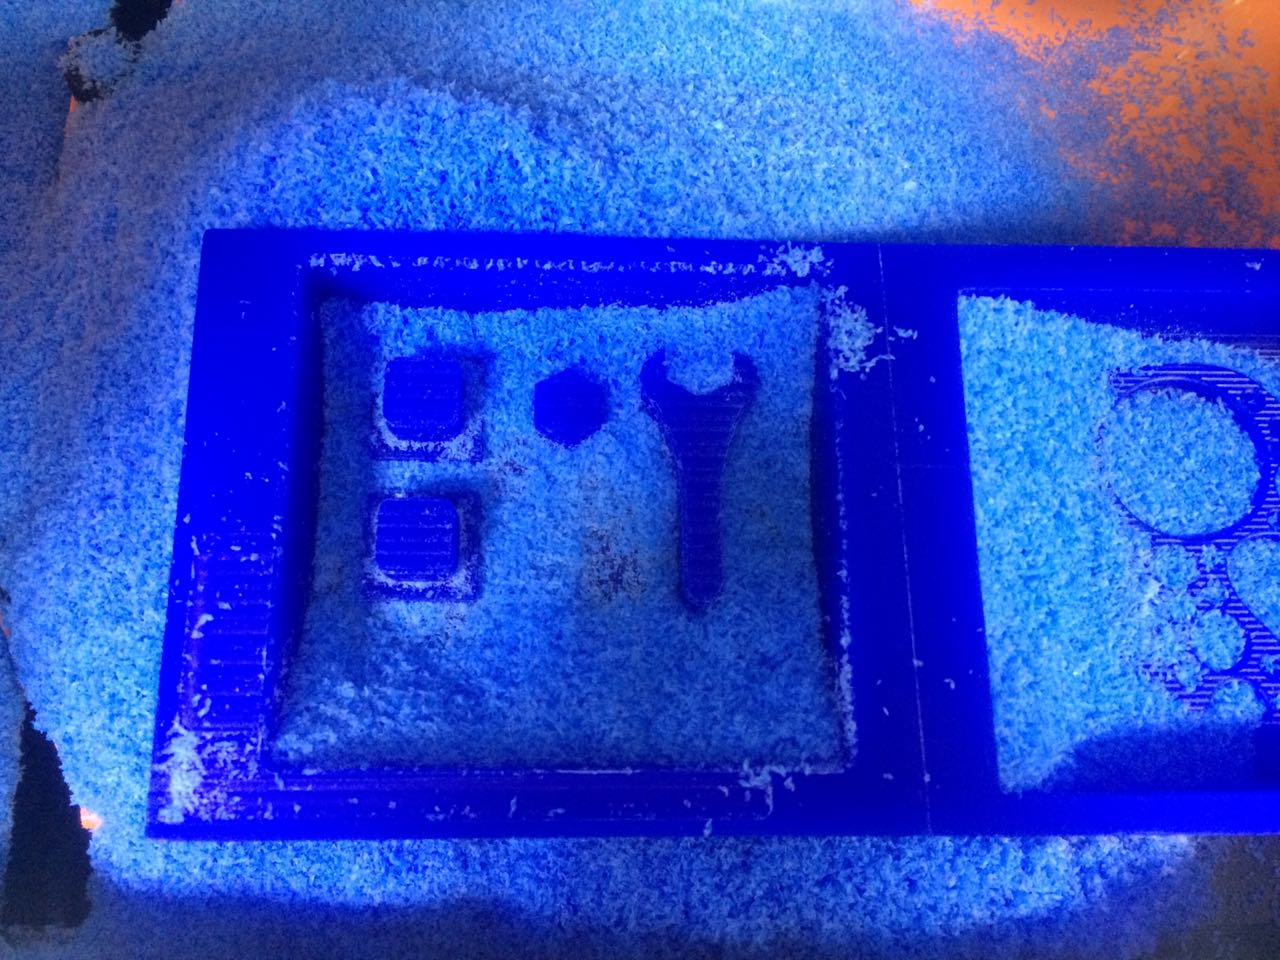
After that output the finishing and clean it up once its done, you will end up with something like this. 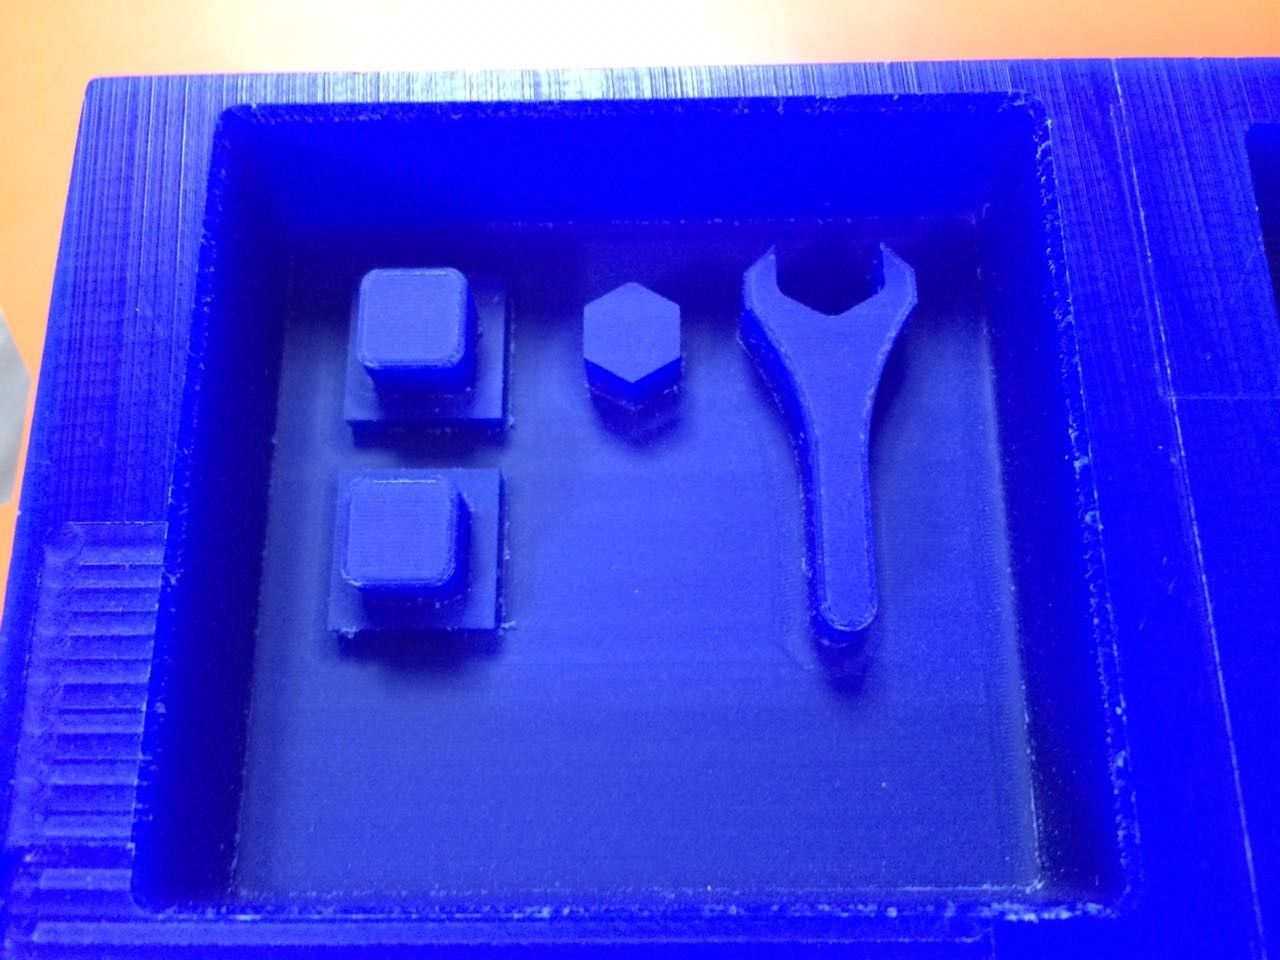
CastingI used Dragon Skin 20, Silicon mold at first. There are 2 parts inside, A and B. 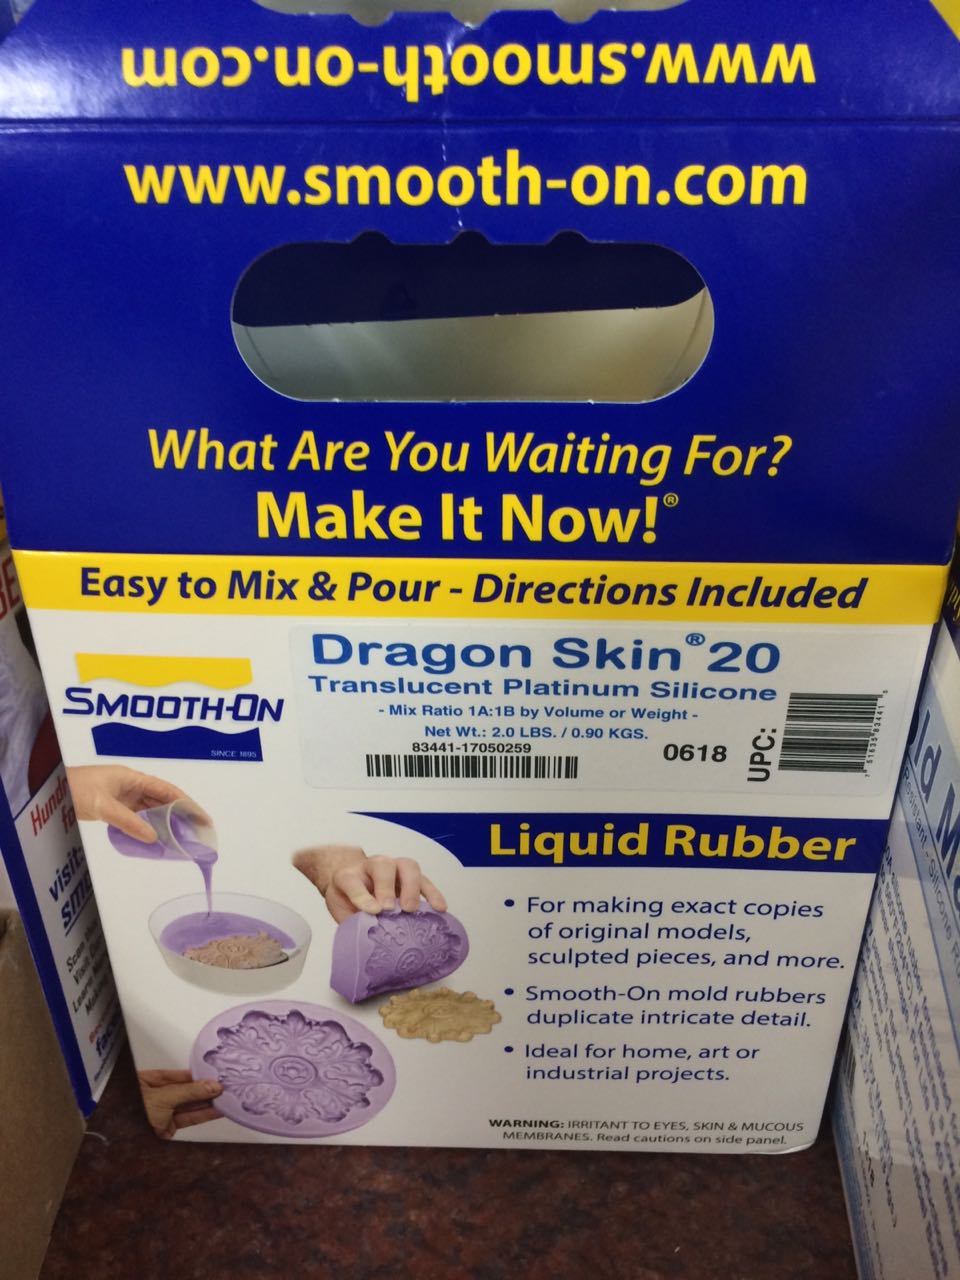
In the instruction manual below I highlighted important things. 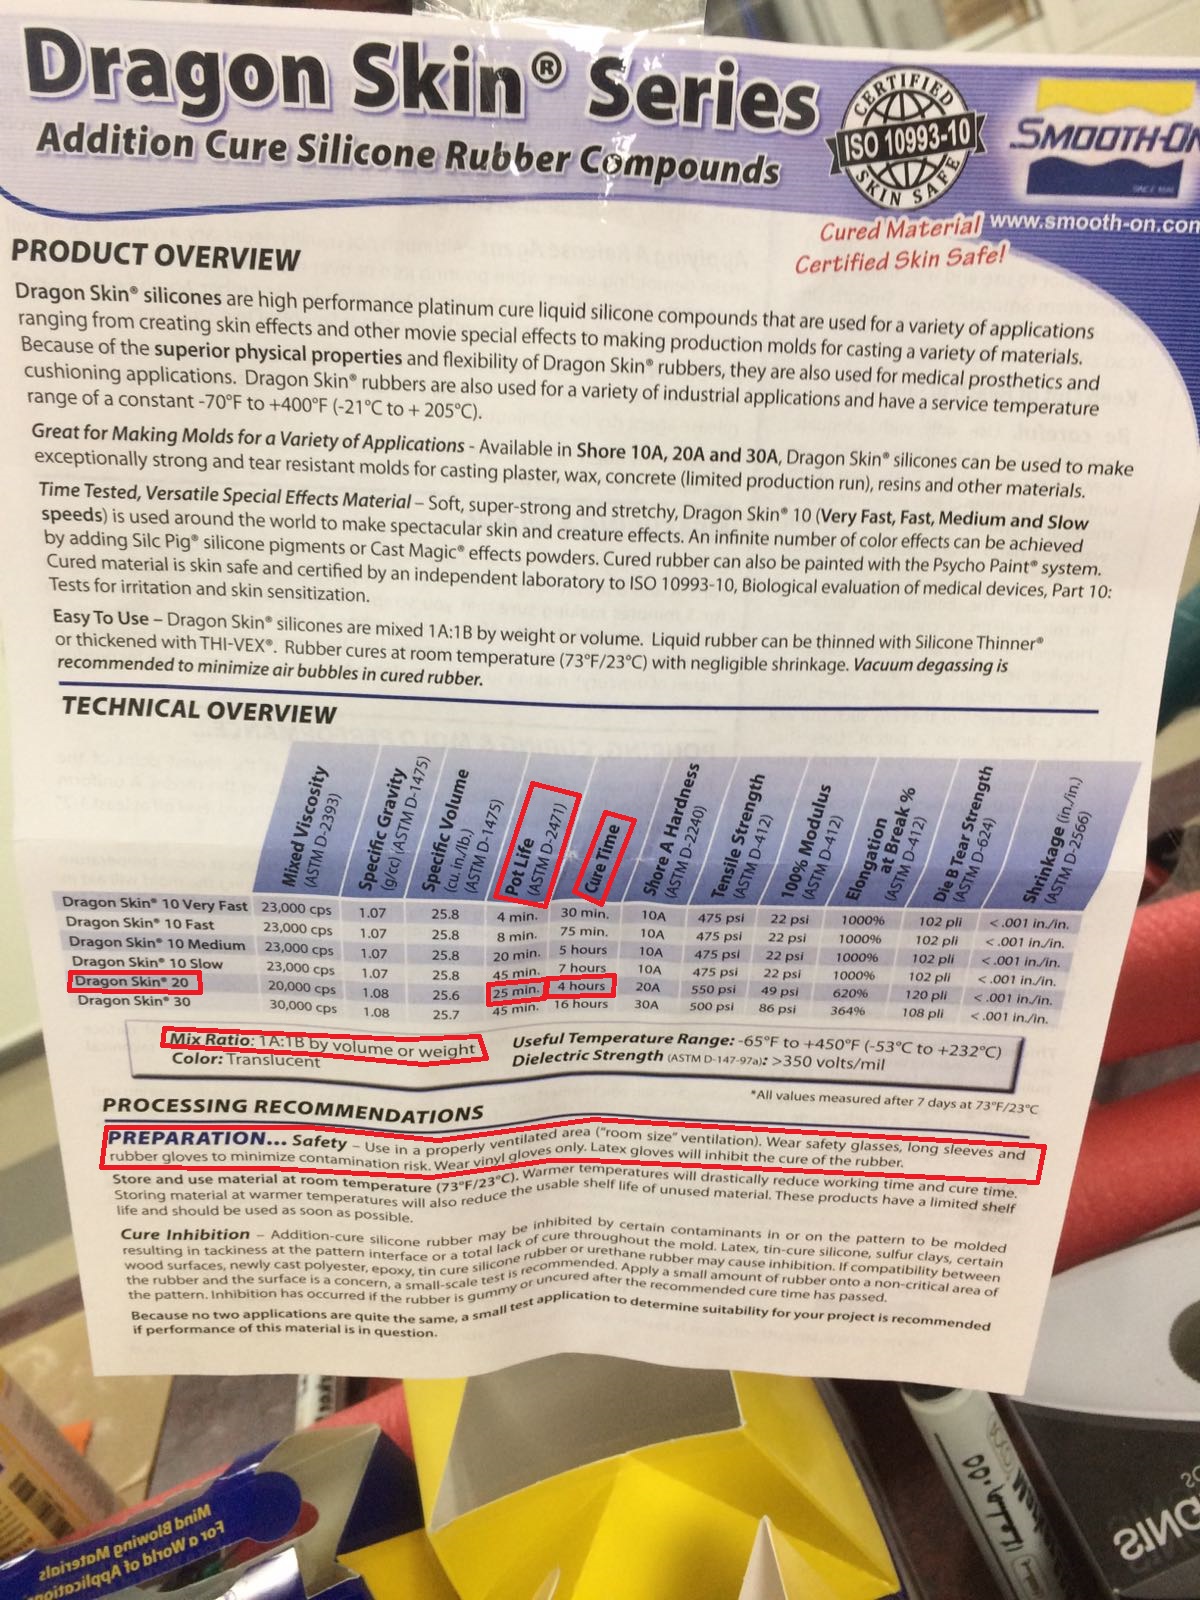
Zoom to see better, but basically mix ration is 1:1 by weight, pot life is 25minutes, this is how much time you have from mixing them together to pouring, you have to do it within this time or it will be too late as the thickness will be too great. cure time is 4hours, safety gear, note vinyl gloves and not latex! 
I poured the mixture by weight, Part A 45 Grams, Part B 45 Grams, mixed them together, and poured them into a thin line to reduce bubbles. 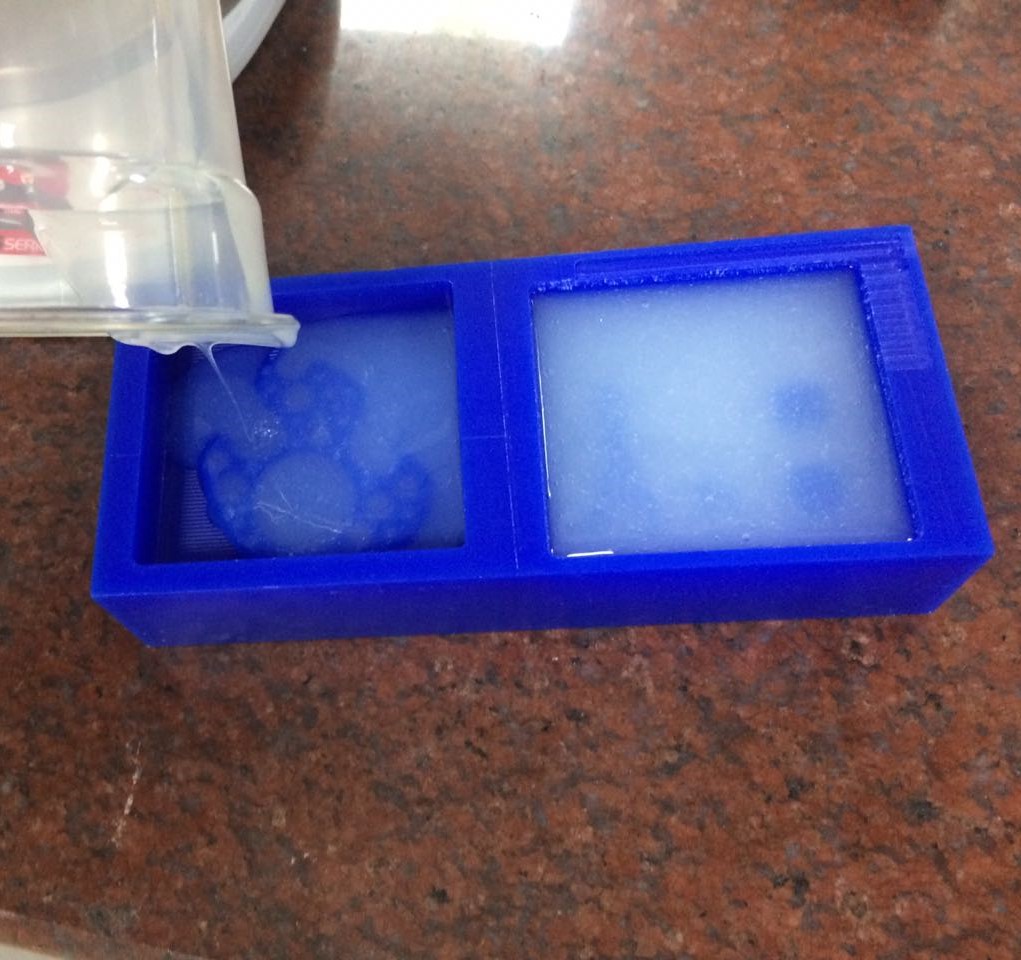
90 grams is too much, so i poured the rest into the old mold and this is how a thin pour looks like. 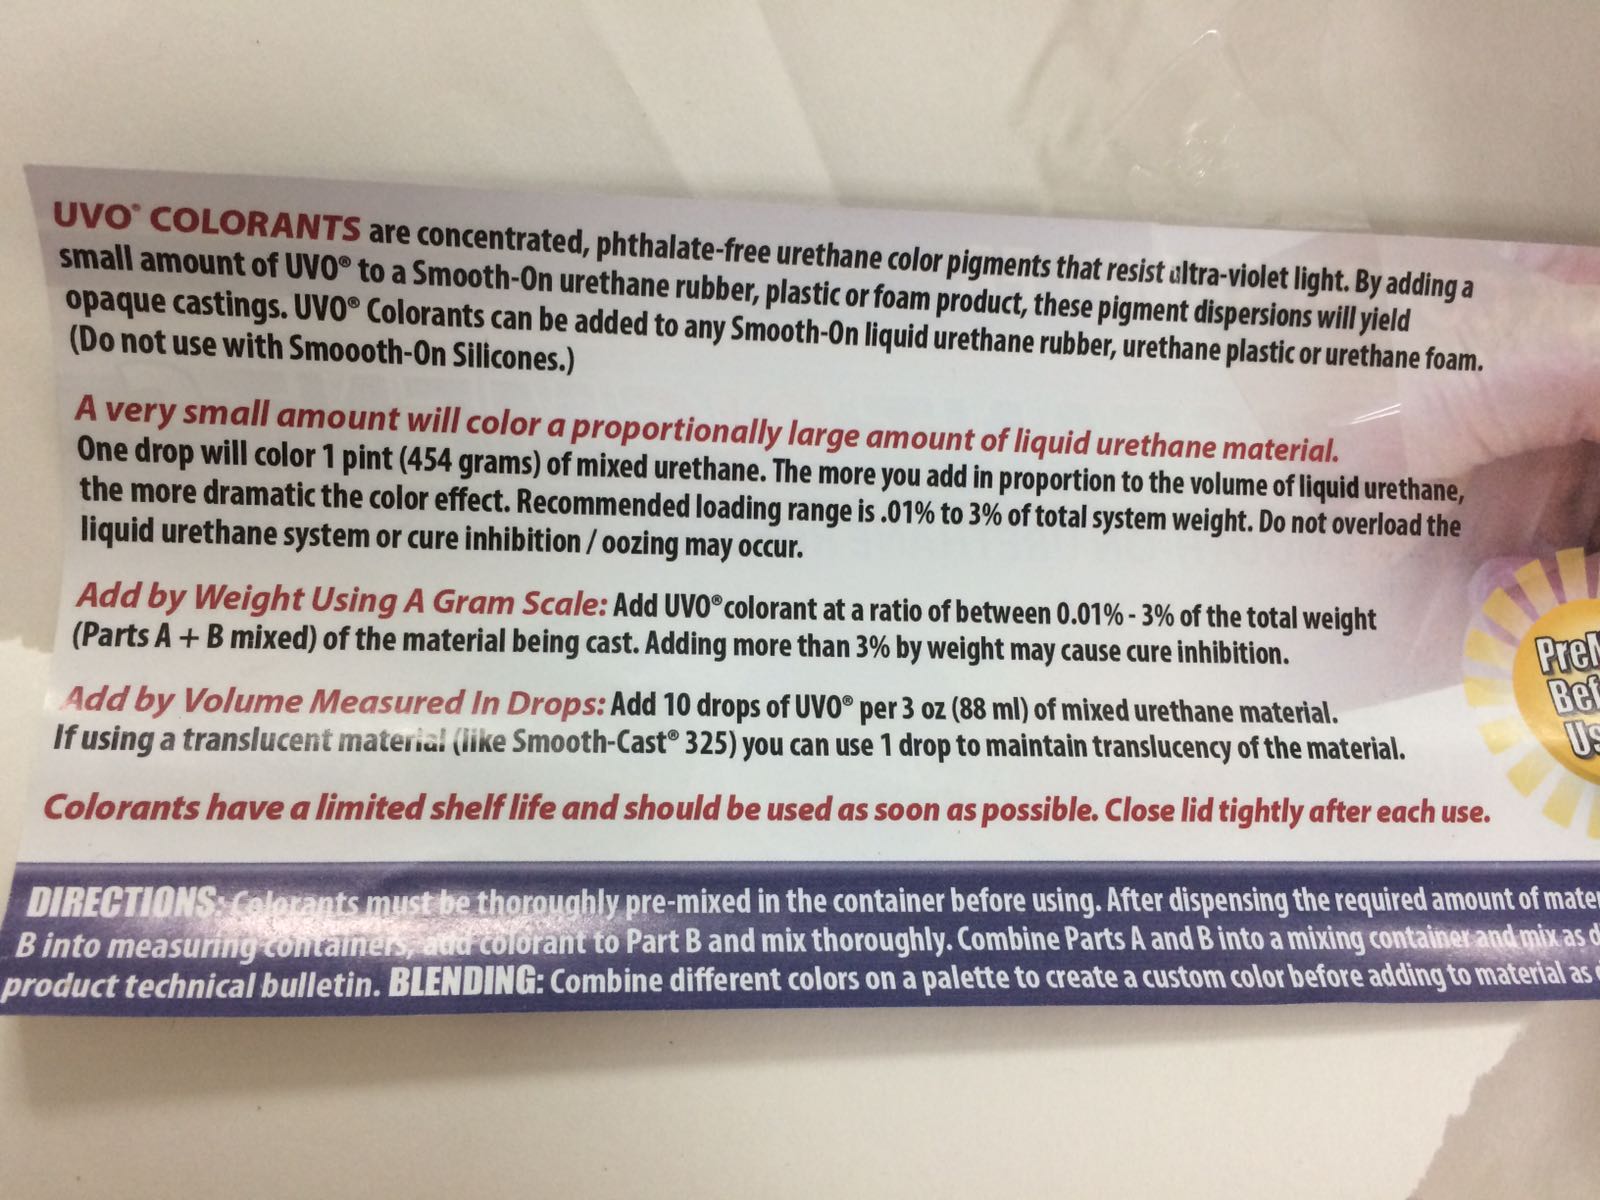
Above is the instructions for the colorant of the cast, it says the ratio should be between 0.01% to 3% of the total weight. The cast is Smooth cast liquid plastic 327. 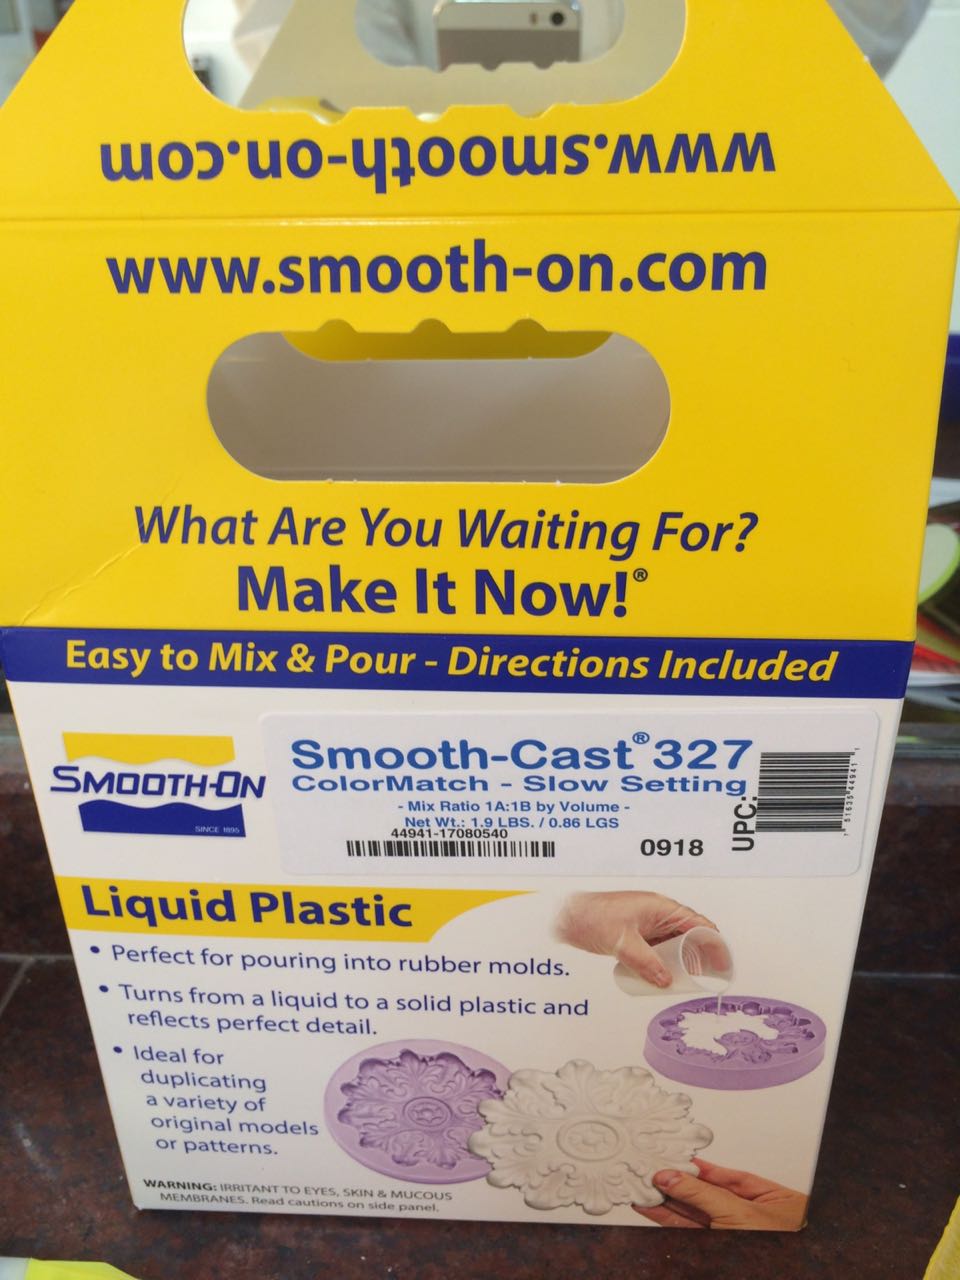
DataSheet of the cast below. 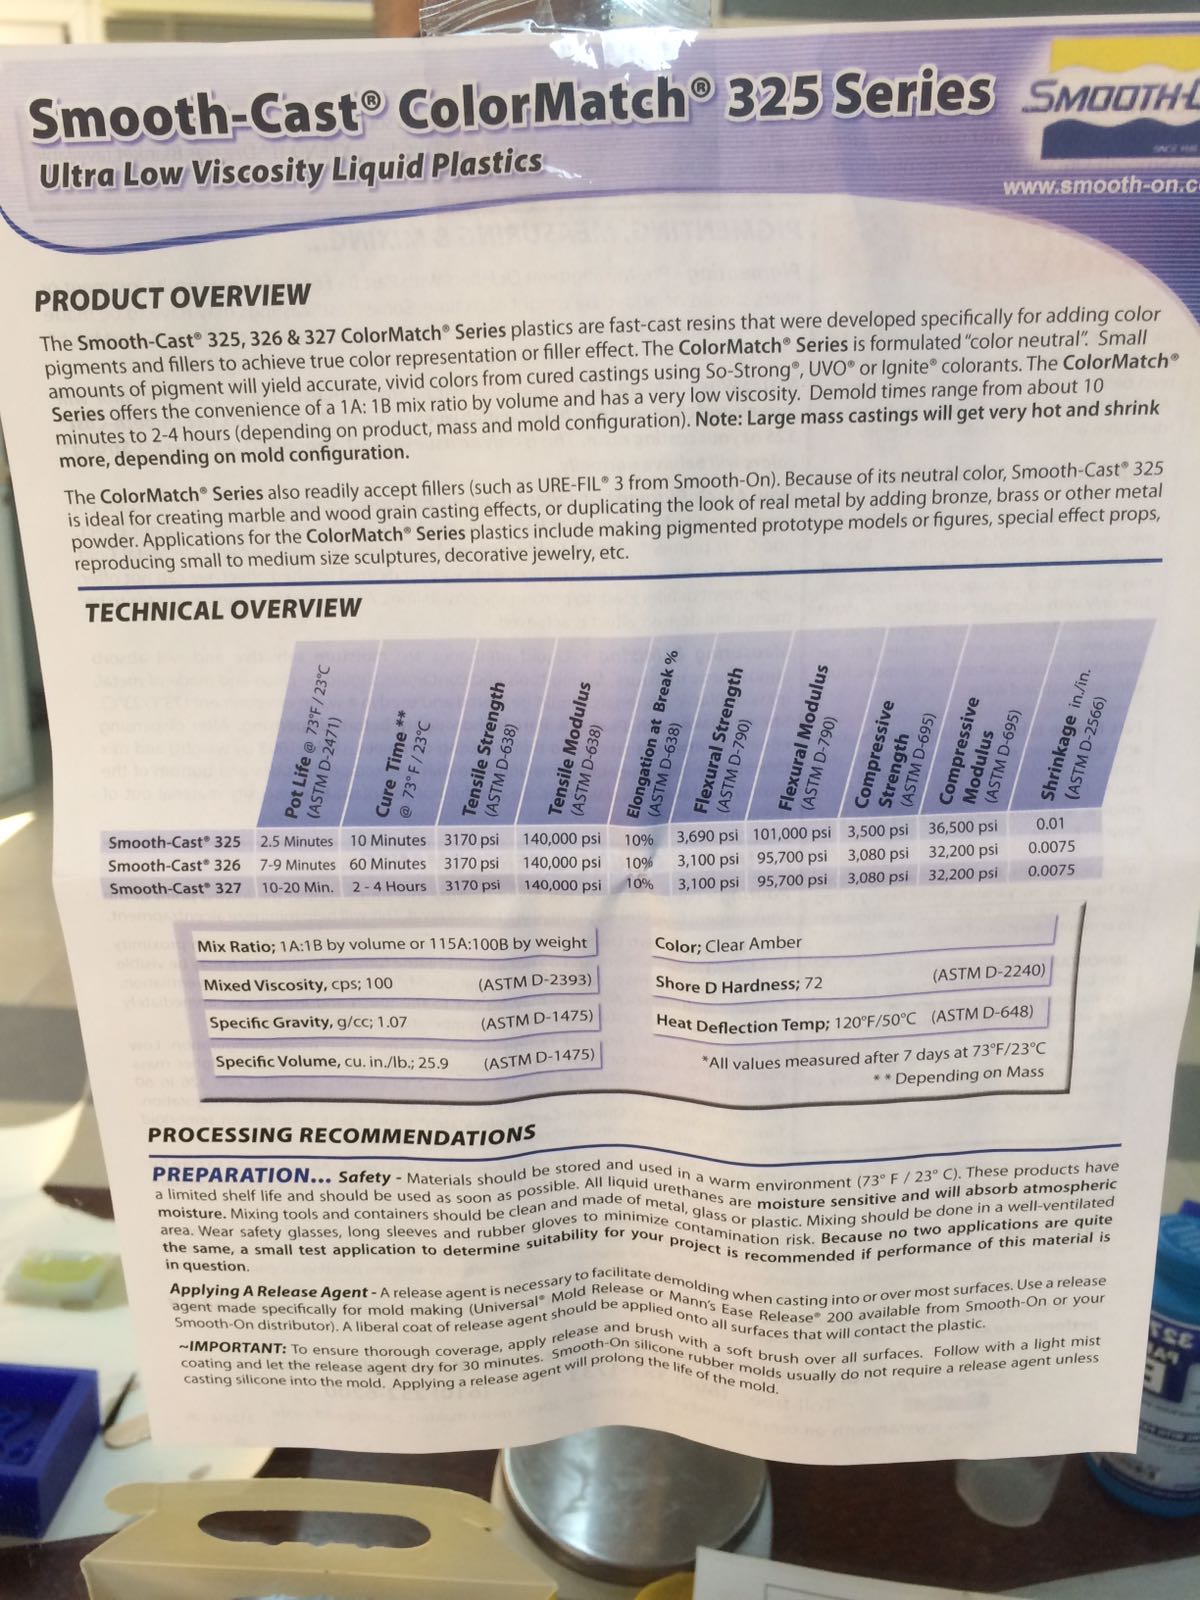
After reading the above, i mixed the Parts together and added the a little amount of colorant. 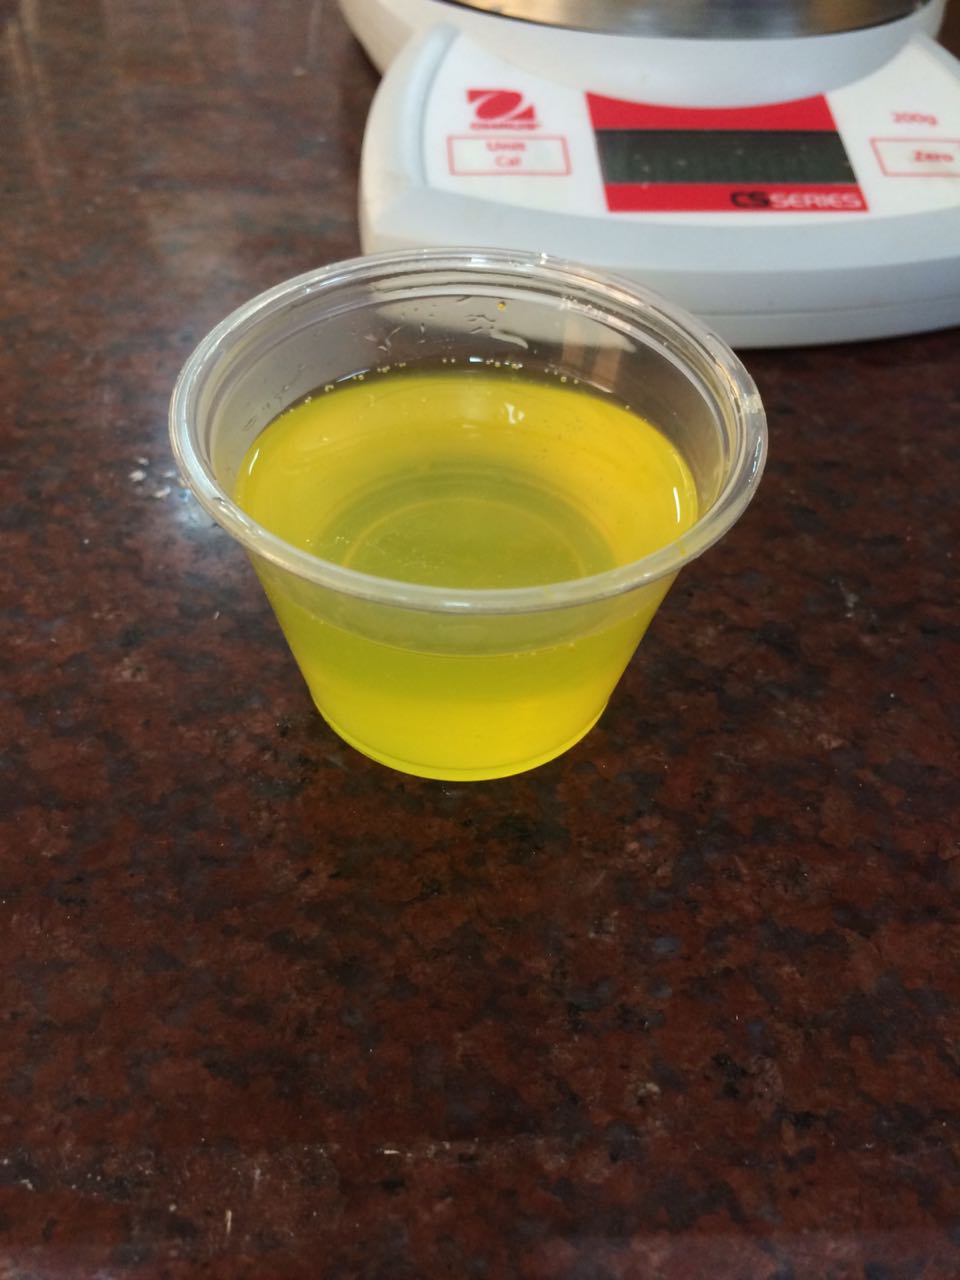
Maybe that was too little, but anyhow i wanted to see how this would turn out to be. 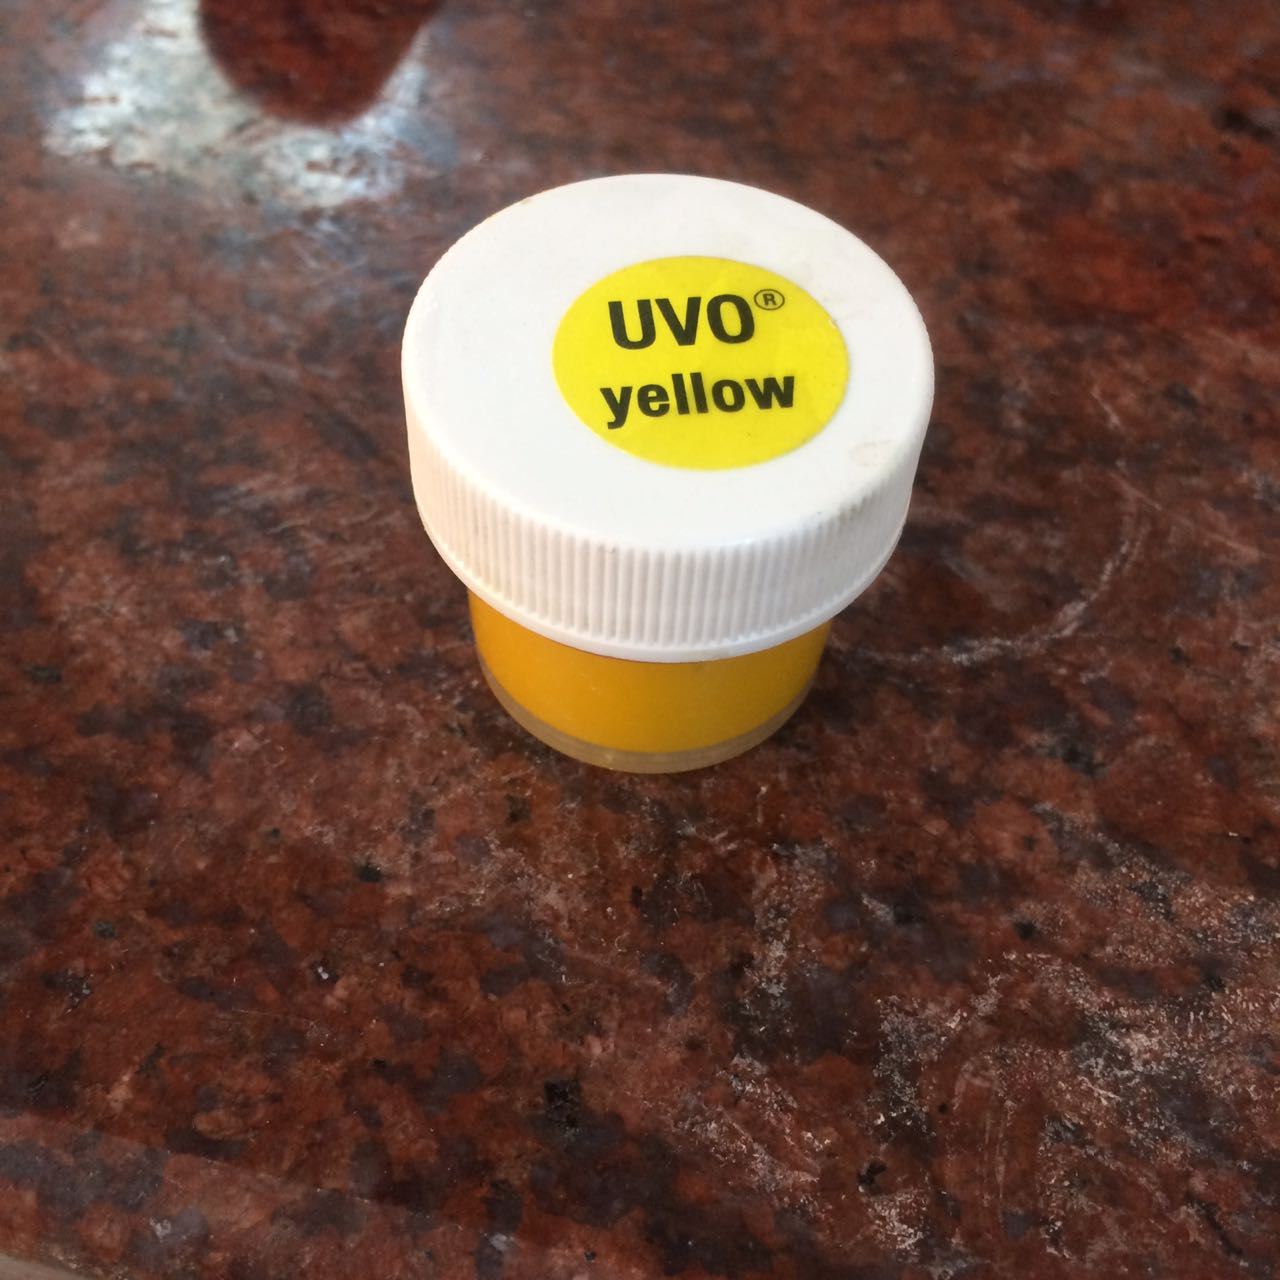
I poured the mix into the mold, the mixture was 30grams, that was way too much for this, 10grams could have been enough. 
I meant it when i said too much, i just poured the remaining cast on my friends molds, almost 5 other molds were filled! 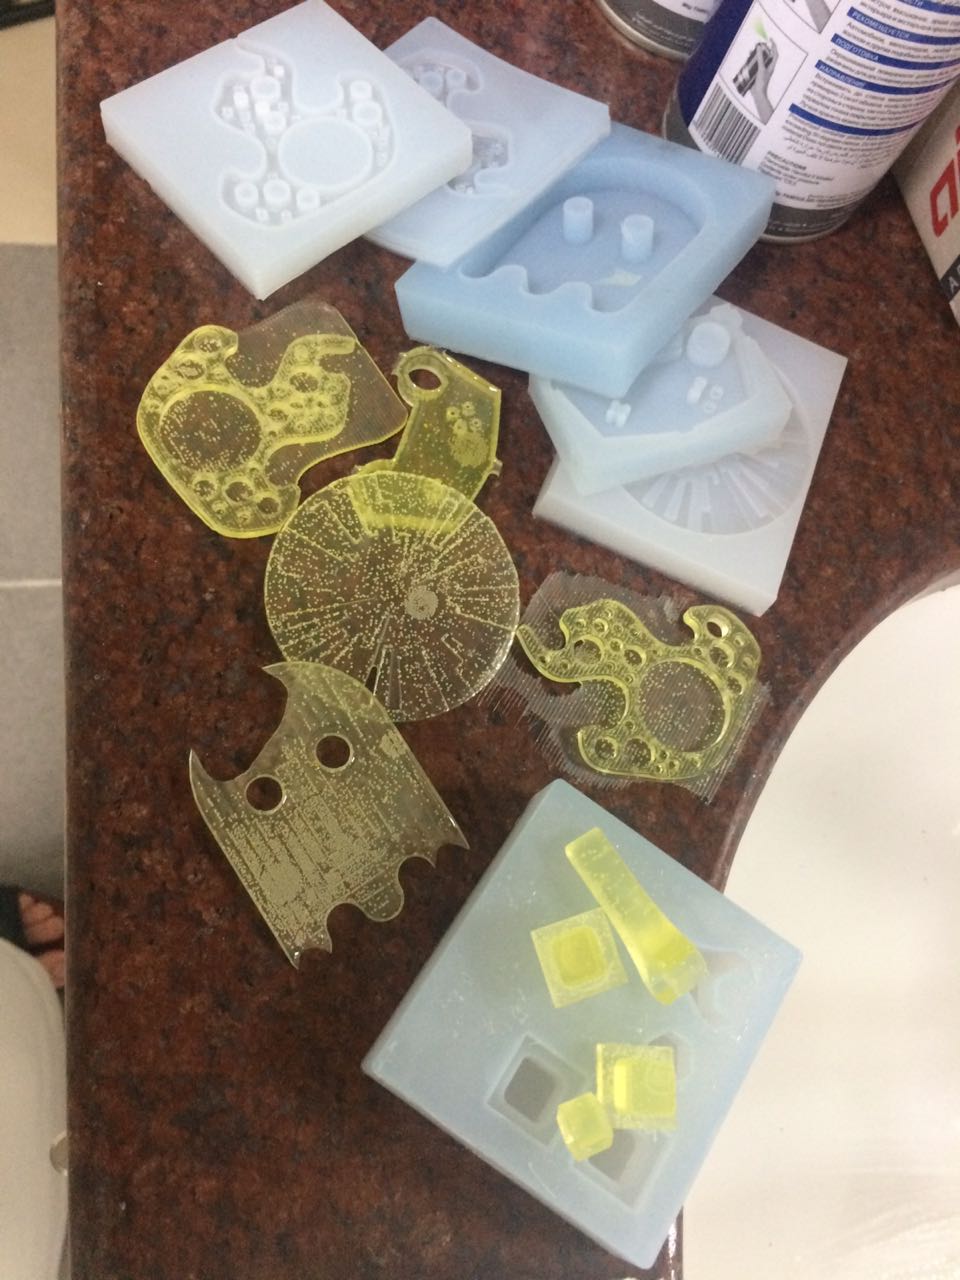
My cast cured! 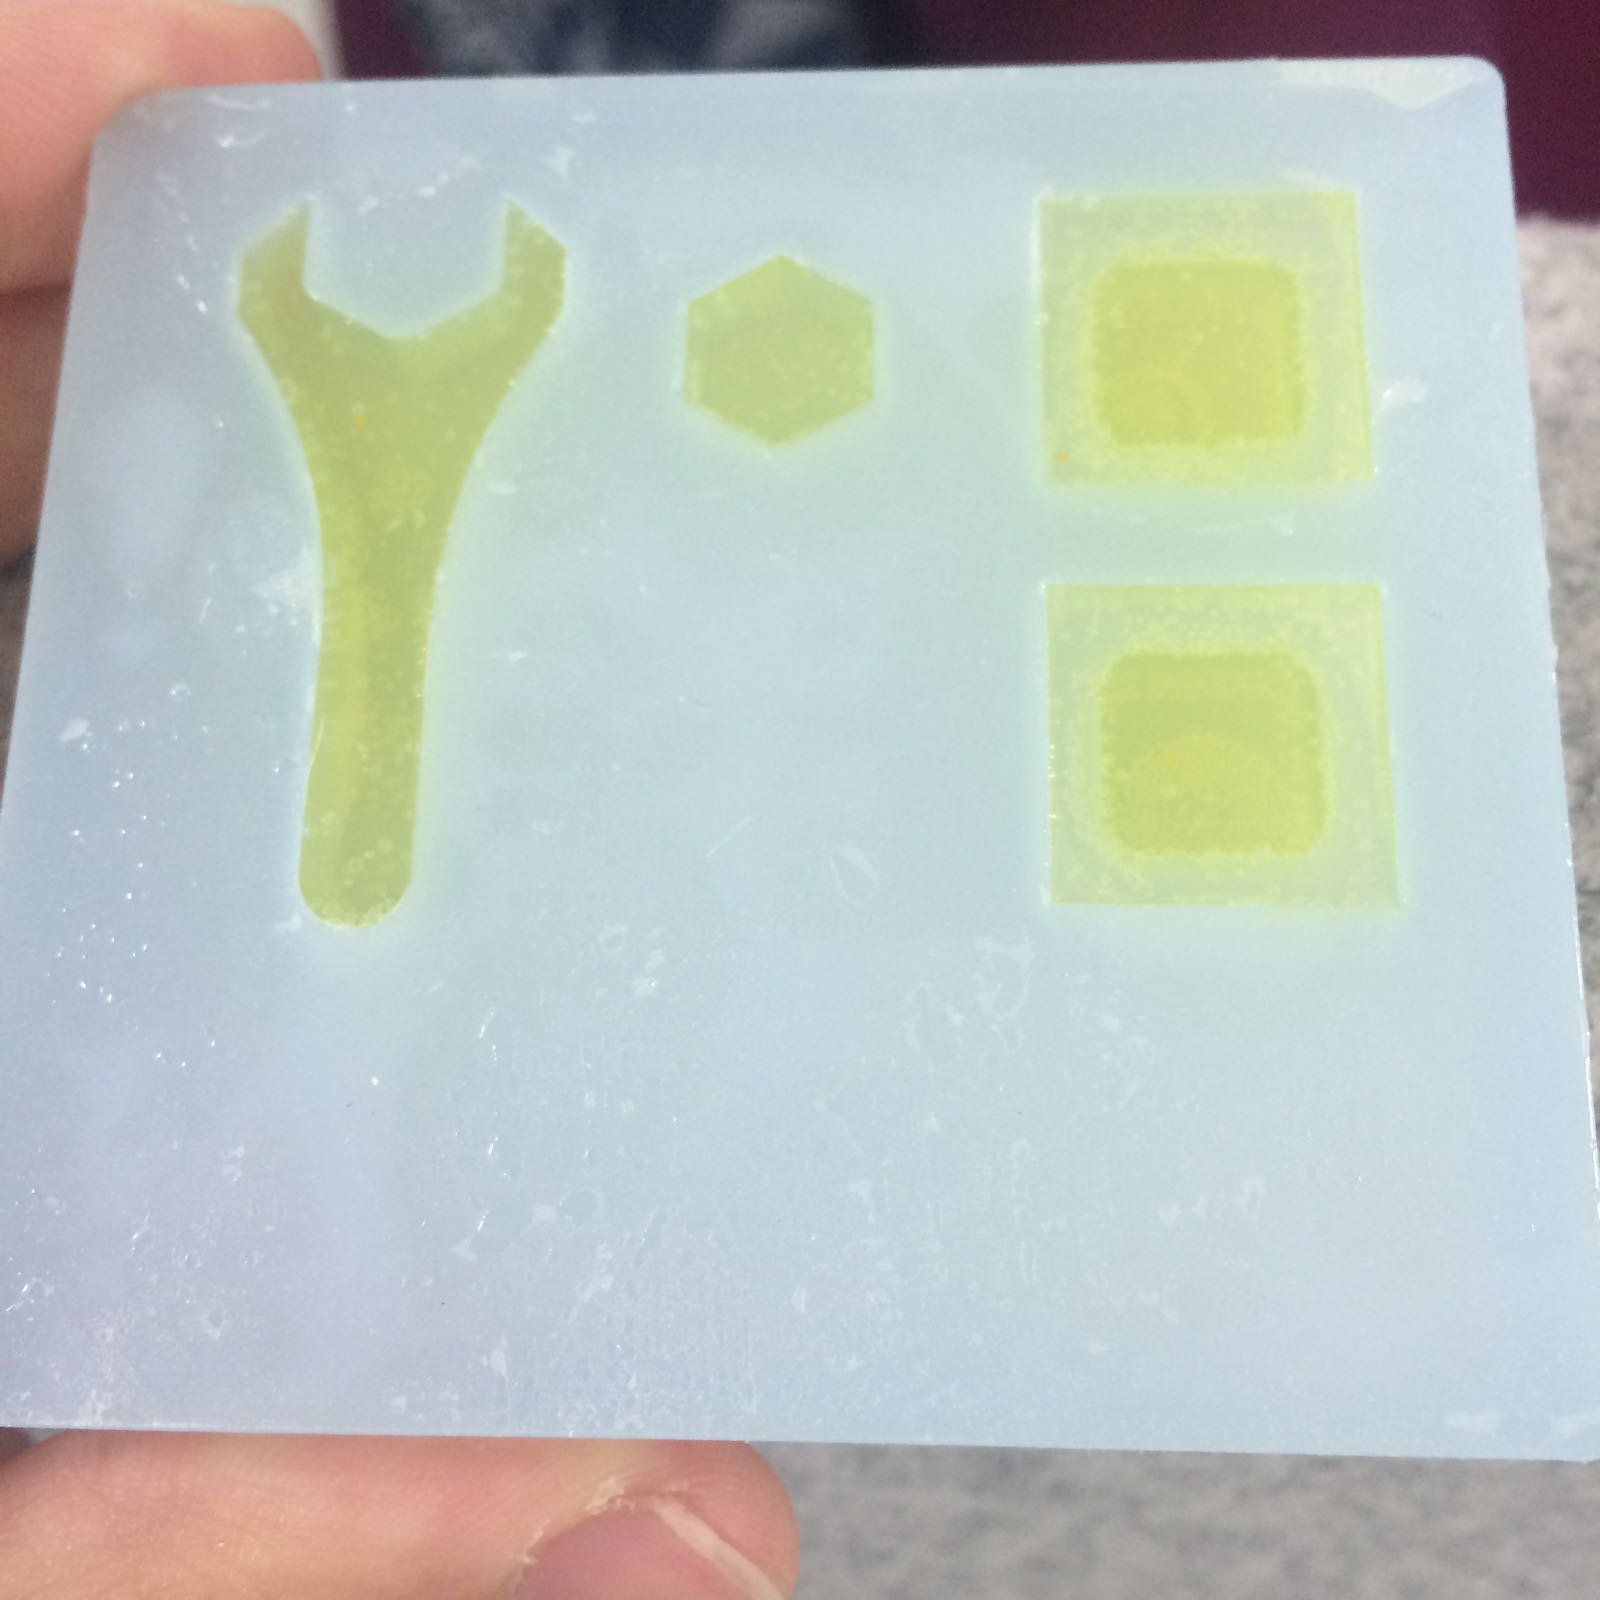
The buttons look perfect! bubbly but perfect! just needs some vinyl sticker work and assembly! 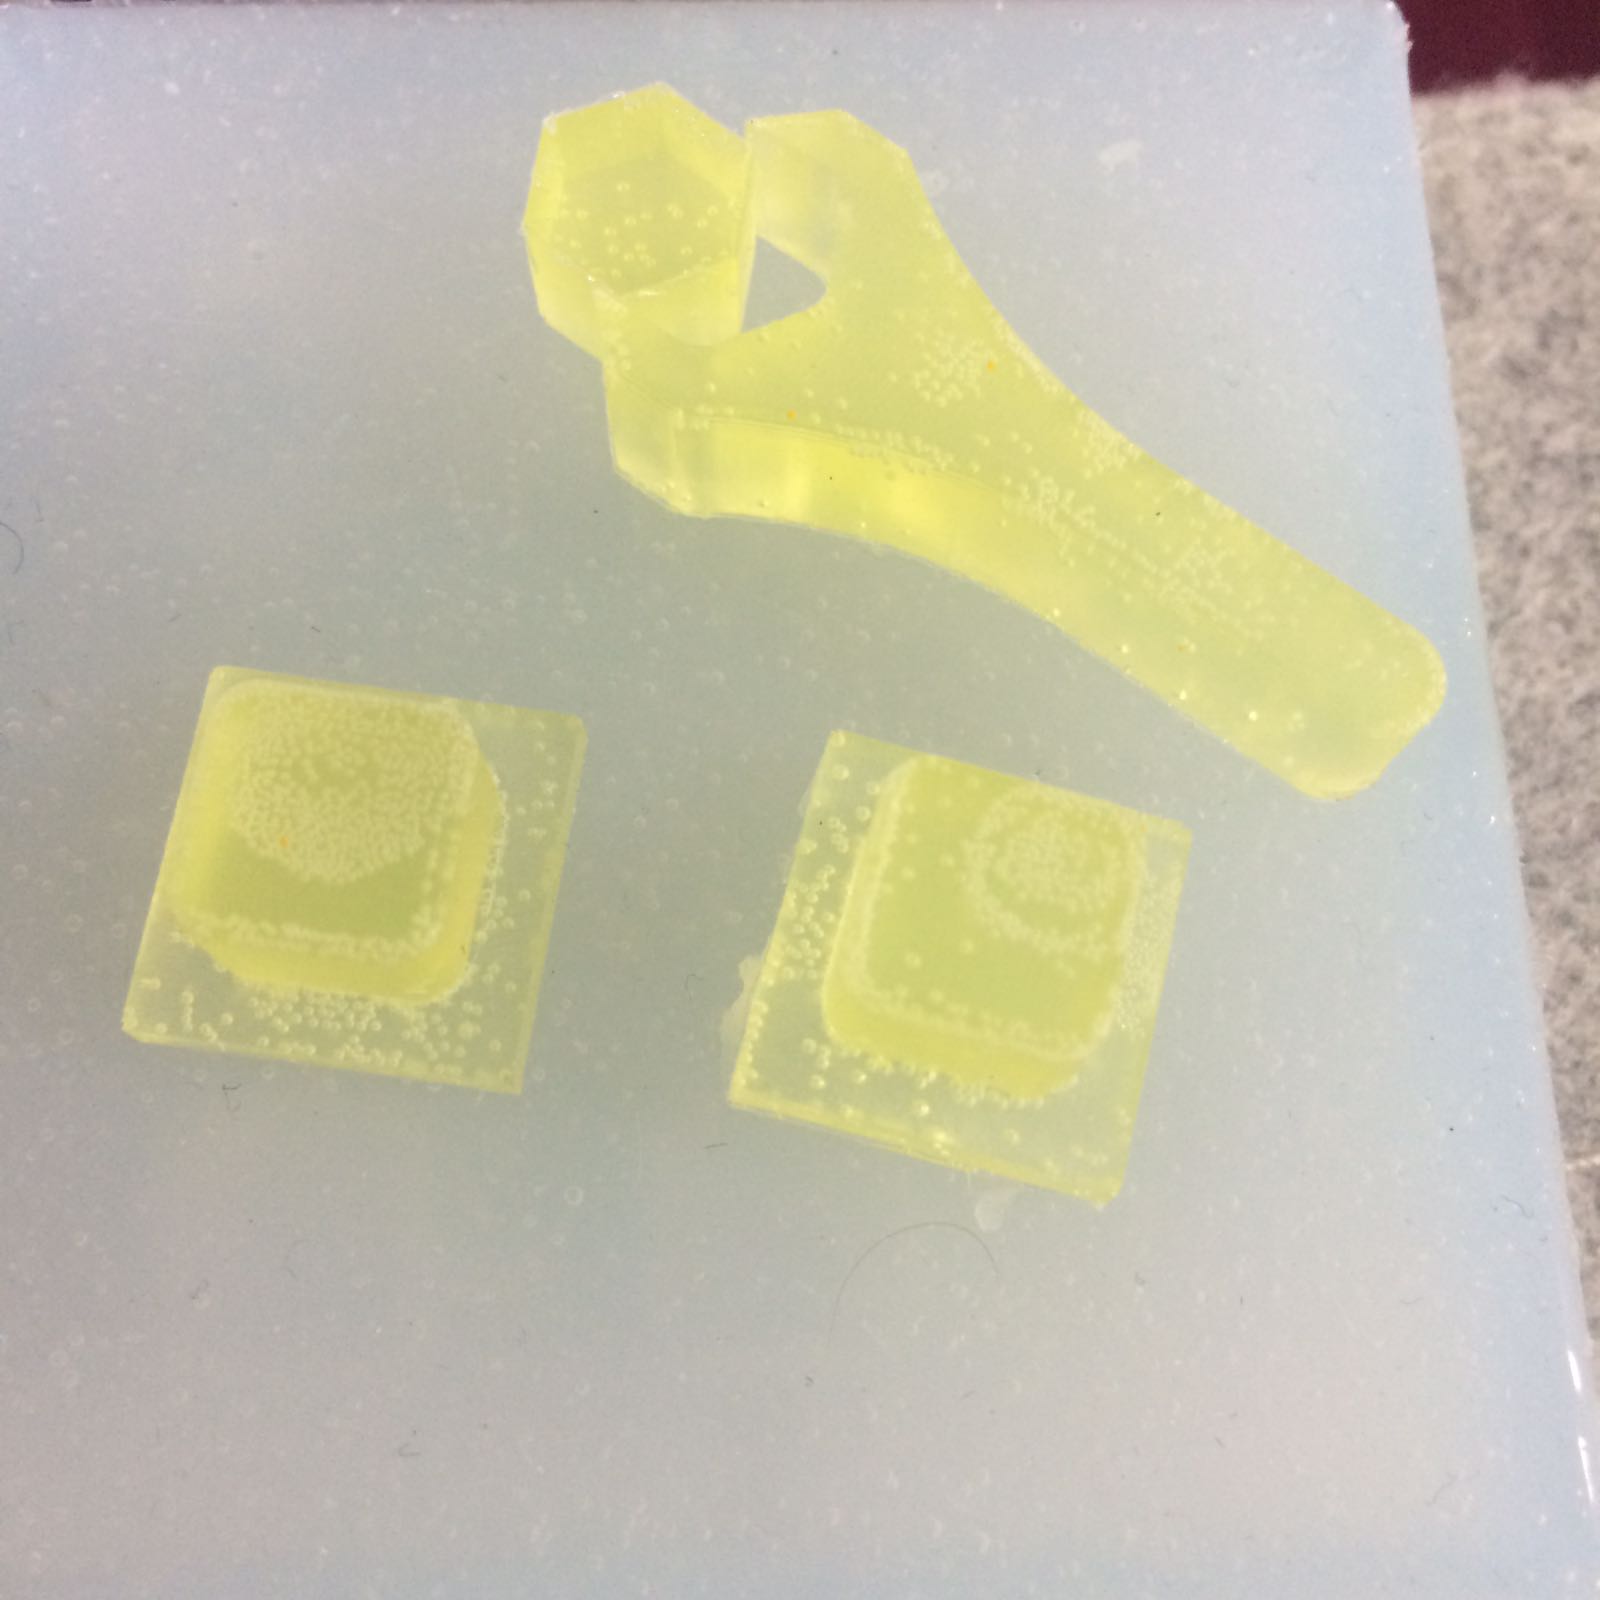
|