Project management
Week 2 - Project Managment
Here you will find my work description during this second week
Class notes
Assignment
Our assignments for this week are:
- work through a git tutorial
- build a personal site in the class archive describing you and your final project
Configure dev env
I use Windows as main Operating system
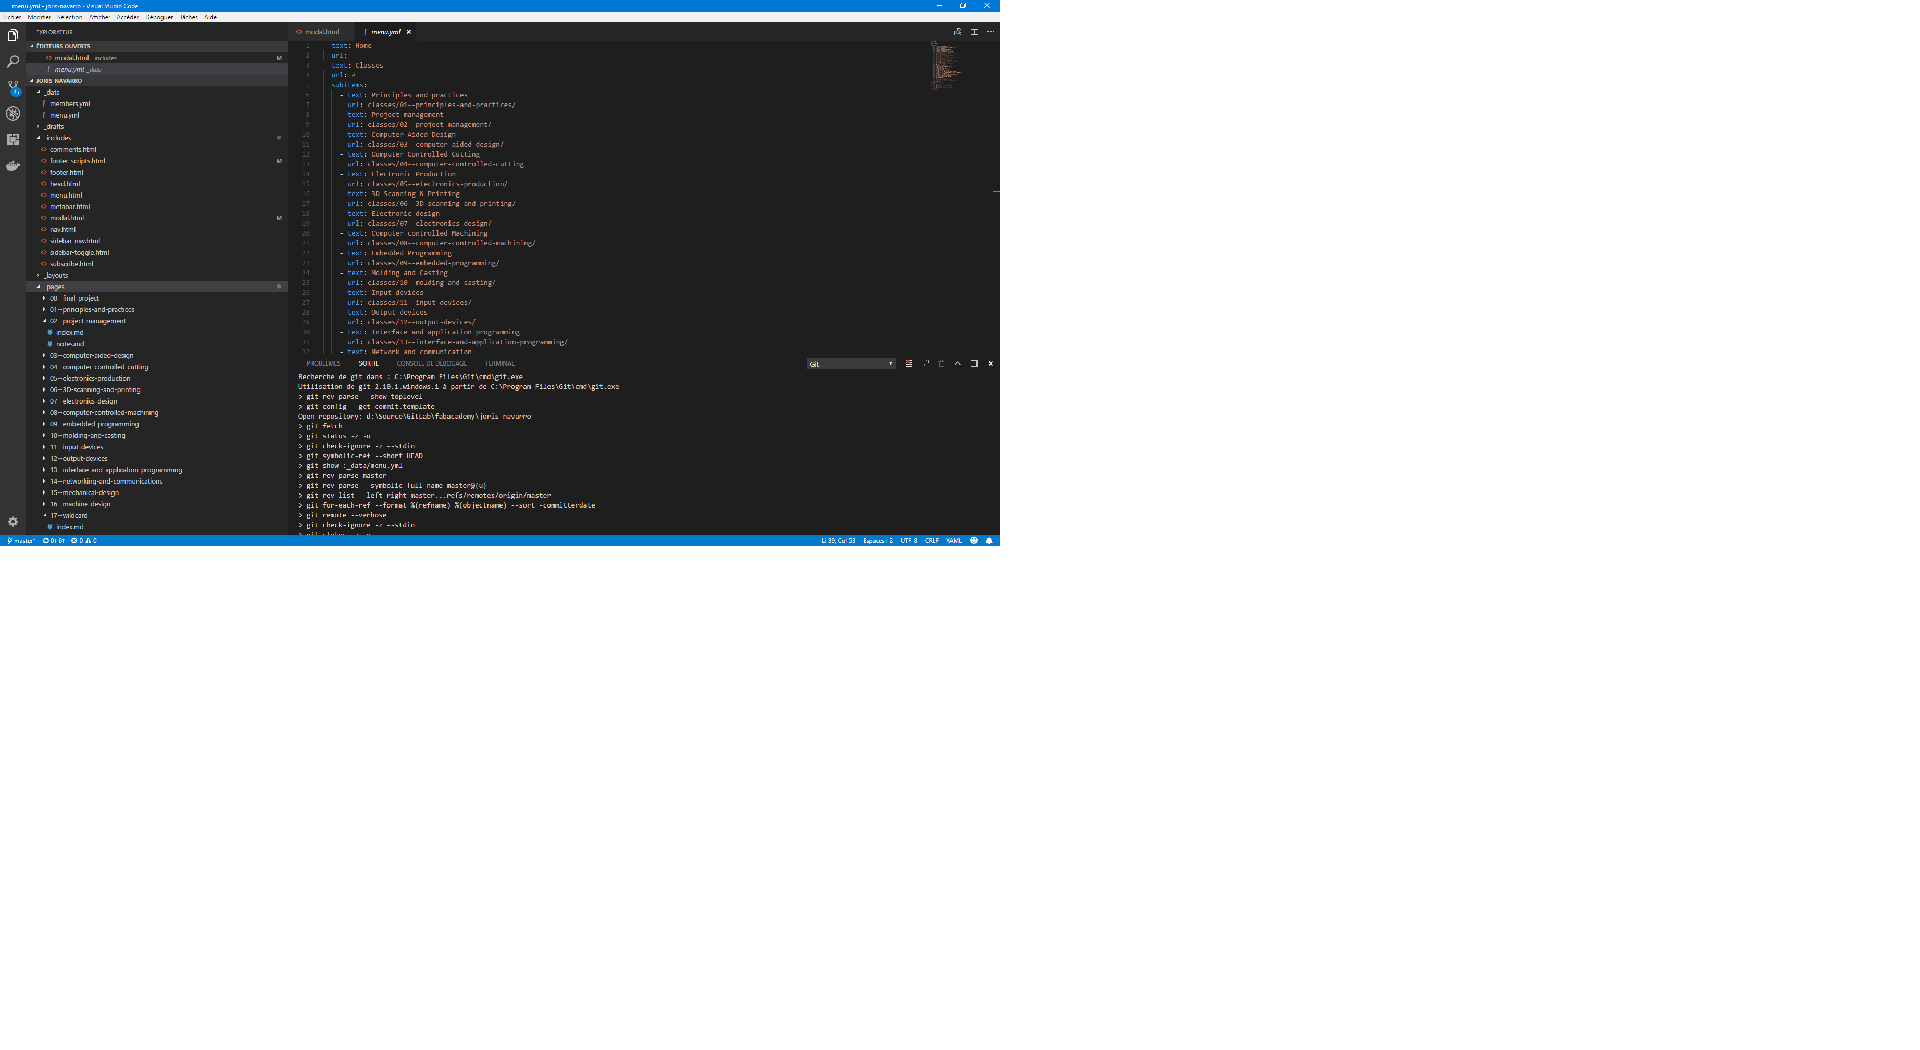
I use Visual Studio Code, known as VSCode. In my opinion VSCode is a lightweight, open source (MIT licence), cross platform multipurpose, extensible and easy IDE, I am used to dev with Visual studio Community and want to give a try to visual studio code. It can handle multiple languages with syntax highlighting, and has a source controll feature. It can be extended with more than 4700 extensions. Here is a screenshot.
- configure gitlab for personnal git repo https://gitlab.fabcloud.org/academany/fabacademy/2018/labs/barcelona/students/joris-navarro
-
git already installed on my computer, generate new ssh key for ssh push to generate key open git bash, and exececute and follow instructions (No passphrase if you don’t want to type password every time)
ssh-keygen -t rsaopen public key in text editor (mine is located at /c/Users/Joris/.ssh/id_rsa.pub)) and paste it in gitlab profile
-
download VSCode and install it.
- (Optionnal) download git kraken a GUI git client cross platform, and install it
- git pull, fiore added a readme.md file
Git tutorial
A french reminder I found : Git Helpbook in French
From Ubuntu subsystem I created a local subfolder to sync with git repository
cd ~
mkdir fabacademy
ln -s /mnt/d/Source/GitLab/fabacademy/ ~/fabacademy
– where /mnt/d/Source/GitLab/fabacademy/ is the sync path of gitlab repo on my windows
cd fabacademy
When it is your first use of git you migh et your profile
git config --global user.name "Joris Navarro"
git config --global user.email joris.navarro@squaregolab.com
then init repo and test git
git init
git clone git@gitlab.fabcloud.org:academany/fabacademy/2018/labs/barcelona/students/joris-navarro.git
this url came from gitlab personal repo web page

git pull to get file pushed by fiore
touch sample.txt or whatever you want
git add sample.txt
git commit -m "Add sample file"
git push
First attempt of personnal web page
I started personal web site during week1, see here for init details
During Week 1 I created a simple html page
- add .gitlab-ci.yml for continuous integration
- create simple index.html file
- start editing it with personnal info
- git commit, then git push
- go to your personnal page in your browser joris navarro
- you can add subfolders, pics, html … your directory, when you are done, commit and push, then refresh your browser
- don’t forget to reduce image size
I am experiencing generating html from markdown throught a vscode extension (copy markdown as Html). That way I write markdown, and when I want to update I need to use this extension to get the html that I paste in an appropriate html file. => (Could be optimized)
I was not happy about this way to generate html, so I explore other solutions and discover Jekyll.
Personal website using Jekyll
On week 2 I added CSS/JS and start discovering Jekyll and continuous integration.
I never used jekyll before nor ruby. And It was not so easy to understand.
this tutorial on jekyll web page was a useful link
BUT In order to go back if needed, the first thing I did is to create a “dev” branch to experiment Jekyll.
git branch dev
git checkout dev
git status
Then I downloaded a nice jekyll theme called Mickey, that you can find here : Theme from Vincent Chan under MIT Licence
running Jekyll
Running ruby on windows is a pain int he a** so I use Ubuntu Linux Sub System to run Jekyll
Here is a usefull link with some ideas to run jekyll on windows
install ruby/jekyll/…
sudo apt update -y && sudo apt upgrade -y this took a long time
in order to install ruby we need to add a new reposirory
sudo apt-add-repository ppa:brightbox/ruby-ng
sudo apt-get update
Now we can install ruby
sudo apt-get install ruby2.3 ruby2.3-dev build-essential
Update gems
sudo gem update
And install Jekyll and Bundler
sudo gem install jekyll bundler
On pine64 I had to install libffi-dev : sudo apt install libffi-dev zlib1g-dev
Then Nokogiri - a Rubygem providing HTML, XML, SAX, and Reader parsers with XPath and CSS selector support
gem install nokogiri
bundle install
Check installation by running
jekyll -v
Because I have some dependencies issues, Ihad to run those command to resolve dependencies.
sudo gem update
bundle update
Check again installation by running
jekyll -v

Now can run Jekyll in our current website repository
jekyll build --destination ./public or
jekyll build --destination ./public --watch to activate autoregeneration
If you use the –watch option and change the config.yml file, changes are not taken in count, you have to stop watching process using Ctrl+C and run it again
jeckyll serve will run a web server, serving the generated public folder to http://127.0.0.1:9001/2018/labs/barcelona/students/joris-navarro/

using local IIS
I also use local IIS mapped to local directory, to access local web site through http://localhost:81

That way I can browse local website before commiting changes

developping
Then I started developp website as I want using jekyll
Integration of a contact Formspree.io contact form
This template was design to display posts, but I want to display static pages that will be generated for classes.
The hard part of setting up this web site is to find a good structure between posts, pages, …
I decided to create a new layout “page” and static files like assignments will be of type page

That way I just have to set up the header of each markdown pages like this

Then finally I decided to create a custome menu using _data. As you can see bellow, this is the content of the menu file.

I needed to update default.html layout in order to add the menu.
% include nav.html nav=site.data.menu % (surrounded by curly braces) added in default.html
This is nav.html

Then add custom css for your menu I decided to define my custom css in a new site.css file, and add an entry in header.html
Now you are ready to write content.
convert images with imagemagick before commiting
Before commiting we need to convert screenshots and images
I installed imagemagick in ubutun subsystem
sudo apt install imagemagick
Then I can use convert tool to convert images in low resolution as shown on screenshot bellow

2018/02/02 Update
I was experiencing difficulties with developpement and production environnements due to relative paths that ware different in local environnement (dev) and in deployment environnement (production)
After some researches, I created a new config file _config.dev.yml that will be read after _config.yml to override production values to dev value. Only read in dev env.
For that I need to change jekyll build command to
jekyll build --config "_config.yml,_config.dev.yml" --destination ./public --watch
and _config.dev.yml contains, for now only one value
baseurl: '/'
where _config.yml value is
baseurl: '/2018/labs/barcelona/students/joris-navarro/'
I create a shell script to run build task easyly
touch buildjekyll.sh
chmod +x ./buildjekyll.sh to be allowed to run it
vi ./buildjekyll.sh
write this in the file
#! /bin/bash
jekyll build --config "_config.yml,_config.dev.yml" --destination ./public $*
save and close (:wq)
then run ./buildjekyll.sh or ./buildjekyll.sh --watch to activate autogeneration
Stay in touch
Hi, I'm
Joris Navarro, from Perpignan (France), a proud dad, a fab director/manager, a teacher, a ceo, a FabAcademy student, but not only. Click here to know more about me.
Check my work for FabAcademy on FabCloud GitLab
@joris.navarro.
Want to say Hi ? Please send me a message.
