Attending the Fab Academy in Barcelona, I document each week of intense learning as I come across new digital fabrication techniques.
This documentation is as much a report of what I do as a reflection on why I do so, and will hopefully guide me back to Oceania to spread and make good use of the knowledge gathered along the path.
--- summary of the assignment ---
objective :
Test the design rules for your printer(s) (group project). Design and 3D print an object (small, few cm) that could not be made subtractively. 3D scan an object (and optionally print it).
what I did :
As a group we tested several printers using an identical test piece. I also designed and printed two small-scale prototypes of a siphon system.
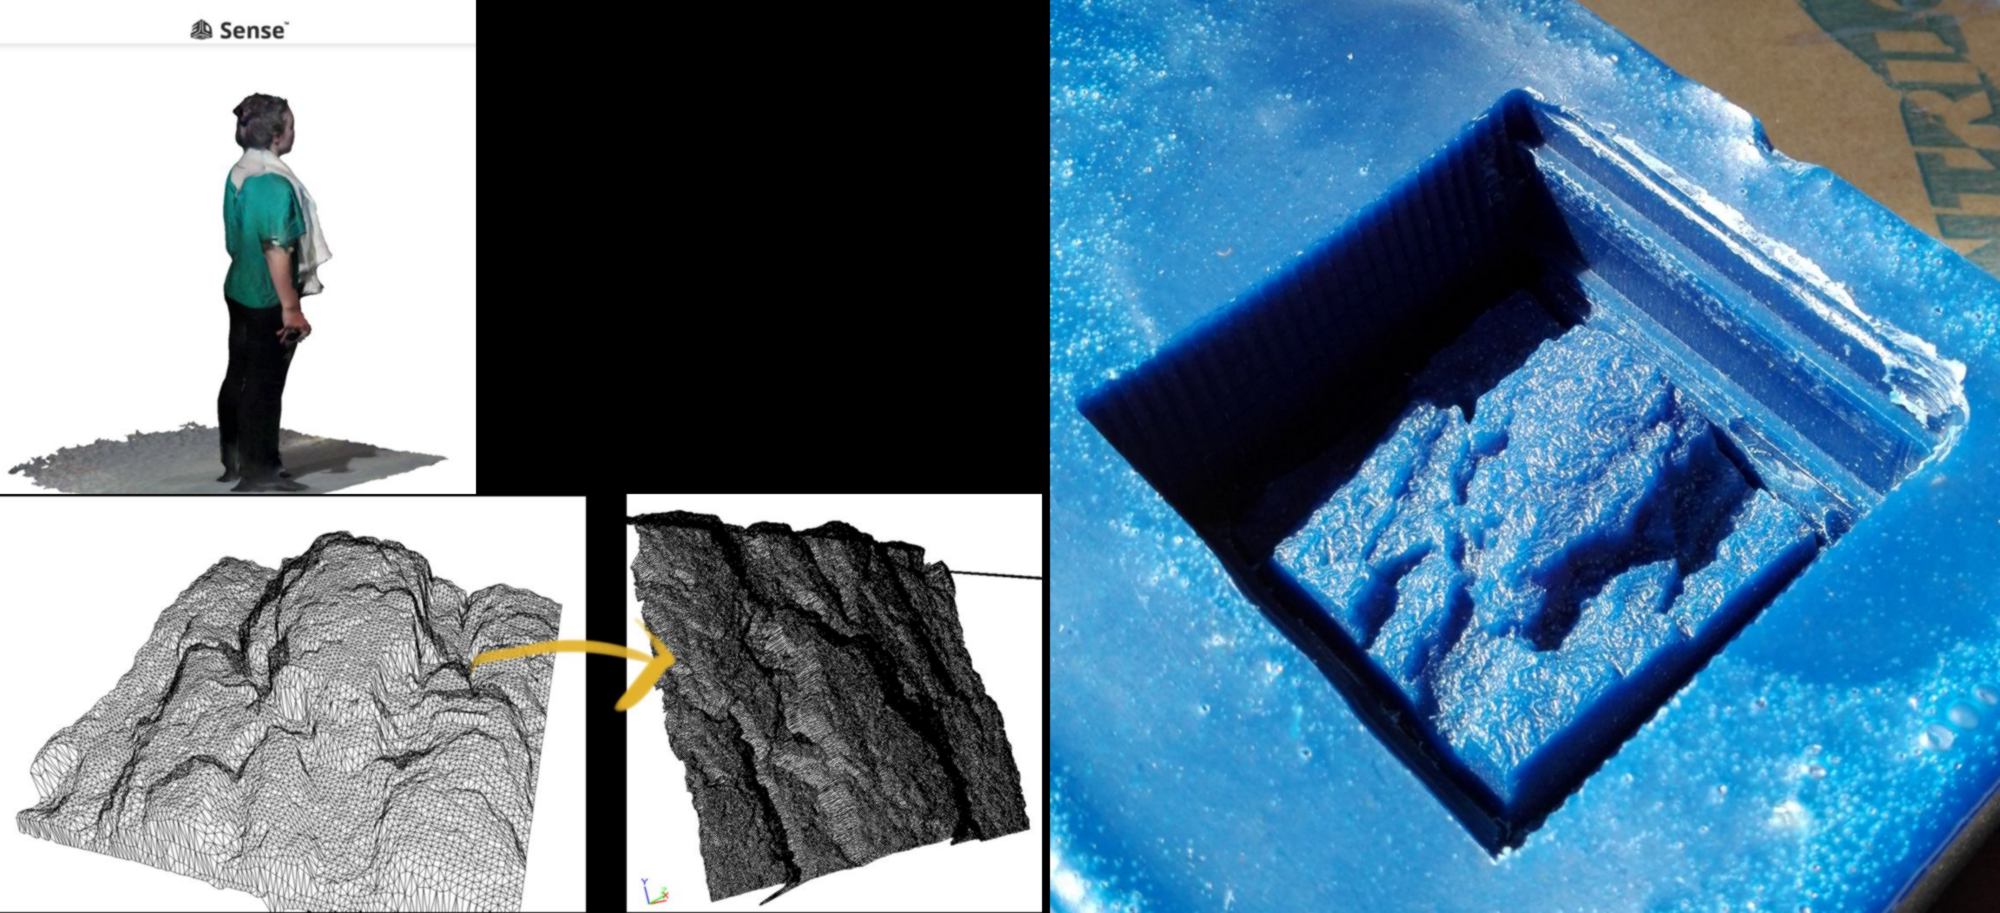
I also tested a 3D scanner embeeded in my computer and scanned a piece of bark using the mdx-20 during the moulding/casting week.
download :
Learning outcomes :
Notes to evaluators :
You will find the 3d scanning exercise on week 09 .
The 3D printing exercise came to a conclusion on week 07 .
22.02.18 / I write an application for funding for Fab Lab Auckland. A big telecom company called Spark has set up a foundation called the Spark Foundation and is looking for long term partners to start community projects focused on young people, education and digital enablement. The deadline for the first round of application is on Friday the 23rd at 5am. In collaboration with Gribblehirst community hub, a community organisation in Auckland, I spend my evenings drafting the application. I also get an in-depth feedback from Mathilde before re-editing the document again. Here it is:
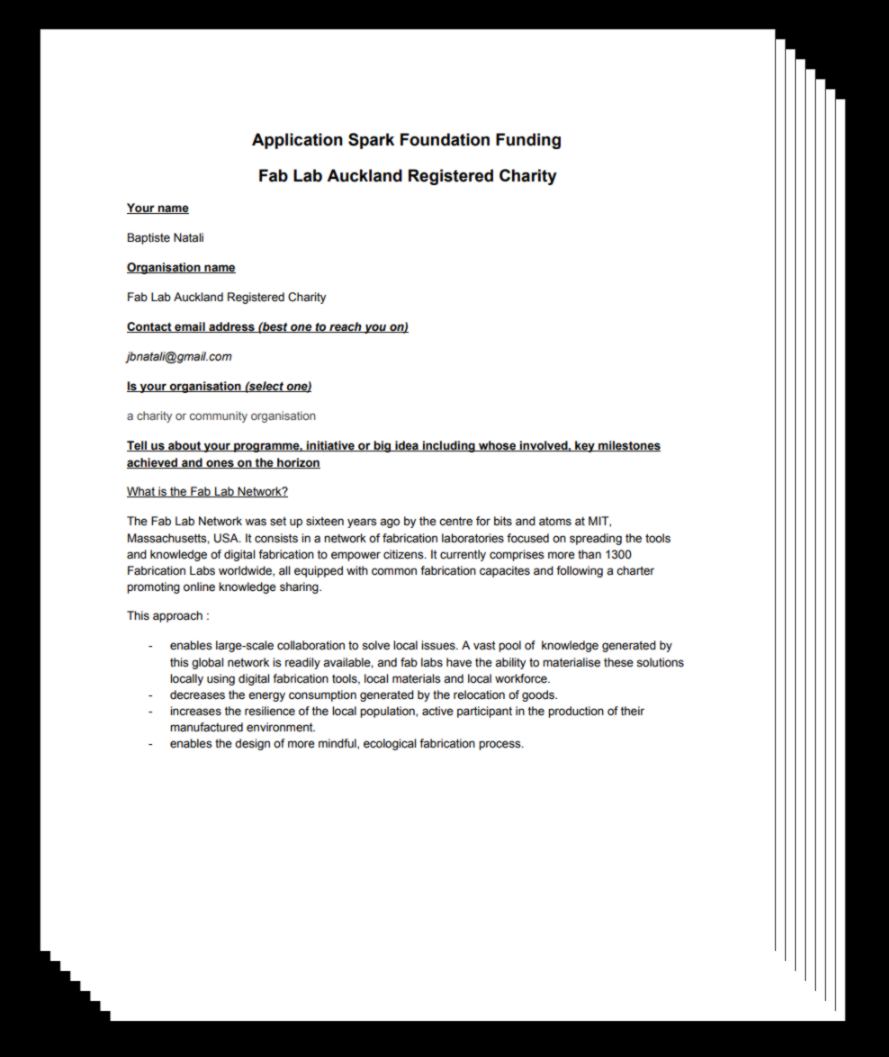
In New Zealand, it is easy to sound pedantic. The cultural background invites people is to take it easy, speak in a very practical way and avoid all buzz words. It is about finding the right balance between explaining the techy concept of digital fabrication and its benefit for communities AND keeping it very accessible and grounded. We will see mid-March if my readers made it past the first paragraph.
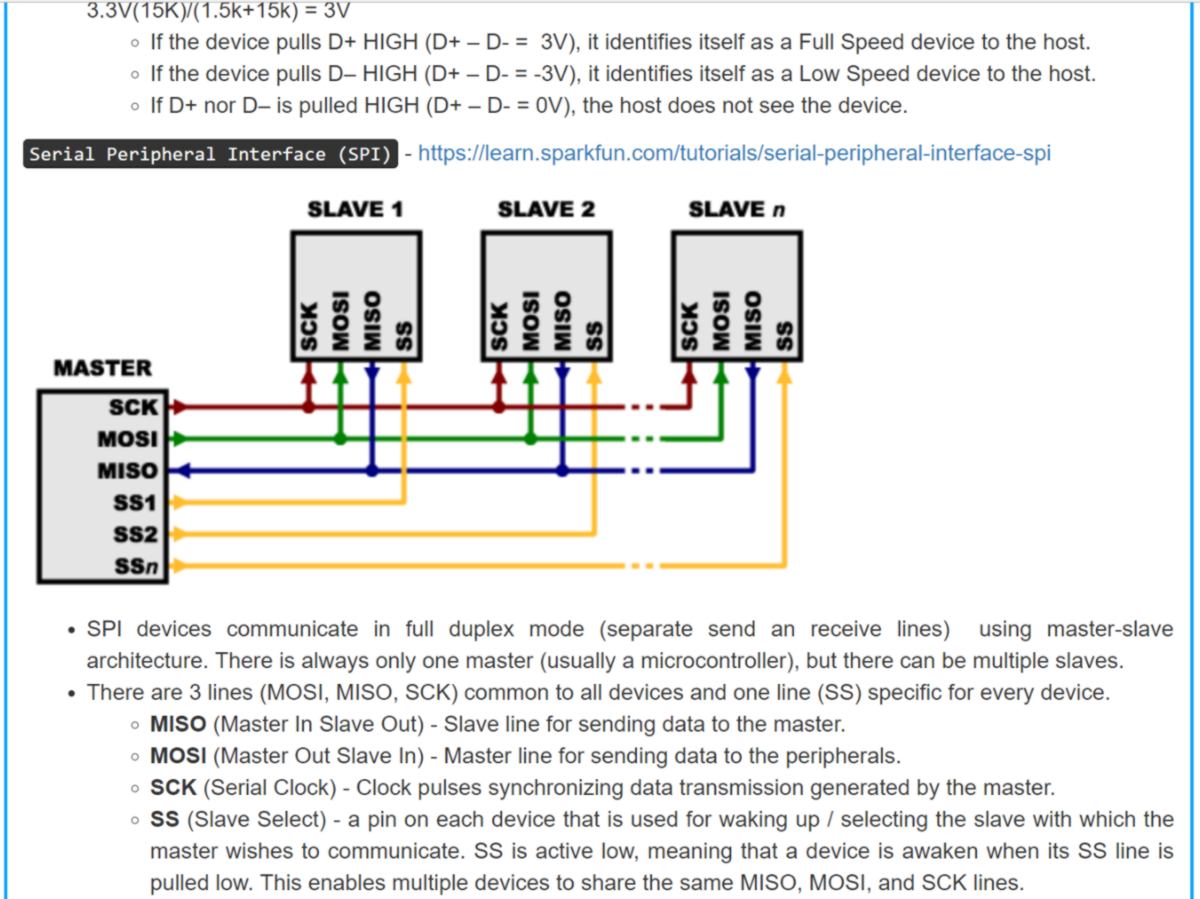
23.02.18 / Last week assignment left me with many questions about electronics. I got through some documentation to understand what we made, more in-depth:
I also catch up with what I have missed yesterday. I happen to have a Sense camera on my Wacom which allows me to 3D scan objects, faces and bodies :
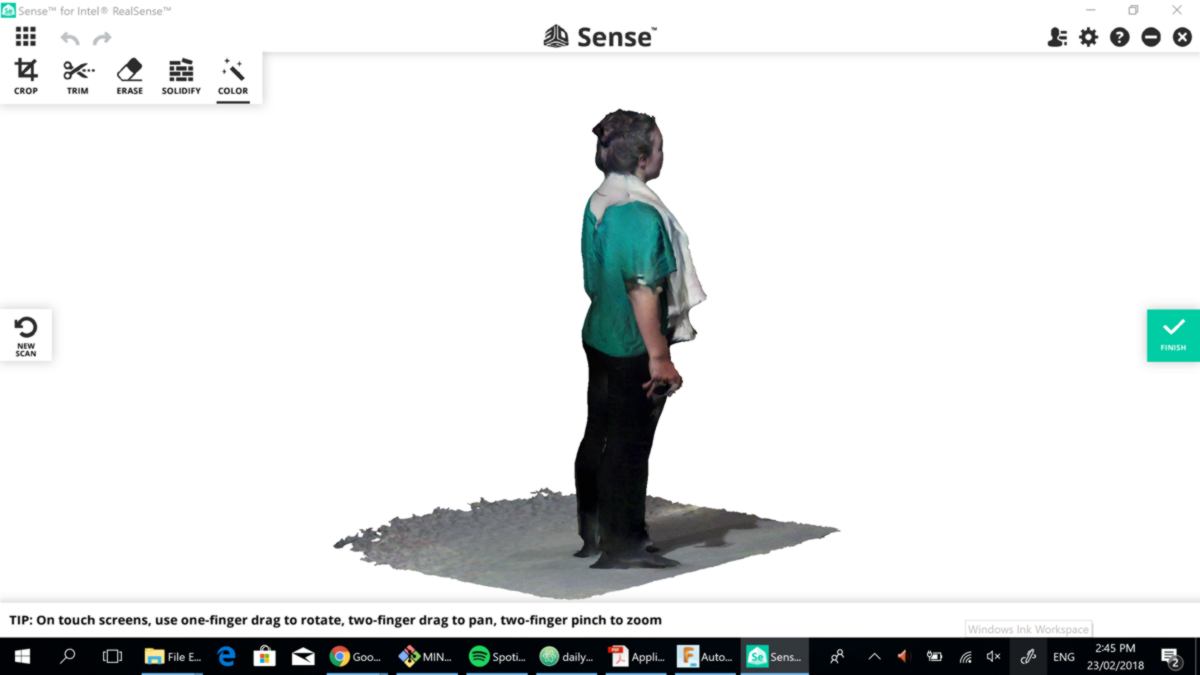
3d scanning would be wonderful to develop a parametric clothing system. I hope I will have the opportunity to discuss that with Anastasia this week.
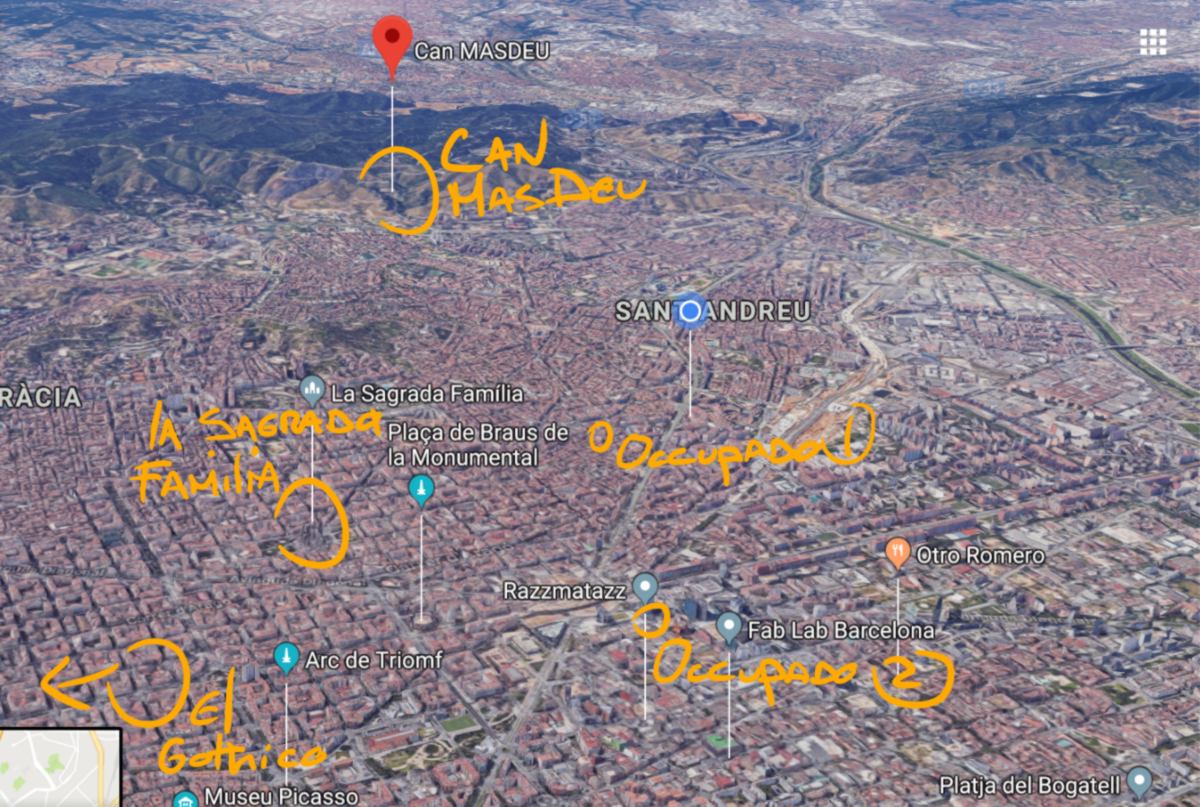
25.02.18 / I left my computer behind this weekend to look for some novelties. My brother, who has a sheer interest in object making, calligraphy, design, being well-versed in ceramic and woodwork himself, has come to pay me a visit this weekend. He has an eye for details and catches tiny decorative features in every streets that I would otherwise miss, questionning the historical and cultural meaning behind every single design decisions. This weekend we cover a lot of ground, starting by la Sagrada Familia :
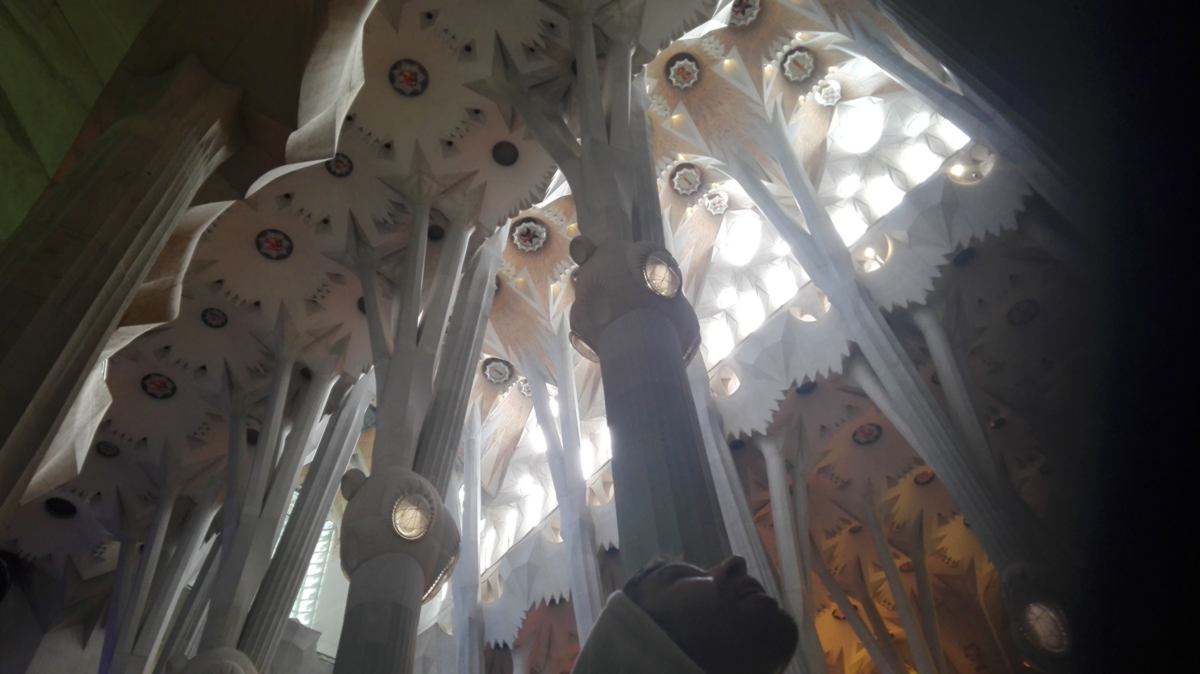
There is a good reason why several parts of this building, still under construction, were inscribed on the UNESCO World Heritage List : it is monumental. After spending a long while in the basilica and staring at both facades, we went to the museum located underneath the building. Many aspects of Gaudi's work requires attention: his work on natural shapes, fractals, hyperboloid design, and his ability to project the construction of the building as a multi-generational team effort, inspiring many creators and disciples.
Underneath the building still remains an active plaster workshop, where reduced-scale models of the building are made. Visitors can also find visual calculation of the hyperboloid using uspide-down model of the cathedral made out of thread and tiny sand bags. This artisanal approach is wonderful and made the complexity of this creation more gaspable.
My recommendation to anyone visiting Europe : book a day, come early with a notebook and spend the whole day there. There is so much knowledge laying around.
We then went to the Gothico, the old Barcelona resembling the Old Nice in France, where I spent my teens. The architecture responds to the same need of shade during Summer, offering narrow streets with small windows to the erratic stream of visitors. At night we explore another side of the cities, walking from one squatted spaces to another, claimed by virtue of occupation, where cabarets are organised. They offer stages for performers and workshops for cardboard and woodworkers of all kinds, counter-balancing their lack of resources with imaginative uses of recycled materials and sense of aesthetic.
Sunday we visit Can MasDeu, a former hospital on the outskirt of Barcelona which has been squatted for the last 16 years. Many community projects have been developped here, including experimental aquaponic systems. Today they are organising a crowdfunding for Syrian refugees :

I get to chat more with Eve and Daniel from my class, and also with Javi and Dasha, currently living at Can MAsDeu and developing a community project to set up aquaponic systems on a rooftop in Barcelona. They mention that projects like these already occured in Sevilla, and that they are in contact with John from FabLAb Valldaura. This is a small world after all. I leave, forgetting to ask them if they would be interested in using any of the tech from the ROMI - robotics for Micro-farms - Europeen project is developing at Fab Lab Valldaura amongst other places.
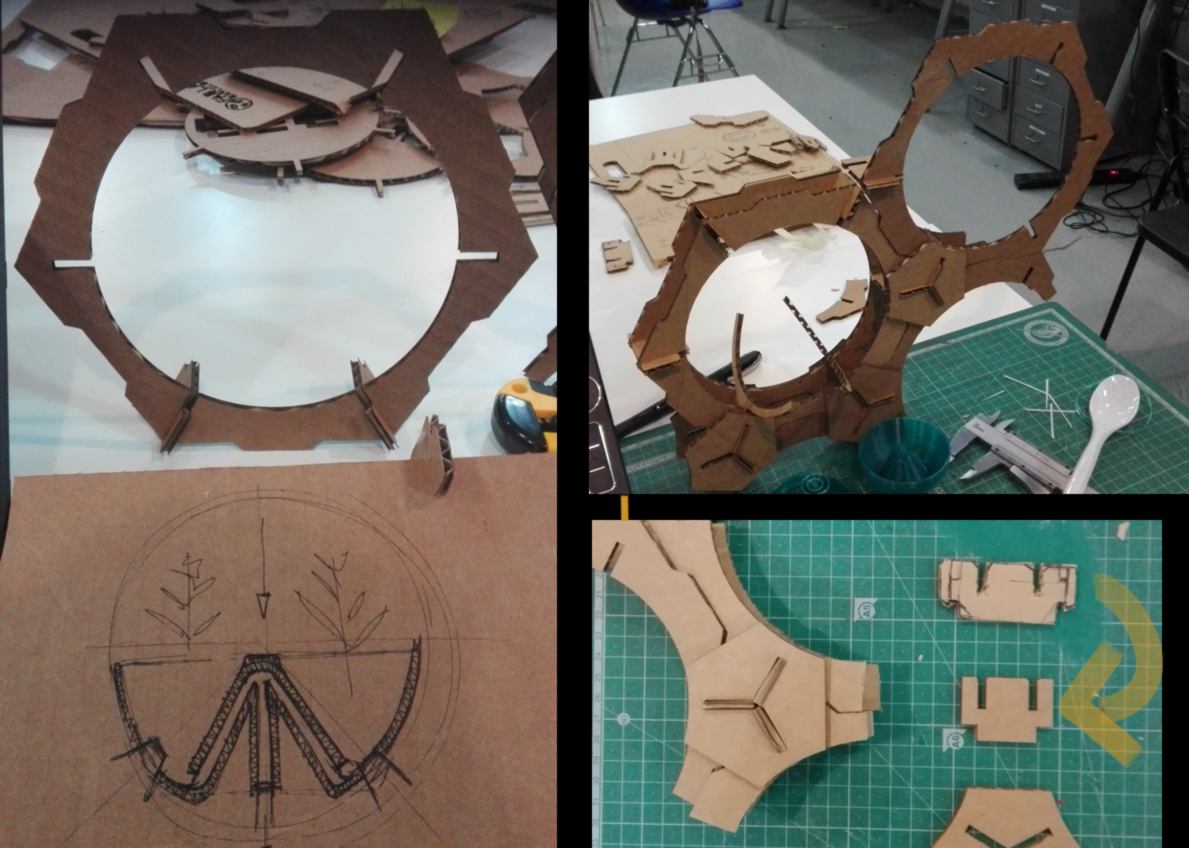
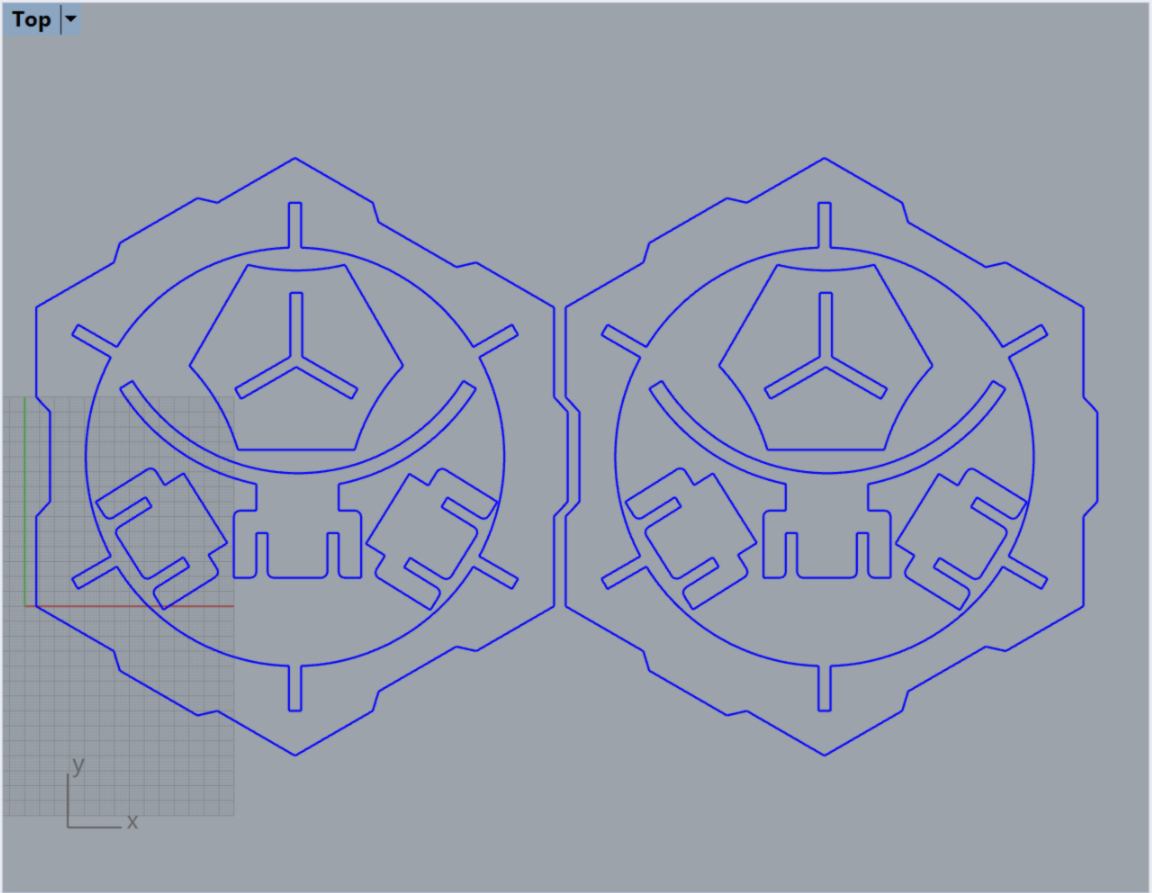
26.02.18 / I put some time aside to develop the green wall. I prototype the structure which will eventually hold the containers for the plant, which will be 3d printed. Following my many attempts over the last few weeks I draft an hexagonal shape which can be stacked with little waste of space. I then use a mix of hand-cut and laser-cut cardboard shapes, recycling leftovers from a weekend workshop, to develop different solutions for the attachment systems :
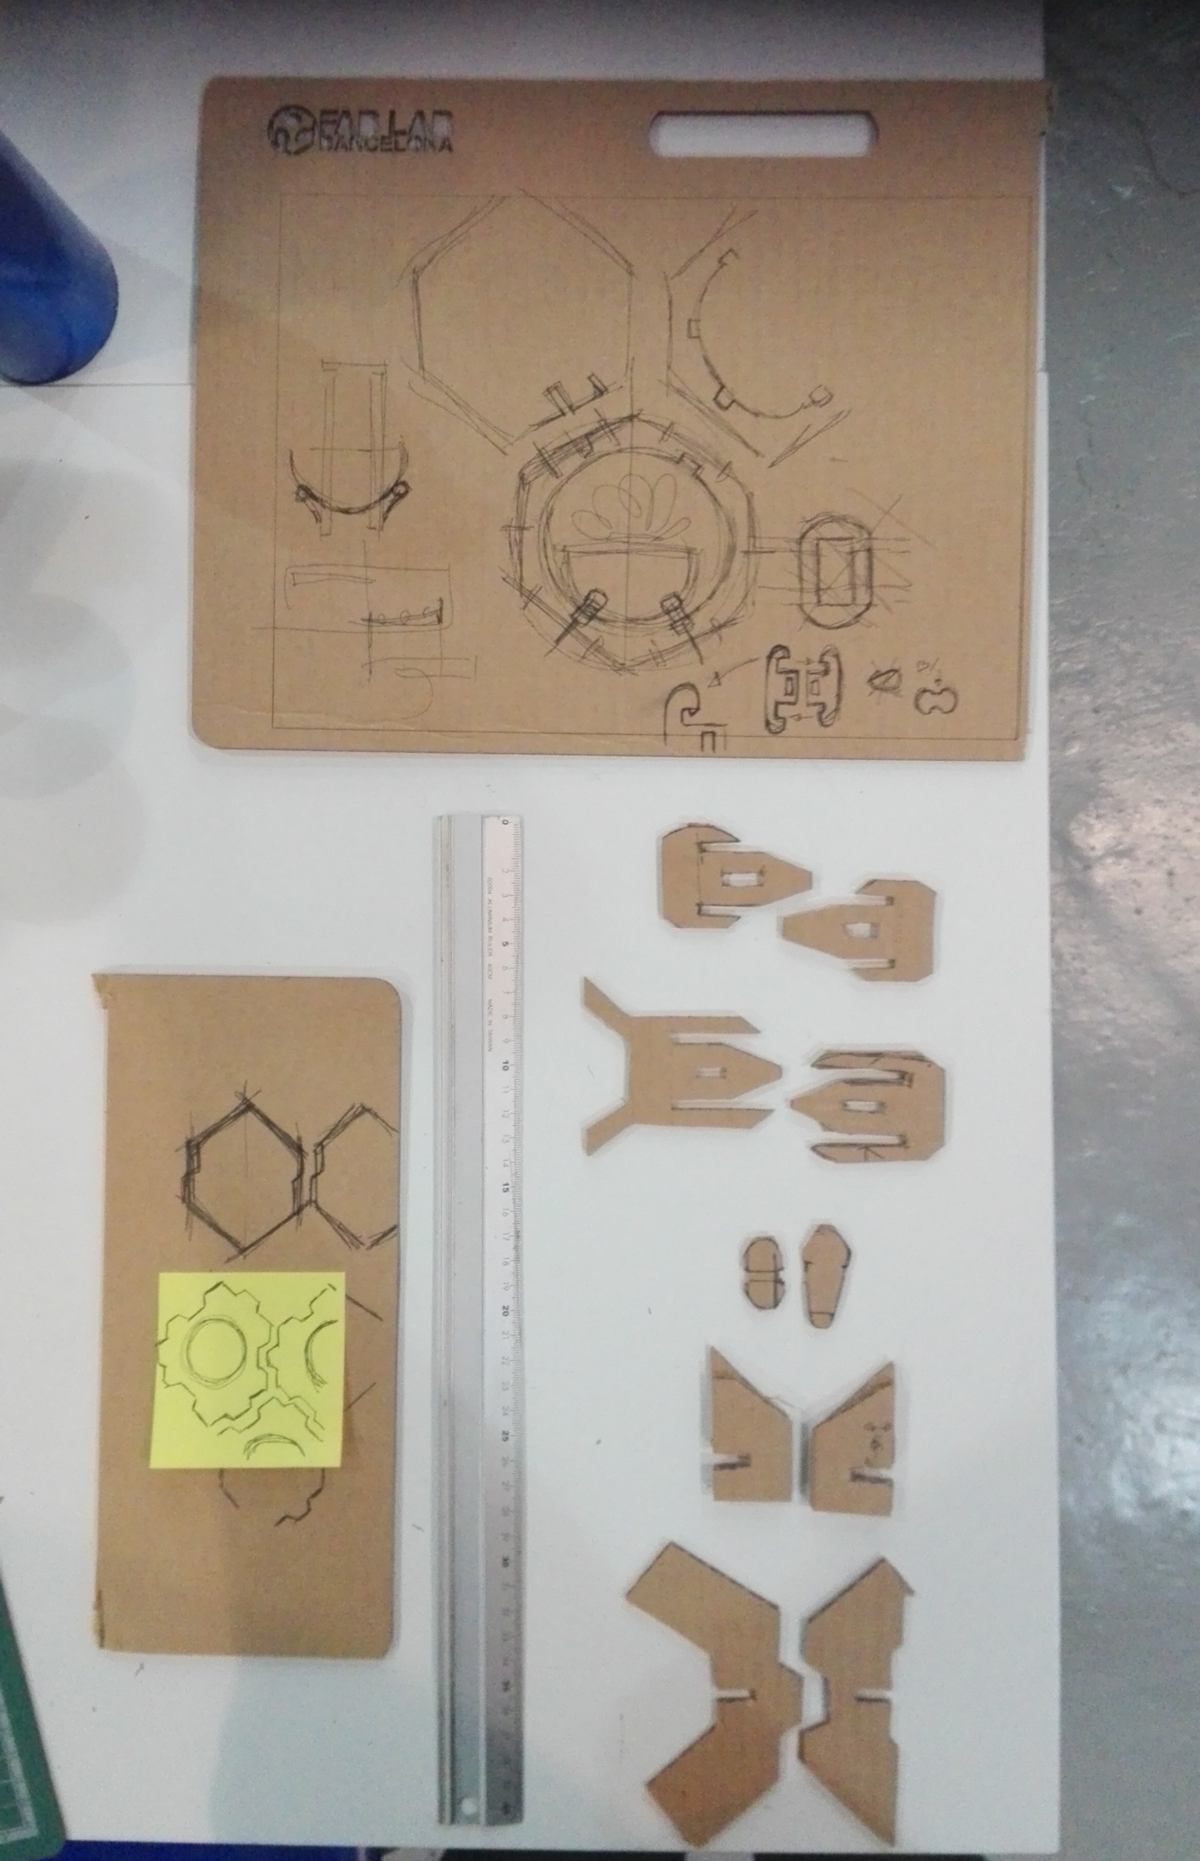
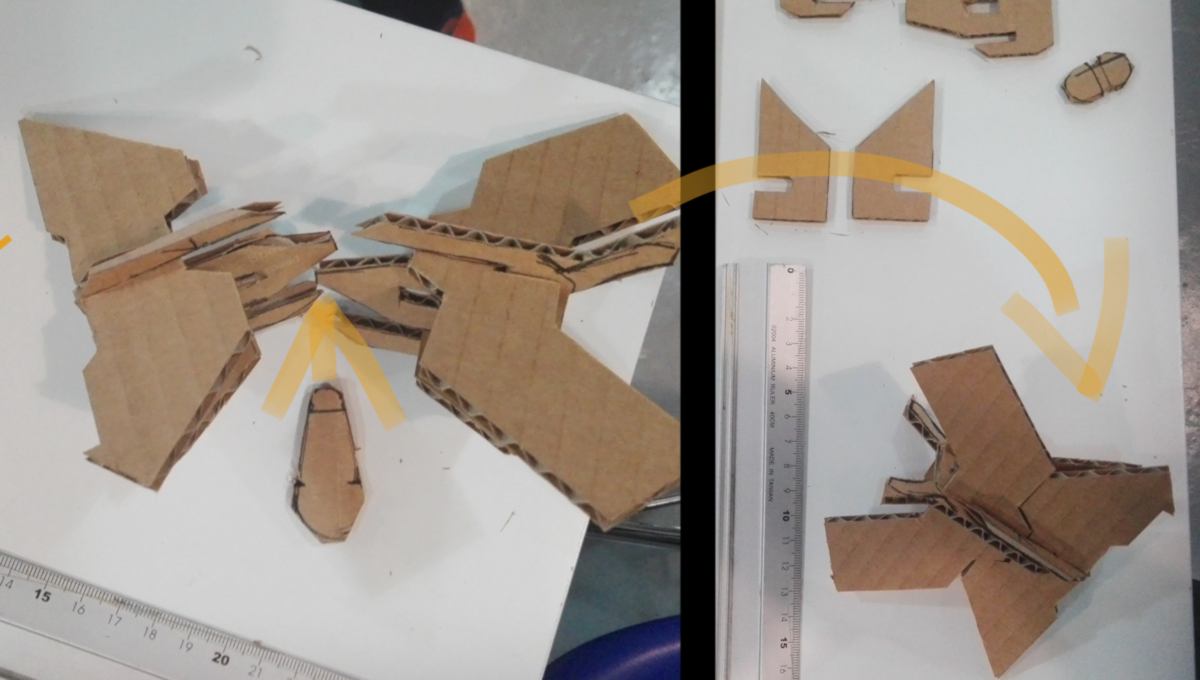
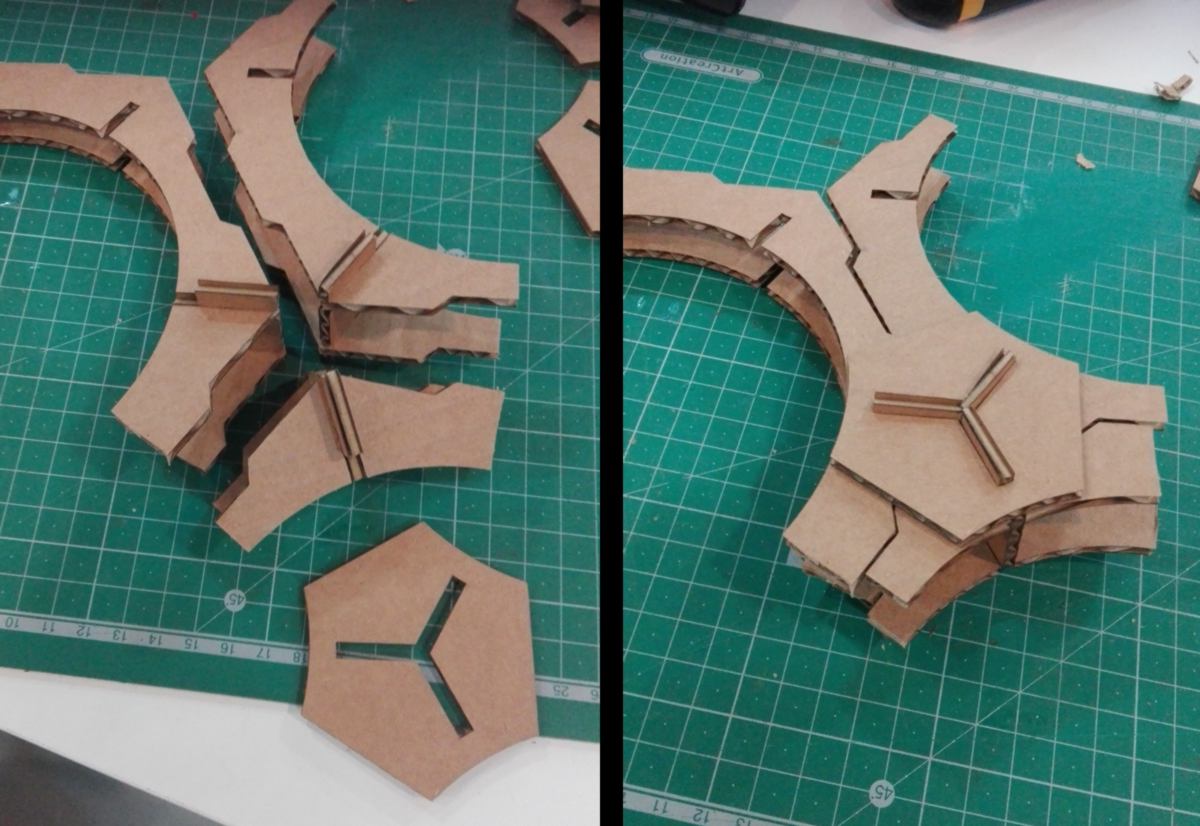
I attempt to design these pieces parametrically with Grasshopper, but a few hours later, I revert back to Fusion 360 for production efficiency. I turn my hand-crafted pieces into accurate press-fit system, knowing that the kerf of the laser cutter is close to .125 mm :
As a side-note, I want to mention that cardboard has a structural resistance that makes it used for other things than prototyping. For instance, Pauline is buidling a surf board which uses cardboard as a structural component to hold the outer layers of fiberglass into place:
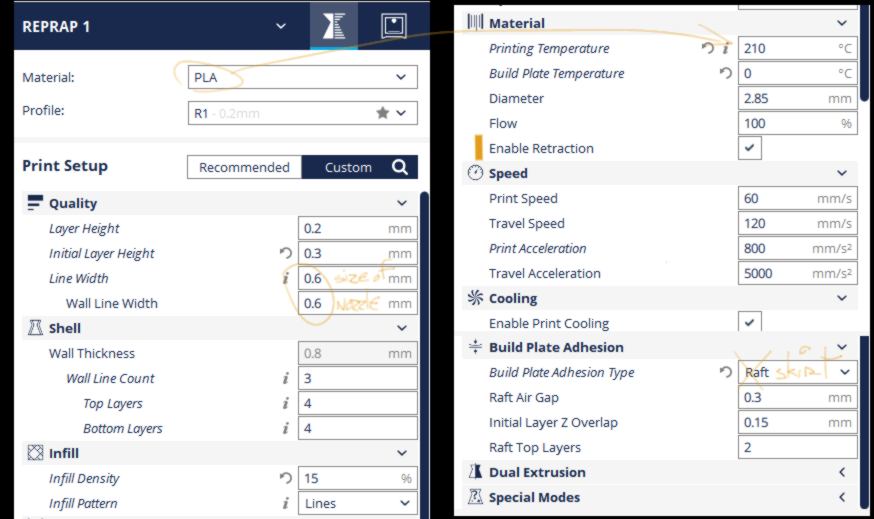
27.02.18 / Marta, Carolina and I are comparing our different prints of the test-piece :
We printed three pieces, using two repraps with exact same speed, layer height, printing temperature :
The models differs in the following ways :
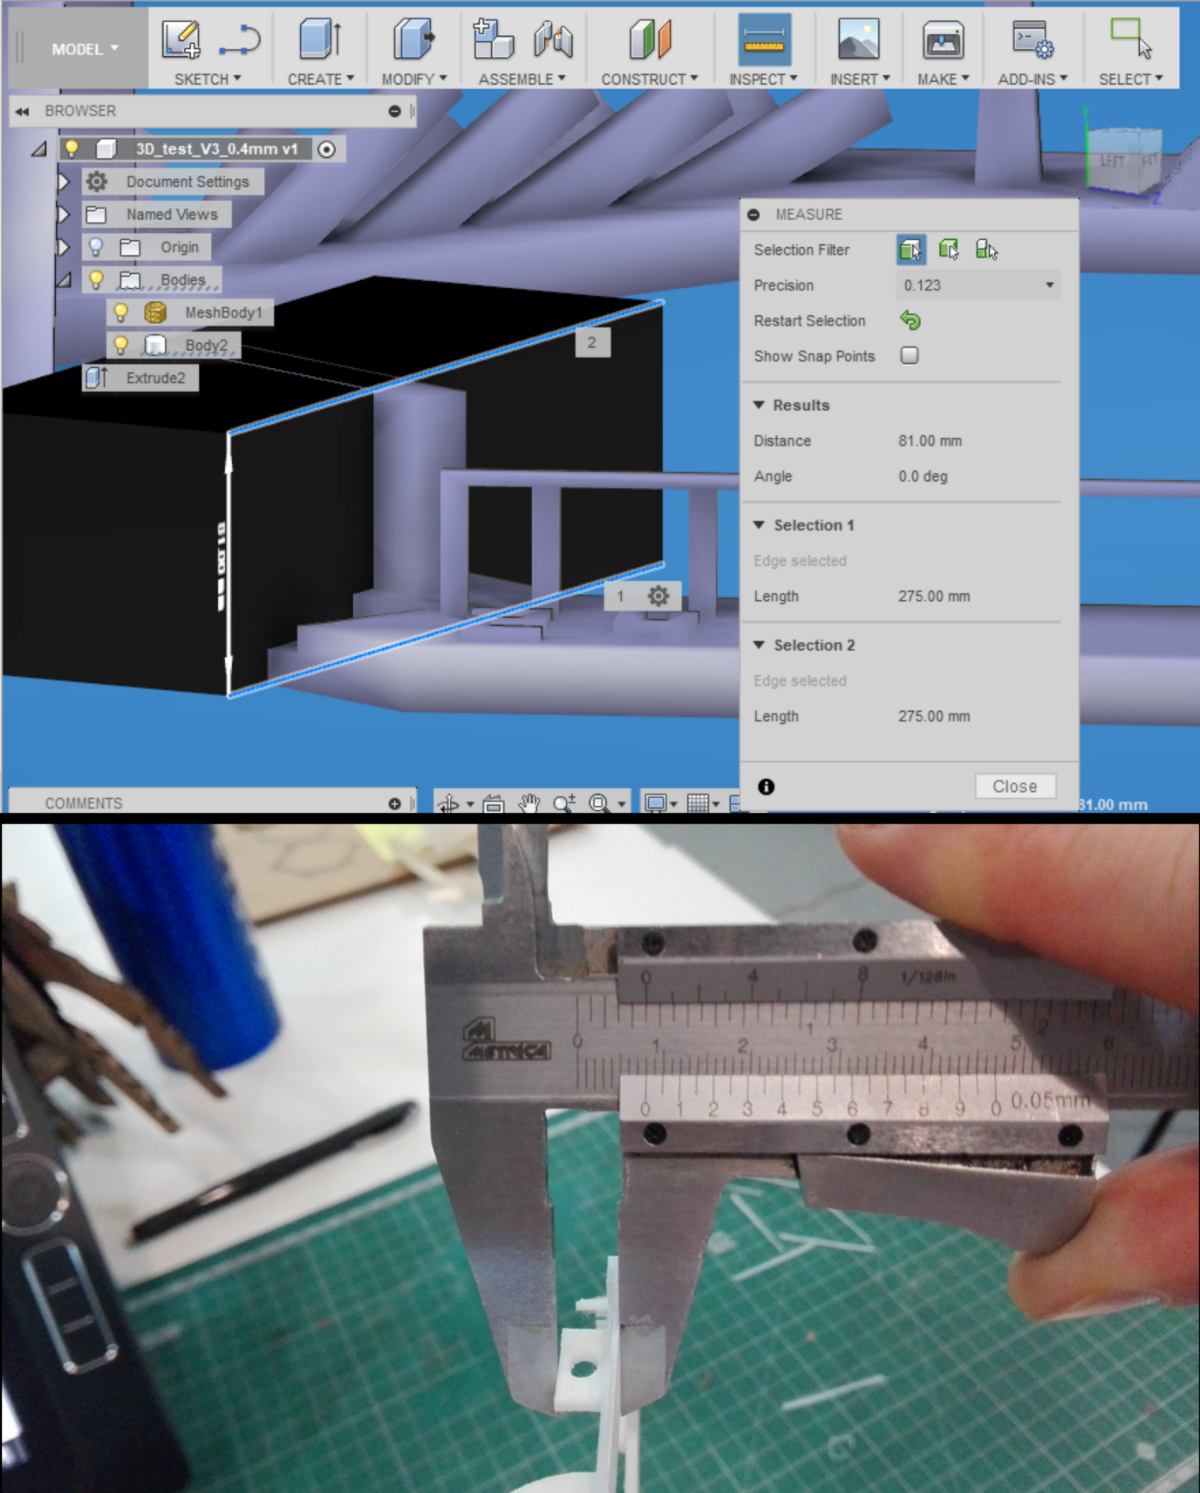
I compare measurements on the different models.
measurement 01, in x/y axis :
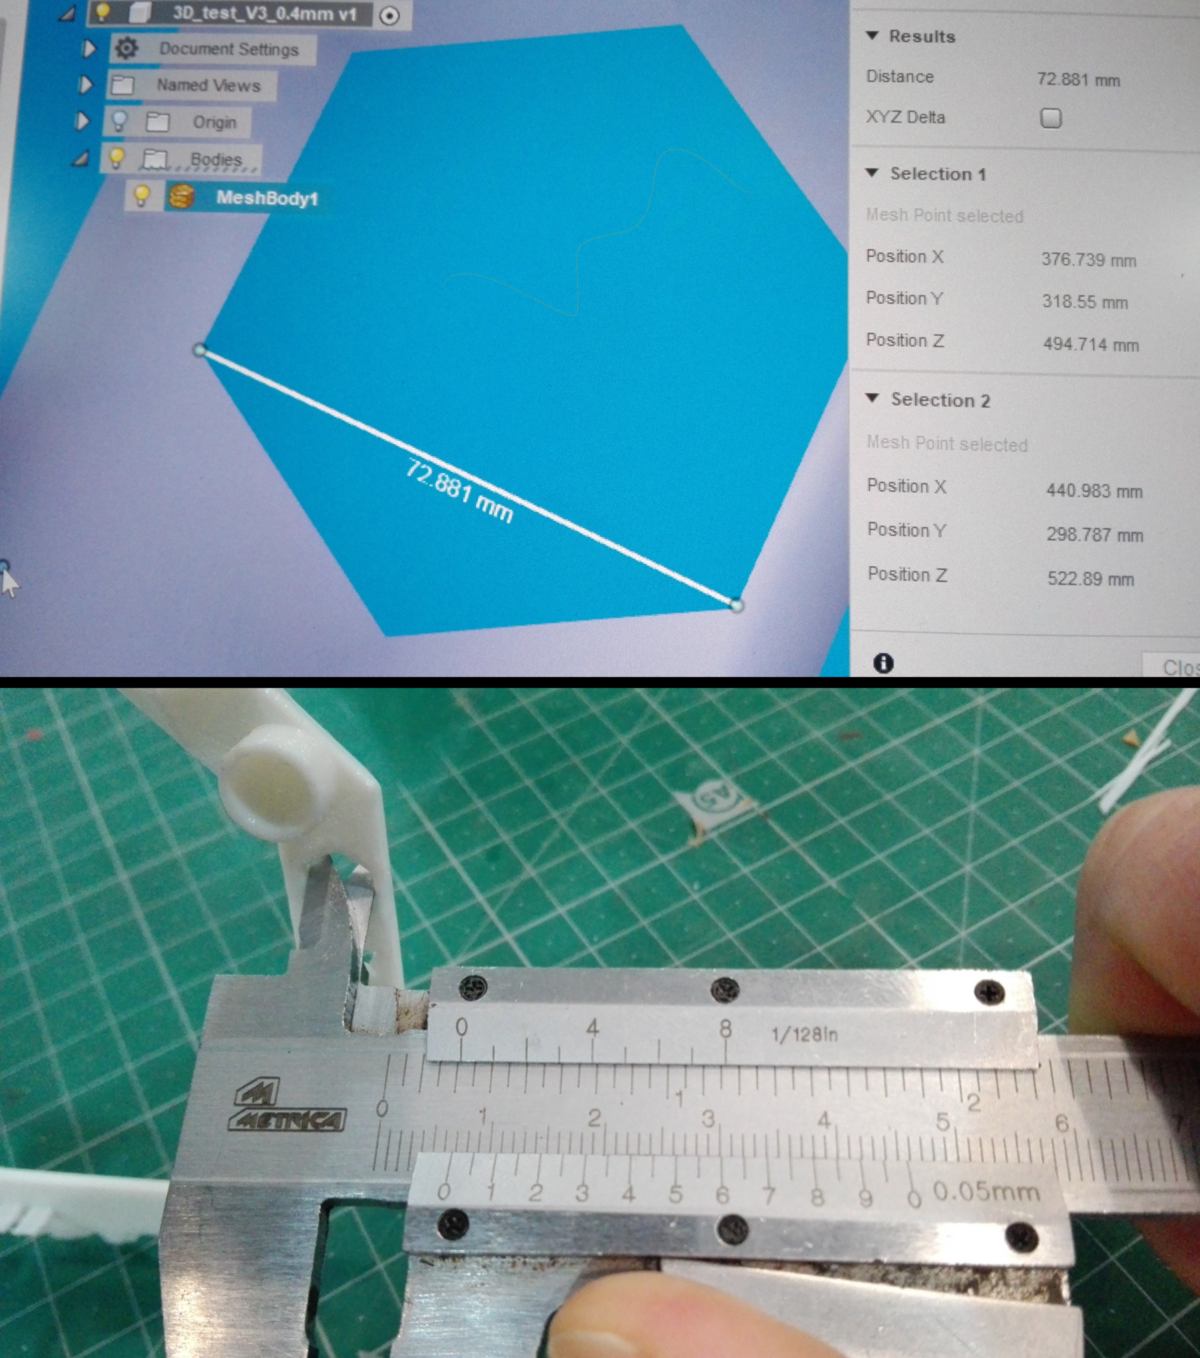
What I measured was a spacing between two printed areas. On all models, I lose some definition due to the line width. The prints tend to "thicken" the dimensions by around 1 mm. When comparing two prints from printers with different nozzle size, we can notice a difference of width, sometimes filling space that were empty in the initial digital design:
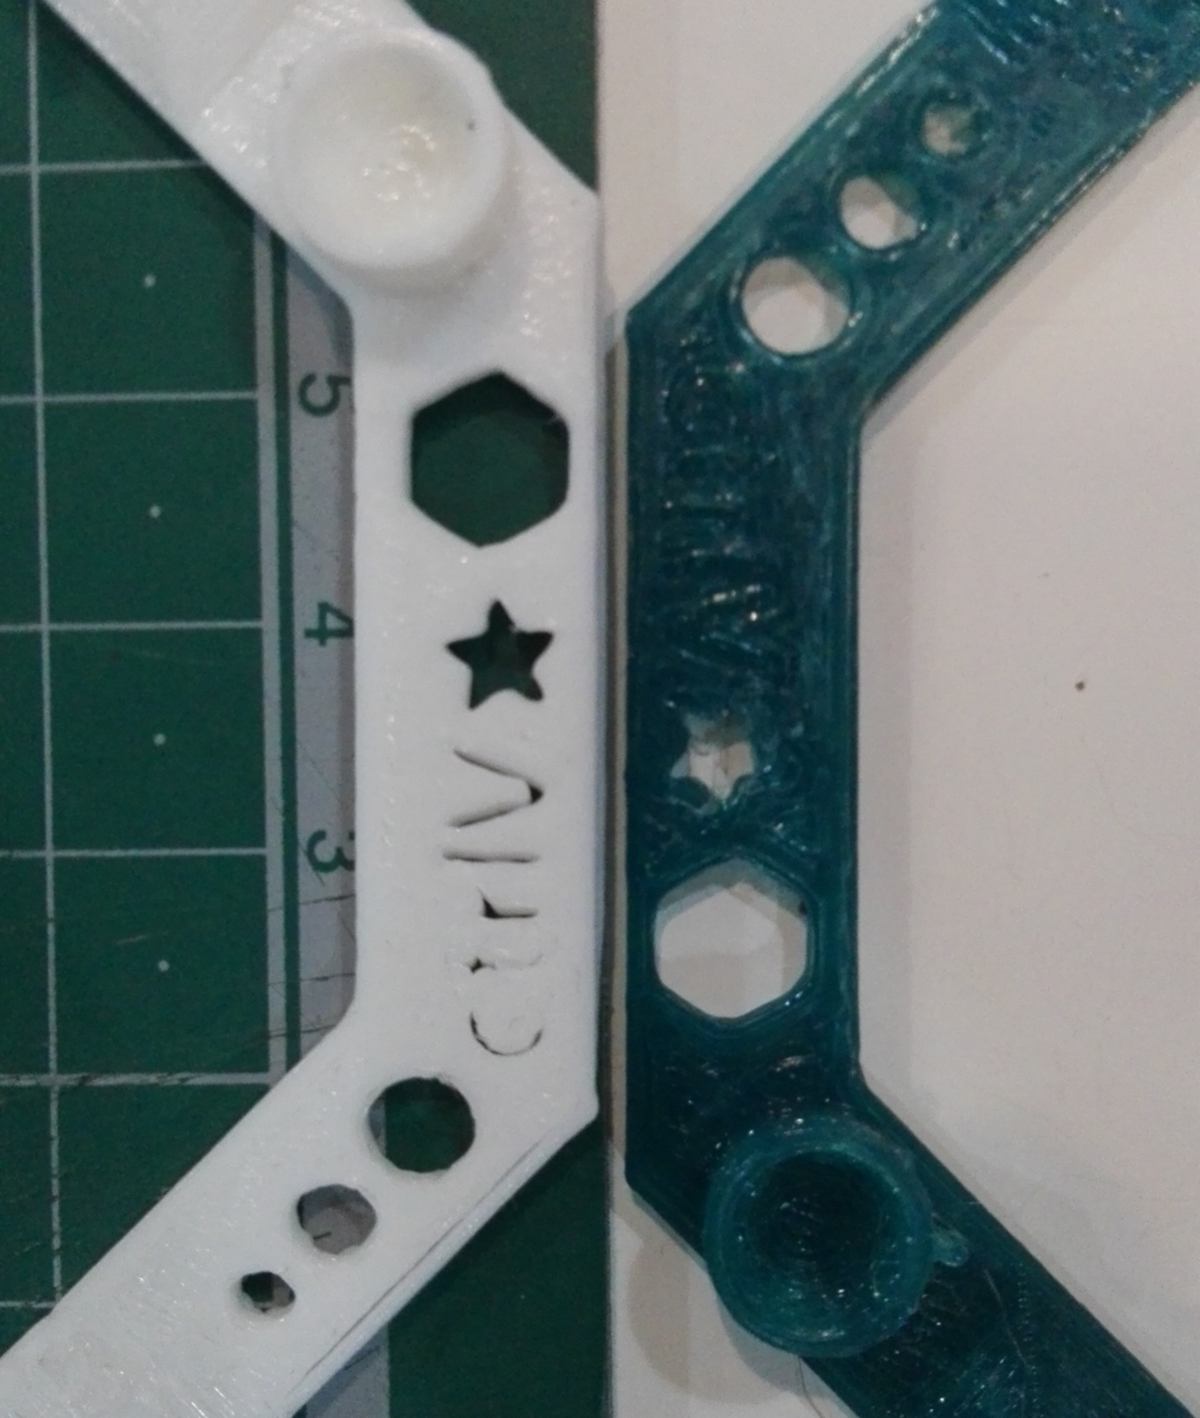
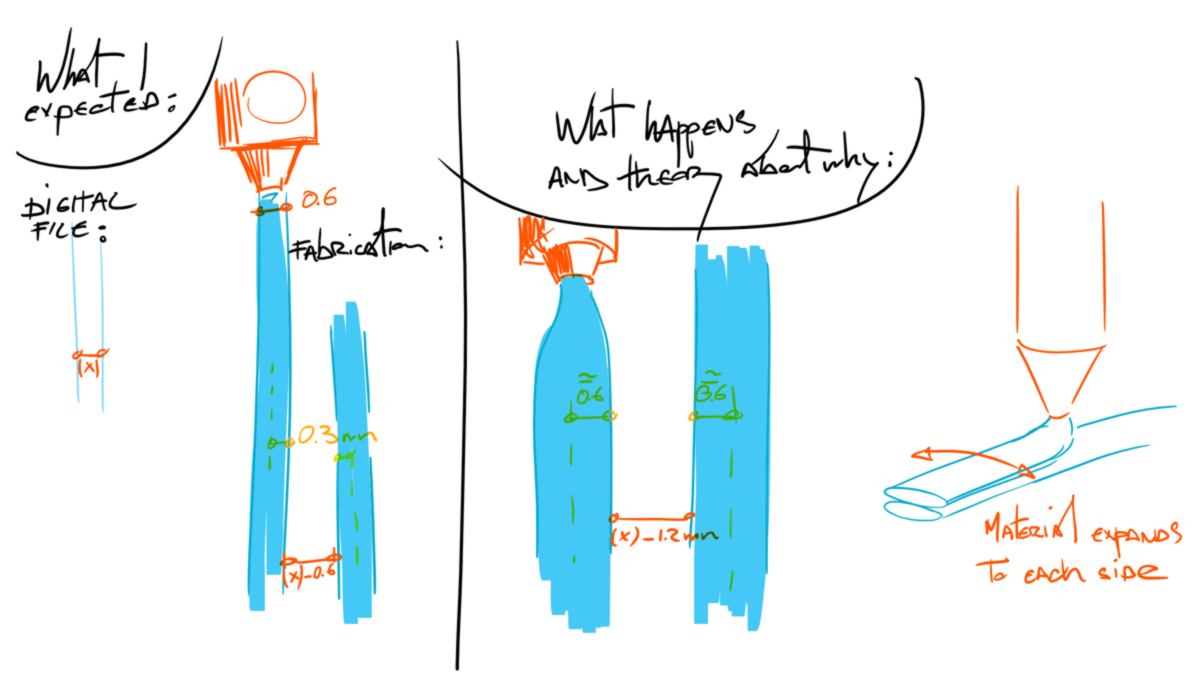
The printer with an 0.6 mm nozzle adds around 1.2mm to the inner, "empty area". I was expecting this dimension to be precisely 0.6 mm (0.3 mm on each side). I guess, since the PLA is deposed at 0.2 mm on top of the former layer, the material flows sideways, widening the final line width:
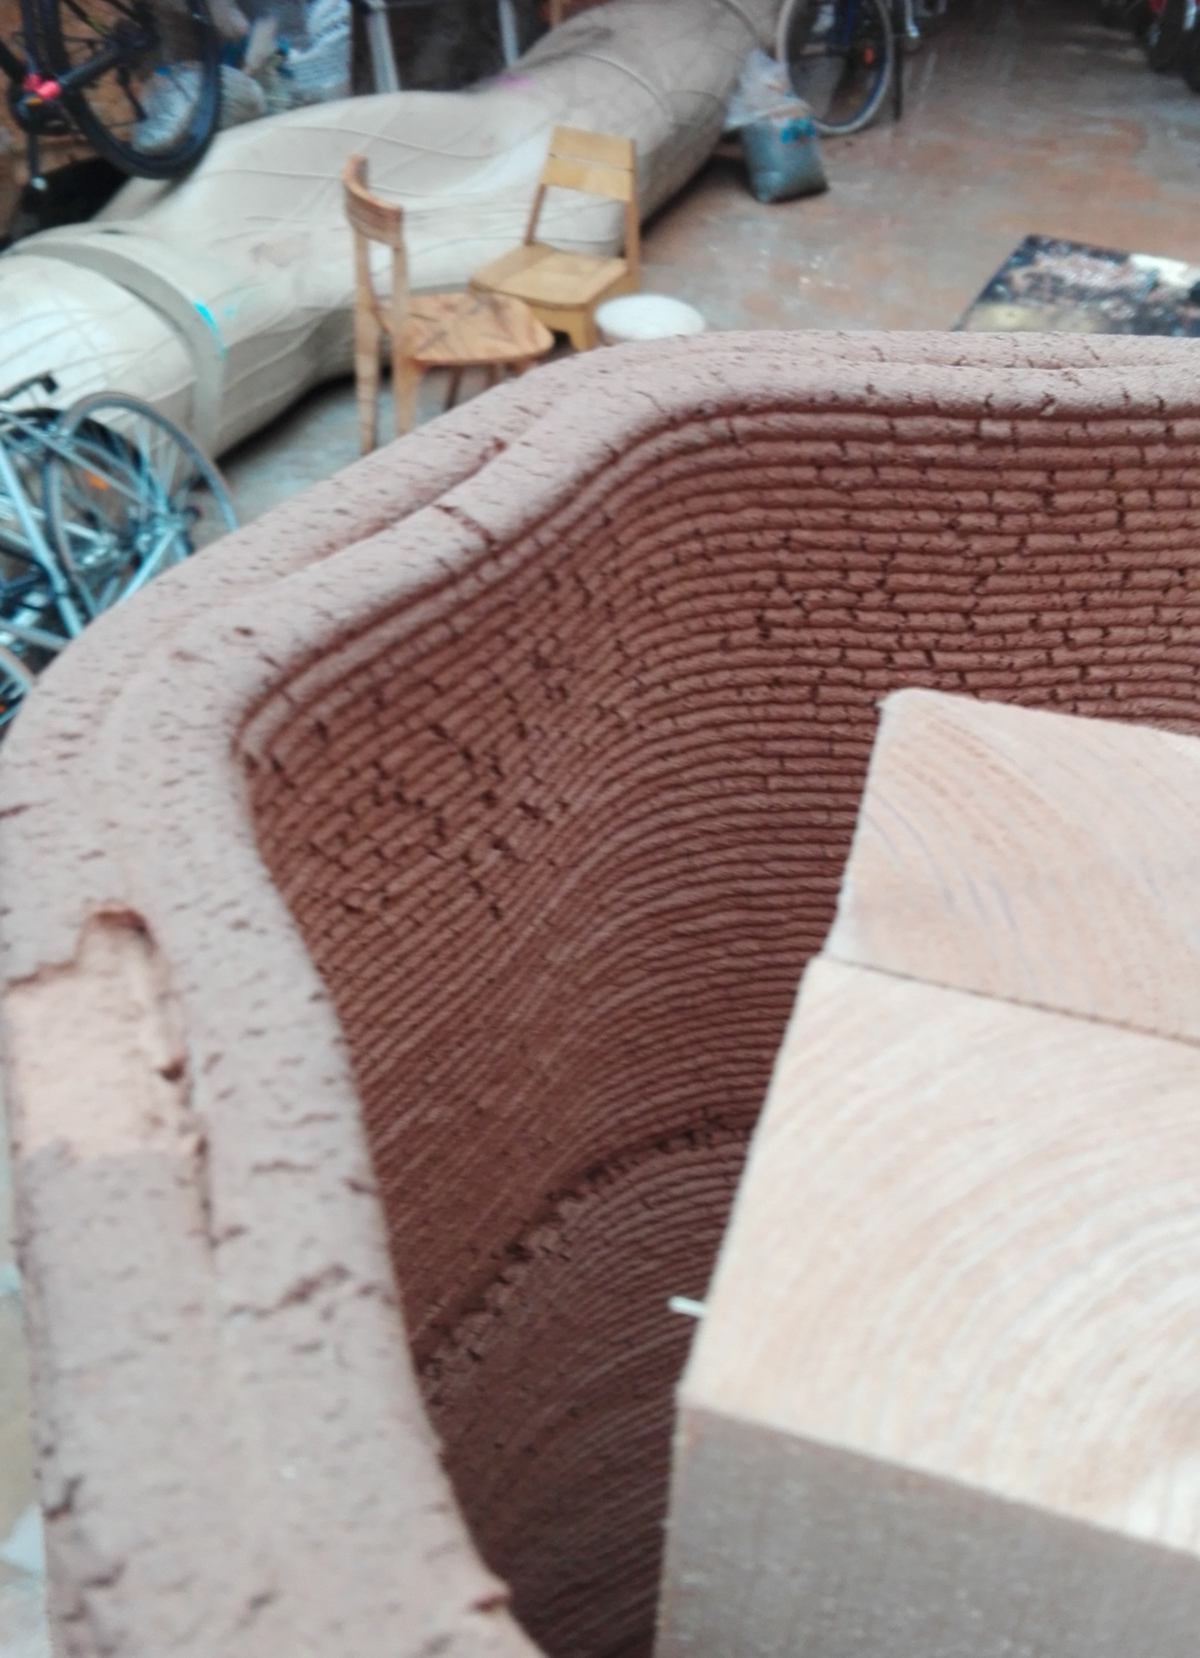
The final width also depends on the amount of material pushed through the nozzle. This is particularly obvious on clay printing:
measurement 02, in z axis :
On the z-axis, the results found on all versions are very similar, if not identical. It makes sense according to the 3d printing process. The machine has a a very fine control over the height of the printed result.
A brief note about the model with a supporting structure:
The addition of a supporting structure appears in several areas, offering support for any bridges or very overhanging surfaces ( the angle above which support is added is set in Cura and can be modified). On such a small object, extra support seems unecessary. As observed on the white model, no support is required to bridge points up to 10 mm apart, or for small overhangs. The test piece would offer more insight at a larger scale.
A brief note about prints of overhanging surfaces :
While printers with a large nozzle repeatedly misprinted specific layers, the white model shows no defects. It is also much smoother final render.
To sum it up, smaller nozzles are admittedly superior. However, I would only use a small nozzle for a very small print, or designs with extreme overhangs. This choice is motivated by the many issues we have had with the printers equipped with small nozzles. They seems to get stuck more often and resist the relentless mistreatments of agitated IAAC and FAB LAB students to a lesser extent.
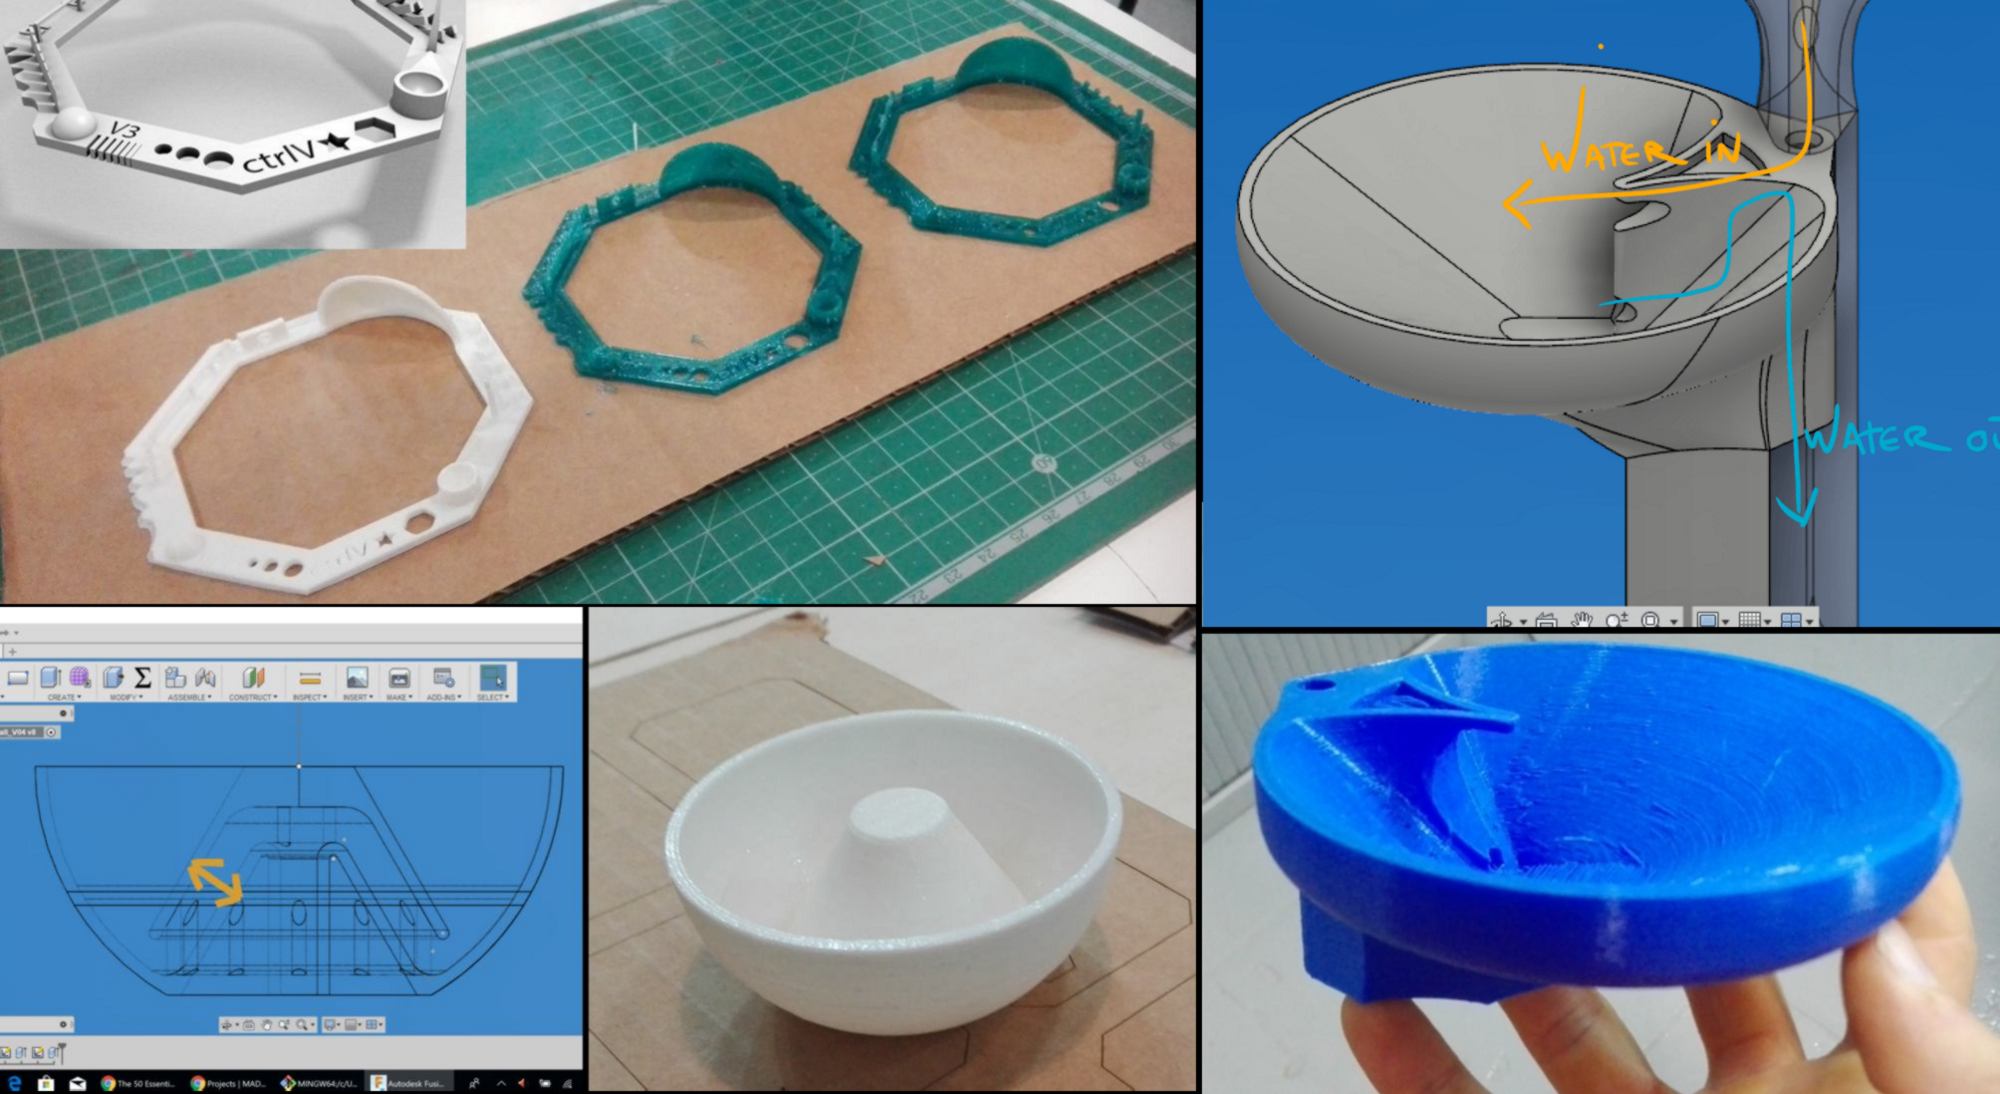
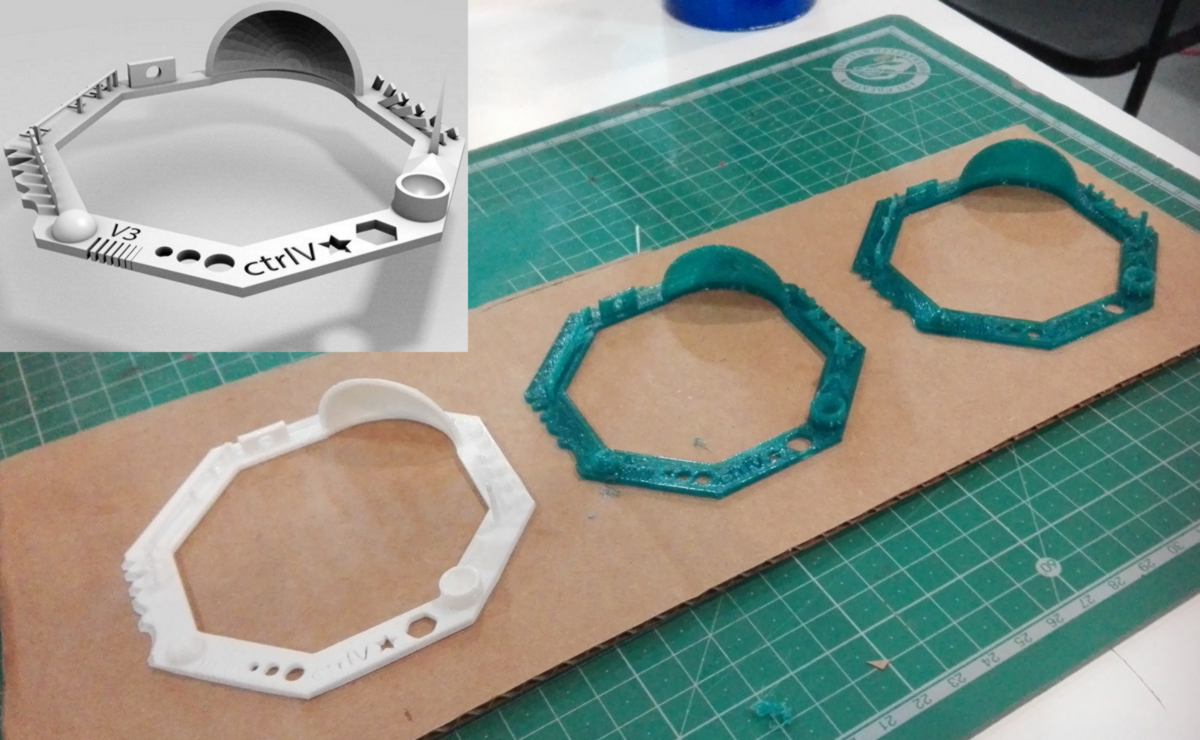
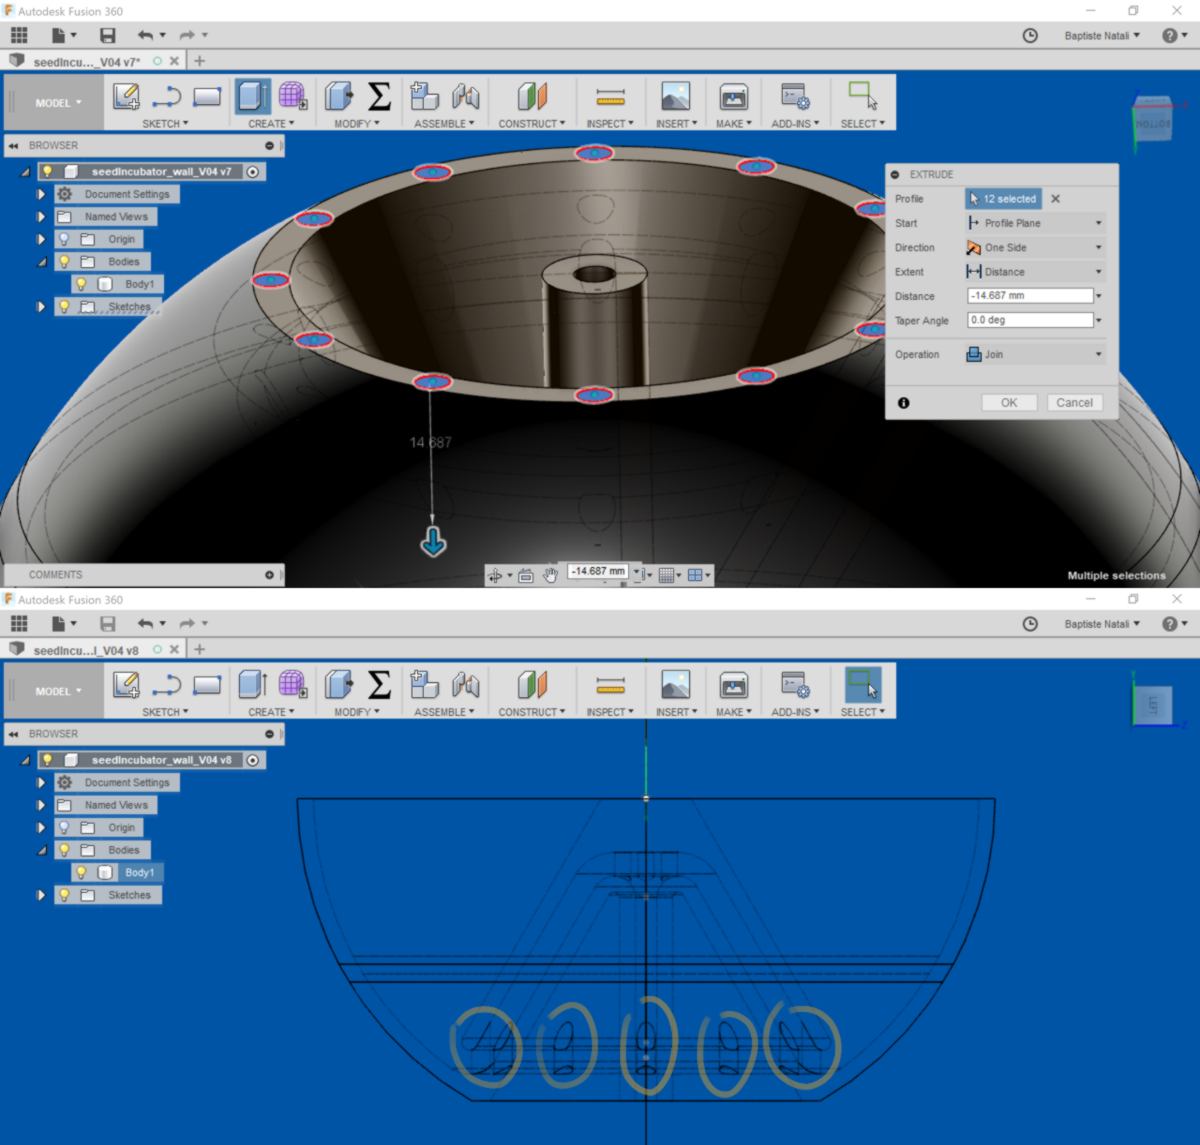
I make time to work on my personal project, designing a supporting, waterproof stucture for the plant with an embeeded siphon system. This shape possesses an inner chamber with makes it impossible to fabricate with a 3axis CNC machine with substractive process :
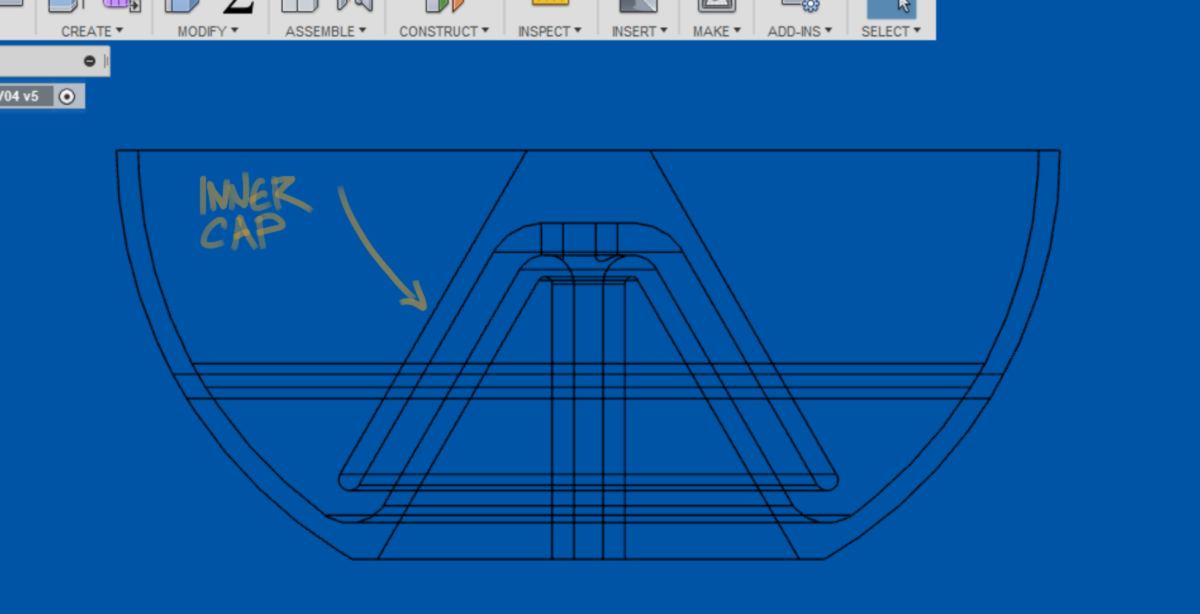
However, due to the width of the container and the extra amount of material required to print the inner cap, a print of 7 hours is required. I could lower the quality by increasing the printing speed and layer height but I learned in the precedent weeks that this could lead to printing issues, and this model must be watertight to be functionnal.
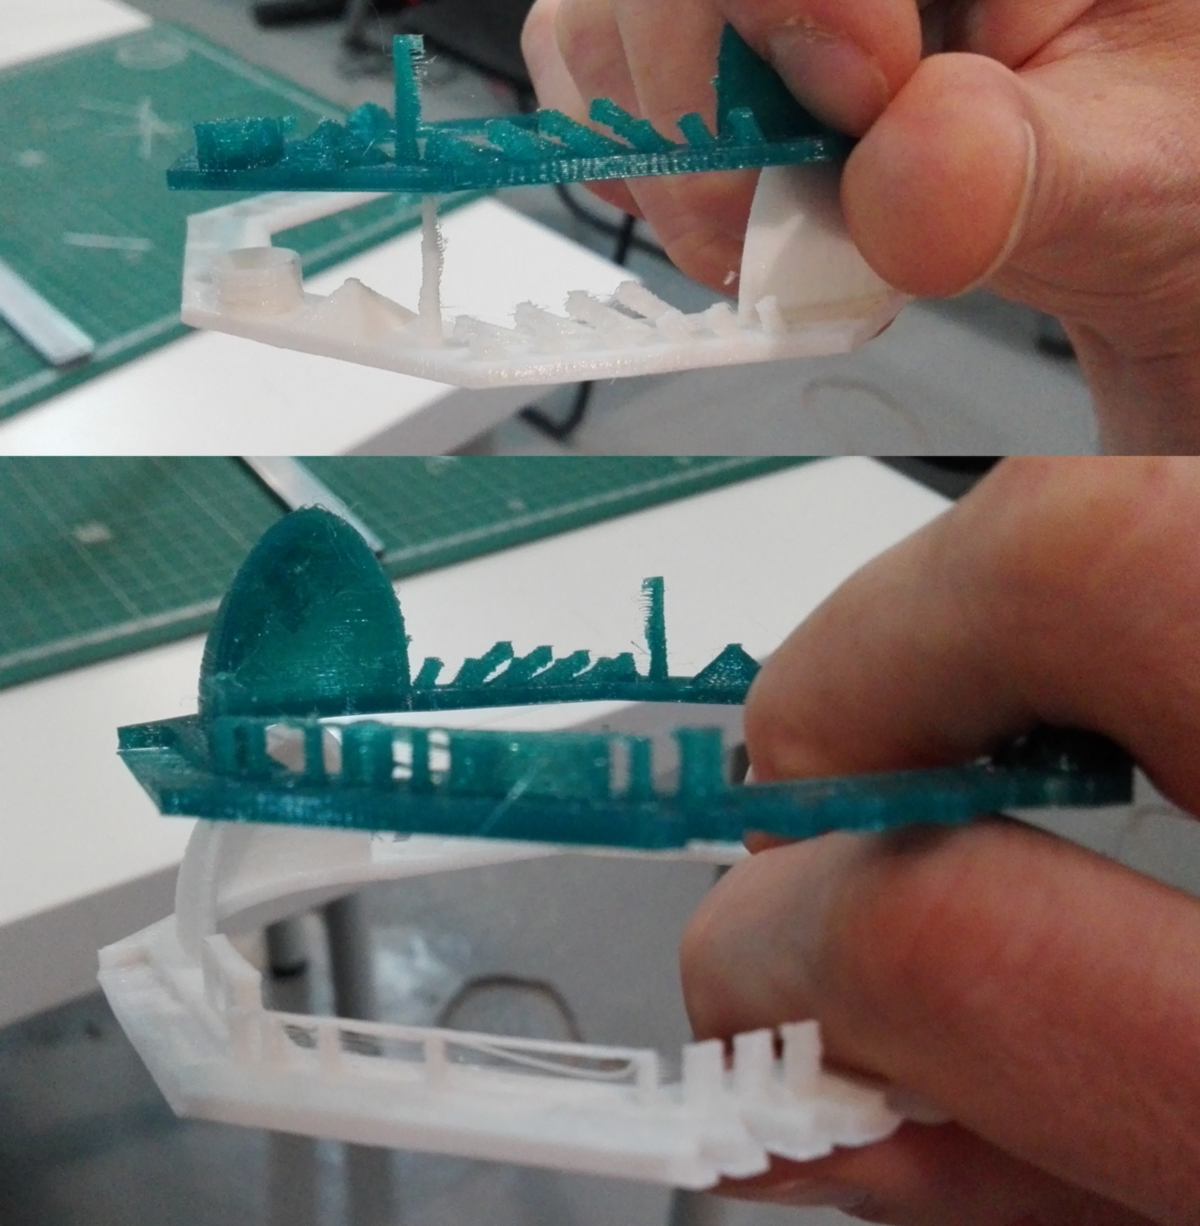
Therefore I decide to print a 1/2 model of it. During the first print, I face a problem never encountered before : the filament in the spool has tangled and is so tighlty knotted that I have to cancel the print.
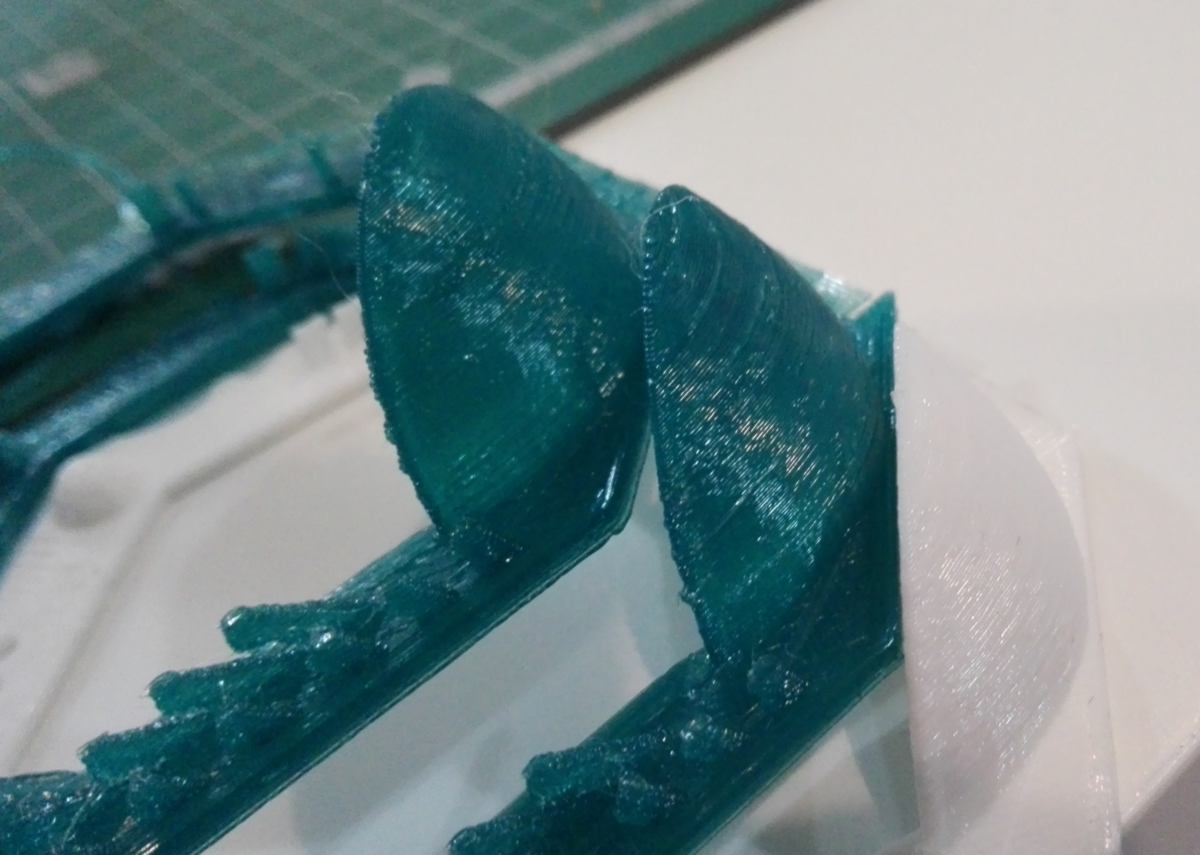
My second attempt is successful. The shape in W that I designed to avoid excessive overhang at the bottom has been printed with great result. However, when scraping the shape out of the printing plate, the inner cap breaks off the main object. This shape was attached to the main shape by three connectors which have become so small at this scale that they cannot provide enough resistance to hold the model together:
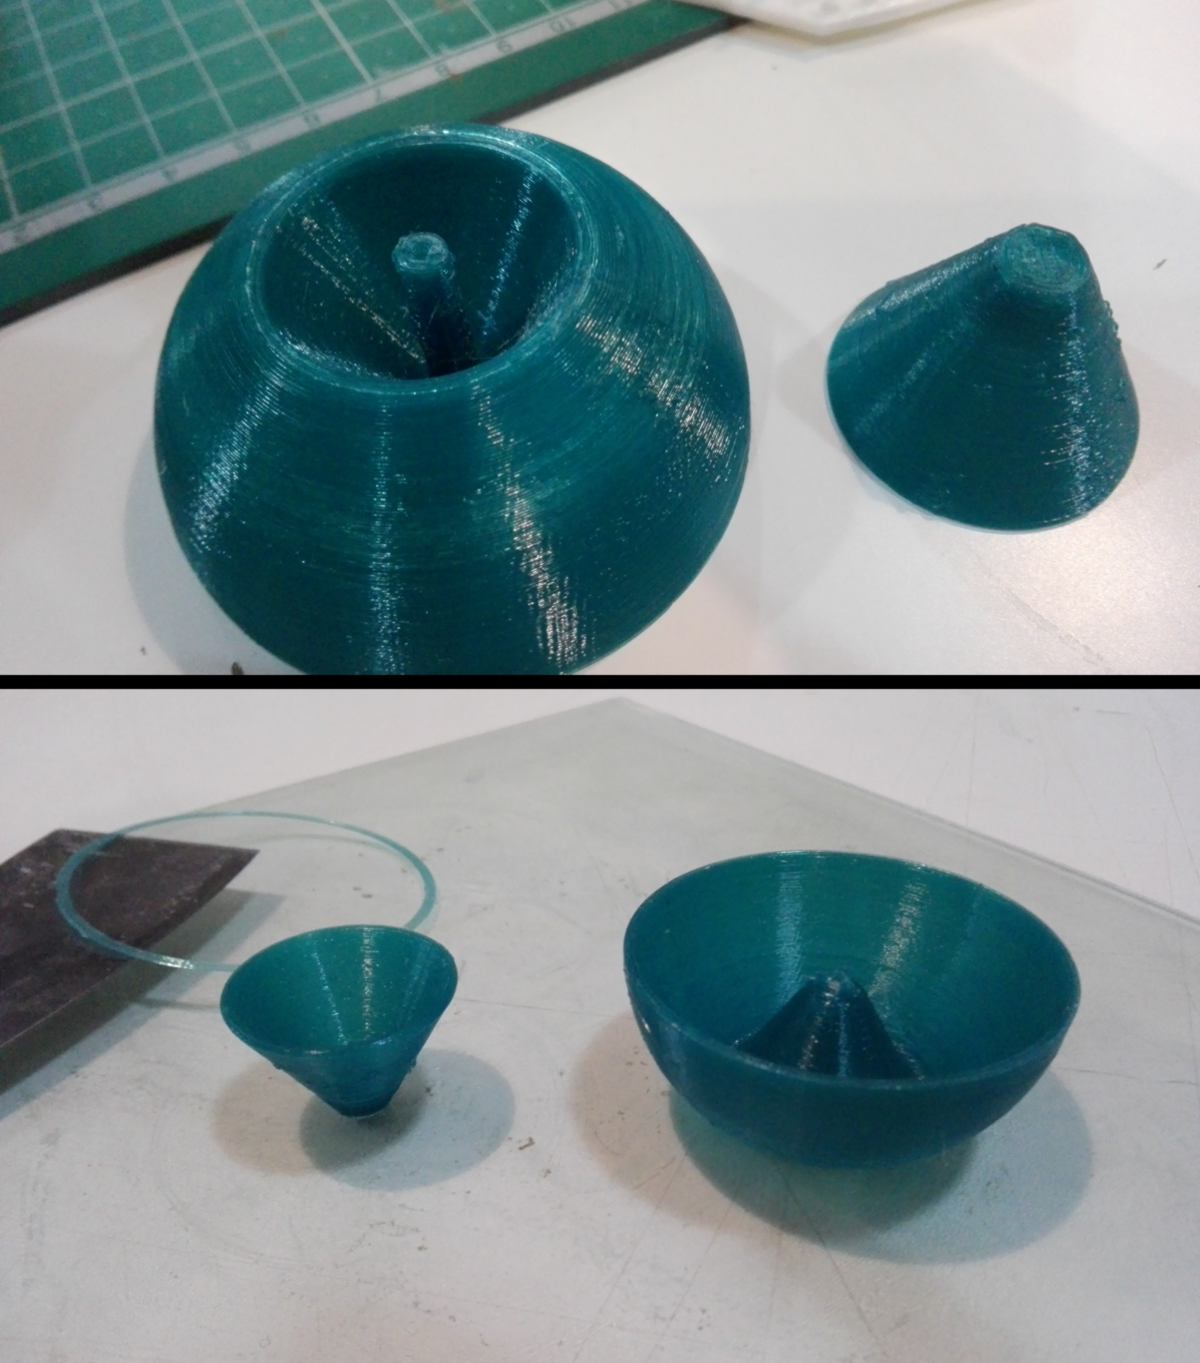
these failures brings insights about the quality of the inner print that I would have never seen otherwise as well as the structural integrity of the overall structure. I decide to reinforce the outer edge of the cap :
I will print out another small-scale model tomorrow and, if successful, print out a full size version to complete the cardboard prototype.