Week 1: Project Management
1. Introduction
During the first week of Fab Academy, I focused on understanding project management, setting up my development environment, and learning how to properly document my work step by step.
The main goal of this week was to build a strong foundation for all future weeks, because every assignment in Fab Academy depends on proper documentation, version control, and a working website system.
The main goals were:
- Set up all necessary tools for development and documentation
- Learn how to use Git and GitLab for version control
- Create and manage a personal website using MkDocs
This week is extremely important because it defines how I will work during the whole course. If the structure is wrong from the beginning, it will affect all future projects.
At first, I thought documentation was only about writing what I did. But later I understood that real documentation must explain the full process:
- What I did
- How I did it
- Why I did it
- What problems appeared
- How I solved them
This changed my way of thinking, because now I understand that documentation is part of engineering, not just writing.
2. Research
Before starting my own website, I researched previous Fab Academy student websites.
For example:Student website
This research helped me understand the expected quality and structure of documentation.
From this, I learned that good documentation must:
- Include images for better understanding
- Clearly explain each step of the process
- Follow a structured and readable format
- Include reflection and learning outcomes
This research helped me improve my own approach and avoid mistakes in structure and presentation.
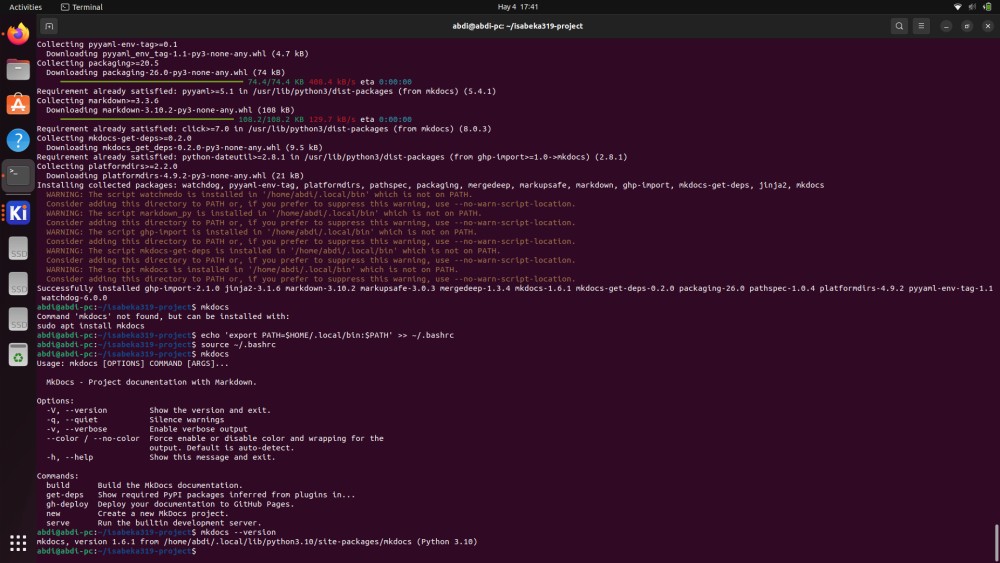
3. Installing MkDocs
To build my website, I installed MkDocs:
pip install mkdocs
Then I created a new project:
mkdocs new my-site
cd my-site
MkDocs is a tool that converts Markdown files into a fully structured website.
It is useful because:
- It is simple and fast
- It automatically organizes content
- It allows easy updates
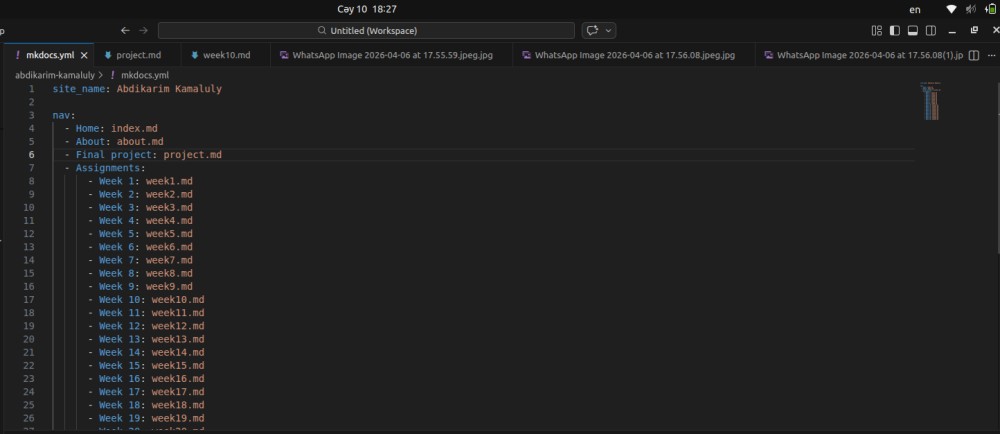
4. Customizing MkDocs
I edited the mkdocs.yml file to define the structure of my website:
site_name: Abdikarim Fab Academy

nav:
  - Home: index.md
  - Week 1: week1.md
This file controls:
- Website title
- Navigation menu
- Page structure
I also explored how to organize content in a logical way so that the website is easy to read and navigate.
5. Installing Git
Git is a version control system used to track changes in files over time and manage project history.
It is widely used in software engineering, electronics projects, and collaborative development.
Git helps to:
- Track every change made in a project step by step
- Avoid losing files or overwriting important work
- Restore previous versions if something breaks
- Organize work in a professional structure
Before learning Git, I used to save files manually with different names, which created confusion and disorganization. Git solves this problem by keeping everything in a structured history.
To install Git, I used the terminal:
sudo apt update
sudo apt install git
Then I verified installation:
git --version
This confirmed that Git is installed correctly and ready to use.
6. Configuring Git
Before starting to use Git, I configured my identity so that all commits are properly linked to me.
git config --global user.name "Abdikarim"
git config --global user.email "isabeka319@gmail.com"
This step is important because every change in Git is recorded with the author's name and email. This allows tracking contributions and understanding the full project history.
Without this configuration, commits may appear without proper identification.
6.1. Connecting to GitLab via HTTPS
To connect my local repository to GitLab, I chose to use HTTPS.
HTTPS advantages:
- Works everywhere without any extra setup
- Does not require generating or managing keys
- Easy to use on any computer or network
- Supported by default in all Git installations
To avoid entering my username and password every time, I saved my credentials locally:
git config --global credential.helper store
After that, I cloned the repository using the HTTPS link from GitLab:
git clone https://gitlab.fabcloud.org/academany/fabacademy/2026/labs/yufablab/students/abdikarim-kamaluly.git
The first time I pushed, Git asked for my GitLab username and password. After entering them once, they were saved automatically and I no longer needed to type them again.
7. Setting Up GitLab
I created a GitLab account and set up a repository to store all my Fab Academy work.
GitLab is important because it allows:
- Safe online storage of files
- Backup of all project data
- Tracking changes over time
- Access from different devices
I created a repository where I will upload all weekly assignments and documentation.
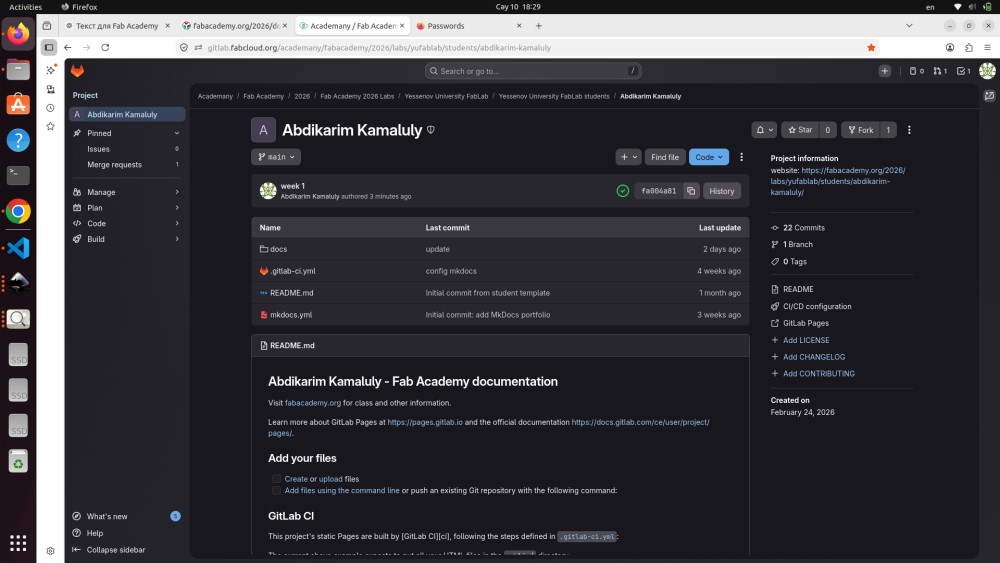
This repository is the main storage for my entire Fab Academy journey.
8. Cloning the Repository
After creating the repository on GitLab, I cloned it to my local computer:
git clone https://gitlab.fabcloud.org/academany/fabacademy/2026/labs/yufablab/students/abdikarim-kamaluly.git
Then I entered the project folder:
cd my-repository
Cloning creates a full local copy of the repository, which allows me to work offline and make changes directly on my computer.
After finishing work, I can upload changes back to GitLab.
This is the standard workflow used in real software and engineering projects.
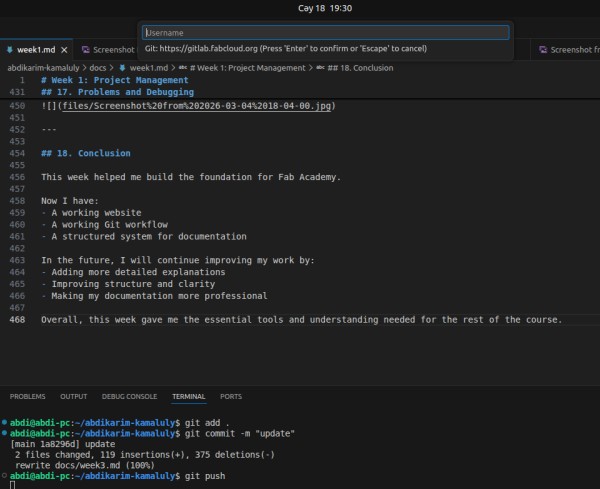
9. Git Workflow (Add → Commit → Push)
The main Git workflow consists of three steps:
git add .
git commit -m "update"
git push
Explanation:
- git add → selects files that will be saved in the next version
- git commit → stores changes locally with a message explaining updates
- git push → uploads everything to GitLab repository
This workflow is repeated every time I make changes to my project.
It helps to:
- Keep full history of changes
- Prevent data loss
- Organize development process
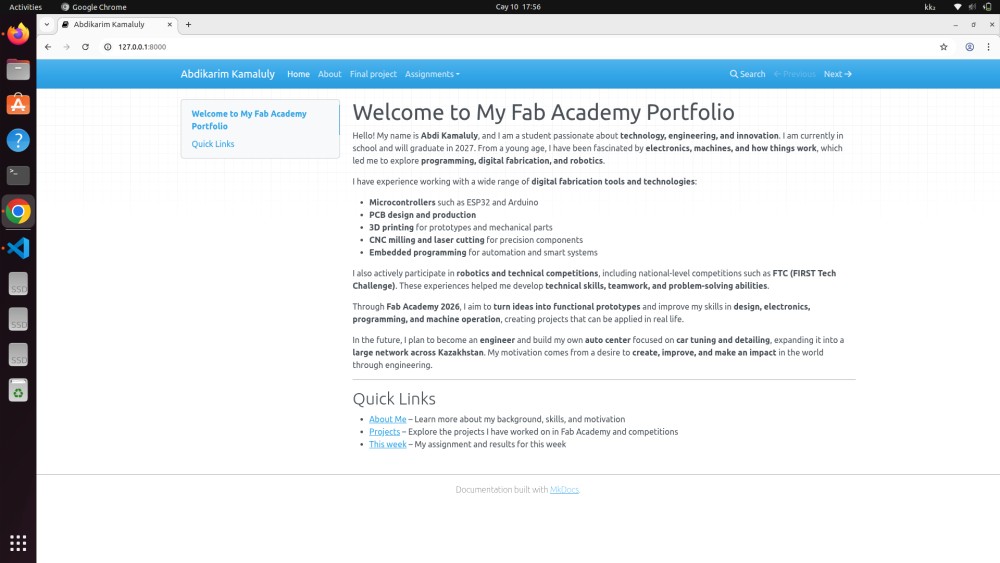
10. Running the Website Locally
To test my website, I used:
mkdocs serve
Then opened:
http://127.0.0.1:8000
This allowed me to see my website in real time while editing it.
This is very useful because:
- I can check layout instantly
- I can fix errors quickly
- I can test changes before publishing
11. Editing the Website
I used Visual Studio Code to edit all files.
Main files included:
- mkdocs.yml for structure
- docs/index.md for homepage
- week1.md for documentation
I structured my content using:
- Headings
- Subheadings
- Lists
- Code blocks
This makes the documentation clear, readable, and professional.
Markdown Syntax Examples
All pages are written in Markdown — a simple text format that MkDocs converts into HTML automatically. Below are the main syntax elements I use in my documentation.
Headings:
# Heading 1
## Heading 2
### Heading 3
Bold and italic text:
**bold text**
*italic text*
Lists:
- Item one
- Item two
- Item three
Adding a link:
[Link text](https://example.com)
Example: Fab Academy website
Adding an image:

The image file must be placed inside the docs/files/ folder. The alt text is shown if the image fails to load.
Example:

Embedding a video (YouTube):
MkDocs does not support video tags directly in Markdown, but you can embed a YouTube video using raw HTML inside your .md file:
<iframe width="560" height="315"
  src="https://www.youtube.com/embed/VIDEO_ID"
  frameborder="0"
  allowfullscreen>
</iframe>
Replace YOUR_VIDEO_ID with the actual ID from the YouTube link.
Code blocks:
Use triple backticks with the language name for syntax highlighting:
```bash
git add .
git commit -m "update"
git push
```
These are the main elements I use to structure and illustrate my weekly documentation pages.
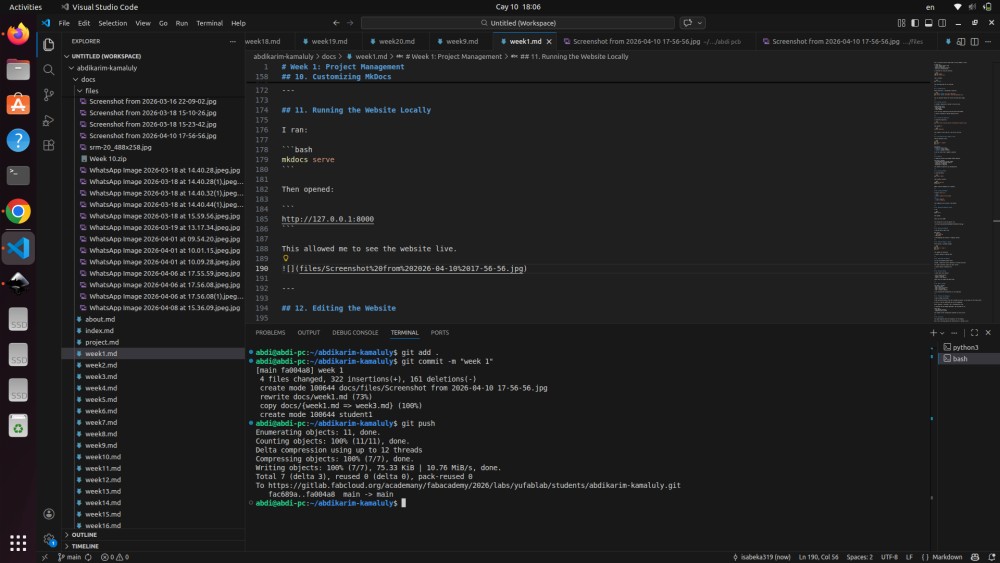
12. Pushing Changes to GitLab
After making changes, I uploaded them to GitLab:
git add .
git commit -m "week 1"
git push
This process updates the online repository with my latest work.
It is important because it keeps everything synchronized between local and online versions.
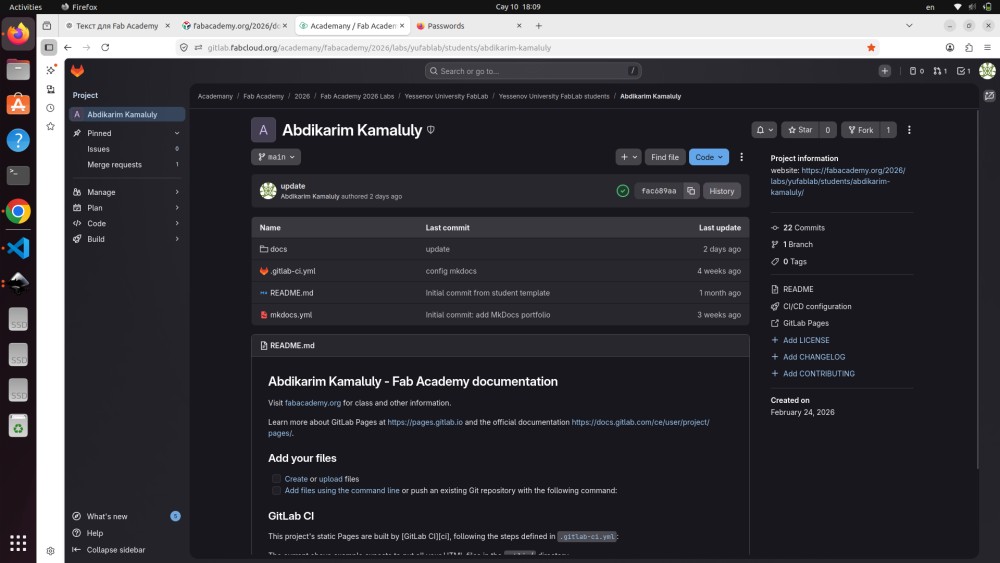
13. Publishing the Website
I publish my website by pushing my files to GitLab using Git.
This method is simple and reliable because it ensures that all changes are stored and updated in the repository.
After pushing, I always check the repository online to confirm that everything is updated correctly and nothing is missing.
14. Decision Making
For Fab Academy, Git and GitLab are required tools — they are part of the program structure and not something I chose personally. Every student uses them for version control and repository hosting.
The one decision I made myself was choosing Markdown as the format for writing my documentation.
Markdown is a lightweight text format that uses simple symbols to define structure — headings, lists, bold text, links, images, and code blocks — without needing a complex editor or software.
I chose Markdown because:
- It is plain text, so it works in any editor
- It integrates directly with MkDocs, which converts it into a website automatically
- It is easy to read even without rendering
- It is widely used in technical documentation and open-source projects
An alternative would have been writing documentation in HTML directly, but that would be more complicated and slower to update. Markdown keeps the focus on content rather than formatting code.
15. What I Learned
This week I learned many important skills:
- How to use Git for version control
- How to connect local and online repositories
- How to use terminal commands for development
- How to build a structured documentation website
I also learned that documentation is not just writing, but explaining the full process clearly and logically.
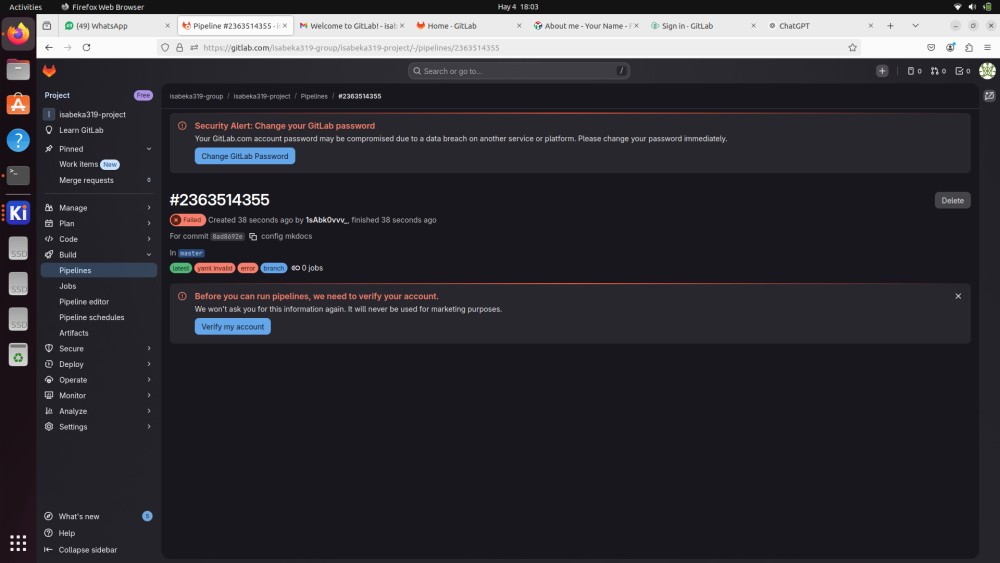
16. Problems and Debugging
During this week, I faced a problem with GitLab configuration.
I had two GitLab accounts, and when I tried to push my project, the files were being sent to the wrong account.
At first, I was confused because everything seemed correct in my setup.
After checking carefully, I realized that the issue was related to account authentication and configuration on my system.
I contacted the Fab Academy developer, explained the problem, and he helped me fix the configuration.
After this:
- The correct account was linked
- The push command worked correctly
- The repository was updated successfully
This problem taught me that even small configuration issues can completely block a project.
17. Conclusion
This week helped me build the foundation for Fab Academy.
Now I have:
- A working website
- A working Git workflow
- A structured system for documentation
In the future, I will continue improving my work by:
- Adding more detailed explanations
- Improving structure and clarity
- Making my documentation more professional
Overall, this week gave me the essential tools and understanding needed for the rest of the course.