Week 14 — Molding and casting
Global Class
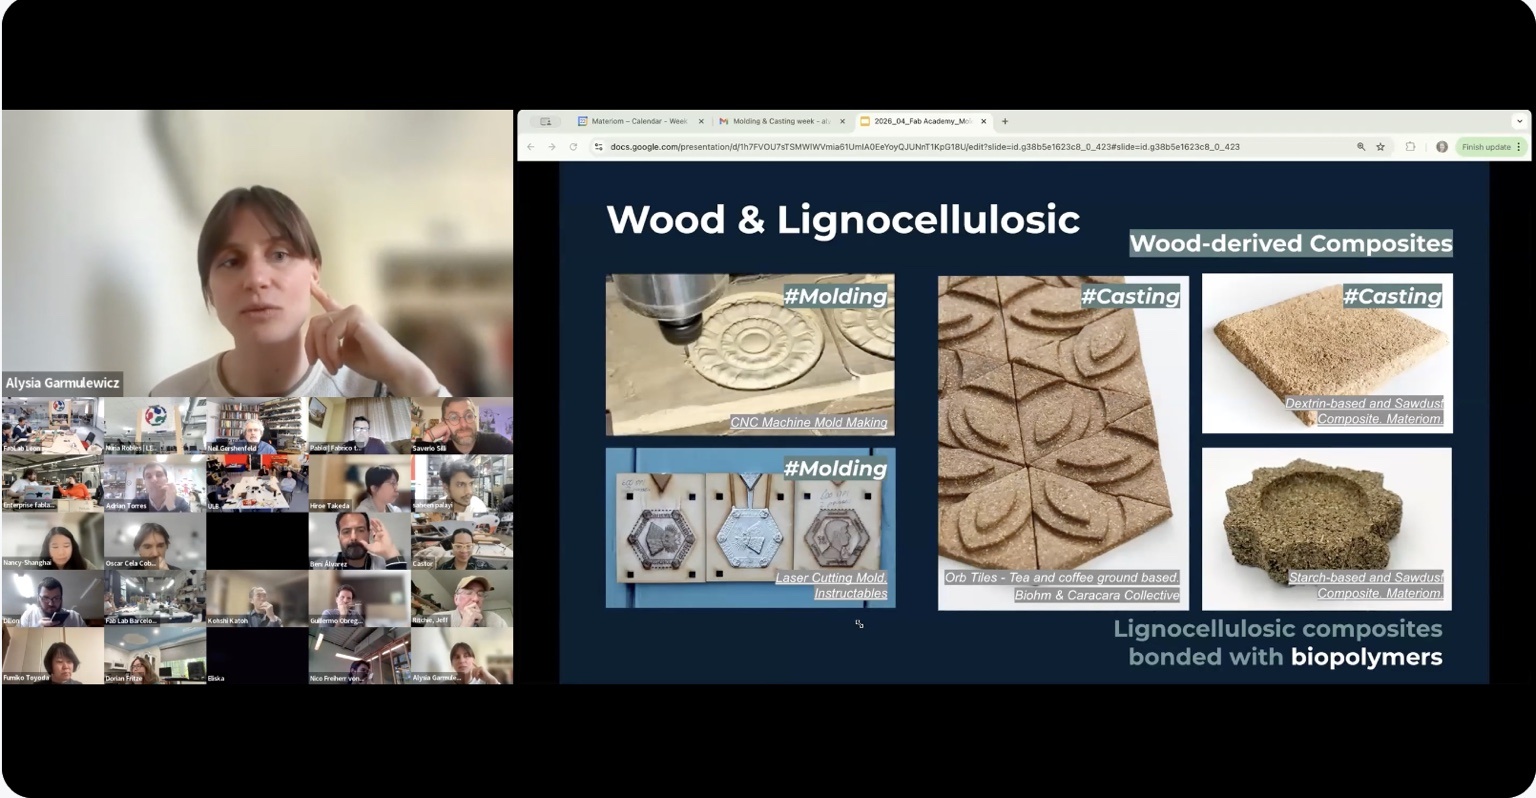
This week introduced molding and casting as a fundamental fabrication process, widely used in industry and highly versatile in the Fab Lab context. Unlike subtractive or additive methods, molding and casting enable the use of a wide range of materials and allow for repeatable production once a mold is created.
Molding refers to creating the negative geometry (the mold), while casting is the process of filling that mold with a material that solidifies into the final part.
The class also introduced different mold strategies depending on geometry:
- one-part molds for simple shapes
- two-part molds for more complex geometries with alignment features
- multi-part molds for highly complex or undercut shapes
Material selection plays a critical role, especially in terms of compatibility between mold and cast. For example, rigid molds are used for soft casts, while flexible molds are needed for rigid cast materials to allow demolding.
Bio-based materials
A major focus of the lecture was on bio-based materials and their potential in digital fabrication. This was particularly interesting because it reframes materials as something that can be developed locally using available resources.
The approach to bio-based materials strongly resembles cooking:
- recipes define ingredient ratios and processes
- materials can be mixed, heated, tuned, and iterated
- properties such as viscosity, flexibility, and strength can be adjusted through experimentation
Materiom presentation of its AI platform, is similar to other nature based discovery platforms that use a vast knowledge base to allow users to access huge compute power to accelerate innovation.
Examples of bio-based materials that caught my attention are:
- gelatin and starch-based bioplastics
- mycelium-grown structures
- alginate molds
- composites using sawdust, coffee grounds, or agricultural waste
These materials resonated with previouas work I have done regarding upcycling side streams, but working with locally sourced biomass and waste streams, and in this case fabrication can be conceived as designing the material itself.
An important observation was the difference between bio-based and biodegradable materials. A material can be bio-based but still not biodegradable depending on how it is processed, which emphasizes the need to consider full lifecycle and end-of-life strategies.
The second part of the lecture focused on practical workflows in the lab, as well as safety, always reminding use to read labels and data sheets from manufacturers and follow them!
The most impactful takeaway is that materials can be engineered through simple recipe-based processes, opening a space for experimentation that feels closer to cooking than traditional manufacturing.
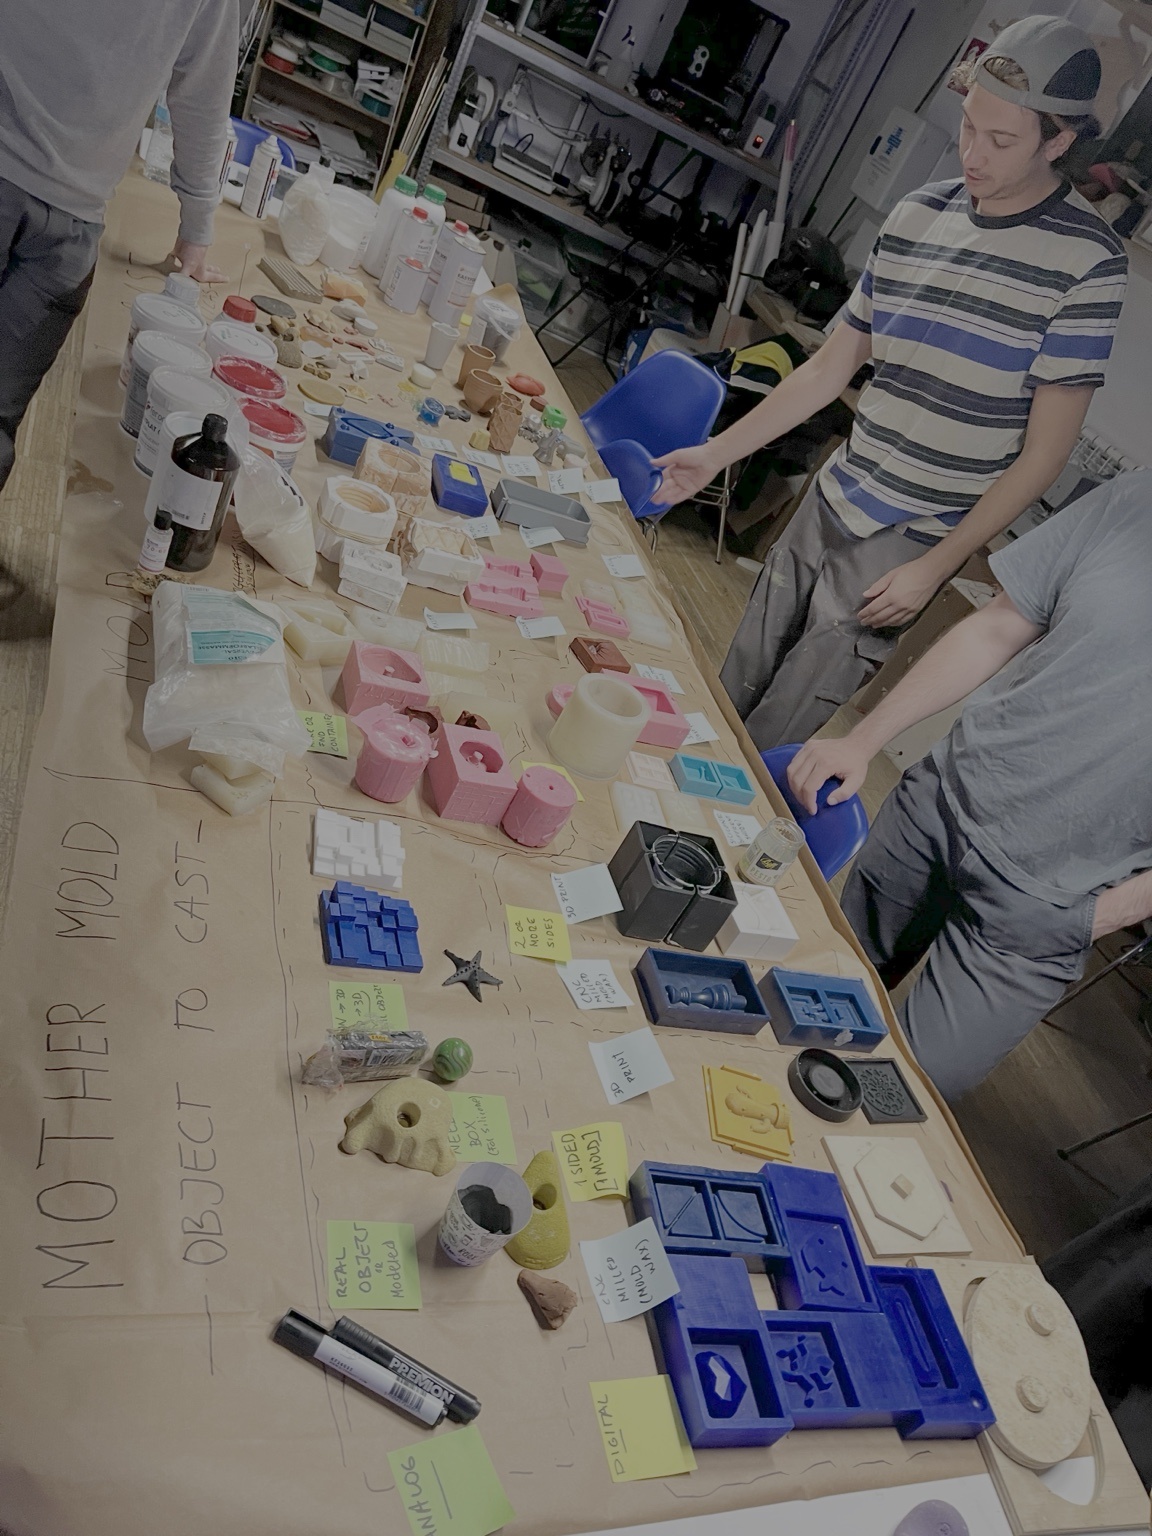
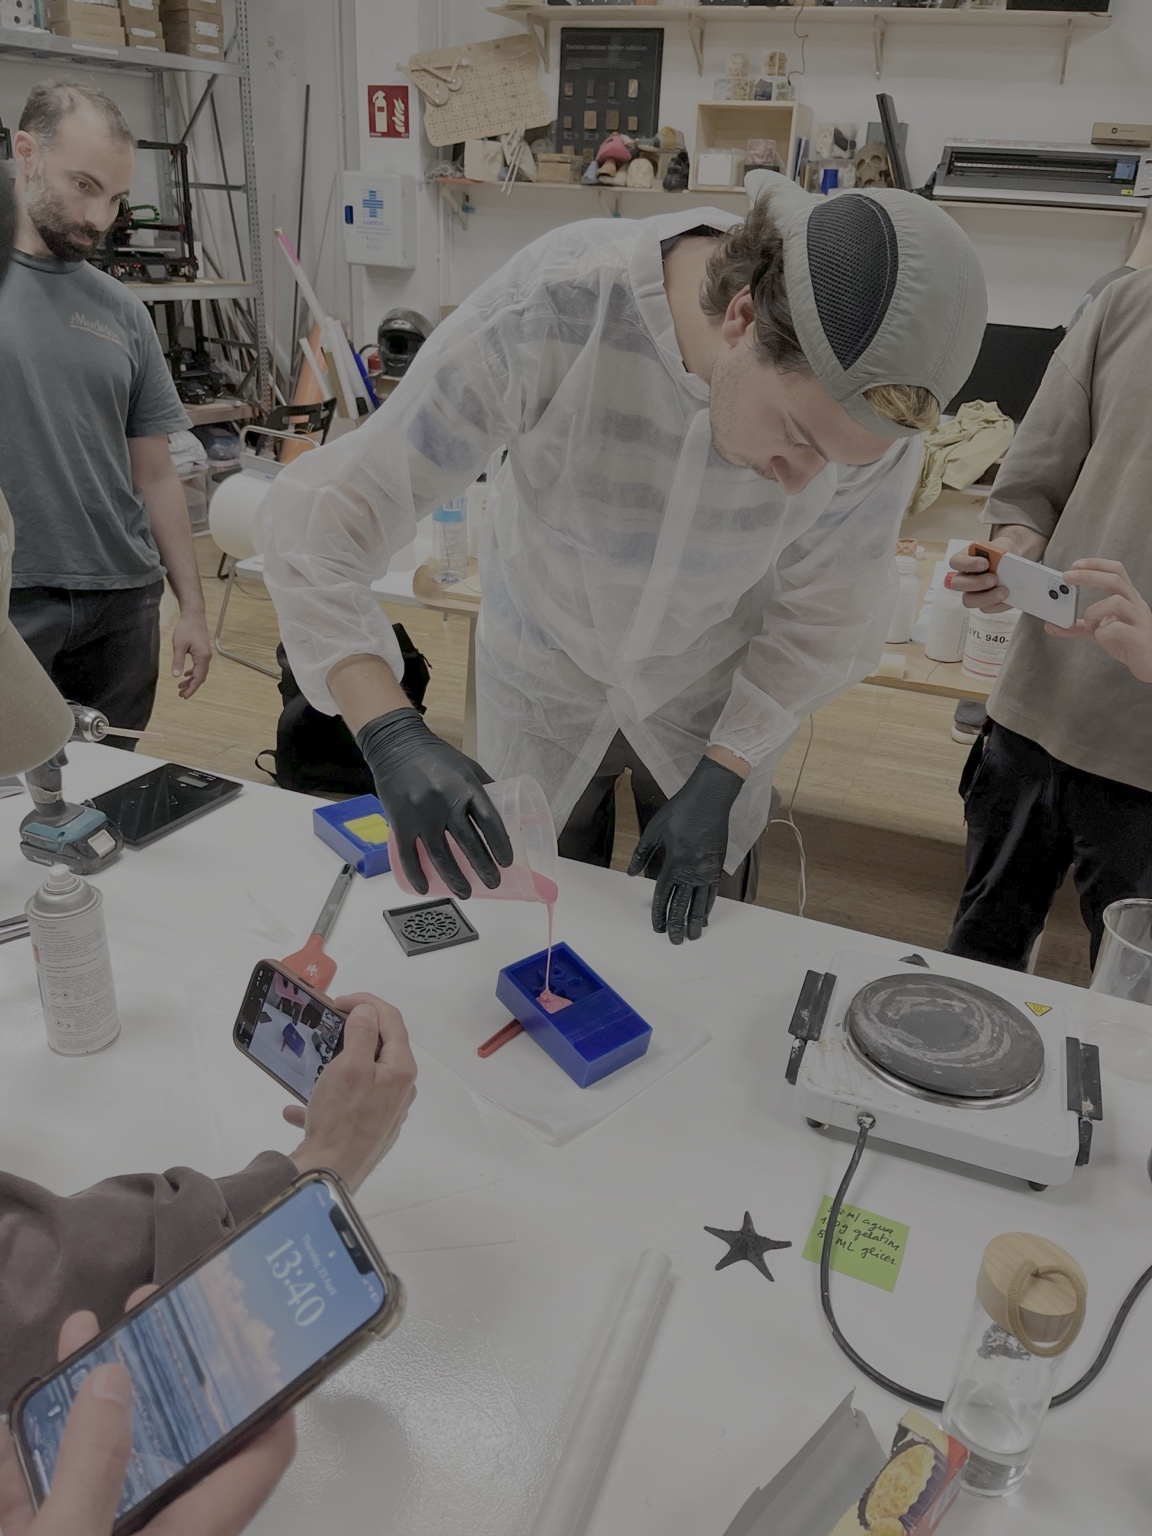
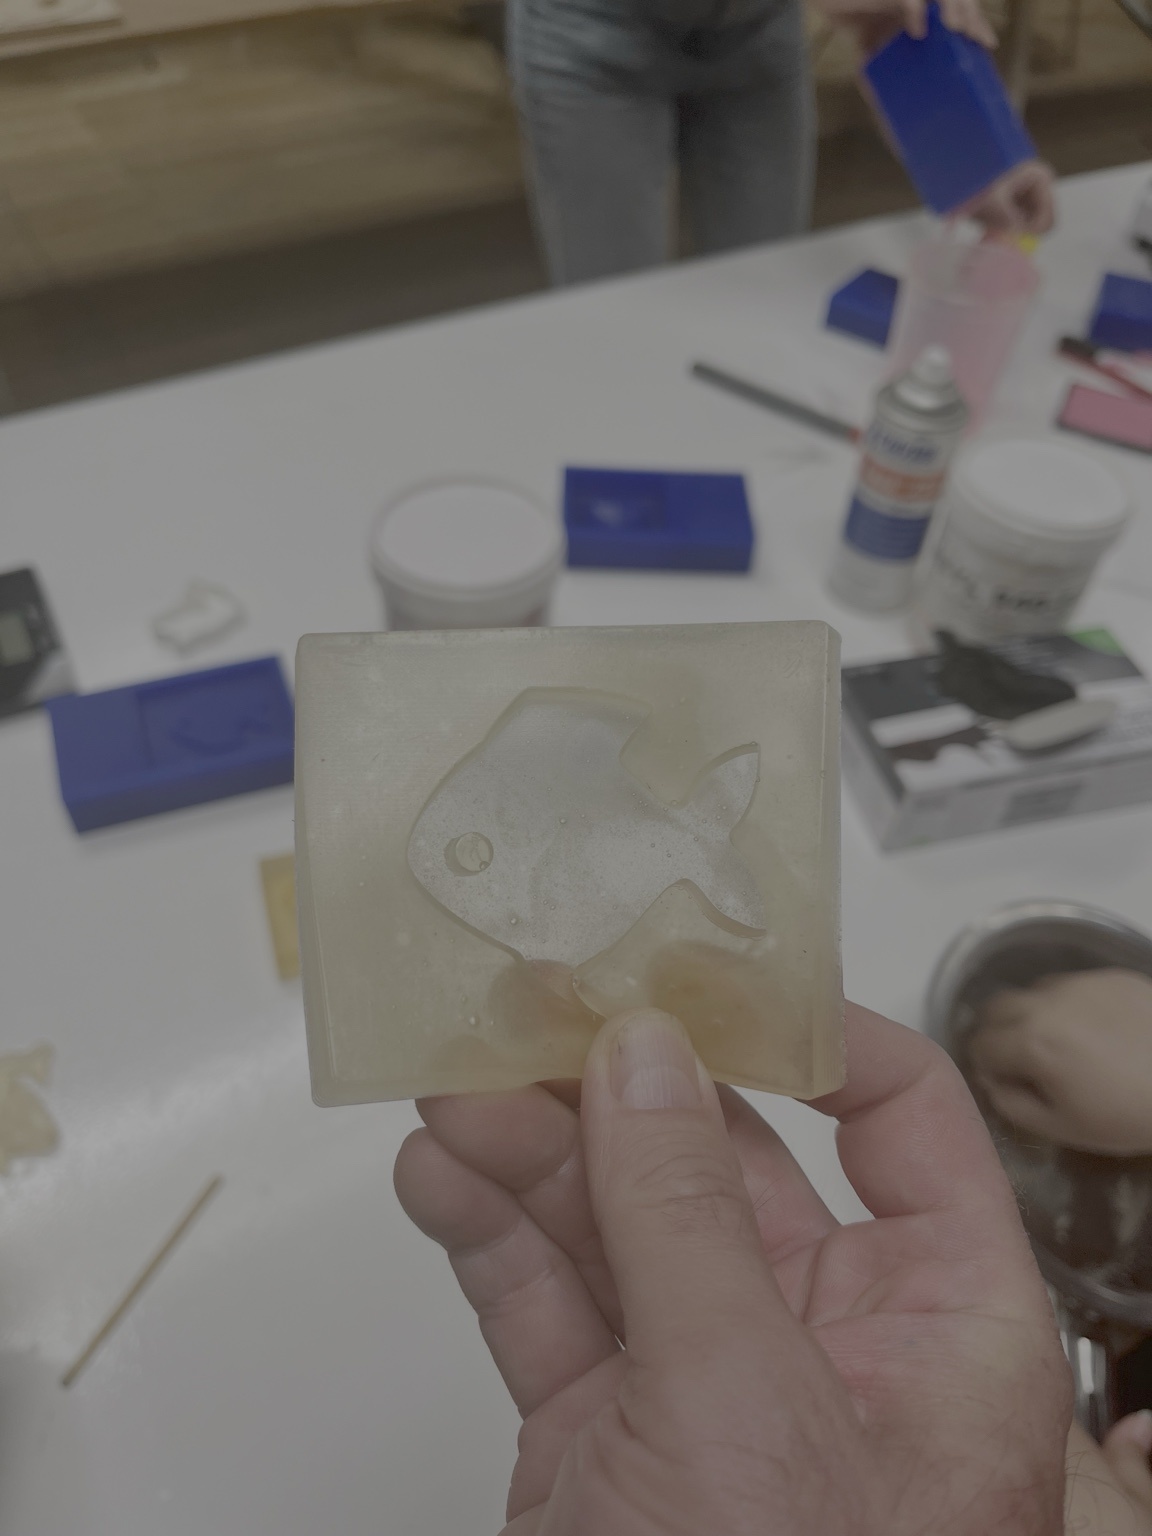
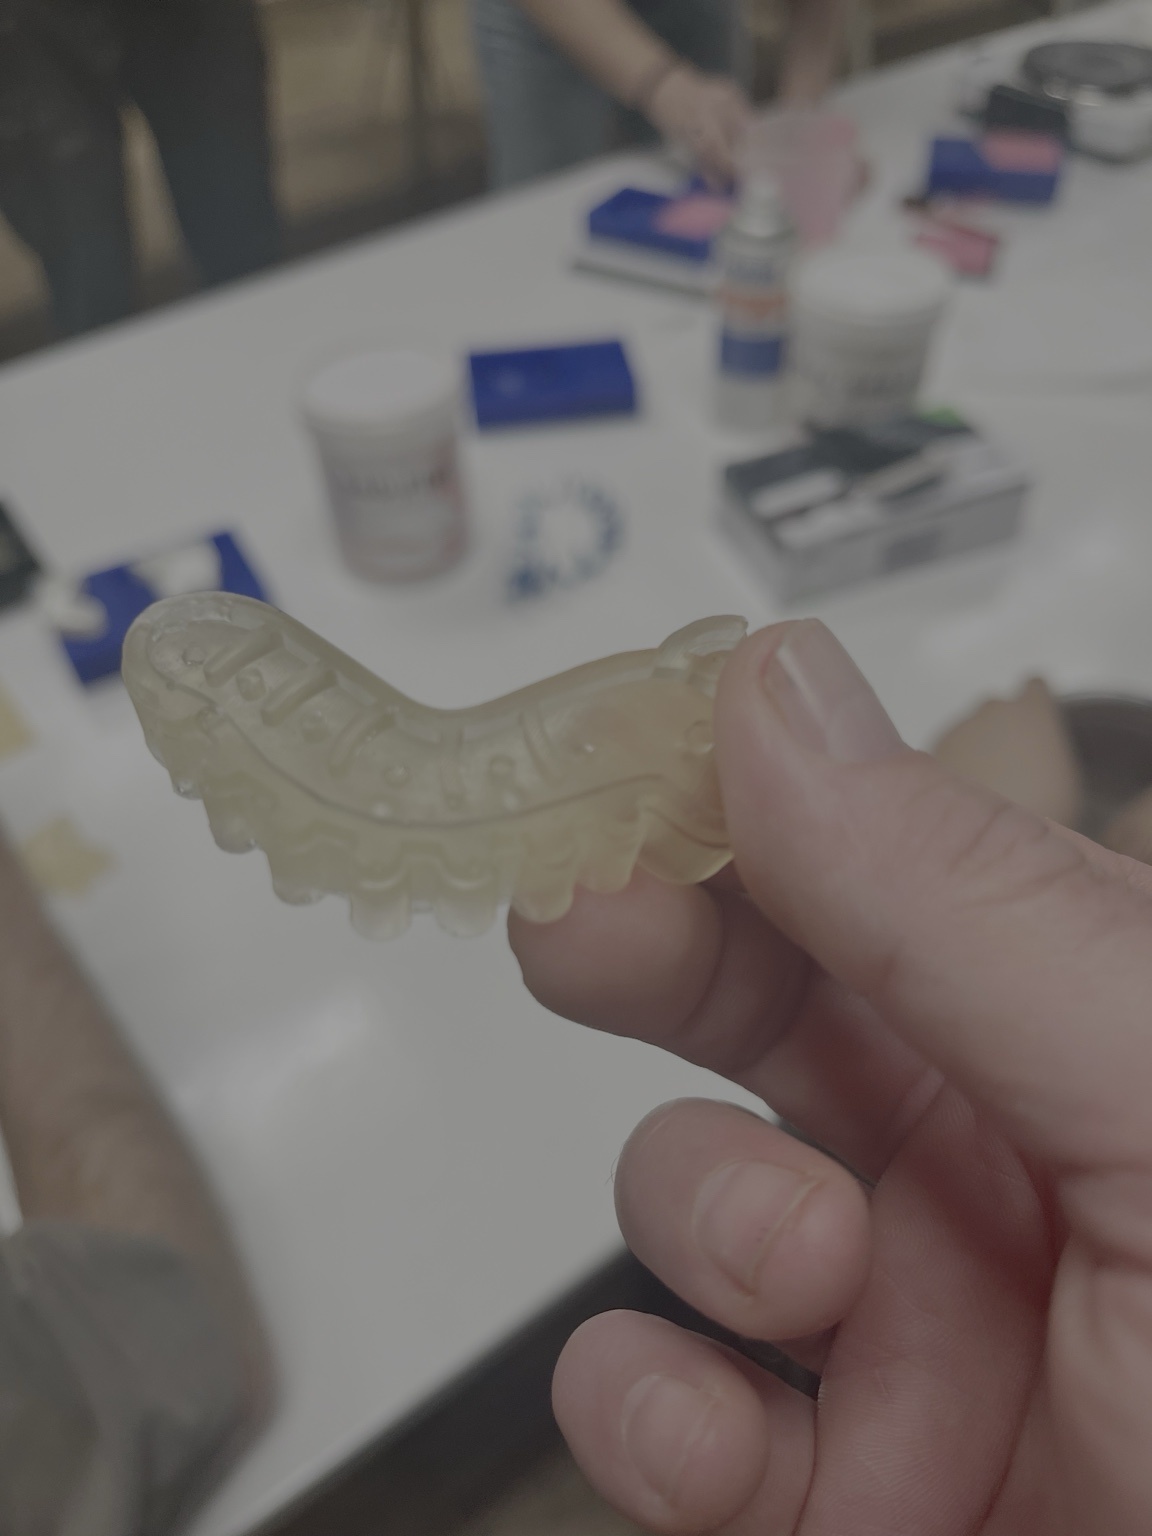
This session focused on testing different mold-making approaches and casting materials, including silicone, rigid molds, and bio-based composites.
I observed how material behavior is highly dependent on mixing ratios, temperature, and curing conditions, and how small variations in the process can significantly affect surface quality, structural integrity, and final finish.
Local Class
This session focused on testing different mold-making approaches and casting materials, including silicone, rigid molds, and bio-based composites.
A wide range of mold materials and casting results were presented, including silicone molds, rigid molds, and bio-based composites. This helped understand the diversity of possible workflows and outcomes.
This 3D printed molds were used as a fast and accessible way to generate custom geometries. These molds can be used directly or as masters for silicone casting.
This one used wood glue adn is particularly intersting as it resembles Asfalt possible Infrared ceramic heating element geometry.
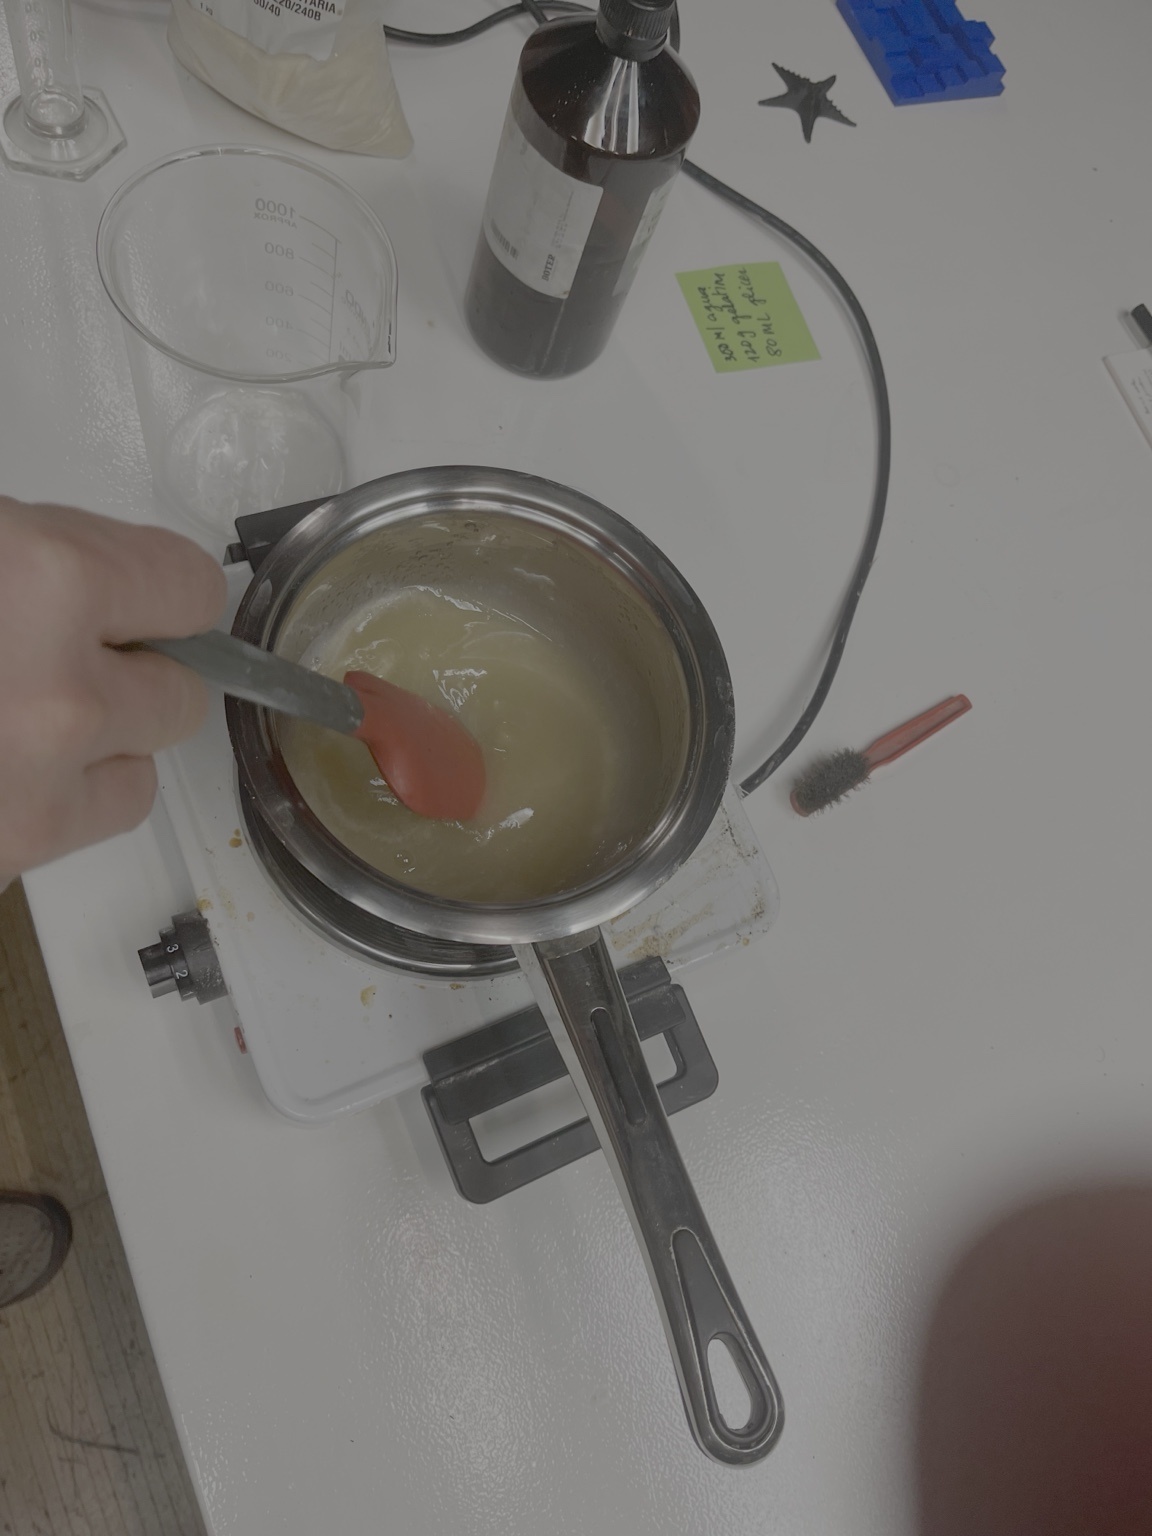
Bio-based materials were prepared by heating and mixing ingredients. This process resembles cooking, where temperature and proportions directly affect the final material properties.
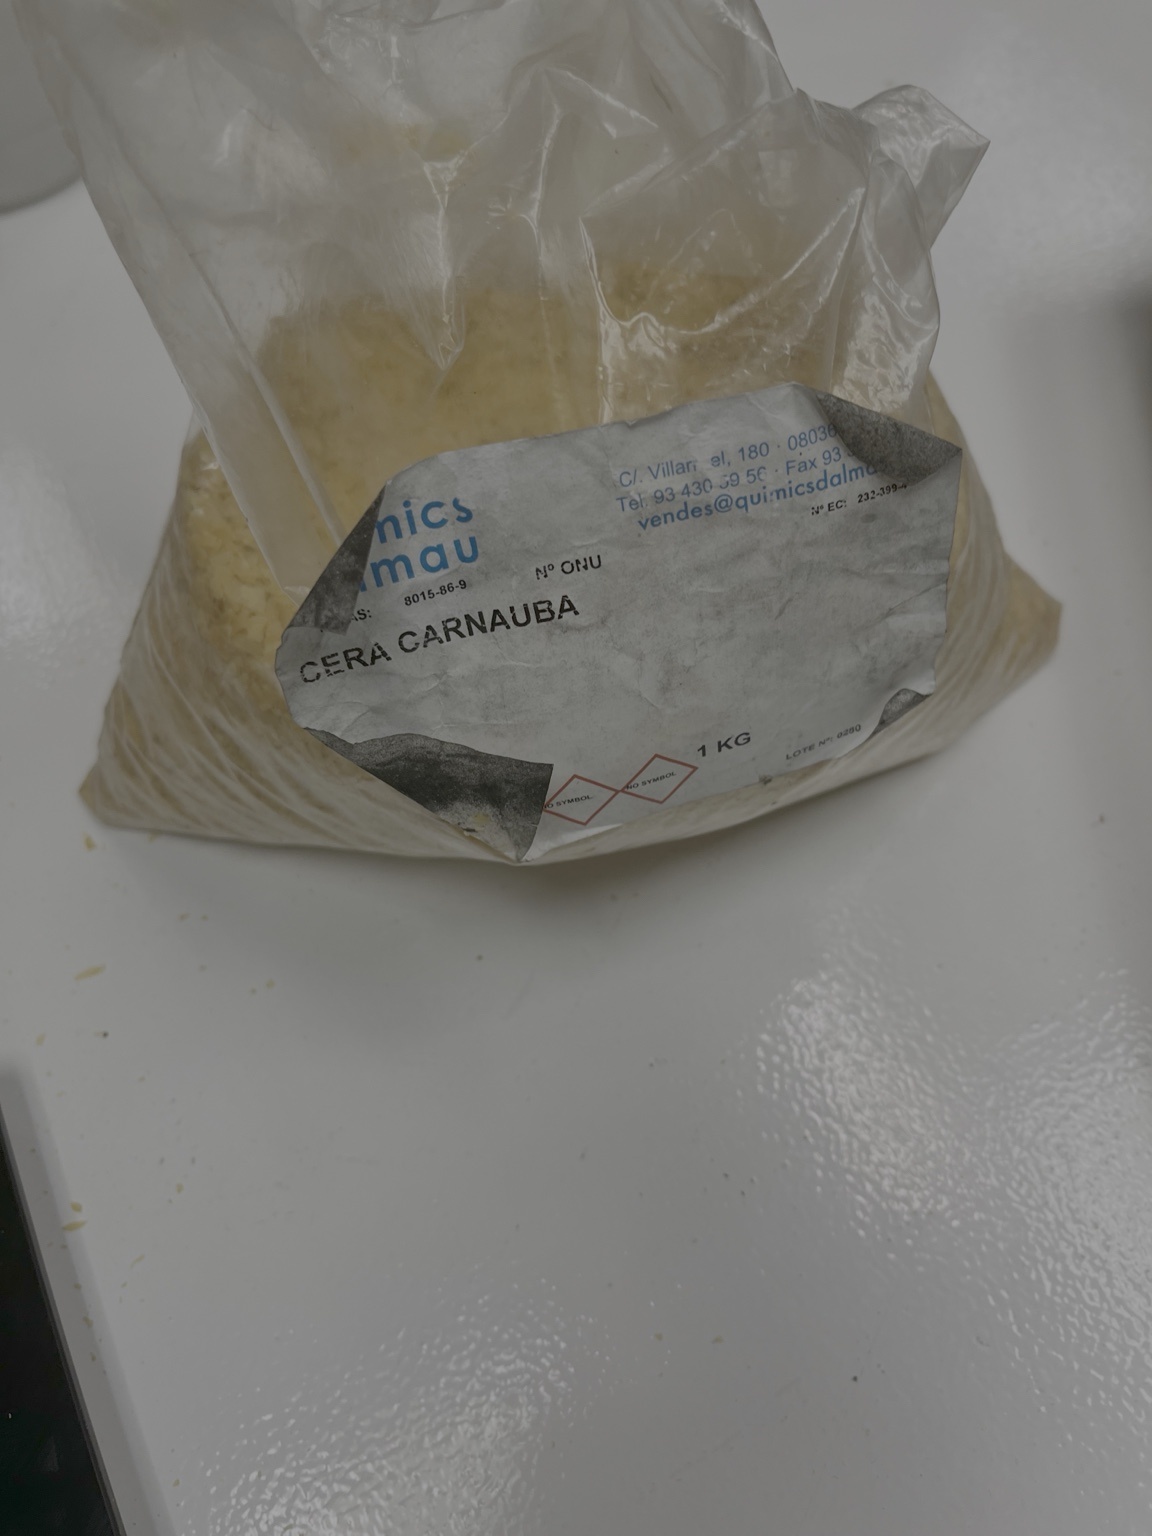
Carnauba wax was introduced as a natural material for casting. It can be melted and reused, making it a flexible option for experimentation.
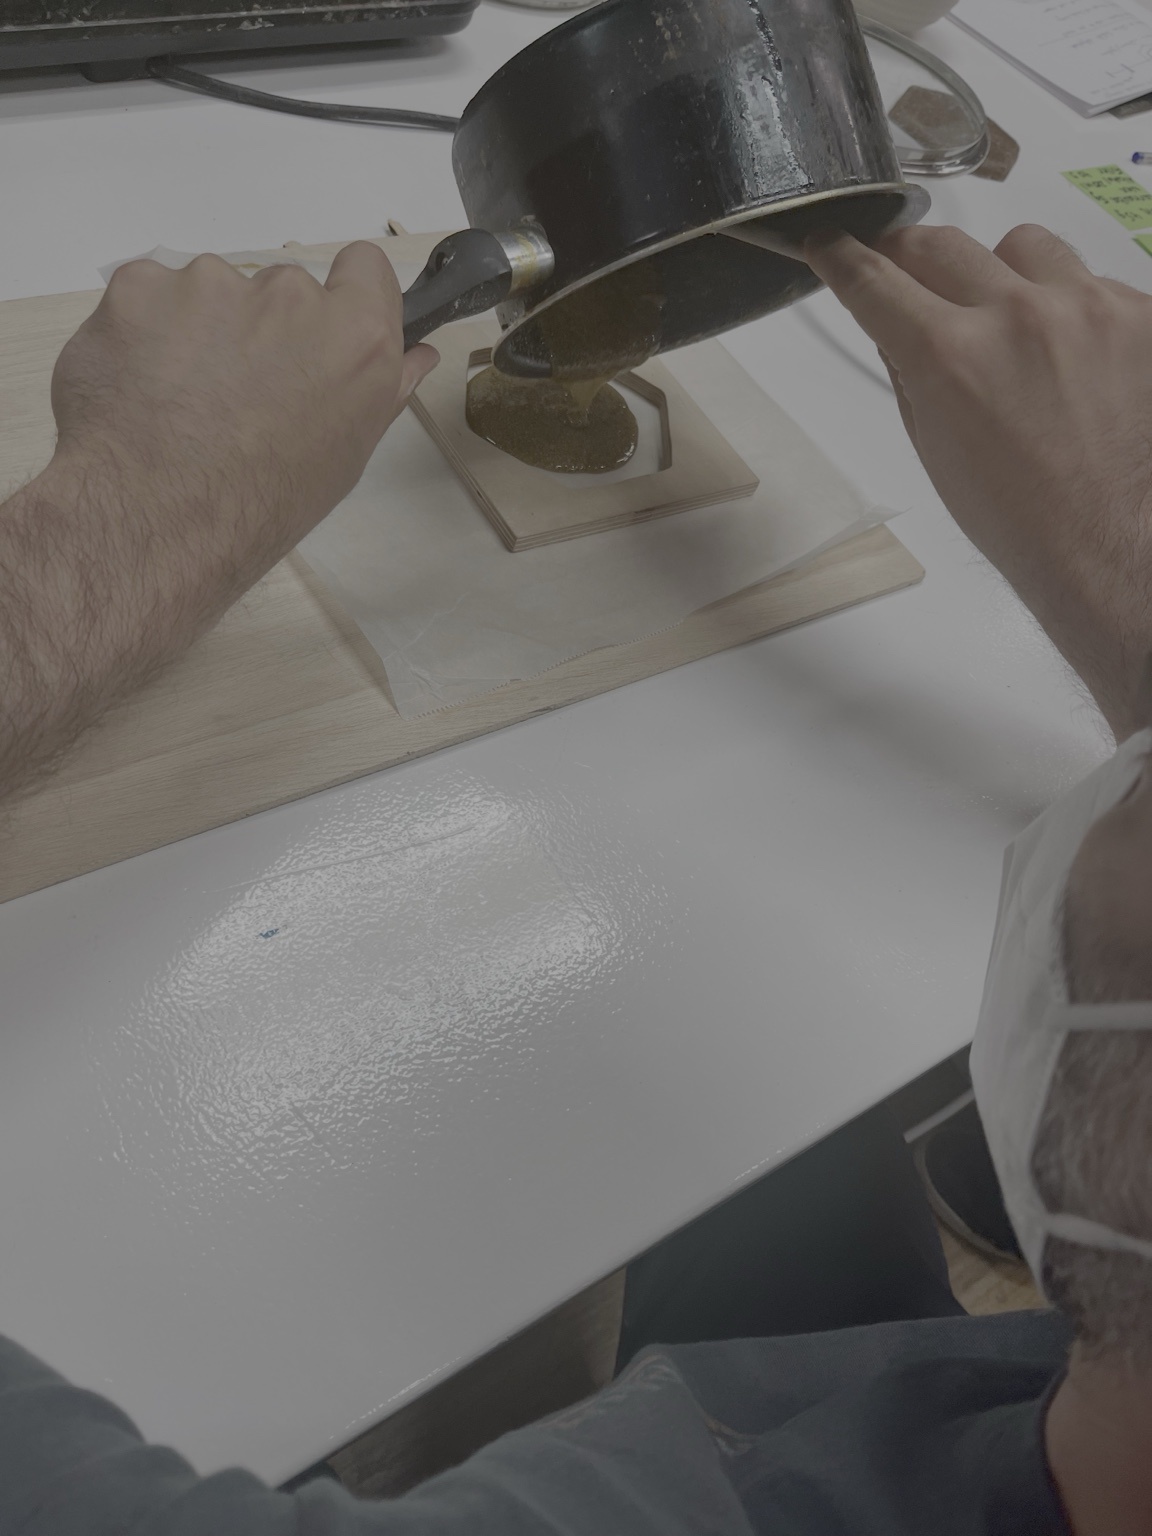
The casting process involves pouring the liquid material into the mold. Proper pouring technique helps avoid air bubbles and ensures uniform filling.
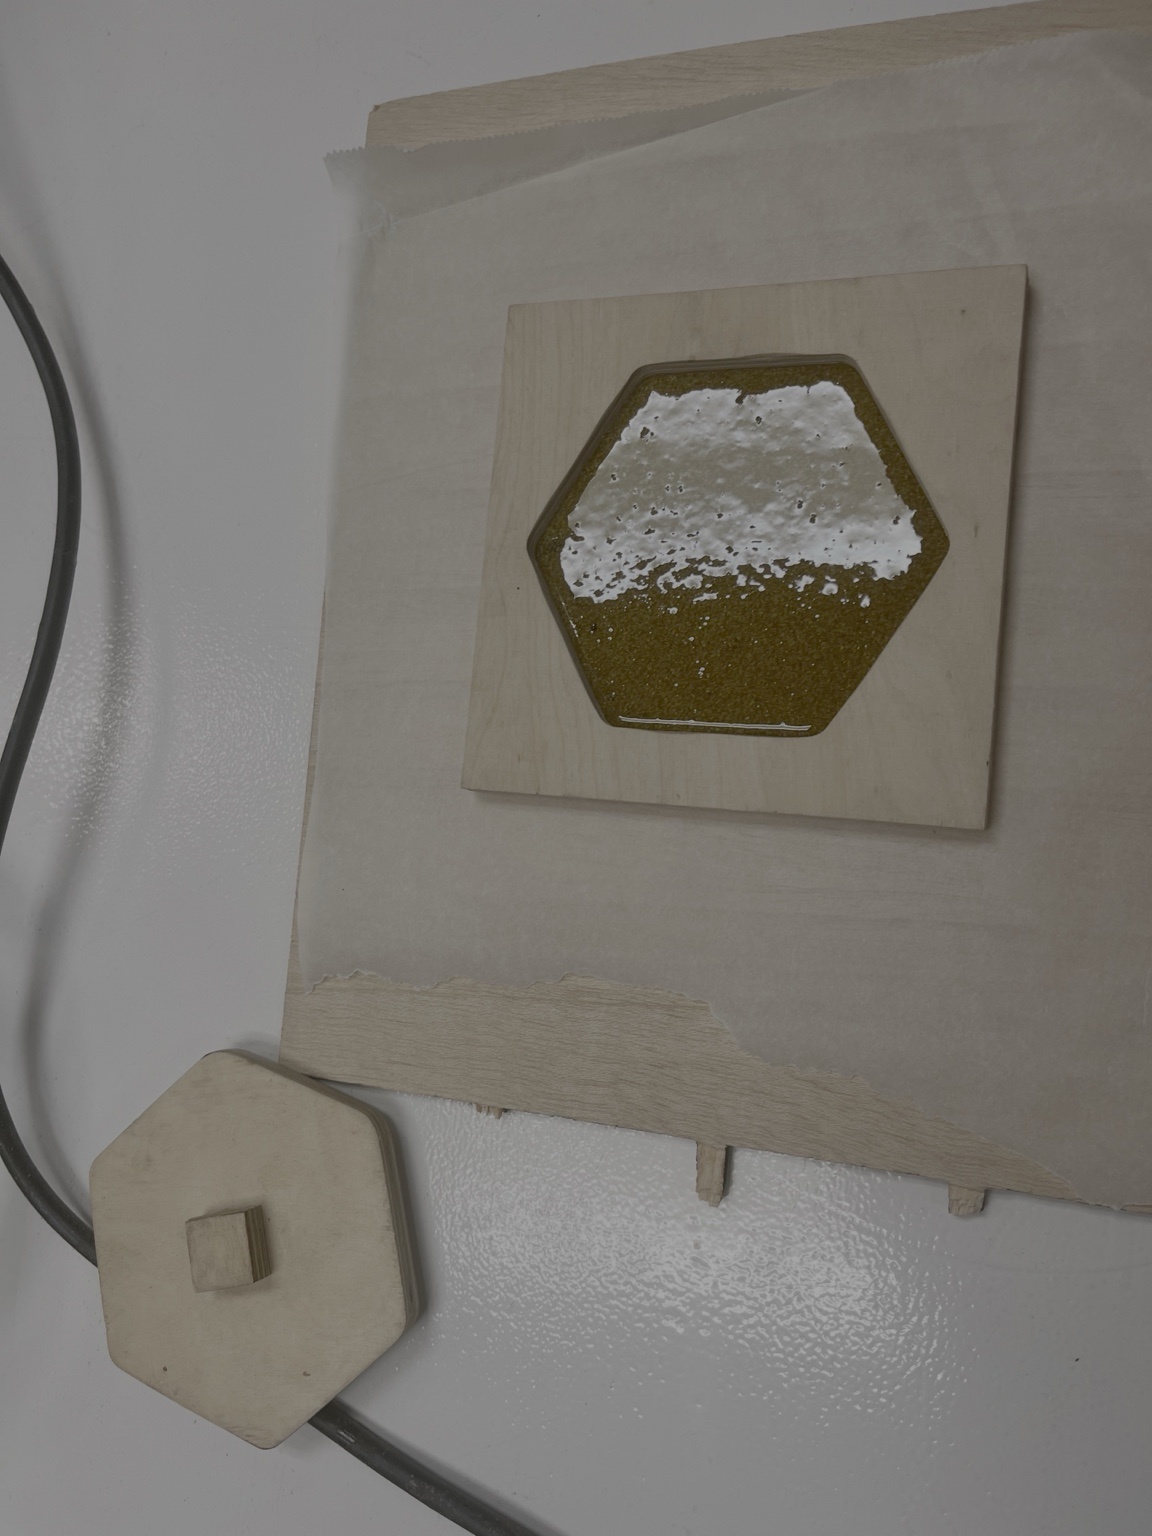
After pouring, the material settles and begins to cure inside the mold. Surface quality and detail reproduction depend on both the mold and the material used.
Once cured, the cast object can be removed. The result reflects the mold quality and the behavior of the material during curing.
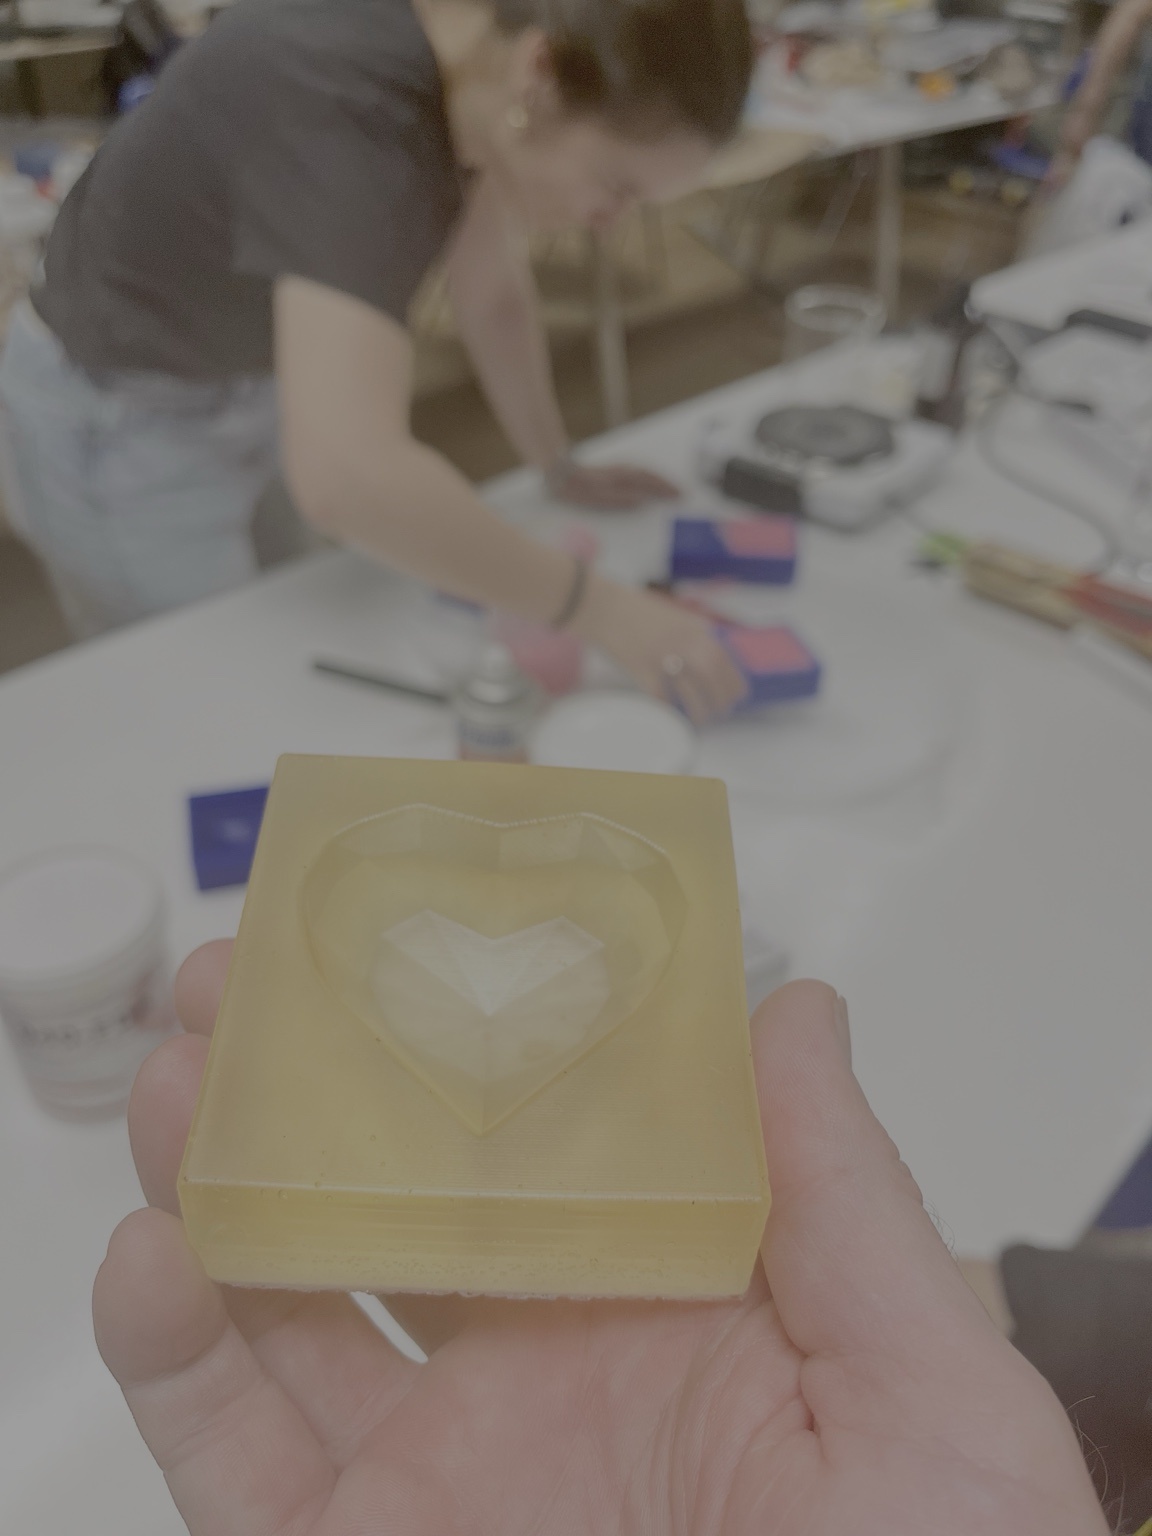
Silicone molds allow for flexible demolding and can capture fine details. They are commonly used for repeatable casting processes.
Bio-based materials showed interesting textures and finishes. Small variations in recipes resulted in noticeable differences in appearance and behavior.
Final examples included a variety of shapes and materials, demonstrating how different combinations of mold and casting material lead to diverse outcomes.
Group Assignment
Here is the work we did for the group assignment:
Reflection
Reviewing the safety data sheets made it clear that even simple materials need to be handled with care, especially when they are used as fine powders or mixed into castable compounds. Comparing test casts also showed that small changes in material type, particle size, and drying conditions can produce very different results in shrinkage, detail, and cracking.
The comparison between 3D printed and milled molds highlighted a useful tradeoff. Printed molds are faster and better for rapid experimentation, while milled molds would likely give cleaner surfaces and more repeatable results.
For this week, printed molds were enough to test ideas quickly, but the limitations of layer lines and surface finish were also evident.
This is relevant to ASFALT because it helped me think more clearly about which parts can be prototyped fast with simple molds, and which parts would later need higher quality fabrication. It also helped me keep in mind the use of materials regarding food safety have to be compliant in my project.
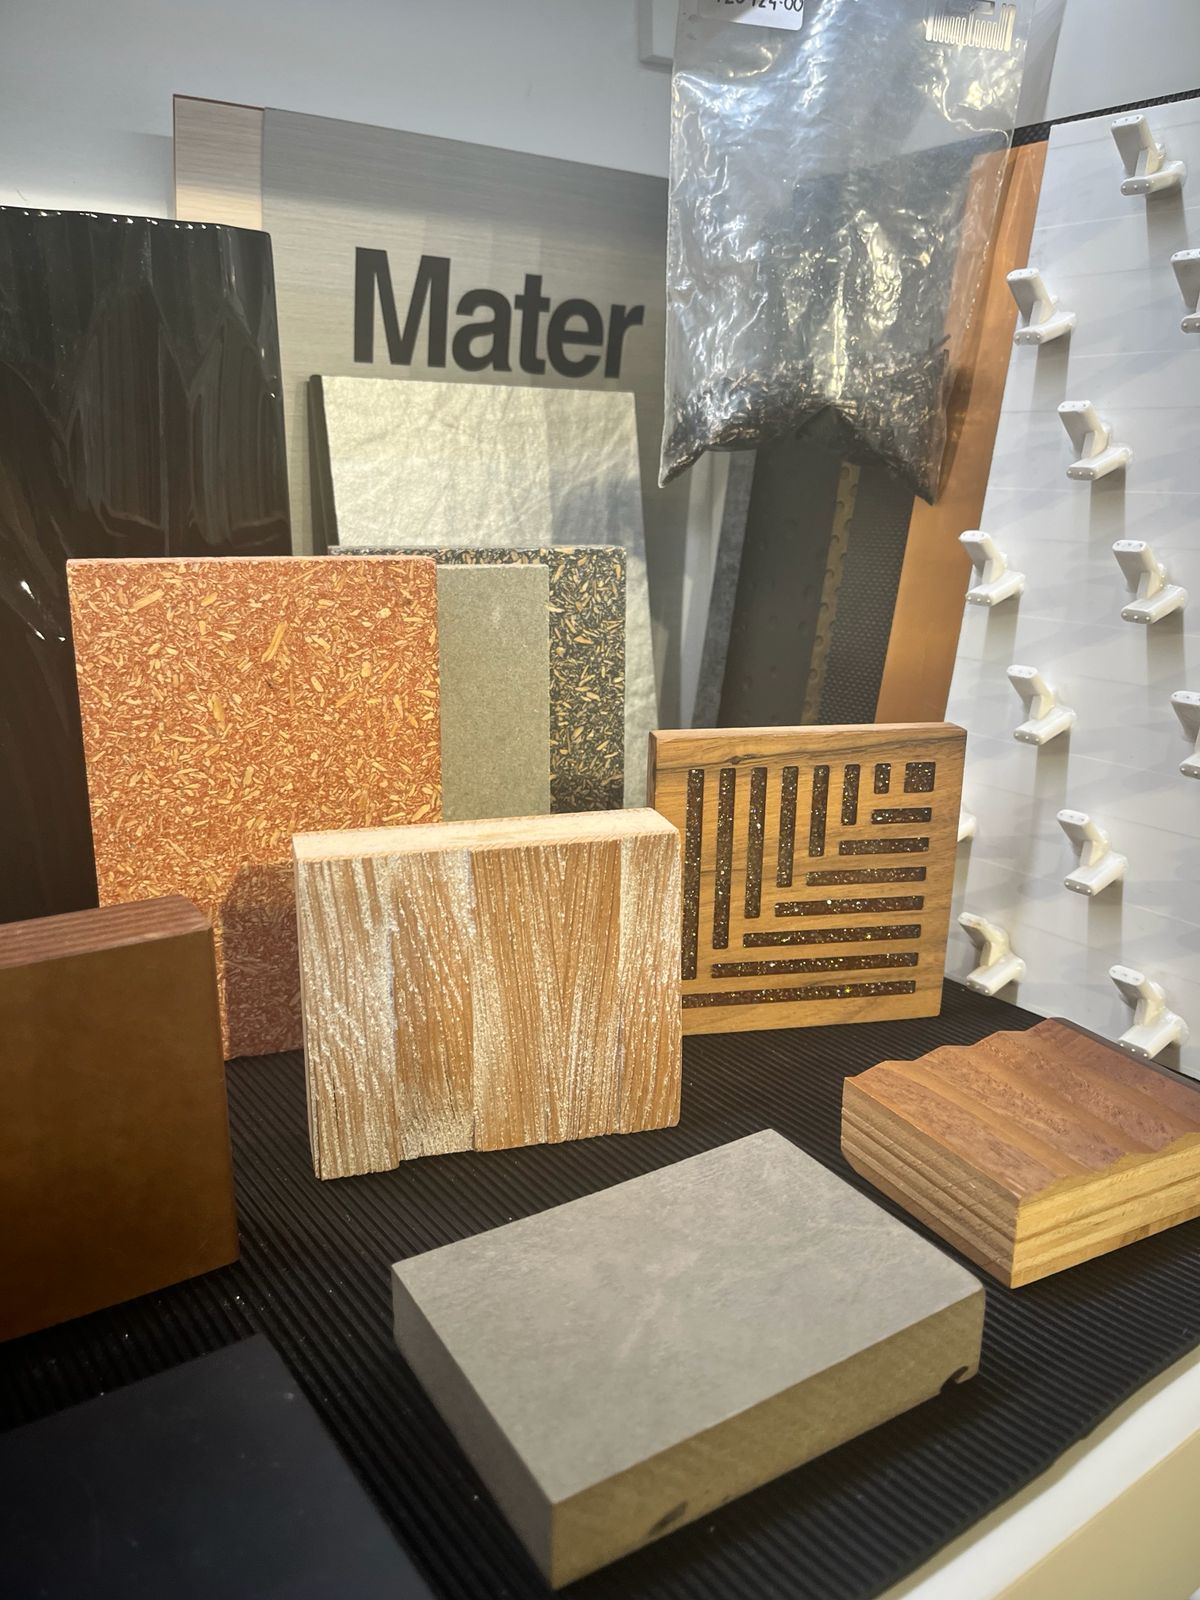
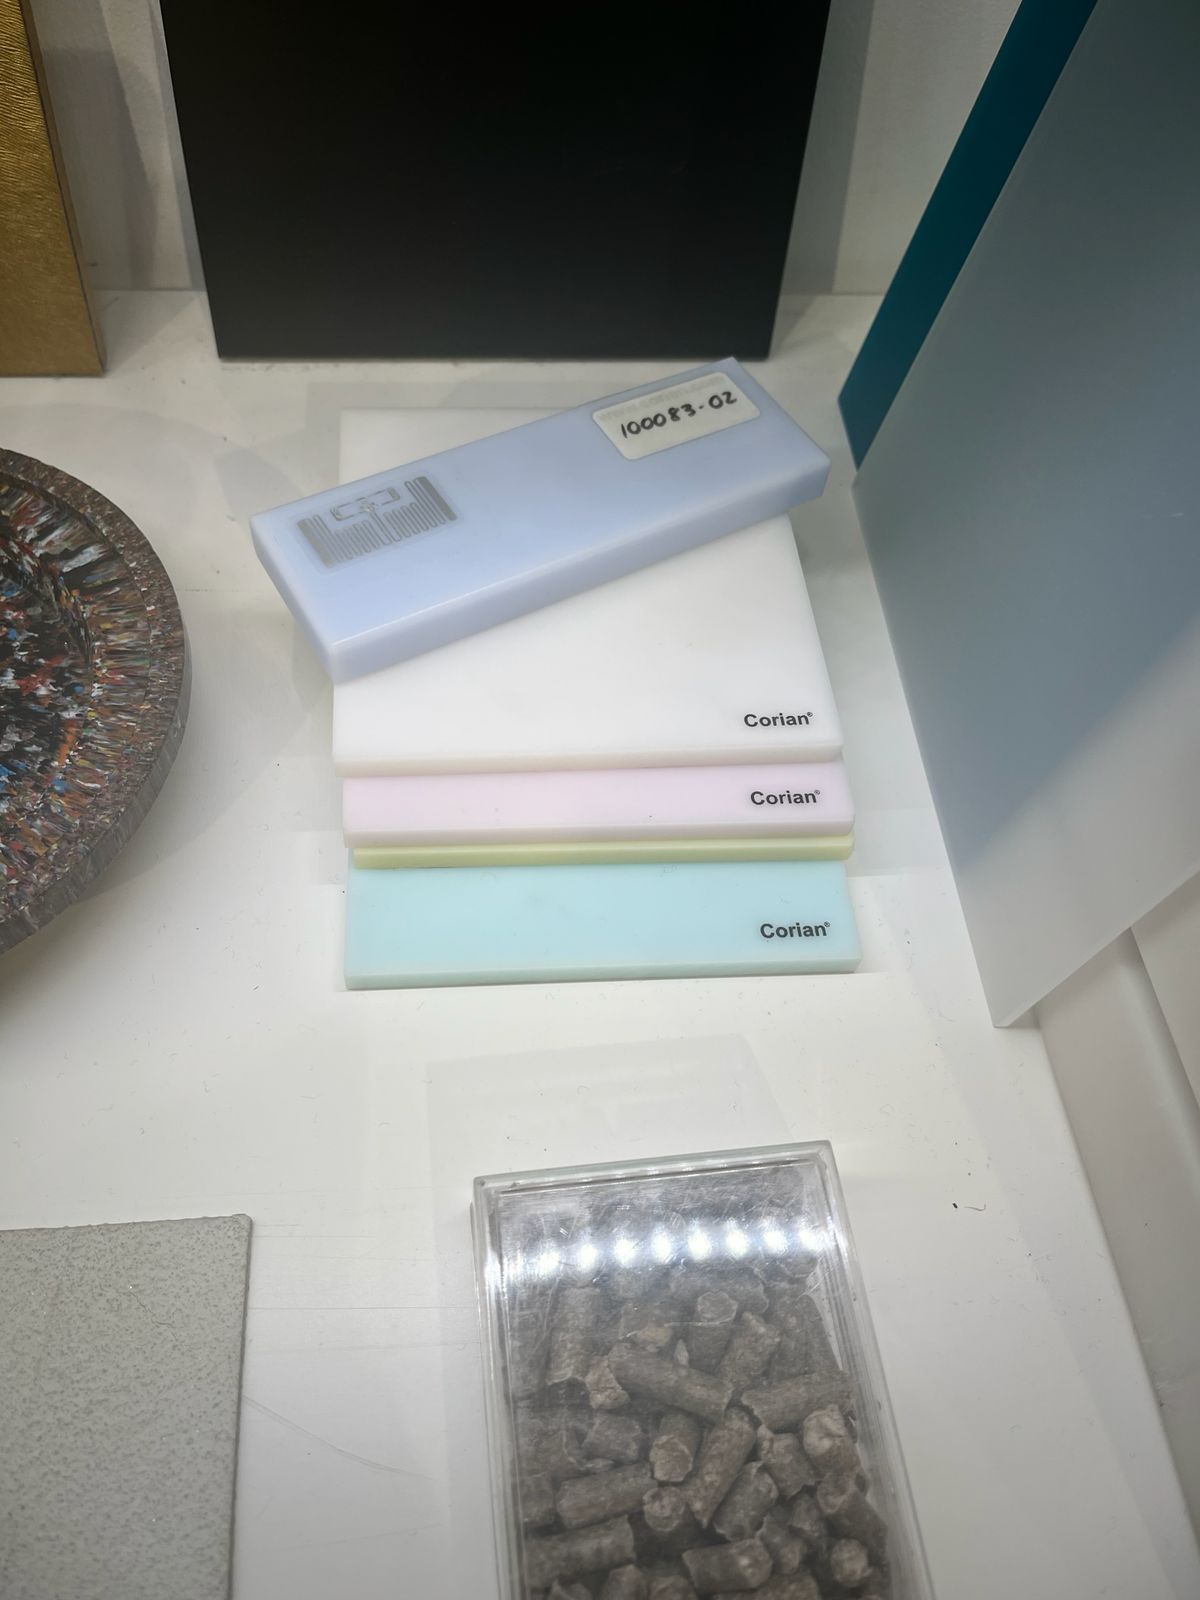
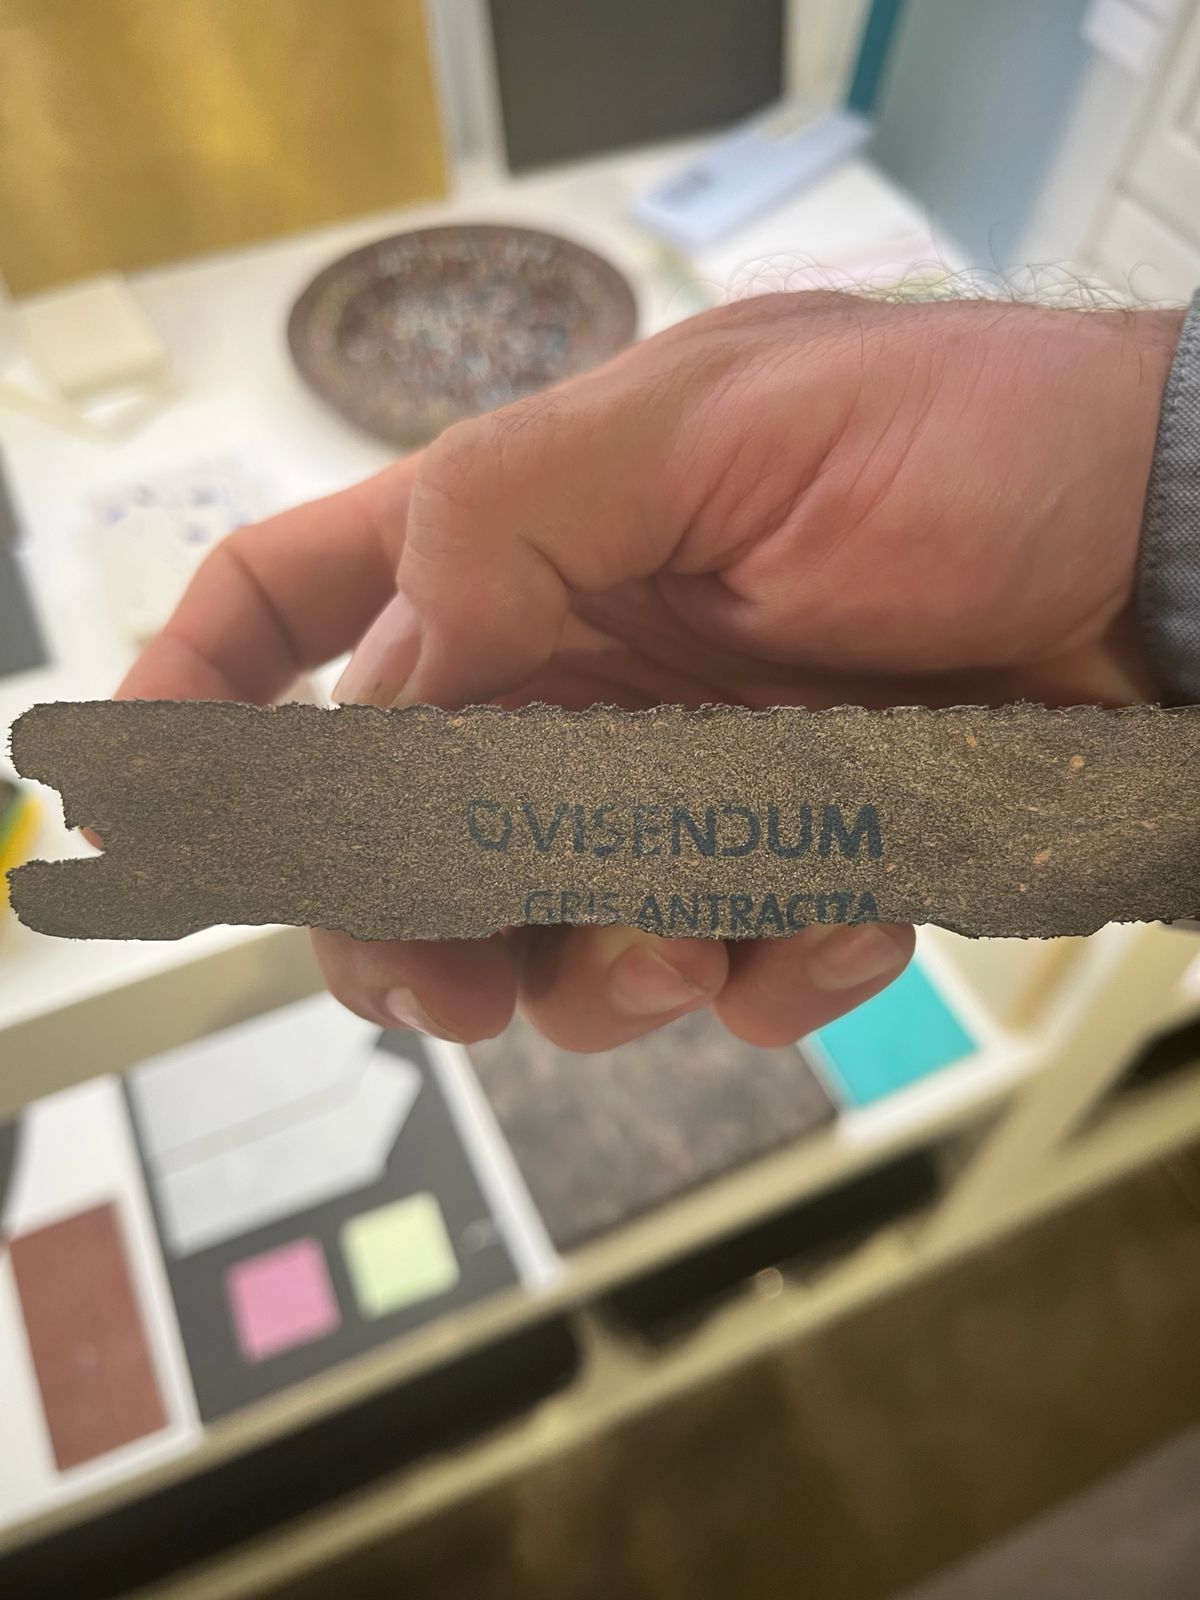
Visit to MATERFAD
As part of Week 14, we visited Materfad and had a conversation with Robert Thompson, Scientific Director of the center. The visit felt less like a technical presentation and more like an invitation to question what we normally accept as materials, waste, and innovation.
One idea stayed with me throughout the visit: innovation is looking where everyone else is not looking. This applied not only to materials, but to mindset. The discussion moved across mushroom leather, hemp fibre, kombucha leather, bird feathers, hair, ocean salt, biological processes, and waste streams. What connected all of them was not novelty for its own sake, but a different way of seeing value.
Reminded me of my work with sidestreams and to be aware of upcycling materials. Many of the resources we call innovative are not rare or exotic. In many cases, they already exist in excess. The challenge is not always inventing a new material, but recognizing overlooked abundance and finding ways to transform untapped material potential.
Another important insight was that biomaterials such as mushroom-based composites are not inaccessible luxury inventions. They can grow on simple substrates, take form naturally, and then be pressed or treated into functional materials. The real barrier is often not the material itself, but the mental model we bring to it.
The visit also made cleared that sustainability is not only about replacing one material with another. Sometimes the real opportunity lies in designing new systems of exchange. If one industry produces excess and another needs raw material, value can emerge from connecting the two. In that sense, material innovation is also systems innovation.
By the end of the visit, the conversation had moved beyond materials and into a more personal reflection on design practice. It became a reminder to look at how nature works, try to mimic it and have open eyes and mind to use resources mindufully.
Reminded me of personal quote of a character I know:
“Waste is a failure of imagination.” — Chef Doug McMaster
Recipe Research and Material Selection
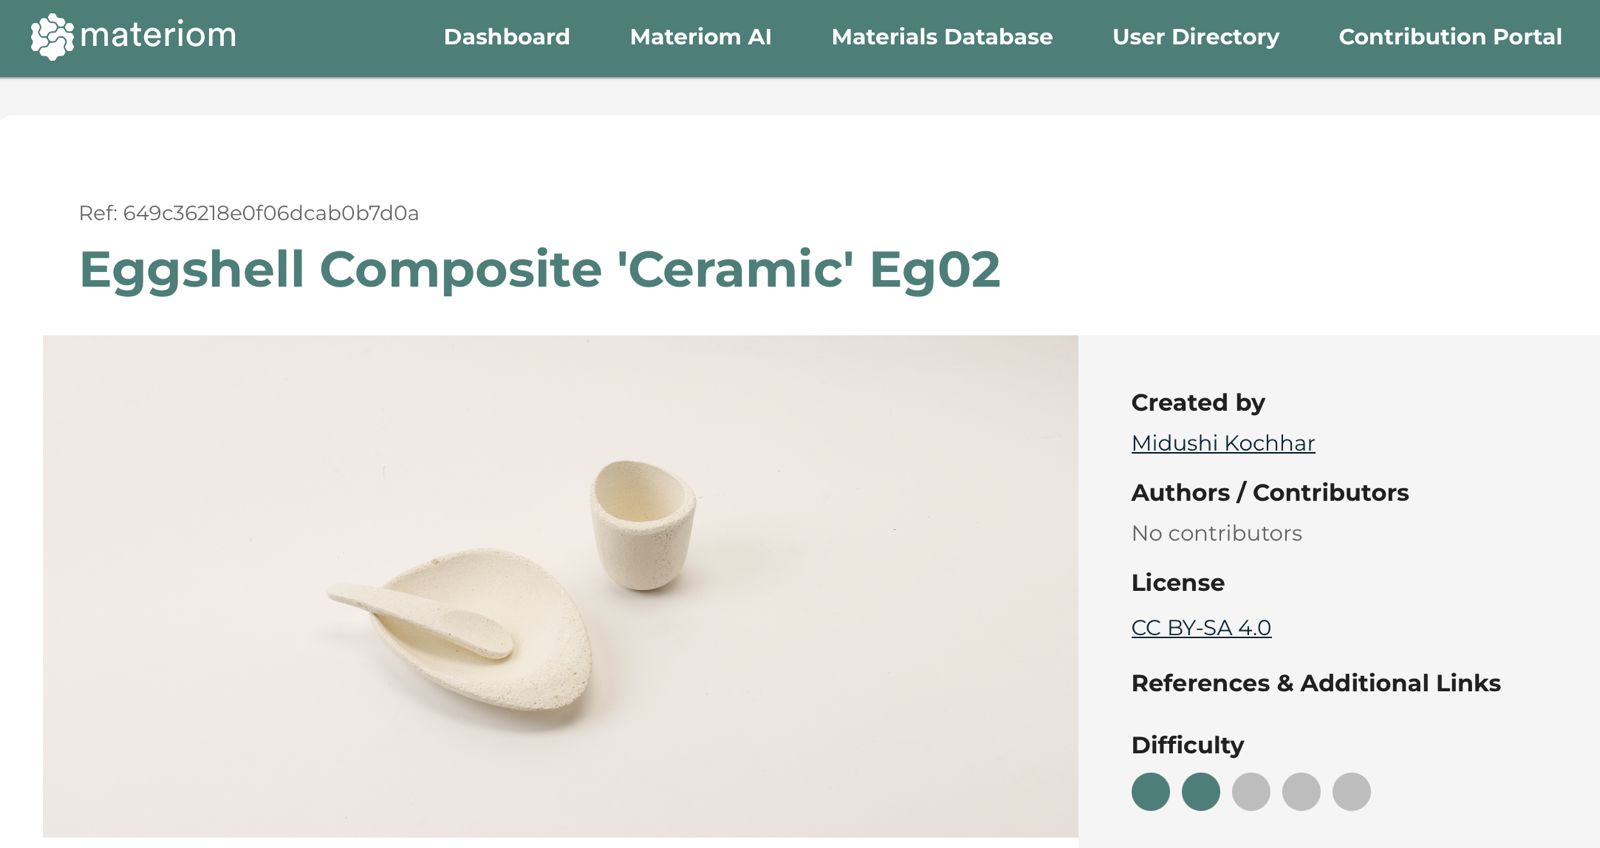
After the visit to Materfad, I started exploring possible biomaterial recipes that could produce a ceramic-like result using accessible ingredients and simple processing. To guide this search, I used Materiom.org as a reference library for open-source material recipes and looked for formulations based on mineral powders and natural binders.
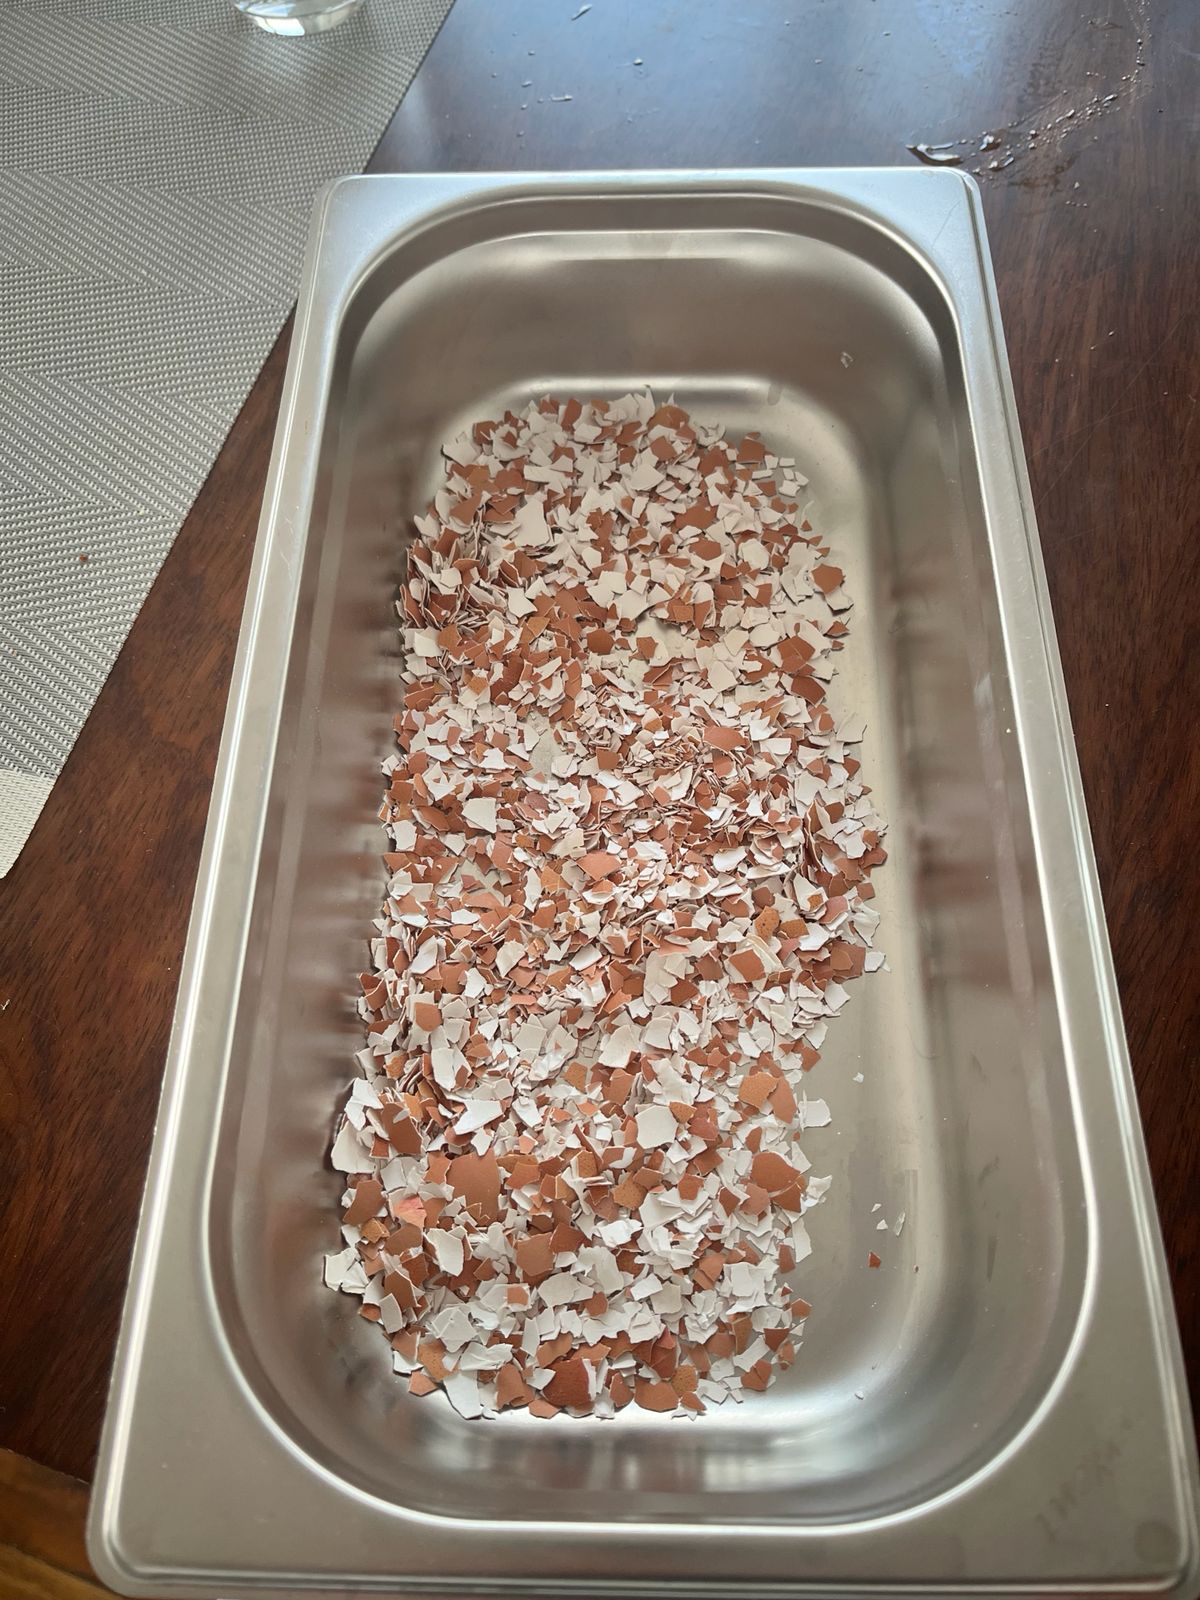
One recipe that caught my attention was an eggshell composite that used sodium alginate as binder. The combination was interesting because it suggested a way to transform a common domestic waste stream into a rigid cast material with a mineral feel.
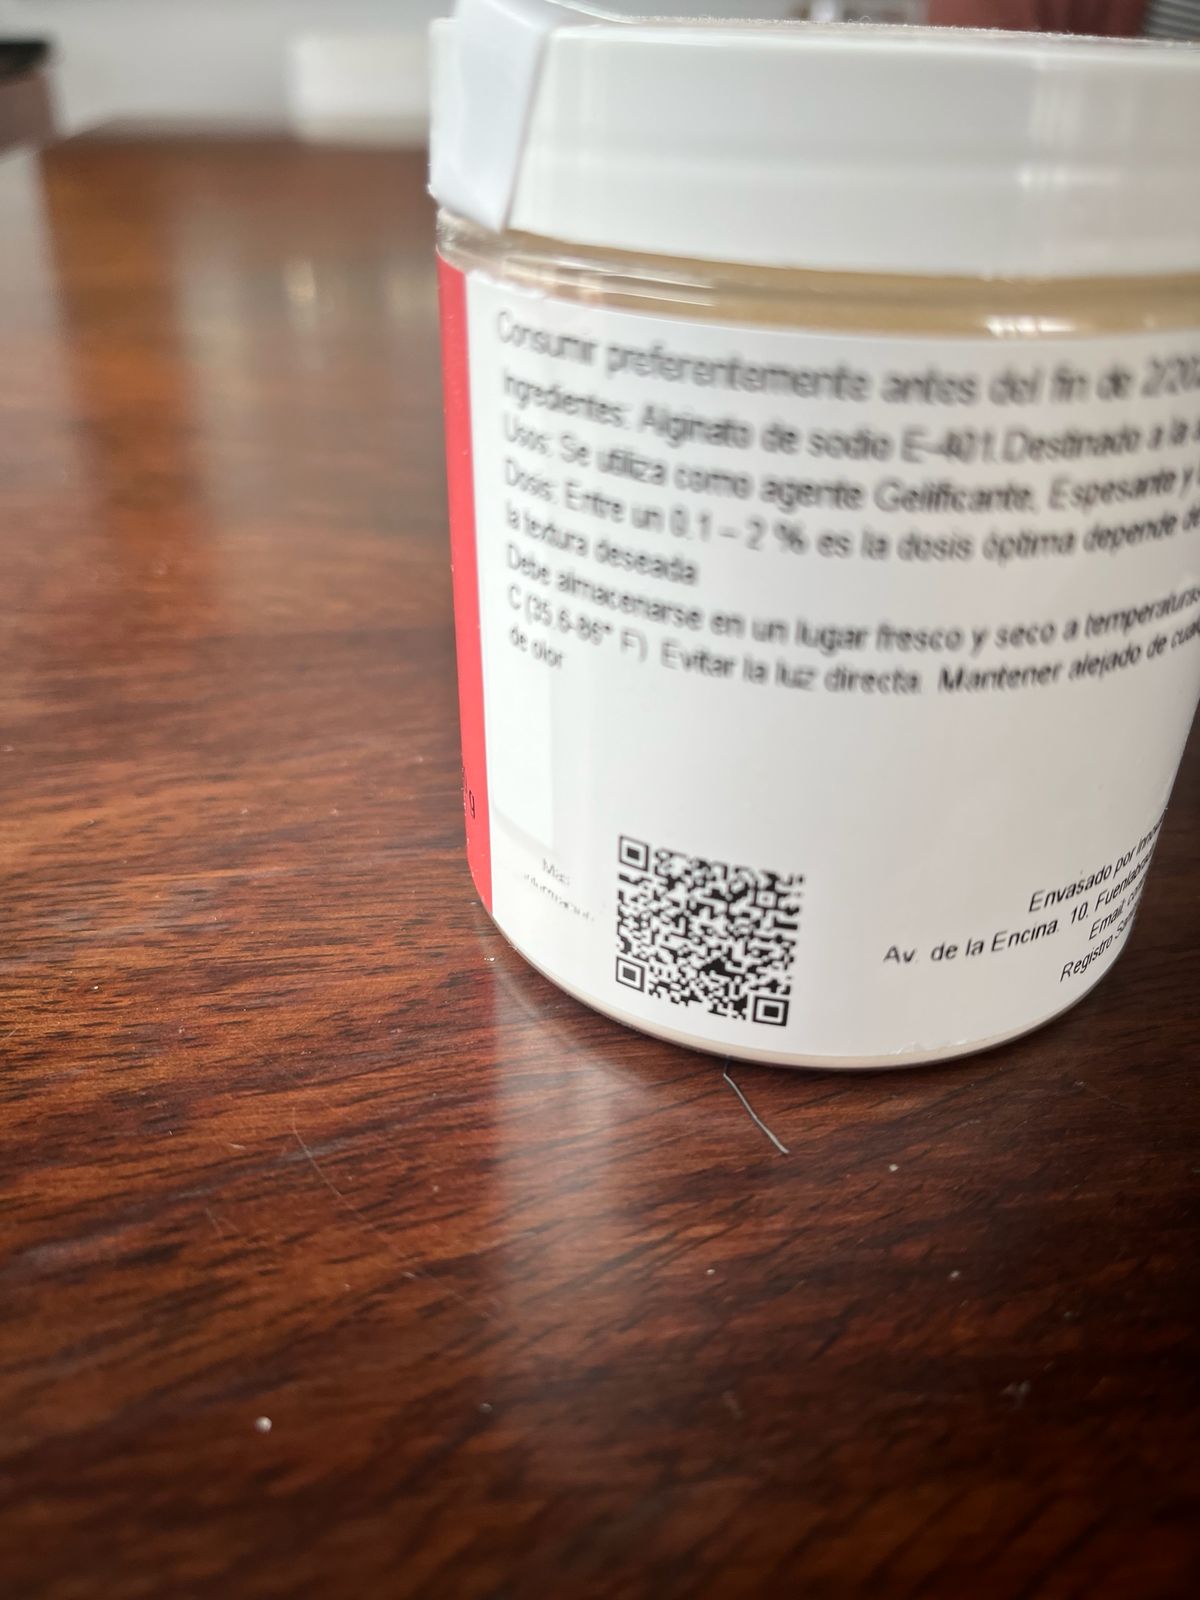
To test this path, I ordered sodium alginate online. Before using it, I reviewed the product label and basic handling information.
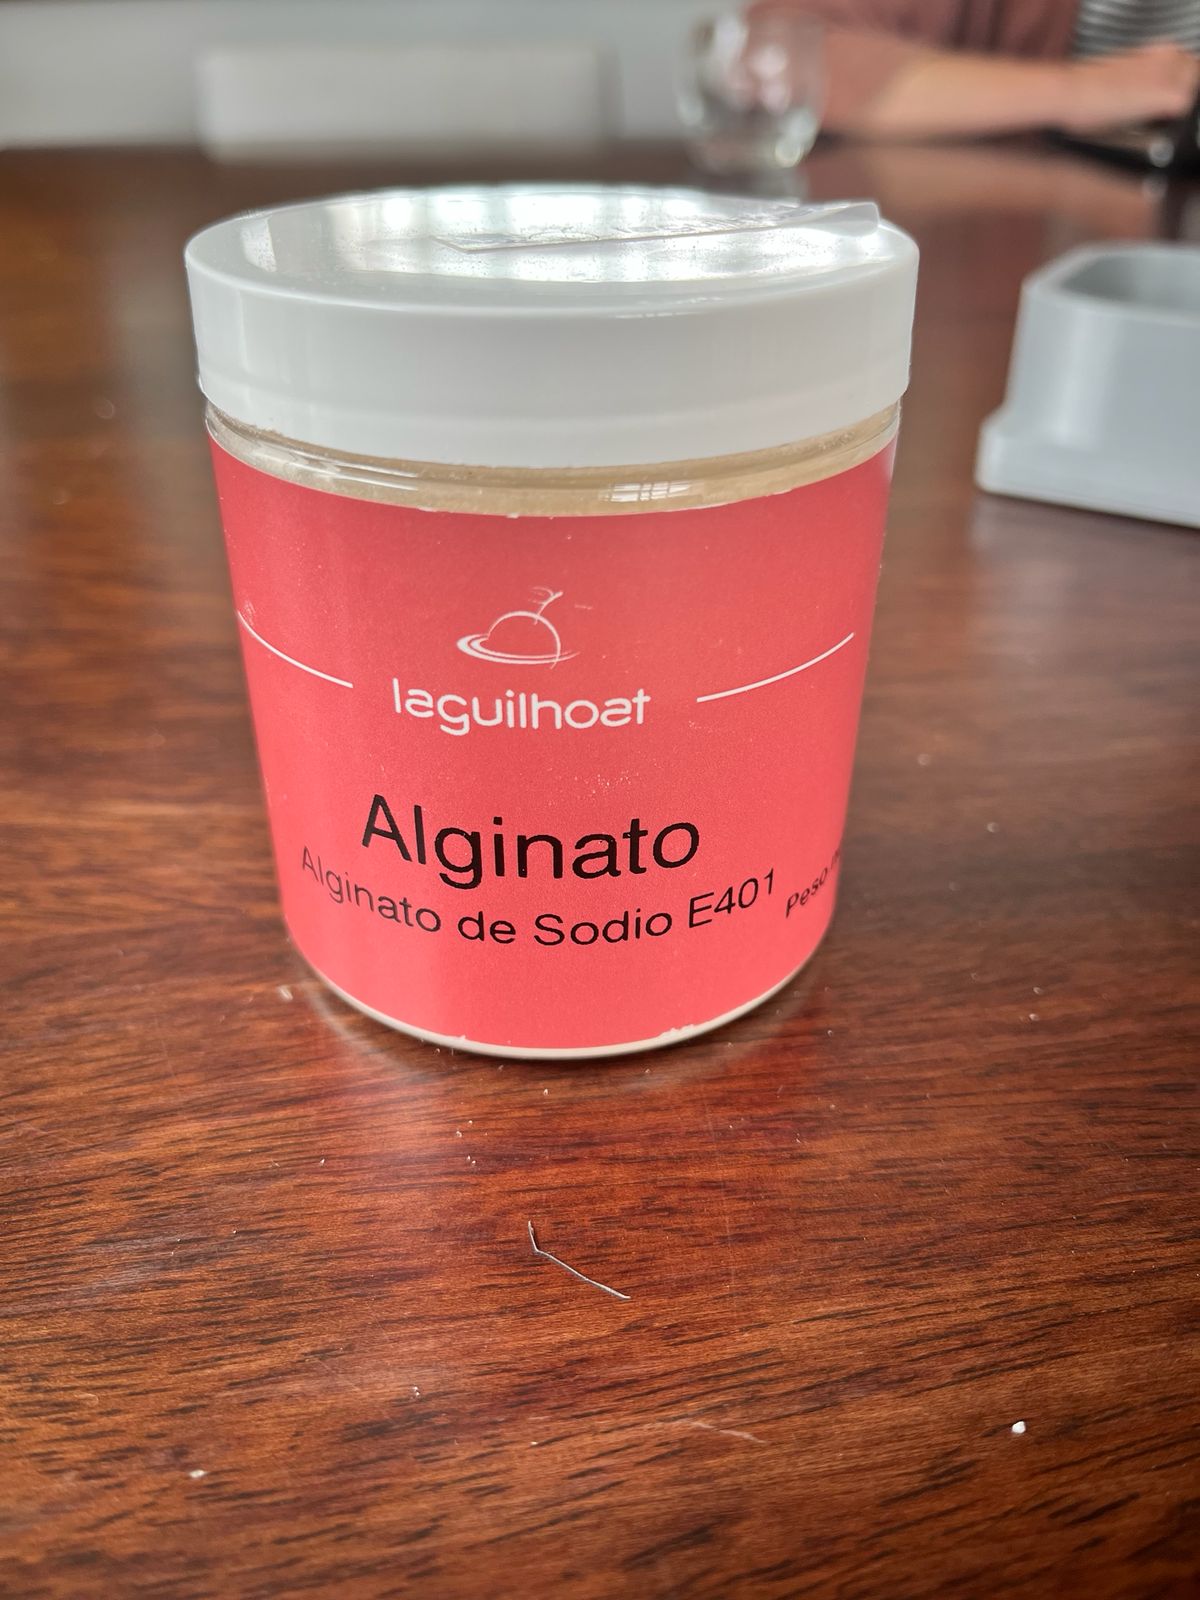
The alginate I bought is sold as food-grade sodium alginate, commonly used in molecular gastronomy, especially for spherification. This meant it was easy to source and relatively safe to handle in a domestic setting, although I still treated it as a fine powder material and worked carefully to avoid unnecessary dust during mixing.
I decided to begin with eggshells because they were directly referenced in the Materiom recipe and were also immediately available as a waste material from daily use. This made them a good starting point for testing a bio-mineral composite that could later be compared with other calcium-rich materials such as shells.
Developing My Own Recipe Variations
After testing the eggshell-based direction from Materiom, I decided to expand the material exploration using other calcium-rich waste materials. Instead of limiting the tests to domestic eggshell waste, I looked for other abundant mineral sources that were locally available and easy to collect.
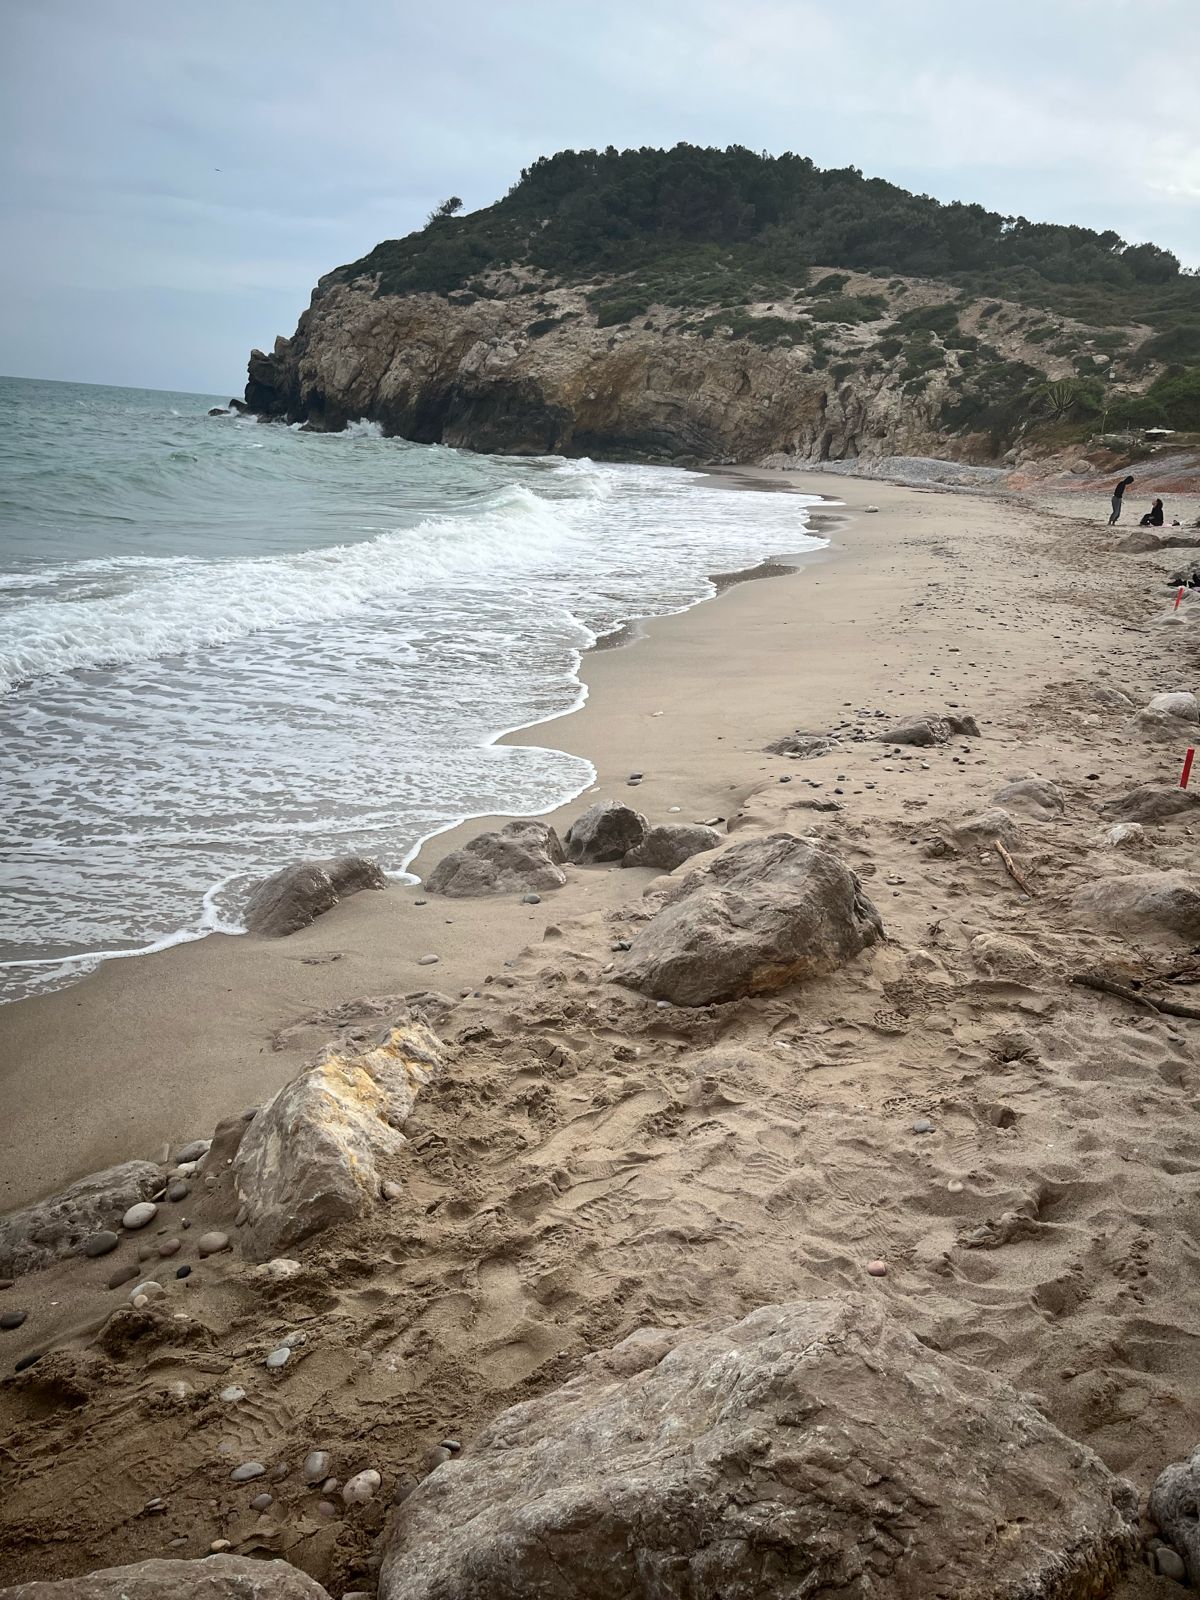
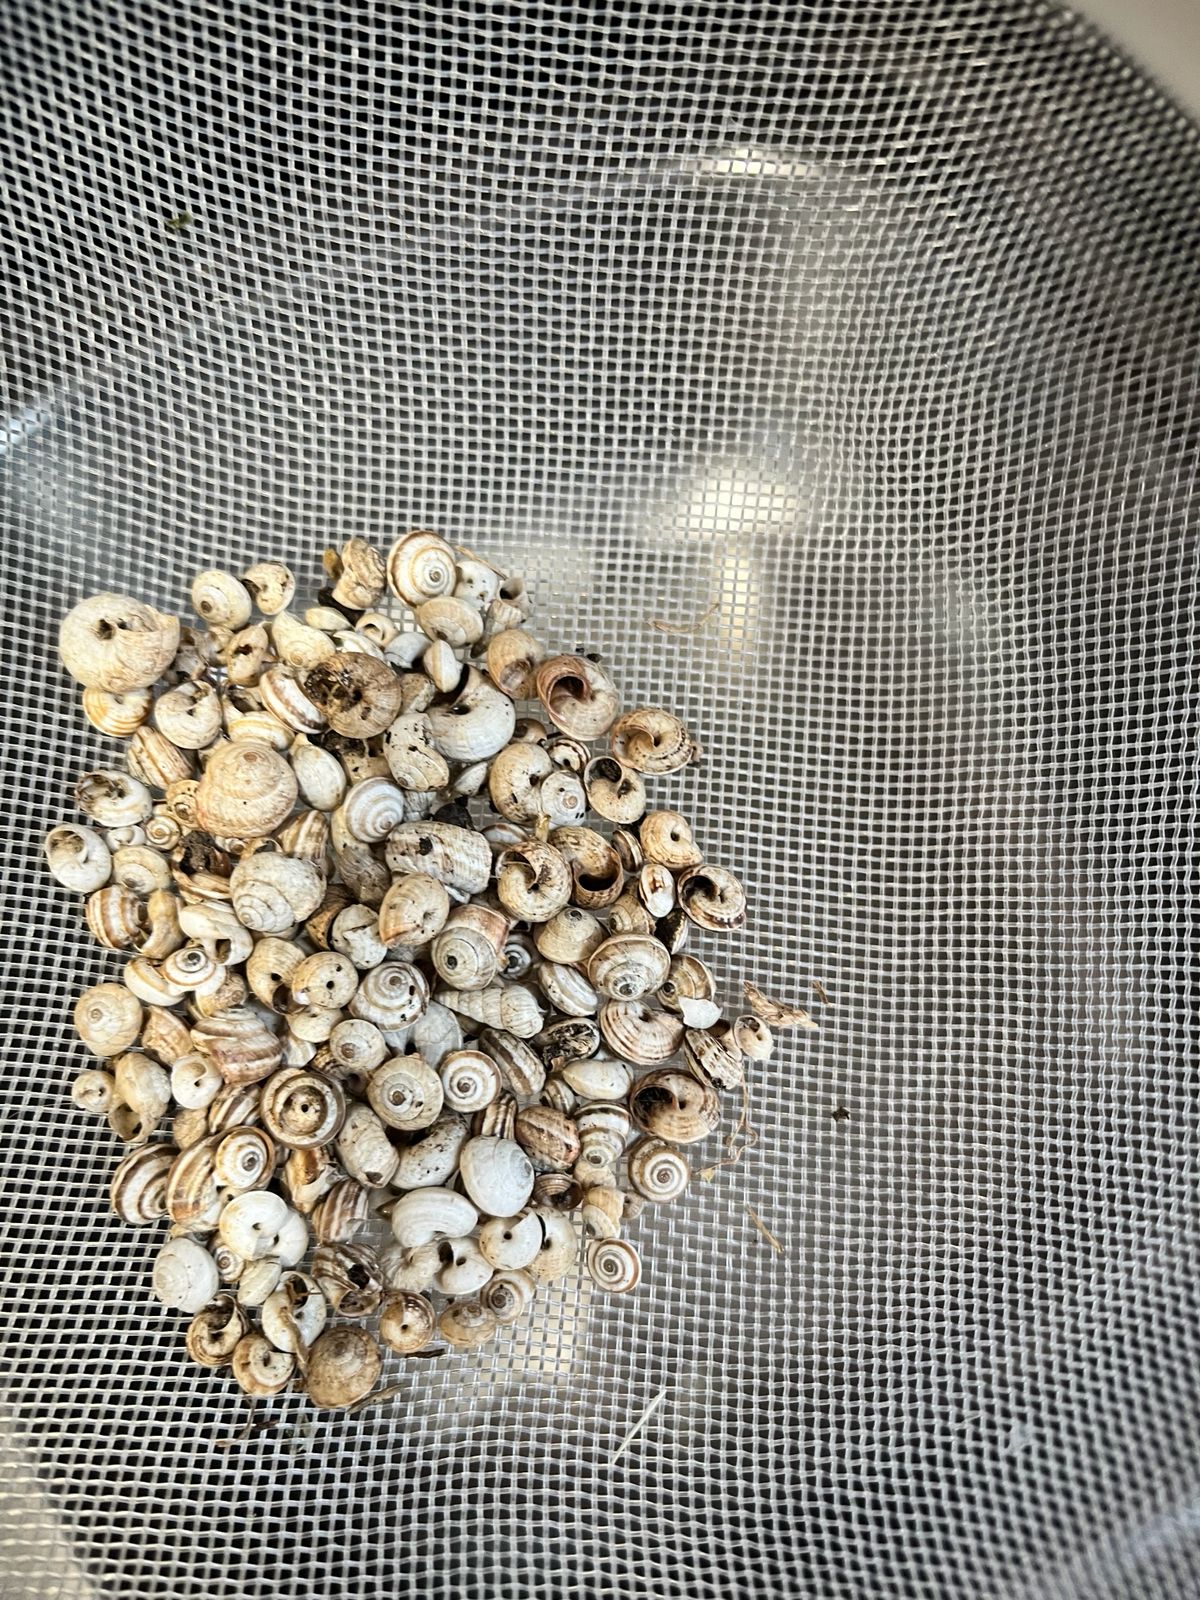
This led me to a small foraging exercise along the coast, where I collected a variety of marine shells as potential mineral fillers. The goal was to compare different calcium-based waste materials and evaluate how their particle size, texture, and composition would affect the final composite.
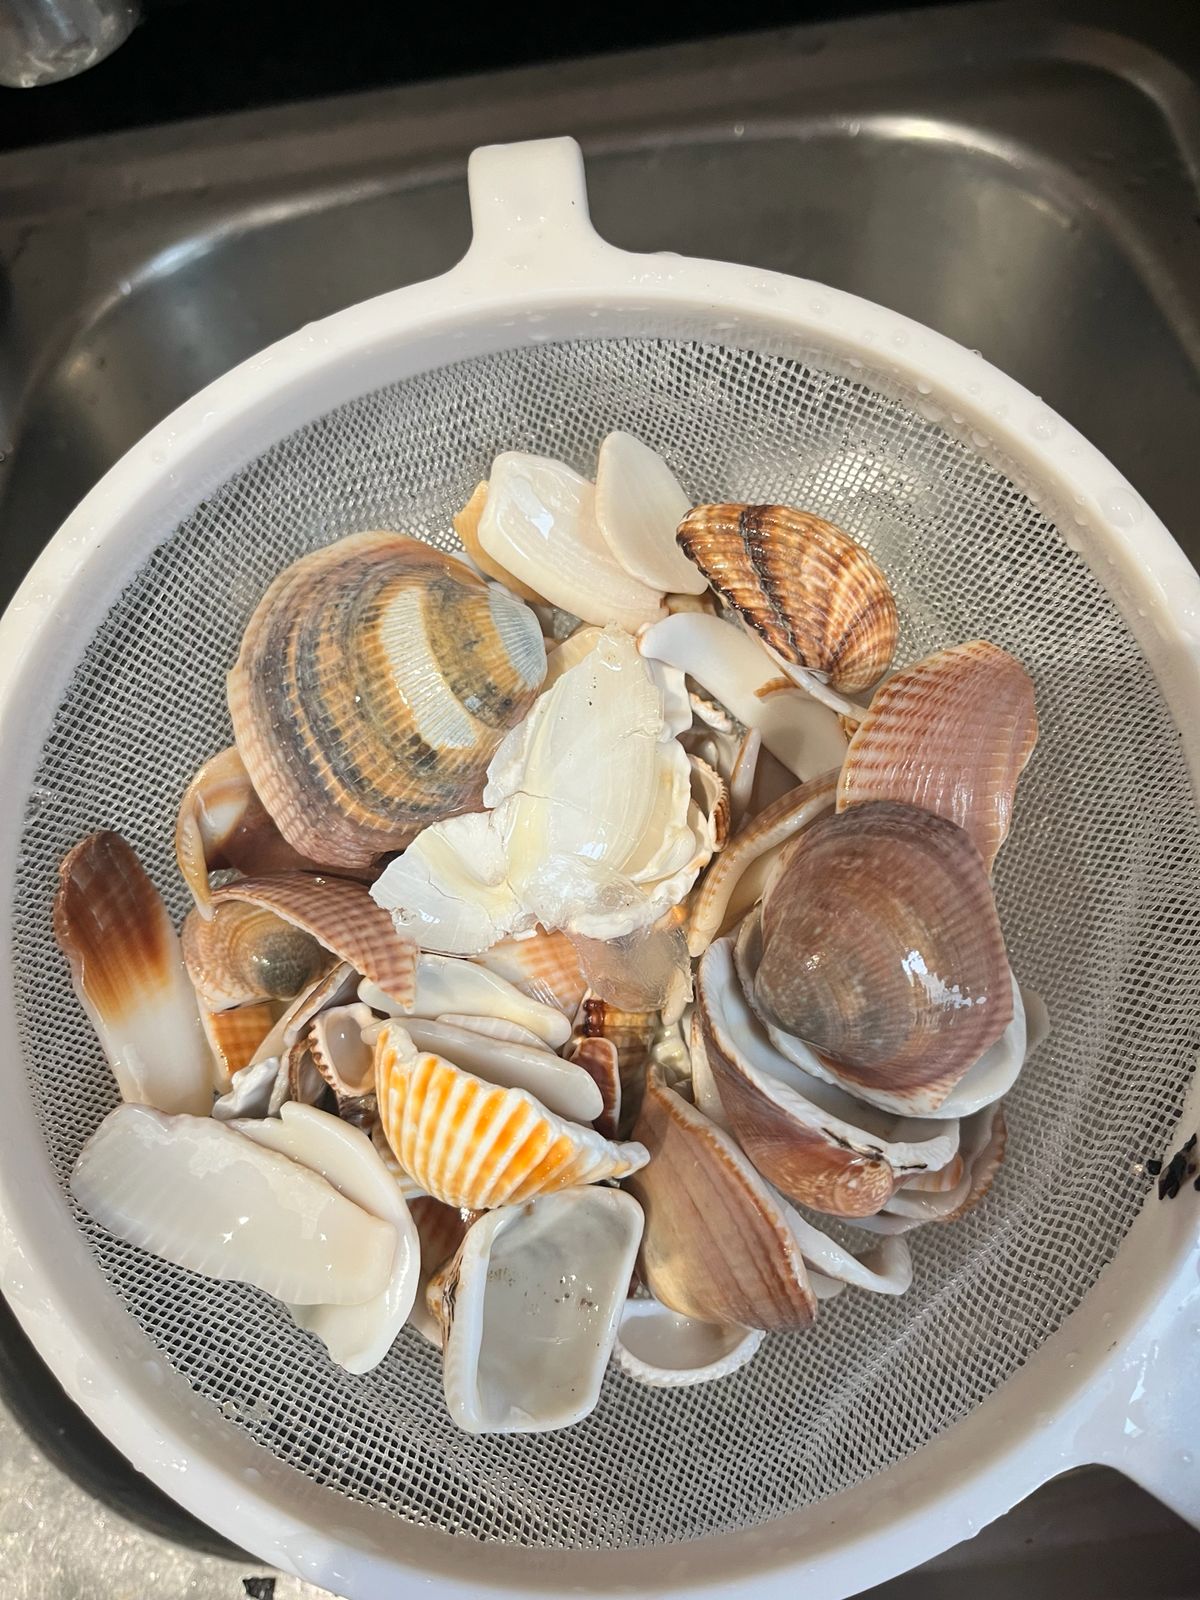
The shell collection included:
- small snail shells
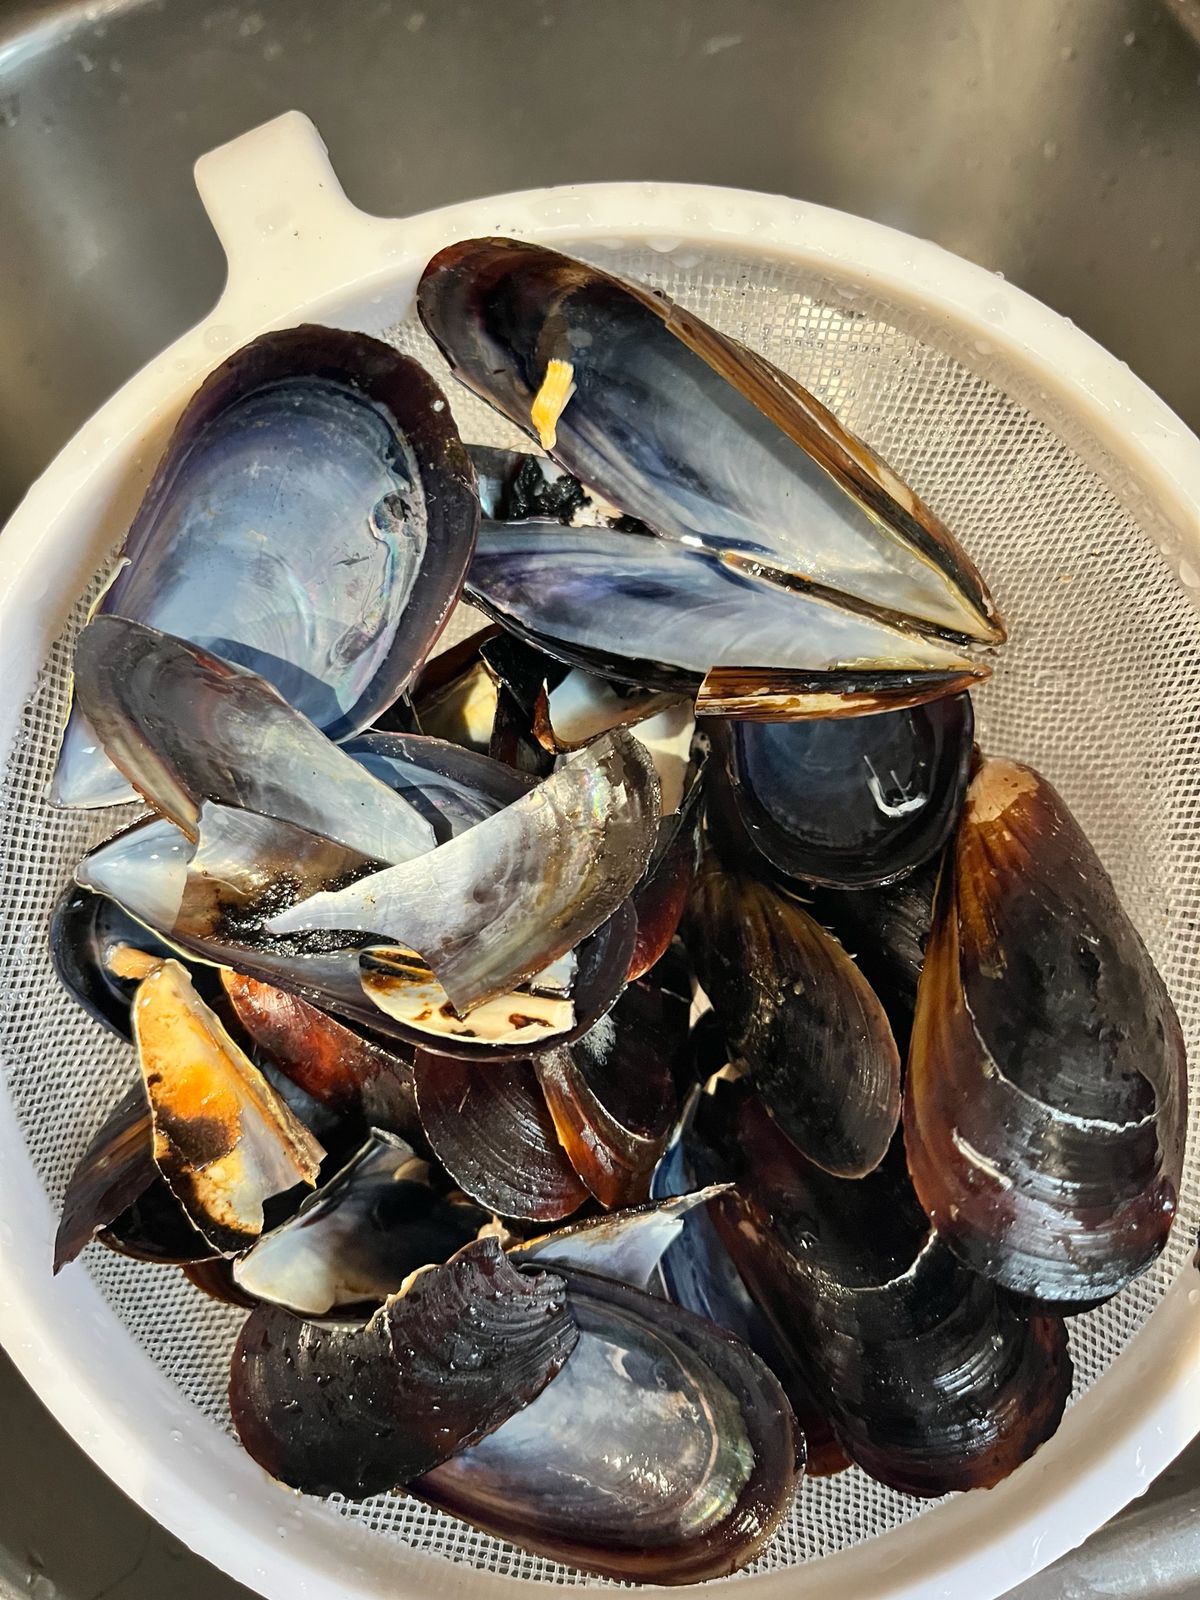
- mussel shells
- mixed sea shells
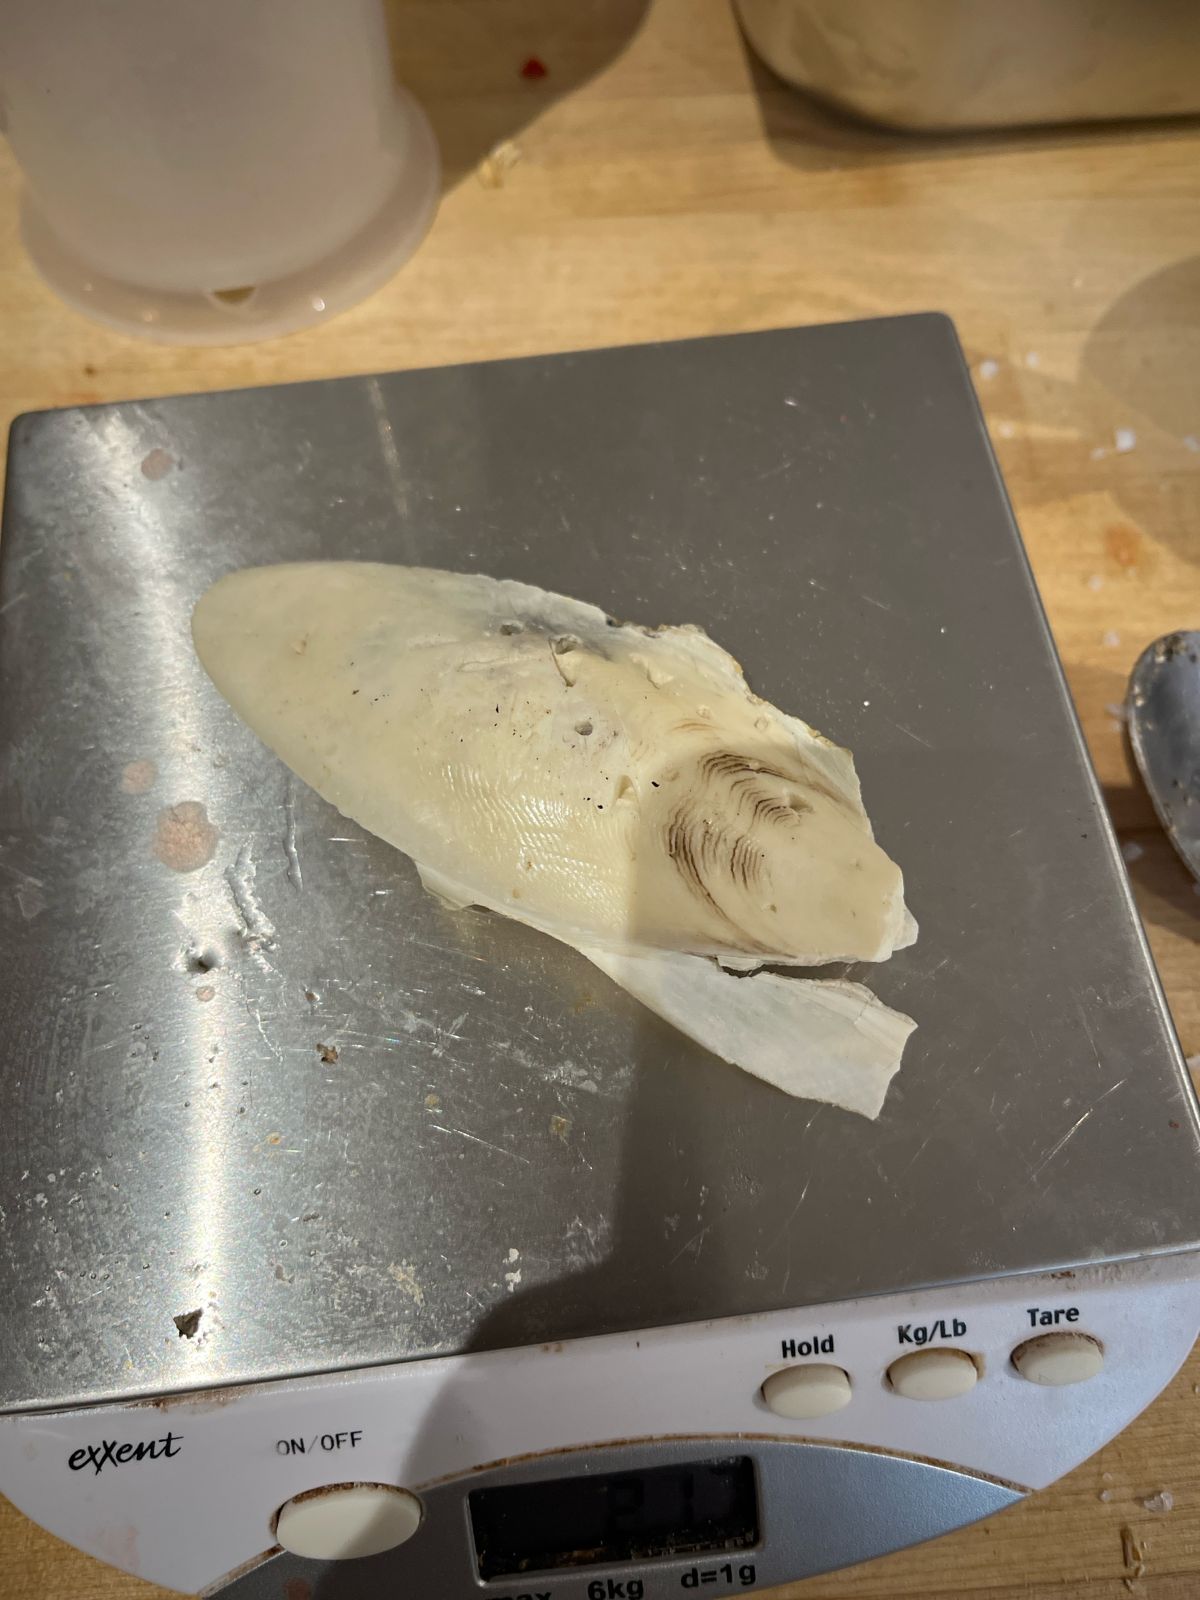
- a fish bone / cuttlebone-like calcified marine fragment
- previously collected eggshells as a reference material
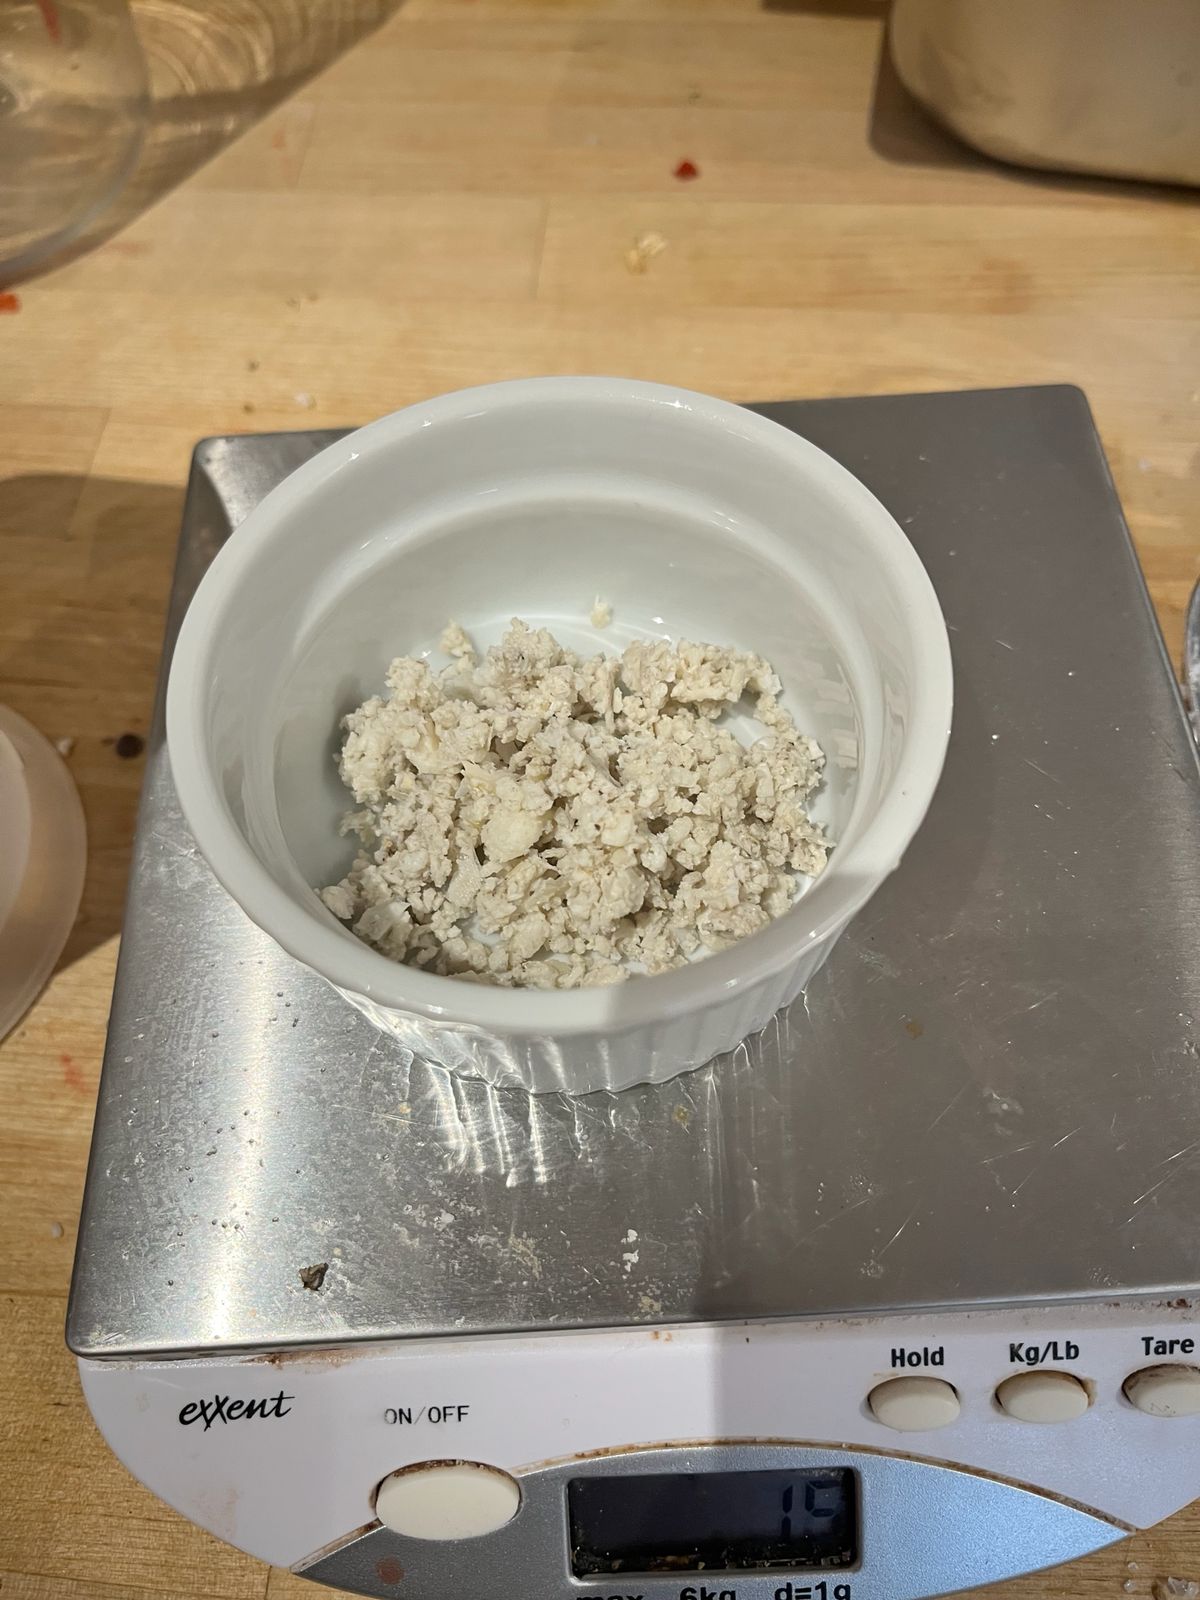
Once collected, all materials went through the same preparation workflow:
- Washing to remove sand, dirt, and organic residues
- Boiling to further clean the material and reduce biological contamination
- Drying in the oven to remove moisture
- Blending / grinding to reduce the material into smaller particles
- Weighing each material batch
- Calculating recipes using the original Materiom proportion as a base reference
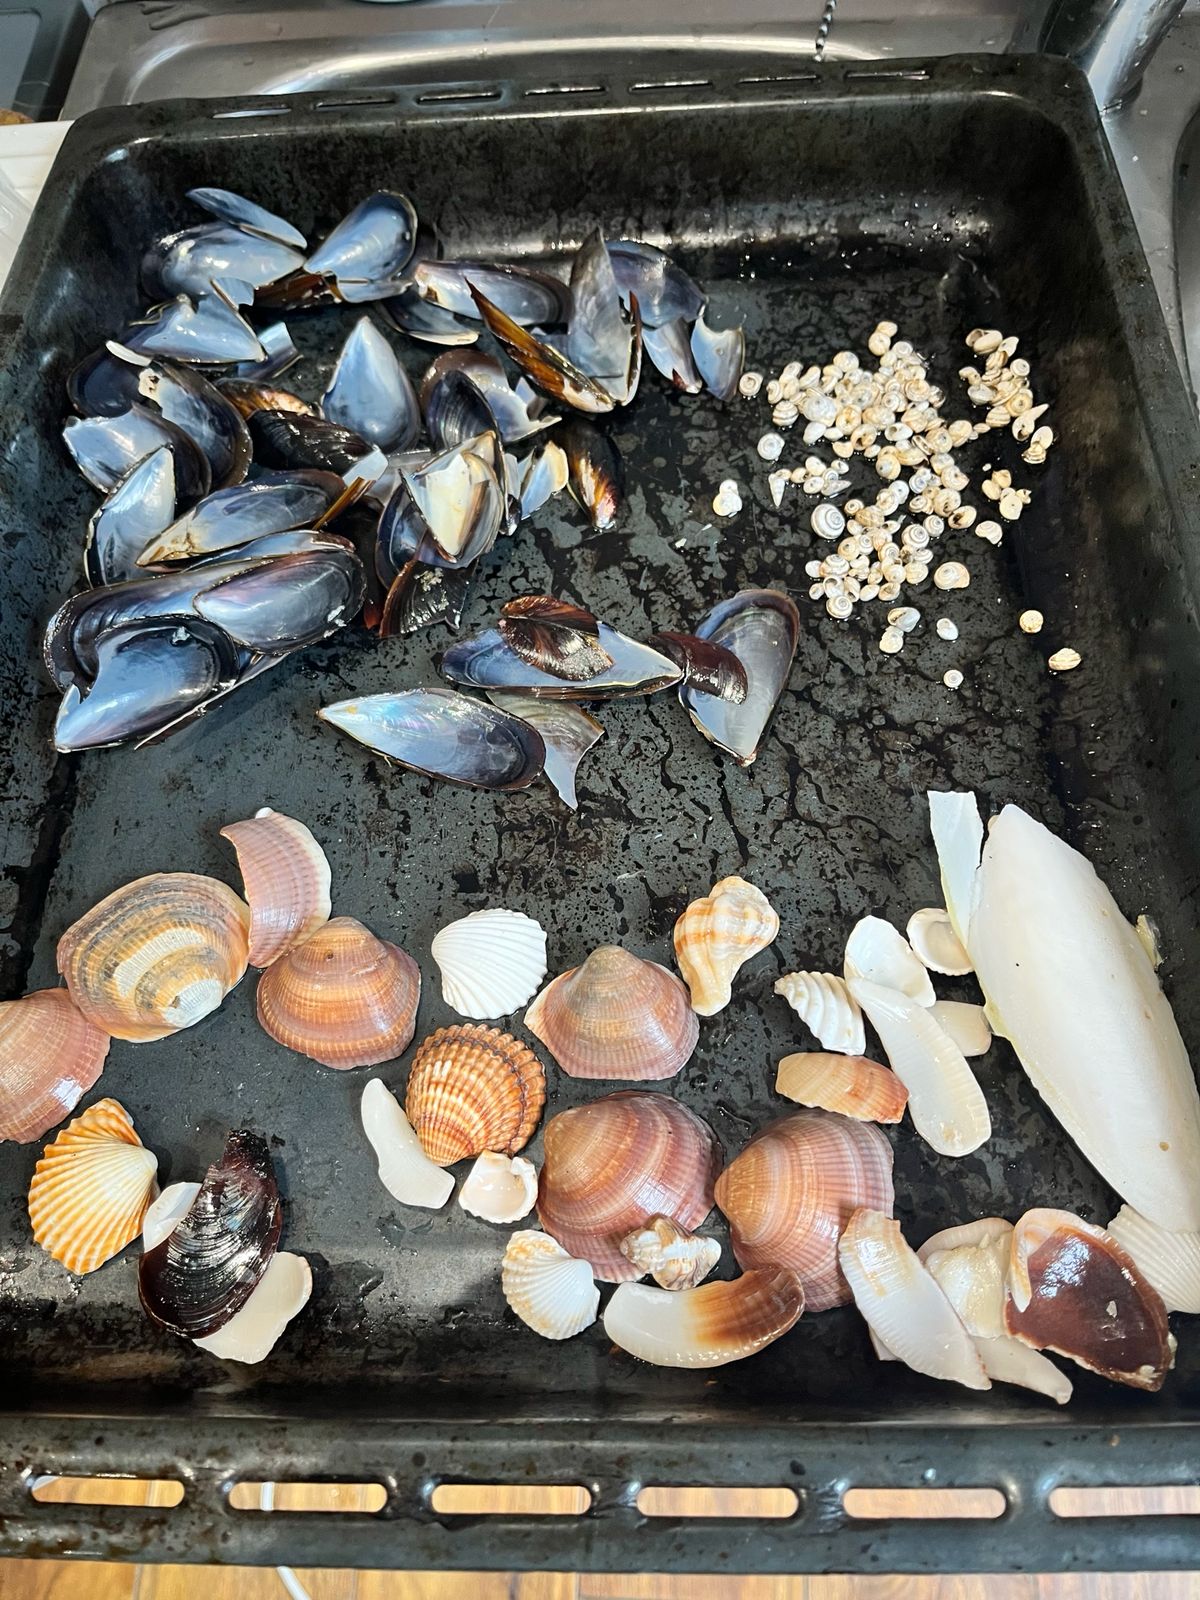
This step became an important shift in the project. Rather than following a single recipe exactly, I started treating the recipe as a framework that could be adapted to different mineral inputs. The main question was no longer only whether the eggshell recipe worked, but how different waste-derived calcium sources would behave when combined with the same alginate binder.
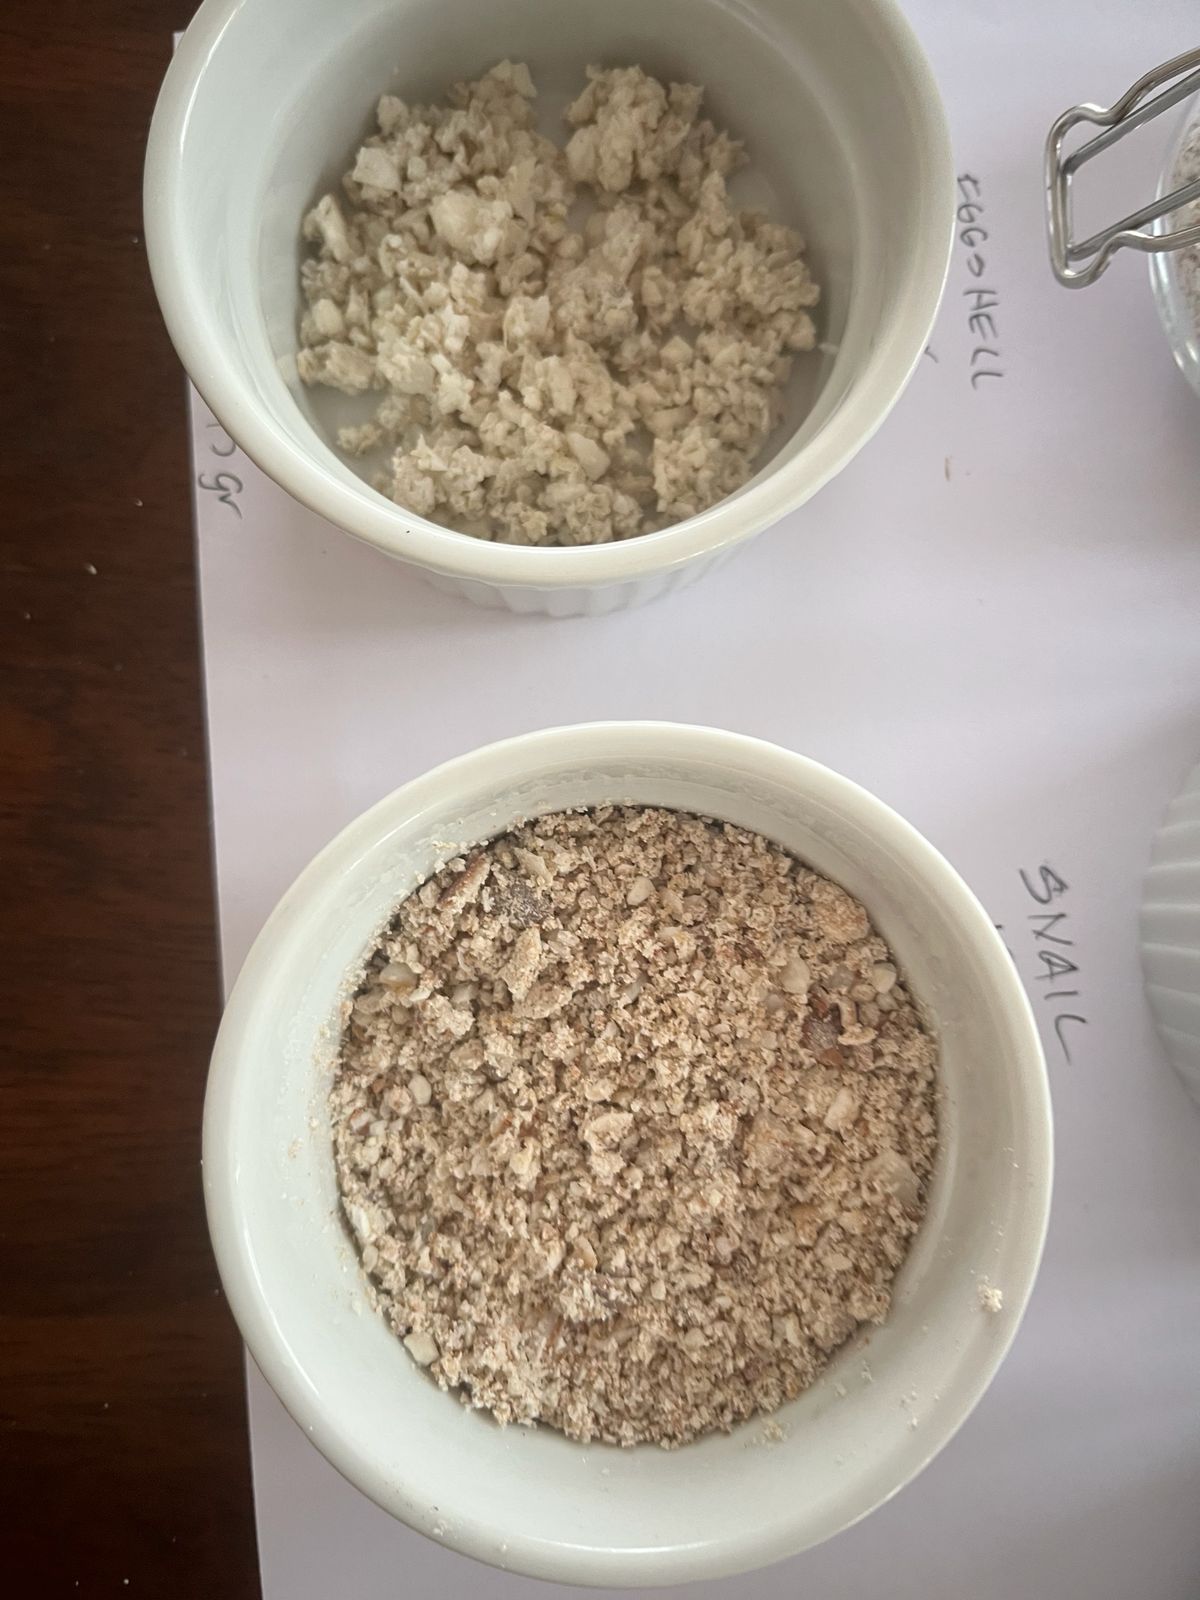
The preparation process also made visible how much the particle size varied from one material to another. Eggshells produced a relatively light and fine powder, while mussel shells remained darker, denser, and more irregular. The mixed sea shells and snail shells also showed different textures after grinding, suggesting that each one might create a different surface finish, density, and structural behavior in the final composite.
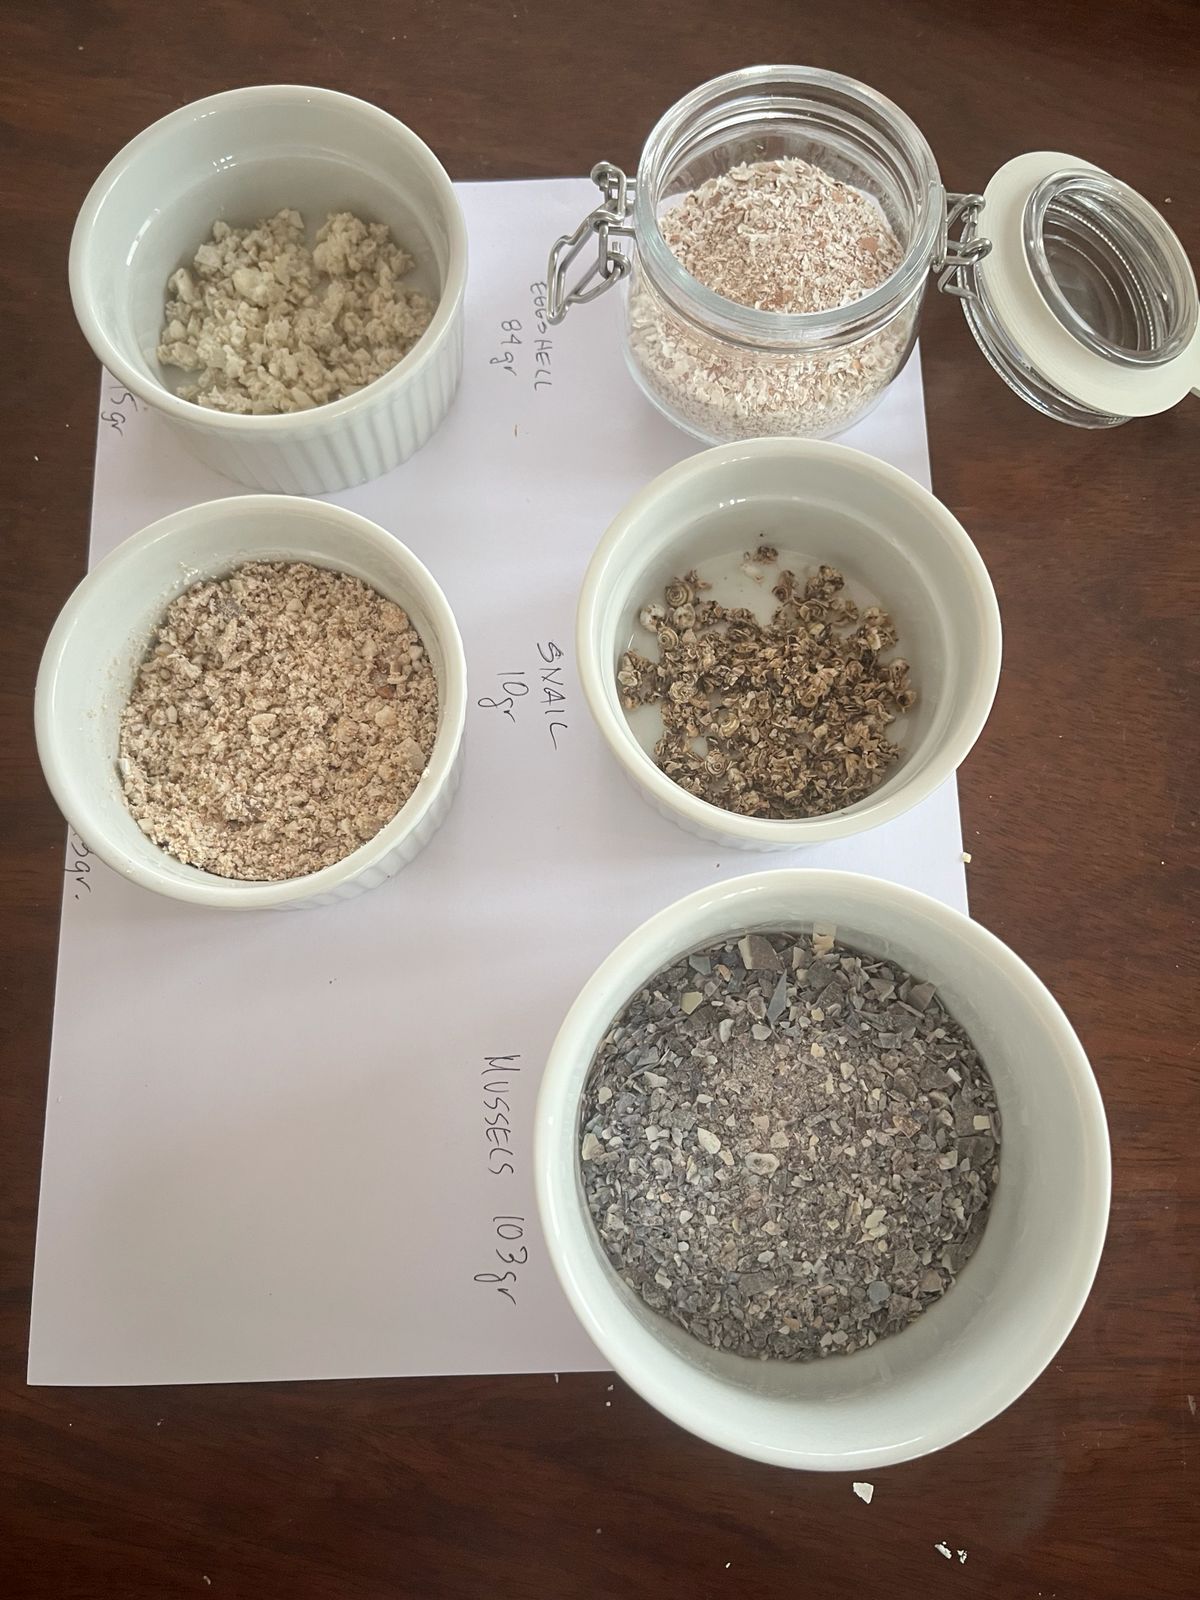
At this point, the work moved from simply reproducing a recipe to building a small material comparison system. Each variation used the same logic, but with a different waste-derived mineral source, allowing me to compare the results through casting and drying tests.
Mold Design and Preparation
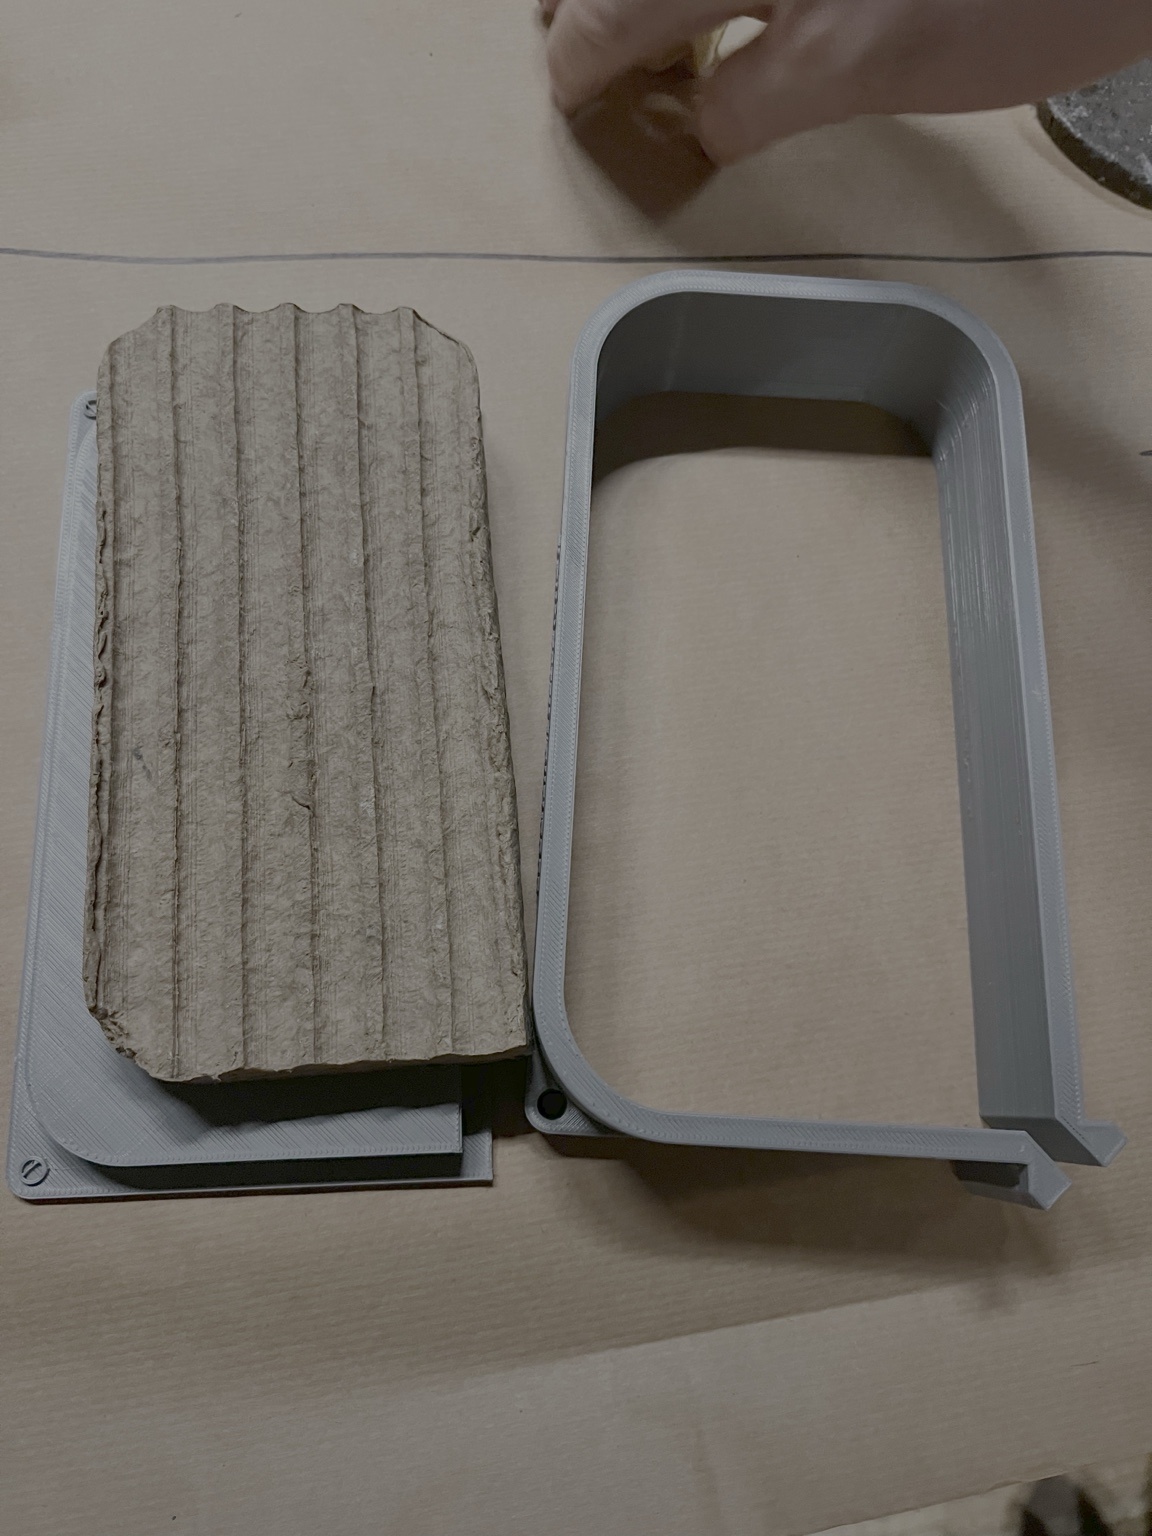
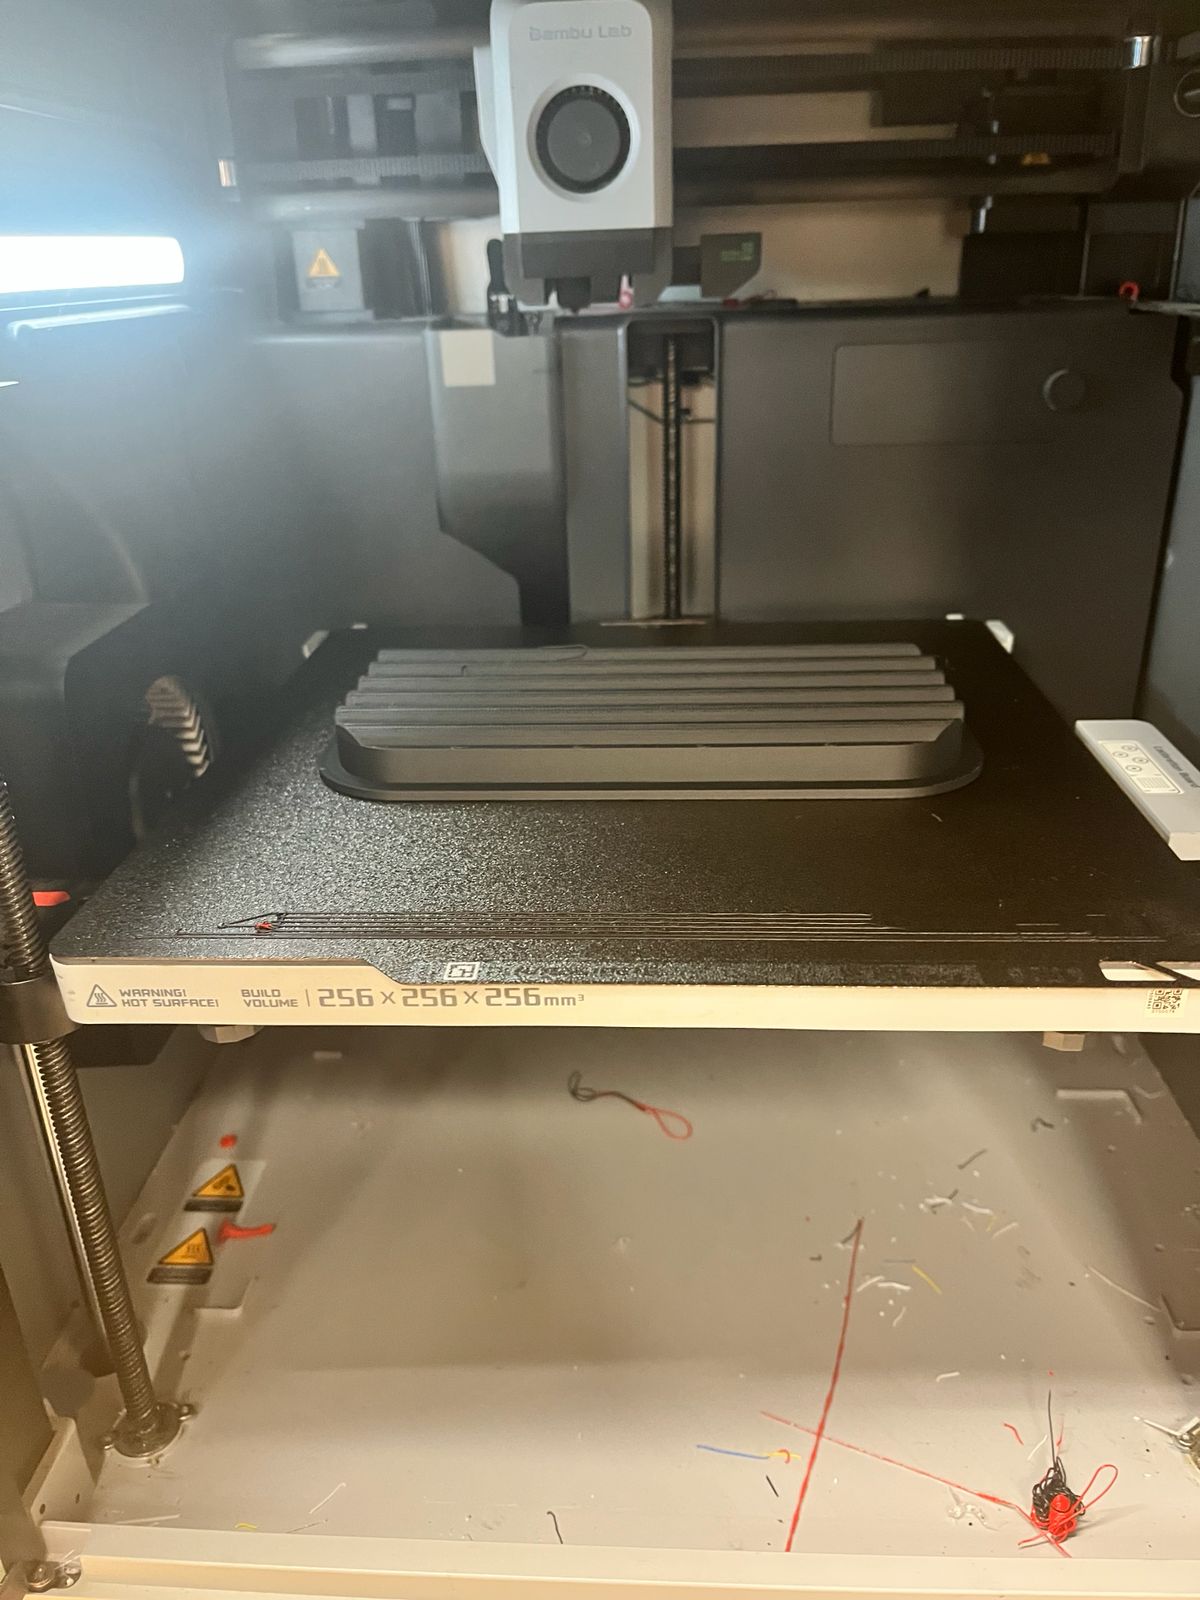
For the molding stage, I 3D printed a custom mold for the heater-like plaque geometry. The goal was to create a surface with longitudinal grooves that visually referenced the form of a ceramic infrared heater plate while remaining simple enough to fabricate quickly and cast with biomaterial recipes.
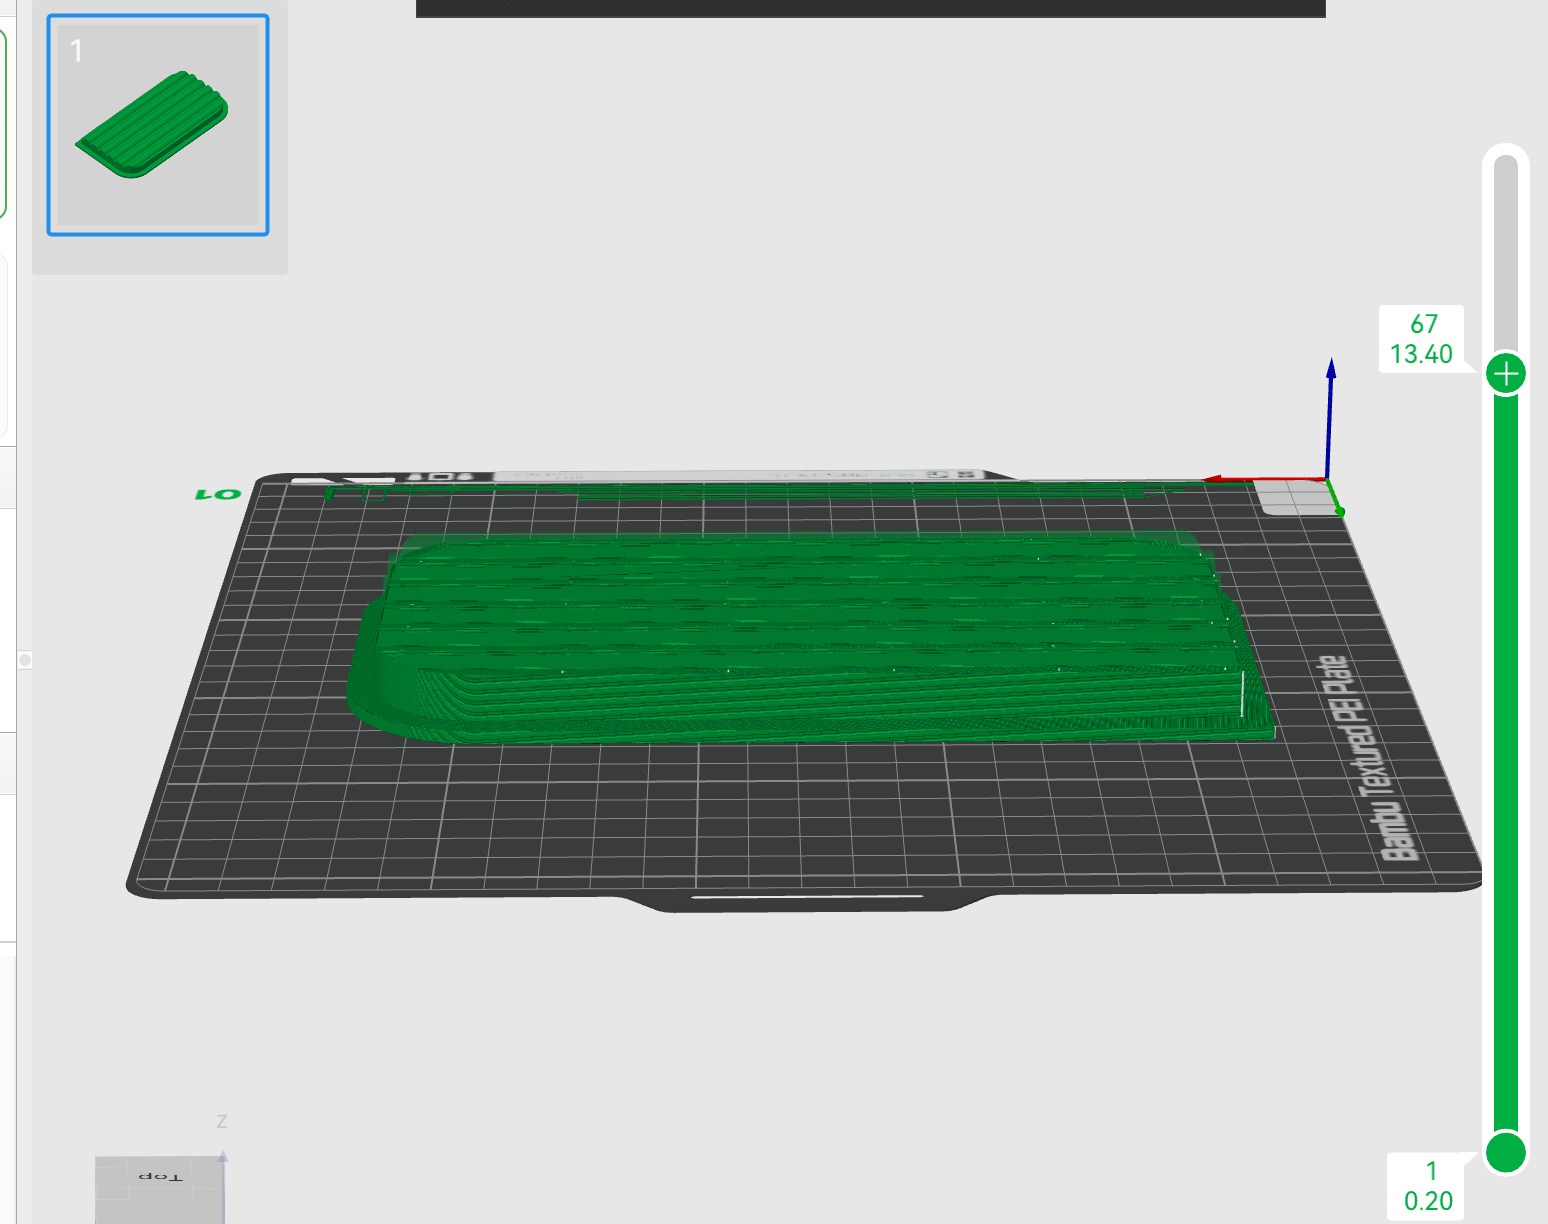
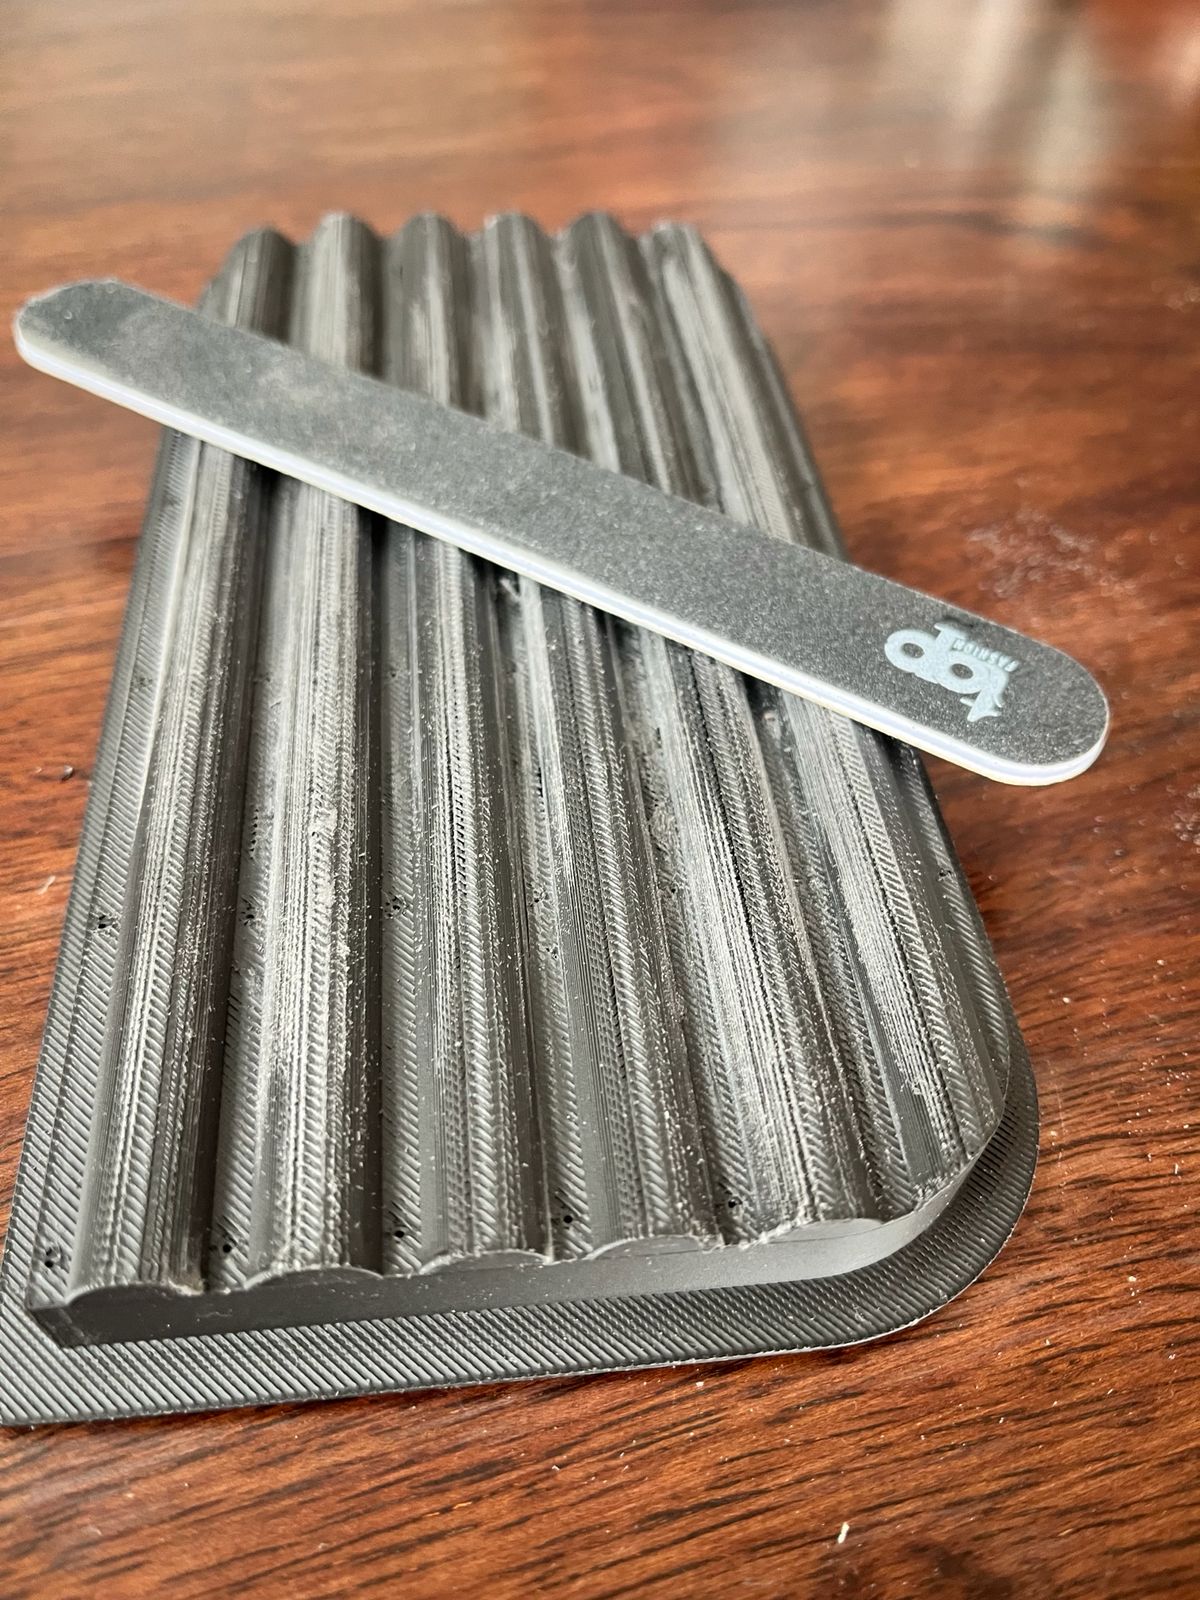
The mold was printed in plastic using the FDM process. Once printed, the surface still showed visible layer lines and small print defects, especially on the curved groove transitions.
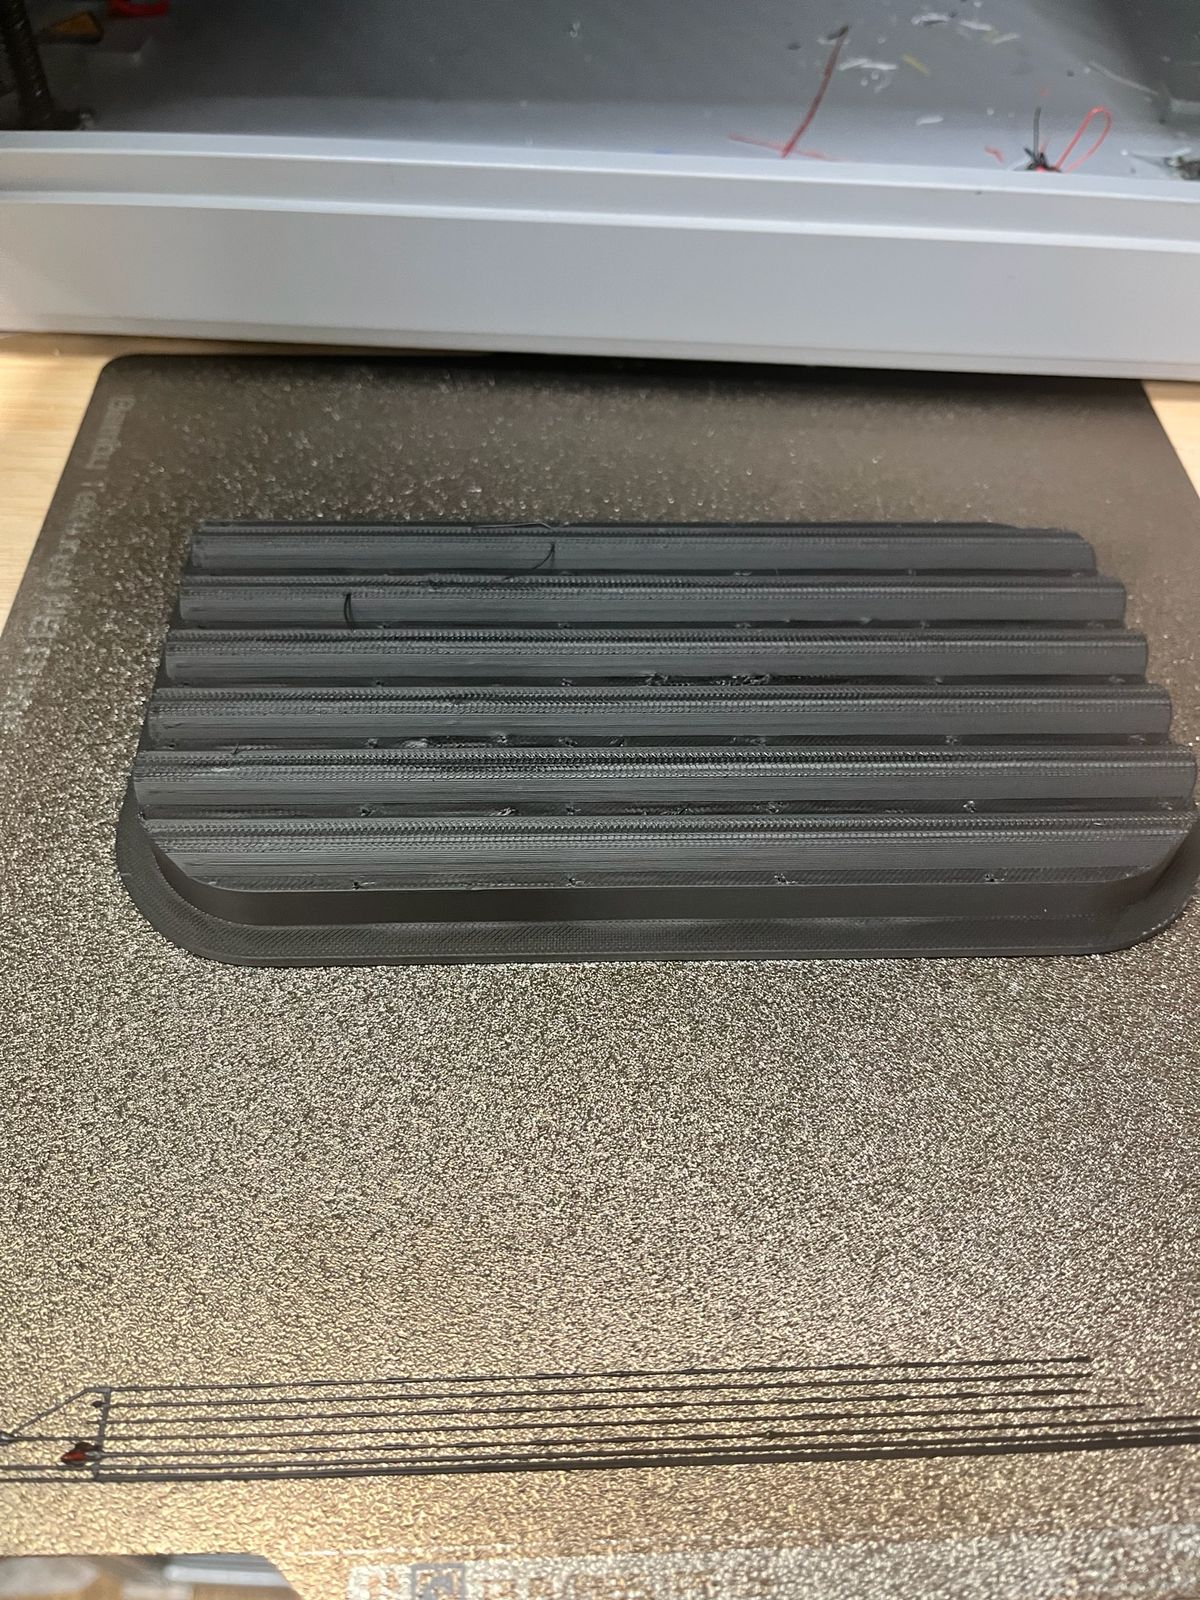
Since these surface irregularities would be transferred directly to the cast part, I manually sanded the top surface with sandpaper to reduce the texture and smooth the mold before use. This post-processing step was important to improve the finish of the cast samples and to make demolding easier.
In parallel, I also reused a second mold developed earlier during Week 03 — 3D Scanning and Printing. This was an octagonal wa-handle geometry originally designed as a handle experiment. For this week, I repurposed it as a vertical mold to test how the same biomaterial behaved in a different form factor: deeper, narrower, and more structural than the flat plaque mold.
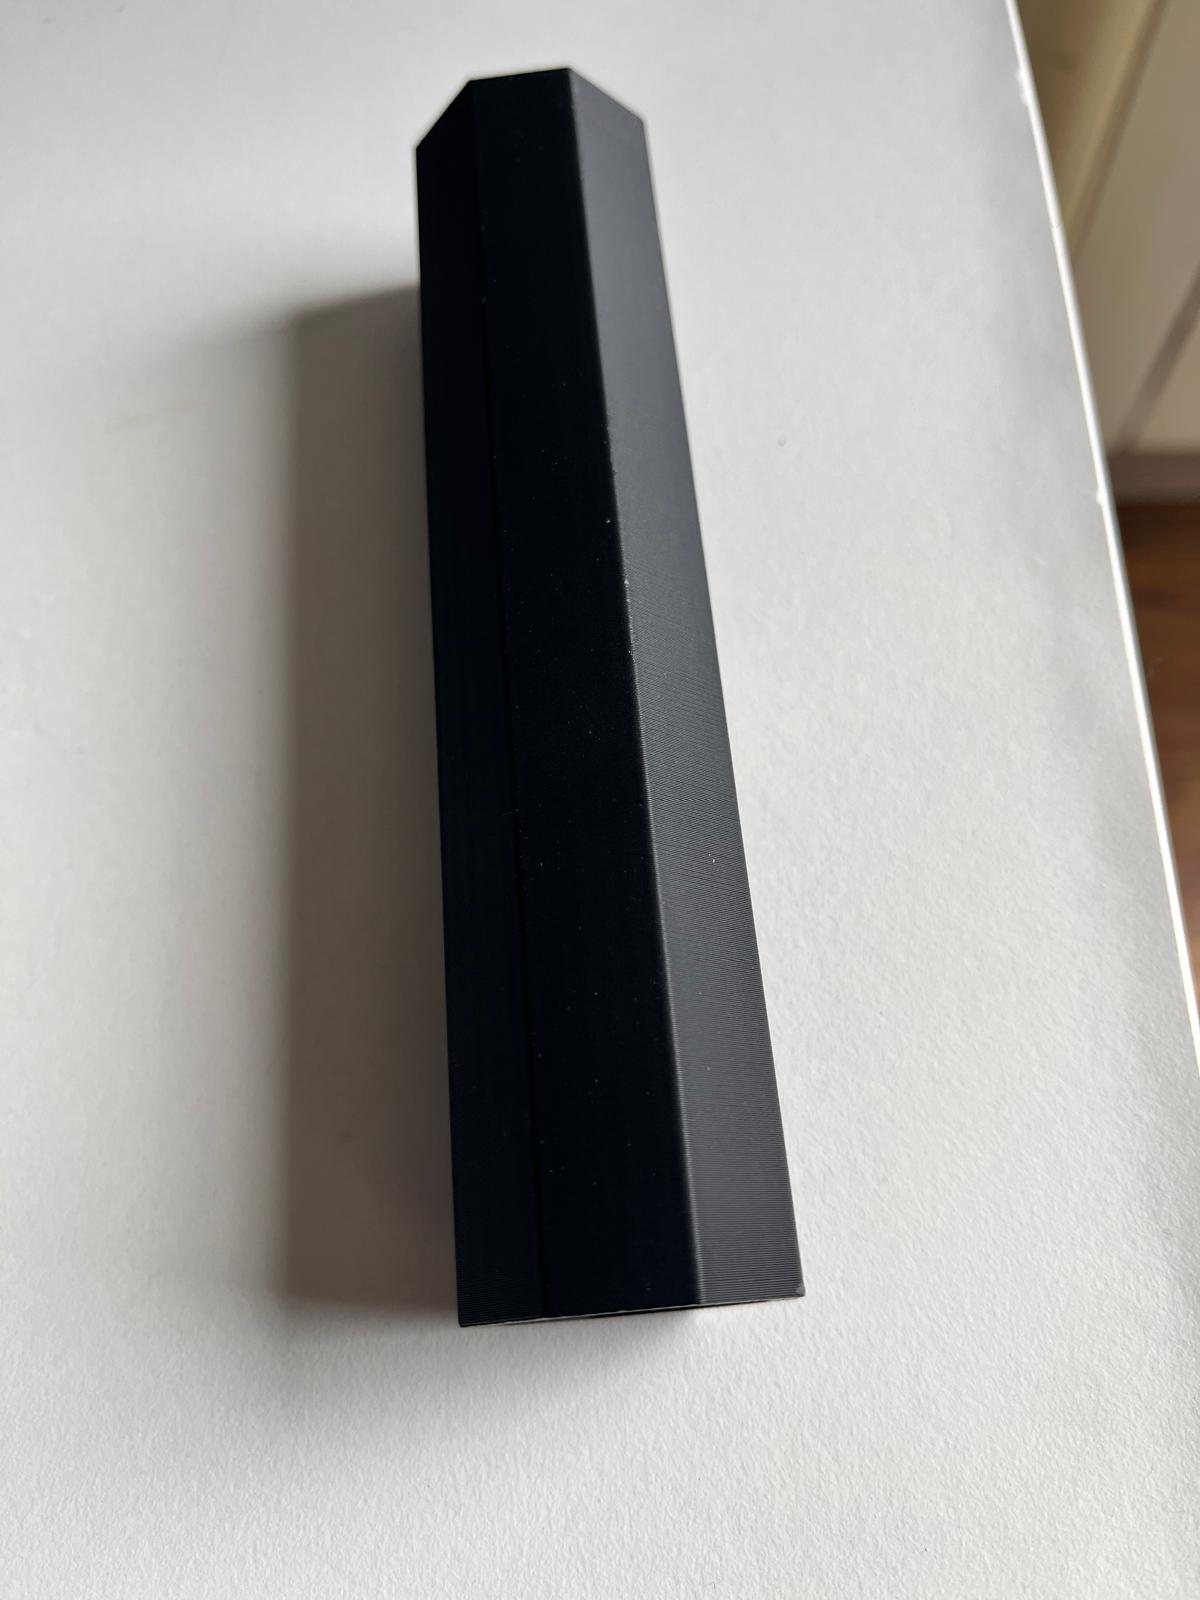
Using these two molds allowed me to compare the material in two different conditions:
- a flat grooved plaque, focused on surface detail and ceramic-like appearance
- an octagonal handle form, focused on filling, shrinkage, demolding, and structural integrity
This also connected the molding and casting assignment back to previous Fab Academy work by reusing a geometry already developed in an earlier week rather than designing everything from zero again.
Casting the Material Tests
Once the molds were prepared, I cast three different material variations to compare how each one behaved in drying, shrinkage, and surface finish.
The three tests were:
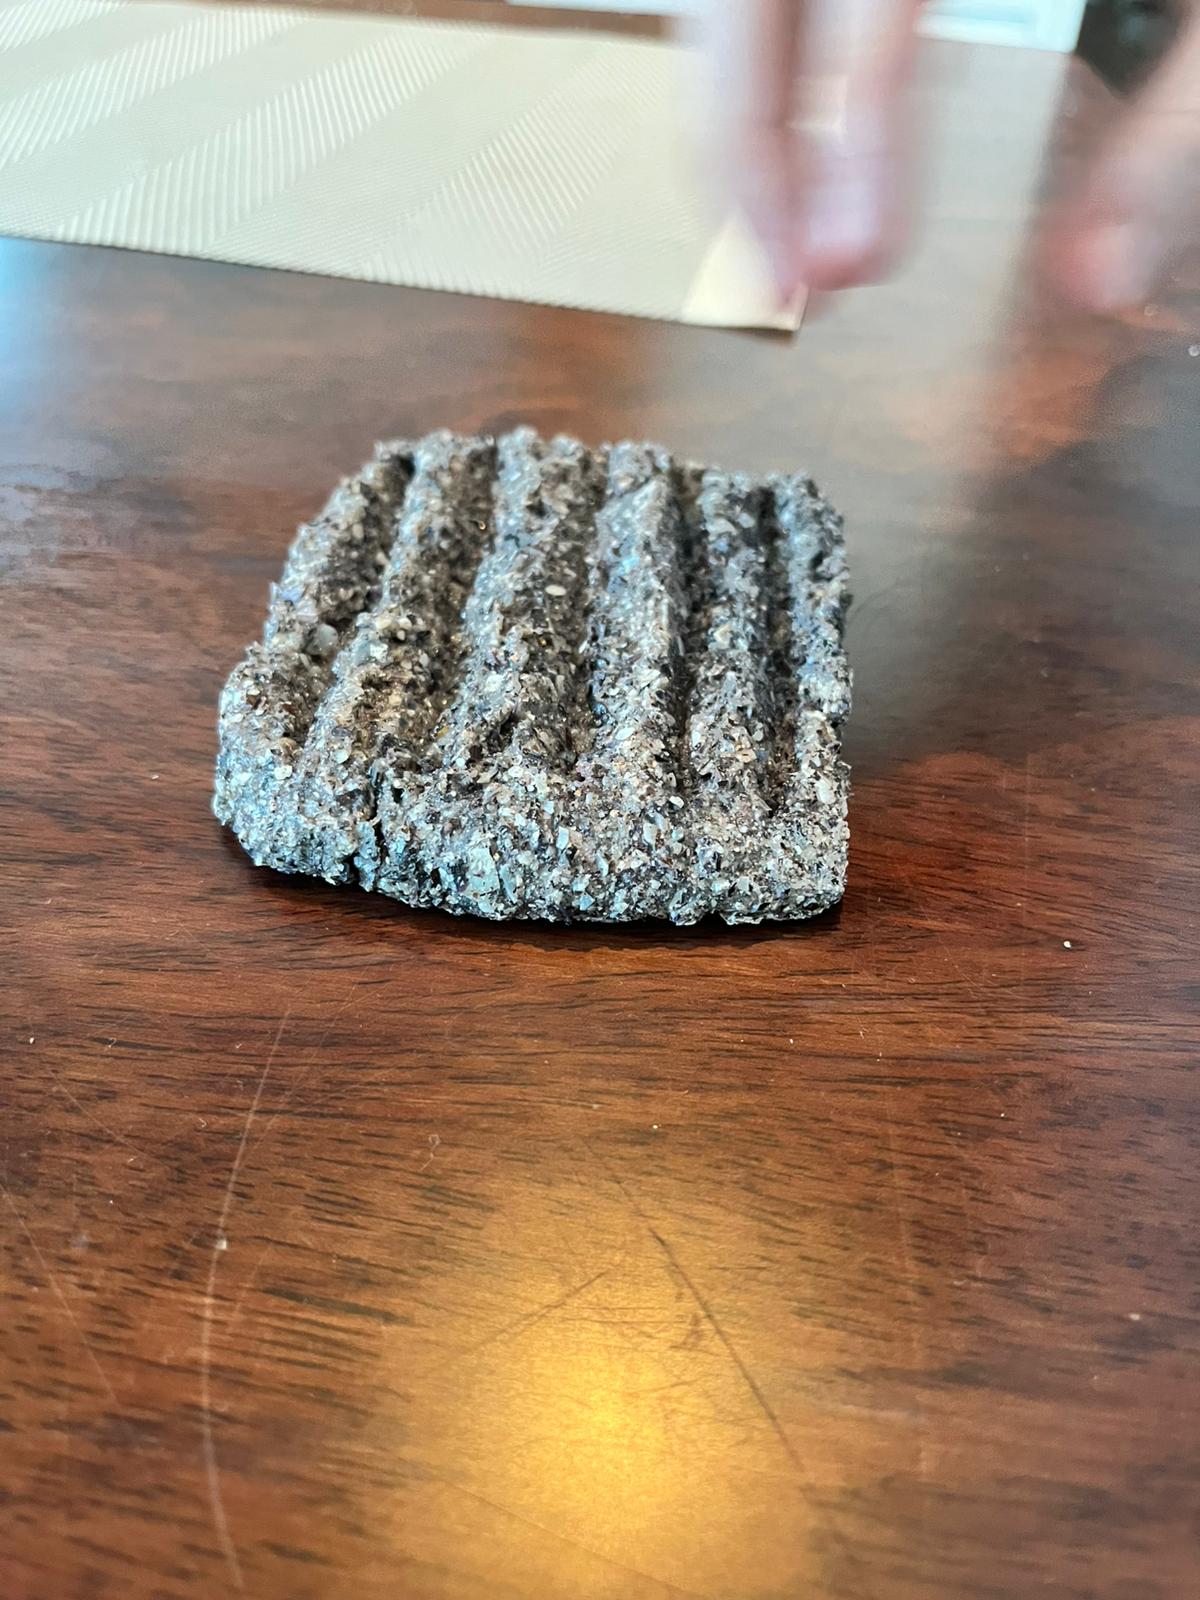
- Heater-like mold filled with the mussel shell composite
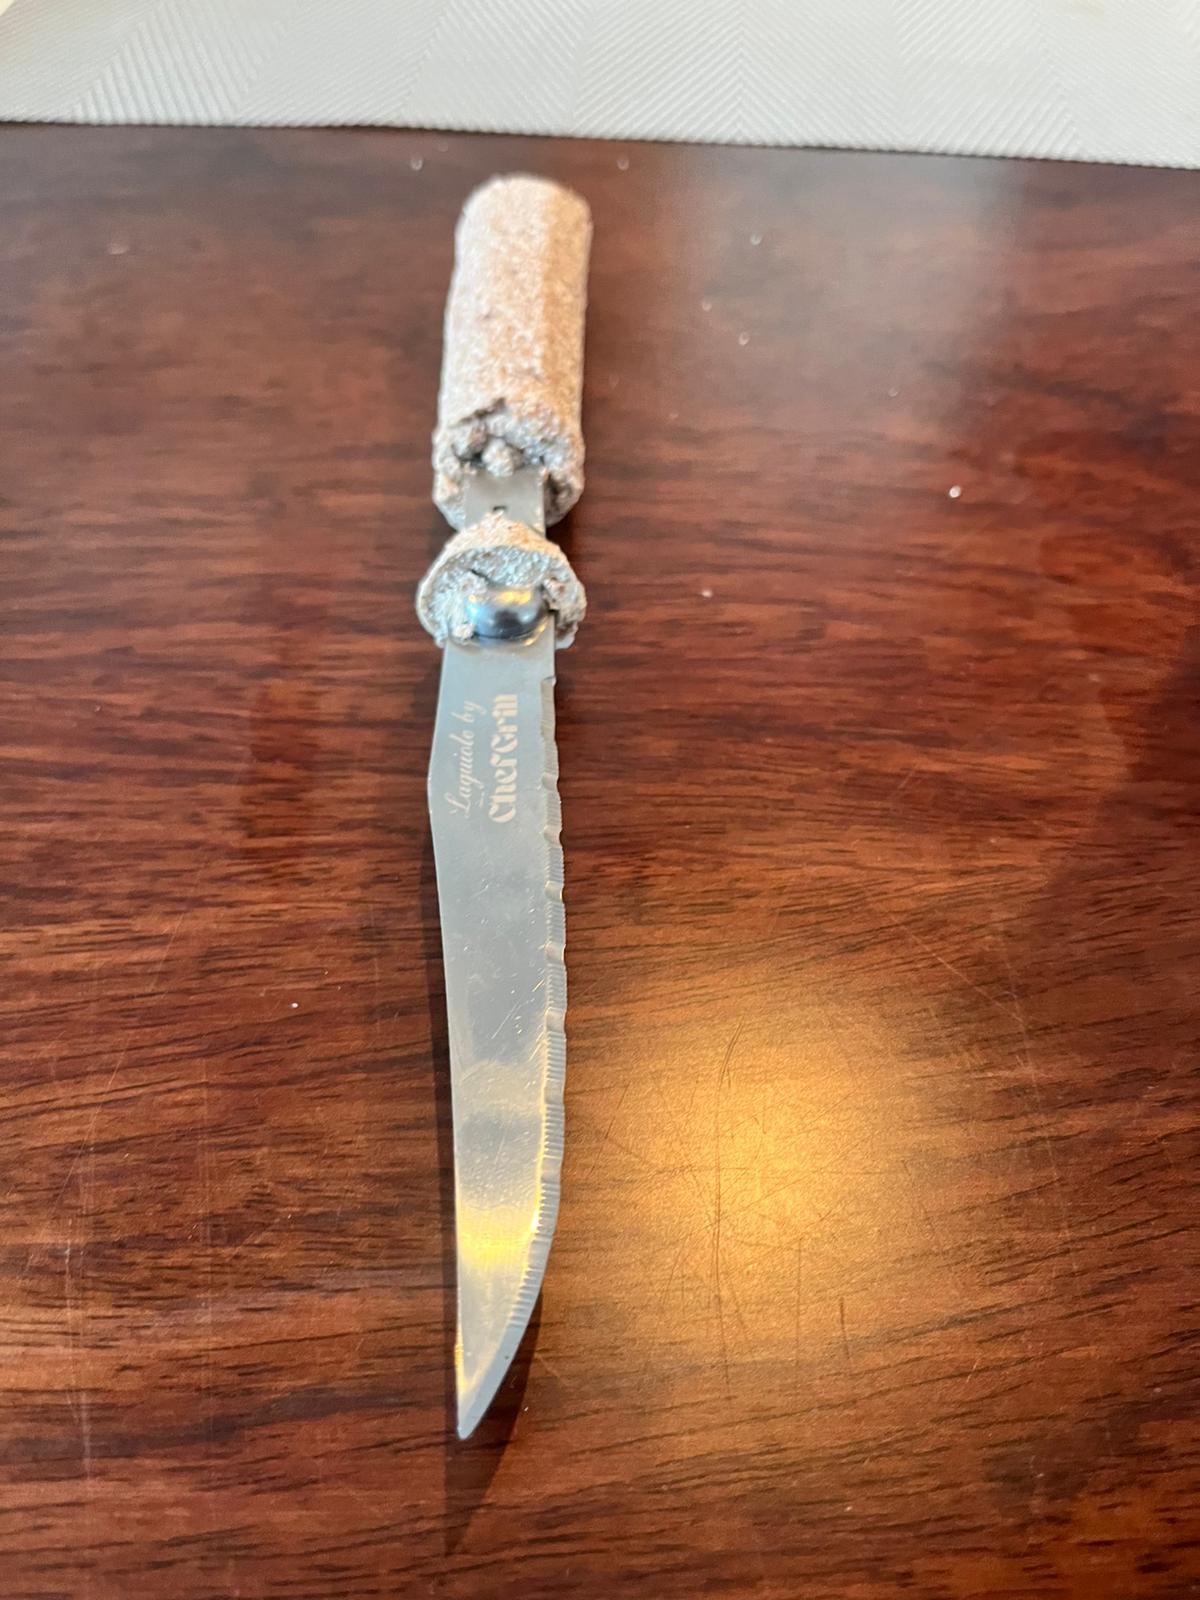
- Octagonal handle mold with knife inserted filled with the eggshell composite
- Octagonal handle mold without knife filled with the mixed shell composite
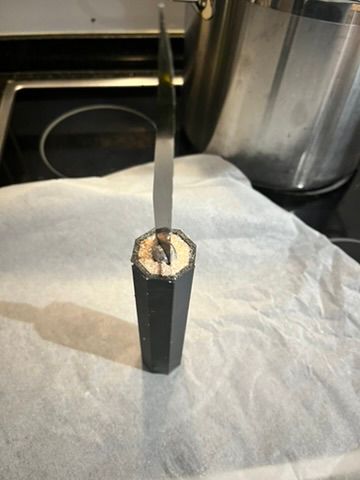
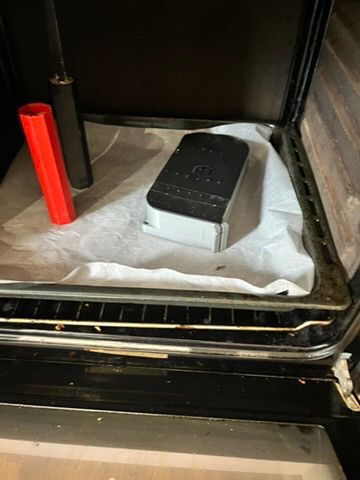
For the octagonal mold, I tested two different conditions. In one sample, I inserted the knife blade directly into the fresh material to see whether the composite could dry around it and form a handle-like part. In the second sample, I cast the same geometry without the knife in order to compare drying behavior and reduce the risk of cracking during shrinkage.
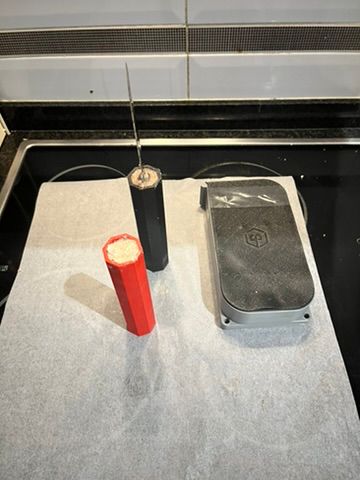
After filling the molds, I placed all three samples in the oven at 50°C for gentle drying. This temperature was chosen to accelerate water evaporation without forcing the material too aggressively, which could lead to surface cracking or uneven shrinkage.
At this stage, the main variables I wanted to observe were:
- how well each material filled the mold geometry
- whether the grooves of the heater-like plaque held detail
- whether the octagonal geometry dried evenly
- if the knife insert caused stress or cracking
- how the different mineral fillers affected color, texture, and compaction
The samples were then left in the oven to dry gradually before evaluating the first results.
Final Results
After removing the samples from the molds, I continued drying them in the oven at low temperature until they became rigid enough to handle and compare. Demolding while the pieces were still wet helped prevent them from sticking permanently to the mold and allowed the drying to continue more evenly on all sides.
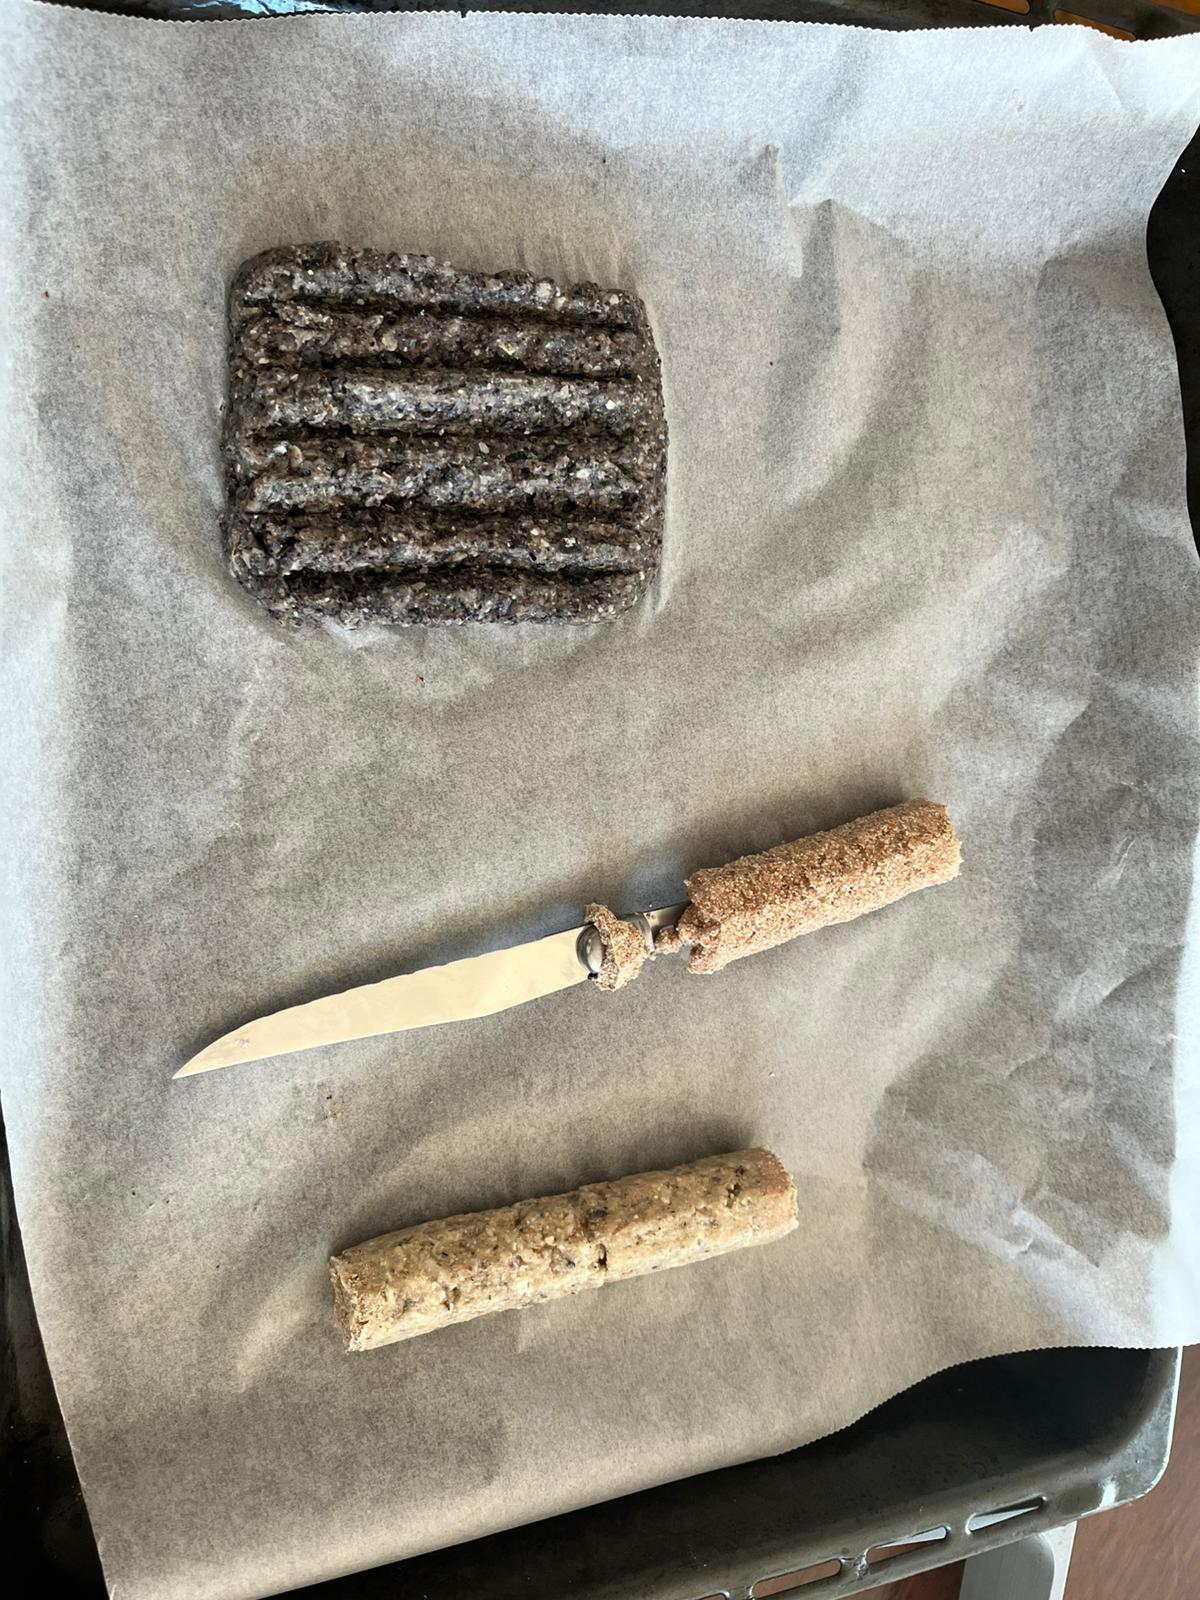
The final set included three cast parts:
- a heater-like plaque made with mussel shell composite
- an octagonal handle with knife inserted made with eggshell composite
- an octagonal handle without knife made with the mixed shell composite
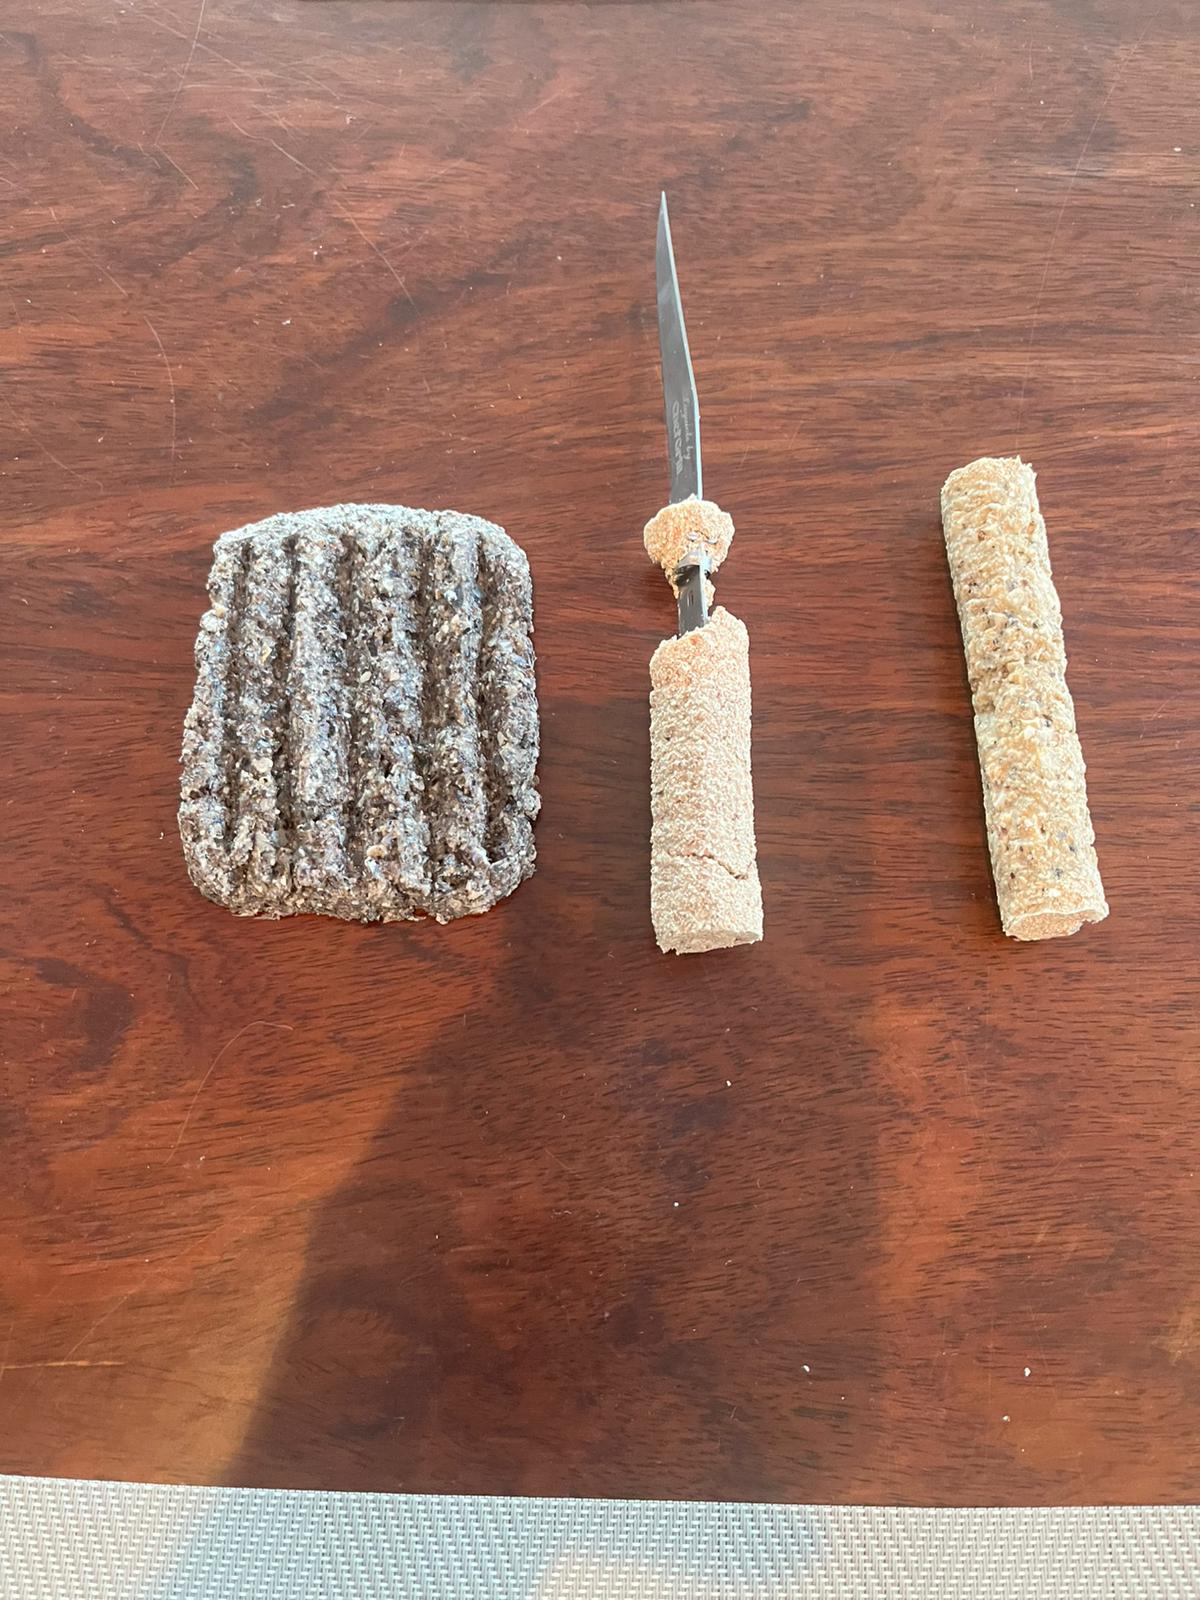
The mussel shell plaque produced the darkest result and the strongest visual contrast. Its rough surface and visible shell particles gave it a more mineral and textured appearance. The grooved geometry remained readable, although the surface was less smooth than a conventional ceramic part.
The eggshell handle with knife successfully formed around the blade, showing that the material could hold a handle-like geometry. However, the area near the blade connection was the weakest zone and showed cracking and breakage. This confirmed that inserting the knife directly during casting introduced stress and made the part more fragile during drying.
The mixed shell handle without knife dried more evenly and was the most stable of the two handle tests. Without the blade acting as an internal constraint, the piece kept its overall geometry more successfully, although cracks from shrinkage were still visible.

Overall, the three samples clearly showed that the recipes could produce rigid bio-mineral composites with distinct visual and structural characteristics depending on the filler used. At the same time, they also revealed the limits of the system: coarse particles, shrinkage, and brittle behavior remained important constraints.
As a first material exploration, the results were useful because they transformed waste-derived calcium sources into cast parts with recognizable form and different material expressions. Further experiments could be improved with proper machines, because inmersion blender didn’t have enough power to finely crush the shells. Even with commercial food processor, much better results could be acheived.
For ASFALT, this does not yet validate these recipes for high-temperature functional use, but it does open an interesting path for non-critical parts, handles, or further material refinement experiments.
References and AI Use
Materiom recipe https://commons.materiom.org/materials-database/recipe/649c36218e0f06dcab0b7d0a
Materfad https://www.fad.cat/a-fad/ca
AI use
Custom GPT used for structuring workflow and documentation formatting.
Prompts
-
“Give me an analysis of which parts of ASFALT hardware could be fabricated with bio based materials.”
-
“Is there a biobased alternative to ceramic that the heater could be fabricated with?”
-
“Calculate recipes based on different materials: eggshell, mussells, and mixed seashells.”
-
“Step by step for bio material ceramic preparation and drying with alginate.”
-
Break down materials contained in eggshells to look for substitutes in nature, for example, sea shells.