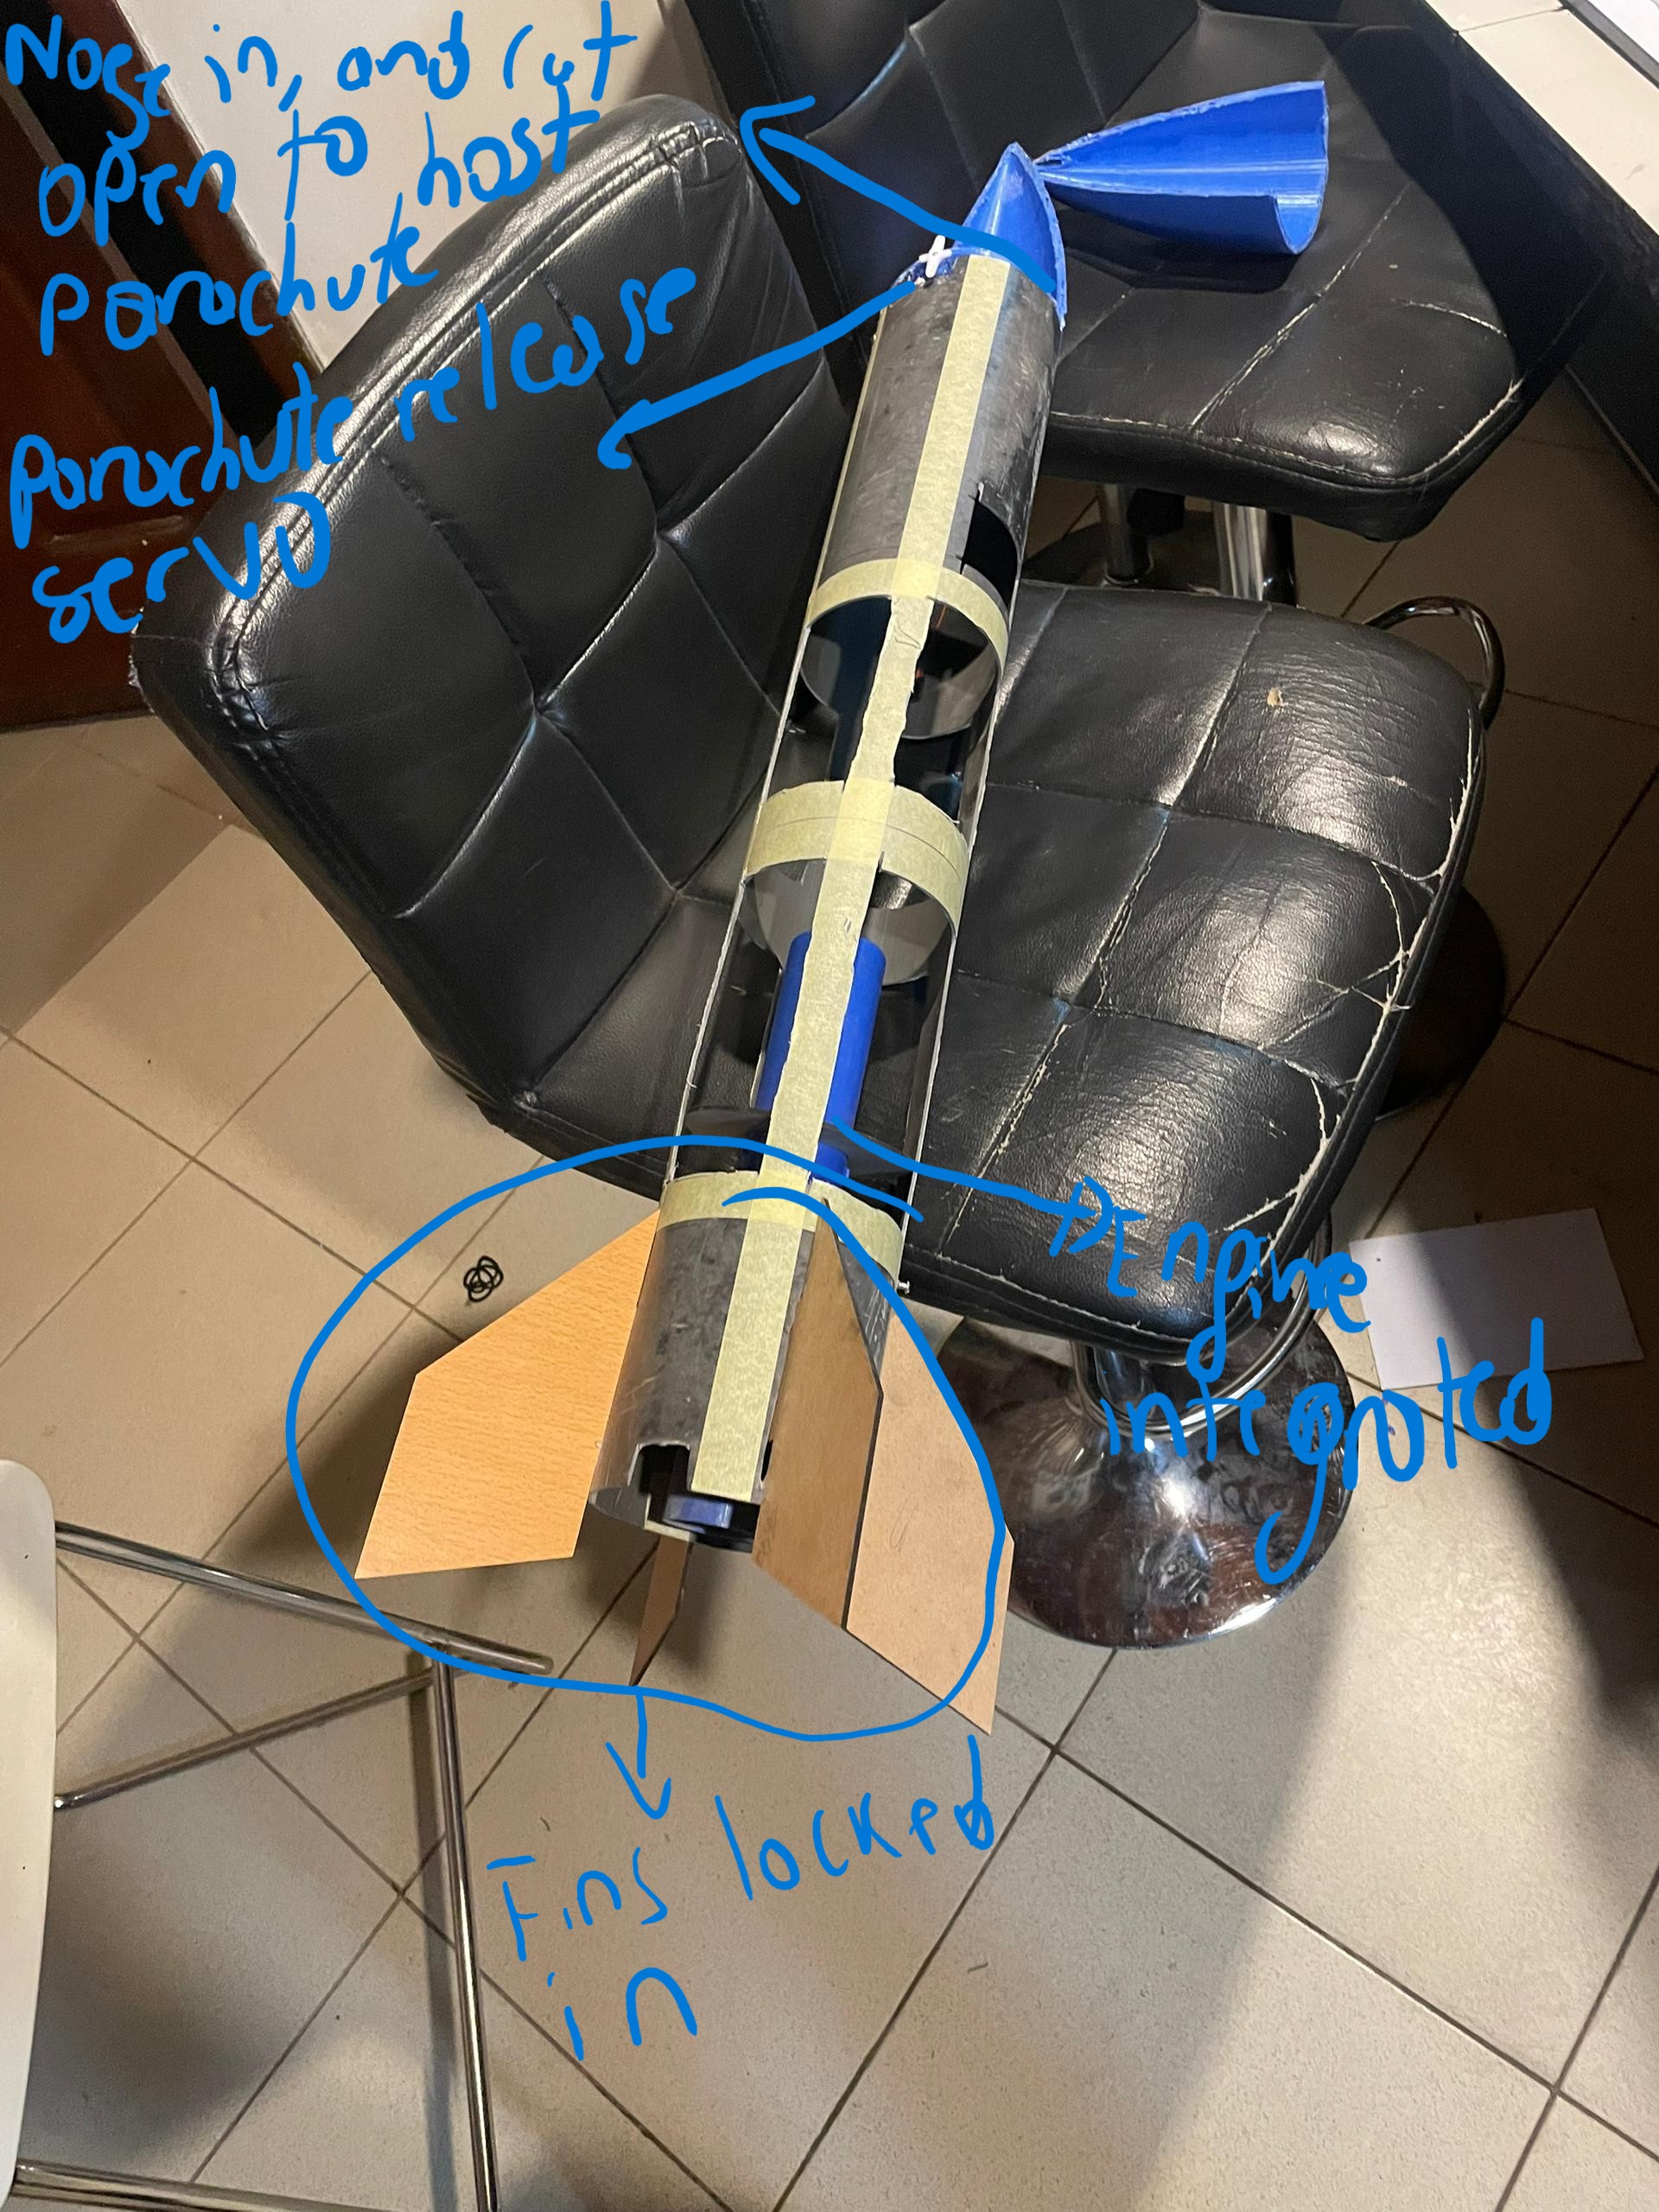
Rocket Body
First model
3D Design, Power cutting, and 3D Printing
I designed the body and models for the internal parts with SolidWorks.

The Engine (Fuel casing) case, nozzle, engine centering ring, and Nose were designed with SolidWorks and 3D printed. I will show the engine and nozzle designs here (for the sake time, I will update nose design latter, I am not finding this specific iterration we printed, and the centering ring is the exact same with electronics bed).


Electronics bed


assembly

I forgot to film the printing and Screenshot my slicer, but I remember I printed them all under these settings: 5 walls inside and out (to increse physical strenght), inside out (to prioritise internal space and enhance how the parts snap together; engine bottom inside the nozzle, and engine top inside the ring).

I was tunning out of filament, so when I changed the filament mid-print (PLA to ABS) it didn't work out well, so
3D to 2D Design
I designed the fins in SolidWorks, going after the dimesnions I got from OpenRockets design tool. I modified the root and made it shortert on the current model so that it fits in any version of the current rocket without taking to much space inside.


The I exported a DWG file that I opened with Illustrator to print on a laser machine.

Systems Integration

Latter I placed in the electronics and parchute, in their dedicated spaces: mid-upstream for electronics and battery and far up (nose), and the parachute. The parachute release servo opens the nose door to let the parachute out once the computer senses a decrease in apogee (or altitude) so that the rocket can safely land.


You have to glue or tape or any kind of fixing that works to lock things in place for physical stability.
latter I used a double sized tape to fit the PCB on separation layer and glued it on top of the battery in the electronics bay.


- NKP/KNO3: Potassium Nitrate & Sugar
- PVC Pipe
- Processor: ESP32 DEVKIT-V1
- Data logger
- Gyro & Accelerometer
- RF transmission
- Data recorder: SD Card
- Parachute Deployment
- Body Tube
- Nose Cone: Electronics Housing
- Center rings
- Shock Cord
Contact
Happy to receive your inquiries.
Location:
Kigali, Rwanda
Email:
philemonmail77@gmail.com.com
Call:
+250 780 716 155
