Week 1. Principles and practices / Project management
In first week I am getting known to website developing process and making my own documenatation page for FabLab journey. Also the task of this week is to think of my final project. I introduce my ideas and sketches on this theme.
Part 1. Principles and practices
For my whole life of exploring industrial design I’m obsessed with additive technologies and opportunities that it can offer. For my many projects in the university I used 3D printing as main method of production my design projects or as main design object of my design projects and designed new versions, offered new ideas of evolving 3D printers. I look at 3D printing technology not only as prototyping method but I want to explore it’s abilities of producing final products and to make it complete means of production.
For my final project in FabLab one of my ideas is to make a 3D printer. Also I have an idea that is based on a global problem, it’s an environment pollution. I think of making PBR panels integrated on building facades in tha city. But the main idea came from another problem more familiar to me. It’s air conditioning outside blocks on building facades everywhere, which is ruining the view of town. Currently I am doing a research on methods of covering air conditioners on facades and I am intended to design something for my hometown to be embedded to the environment of it.
Research
Some projects I was inspired with
- Custom 3D printer for recycled plastic
- Gyroscope reacting LED light shield
- Clay 3D printer and garametric vases printed with it
- Autoregulating tripod
Sketches
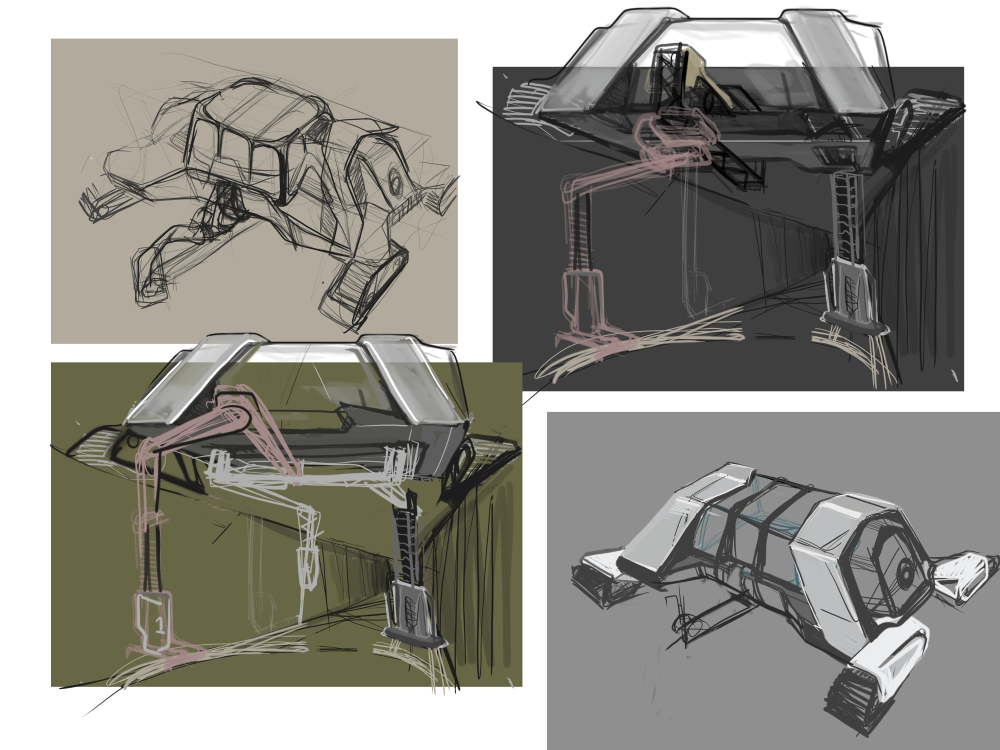
These are my first sketches that i had done for one of my design projects in university. These are idea-formation thoughts sketched for a 3D printer that prints temporary accommodation out of soil and composites.
Updated. My final project idea eventually became to make an air humidifier ang oxygen generator smart device for home.
Part 2. Project Management
The necessary part of Fab Lab is documenting whole your journey in the course. With this aim it’s accepted here to make Website which is going to be helpful for ourselves and for next students in future.
Requirements
Here is a description how I made a website and what i learned about this.
Info
Git. It’s a tool allowing developers to control versions of their projects, to distribute resources and cooperate with thousand developers around the world. Git Lab, Git Hub, and etc. are online sources which provides the connection between Git users.
Getting set up.
Info
Git Bash is basic command stroke that comes with Git, whereby we can run Git and initialize us as a developer as well as connecting our project to Git Lab that provides us hosting for our future Websites. And for editing the Website we need a program. For comfortable coding we use Visual Studio Code by Microsoft. It supports programming in all languages.
My PC is on Windows BTW. It’s needed to install Git and Visual Studio Code on Windows.
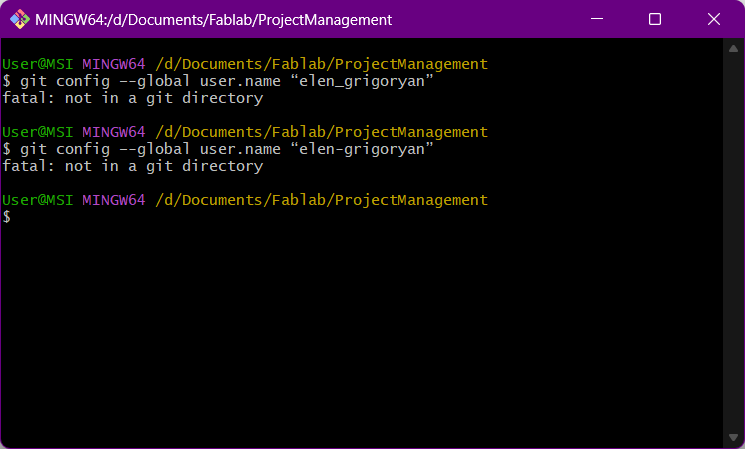
So we got the programs Git and Visual Studio, now let’s run Git Bash somewhere in a Fablab” folder (prepared in advance) by right click > * show more options (for Windows 11) > Open Git Bash here.
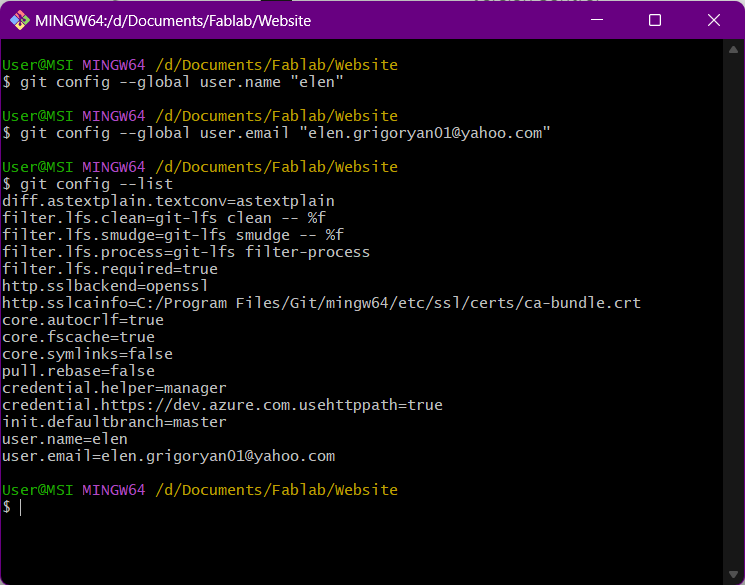
First off we need to configure our local git environment, with same details used on Git lab. Type the following command and write your name and email from Git lab.
$ git config --global user.name "Your name"
$ git config --global user.mail "Yourmail@example.com"
Tips I wish I knew
- Git bash commands start with $ symbol, but don’t type it twice.
- For paste Ctrl + V doesn’t work here, use Shift + Ins
- Pay attention to all symbols to be written right.
- If it doesn’t give “fatal, error” and things like that then everything goes right.
For example my first try was marked as error. The reason of that was the code I copied had wrong symbols.
Here everything worked To check run the command:
$ git config --list
Getting domain. HTTPS or SSH.
I tried both
1. How to set up HTTPS
HTTPS protocol
HTTPS (Hyper Text Transfer Protocol Secure) Not required to generate a secure key It’s 9needed only to clone a URL address from GitLab.
Go to Git Lab and clone URL:
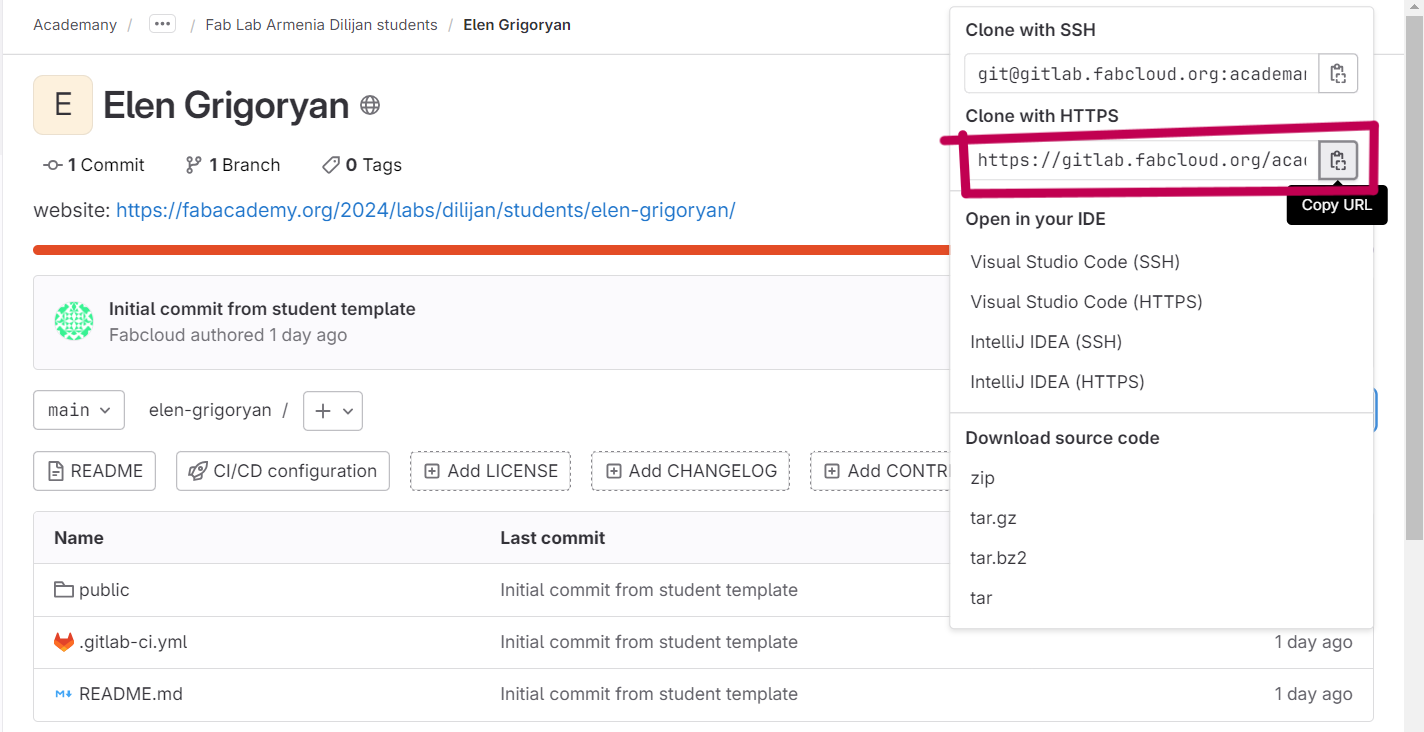
Then run the following command in Git Bash with copied URL
```
$ git clone paste_your_URL
```
2. How to set up SSH
SSH protocol
SSH (Secure Shell) requires to generate a secure key and keep it on the computer. not all browsers recognize this protocol as secure.
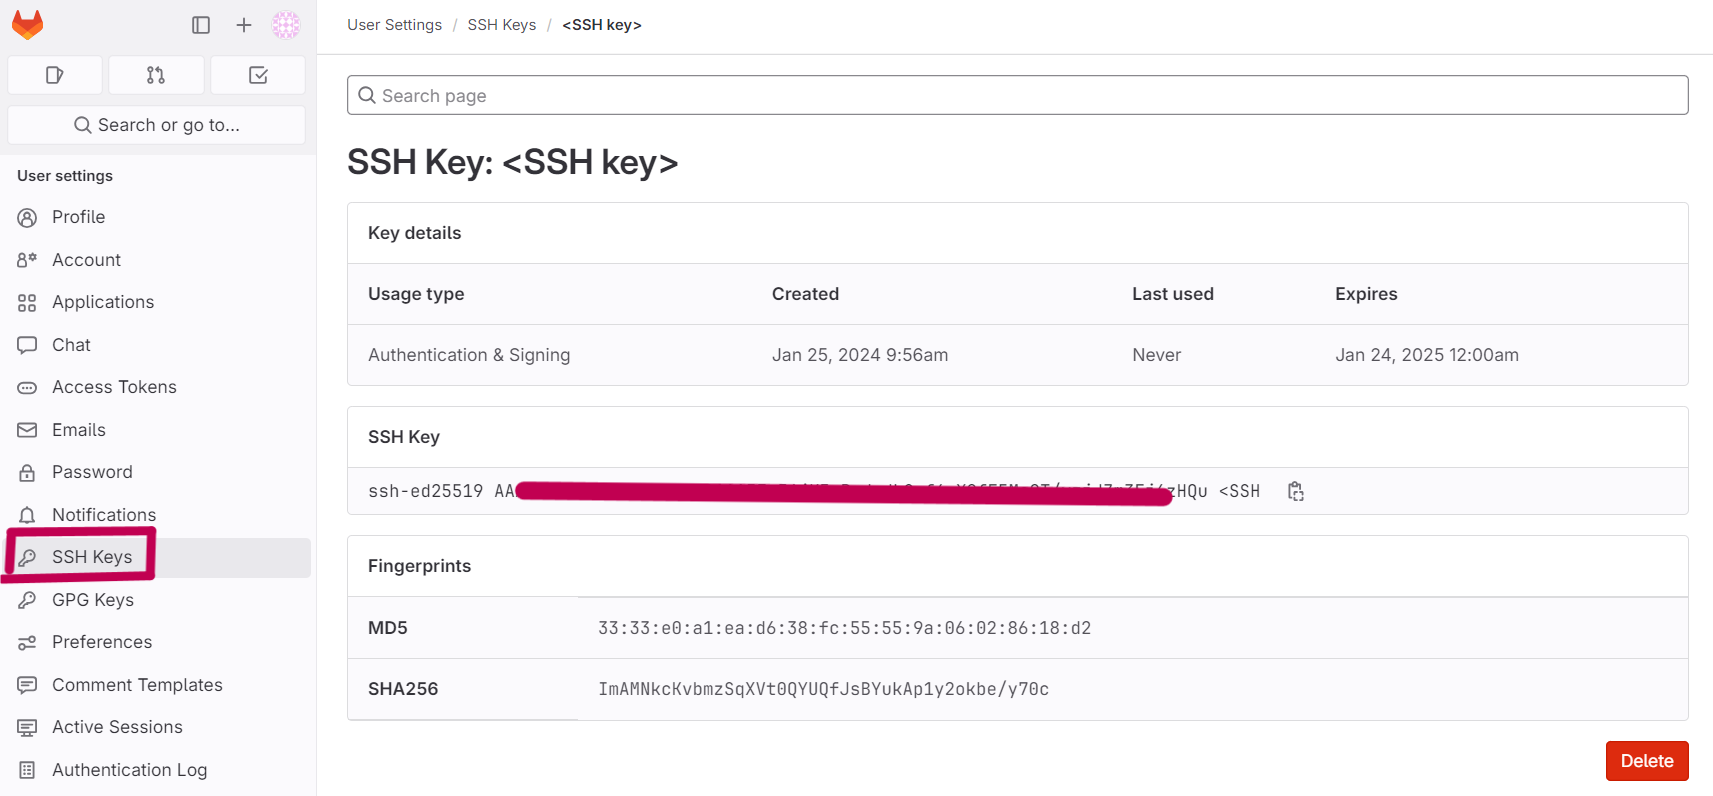
I used this instruction for SSH. Generate SSH with following command in Git Bash, comment is optional There are several supported SSH key types.
$ ssh-keygen -t ed25519 -C "<comment>"
It generated a key and saved in user folder with name .ssh You can find key either in the folder named .pub
or by copying with command:
$ cat ~/.ssh/id_ed25519.pub | clip
Copied key add to your Git Lab > preferences > SSH Keys > Add key
Clone your SSH repository URL on GitLab.
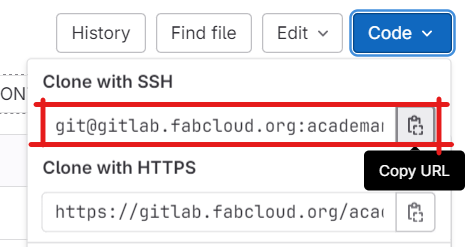
Then run the following command in Git Bash with copied URL
$ git clone paste_your_URL
Controls and commits
Now it’s needed to set control on that folder.
$ cd folder-name
To see it on Web we do commands:
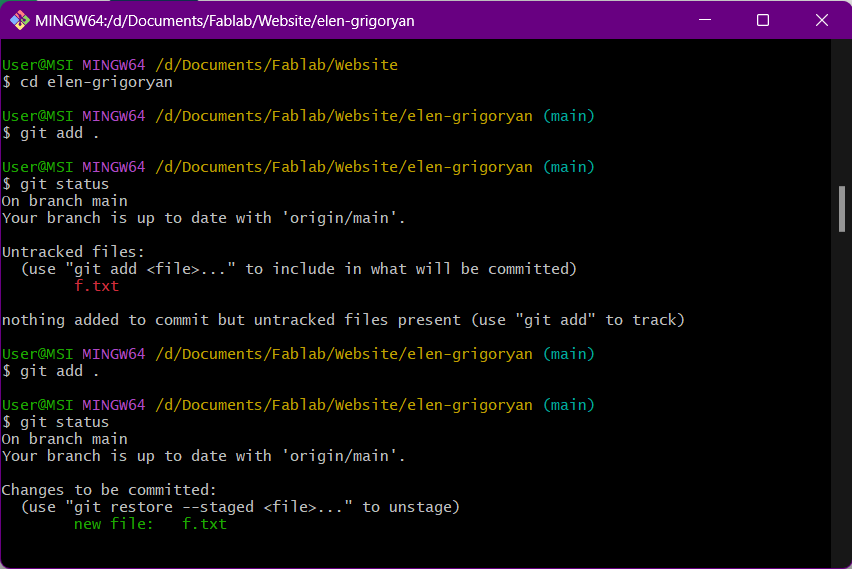
$ git add .
kind of saving all changes in the local repository
$ git commit -m "Named message"
commit changes locally and give a name for easier exploring
$ git push
load changes in Git Lab in global repository
I added some “f.txt” document in folder to check how it tracks changes
Finally, programming
Now we’re ready to make our page. Web page programming basic language is HTML and CSS but they’re quite hard, so we use here Markdown which is simplified version of the above-mentioned and it’s completely suitable with Git Lab and Git Hub.
After activating my website in Gitlab I used Julian’s template by downloading the code and replacing the folders and files in my folder.
What is Material
The template of Julian was written in Markdown with installed Material theme in it. Material is a pre-prepared construction of web documentations with navigation panels, some colors, icons, and other helping stuff that we don’t need to write whole site from zero. For example it creates navigation bar on left and right of the Web page related to the headings automatically. Material is one of themes supported by Markdown.
In the template of Julian is all set up for our Fab Lab documentation so we need only to edit it in Visual Studio by right-click on our folder > *show more options (for Windows 11) > Open with code.
RENDERING
I didn’t want to wait until my pushes load to server and then to check my actions, so I searched way to render my site locally and check every my code in a second.
For that we need to install Python to PC and make sure to check the box “add Python to PATH”.
Python and Pip
Python is programming language with use of which is written Markdown. Pip is Python management package. Also Mkdocs which is static site generator supported by Markdown.
Check versions to make sure everything worked with installation of Python. Command:
BTW Visual Studio has in built Terminals (Powershell, Git Bash, etc.)
 python --version
 pip --version
Then install Mkdocs and Material right from Terminal with command:
pip install mkdocs
pip install mkdocs-material
pip install mkdocs-Git-revision-date-localized-plugin
You should now have the Mkdocs installed on your system. I used this instruction.
To check that everything worked:
mkdocs --version
mkdocs serve
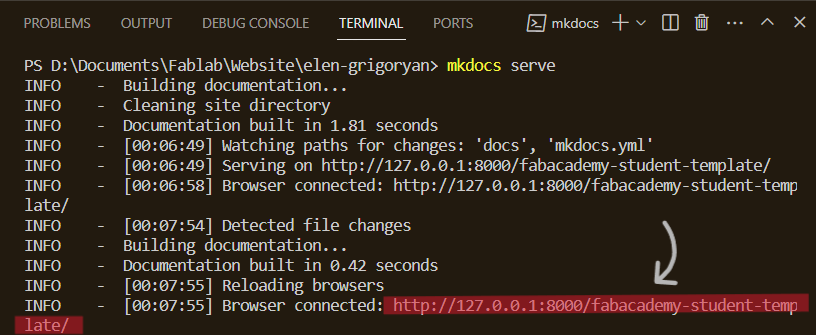
View on browser, just Ctrl + left click on the marked link in the terminal.
Editing
What I did for my website look like this.
First of all I added night mode and the switch on the top. This is modified in mkdoscs.yml document.
  palette:
    # Palette toggle for light mode
    - scheme: default
      toggle:
        icon: material/brightness-7
        name: Switch to dark mode
      primary: grey
      accent: orange
    # Palette toggle for dark mode
    - scheme: slate
      toggle:
        icon: material/brightness-4
        name: Switch to light mode
      primary: black
      accent: deep orange
Instruction for customization Material is here.
Most of the modifications I did by following this documentation. I enabled cards, lists, content tabs, code blocks, admonitions, buttons, a back to top button and etc. There are a lot of extentions to make an interesing website.
Also I added stylesheets folder in docs folder with style.css document file. Where I can add some modifications in Material template which are not provided by material by default. For example font weights, border radiuses, page width etc. Check extra.css
I used guides in instructions for customization Material. But for additional help I requested AI.
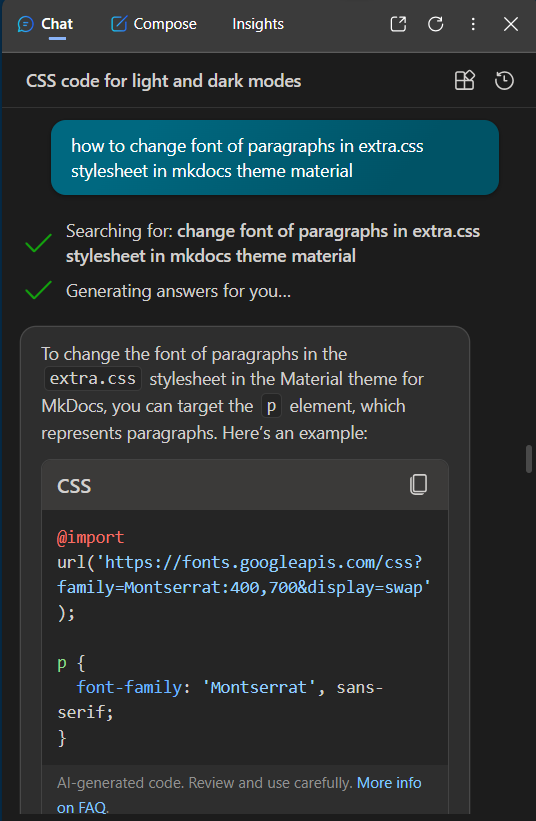
Prompt I’ve used “how to change the font of paragraphs in extra.css in mkdocs material template.”
In this case I requested a code for changing font in extra.css stylesheet of MkDocs Material because I could’t find working one. I used Copilot AI by Microsoft. It gave really accurate responses and all worked well. From now on I’m going to save my time.