Document as Docusaurus Format
Why I choose Docusaurus Format to write my journey
This is related to my work, because I am responsible for Seeed Studio's wiki platform, but only the contents management. I am not very fimliar with the front-end Knowledge where our front-end engineer did almost all the works about the platform updated. Thus, I am going to learn and maybe develop more advanced website in the future.
- The Docusaurus is open source and kept developing by Meta.
- It is pretty powerful and initial installation is pretty easy.
- Making changes are easy as well.
Deploy Steps
Step 1. Follow on the "Docusaurus" official Wesbite and download the formal files
- Go to the Docusaurus official websites.
- Download Node.js.
- Run the code
npx create-docusaurus@latest my-website classic
And there will be automatically installed, creating dependencies with npm and new folder named "my-website". It is written in JS.
Step 2. Download my website files on GitLab.
- Download homebrew installation tool with command:
/bin/bash -c "$(curl -fsSL https://raw.githubusercontent.com/Homebrew/install/HEAD/install.sh)"
- Download Git with "brew" command:
brew install git
- Refer to my website folder on GitLab and use below command to download my files to my local computer:
git clone https://gitlab.fabcloud.org/academany/fabacademy/2024/labs/chaihuo/students/matthew-yu.git
Step 3. Replace my GitLab files with the docusaurus files.
-
I renamed my original files folder as "backup" since I might need them in the future.
-
Then I create one folder with "public" since it requires "public" folder to deploy pages.
-
I ran the below commands to have the default local website:
yarn
This helps me installing all the dependencies that needs to build the local webistes
yarn start
This helps me running the website locally at http://local:3000, as the default.
Step 4. Change contents and adding some css
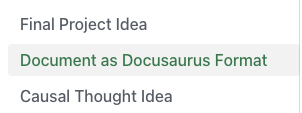
- I first create a "week1" folder to store all my work files. Then I create some MarkDown files, to store my works: my assignments, my introduction, my final project idea.
- I then put the relative path of them to the 'sidebars.js' file.

And will see my created files display on my website, at the left colomn of it.
- I want to have a big title above them and it has the "hyperlink" function. So I have written css call ".navbar_doc_items", where the css file is in the path of "src/css/custom.css"
.sideboard_calss > a {
	font-weight: bold;
	font-size: 1.2rem;
	width: 100%;
	display: inline-block;
	text-decoration: none;
	text-align: center;
	font-size: 20px;
	margin-top: 5px;
	margin-bottom: 5px;
}
And I called it on the 'sidebar.js':
{
      type: 'doc',
      id: 'week1/week1_assignment',
      label: 'Week 1',
      className: 'sideboard_calss',
},
Finally I have the big, center, strong title above them:
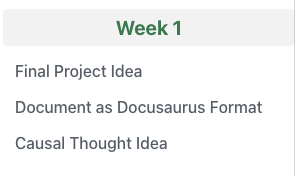 .
.
BTW - How I can add adjustable images into my websites
As you guys can see on my introduction pages, I use adjustable images:
 .
.
I am adding some css as well on the "custom.css":
.Matthew {
	display: inline-block;
	background-image: url('/static/img/Matthew_Yu.jpg');
	background-size: cover;
	background-position: center;
	margin-top: 8px;
	margin-bottom: 15px;
	padding: 10px 20px;
	/* color: rgb(0, 0, 0);text color */
	font-size: 100px;
	font-weight: 40%;
	text-decoration: none;
	border: 1px solid #ffffff;
	border-radius: 8px;
	transition: transform 0.2s ease-in-out;
	width: 230px; /* width */
	height: 300px; /* high */
}
In this code I am using the images stored in the "/static/img/", and adjust the display.
BTW - How I can add adjustable top navigation bar
As you guys can see on my introduction pages, I use adjustable top navigation bar:
 .
.
I am adding some css as well on the "custom.css":
.navbar_doc_items {
	display: inline-block;
	color: var(--text-color);
	font-size: 0.85rem;
	font-weight: bold;
}
Finally I called it on the 'docusaurus.config.js' file:
themeConfig:
    /** @type {import('@docusaurus/preset-classic').ThemeConfig} */
    ({
items: [
          {
            type: 'doc',
            docId: 'week1/week1_assignment',
            // to: 'docs/week1_assignment',
            label: 'Week 1',
            position: 'left',
            className: 'navbar_doc_items',
          },
          // {
          //   type: 'docSidebar',
          //   sidebarId: 'tutorialSidebar',
          //   position: 'left',
          //   label: 'Tutorial',
          // },
          // {to: '/blog', label: 'Blog', position: 'left'},
          {
            to: 'https://gitlab.fabcloud.org/academany/fabacademy/2024/labs/chaihuo/students/matthew-yu',
            label: 'GitLab',
            position: 'right',
          },
        ],
    })
This function helps me directly refer to my "week1" website.
Step 5. Upload my changes to GitLab
- I am using this coomend(docusaurus default):
yarn build
to convert all my MarkDown files to the html files and put them all in the "public" folder.
- Using the command:
git add .
to add all my changed files into some standby places.
- Using the command:
git commit -m "Update: replace my original gitlab files with my docusaurus files"
to name my this time changes.
- Using the command:
git push
to push all my changed files to the GitLab.
Some Problems I faced
1. I want to directly use yarn build to create a "public" folder.
I change the js function:"build" from "docusaurus build" to "docusaurus build && rm -rf public && mv build public". This will make the command "yarn build" directly update the "public" folder. But I find that it couldn't pass the website build. So I creat another function called "buildlocal": "docusaurus build && rm -rf public && mv build public". So I will use the command yarn buildlocal locally.
2. I need to make the calling local images more convenitent and more adjustable.
The command

works fine.
But the command
<div style={{textAlign:'center'}}><img src="url" style={{width:250, height:'auto'}}/></div>
is not well. The "url" doesn't support local images like "./image.png"
I still don't know why. I use css to make it happened.
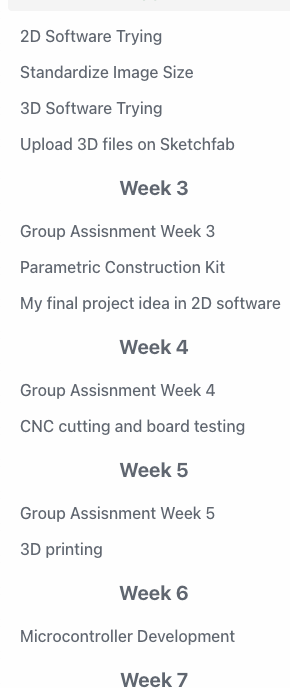
Update on 4.14th
This is updated on 4.14th, I think my elder sidebar is a litte complicated, it does show everthing I did but it is not well looking:
I then search for this code for folding content:
- First set up on the "docusaurus.config.js" file:
  themeConfig:
  {
      docs: {
        sidebar: {
          hideable: true,
          autoCollapseCategories: true,
        },
      },
  }
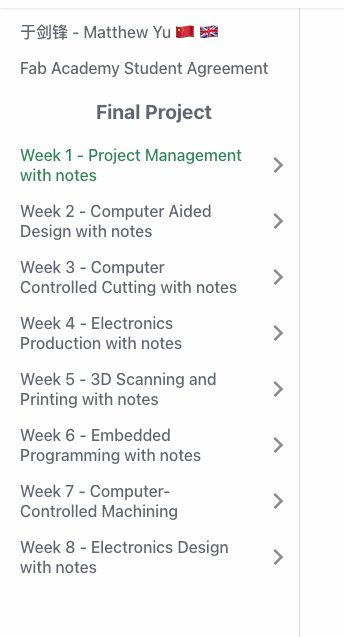
- Then the folding content function can be applied on the "sidebar.js" file:
type: 'category',
      label: 'Week 1 - Project Management with notes',
      collapsed: true,
      collapsible: true,
      link: {
        type: "doc",
        id: "week1/week1_assignment"
      },
This is final looking:
Update on 5.8th
Updated on 5.8th, I need to change the commend about yarn buildlocal. Because I have video files in the "static" folder, and when I ran yarn buildlocal there will be duplicate files in the "public" folder as well... So I have to think a way to bypass it...
Thus: "buildlocal": "docusaurus build && find build -type f -name '*.mp4' -delete && rm -rf public && mv build public"
docusaurus build: Build the site.find build-type f-name '*.mp4' -delete: search for all MP4 files in the build folder and delete them.rm -rf public: deletes the old public folder.mv build public: Rename the build folder to public.