Reactor Core - Designing, Modeling, and Casting
Write something at the front
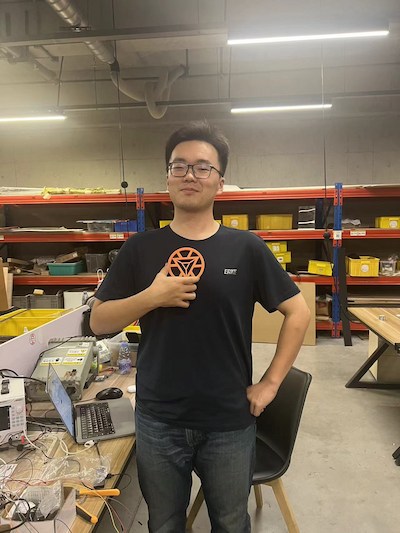
Updating on 6.26th, I am updating my mobile module design, which is included Iron Man Reactor Core.
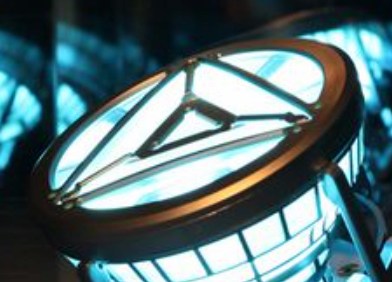
I might want my case design looking like this. Thus, for this assignment, I am going to design a Reactor Core logo.
Refering to this project.
File Sharing
- The Onshape link for my design is here.
Design and 3D Print my Module
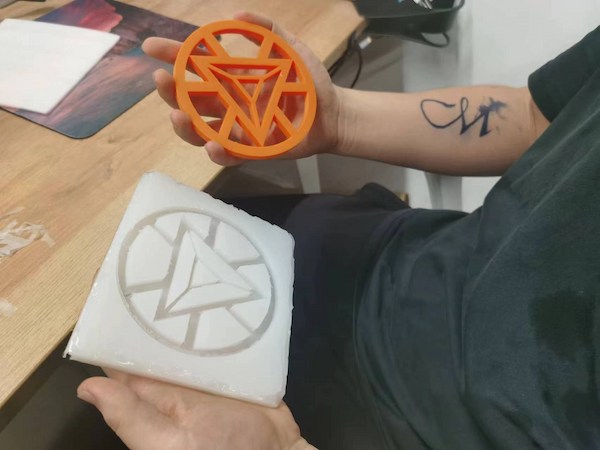
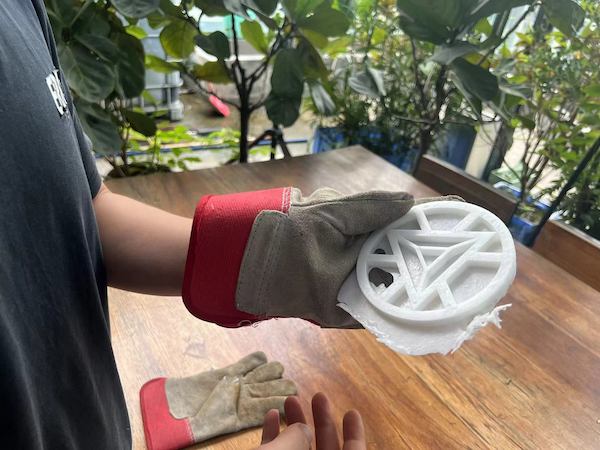
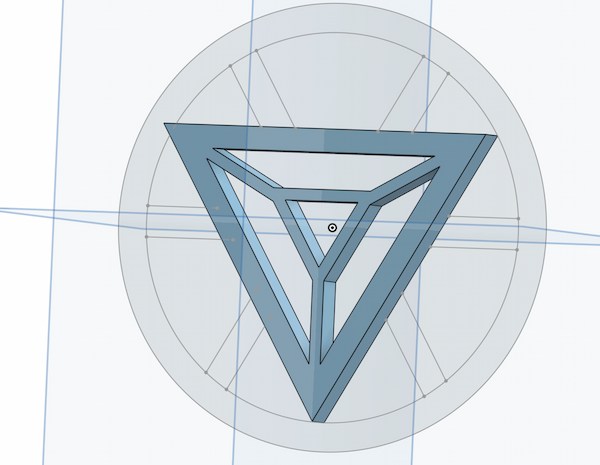
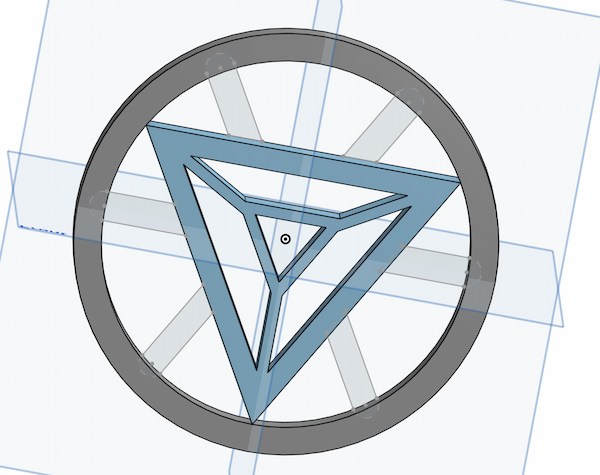
I have designed a Reactor Core Logo on the Onshape and this is the final look like:
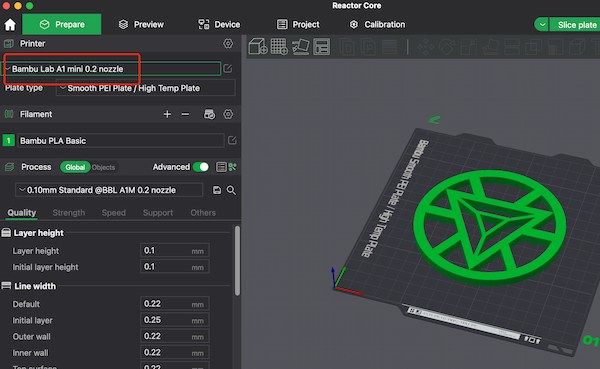
Printing with 3D printer
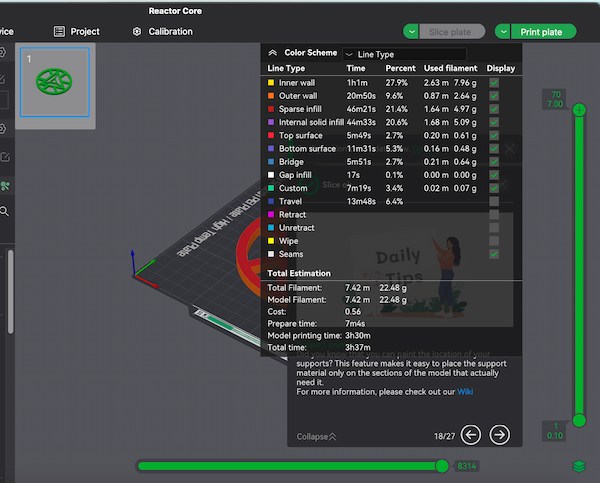
I am using 3D printer to print this part. And I use the thinnest 0.2mm nozzle to print it to ensure the precision:
Requiring 4 hours, seems reasonable.
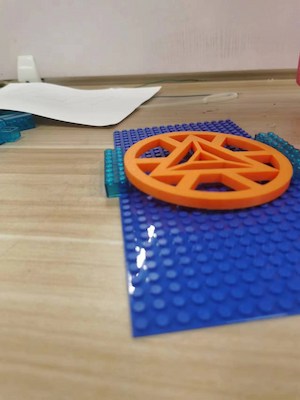
Done and looking good.
Modeling
For the storage and safety. Unmixed silica gel and fixative should be sealed and stored in a dry, cool place. Wear appropriate protective equipment, such as gloves and masks, during operation to avoid direct contact with the skin and inhalation.
I didn't do this for modeling part and I should be careful next time.
For this I learnt that this is a relatively complex multi-step manufacturing process that involves making a mold using 3D printing technology, using silicone to shape it, and then casting it. This method is often used to make prototypes of complex shapes or parts produced in small batches.
Now the part is done and the surface is very smooth(0.2mm nozzle). I will shape it with silicone. And I chose this kind of silicone:
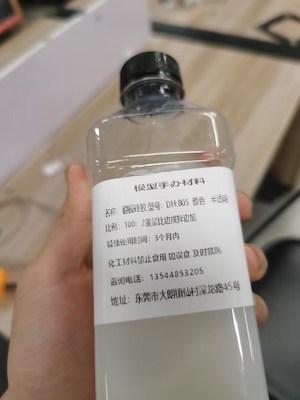
The company said: This is RTV Silicone Rubber, i.e. Platinum-cure silicone. This silica gel is cured by platinum as a catalyst, with fast curing speed, extremely low shrinkage rate, and no release of volatile organic compounds (VOCs), which is suitable for applications requiring high precision and high-quality requirements.
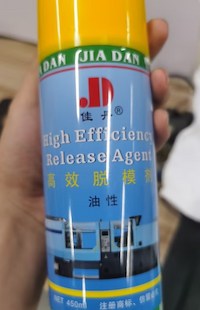
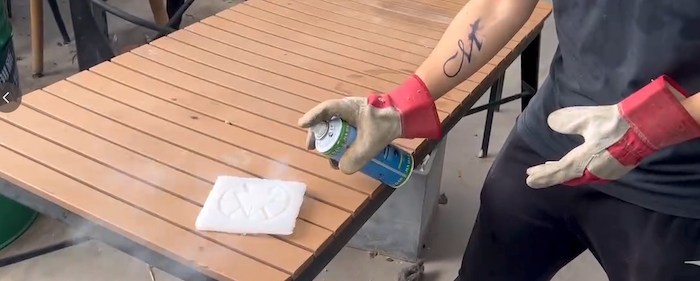
In order to make the mold release better, I have this High-Efficiency Release Agent.
The problem at the very beginning...
I have faced the problem at the beginning. Because I want to make a silicone mold, and silicone takes time to solidify, this LEGO toy can help me solidify my silicone very well:
But the situation is that my module is too big, and I can't place it smoothly on the LEGO.
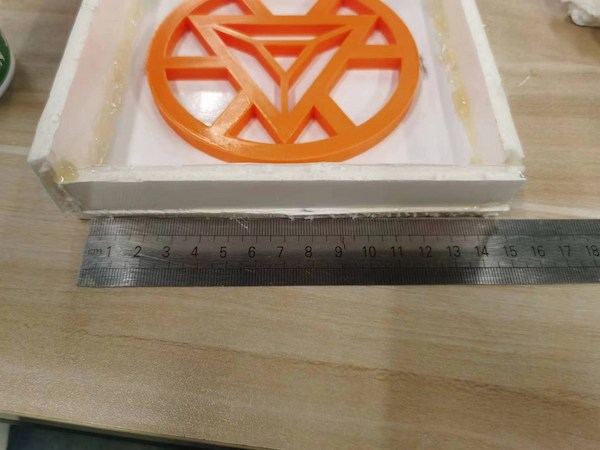
I have to find a foam board which also doesn't react chemically with silicone:

Calculate the dimensions so I can fit my model:
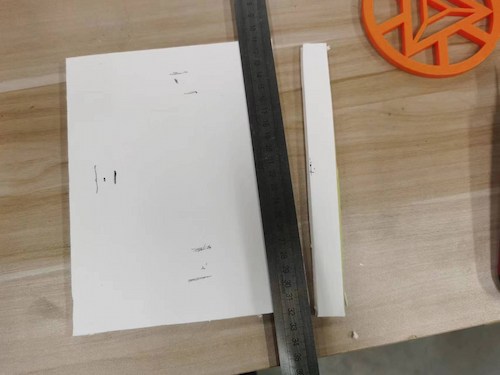
And then cut it, roughly:
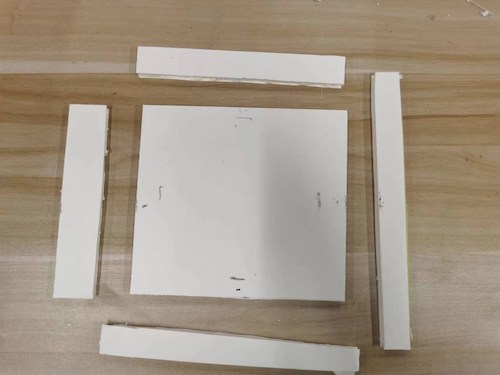
Use hot glue to stick:
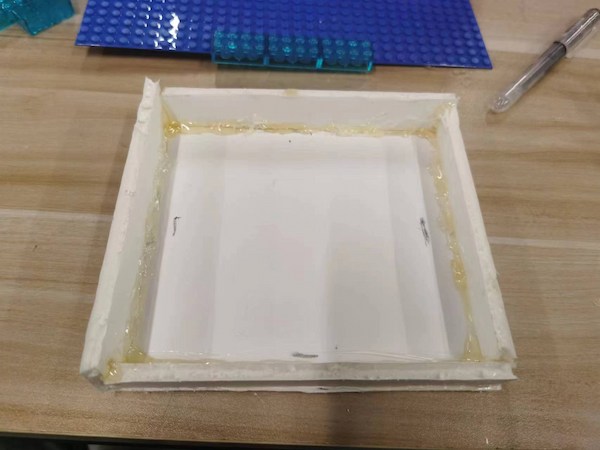
This simple box doesn't let the silicone spill and helps me make my silicone molds.
The actual steps for making a mold
At first, I use High Efficienty Release Agent to make sure the silicone mold can be removed more easily.

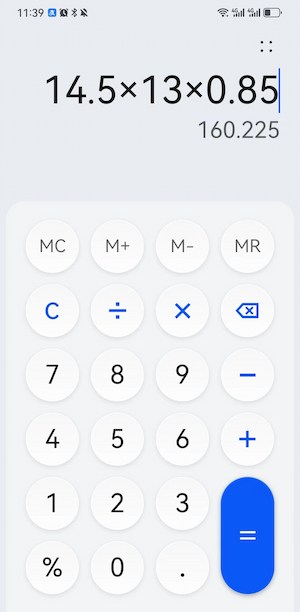
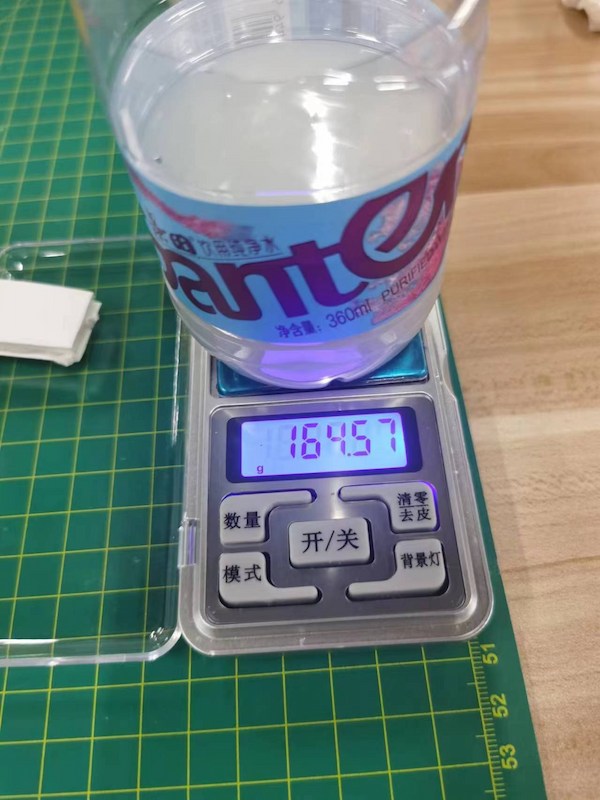
I fisrt calculate the capacity of material for making the silicone mode that I need:
Done and it should be 160.225, give it or take.
Length: 14.5mm, Width: 13mm, and Highth: 0.85mm.
The length of my model is 7mm, so I set it a little bit higher and it is 0.85.
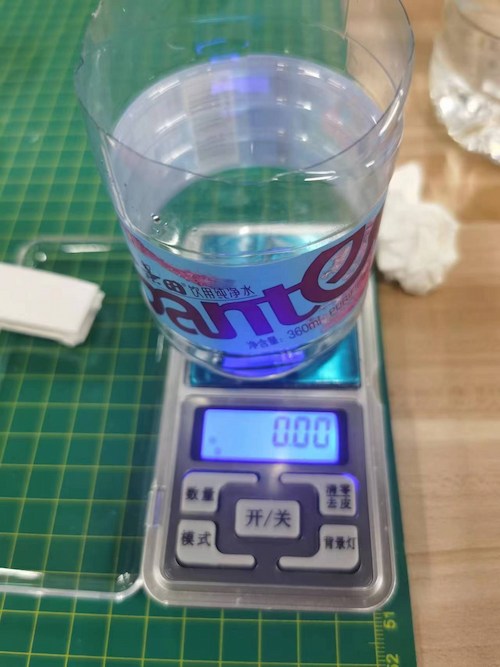
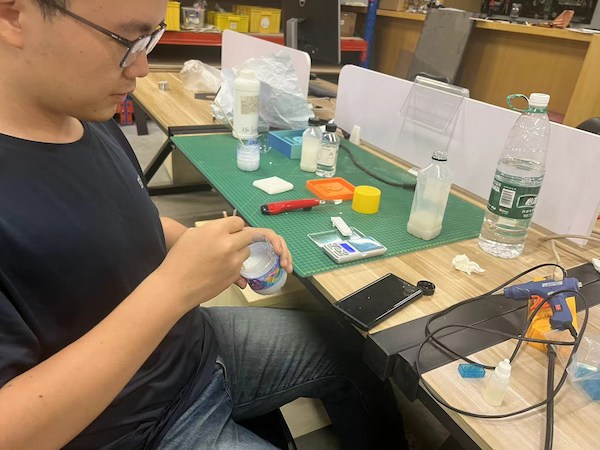
I cut a water bottle and used the bottom of it to make the expected material stir.
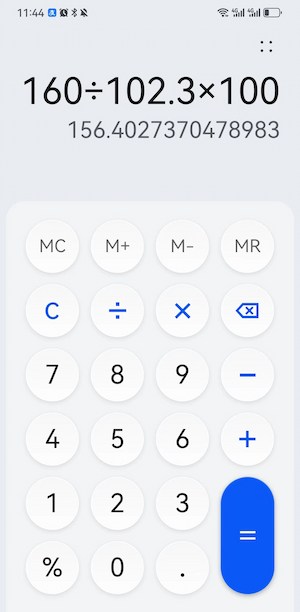
For the recommendation, I should apply 100:2(2.0~2.5) ratio to mix the mold. Maintaining the correct ratio is essential to ensure that the silicone can cure correctly.
Calculating and calculating(I applied 100:2.3 ratio):

There is a lttle bit more but it should be fine:
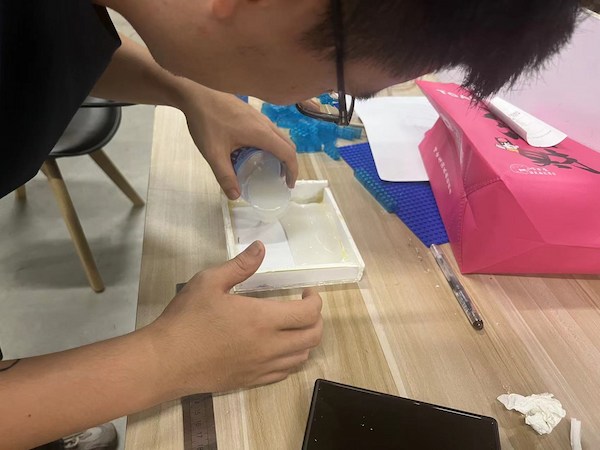
Done and then I should mix evenly: When the silica gel is mixed with the fixed liquid, it must be fully stirred evenly to avoid uneven curing.
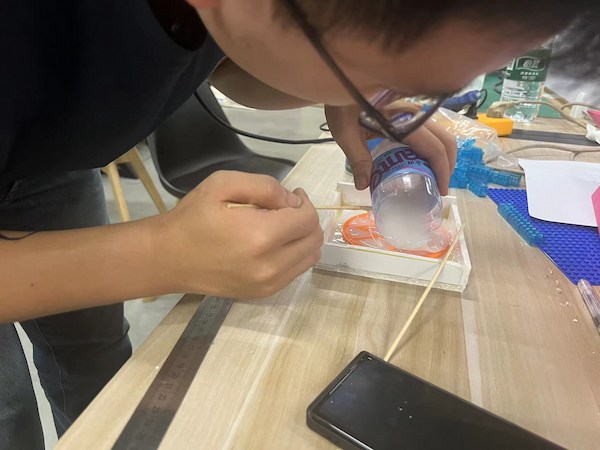
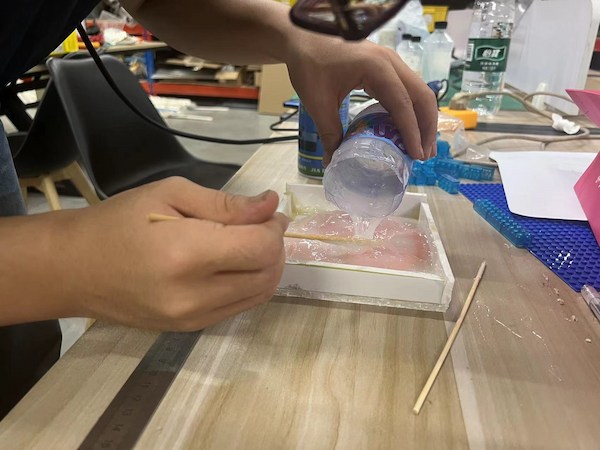
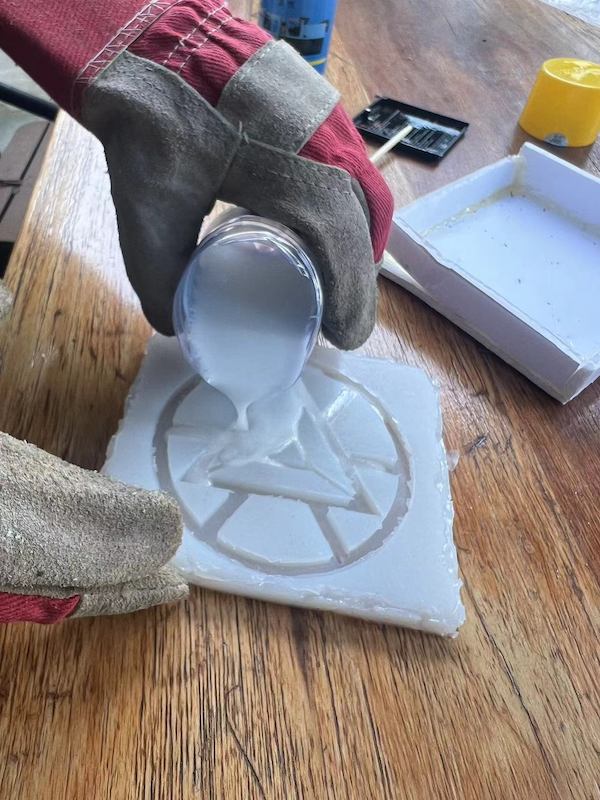
And then pour the ingredients into my simple box(container).
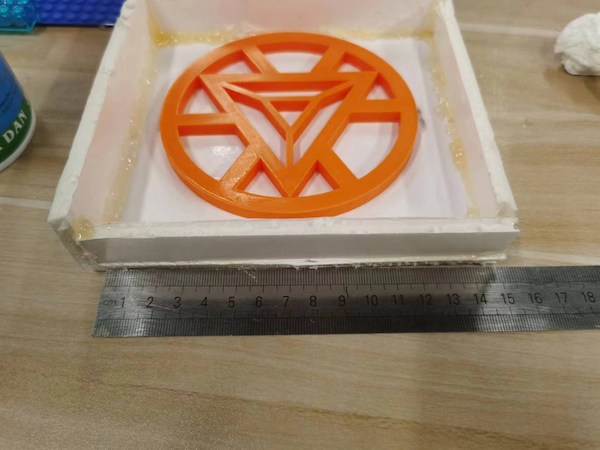
And then pressing the mold into my material - This method requires attention, and done well can reduce the amount of air that may be present inside:
Debubbling: Air bubbles may be introduced during mixing. Large bubbles can be removed by hand or by stirring at a low speed, while small bubbles may need to be treated with a vacuum defroster.
Capping at the end
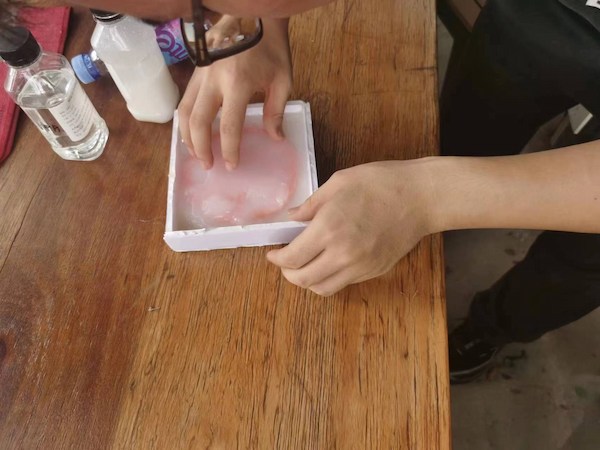
After 12 hours, I got my silicone mold.
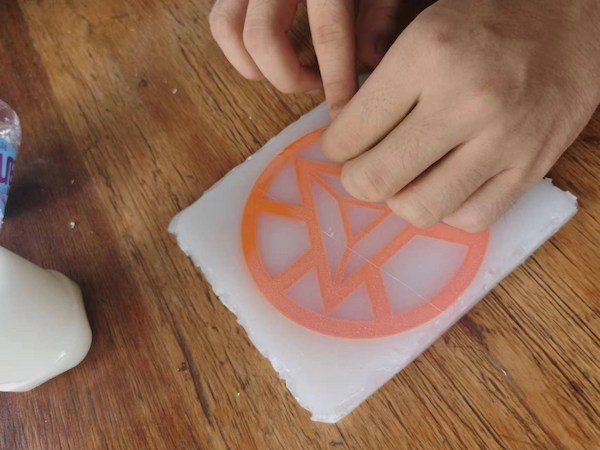
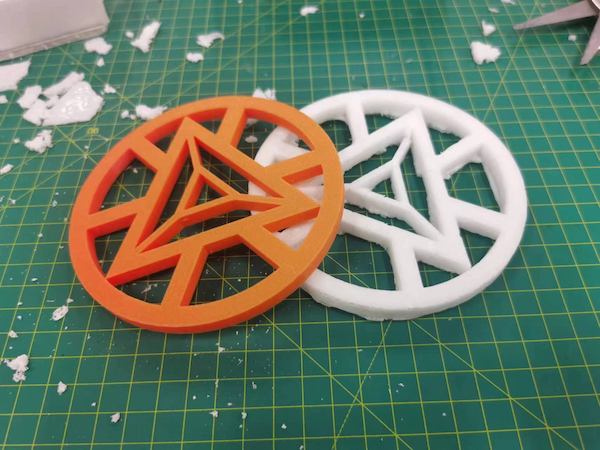
Casting
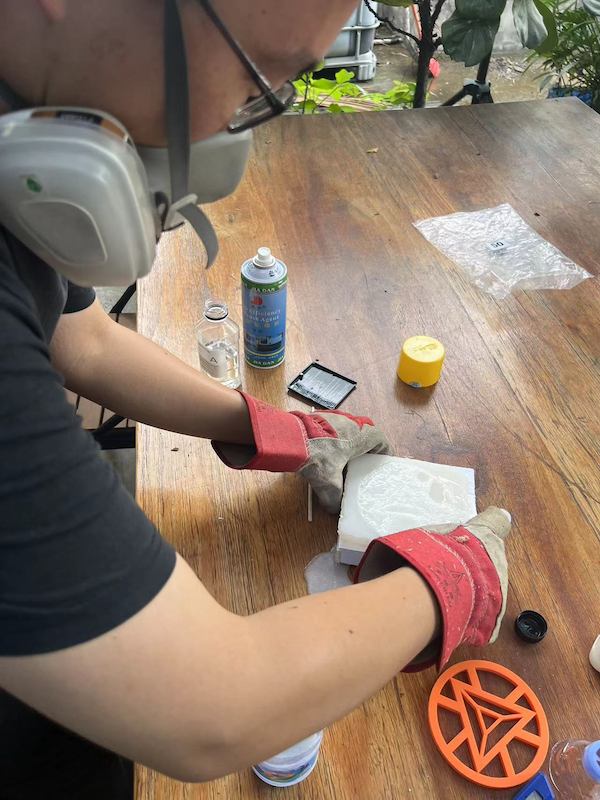
When I break off the shell, it looks like the contents are very good and there are no bubbles appering.
But he has a membrane on top and I need to use knife to remove:
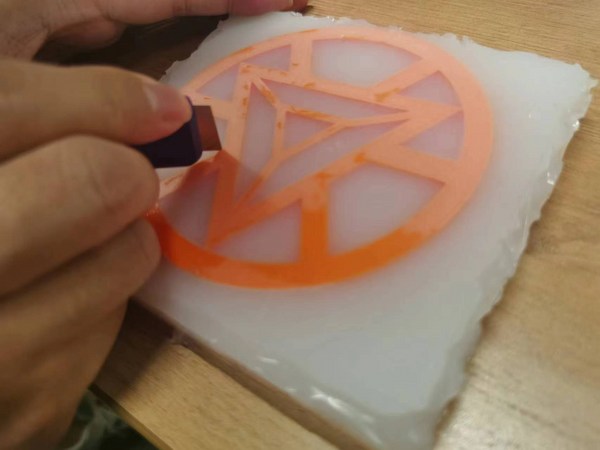
Done and I now can have my final mold:
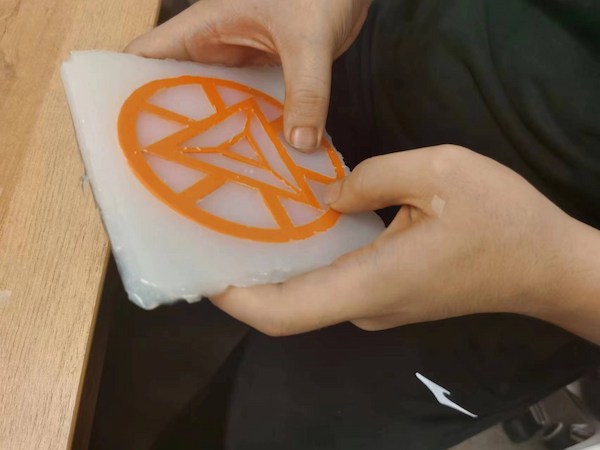
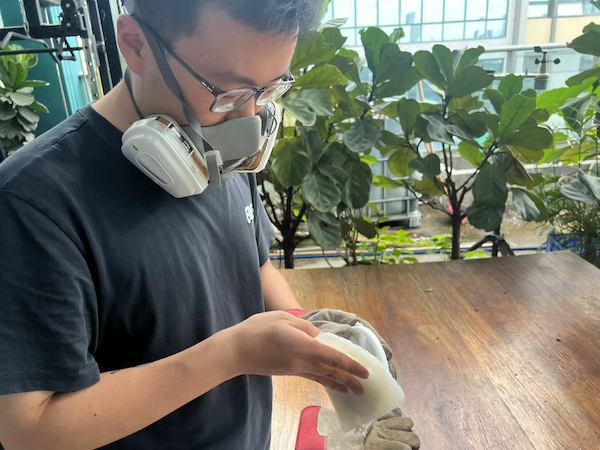
Because I use to spray the High Efficienty Release Agent and the removement is really neat:
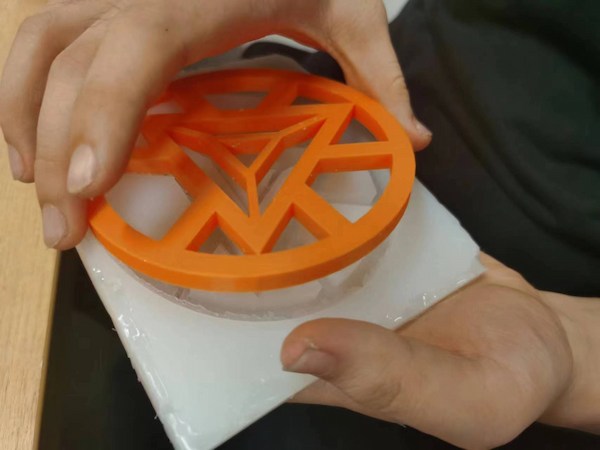
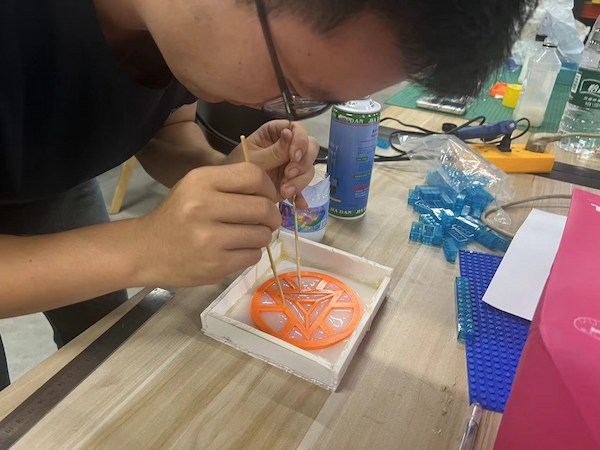
Now I can use this mold to cast more Reactor Core Logo modules:
But first, for removing smoothly, I spray the High Efficienty Release Agent again:
For the main part of casting:
I am using AB glue to cast the model.
AB glue, also known as two-component glue, is an adhesive commonly used in model making and many craft casting. It is mainly composed of two parts: component A (resin) and component B (hardener), which will undergo a chemical reaction after mixing and quickly cure into a hard plastic. In casting and modeling, AB glue is used to make small parts, join parts or repair.
My AB adhesives are mixed in a ratio of 1:1 by weight.
I first input 50g B glue。
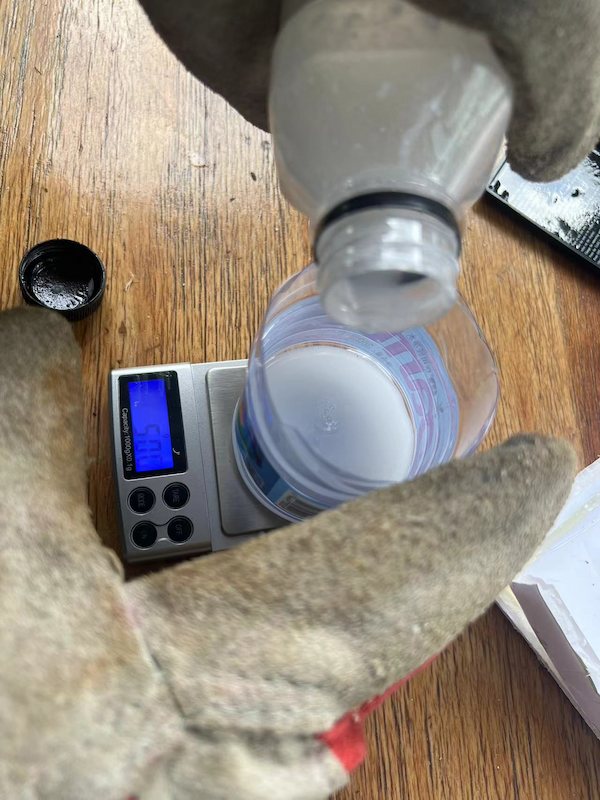
Then input 50g A glue.
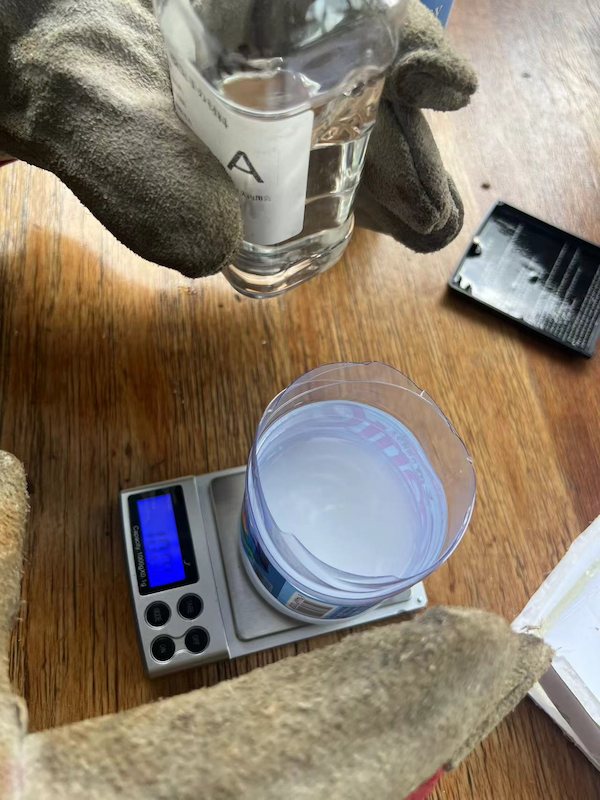
Then I stir them for like half a minue and ready to pour:
Hold it for a while, since the board is a little tilt.
Some of the material spilled out, do not know how the effect is.
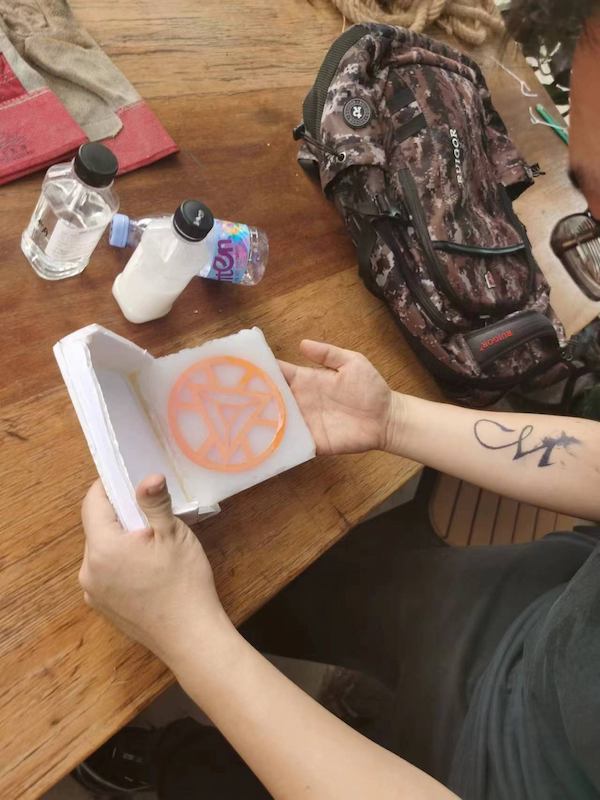
After 10 minutes, I cast my model:
Ops!
I guess it is the spilling thing.
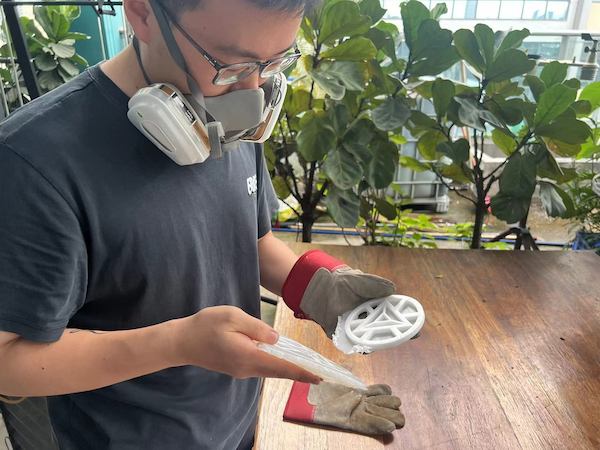
Now it is the time pull my knife again.
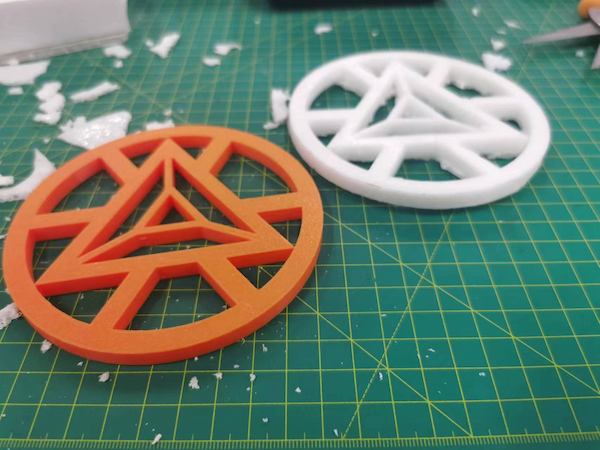
The front surface is actually looking good. The back one is not well.
Fun assignment.
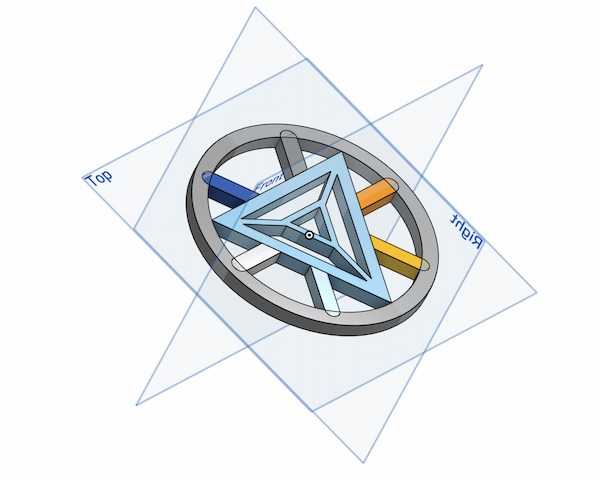
Design the Part on Onshape
I create a new document on Onshape.
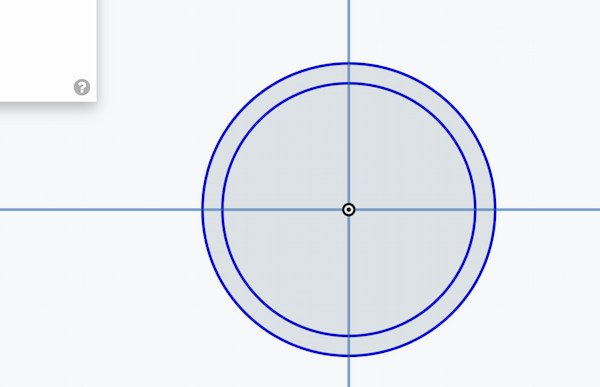
Raw drawing
I first want to make sure the steps that I draw them:
The concentric circles serve as the outer rings:
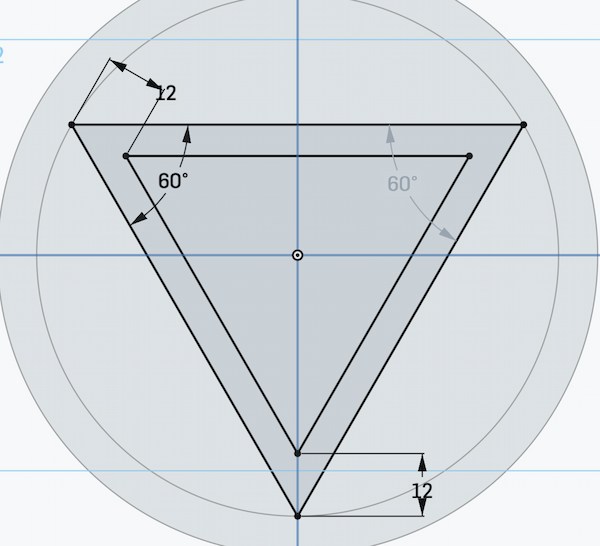
Parity triangle as intermediate core:
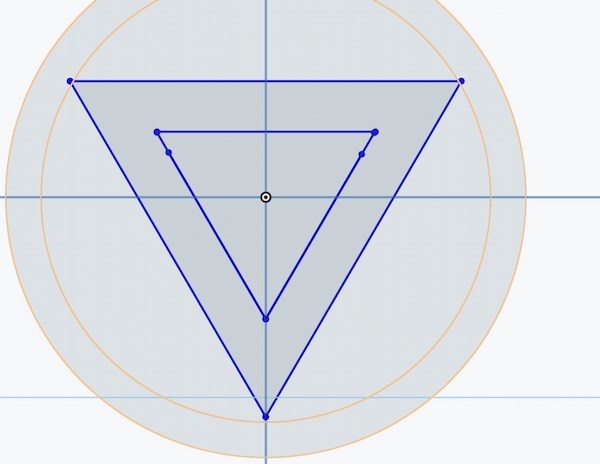
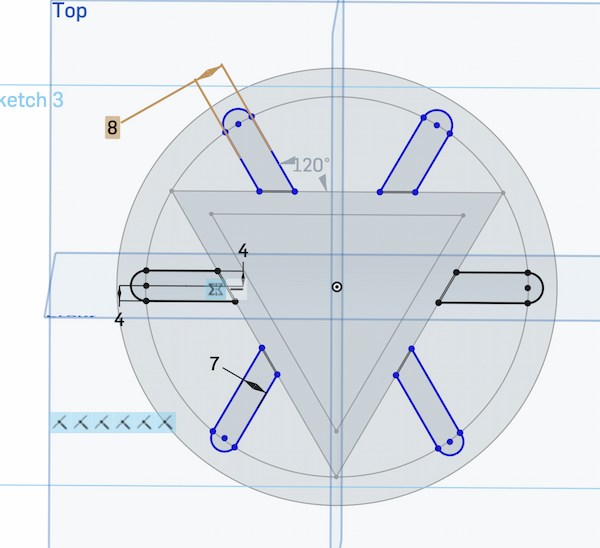
Some pillars for decoration:
Design the model according to the actual situation
I first calculate the length of my input board, for ensuring it can be put into the circle:
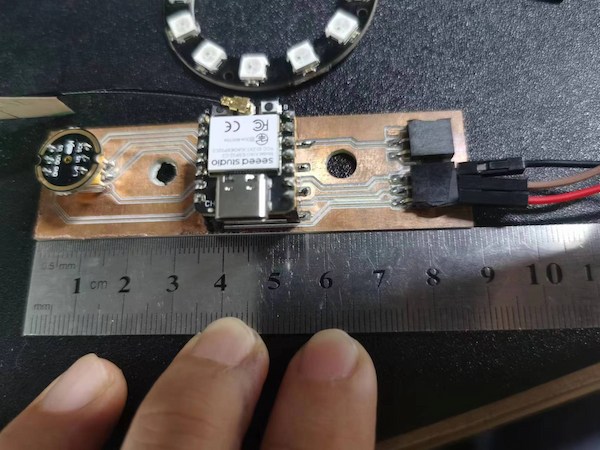
Since I will have other components to assemble, I will just measure this one: 99mm. This is because I will have the connectors for connecting RGB light on my board. Thus, 100mm is setting for ensuring.
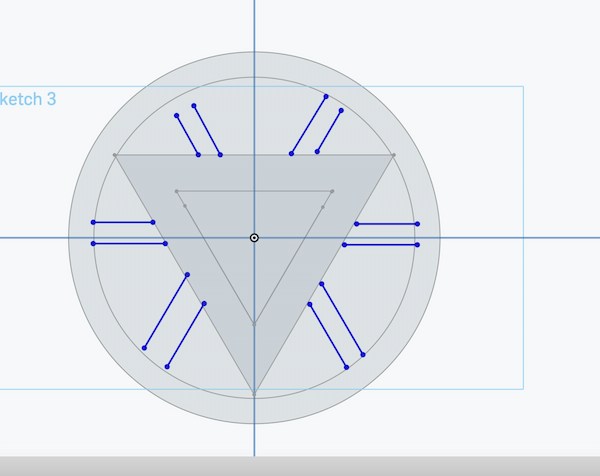
Align cluttered lines.
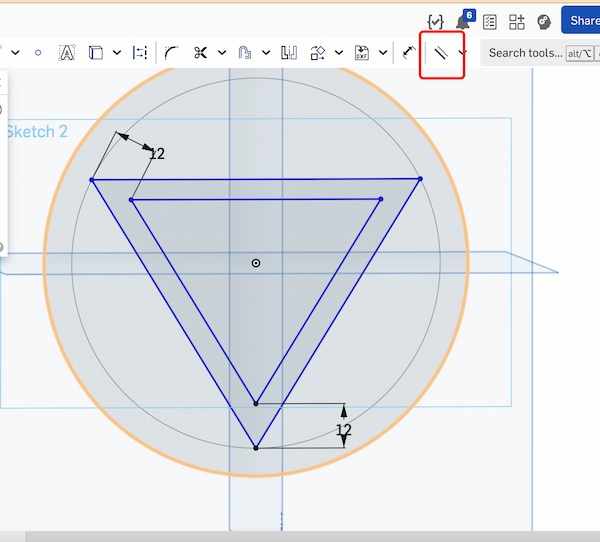
Adjust the angle and make it looking a little better:
Adjust the length of the post and adjust the angle:
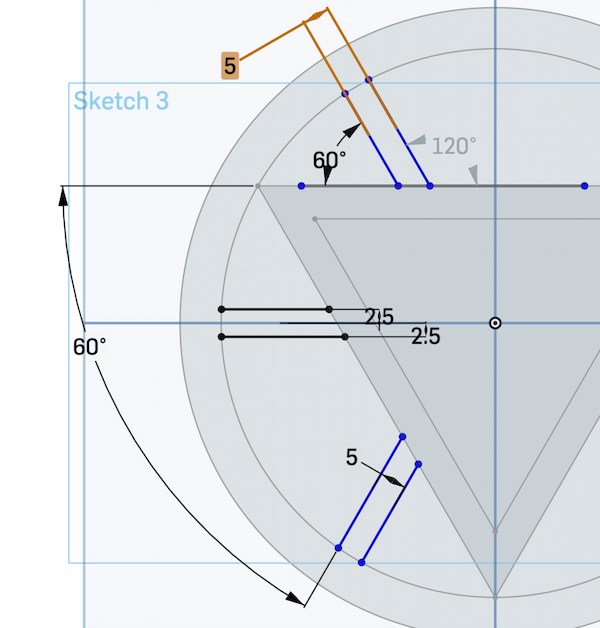
Using Mirror function to duplicate another part of the symmetry.
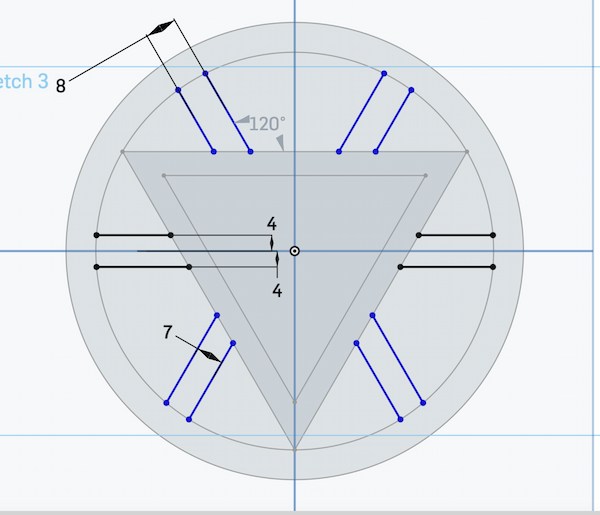
And then there's the little bit in the middle.
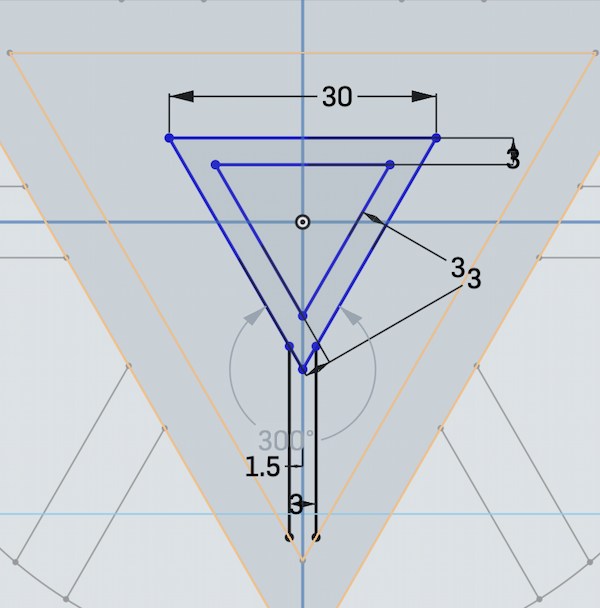
Now I can use Extrude function to make the parts, setting as 7mm:
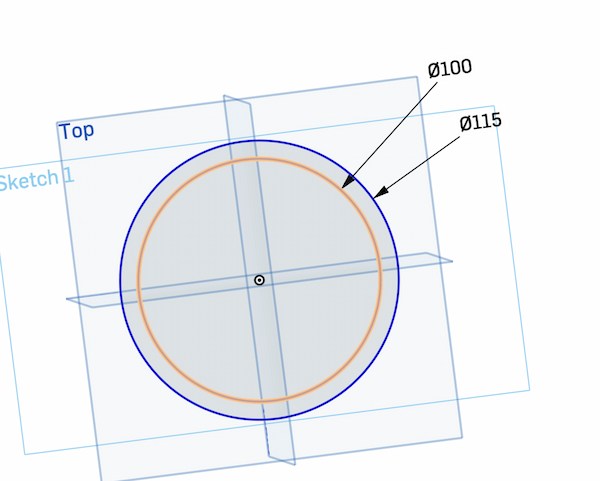
The outside circles:
I forgot that I need to have closed shapes to do the parts:
Why I am doing in different sketches. It is because I might need to adjust them in the future.
Finally, I have my parts:
This can be found here.