Electronics Production
| Task | progress |
|---|---|
| Linked to the group assignment page | done |
| Documented how you made the toolpath | done |
| Documented how you made (milled, stuffed, soldered) the board | done |
| Documented that your board is functional | done |
| Explained any problems and how you fixed them | done | Uploaded your source code | done |
| Included a ‘hero shot’ of your board | done |
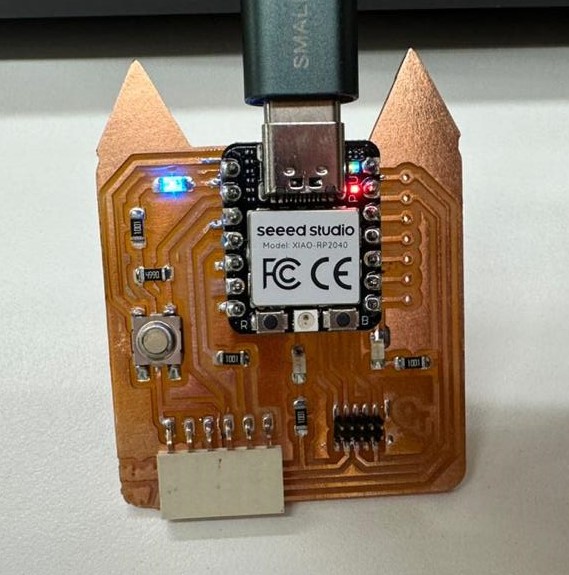
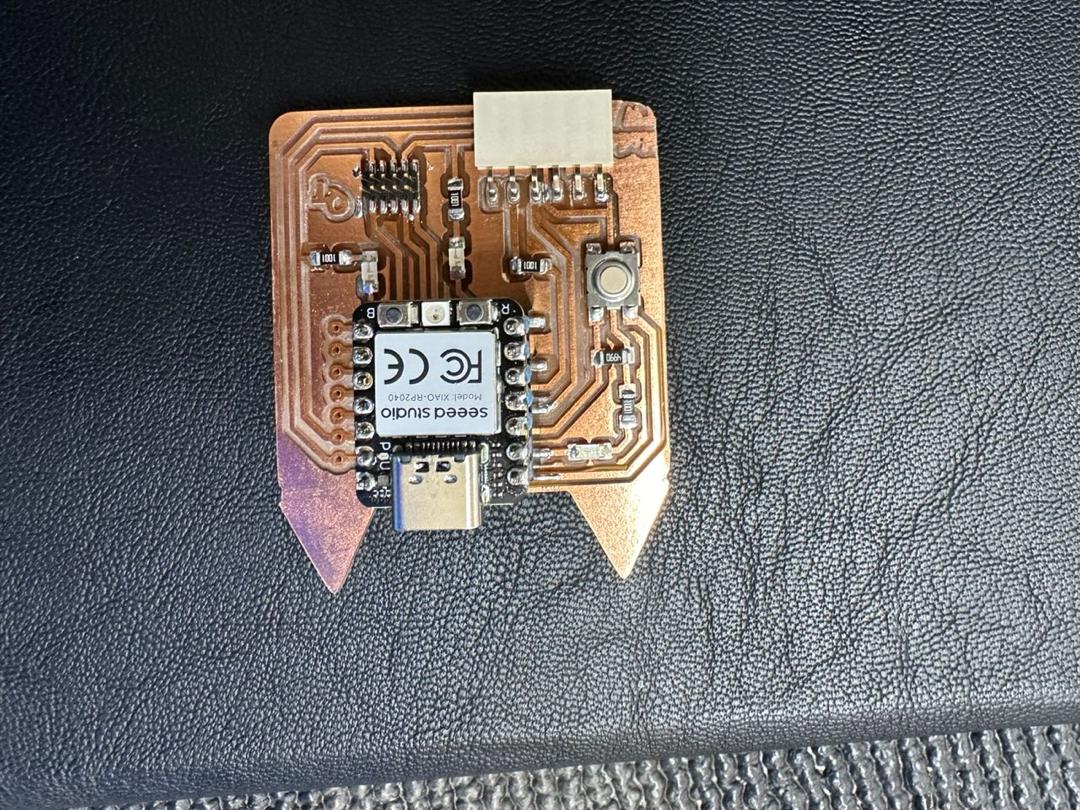
Hero shot
Group Assignment
We did our group assignment using Roland SRM-20 and also made an attempt to use fiber laser. You will fine more details here Link
Must remember
- The end mills are brittle especially 1/64” but when used carefully can mill more than 500 boards.
- When using SRM-20 always make sure to take your spindel before milling to your set HOME as the machines starts cutting from the lastest spindle location even if you have set your HOME.
- Be very careful to move your Z up before changing x/y as it can break otherwise.
- Move Z very sowly, X100 or X10 when setting Z home. If you use continue movement, there is the risk of the end mill tip hitting hard on the board and breaking.
DIDN’T break any endmills. YEAH!!!
PCB production Process
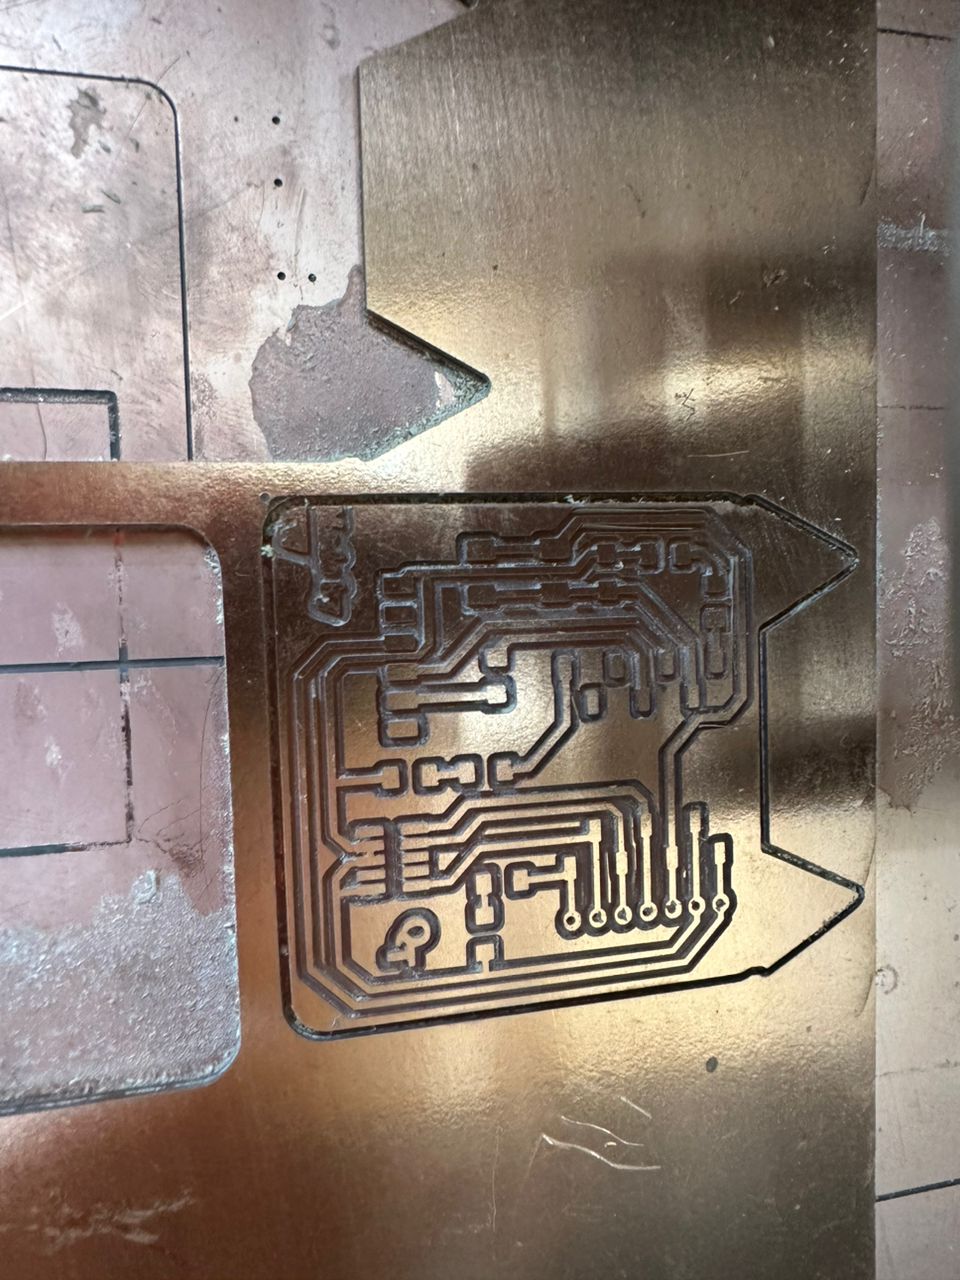
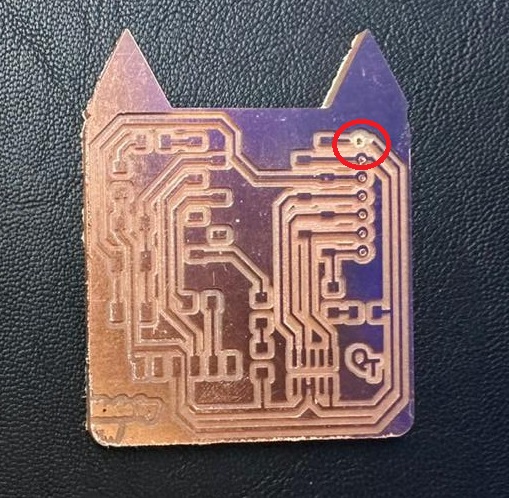
This weeks assigment was to reproduct Quentorres board. I tried making some modification like adding my name and giving my boards ears(MEOW!!! board lol) I also changed the dpi of the board to 600 DPI while exporting as PNG.I did that for all the boards.

MODS set up
Navigating through Mods is quite tricky for the first timer but got more used to this new MODS after doing the group assignment.
Here are the steps to take for generating rml file:
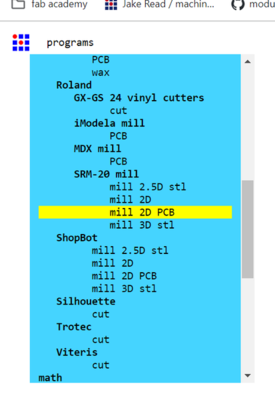
- When you land on Mods page right click on Program–> Click on open Program–> Scroll down to SRM-20 mill and select Mill 2D PCB
-
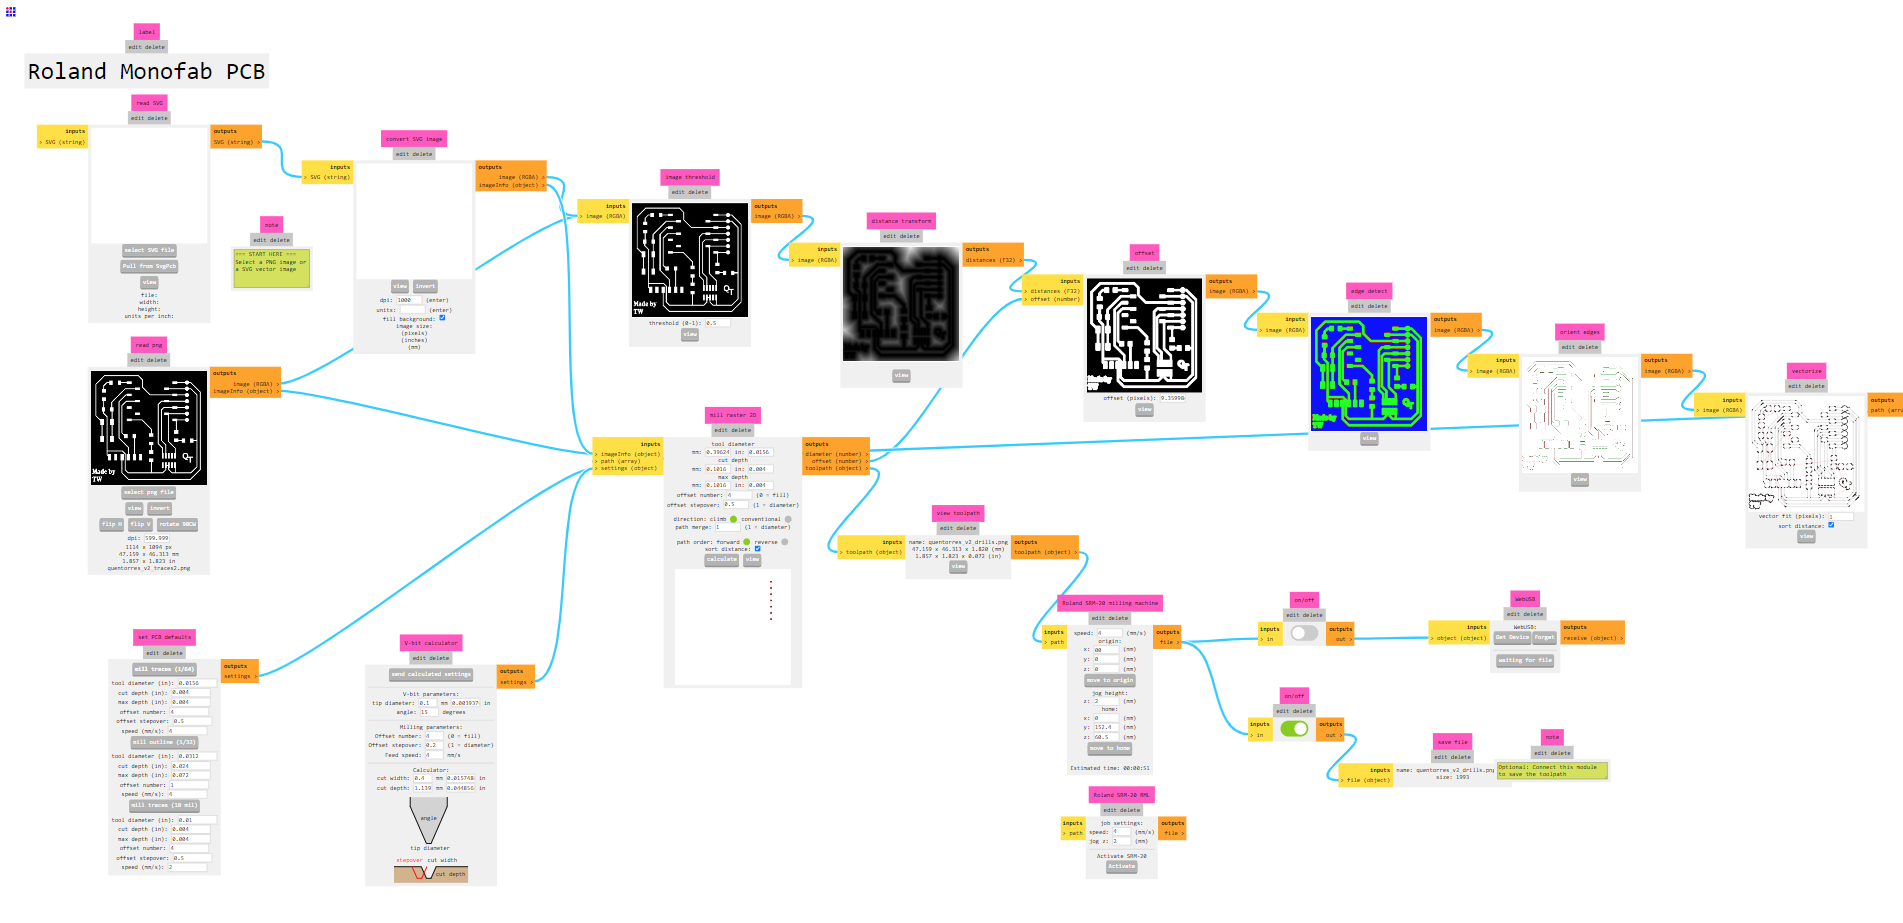
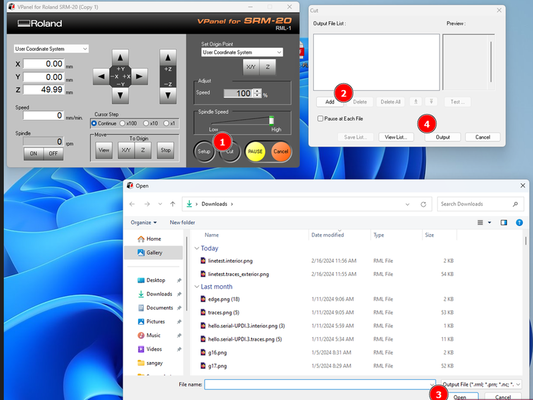
A show below is for SRM-20. Here you can either use SVG or PNG file. We 1.selected a PNG file.
-
Next, 2.select 1/64 for milling the traces and 1/32 for milling the boarders and drilling. No need to make any changes other as the software does it for us.
-
Click calaculate and this generates a path for the milling. This might take times as per you design.
-
Make sure to turn on the Save file and tun off the object above it.
-
This will download the file for you. If the download doesn’t take place , Click on calculate again.

Note
Don’t forget to change the coordinates to 0 for X, Y and Z
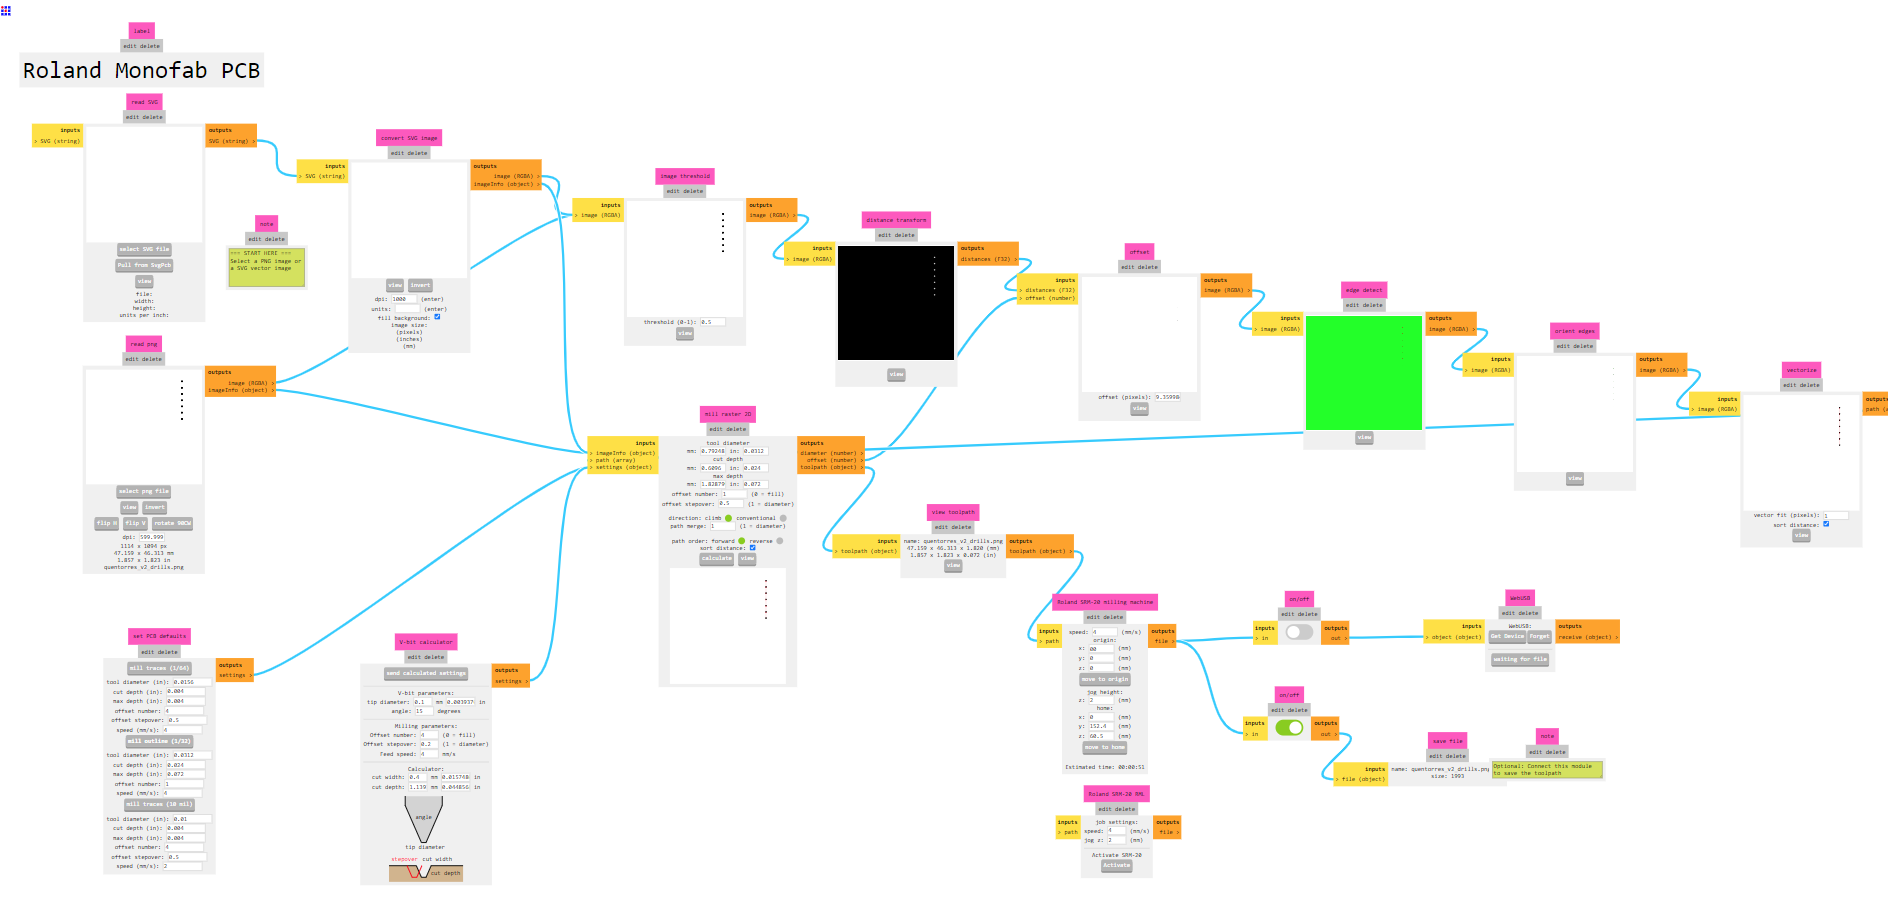
For drill files, I selected 1/32” bit end mill and saved the rml file.
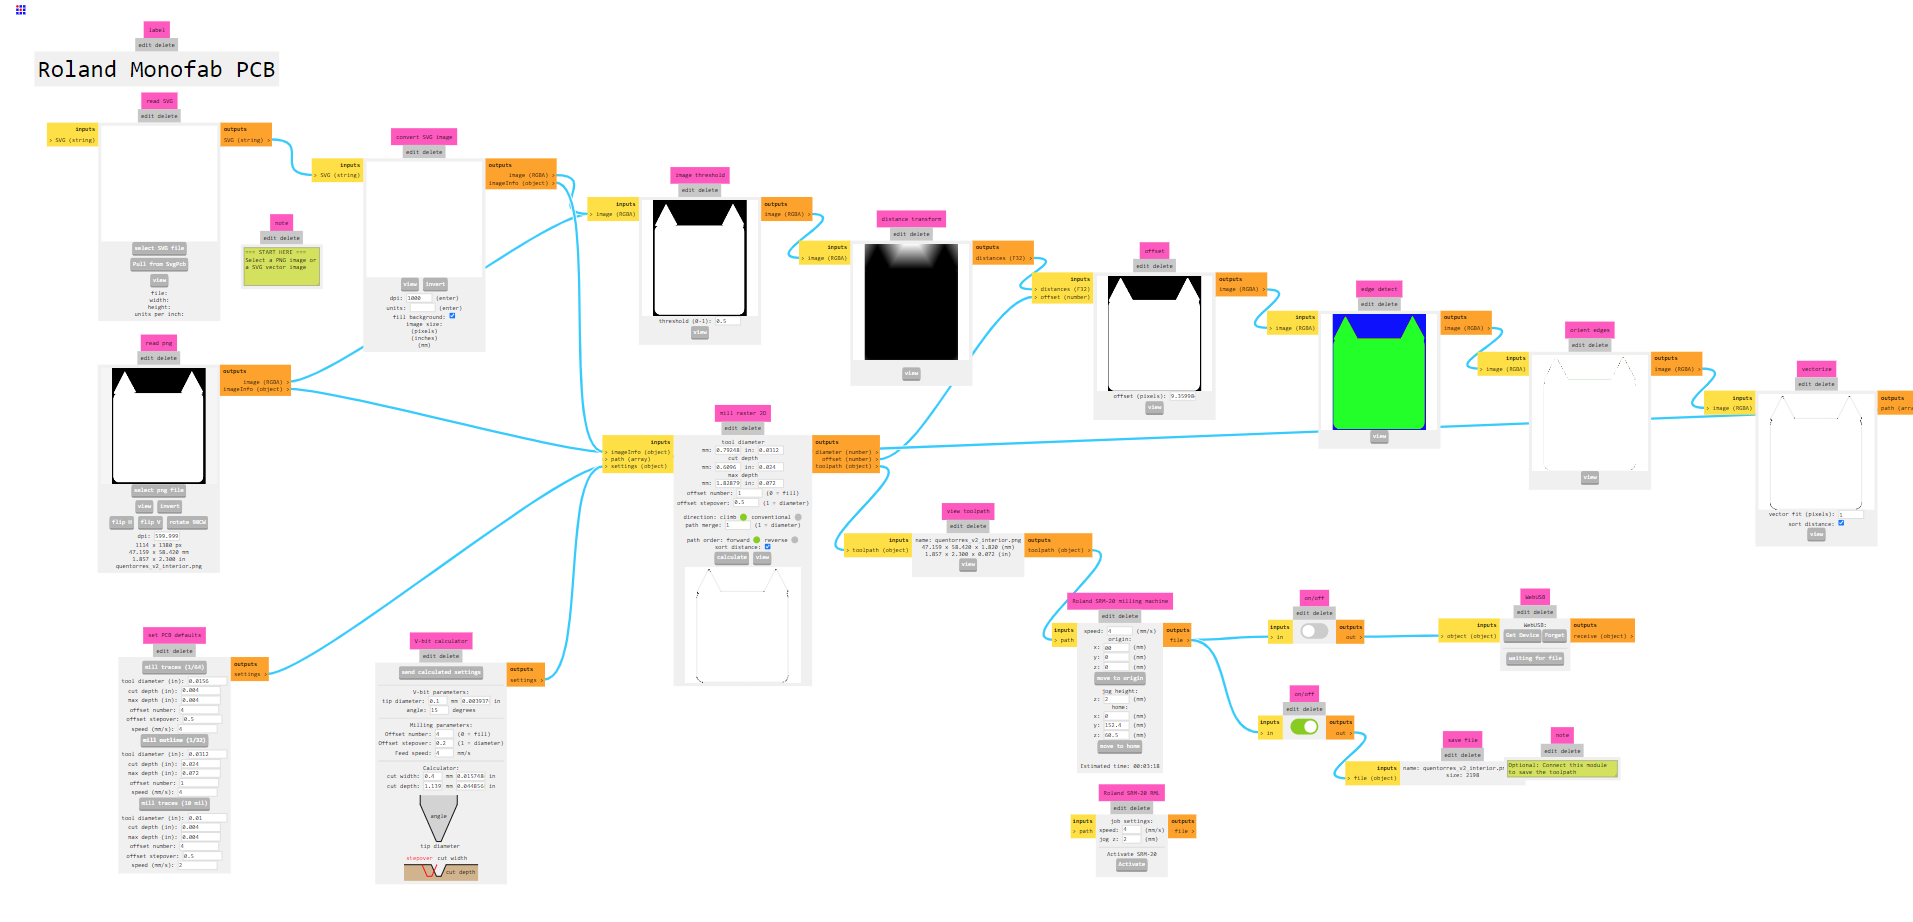
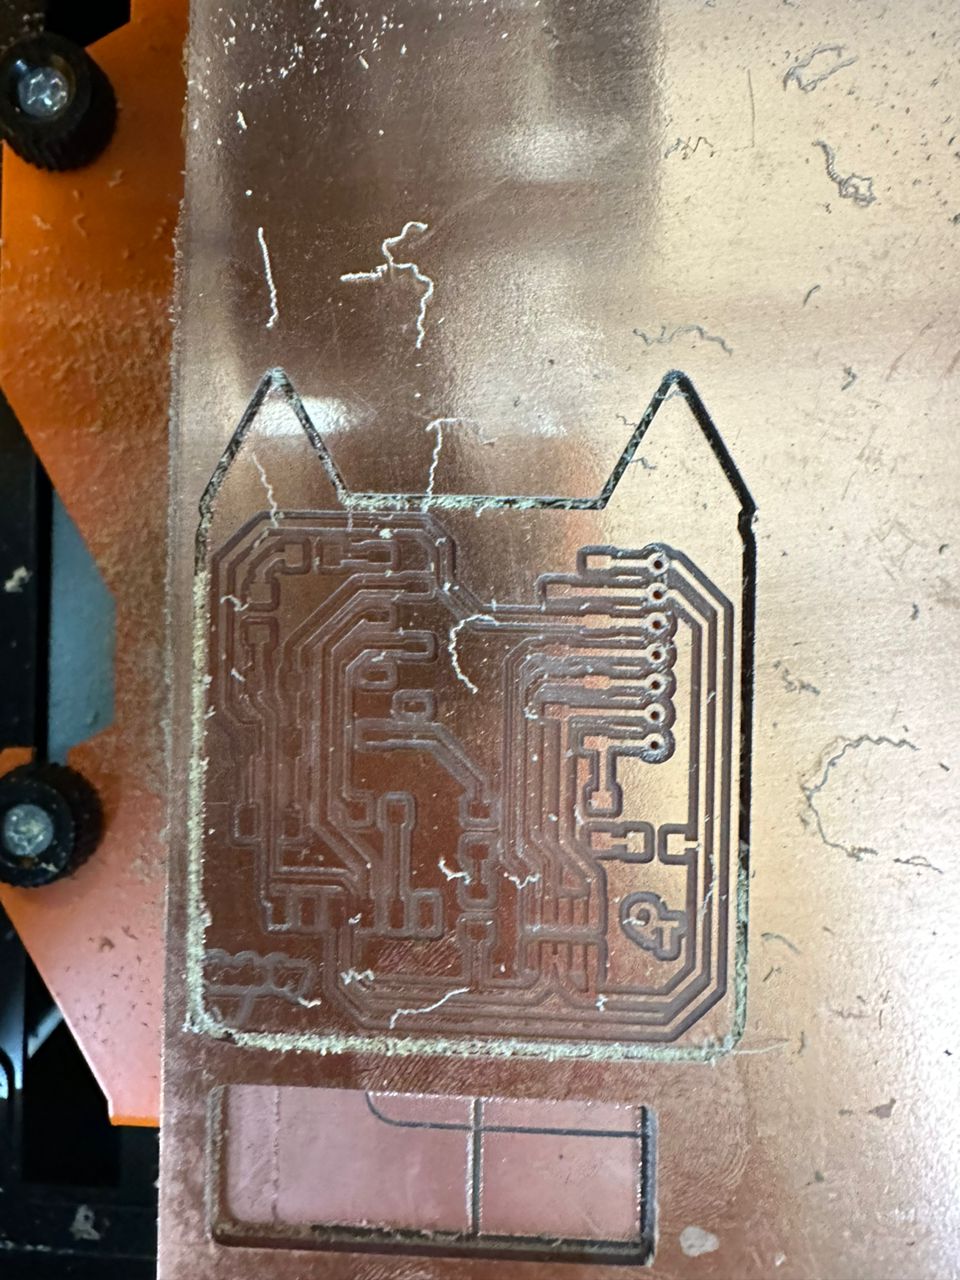
For this image, I had to invert the image twice because path for milling was not getting generated when calculated. Got the image shown below after inverting twice. I selected 1/32” end mill for the edge cuts.
Roland SRM-20
Using SRM-20
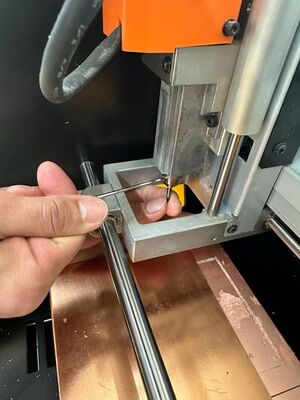
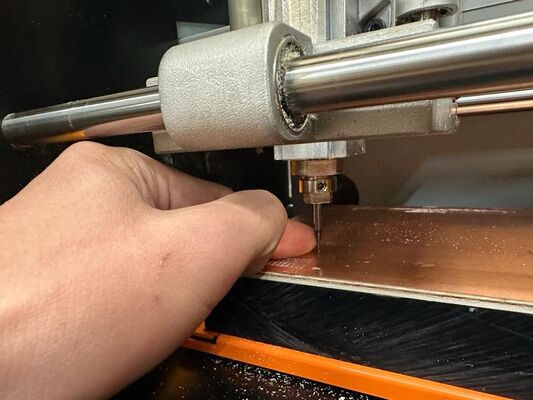
You tighten milling bit using an alen key, as shown below and make sure to keep it little shorter before preparing the Home for the machine.
Now, open the Vpanel for SRM-20 and by using the keys on the panel you can move the spindel to your desired location and set HOME. (Always make sure not waste your board by selecting the optimal position)
-
First, move the spindle to most corner side of the board by using the X and Y keys. Then set that as your home by clicking on the X/Y under set orgin point.
-
Next, move the spindle to somewhere center on your intended milling space and slowly bring down the spindle using Z key on Vpanel.
-
Change the cursor step to x100 or even X10 to slowly bring down the spindle and reduce the risk of hitting the end mill on the board which will break the end mill.
-
When the spindle is down enough, loosen the endmill and let it drop (gravity fall as Fran from beach lab calls it) on the board.
-
Then tighten back the mill. This will be your Z so set that by clicking on the Z under set orgin point.
Roland SRM-20 is ready to mill your board, select the .rml files downloaded from mods by slecting Cut-> Add( Make sure delete all the other files) -> and open the file and -> select output.
For milling, always start with milling the inner traces or else if you start with edges, your board won’t stay in one place there is a risk of breaking the bit. I used epoxy tape so I was able to mill the edges then the drill file, otherwise if you use double sided tape only on few places then it is best to start with drilling and then finally the edge cut.
WARNING
I am using FR4 PCB board and it is generally non toxic but we should not be breathing it. It can cause respiratory problems. In our lab because we use Roland SRM-20 which has enclosure it is safe while milling but when cleaning we always vaccume the dust and use mask.
The process of Milling the board using Roland SRM-20 was same as in group assignment.
Soldering and testing
I decided to do reflow and used soldering paste.
-
I carfully prepared the board and placed on a clamp for stability and I wont be able to hold the board as it will get hot.
-
Carfully added small amount of paste on all the places the components place holders.
-
Using twizers, placed the components on to its repective places and made sure it is on the paste.I did that for microcontroller too.
-
By using a hot gun, I incresed the temperature to 300degrees and fan speed to low and bought it close to the board from above.
- The hot air slowly melted the paste into shiny leads and started sticking to copper like magnets.
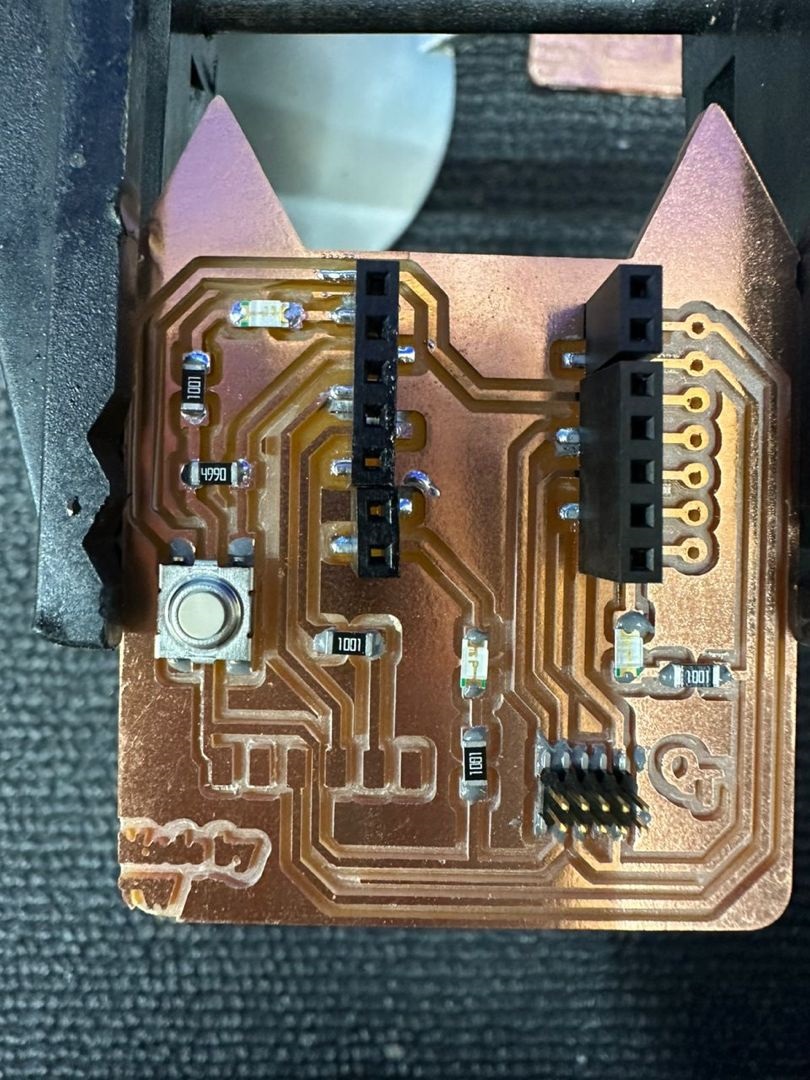
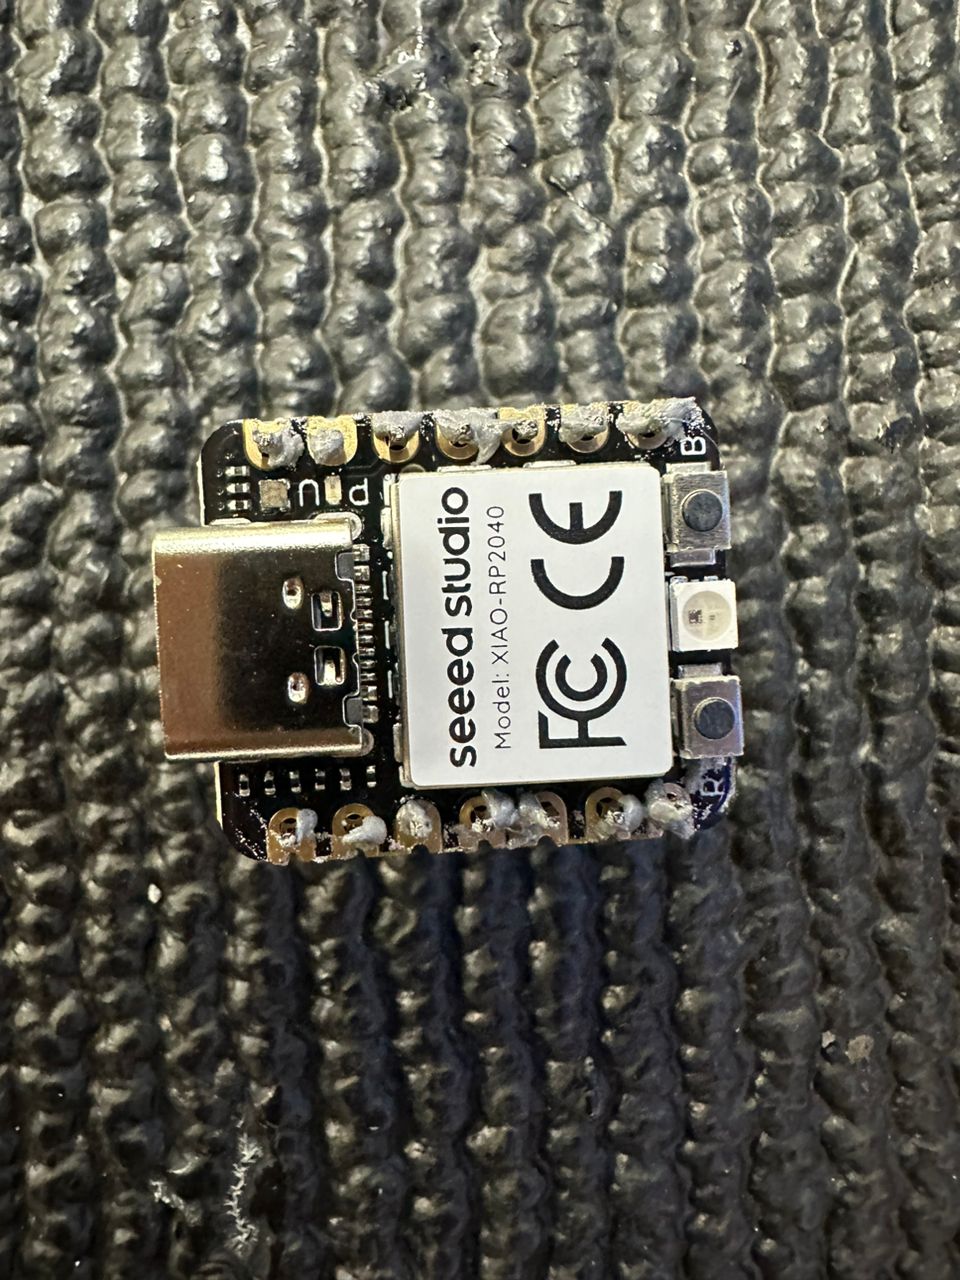
This is my board after soldering.
Errors
Failure1
I ended up milling two boards, as i relized that when making my rml file I forgot to choose 1/32” end mill and drill file was set for 1/64”.
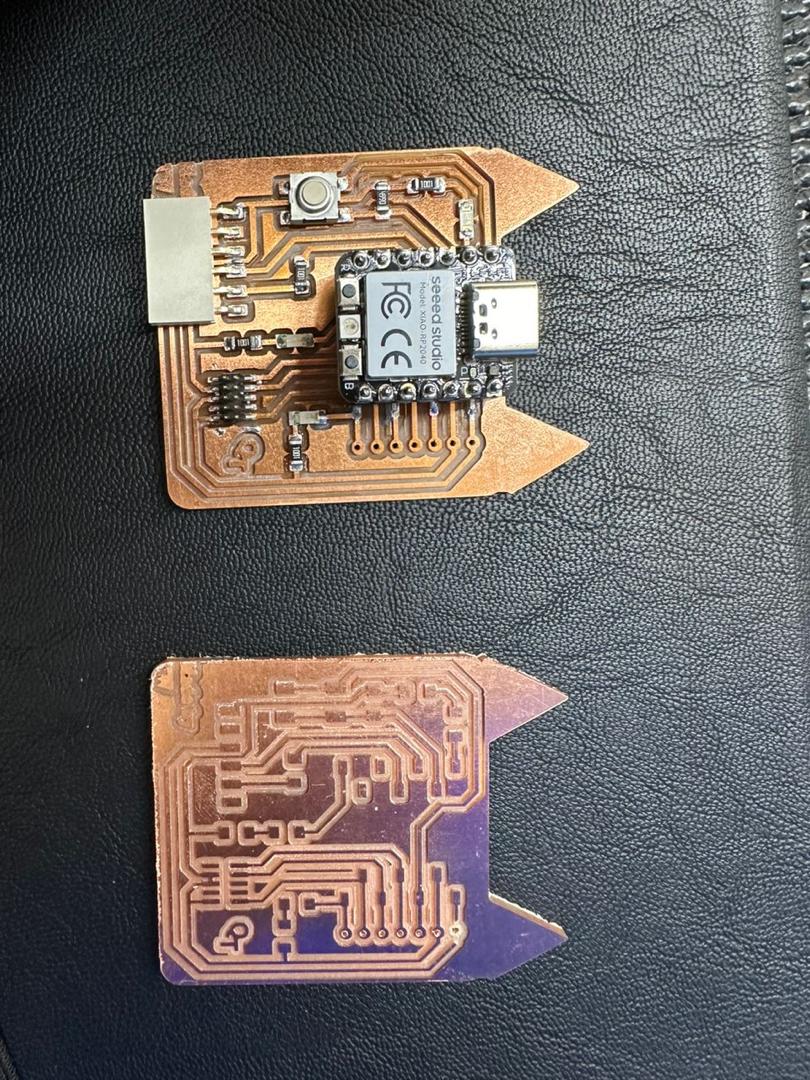
The drill hole were not made so I tried drilling manually but ended up spoiling my boards.
Failure2
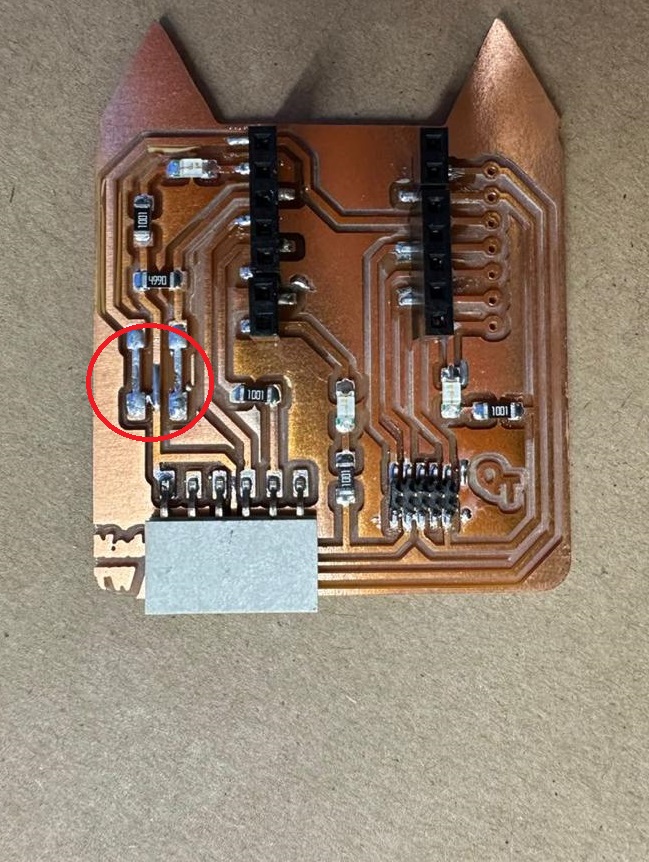
My problems did not end there, after I finished soldering and was uploading my board I noticed that, when ever I put the Xiao on my board it was not powering on. I figured there was a short somewhere, after doing continuity test, I realized the gound and 3.3v supply was shorted.
After tracing the short i realized something was wrong with the switch. I de-slodered the switch and found my short. I used too much paste which lead to this problem as shown below.
Programming
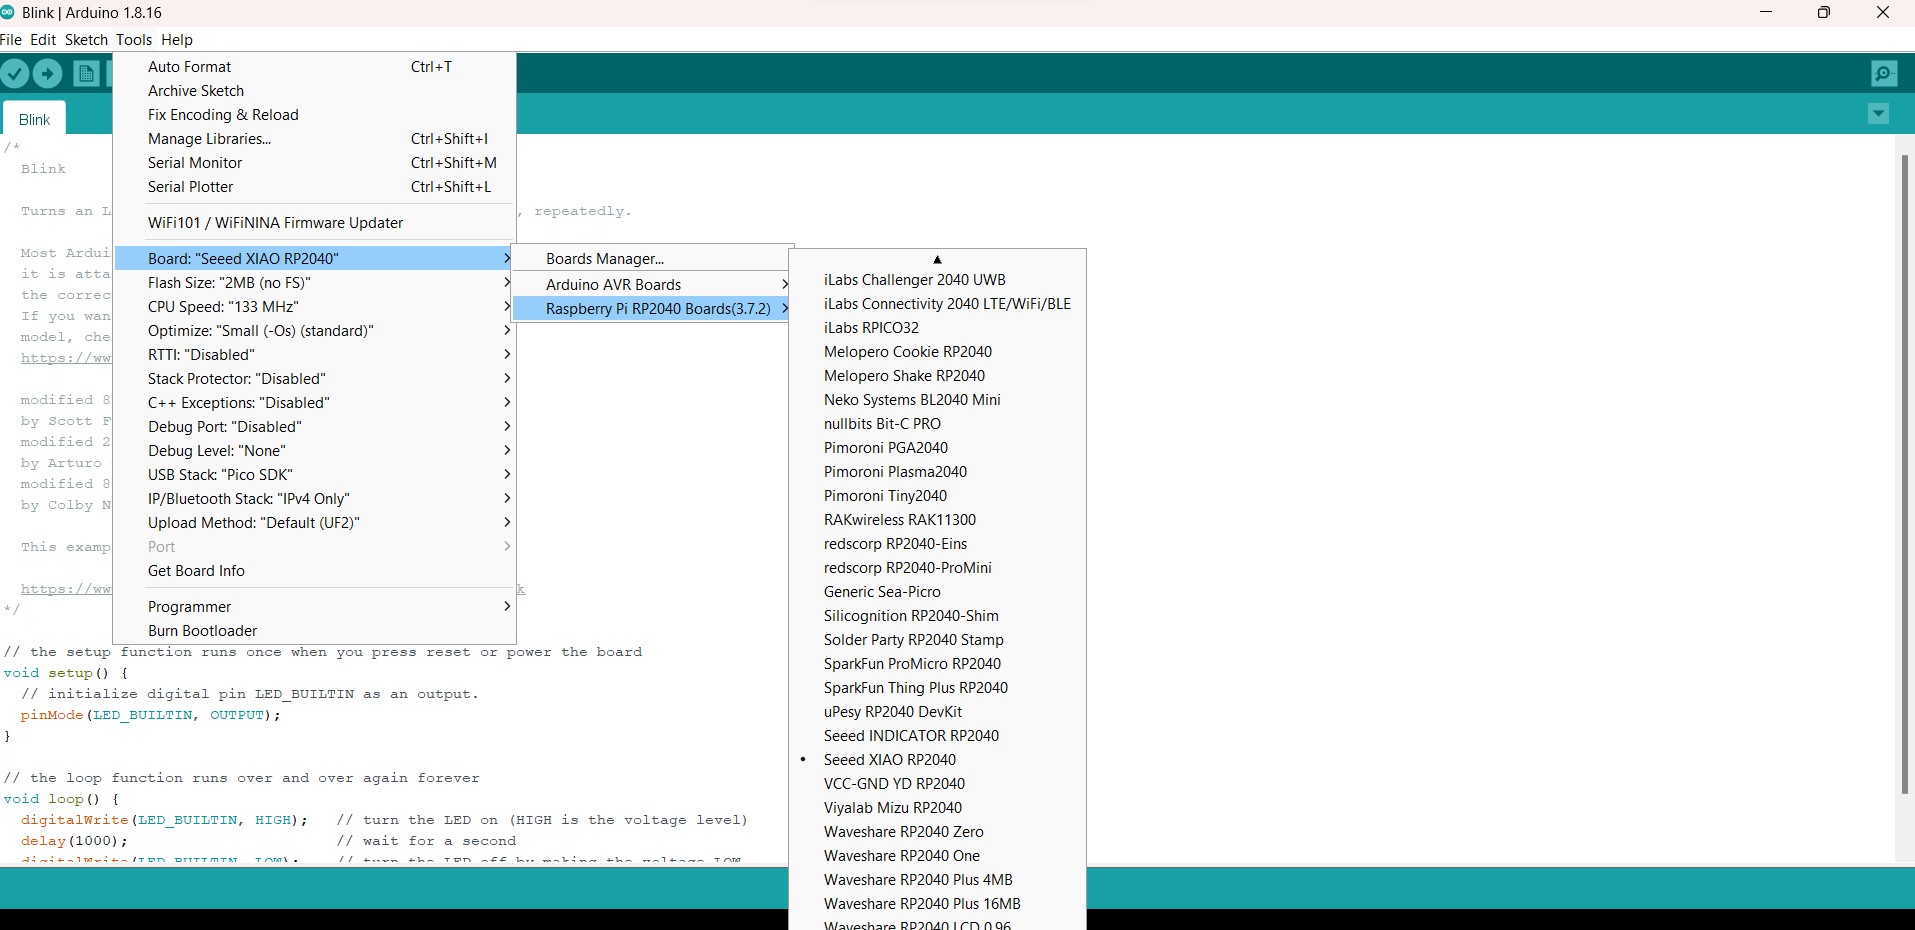
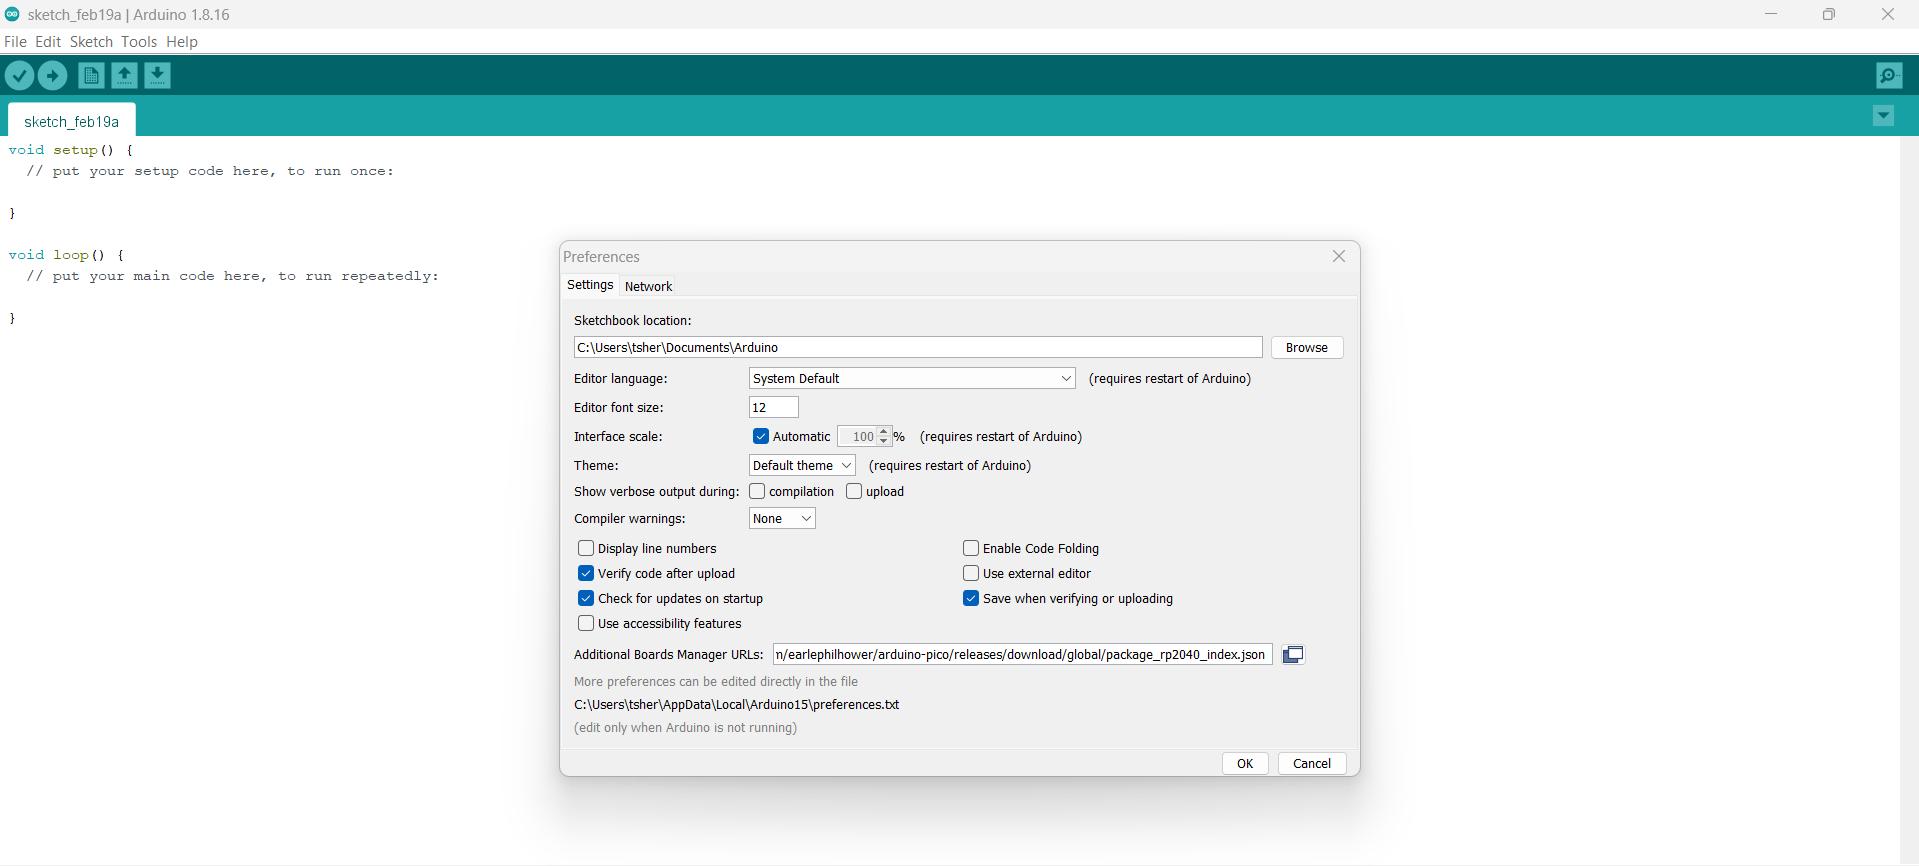
I was not able to download board in the lates arduion app so I decided to downgrade the arduino app to 1.8.16 version. The after doing that I was able to get the board from board manager after pasting the board link in preferences–>additonal boards manager URL.
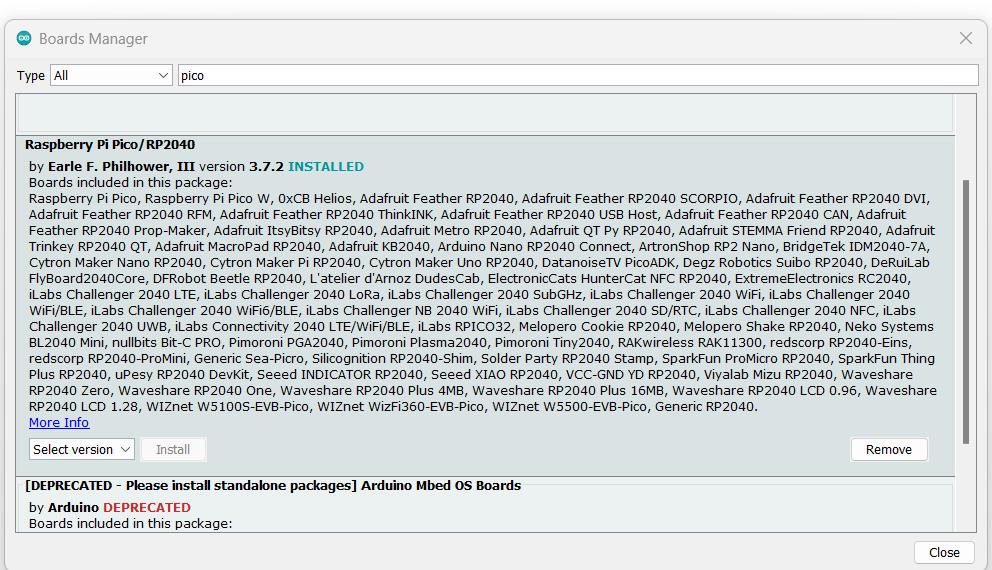
After installing the Raspberry Pi Pico/RP2040, the additional boards show up in the Tools–>boards.